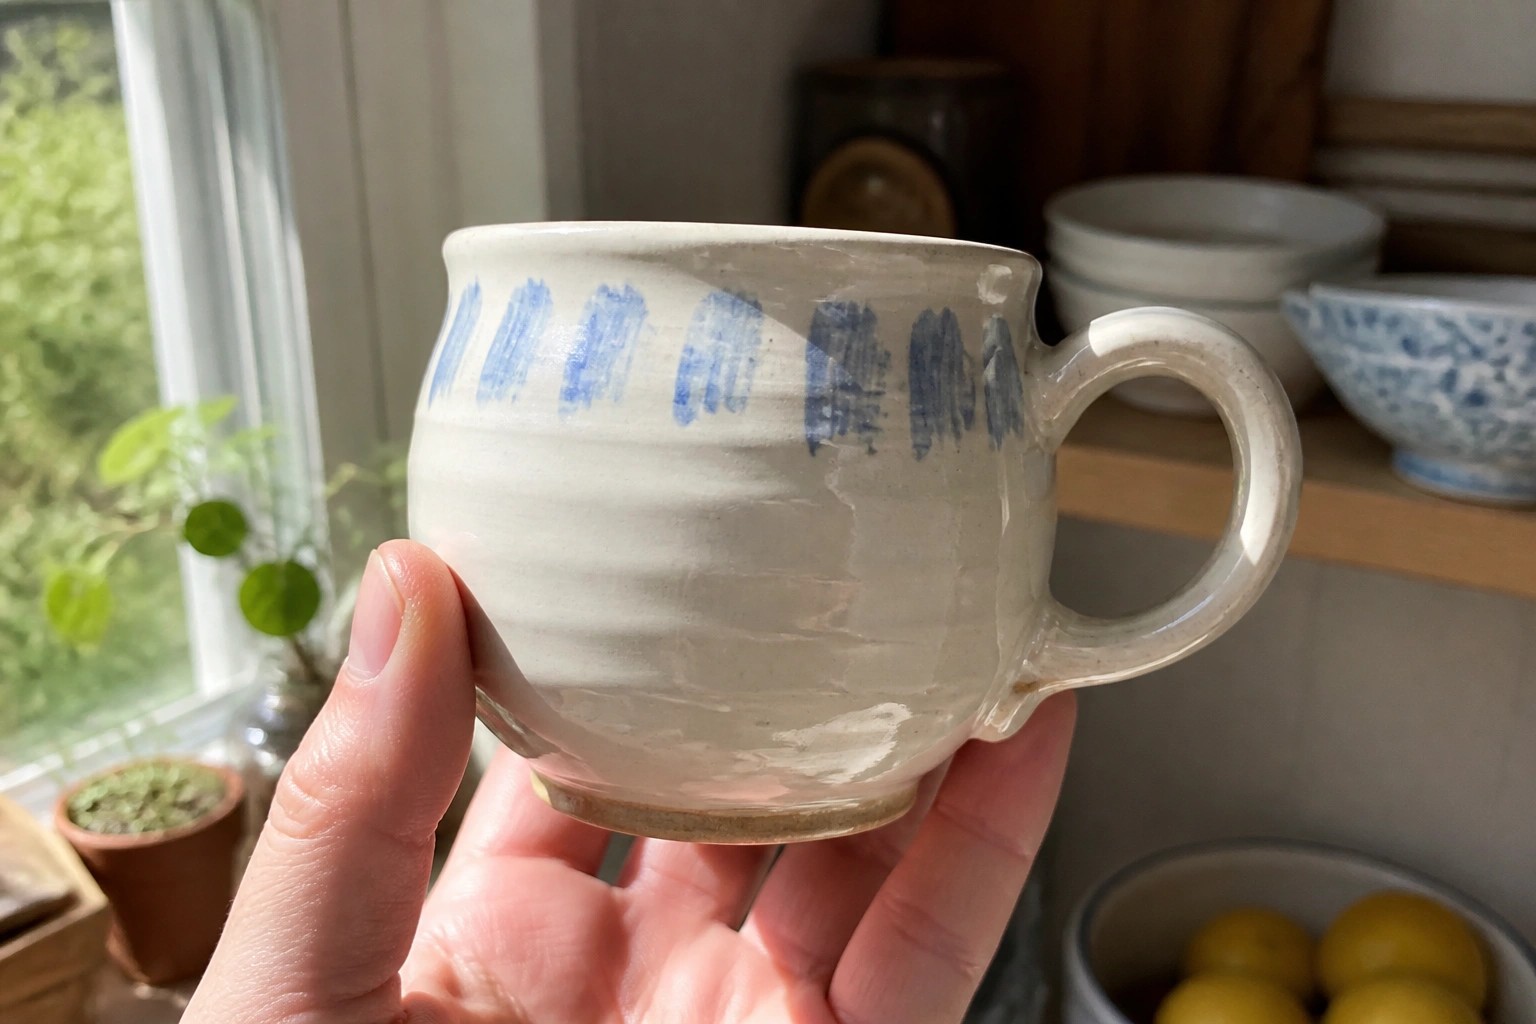
I got into wheel throwing after taking a class at a local studio and it felt more approachable than I expected.
My first few attempts were wobbly but I kept at it with small projects.
These ideas are ones I have tried myself or seen other beginners manage successfully.
They focus on basic shapes that build your skills without needing advanced techniques.
I hope they give you a place to start if you are new to the wheel.
Mug with Blue Brush Marks
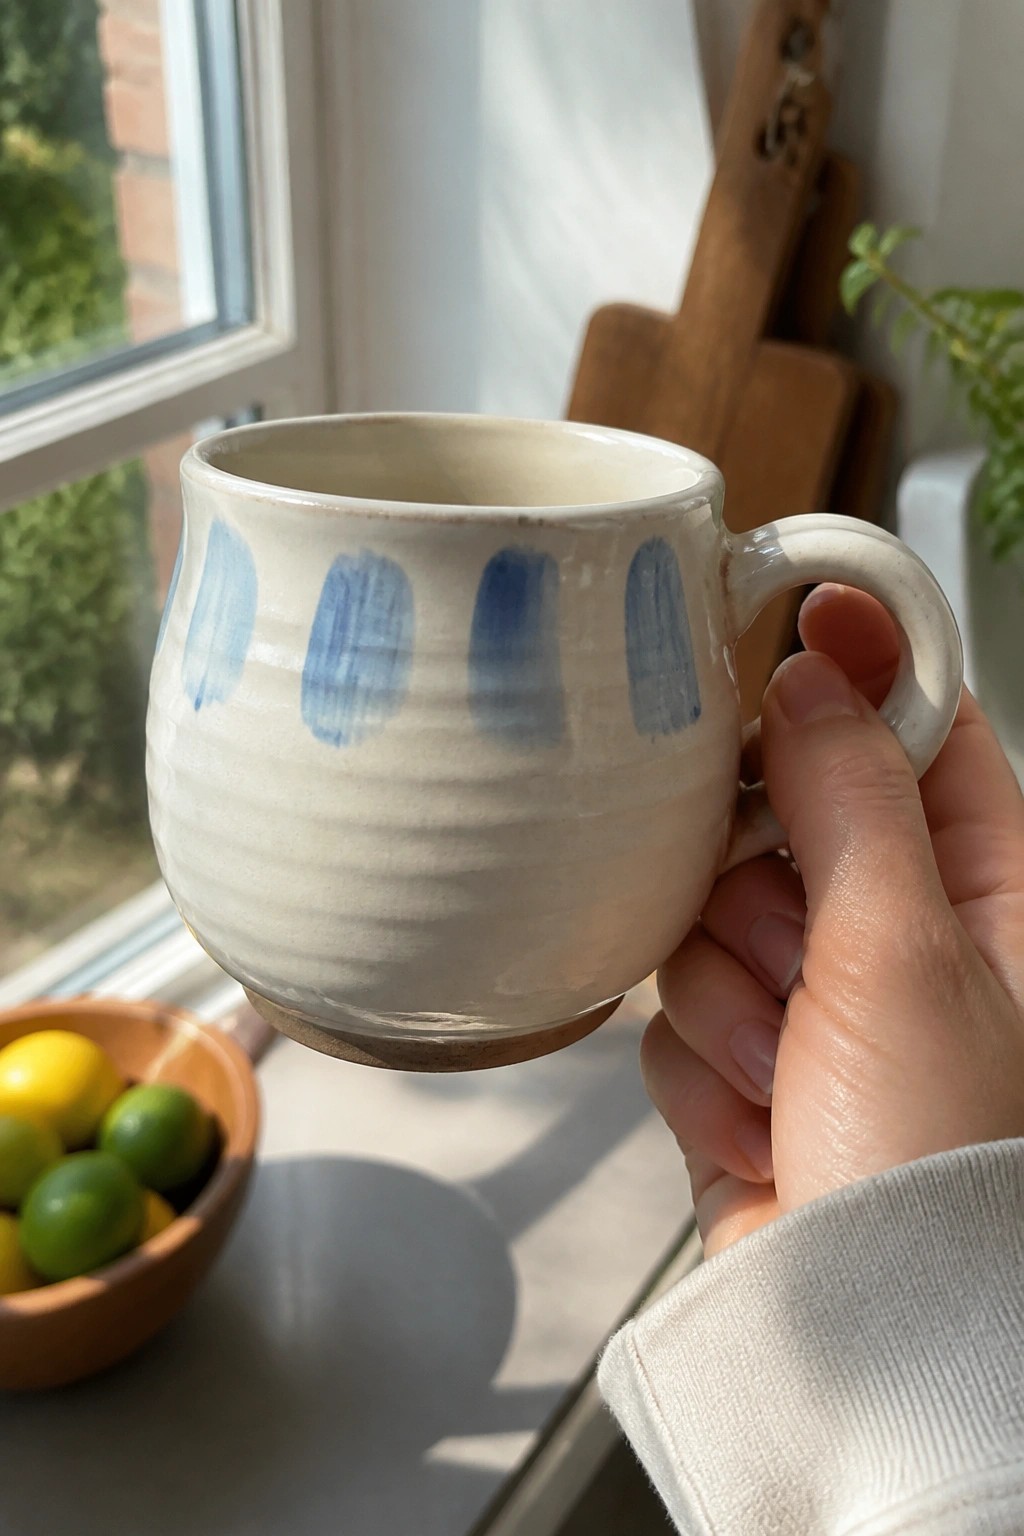
A wheel-thrown mug with a rounded body and a pulled handle forms an easy beginner project that stays functional. The light base glaze leaves room for a simple row of blue brush marks placed around the upper section. Those marks create contrast and movement while staying loose enough that small variations do not ruin the result. The overall size keeps the piece comfortable to hold and quick to finish on the wheel.
What makes this idea useful is how the painted marks can be spaced wider or made shorter to change the look without new tools. In a kitchen this mug works well for daily drinks and can be repeated to build a small set. The same shape and mark style could shift to a taller cylinder for a different drinking vessel or scaled down for an espresso cup. The painted detail also photographs clearly for sharing the finished work.
Wheel-Thrown Green Speckled Bowl
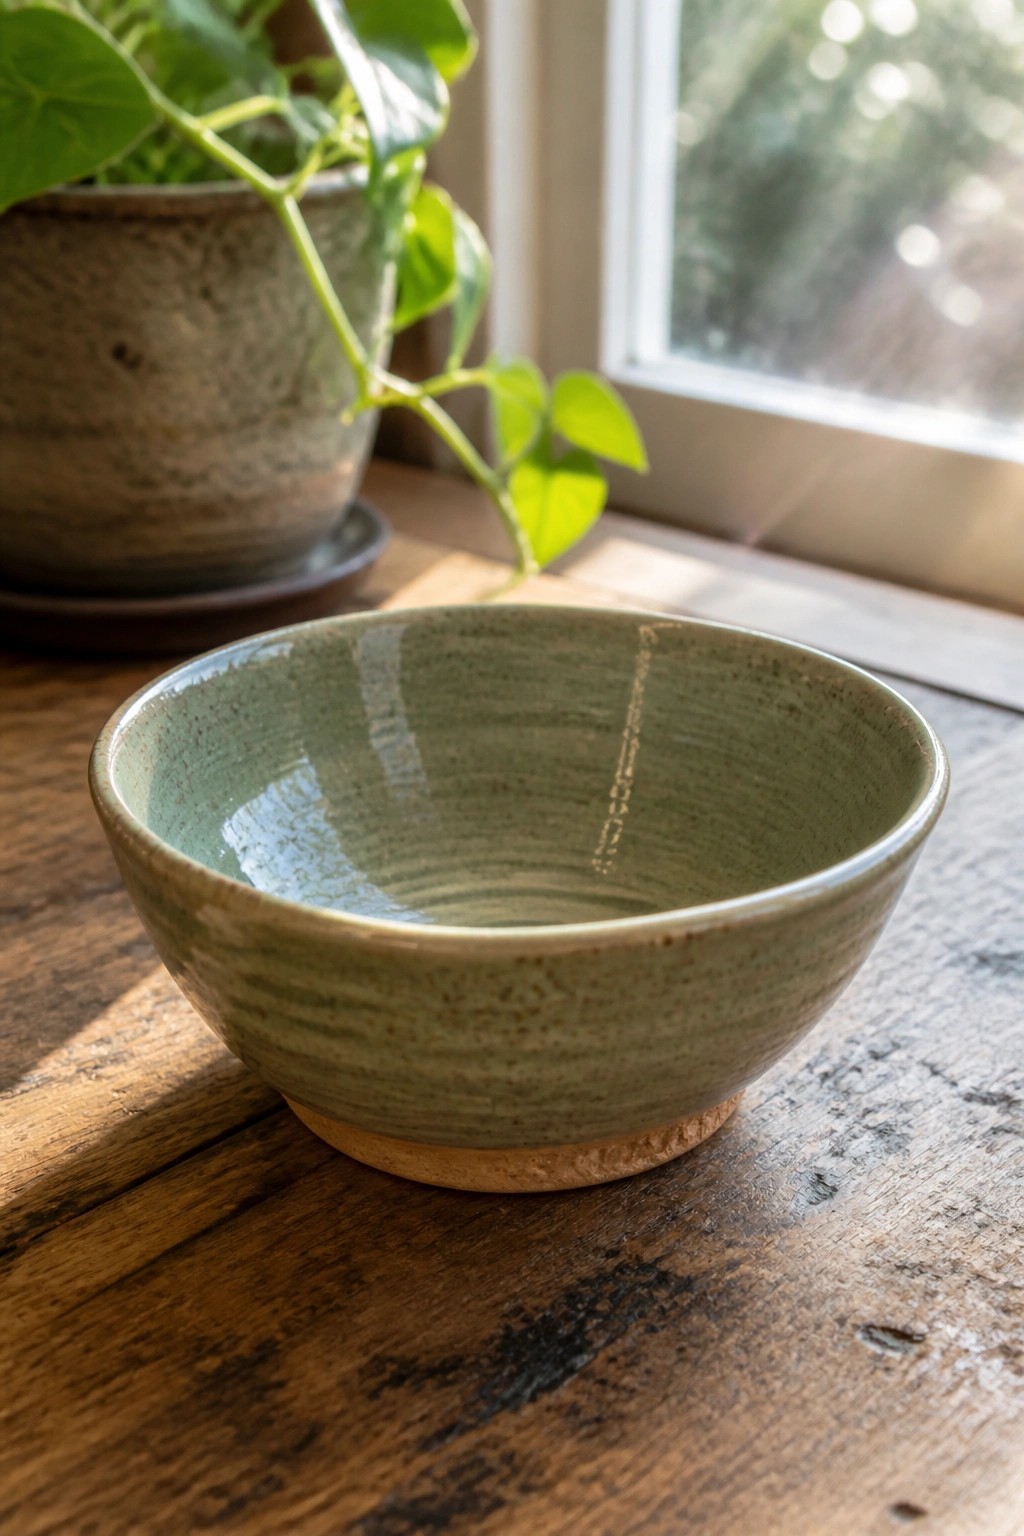
A small wheel-thrown bowl like this starts with a basic open form that keeps walls even and the rim simple. The green glaze settles into the throwing ridges to create soft horizontal lines and slight color shifts without any added carving. This approach works well as a kitchen item for dips, snacks, or small sides where the clay texture stays visible.
What makes this idea useful is the compact size that fits on a table or shelf without taking much space. You could repeat the same shape in a set of four with different glaze colors or stretch the walls a bit taller to make a small planter. The speckled surface also gives you room to test how one glaze behaves on the same clay body before moving to larger pieces.
Wheel-Thrown Bud Vase with Throwing Lines
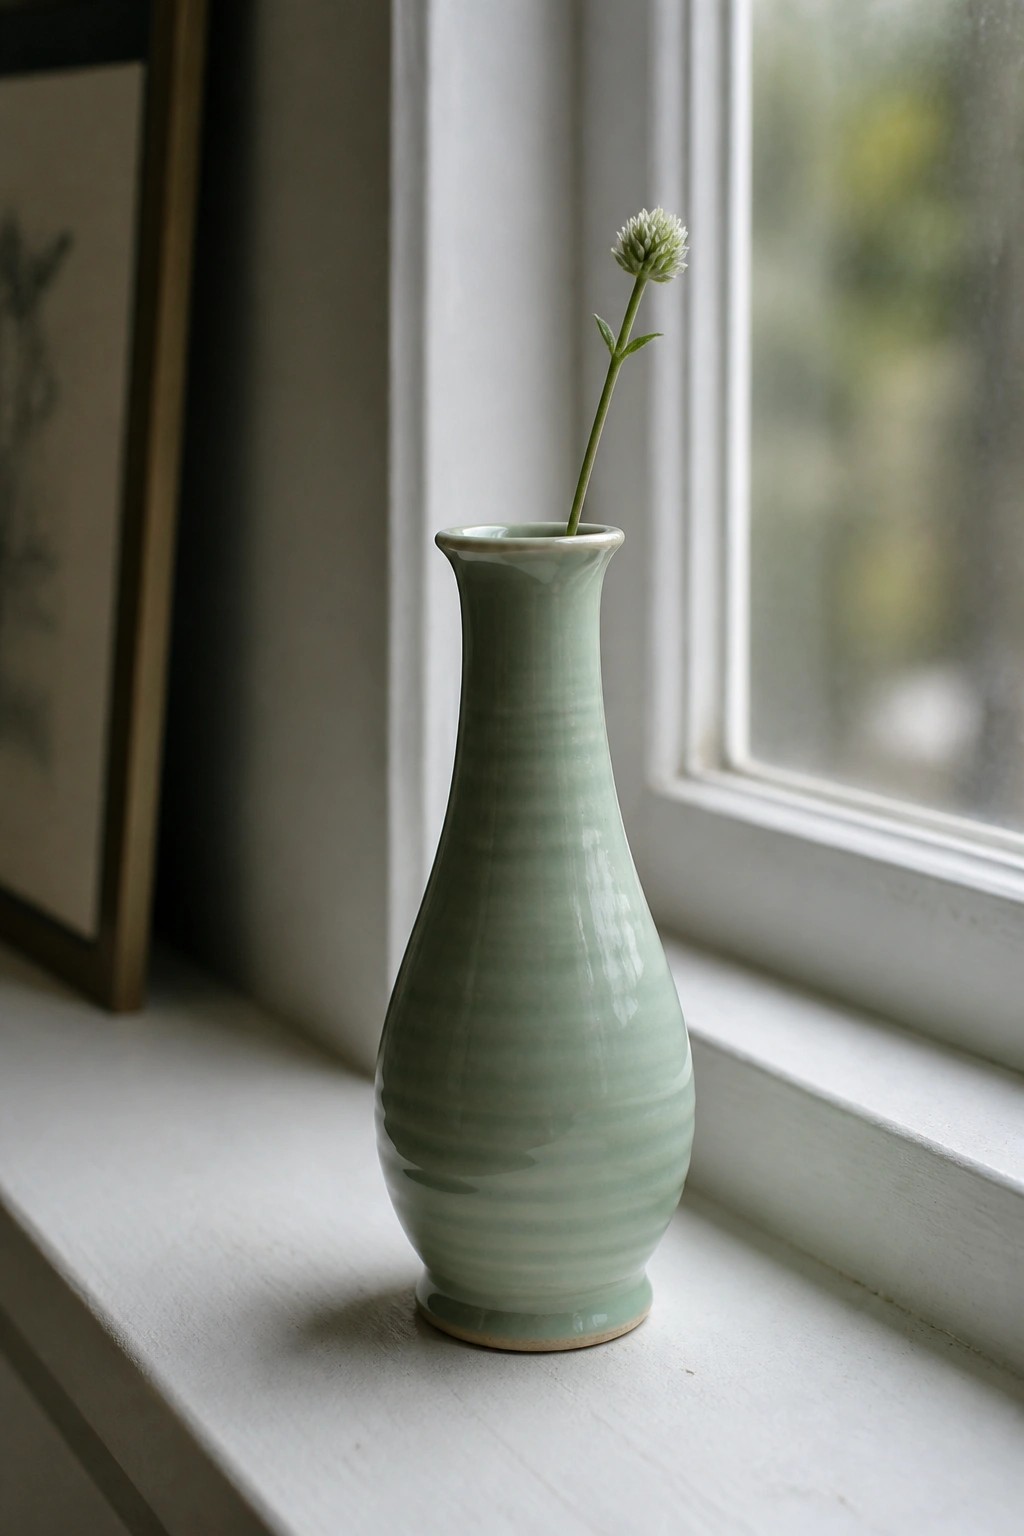
A wheel-thrown bud vase gives beginners a clear goal for centering, pulling, and shaping a narrow neck that flares slightly at the rim. The horizontal ridges left from throwing remain visible under the pale green glaze, adding quiet texture without any added carving or slip. This form works as a simple decor object that holds one or two stems and needs only basic trimming to finish the foot.
What makes this idea useful is how the tall, balanced shape stays stable even when the walls stay thin. You can adapt the same profile into a taller version for dried flowers or shorten the neck to make a small pitcher. The soft glaze color shows off the ridges clearly, which helps the piece photograph well for sharing. In a kitchen or entryway, this size takes up little space while still reading as intentional pottery rather than filler.
Two-Tone Wheel-Thrown Planter Bowl
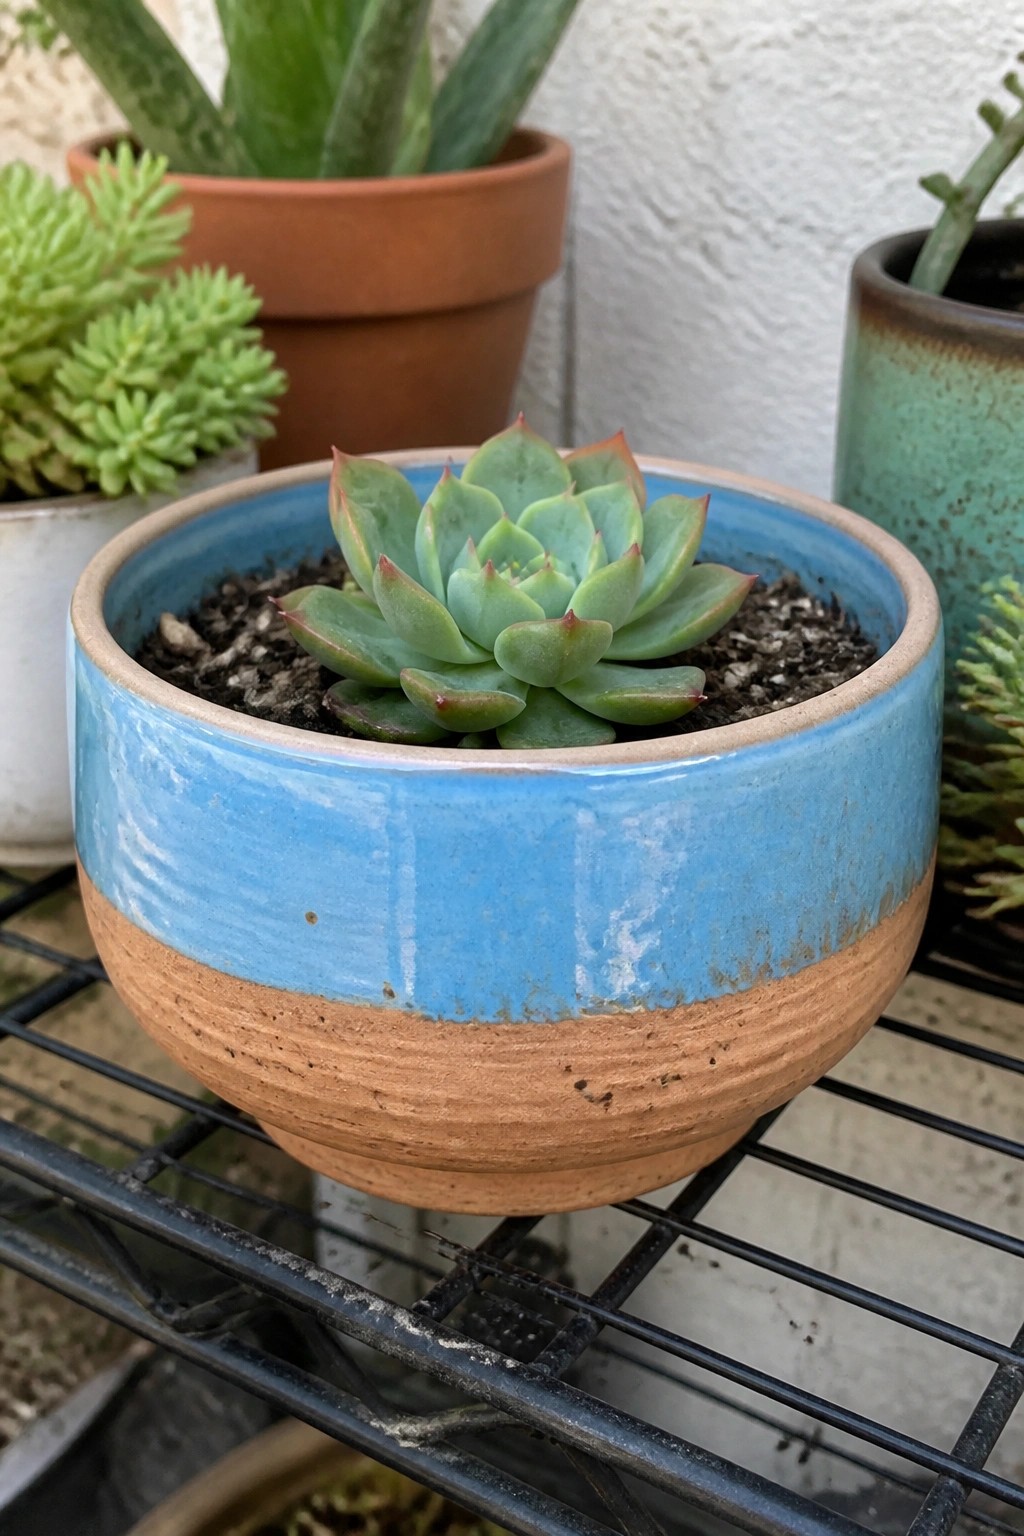
A small wheel-thrown bowl works well as a planter when the upper half receives a solid blue glaze while the lower half stays in its natural terracotta with visible throwing ridges. The sharp color break and the contrast between the glossy top and the matte, textured base keep the design simple yet distinct. This style suits succulents because the bowl stays low and wide enough to support the plant without competing for attention.
What makes this idea useful is the way the two-tone finish highlights the form without extra carving or painting. The same shape can be adapted by switching the glaze color or narrowing the glazed band for a different look. A piece like this fits easily on a windowsill or shelf and gives beginners practice with basic throwing and glazing on a functional object.
Lemon Painted Kitchen Tray
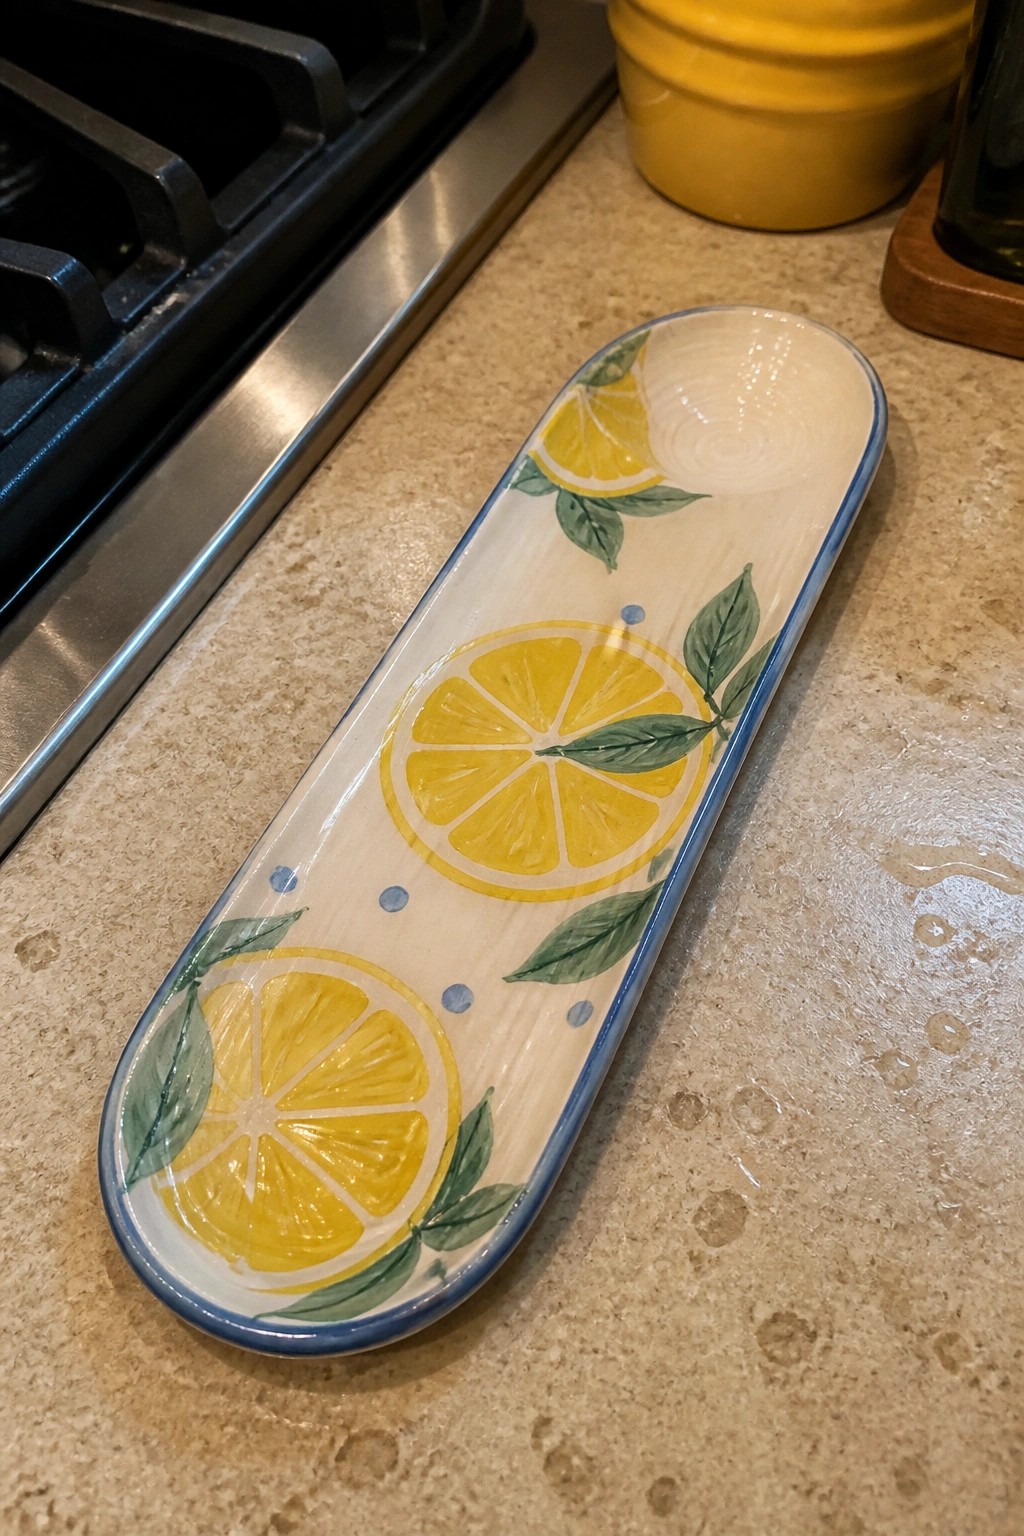
A wheel-thrown elongated tray gives beginners a straightforward form to practice pulling a consistent oval shape with gentle curves at the ends. The design uses simple painted lemon slices and leaves across the surface, with a blue rim to frame the yellow and green motifs and keep the layout balanced. This approach works as a kitchen item because the narrow, low profile creates a stable surface without requiring lids or handles.
The shape does a lot of the work here since the length fits neatly beside a stove or on a countertop for holding utensils. You can adapt the idea by swapping the lemons for other fruit or keeping the same layout but changing the rim color to match different kitchen styles. For a gift, something like this stays useful because it serves as both a spoon rest and a small serving piece without taking up much space.
Speckled Pink Ring Dish
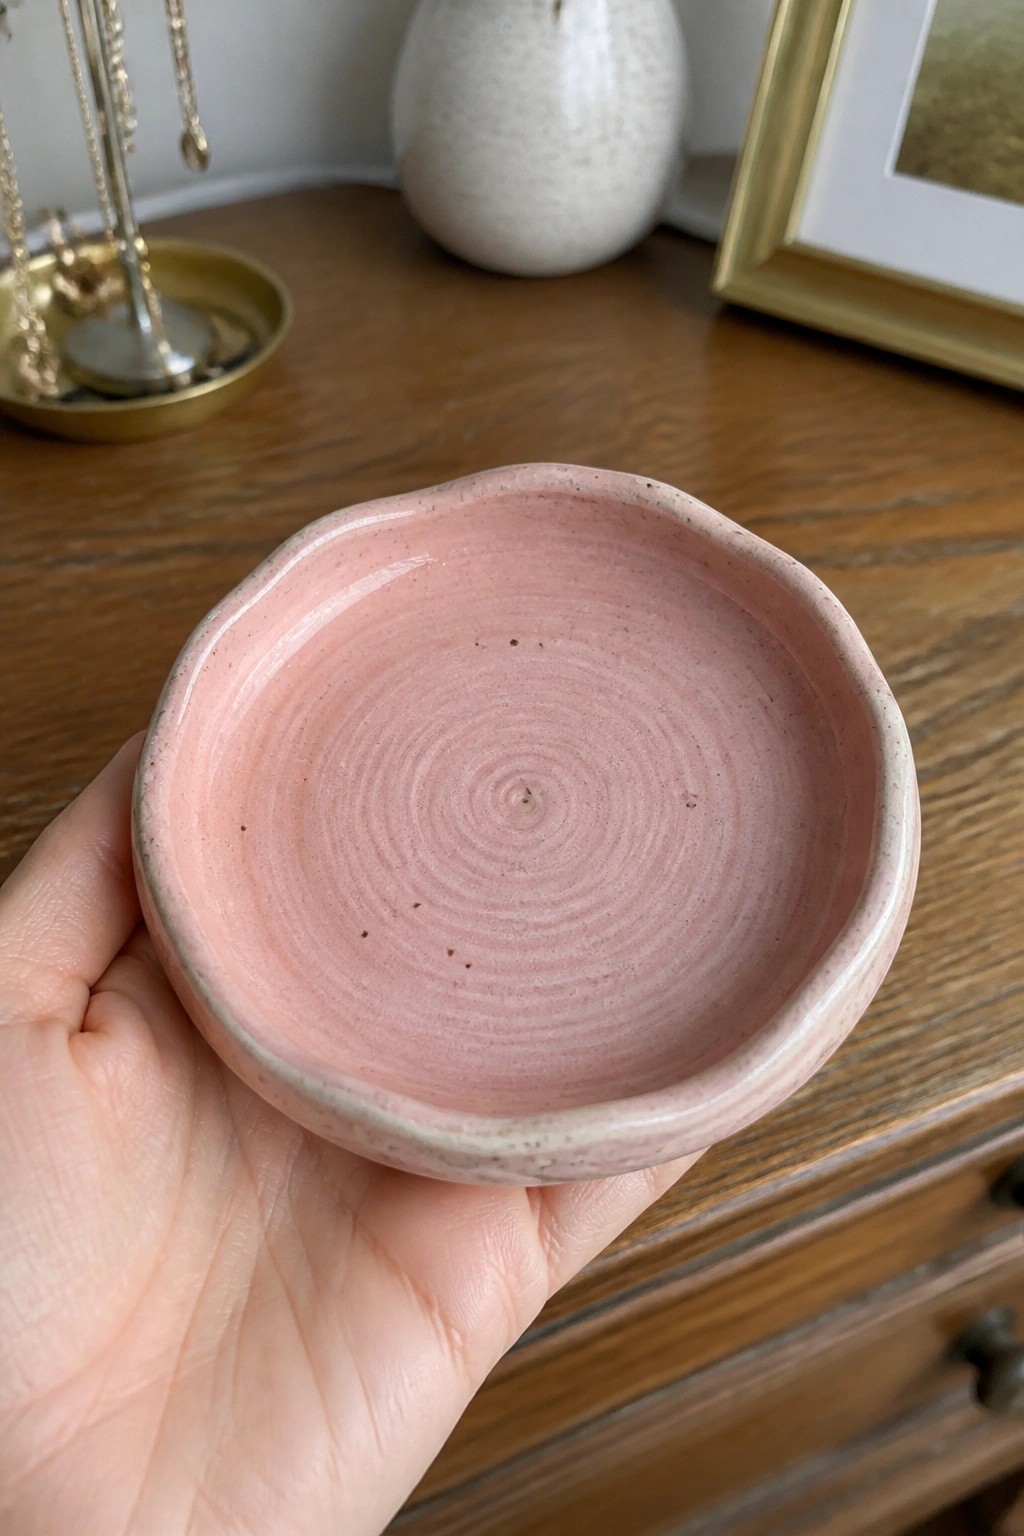
A wheel-thrown ring dish in soft pink with dark speckles gives beginners practice with a shallow open form and simple glazing. The concentric throwing lines remain visible on the interior, and the rim is left slightly uneven for an organic finish. This small dish functions as a place to hold jewelry or loose items like keys or coins.
What makes this idea useful is the compact size, which requires less clay and time on the wheel than a full bowl. You can swap the pink glaze for other colors to match a desk or bathroom setup, or try the same shape as a soap dish or tea bag rest. For a gift, throw several in one session and vary the speckle amount or rim shape to create a quick set.
Nesting Prep Bowls in Pastel Glazes
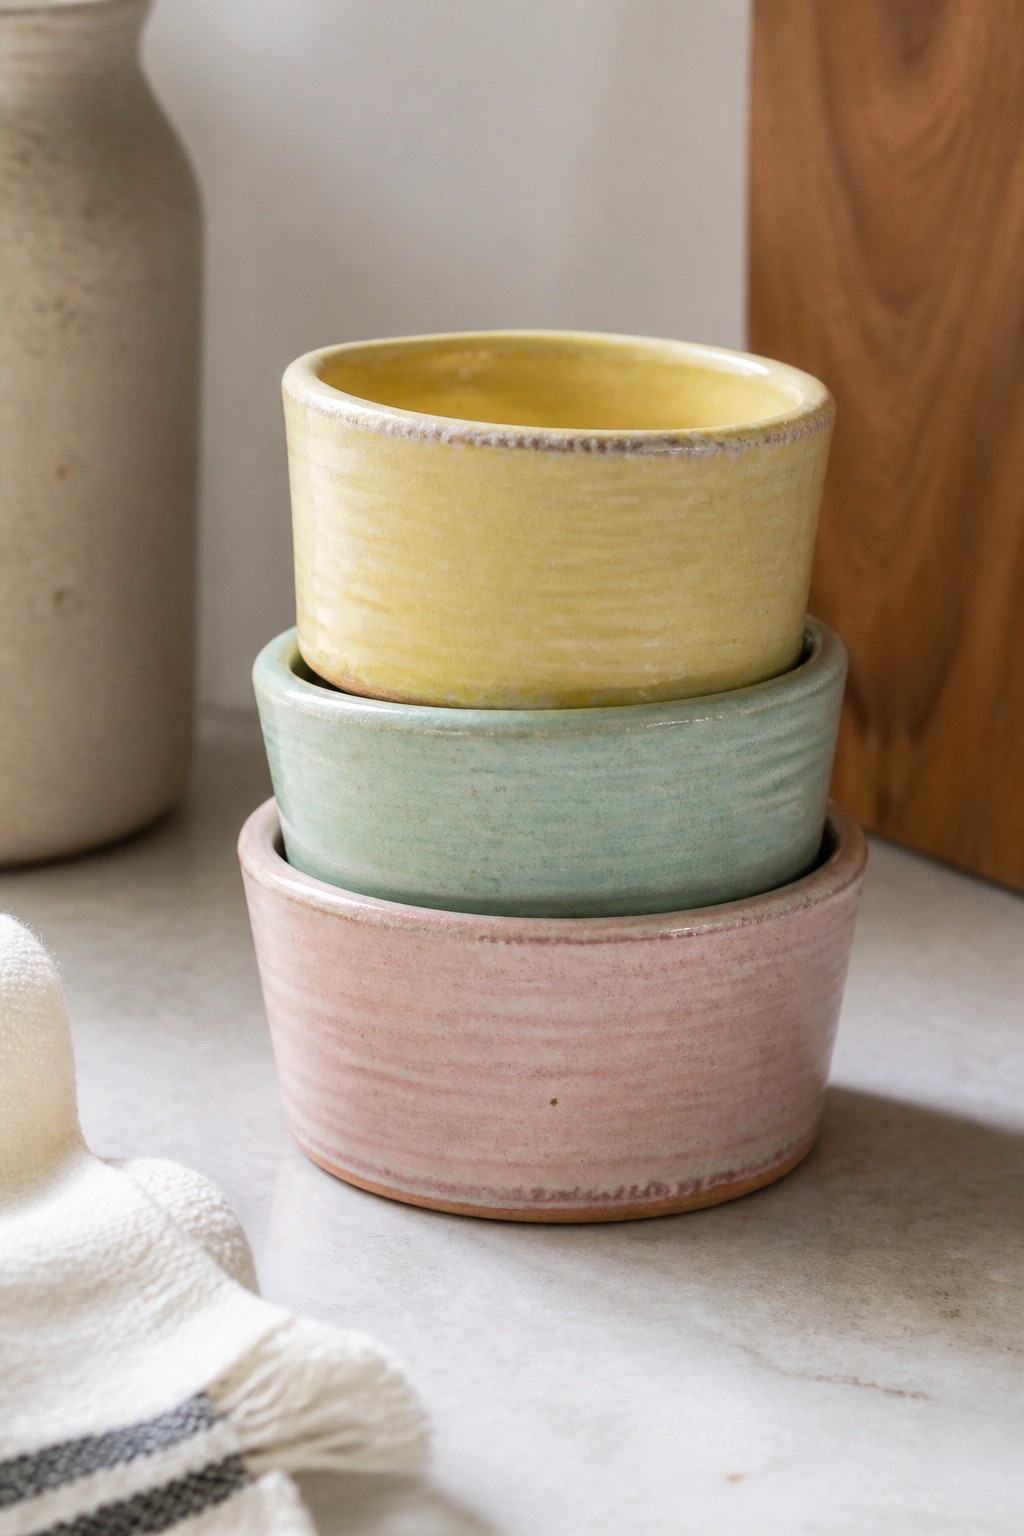
These wheel-thrown bowls form a simple nesting set meant for kitchen use. Each piece stays small and open with straight sides that stack neatly. The glazes in yellow, mint, and pink sit thin enough to let the throwing ridges show through, adding surface interest without extra carving or stamping. The approach keeps the focus on consistent forms and basic glazing rather than complex profiles.
What makes this idea useful is how the bowls serve as prep dishes, sauce ramekins, or small serving pieces without taking up much shelf space. You can repeat the same shape in one session and swap glaze colors to build a set quickly. Scaling the diameter up a couple inches turns the same idea into everyday cereal bowls or dessert dishes. The stacked arrangement photographs cleanly for Pinterest because the color contrast and visible ridges read well even at small thumbnail size.
Speckled Creamer with Dot Pattern

A small wheel-thrown creamer pitcher gives beginners a straightforward project that stays functional. The form includes a simple spout and pulled handle on a rounded body, finished with a speckled tan glaze. Scattered dots in blue, brown, and yellow create the main pattern through basic slip or underglaze application. This keeps the idea in the kitchen item category while adding surface decoration without complex carving or multiple glazes.
What makes this idea useful is how the small size works well for tea trays or coffee setups without taking much shelf space. The dot pattern can be adjusted easily by changing colors or spacing to match other pieces you already make. You could rework the same shape into a small syrup pitcher or adapt the dots onto a taller jug if you want more volume later. The compact scale also makes it quick to throw and fire, which helps when testing new surface ideas.
Wheel-Thrown Cup with Gold Crescent Moon
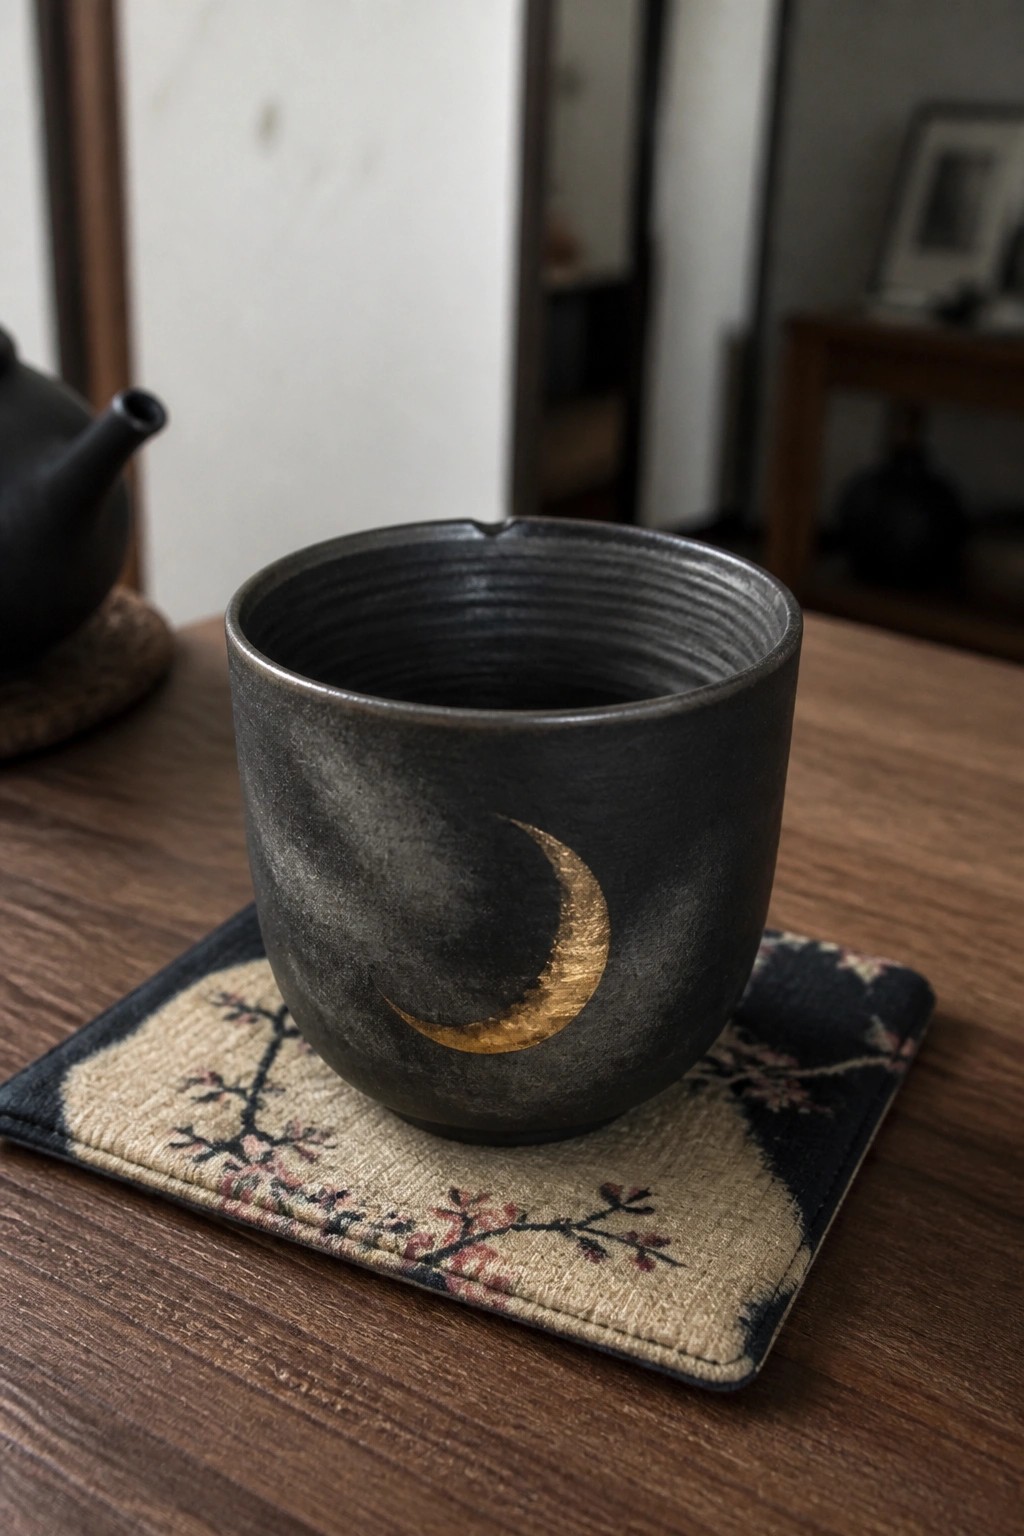
A wheel-thrown cup gives beginners a compact form to practice pulling walls evenly and shaping a simple rim. The dark matte surface finish sets up strong contrast for a single gold crescent moon painted on the side. This keeps the project focused on basic throwing while the painted motif adds a clear focal point without added sculpting or carving.
What makes this idea useful is how the small scale reduces clay use and makes centering and pulling easier to repeat. The moon shape can be swapped for other simple outlines like stars or leaves using the same underglaze or gold application. In a kitchen or tea area, the cup works well for daily drinks or as a gift that fits standard saucers. You could apply the same dark glaze and motif to a slightly wider bowl if you want to shift the shape toward a small serving piece.
Tall Cylinder Vase with Gradient Glaze
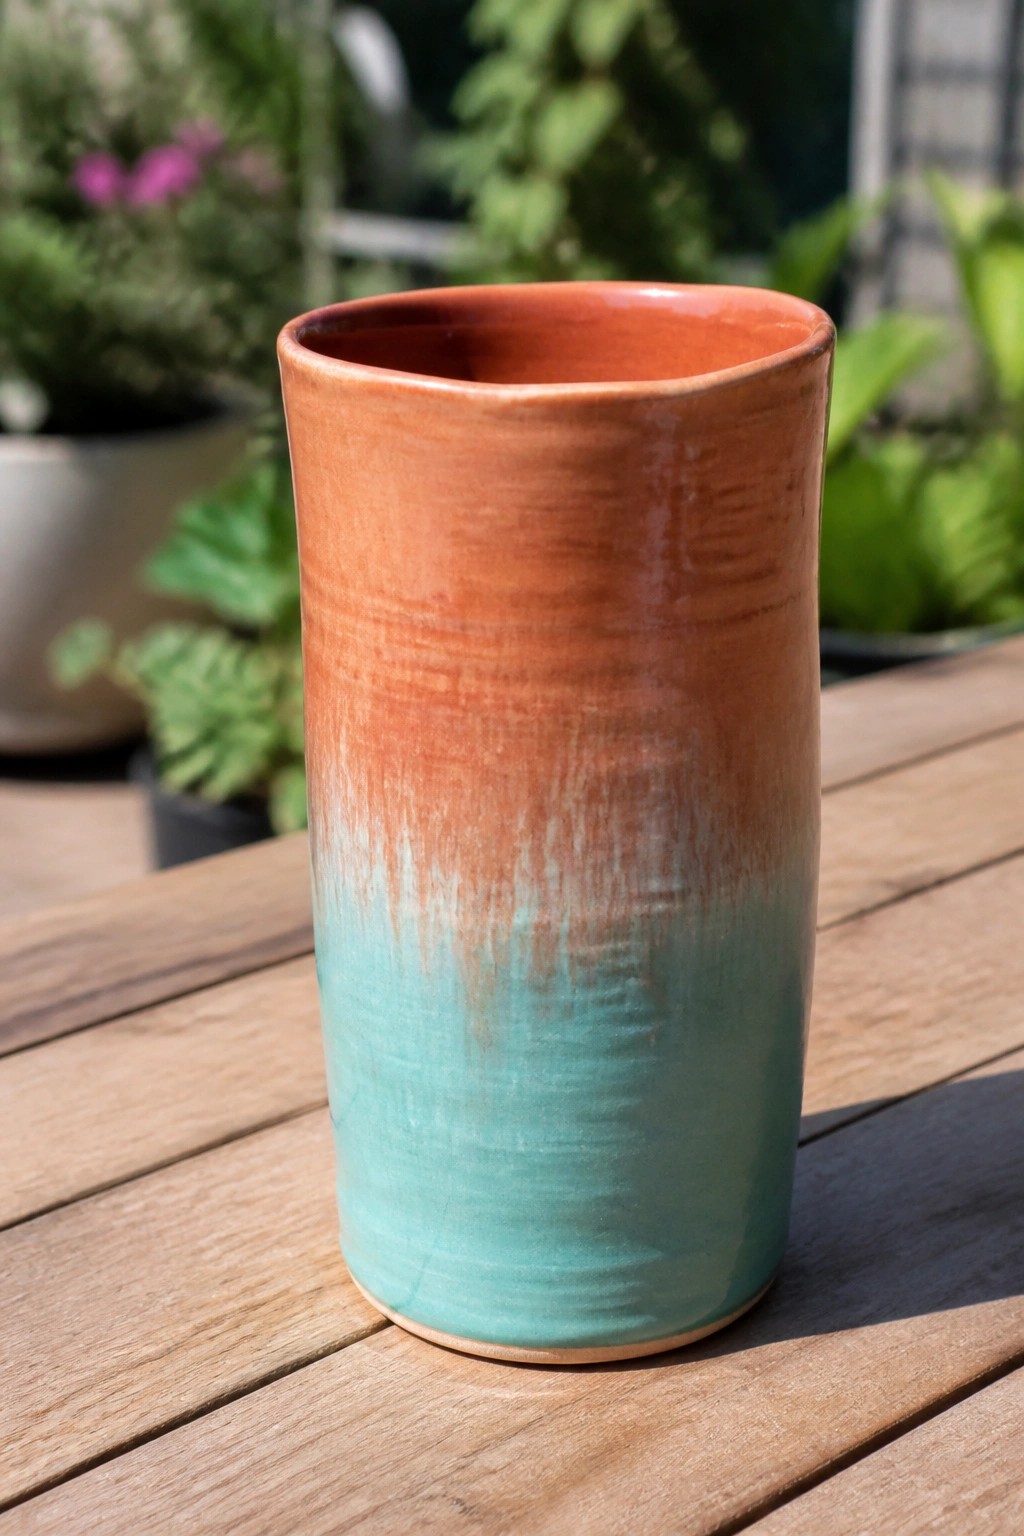
A wheel-thrown cylinder vase like this uses a simple tall form finished with two glazes that blend from warm orange at the top into turquoise lower down. The vertical walls let the color shift show clearly without extra texture or carving. This idea fits the beginner category because the shape requires only basic centering and pulling, while the glaze transition supplies the visual interest.
What makes this idea useful is how the same cylinder can be thrown shorter for a tumbler or kept tall for flowers or a single branch. The gradient works by overlapping the glazes so they run together in the kiln, and you can swap the color pair to suit a kitchen counter or desk. In a small space the narrow base takes little room while still holding water or a small plant, and the form translates directly into a matching set of two or three vases in different heights.
Yarn Bowl with a Notch for Knitting
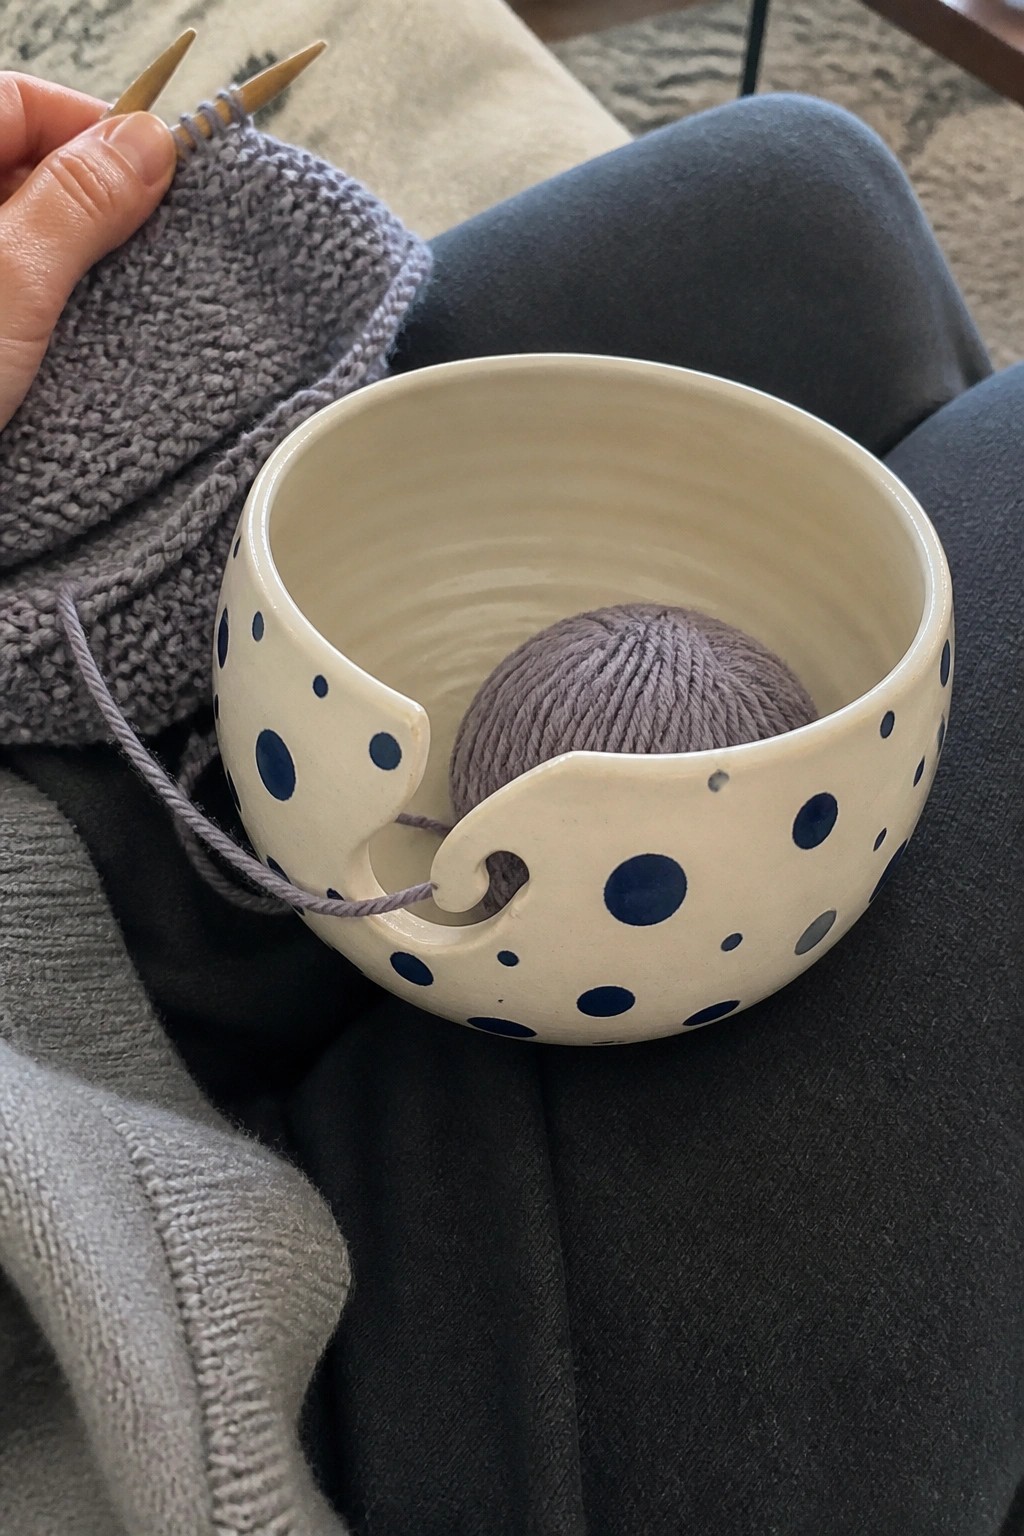
A wheel-thrown yarn bowl holds a ball of yarn in place while you knit or crochet. The rim includes a cutout that guides the strand outward so it feeds evenly without rolling across the floor. This example uses a cream base with blue dots and a smooth interior that shows the throwing lines.
What makes this idea useful is how the notch turns a simple bowl into a working tool. You can adapt the size to fit larger skeins or change the dots to lines or solid color blocks for a different look. It sits well on a couch arm or side table during projects and stores easily when not in use. The same shape can be made without the notch to serve as a regular catch-all bowl.
Double-Bowl Salt Cellar
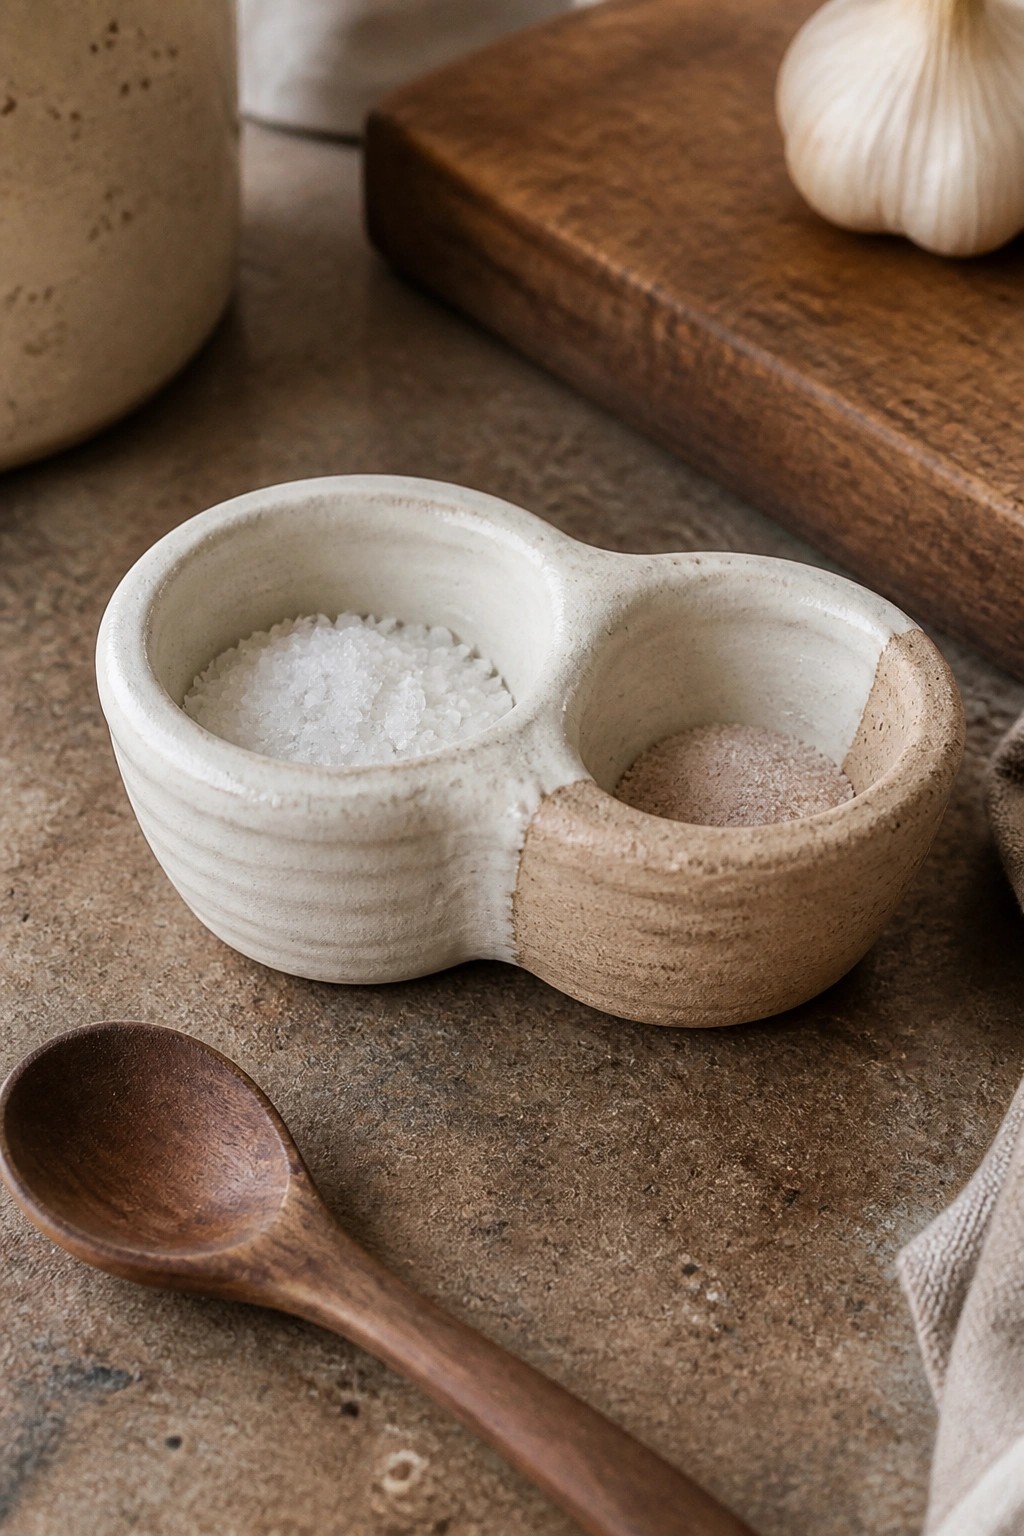
A divided salt cellar gives you two connected compartments in one compact form so you can keep coarse salt and a second seasoning side by side. The pinched waist between the sections keeps the contents from mixing while the simple wheel-thrown shape stays easy to throw and trim. One side carries a white glaze while the other stays closer to the raw clay, which helps the two compartments read as distinct without extra decoration. This kitchen item works well on a counter or stovetop where you reach for salt often.
The shape does a lot of the work here by turning a single small piece into two practical storage spots. In a kitchen this kind of piece sits neatly beside a cutting board or stove for daily use. You could rework the same divided layout for sugar and cinnamon or for two different finishing salts by adjusting the depth of each bowl. The small overall size also makes it simple to batch out several as gifts.
Wheel-Thrown Tealight Holder
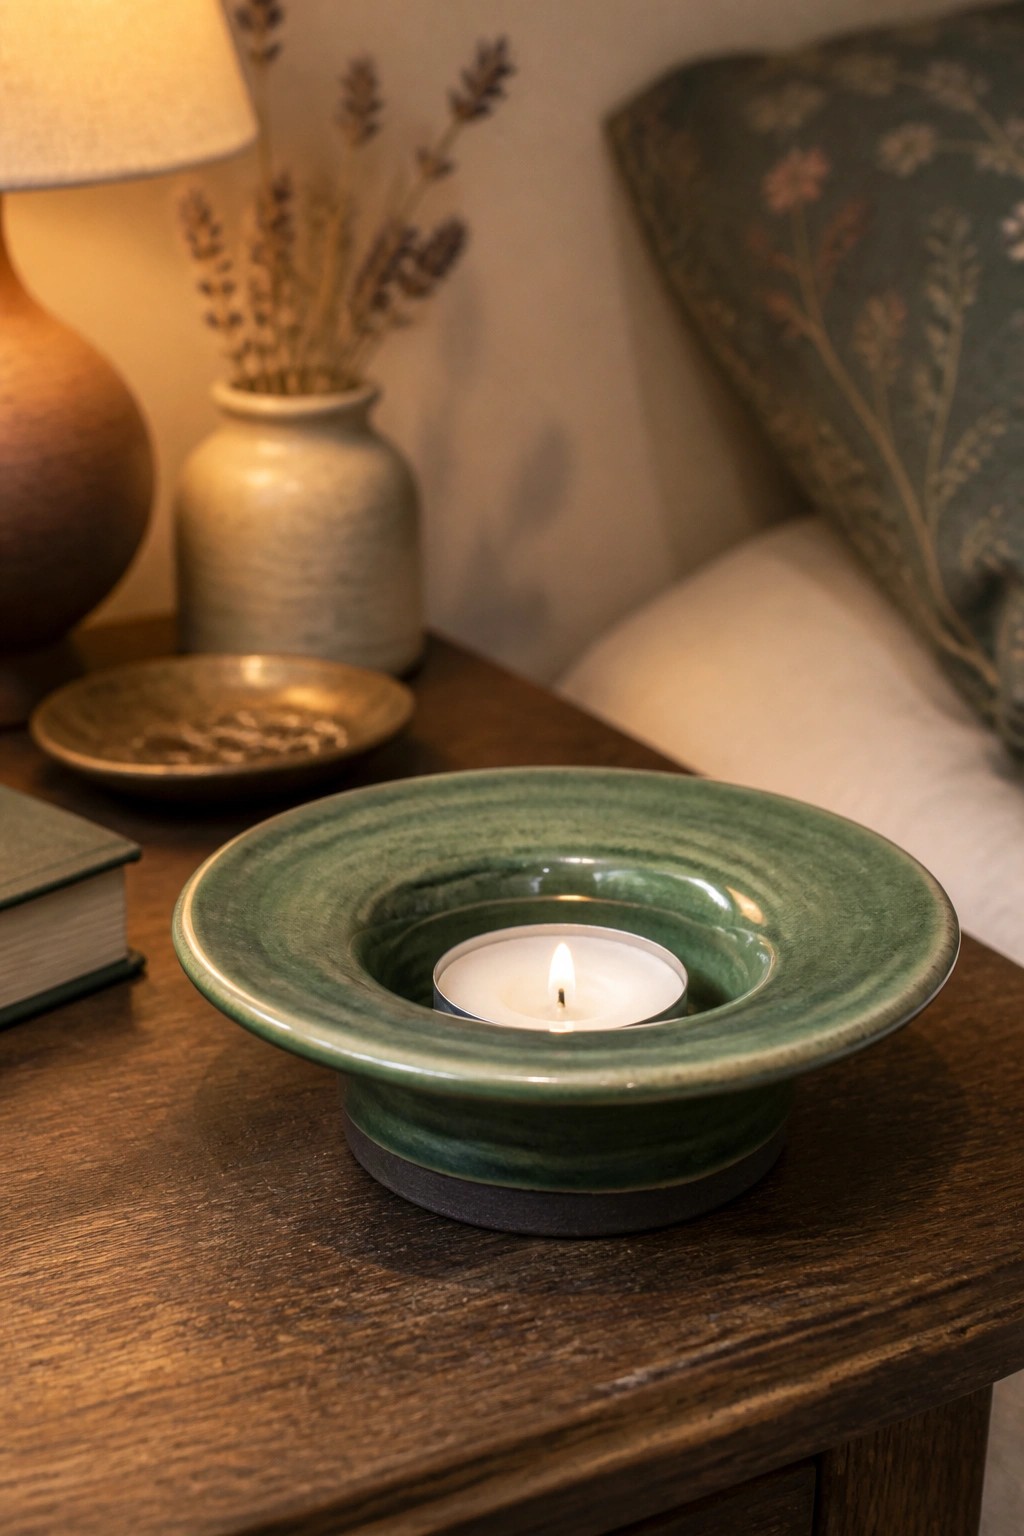
A wheel-thrown tealight holder takes the form of a low, wide bowl with a centered well sized for a standard tea light. The rim features soft concentric ridges that catch light and add surface interest, while the green glaze covers the upper portion and leaves the foot in a darker clay tone. This shape keeps the piece compact and stable on a flat surface.
What makes this idea useful is how the wide rim doubles as both a heat shield and a decorative border without extra parts. You can adapt it by throwing the same form in a smaller diameter for votives or stretching the rim wider for a double tealight version. The small scale makes it quick to throw and easy to fit into a set of matching holders for table use. In a beginner series, this project gives practice with even walls and controlled centering while producing something that works on a desk or shelf.
Cone-Shaped Incense Holder

A cone-shaped incense holder gives you a simple wheel-thrown form that tapers from a wide base up to a narrow top with a centered hole. The throwing lines stay visible under a dark matte glaze, and a glossy drip near the foot adds a small visual break. This style works as a dedicated holder for stick incense and stays stable because of the broad base.
What makes this idea useful is how little space the shape takes on a shelf or windowsill. You can adjust the height or angle of the cone on the wheel to change the look without adding extra parts. The same form adapts quickly into a small bud vase if you open the top wider during trimming. A dark glaze like this also photographs cleanly for project sharing.
Small Ear-Handled Vase
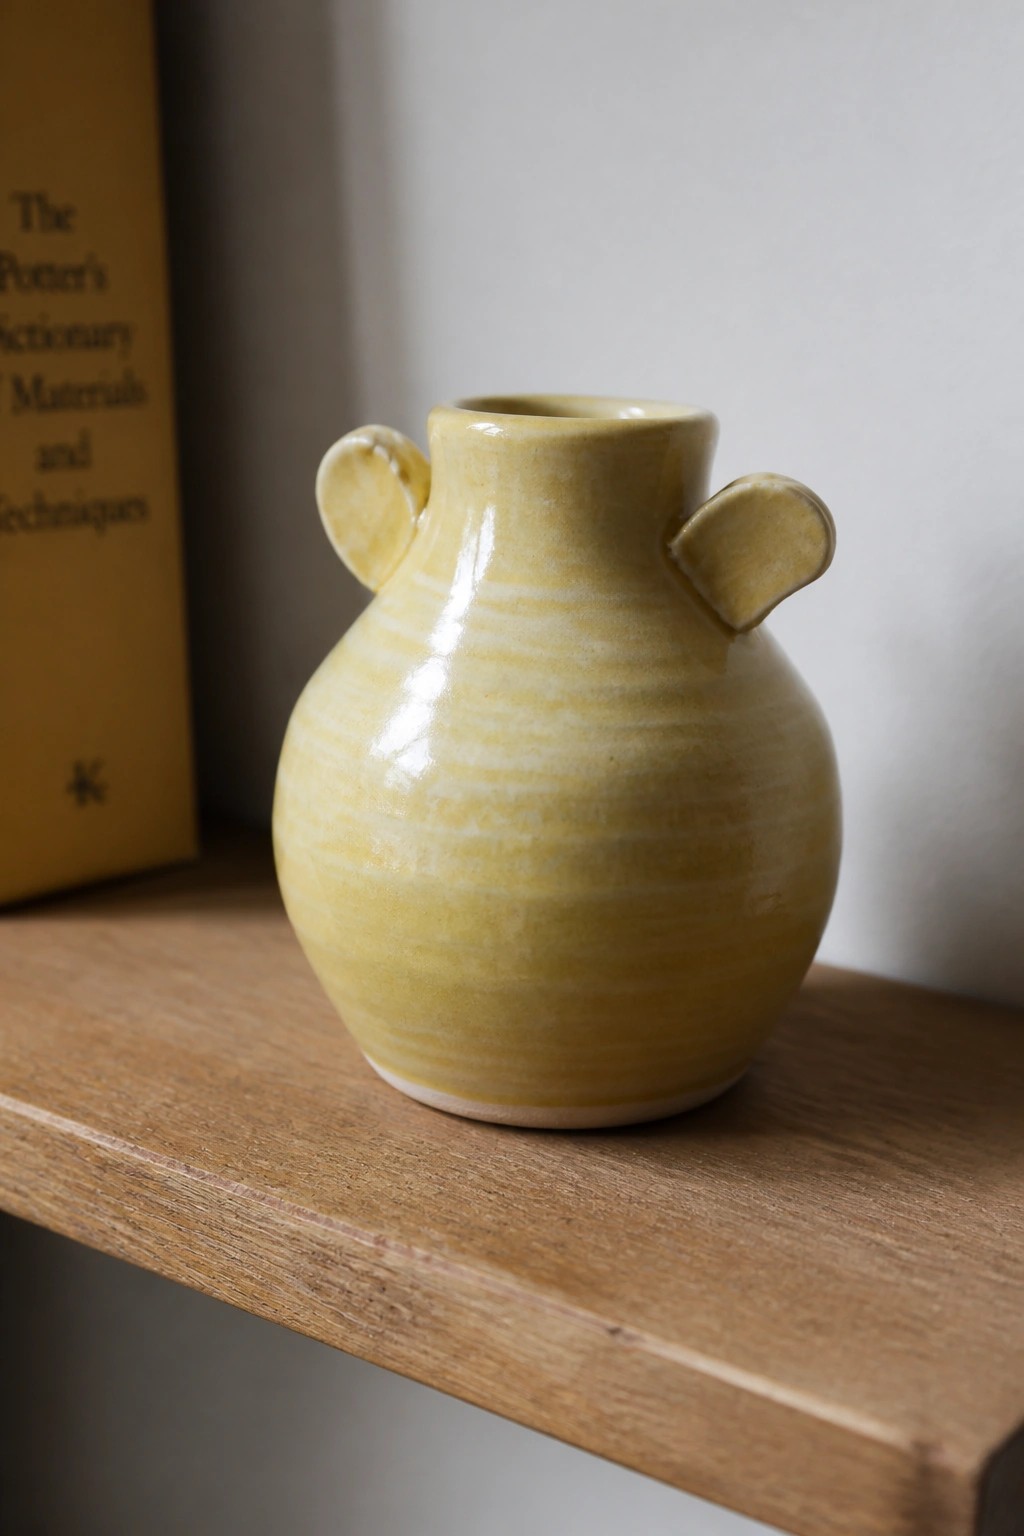
A compact wheel-thrown vase with a rounded body and short neck works well as a beginner project. Two small looped handles attached near the top add a simple detail that still shows off basic handbuilding skills. The glossy yellow glaze with visible throwing lines keeps the surface interesting while staying easy to apply.
What makes this idea useful is how the small size lets you practice throwing and trimming without needing a lot of clay or kiln space. You could change the handles to different widths or angles, or leave them off for a plain version. This shape works especially well as a bud vase on a desk or shelf, and the same form could be made a bit taller for a small pitcher or adapted into a set of matching cups.
Mini Spouted Pour Cups
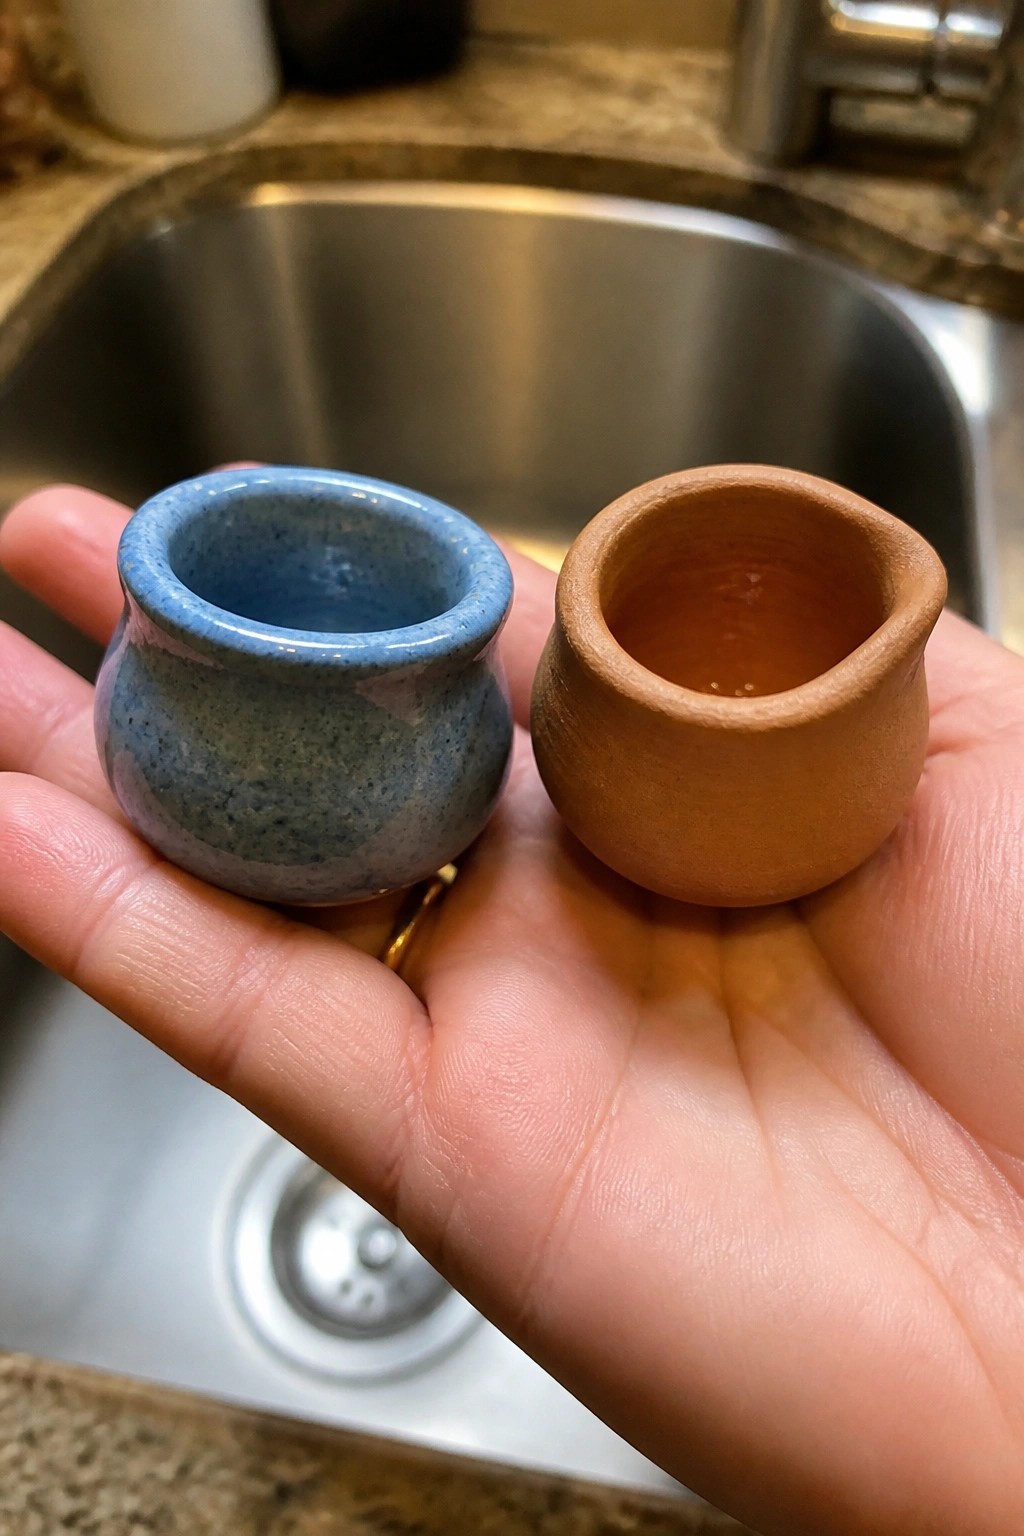
These small wheel-thrown cups have a rounded body that tapers slightly at the base and a simple formed spout for controlled pouring. One uses a speckled blue glaze that covers the entire surface while the other remains in raw clay. The compact scale and basic spout shape make them practical as kitchen items for holding and serving small amounts of oil, vinegar, or spices.
The shape does a lot of the work here since the rounded form is quick to throw and the spout adds function without extra steps. In a kitchen this kind of piece keeps counters tidy when used for daily condiments or as individual dipping bowls. You can adapt it by widening the opening for a small planter or shortening the body to make ring dishes instead. For beginners the small size means less clay and faster drying so you can test glazes and spouts on multiple versions at once.
Wheel-Thrown Shallow Bowl with Leaf Rim Carving
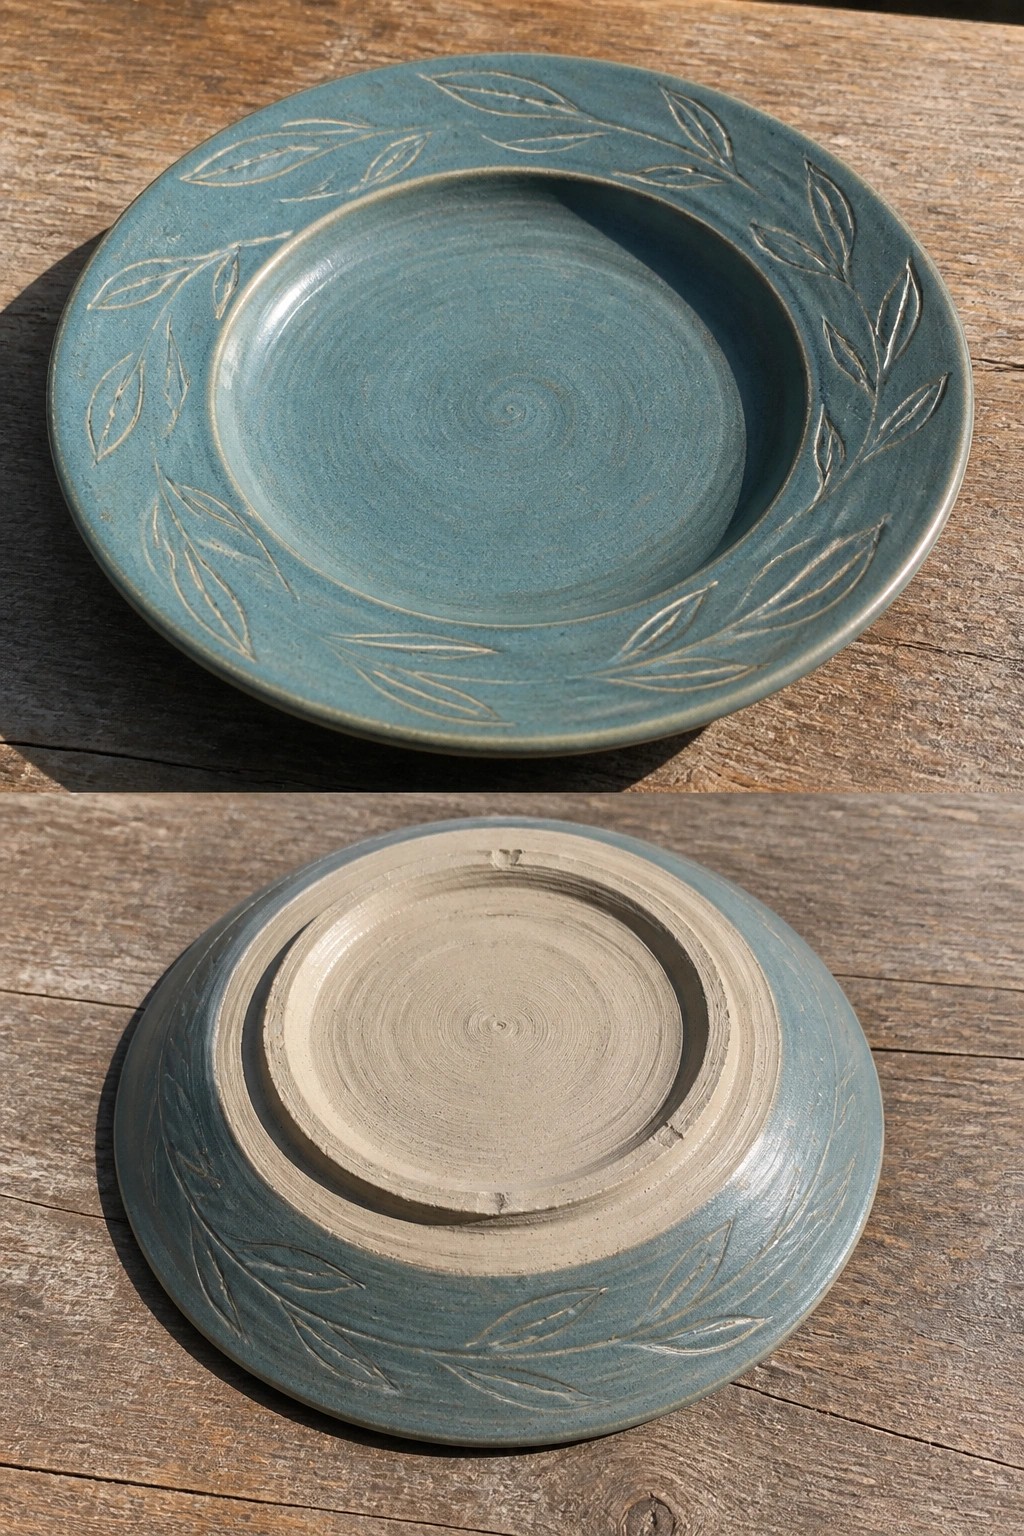
A wheel-thrown shallow bowl gains a clean border when simple leaf shapes are carved into the rim while the clay is leather hard. The repeating leaves sit just inside the edge and leave the center open so the throwing rings remain visible under the glaze. A single blue-green glaze covers the piece and settles into the carved lines to make the pattern stand out without extra color work.
What makes this idea useful is that the leaf carving can be scaled up or down depending on the bowl size you throw. The shallow form works for side dishes, fruit, or a desk tray, and the same rim treatment can be added to plates or deeper bowls. You could swap the leaves for another basic motif or carve only the outside if you want less detail on the interior. The technique stays manageable for beginners once the bowl is trimmed and ready for carving.
Bear Face Succulent Planter
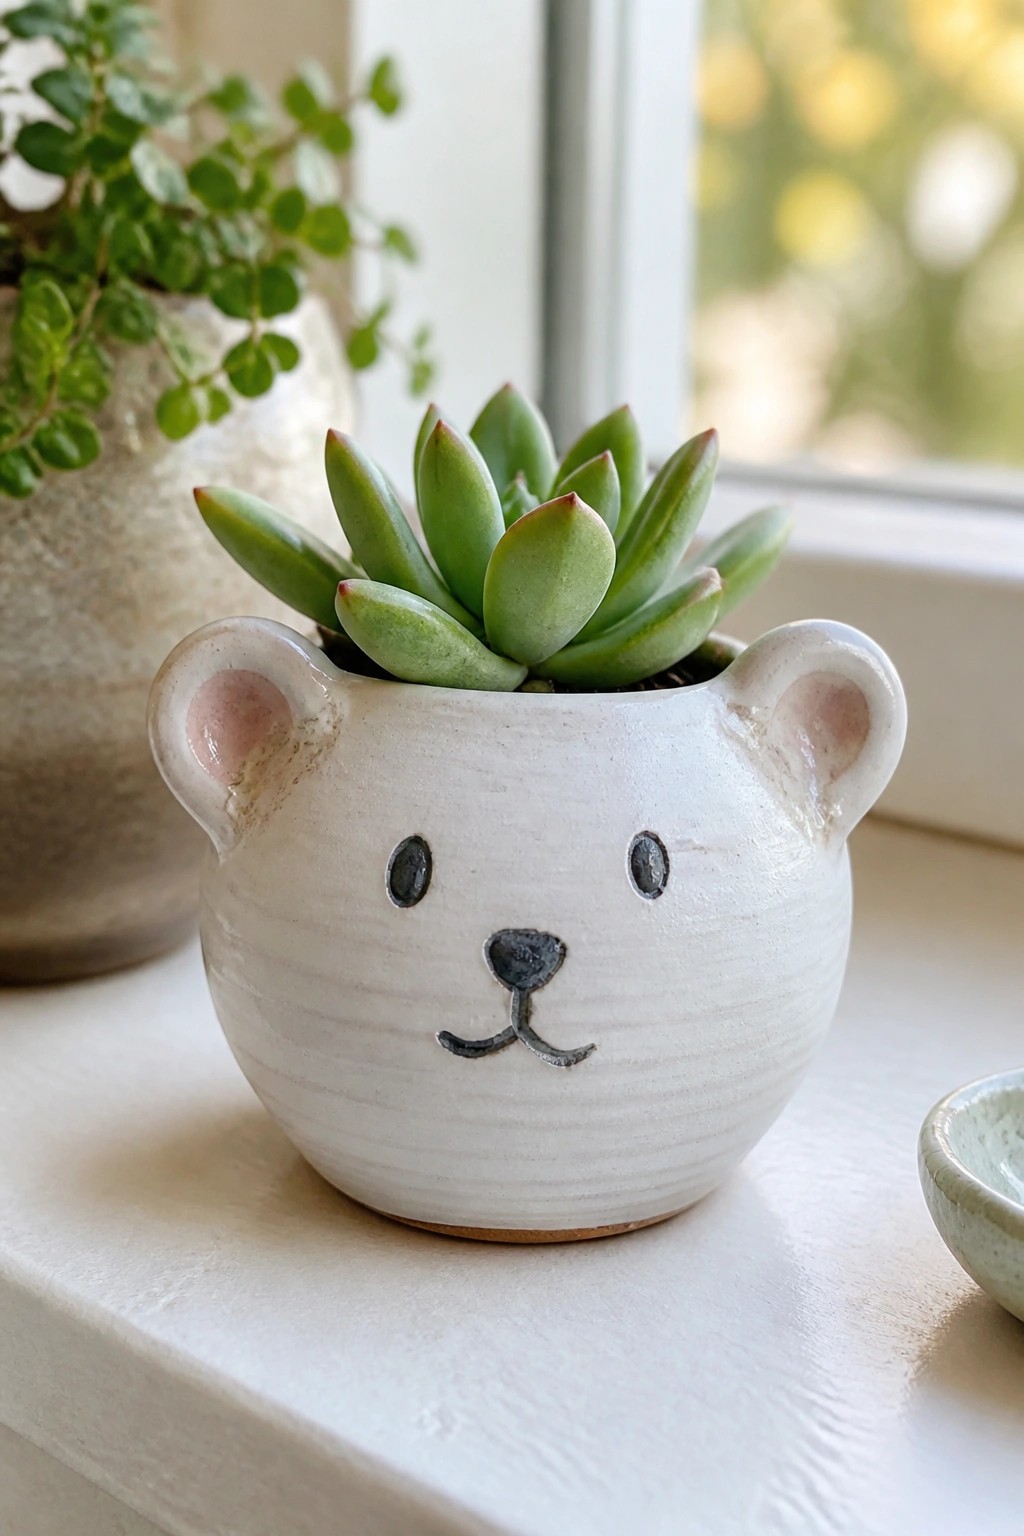
A wheel-thrown cylinder can be turned into a bear planter by adding two pinched ears at the rim and painting simple eyes, nose, and mouth with underglaze before glazing. The rounded form holds a small succulent securely while the low height keeps the plant as the main visual element. White glaze on the body lets the dark face details stand out without competing with the greenery inside.
The shape does a lot of the work here because the bear outline stays clear even when the painted features stay minimal. You could swap the ears for pointed cat or fox versions or skip the face entirely for a plain version that still reads as an animal pot. This works well as a windowsill or desk piece since the small size fits most ledges and pairs easily with any low-light plant. For a gift, throw a few bases in one session and vary the ear shapes so each one feels different without extra time.
Lidded Kitchen Canister
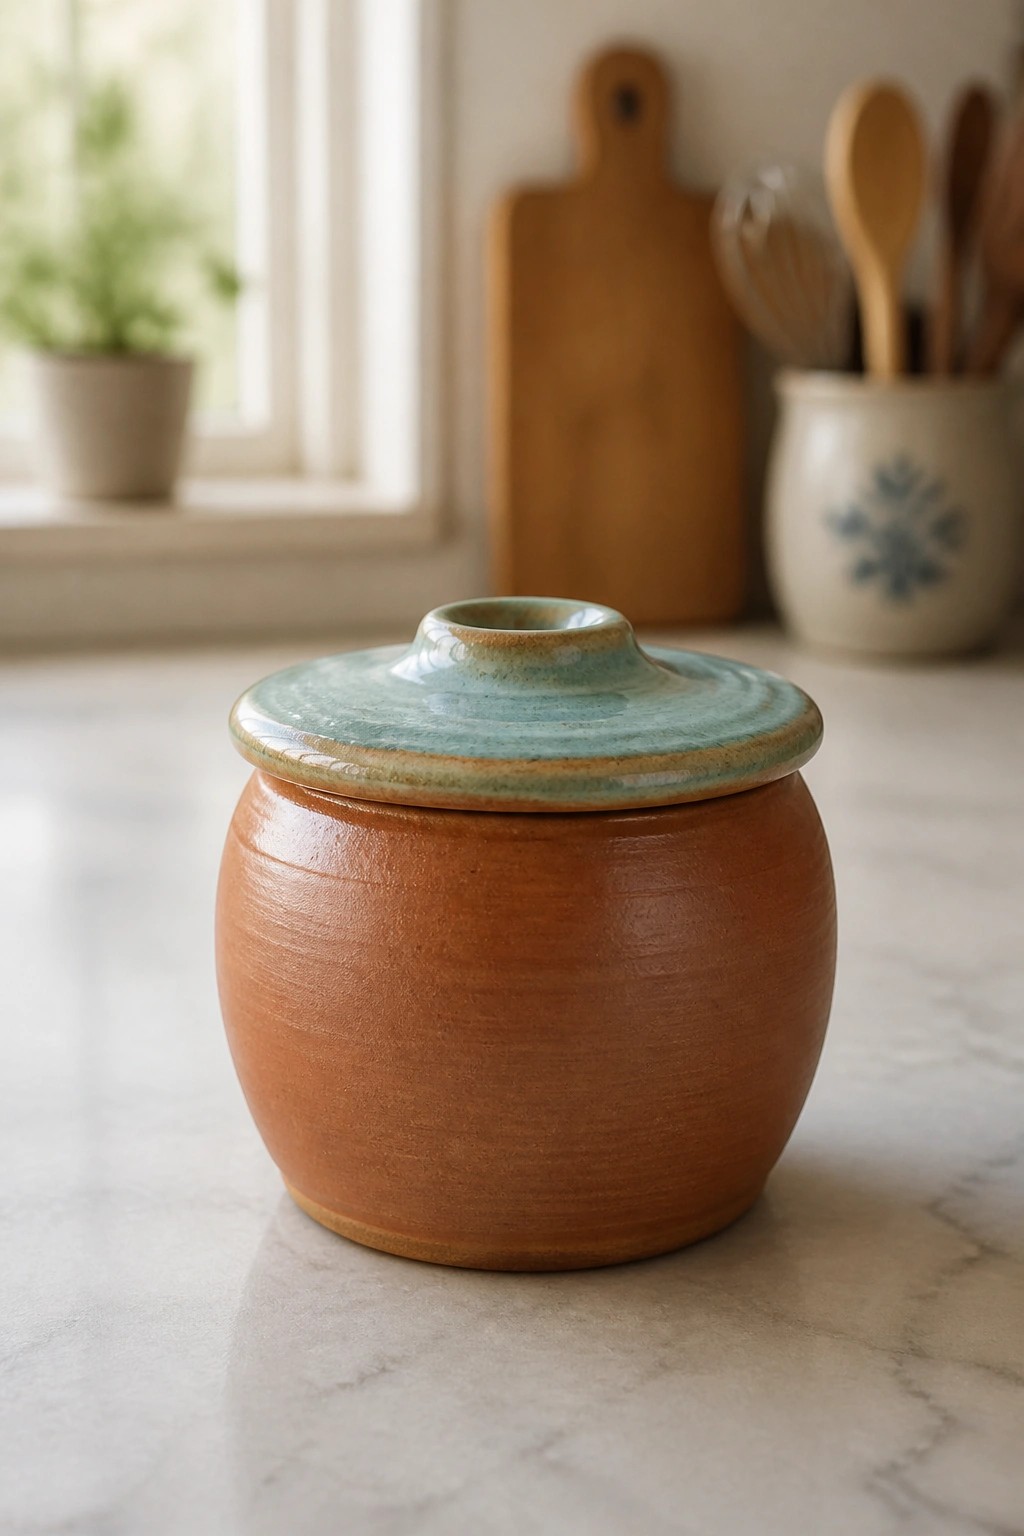
A wheel-thrown lidded jar makes a compact storage piece for sugar, salt, or loose tea. The rounded body stays simple and functional while the lid adds a flat top with a small central knob for easy lifting. The brown clay body contrasts with the turquoise glaze on the lid, which keeps the color limited and the form easy to read. This approach fits the kitchen item category and works at a scale that stays manageable for beginners.
What makes this idea useful is how the lid turns a basic pot into something that actually stores items on the counter. The small size lets you finish the piece quickly and adjust the proportions later for a taller or wider version. You could repeat the same shape to build a matching set or change the lid glaze to another color for variety. In a kitchen, this kind of jar keeps dry goods visible without relying on store-bought containers.
Frequently Asked Questions
What basic equipment do beginners need to attempt wheel thrown pottery projects?
To get started with any of the 19 ideas you will need a pottery wheel, several pounds of suitable clay such as stoneware or porcelain, basic tools including a wire cutter, wooden or metal ribs, sponges, and a needle tool, plus access to a kiln for firing. Many beginners begin with a small electric wheel and a starter kit of tools that costs under two hundred dollars while sourcing clay from local suppliers or online retailers in twenty five pound blocks.
How do beginners center clay on the wheel before shaping the listed projects?
Start by placing a well wedged ball of clay firmly in the center of the wheel head and wetting your hands. Use steady pressure with both hands to push the clay down and inward while the wheel spins at medium speed until it feels balanced and does not wobble. Practice this step several times on its own because centering is the foundation for successful bowls, mugs, and vases from the idea list.
Which of the 19 ideas are best suited for someone with no prior wheel experience?
Simple cylinder forms, basic bowls, and small plates rank among the easiest because they require fewer steps and less precision than complex shapes like teapots or lidded jars. Focus first on pulling even walls and keeping the form symmetrical rather than adding handles or intricate details until your control improves.
What should beginners do if a piece collapses or becomes off center during throwing?
Stop the wheel, use the wire cutter to remove the clay, re wedge it thoroughly, and try again rather than forcing corrections on a failing form. Many potters find it helpful to keep a bucket of water nearby for frequent hand rinsing and to work with slightly firmer clay once they gain confidence so the walls hold their shape better.
How are finished pieces from these beginner ideas prepared for firing and glazing?
Allow the thrown forms to dry slowly to a leather hard stage over several days while covering them loosely with plastic to prevent cracking. Once bone dry, bisque fire them in a kiln, apply glaze using dipping or brushing methods, and complete a final glaze firing according to the clay and glaze instructions provided by your supplier.

Pottery Path is my cozy corner of the internet where I share clay ideas, pottery inspiration, and simple projects you can recreate at home. I love exploring everything from air dry clay to handbuilt pottery to cute minis that brighten your day. My goal is to make clay crafting feel easy, fun, and welcoming for anyone who wants to try it.
You will find beginner friendly tutorials, creative pottery painting ideas, and lots of warm inspiration for slow and happy crafting. If you enjoy hands on creativity, this space will feel like home.