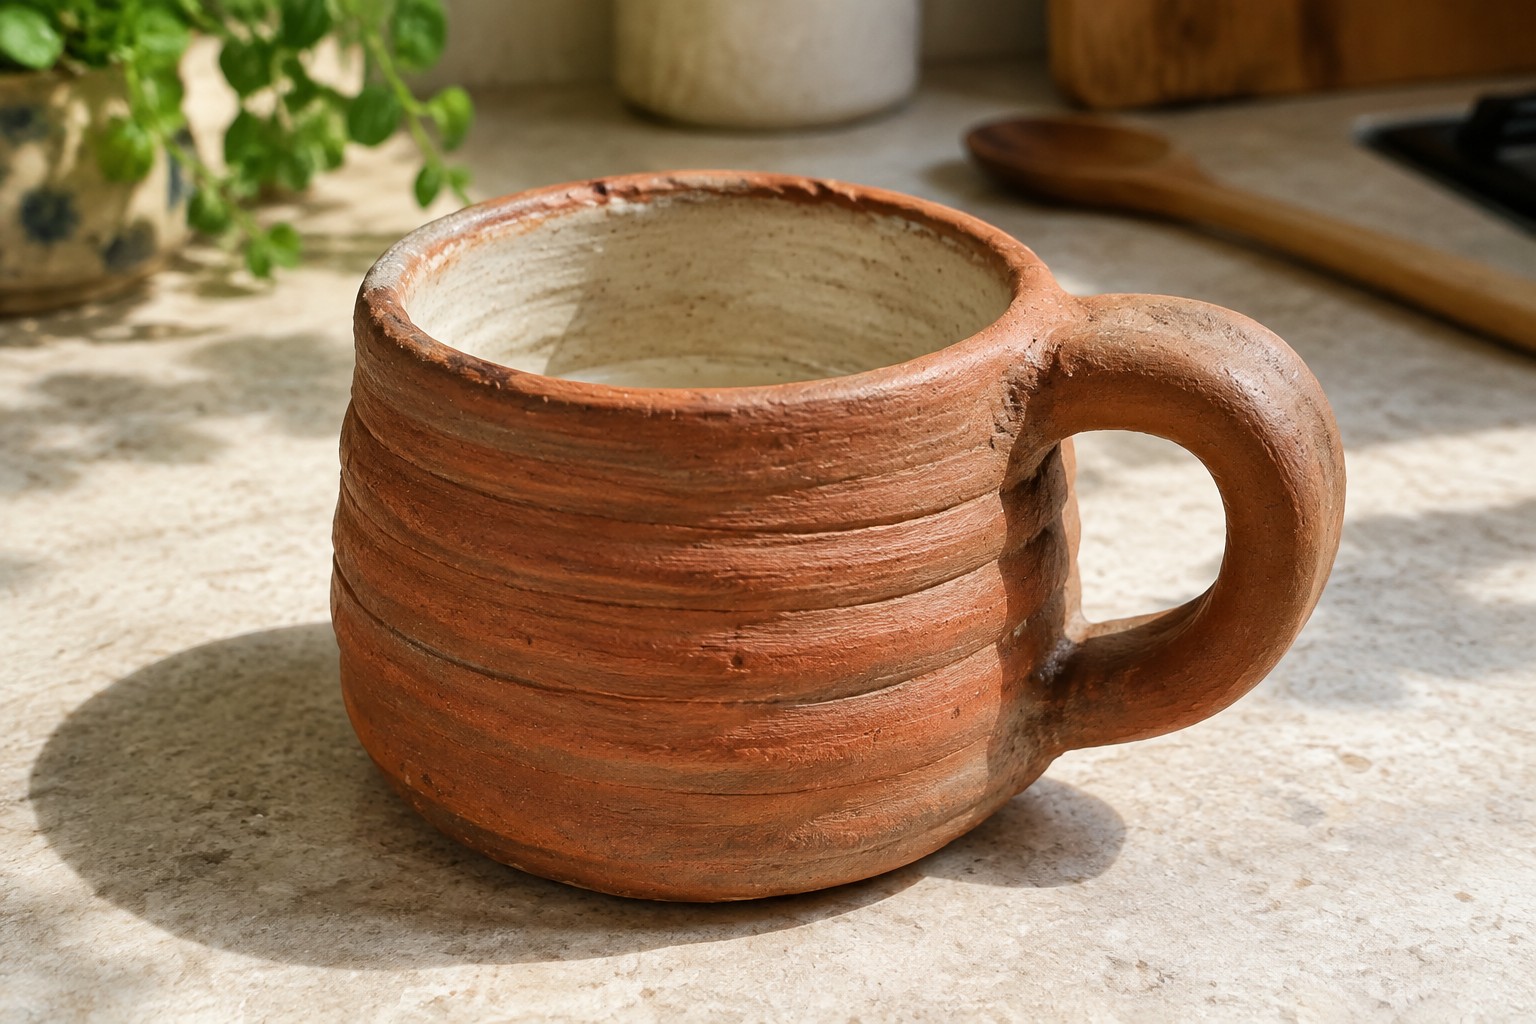
I started making coil pots a couple years ago because it felt like a straightforward way to shape clay by hand.
I usually leave the surfaces in their natural state since that gives them a simple earthy feel without extra steps.
Over time I collected some designs that worked well for everyday use or decoration around the house.
These twenty ideas are ones I think could be useful if you want to try something similar.
They focus on basic forms and finishes that highlight the clay itself.
Coil-Built Mug with Exposed Horizontal Ridges
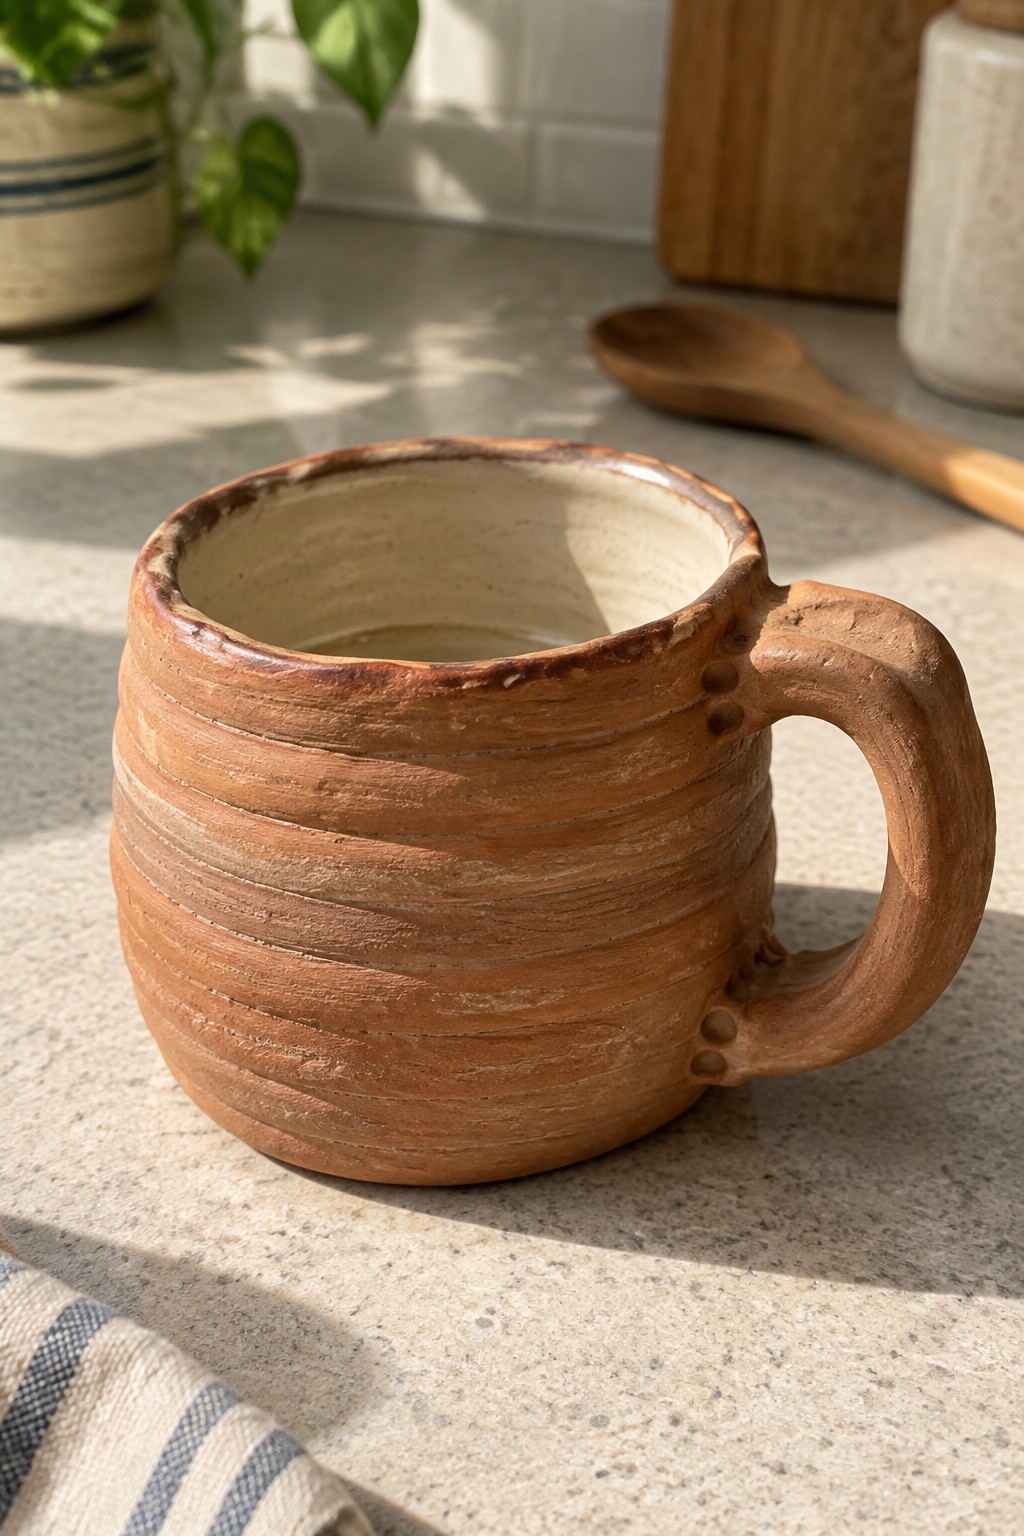
A coil-built mug keeps the construction lines visible so the stacked clay ropes become the main surface pattern. The horizontal ridges run evenly around the body while the outside stays in raw terracotta with no added glaze. The handle is pulled or rolled separately then joined with small clay dots that add a simple repeated detail without extra tools. This method suits anyone who wants a functional drinking vessel that still shows the clay building process clearly.
What makes this idea useful is how the coil texture supplies the decoration so you skip carving or glazing steps. The same ridge pattern works on taller tumblers or shorter espresso cups by changing the number of coils. You can adapt the dotted handle accents to small pitchers or utensil holders that need a matching rustic set. In a kitchen this mug reads as practical because the sturdy walls and wide base handle daily use while the natural finish pairs easily with other unglazed pieces.
Coiled Hedgehog Planter for Small Houseplants

A coil-built hedgehog planter uses stacked clay ropes to form the rounded body while the head is sculpted as a separate piece and joined at one end. The coils stay visible as horizontal ridges that wrap around the form, giving the surface a clear handmade texture in the natural clay color. The face gets simple details like closed eyes, a snout, and small ears without extra decoration. This keeps the project focused on the coil technique and the animal shape rather than surface treatments.
The small overall size makes it practical for windowsills or narrow shelves where a standard pot would feel too wide. You can simplify the idea by skipping the face and just using the coil texture on a basic round or oval form, or you can change the animal to a different creature if hedgehogs are not your style. The same method works for slightly larger versions if you want to hold a medium plant instead. For Pinterest, the recognizable animal shape combined with visible coils gives the piece a clear focal point that photographs well against simple backgrounds.
Horizontal Coil Serving Bowl
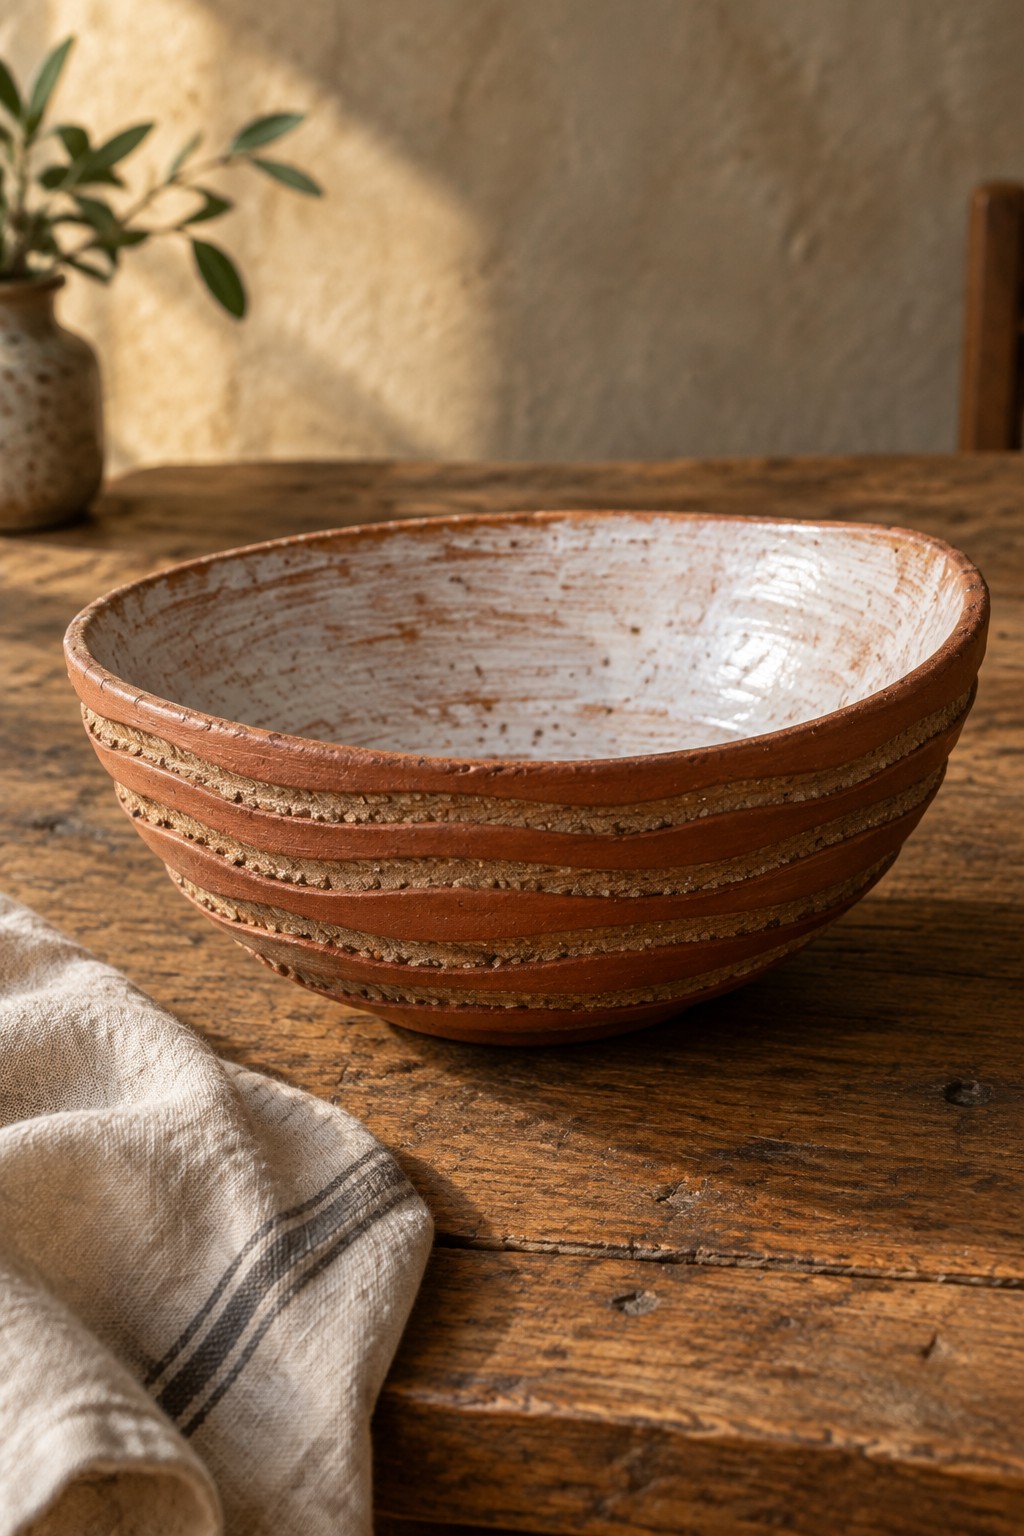
A coil-built bowl uses stacked ropes of clay to form both the structure and the surface pattern. Multiple horizontal coils in different natural clay tones create distinct bands around the exterior while the interior receives a light speckled wash. The open, wide shape makes it practical for serving or mixing, and the visible coils turn the construction method into the main visual feature.
The wide rim and generous size suit it for kitchen table use with bread, salads, or fruit. You could scale the same coil approach down for a smaller dip bowl or switch to a taller cylinder to make a utensil holder. Keeping the clay colors limited to two or three tones simplifies the process without losing the striped effect. This style shows up well in searches for rustic kitchen pottery because the texture reads clearly even in small thumbnails.
Coiled Oval Tray with Ridges

A long oval tray built from coils makes a practical catch-all for keys and small daily items on a kitchen or bathroom counter. The interior features evenly spaced horizontal ridges that add grip and visual interest while the speckled clay body shows through at the edges. A muted green glaze settles into the grooves and leaves the higher ridges lighter, creating contrast without extra decoration.
The shape works well in narrow spaces where a round dish would feel too wide. You could shorten the length to make a desk version for coins and earbuds or stretch it further for a bathroom soap rest. The ridge texture is easy to add with a simple tool after the coils are joined, and leaving parts of the clay unglazed keeps the rustic finish intact.
Coiled Clay Bird Figurine

A coil-built bird figurine starts with stacked clay coils that form a rounded body while leaving the construction lines visible as horizontal ridges. The natural speckled clay is left mostly unglazed so the earthy tones and texture stay front and center. Small additions for the head, tail, and feet turn the coil shape into a clear bird without extra detail. This style fits the decor object category and works especially well when the maker wants the building process to show in the finished piece.
The small scale keeps material use low and makes the project manageable on a tabletop workspace. You could repeat the same coil method for other simple animals or stretch the body longer to create a different silhouette. A finished piece like this fits on a shelf or nightstand and pairs easily with other natural materials. The visible coils give it enough surface interest to photograph well for sharing without needing added color or patterns.
Coiled Oval Tray for Kitchen Utensils

A long oval dish formed from stacked coils gives you a narrow tray that works as a spoon rest or small prep holder. The exterior keeps the natural terracotta color and shows the ridged coil lines, while the inside carries a simple amber glaze that makes cleaning easy. This shape stays low and stable on a counter so it does not tip when a spoon rests across it.
What makes this idea useful is the narrow footprint that fits between the stove and sink without crowding the workspace. You could shorten the same coil form into a soap dish for the bathroom or widen it slightly for a butter tray. The unglazed ridges give texture that hides small marks over time, and the basic shape adapts quickly if you want to add a small handle at one end.
Leaf-Impressed Ring Dish
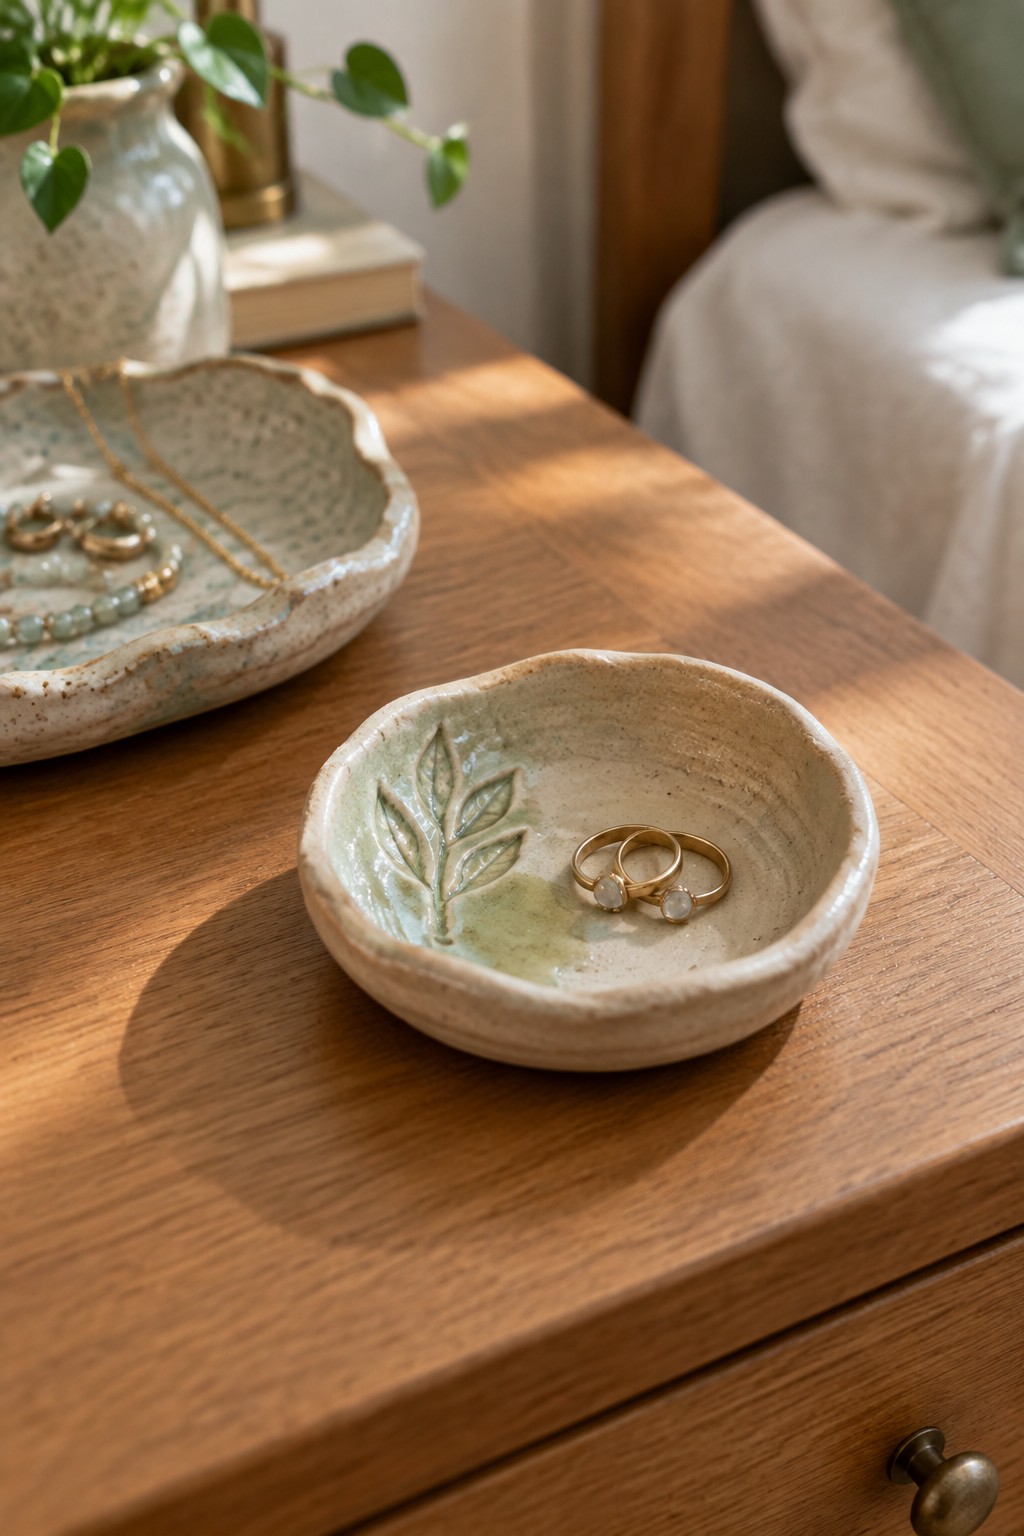
A small handmade ceramic ring dish uses an organic round form with a raised leaf motif sculpted into the base. The natural speckled clay shows a light green wash that settles into the leaf veins for soft contrast against the beige surface. This shallow shape keeps rings in one spot while the simple motif adds a nature detail without extra decoration.
The compact size works well on a nightstand or dresser for daily jewelry storage. You could swap the leaf for other pressed botanicals or skip the sculpting and use a basic stamp pattern instead. The same shape adapts easily into a small tray for keys or loose change.
Coiled Vase with Vertical Slip Stripe

A coil built vase uses stacked ropes of clay to form a tall, rounded body that narrows at the neck. The visible coil ridges create a rough texture that contrasts with the smooth vertical stripe of white slip applied down the center. This simple accent breaks up the solid terracotta surface and gives the piece a clear focal line without needing additional carving or handles. The result fits the category of a basic dried flower vase or small bouquet holder that relies on the clay body and one painted detail for its look.
What makes this idea useful is how the single stripe works with the coil texture instead of fighting it. The shape fits well on a windowsill or narrow shelf where taller pieces can stand behind shorter ones. You could repeat the stripe on the back side, use a different slip color, or scale the whole form down for a bud vase. For a gift, the same coil method with a thinner stripe keeps the project quick while still looking finished.
Textured Coil Tea Light Holder

A coil-built candle holder formed from dark earthenware clay creates a low, rounded bowl that safely contains a standard tea light. The maker left the coils visible on the exterior so the ridges and seams remain part of the finished surface, then applied a thin wash that settled into the texture without covering it completely. This keeps the piece firmly in the rustic coil pottery category while the thick walls provide weight and stability on a tabletop.
What makes this idea useful is how easily the same coil method scales to a slightly wider version for votives or a shallower tray for matches. The compact size works well on a mantel, desk, or windowsill where larger pottery would feel heavy. You can adapt the shape by smoothing the inside rim for a cleaner look or leaving it rough for more contrast. The natural clay finish also photographs cleanly for Pinterest without needing extra props.
Coil Built Toothbrush Holder in Natural Clay
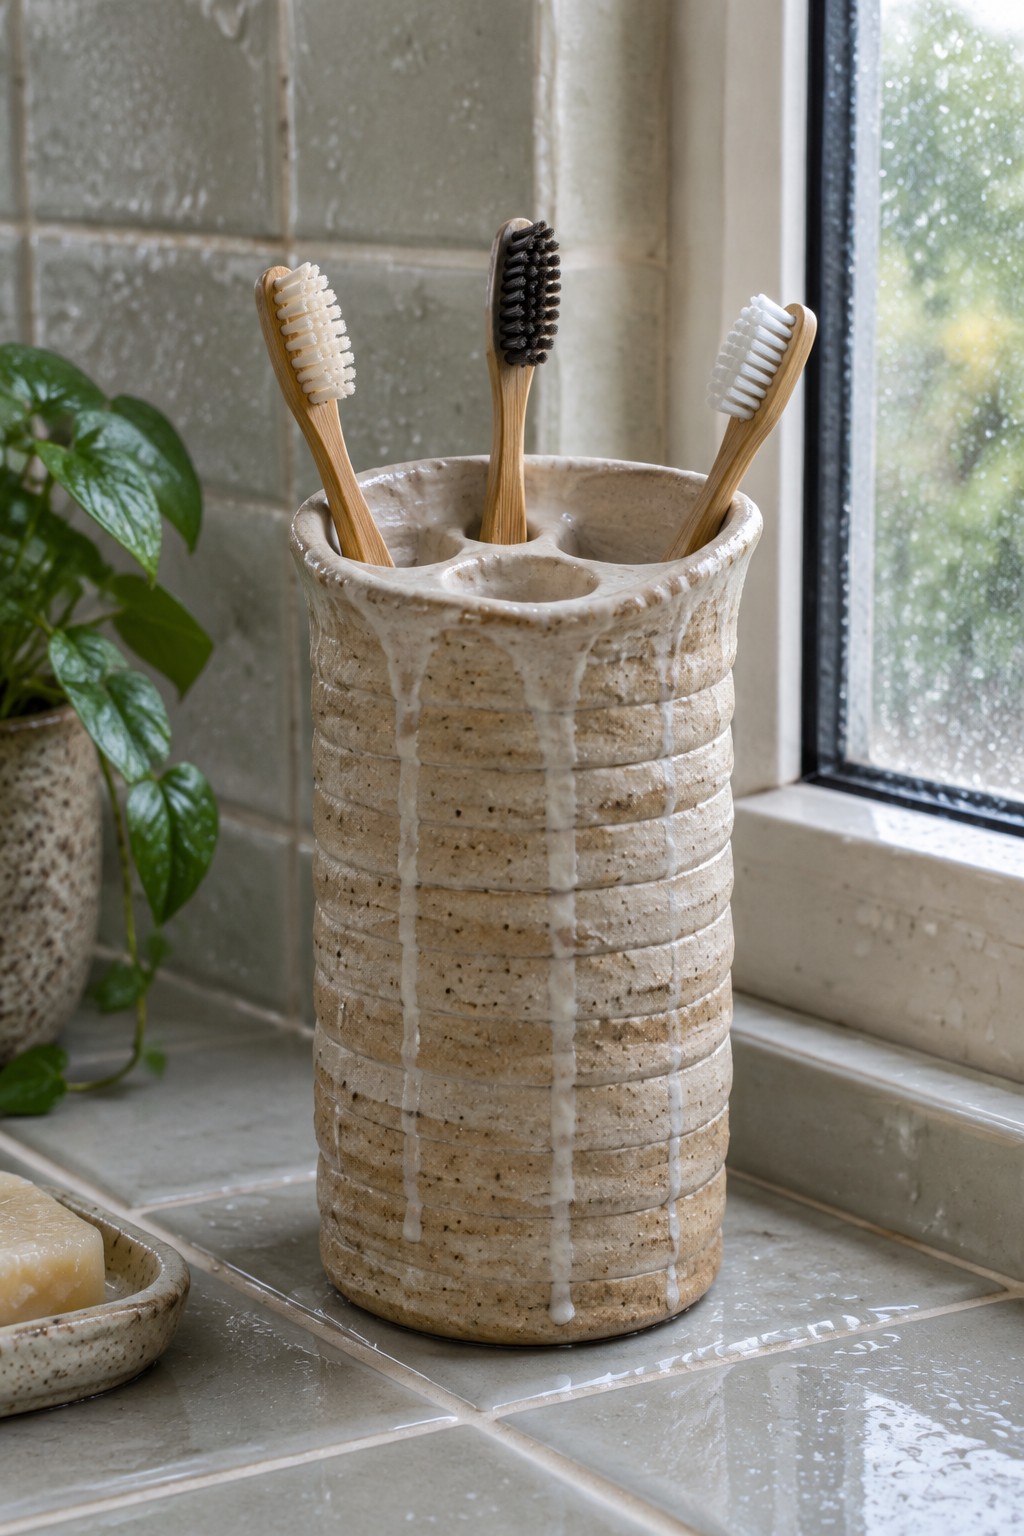
A coil-built cylindrical holder with multiple openings at the top makes a practical toothbrush caddy for a bathroom counter. The visible horizontal ridges from the coils create texture across the natural clay surface, while simple white glaze drips add contrast without covering the material. This shape keeps several brushes separated and upright while showing the construction method clearly.
What makes this idea useful is how the compact size fits on a small ledge or windowsill without taking much space. The multiple holes prevent brushes from touching, and the same coil method could be adjusted for a wider version to hold makeup brushes or a narrower one for cotton swabs. The drip glaze works on any clay color, so the design stays easy to adapt for different bathroom setups.
Coil-Built Salt Cellar in Natural Terracotta

A small coil-built bowl makes an effective salt cellar or kitchen pinch bowl. The stacked coils form a sturdy, rounded shape with a wide opening that makes it easy to reach in with fingers or a small spoon. Leaving the clay unglazed keeps the surface matte and slightly rough, which helps the piece feel grounded next to wooden boards and linen.
What makes this idea useful is how the compact size works on a countertop or beside the stove without crowding other tools. You could repeat the same coil technique to make a matching set for sugar or spices, or widen the base slightly to turn it into a small planter for herbs. The natural clay finish also ages well with use, so the piece gains character instead of wearing out.
Rustic Sponge Holder with Drainage Ridges
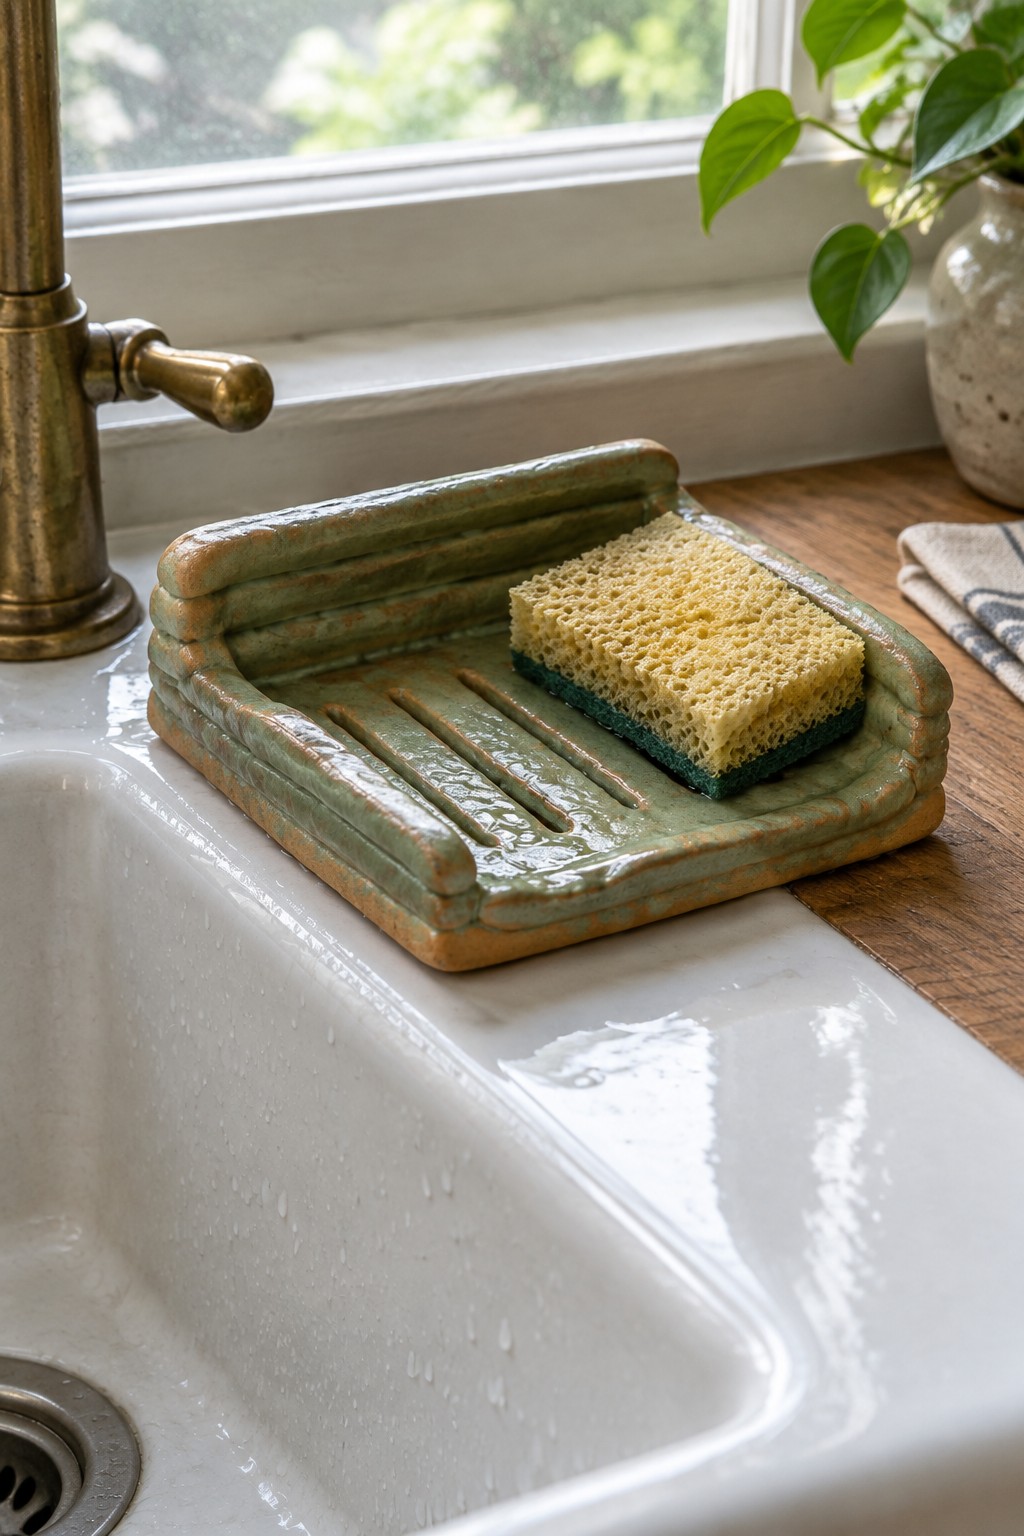
A rectangular ceramic tray works as a kitchen sponge holder with raised edges and a series of parallel ridges along the base. The ridges lift the sponge so water drains through the gaps instead of pooling underneath. The piece uses a green glaze layered over a warmer clay tone that gives it a natural, aged surface suitable for everyday sink use. This approach turns a simple functional item into a durable, handmade alternative to plastic caddies.
What makes this idea useful is how the drainage ridges solve a common problem without adding extra parts. You could adapt the same shape and ridge pattern into a soap dish by widening the base or shorten it for a smaller scrub pad. In a kitchen it fits right on the sink ledge and stays put during daily use. The earthy glaze tones also make it easy to match with wooden counters or other unglazed pottery pieces already in the space.
Coiled Pitcher in Natural Clay

A pitcher formed from stacked coils shows visible horizontal ridges that emphasize the construction method. The natural clay exterior stays matte and earthy while the interior is left light for easy cleaning. This shape works well as a small serving pitcher for milk, cream, or syrup at the table.
What makes this idea useful is how the coil ridges create texture without added tools or slips. You can adjust the width for better balance or shorten the height to make a creamer instead. In a kitchen, this kind of piece fits with wooden utensils and linen towels for a simple setup. The same coil approach adapts quickly to a matching utensil crock or small vase.
Spiral Coil Wall Plaque

A round plaque built from coils of clay arranged in a continuous spiral makes a straightforward decorative piece that relies on form and texture rather than glaze or paint. The coils begin tight at the center and widen outward, creating visible ridges that highlight the construction method in unglazed terracotta clay. A hole drilled near the edge lets the finished piece hang from a simple cord, keeping the focus on the natural clay surface and the pattern of the coils. This style works as a decor object that adds wall interest without competing with other elements in a room.
What makes this idea useful is how the spiral pattern itself carries the visual weight, so the same coil method can be scaled up or down or shifted into an oval shape without losing impact. The flat form and single hole make it simple to hang in groups or alone, and you can add shallow stamps or texture marks to the coils before drying if you want more surface detail. Because it needs no glaze, the piece stays quick to finish and fits easily into a kitchen, entryway, or studio wall where natural clay tones already appear. The clean spiral also translates well to photos, which helps when you want to share finished work online.
Coiled Yarn Bowl with Built-In Guide Notch
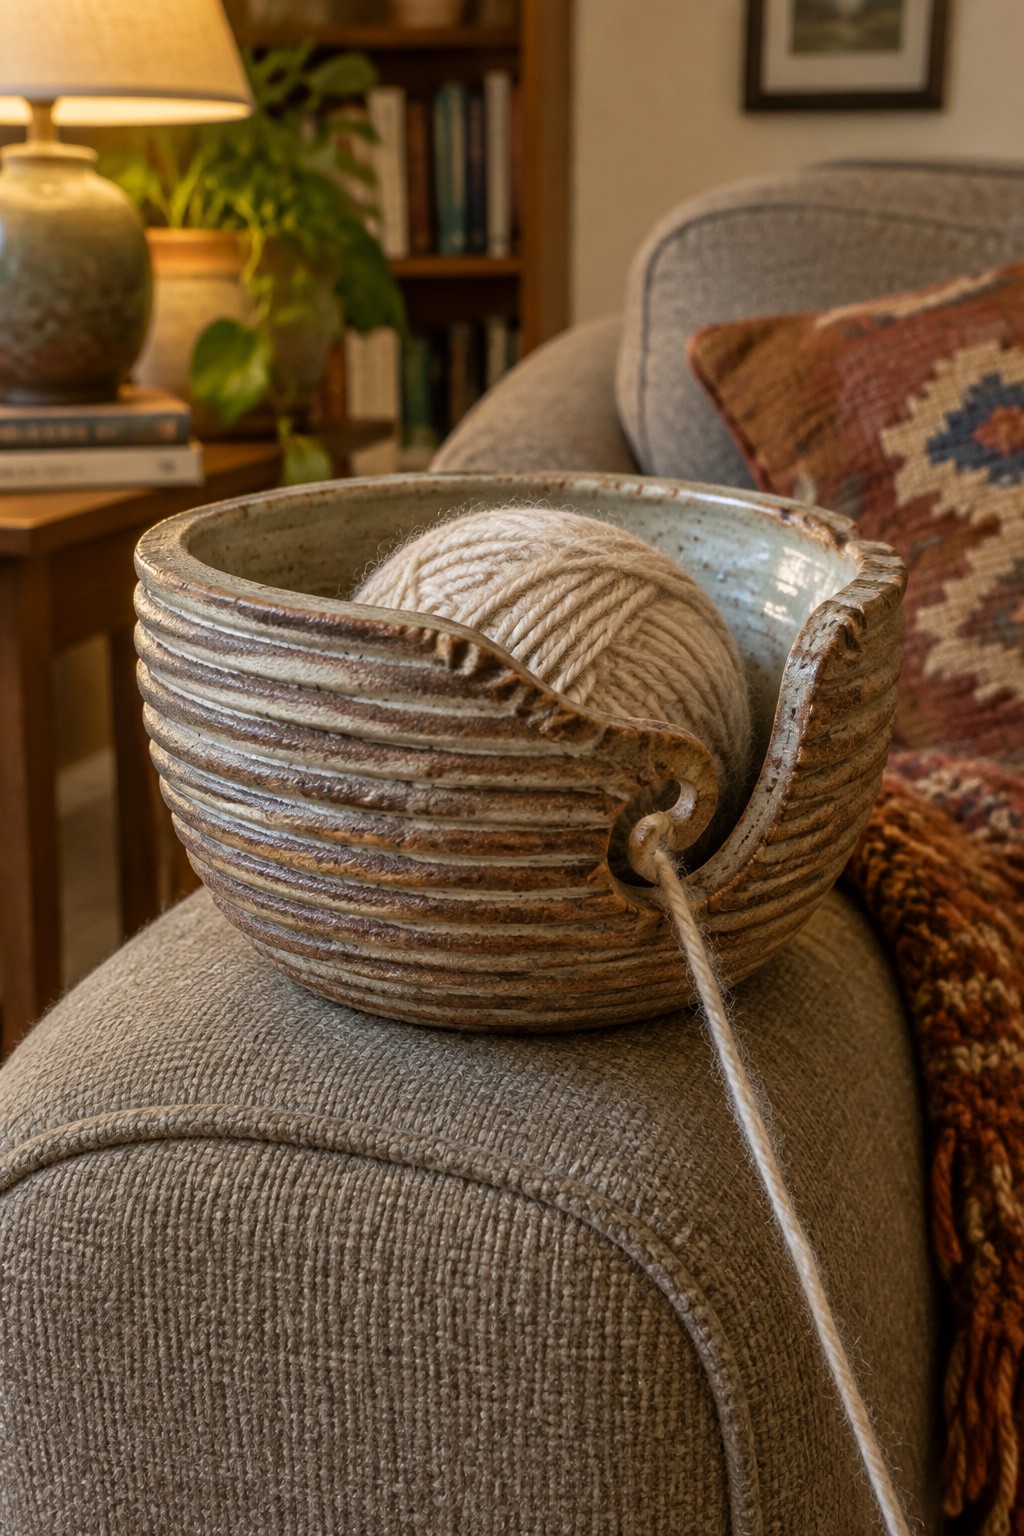
A coiled yarn bowl is built by stacking clay coils into a rounded form that holds a full skein while keeping it from rolling. The rim includes a notched opening with a small hole that guides the working strand outward. Horizontal ridges from the coils remain visible under a simple earthy glaze that lets the natural clay color show through.
The notch and hole do the main work by stopping the yarn from catching or tangling as it feeds out. This shape sits comfortably on a couch arm or side table during a project and takes up little room when not in use. You can scale the same coil method down for sock yarn or widen the base for larger skeins. The finished piece also makes a straightforward gift when paired with a new ball of yarn.
Coiled Clay Lidded Jar

A small lidded jar built from stacked coils creates a compact container suited for kitchen storage or table use. The visible horizontal ridges formed by the coils add texture and structure without extra tools, while the natural clay color keeps the surface matte and understated. The lid sits flush with a simple rounded knob that makes it easy to lift. This method suits basic storage pieces that need both a cover and a handmade look.
The shape does a lot of the work here because the coils serve as both the building method and the surface pattern. You can repeat the same coil stacking on a shorter, wider form to make a butter dish or on a taller cylinder for a small utensil crock. In a kitchen, this jar works well for sugar, salt, or loose tea, and the lid keeps the contents protected. The natural clay finish also means you can skip glazing if you want a quick, low-maintenance project that still looks finished.
Coiled Terracotta Cup and Saucer with Slip Drips
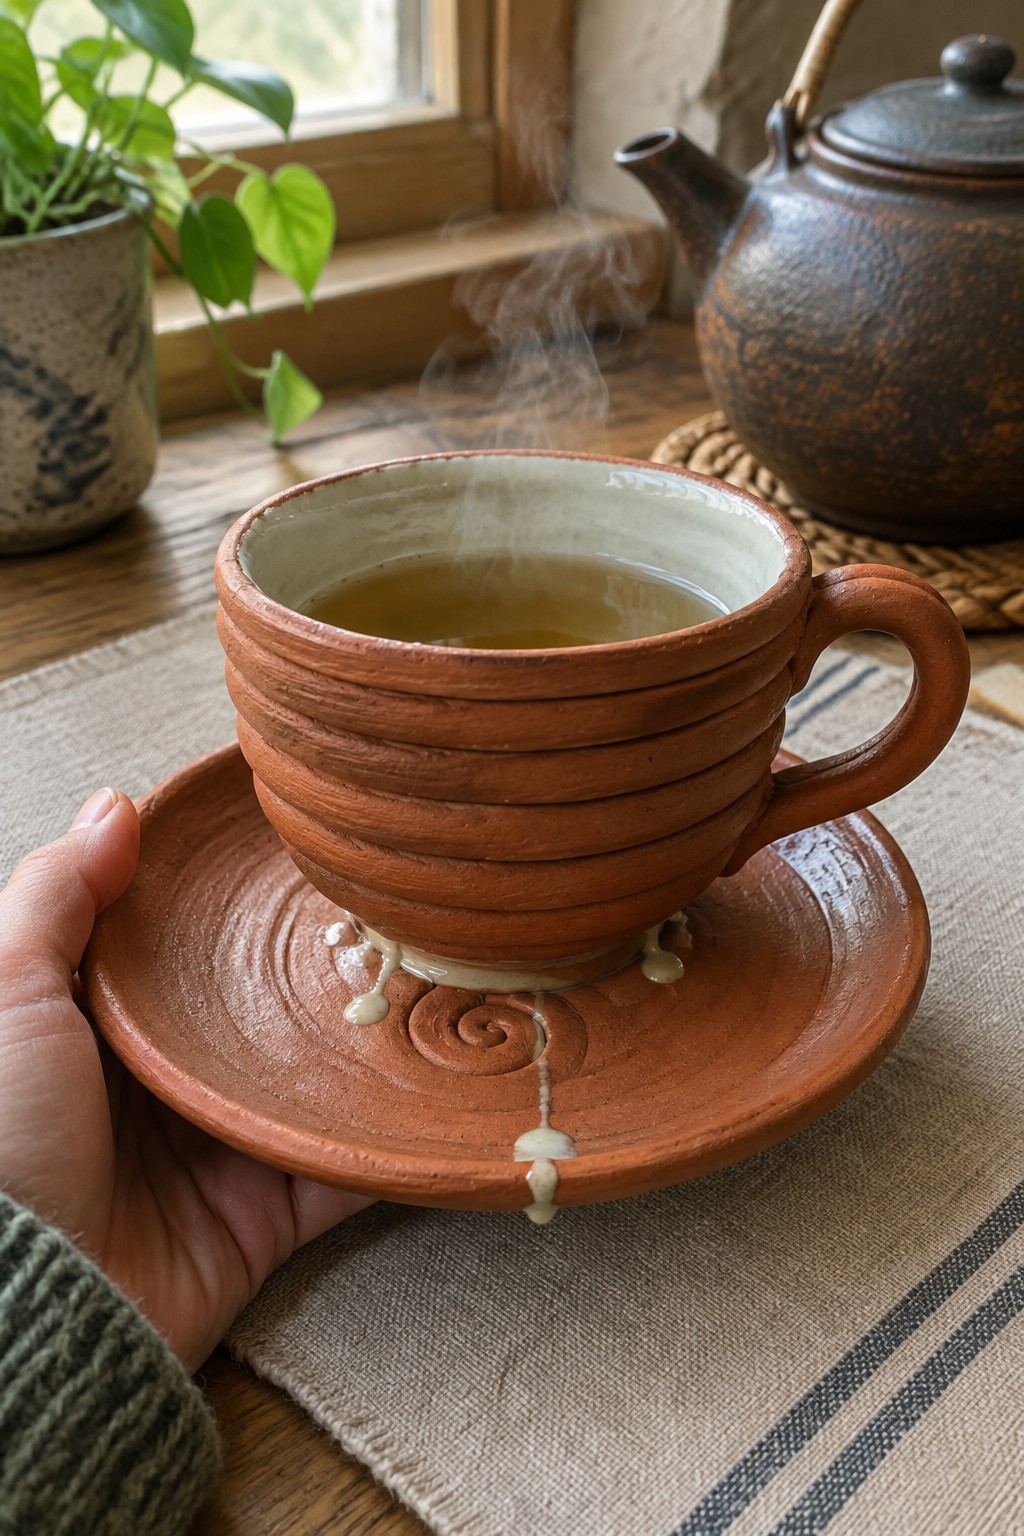
A coil-built cup and saucer set in terracotta clay makes a straightforward drinking vessel for tea or coffee. Thick coils form the walls and create visible horizontal ridges, while a white slip applied at the rim and foot runs downward in uneven drips. The saucer repeats the coil texture with an added spiral stamp at the center. This keeps the piece simple and functional while using the clay’s natural color as the main finish.
What makes this idea useful is how the built-in saucer catches drips during use. You can scale the same coil method up for a small bowl or down for an espresso cup by adjusting the coil count and diameter. The slip drip works on any dark clay body and does not require precise control, so uneven runs still look intentional. For a gift, the set feels complete without needing extra decoration or perfect symmetry.
Rustic Coiled Candle Holder

A coil-built candle holder made from stacked clay rings creates a simple, textured base that holds a standard pillar candle. The uneven coils and layered brown glazes emphasize the handmade construction while keeping the focus on the clay itself. This approach suits anyone wanting a functional piece that shows the building process without extra carving or molds.
What makes this idea useful is how the coil method lets you adjust height and width easily for different candle sizes. You can rework the same stacking pattern into a small tray or a low planter base by changing the top shape. In a living room or on a desk, the earthy tones blend with wood surfaces and natural decor. For a variation, mix in unglazed sections on the coils to add more texture contrast without extra steps.
Coiled Terracotta Egg Cup

A simple egg cup formed from stacked coils of natural clay gives the piece a tapered stem and a wide, slightly irregular rim that holds one egg upright. The visible coil ridges on the base add subtle texture while the raw terracotta color stays consistent with the rest of a natural-clay kitchen setup. This small holder keeps the focus on function and fits easily among other rustic tableware without extra glaze or detail.
What makes this idea useful is how the coil technique lets you change the height or rim width with little extra effort. The same shape works as a salt cellar or small spoon rest if you widen the opening slightly. In a kitchen, this kind of piece pairs with wooden boards and plain dishes, and it scales down quickly for a set of two or three if you want matching pieces for gifts.
Rustic Coil Incense Holder for Small Spaces

A long, narrow tray formed from coils of natural clay makes a practical holder for incense sticks. One end has a small drilled hole to keep the stick upright while the rest of the shallow trough catches ash. The visible coil lines and rough, sanded texture give the piece an earthy surface that pairs easily with wood furniture and linen textiles. This shape stays simple enough to build in one session yet looks intentional next to lamps, books, or plants.
What makes this idea useful is how the narrow footprint fits crowded nightstands or desks without competing for space. You can shorten the form for a ring dish or lengthen it for a small plant saucer using the same coil technique. The hole placement works for standard incense sticks, and the unglazed finish means no extra firing steps are required. A piece like this stands out on Pinterest because the clean lines and natural color read as modern rather than overly decorative.
Frequently Asked Questions
1. What is the best way to start building rustic coil pottery pieces at home? Begin by selecting a natural clay body such as terracotta or stoneware that fires to earthy tones. Wedge the clay thoroughly to remove air pockets then roll out coils of even thickness. Stack and score each layer while keeping the form slightly irregular to enhance the rustic appearance. Allow the piece to dry slowly to prevent cracking before firing.
2. How can I create natural clay finishes without using commercial glazes? Focus on burnishing the surface with a smooth stone or spoon after the clay reaches leather hard stage. This compresses the clay particles and brings out a subtle sheen. You can also apply a thin layer of terra sigillata made from the same clay body or leave visible coil textures exposed. Fire in an electric or wood kiln at the clay’s recommended temperature to preserve the organic color.
3. Which tools are essential for making the ideas in the article? You need a basic set including a wire cutter for dividing clay a rolling pin or slab roller for flattening bases wooden ribs for shaping and scoring tools like a fork or serrated rib. A spray bottle helps keep coils moist during construction. Avoid fancy equipment since the rustic style benefits from simple hand building methods.
4. How do I make my coil pottery look authentically rustic rather than polished? Embrace uneven coil joins and slight asymmetry in the overall shape. Incorporate natural textures by pressing leaves twigs or fabric into the surface before smoothing. Limit sanding and allow some finger marks to remain visible. Choose firing methods like pit firing or saggar firing if possible to add smoke patterns that complement the natural clay tones.
5. What should I consider when choosing which of the 20 ideas to try first as a beginner? Start with simpler forms such as low bowls or small planters that require fewer coils and less structural support. Practice joining coils securely on a flat base before moving to taller vessels. Test your clay and finish techniques on small samples first to understand drying times and firing results in your setup. This approach builds confidence while producing usable rustic pieces.

Pottery Path is my cozy corner of the internet where I share clay ideas, pottery inspiration, and simple projects you can recreate at home. I love exploring everything from air dry clay to handbuilt pottery to cute minis that brighten your day. My goal is to make clay crafting feel easy, fun, and welcoming for anyone who wants to try it.
You will find beginner friendly tutorials, creative pottery painting ideas, and lots of warm inspiration for slow and happy crafting. If you enjoy hands on creativity, this space will feel like home.