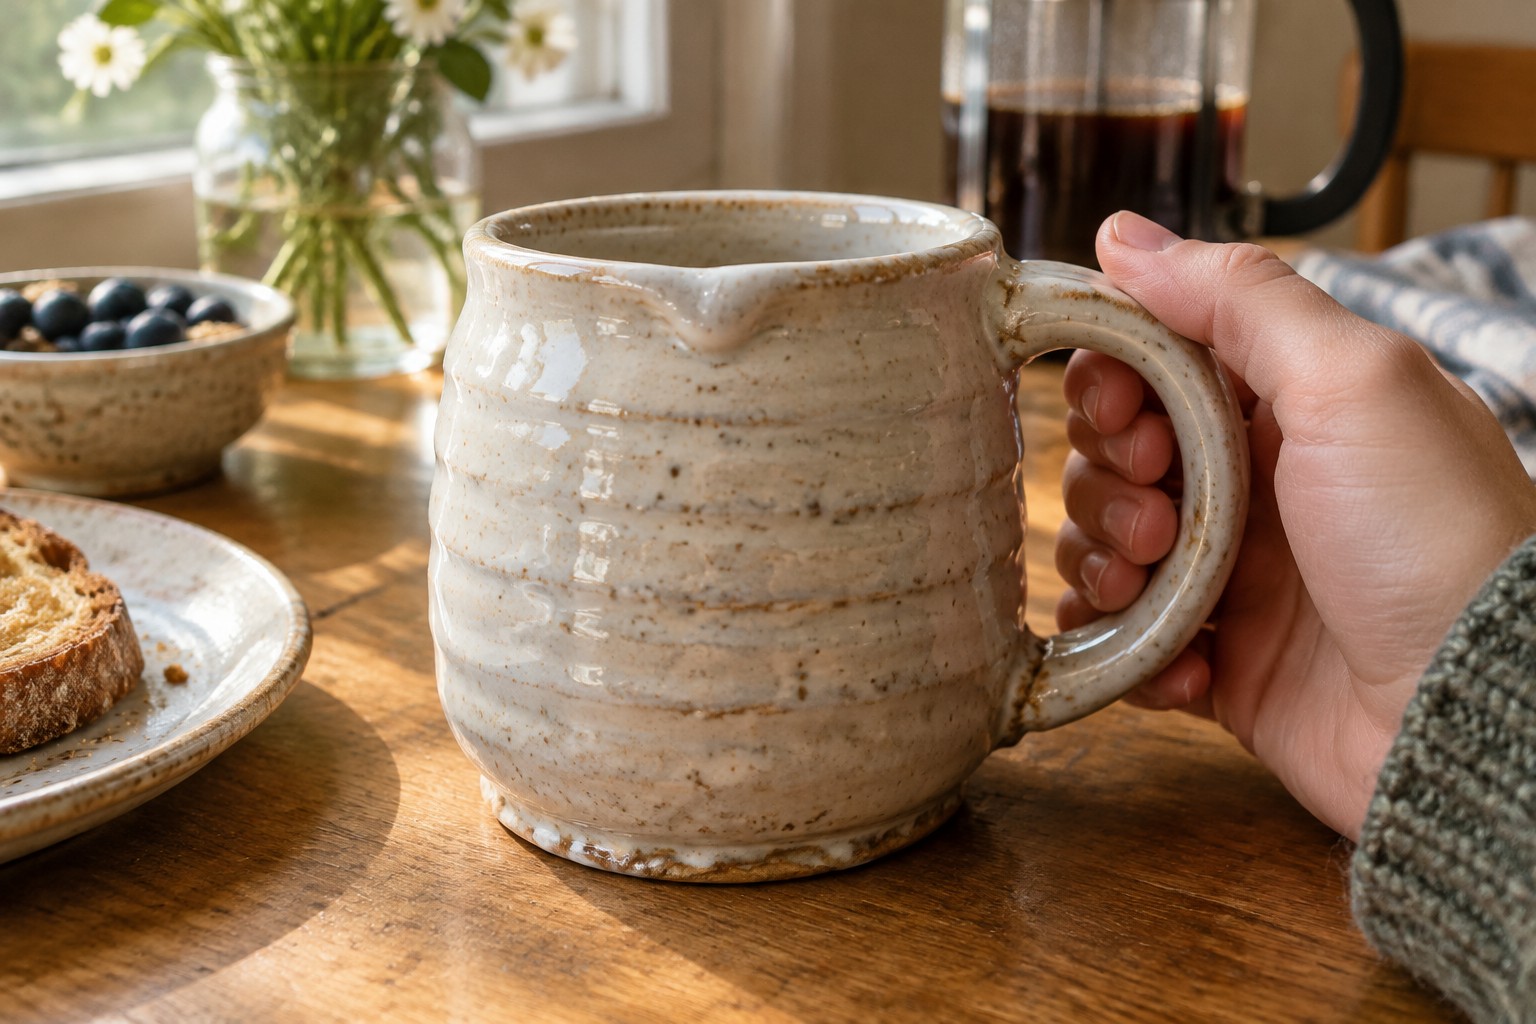
I got into coil pottery because it felt approachable compared to other methods I have tried.
My early attempts were simple but they worked well enough to keep me going.
This list of 24 projects came from things I have made or wanted to try myself.
They all stick to basic clay techniques so beginners can follow along without extra tools.
I think these can be a good starting point if you are looking for something new to create.
Coiled Mug with Horizontal Ridges
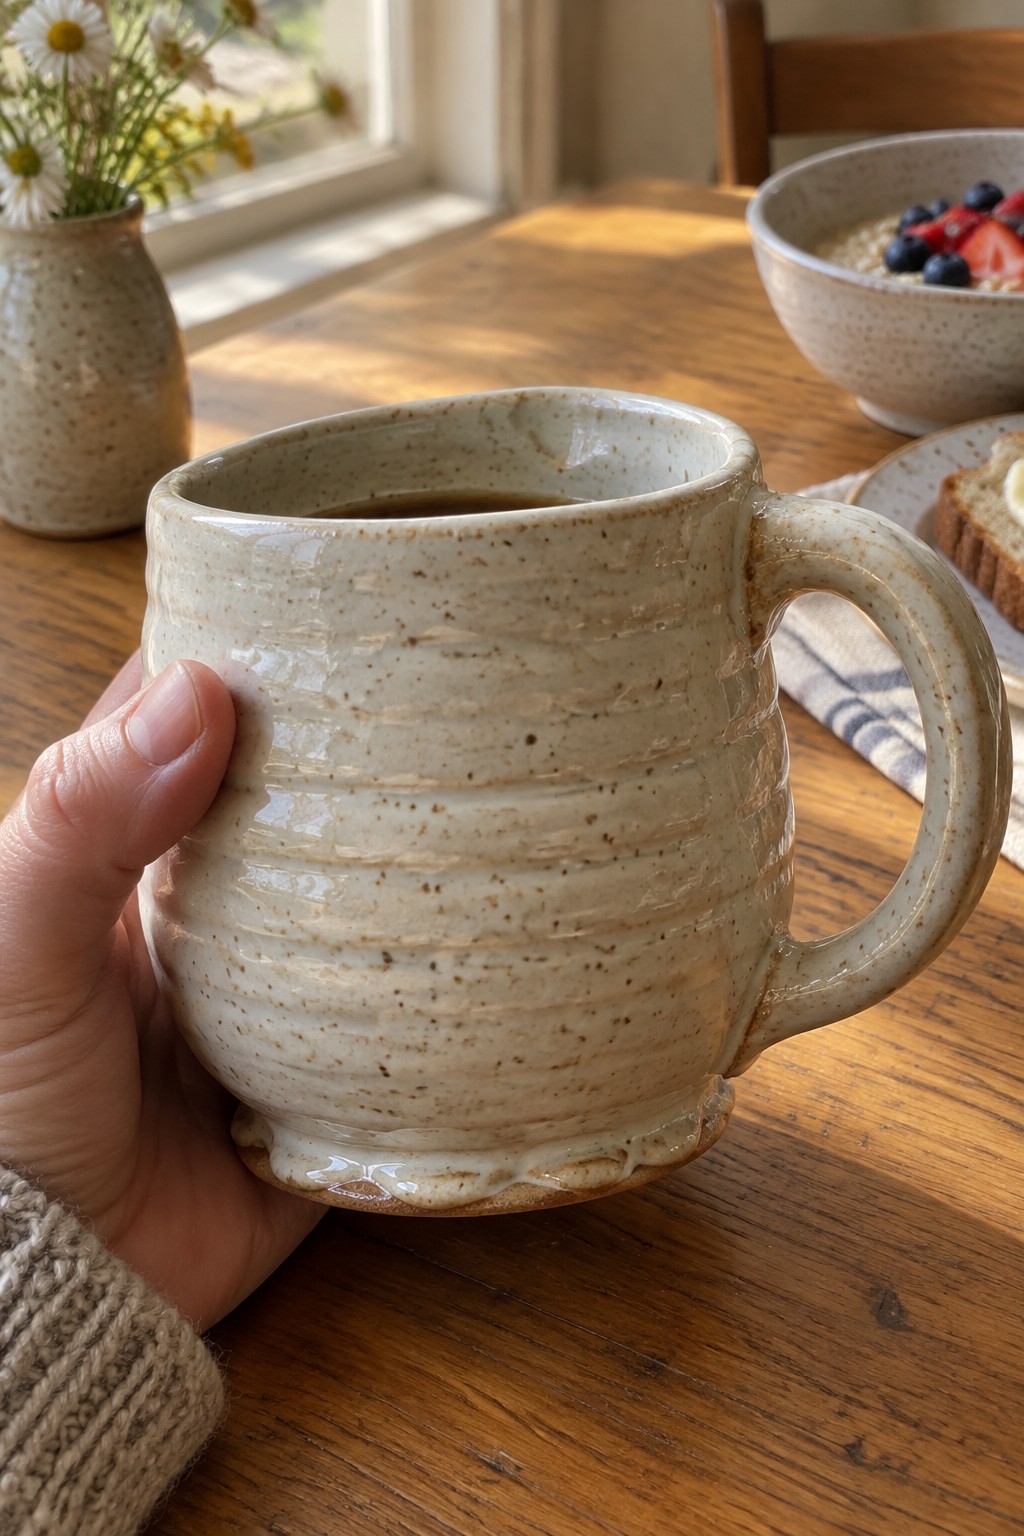
A coil-built mug uses stacked clay ropes to form both the walls and a built-in texture. The horizontal ridges created by the coils give the surface grip and catch light once glazed. A speckled matte glaze keeps the look simple while making the ridges stand out without extra carving or stamps. This approach fits the beginner coil category because the shape stays basic and the coils themselves supply the decoration.
What makes this idea useful is that the same ridges work as both texture and finger holds on a daily drinking vessel. You could repeat the coil pattern on a shorter form to make a small creamer or sugar bowl that matches. The neutral speckled surface pairs easily with most kitchenware, so the mug stays practical rather than purely decorative. Scaling the coils tighter would let you adapt the idea into a desk pencil holder or small planter without changing the core technique.
Two Tone Coiled Bowl with Ribbed Exterior

A coiled bowl like this starts with simple clay ropes stacked into a round form, then partially smoothed on the inside for everyday use. The outside keeps the stacked ridges visible, which gives the surface texture without extra tools. A split glaze in green and warm orange creates contrast across the form while keeping the process straightforward.
What makes this idea useful is how the coil ridges do most of the visual work, so beginners can focus on even walls and basic glazing. This shape works well as a fruit bowl, salad server, or catch-all on a kitchen counter. You could scale the same coil method down for smaller prep bowls or swap the glaze colors to fit different room styles. The visible texture also makes it easy to add stamps or simple line details along the ridges if you want to change the look.
Stacked Coil Planter with Built-In Feet

A coil-built planter formed from repeated rings of clay creates a compact container suited for small succulents or herbs. The stacked coils give the sides both structure and visible texture while the pinched feet raise the base for airflow and drainage. A single soft green glaze covers the entire surface, letting the coil lines show through without extra decoration. This keeps the project squarely in the planter category and relies on simple coil placement rather than added handles or carving.
The small scale makes it practical for tight spots like windowsills or desk corners where a larger pot would crowd the space. You can change the height by adding or removing coils or widen the top ring to fit a different plant size. The three-foot base is quick to form and stops the pot from sitting in pooled water. The same stacked method works for a shallow tray or a slightly taller herb pot if you adjust the coil widths.
Leaf-Shaped Ring Dish

A leaf-shaped ring dish gives you a shallow, wide tray that holds several rings without them sliding off. The clay is formed into an elongated leaf with a slightly raised rim and surface texture that shows through the glaze. A soft turquoise glaze with visible brush movement adds interest while staying simple enough to build by hand. This style fits the ring dish category and works best in small sizes for everyday use.
The small scale makes this easy to adapt by switching to different leaf outlines or skipping the veins for a smoother surface. It keeps rings in one place on a nightstand or dresser and takes up little room. You could make a wider version for earrings or a narrower one for a bathroom counter. The organic shape photographs well against plain wood or fabric backgrounds.
Hanging Spiral Sun Wall Disc

A flat clay disc formed from coils or a thick slab becomes a hanging decor piece when you add a raised central spiral and evenly spaced radial lines across the surface. The terracotta glaze highlights the texture of the coils while keeping the overall color warm and simple. Two holes drilled near the rim before firing allow cord or twine to pass through for wall display. This fits the decor object category and stays beginner-friendly because the spiral and rays can be built directly from extra coils without needing advanced tools.
What makes this idea useful is how the round shape and centered motif work on almost any wall without competing with other decor. You can easily change the size of the disc or swap the radial lines for different patterns like waves or dots to match a new space. In a kitchen or hallway the earthy finish blends with wood shelves or plants, and the same coil layout could be reworked into a flat trivet or a base for a small sculpture. The design also shows up clearly in photos, which helps when sharing finished work online.
Long Narrow Tray with Carrot Row

A long oval tray built from coils gives you a simple kitchen piece when you add a straight row of painted carrots down the center. The light speckled glaze lets the small orange shapes with green tops read clearly without extra decoration. This approach keeps the project focused on a single repeated motif that matches the tray’s narrow proportions.
The shape does a lot of the work here because the length works as a spoon rest beside the stove or a holder for small utensils. You could swap the carrots for other quick vegetable stamps or shorten the tray to fit inside a drawer. In a kitchen, this kind of piece stays useful without taking up much space and adapts easily to whatever small produce motif you already know how to paint.
Stacked Coil Tealight Holder
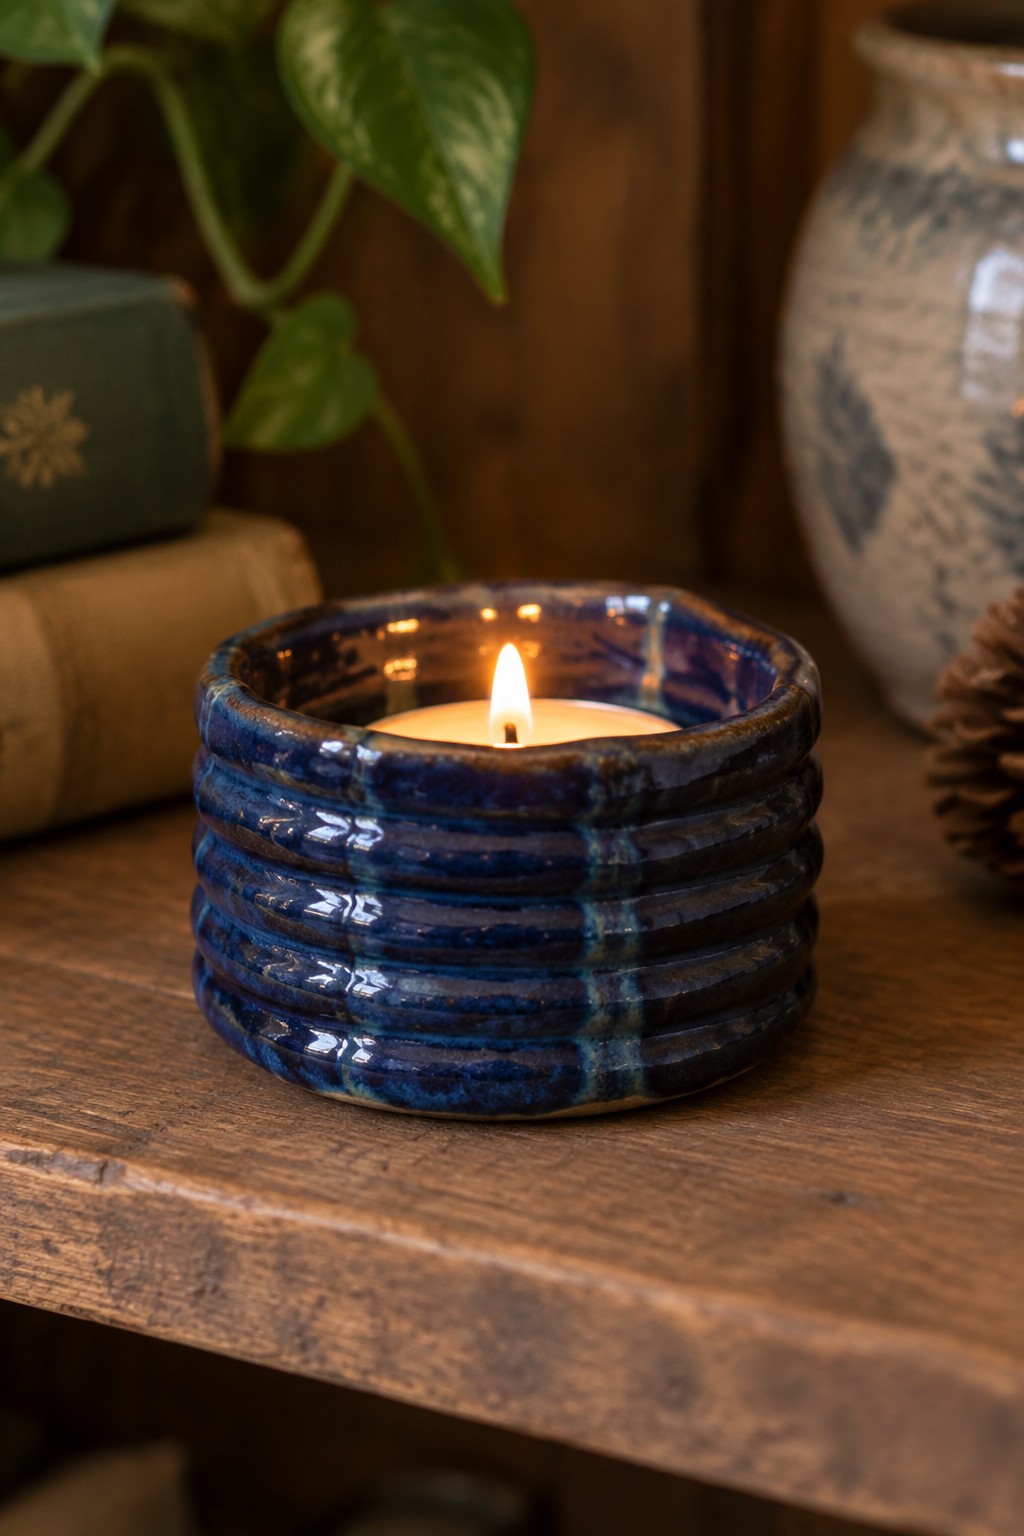
A small candle holder formed from stacked coils creates a compact cup shape that keeps a tealight centered and stable. The horizontal ridges from the coils add texture and make the walls look thicker and more substantial. A glossy blue glaze covers the surface and pools slightly in the grooves, giving the piece a finished appearance without extra decoration.
This shape works especially well on a shelf or desk where you want a contained spot for a single candle. The coil construction lets you adjust the height easily by adding or removing layers, and the same base form could be widened into a small ring dish or shortened into a pinch pot. A piece like this stands out in a beginner project list because it shows clear coil work while staying functional and quick to build.
Ribbed Creamer Pitcher for Coffee Service

A small clay creamer pitcher with a spout and handle gives you a dedicated piece for pouring milk or cream into coffee or tea. The horizontal ridges on the body create texture through simple shaping, and a solid yellow glaze keeps the form bright and easy to clean. This pairs with a larger mug that uses blue painted leaf motifs on a speckled surface to form a loose, coordinated kitchen set without needing exact matches.
What makes this idea useful is how the compact size and handle make it practical for daily table use or small-batch serving. You can adapt the same shape into a syrup pitcher or small vase by adjusting the spout width or skipping the handle. The solid glaze leaves room to test different colors or leave sections bare, while the mug’s painted details show a straightforward way to add pattern without crowding the surface. For a gift, the set works well because both pieces stay functional and the scale fits most kitchen storage.
Coiled Yarn Bowl with Side Notch

A yarn bowl built from coils creates a simple holder that keeps a ball of yarn contained while you knit or crochet. The rounded form includes a notch cut into the rim so the working strand feeds out cleanly without the ball rolling off the table. Horizontal coil ridges show in the finished surface, and the teal marbled glaze with white drips along the top edge gives the piece a finished look without extra decoration. This project sits in the craft-tool category rather than kitchen or decor use.
What makes this idea useful is how the notch solves a common knitting frustration with almost no extra steps. You can scale the same coil shape down for embroidery thread or add a second notch for two-color projects. In a craft space the bowl keeps yarn visible and tidy, and the marbled glaze effect works with any color combination you already have on hand. For gifts, the same form translates easily to a small plant holder or desk catch-all by skipping the notch.
Ridge Soap Dish for Bathroom Counters
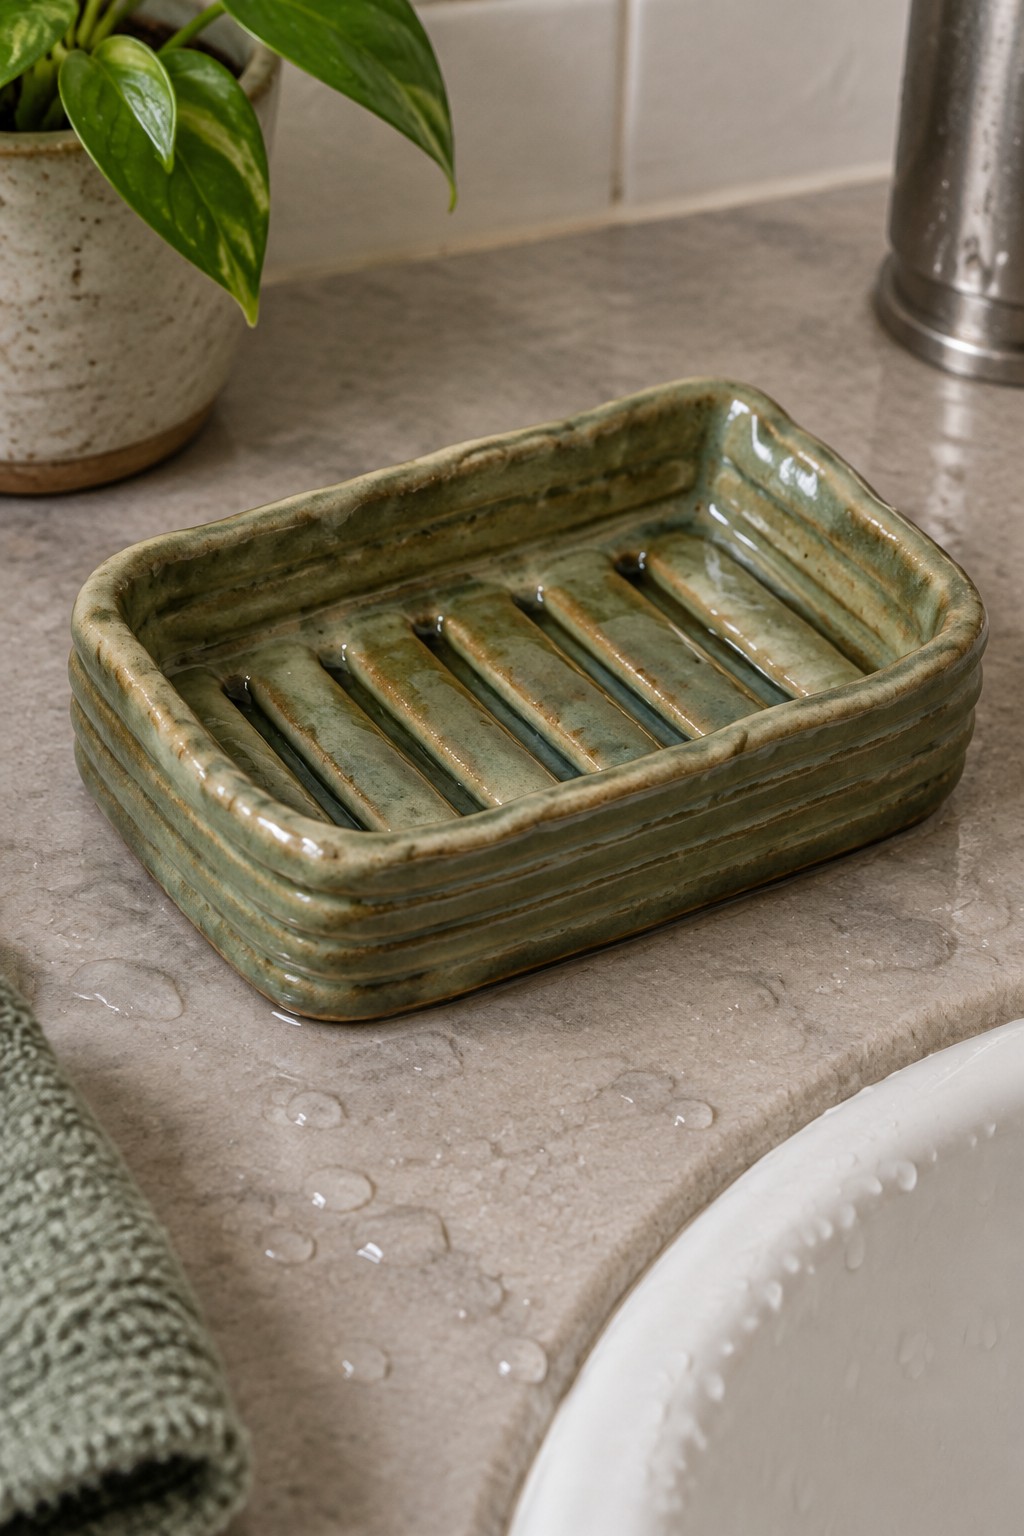
A rectangular ceramic soap dish with evenly spaced raised ridges across the base keeps a bar of soap lifted so water drains away instead of pooling underneath. The low walls and simple rectangular form make it a practical bathroom item that fits on a countertop without taking up extra space. The green glaze with its natural color shifts adds subtle variation while keeping the surface easy to wipe clean.
What makes this idea useful is how the ridges solve a daily problem without adding extra pieces or hardware. You could adapt the same base shape into a sponge holder or small plant saucer by widening the gaps between the bars. In a bathroom this kind of piece sits neatly beside the sink and handles constant moisture better than flat trays. The compact size also makes it a straightforward coil project to scale up or down for different sink areas.
Two-Section Salt Cellar

A divided ceramic dish made from two connected bowls creates a simple holder for salt and other seasonings on the counter. The joined shape keeps the two sections stable while the low, open form makes scooping easy with a small spoon. A speckled green glaze over a textured surface gives the piece a kitchen-friendly look that blends with everyday tools and surfaces. This project works well as a coil-built form since the walls stay short and the base stays wide for balance.
What makes this idea useful is the divided layout lets you store two different items in one compact piece without them mixing. You could scale the sections larger for spices or smaller for finishing salts, or add a third compartment by adjusting the coil layout. The same shape translates easily to a double dip bowl or a small tray for oil and vinegar. In a kitchen this kind of piece keeps essentials within reach during cooking and takes up less space than separate containers.
Polka Dot Catch-All Tray
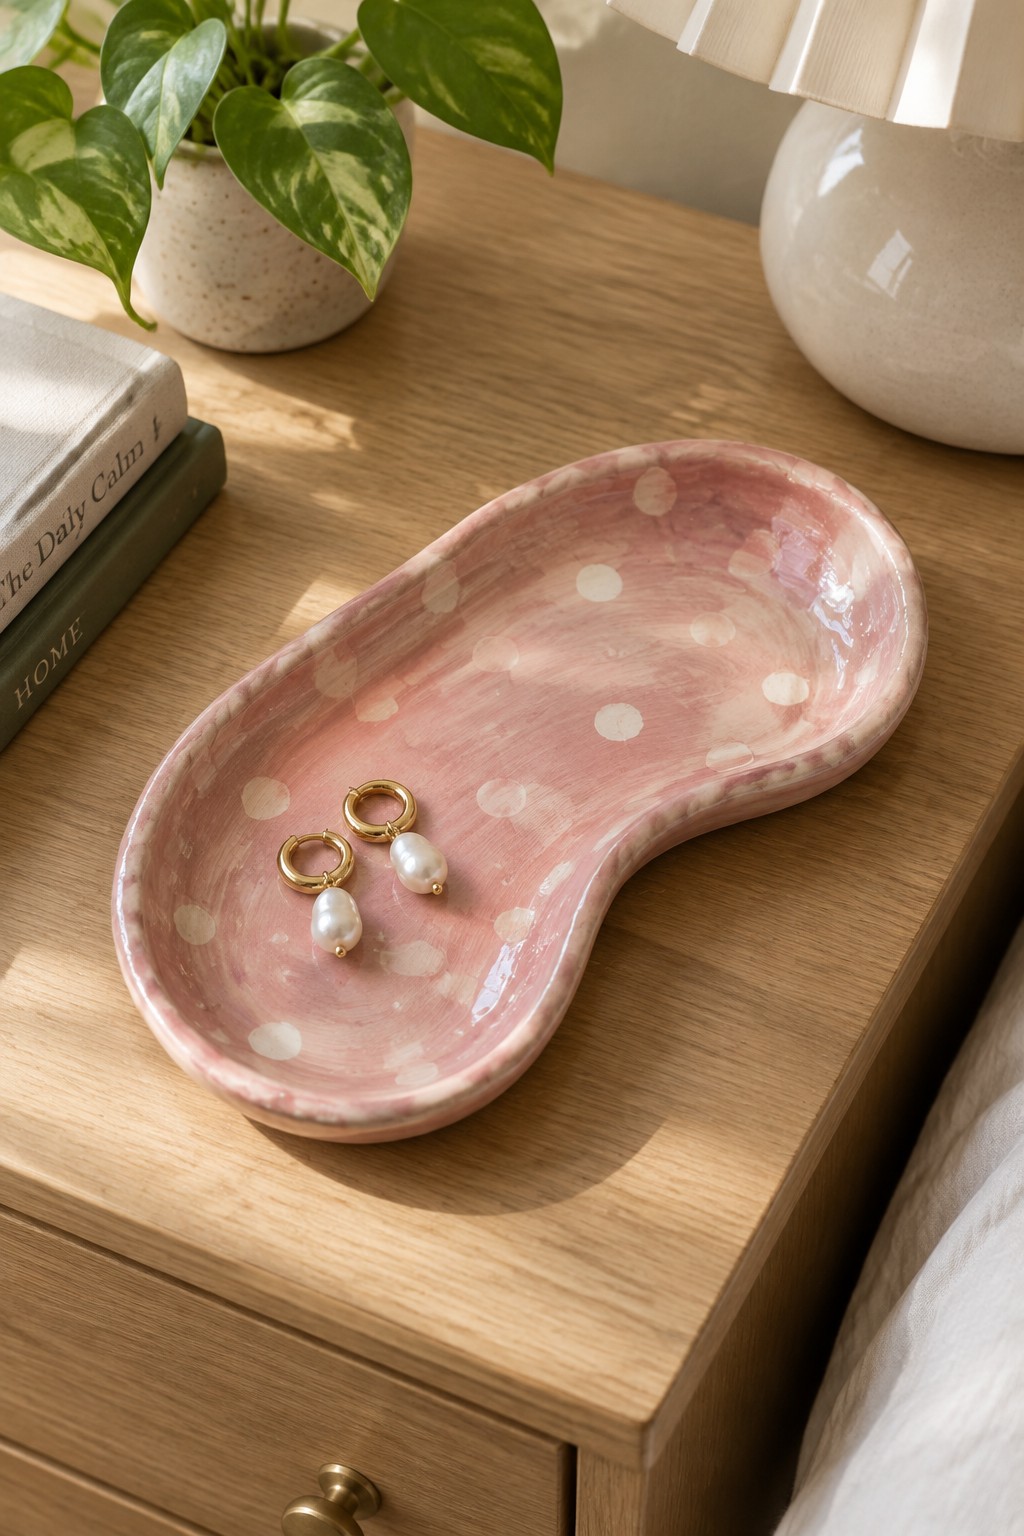
A shallow, organic-shaped tray formed from clay works well as a jewelry or small-item holder. The curved outline and simple white dots on a pink glazed surface create enough visual interest without extra sculpting or handles. This style fits beginner projects because the form can be built with coils or slabs, then finished with basic glazing techniques that highlight the handmade surface.
The shape does a lot of the work here by giving small objects like rings or earrings a natural place to rest without sliding off. You could rework the same tray in solid colors or change the scale slightly to fit a bathroom counter or desk. For Pinterest, the spotted pattern stands out in photos while staying easy to adapt with different glaze combinations or by leaving the rim plain.
Coiled Striped Cat Figurine

A coil-built cat uses stacked clay rings to create the rounded body and tail, giving the form clear horizontal lines that double as a guide for stripes. The sitting pose with upright ears and a curled tail keeps the piece compact and stable on a flat surface. Painted gray stripes over a light base color emphasize the coil structure without requiring complex carving or added clay pieces.
The small scale makes this easy to finish in a few sessions and simple to adapt by changing stripe width or switching to spots for a different animal. You can place it on a windowsill near real plants or use it as a desk object that does not take up much room. For variation, shorten the tail or flatten the top slightly to turn the same coil method into a small holder for rings or keys.
Coil-Built Utensil Crock

A coil-built utensil holder creates a tall, stable cylinder that stores wooden spoons, spatulas, and slotted tools upright on the counter. The visible horizontal ridges come directly from stacking and smoothing coils, giving the surface texture while keeping the build simple. An attached handle on one side makes the piece easy to shift when the counter needs clearing. A light speckled glaze protects the clay and keeps the form practical for daily kitchen use.
What makes this idea useful is how the height and open top fit standard utensil lengths without crowding the workspace. You can change the coil thickness to create wider or narrower versions, or shorten the overall height for a smaller tool caddy. In a kitchen, this shape stays both functional and visible, so the glaze color or ridge spacing can be adjusted to match other dishes or the counter surface. The same coil method also works for a basic pitcher or a lidded storage jar if you want to reuse the technique.
Coil Built Planters with Horizontal Ridges
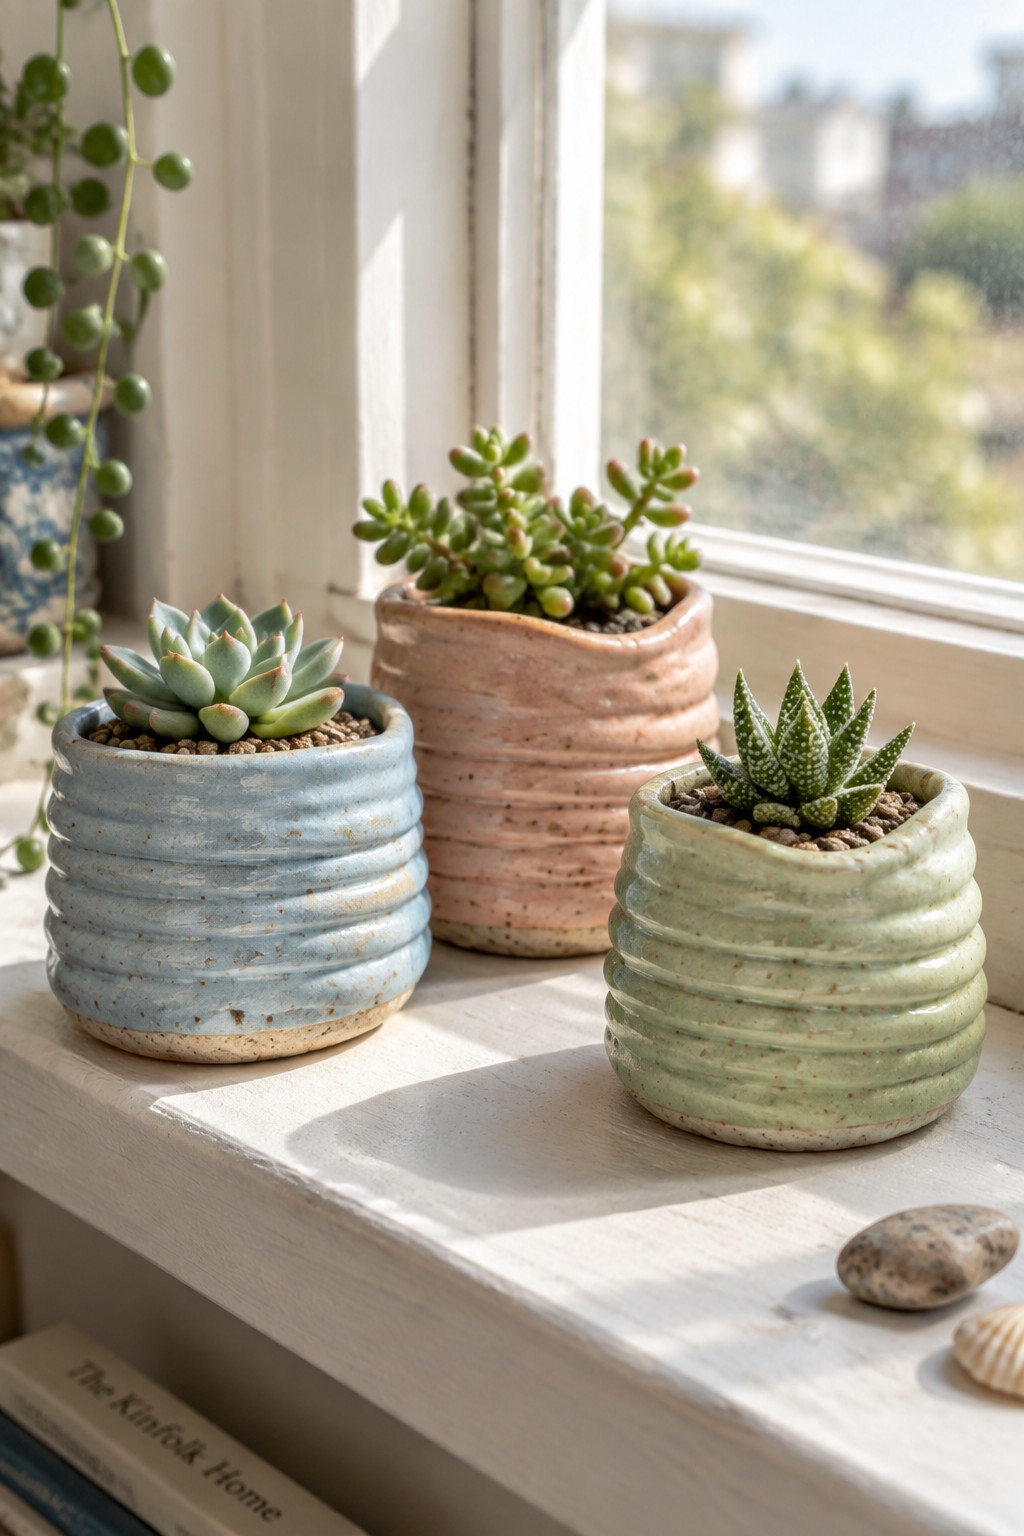
These small planters are formed by stacking clay coils into short, rounded cylinders that keep a visible ridge pattern around the outside. The low, wide shape suits succulents and other small plants that need stable root space and good drainage. Simple glazing in soft blue, earthy pink, or muted green lets the coil texture show through while giving each pot its own color without added decoration.
The shape does a lot of the work here because the ridges create surface interest with almost no extra tools or carving. You can repeat the same coil method in different diameters to make a matching set or shift the glaze colors to fit a kitchen shelf or bathroom counter. For a gift, build three pots in one afternoon, fire them, and group them with a few stones or shells. This style shows up well in photos because the ridges catch light and make the handmade construction obvious.
Tall Coil Vase with Glazed Stripe Band

This project is a tall narrow vase built from stacked clay coils that form both the structure and the surface pattern. The top and bottom sections stay unglazed to keep the rough coil texture visible while a single band of glossy blue glaze wraps around the middle. The tapered shape and horizontal lines from the coils create a clean striped look that works well for holding a few stems. It fits the category of a simple decorative vase or flower holder.
What makes this idea useful is how the unglazed coil texture contrasts with the glazed band to add interest without extra tools or carving. A piece like this works especially well as a bedside or desk accent for single flowers or small cuttings. You could adapt the same stacking method to make shorter versions for toothbrushes or change the width and placement of the glazed section to create different stripe patterns. The small base keeps it stable on shelves while the height gives it presence without taking much space.
Coiled Snake Incense Holder
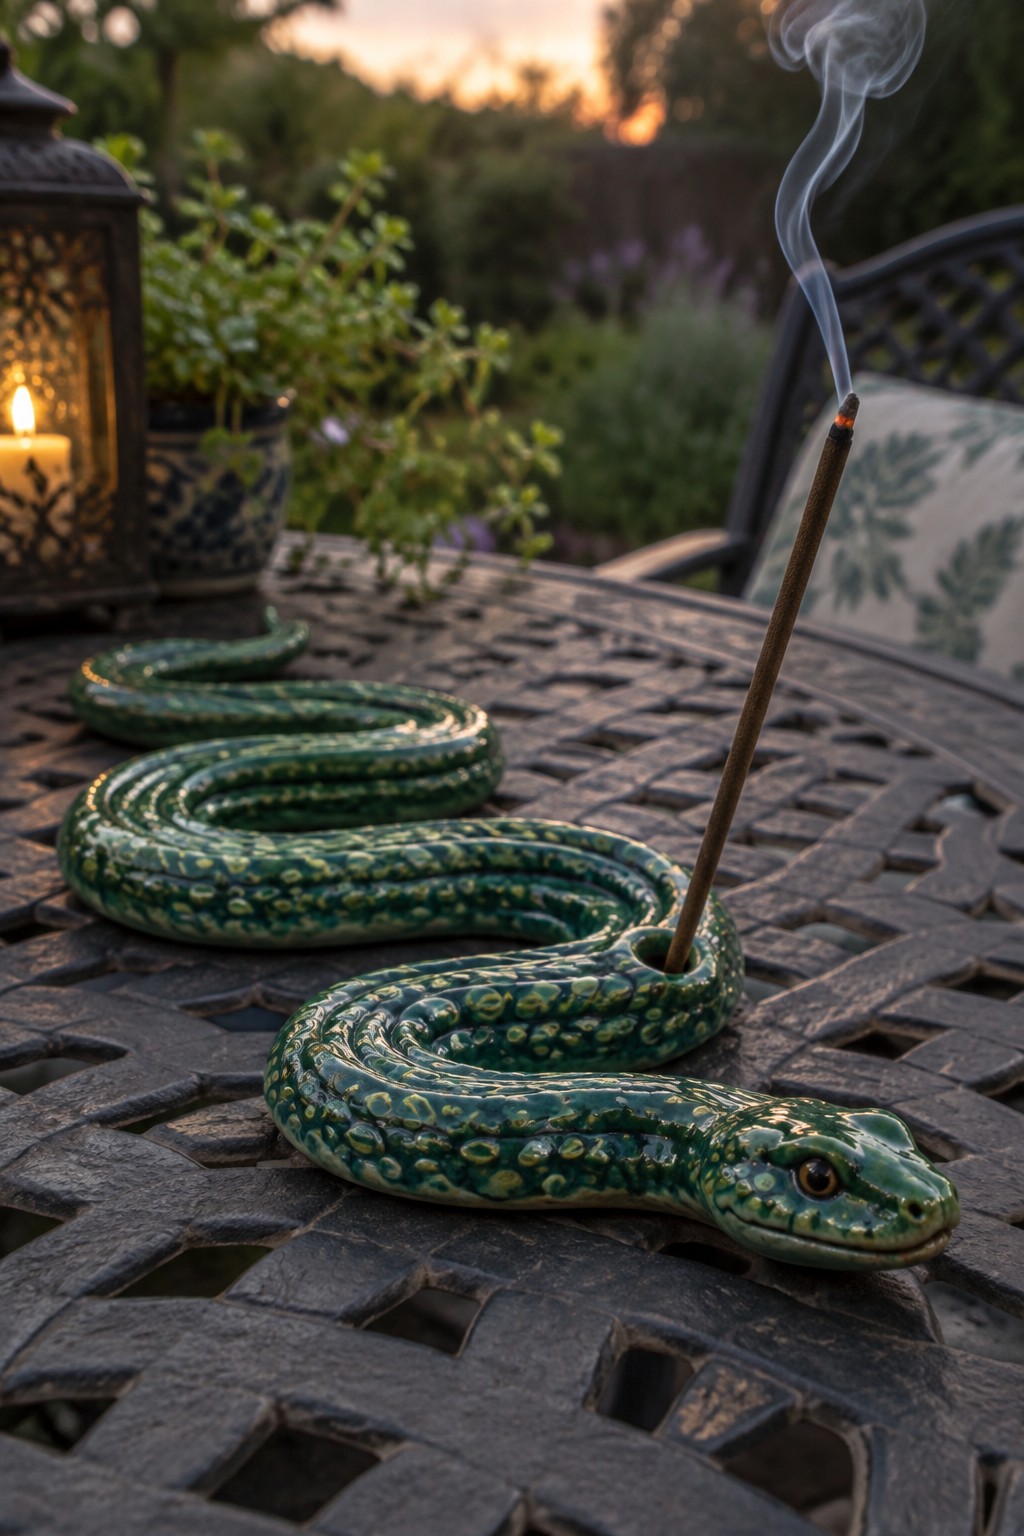
A snake incense holder is built by rolling clay into coils and stacking them into a single continuous spiral that forms the body. The head sits at one end with a small opening sized to grip an incense stick upright. The green glaze with scattered yellow spots creates a simple scaled texture that reads clearly as a snake without extra carving. This project fits the decor object category and stays functional as long as the coil walls stay thick enough to support the stick.
What makes this idea useful is how the coiled shape handles both structure and function in one piece. You can shorten the same spiral to make a ring dish or lengthen it into a shallow tray for small items. The holder works well on a desk or shelf where space is tight and you want something that stands on its own. For a gift, swap the green glaze for a solid color or add simple dots along the back to change the look without changing the coil method.
Coil-Built Multi-Hole Toothbrush Holder
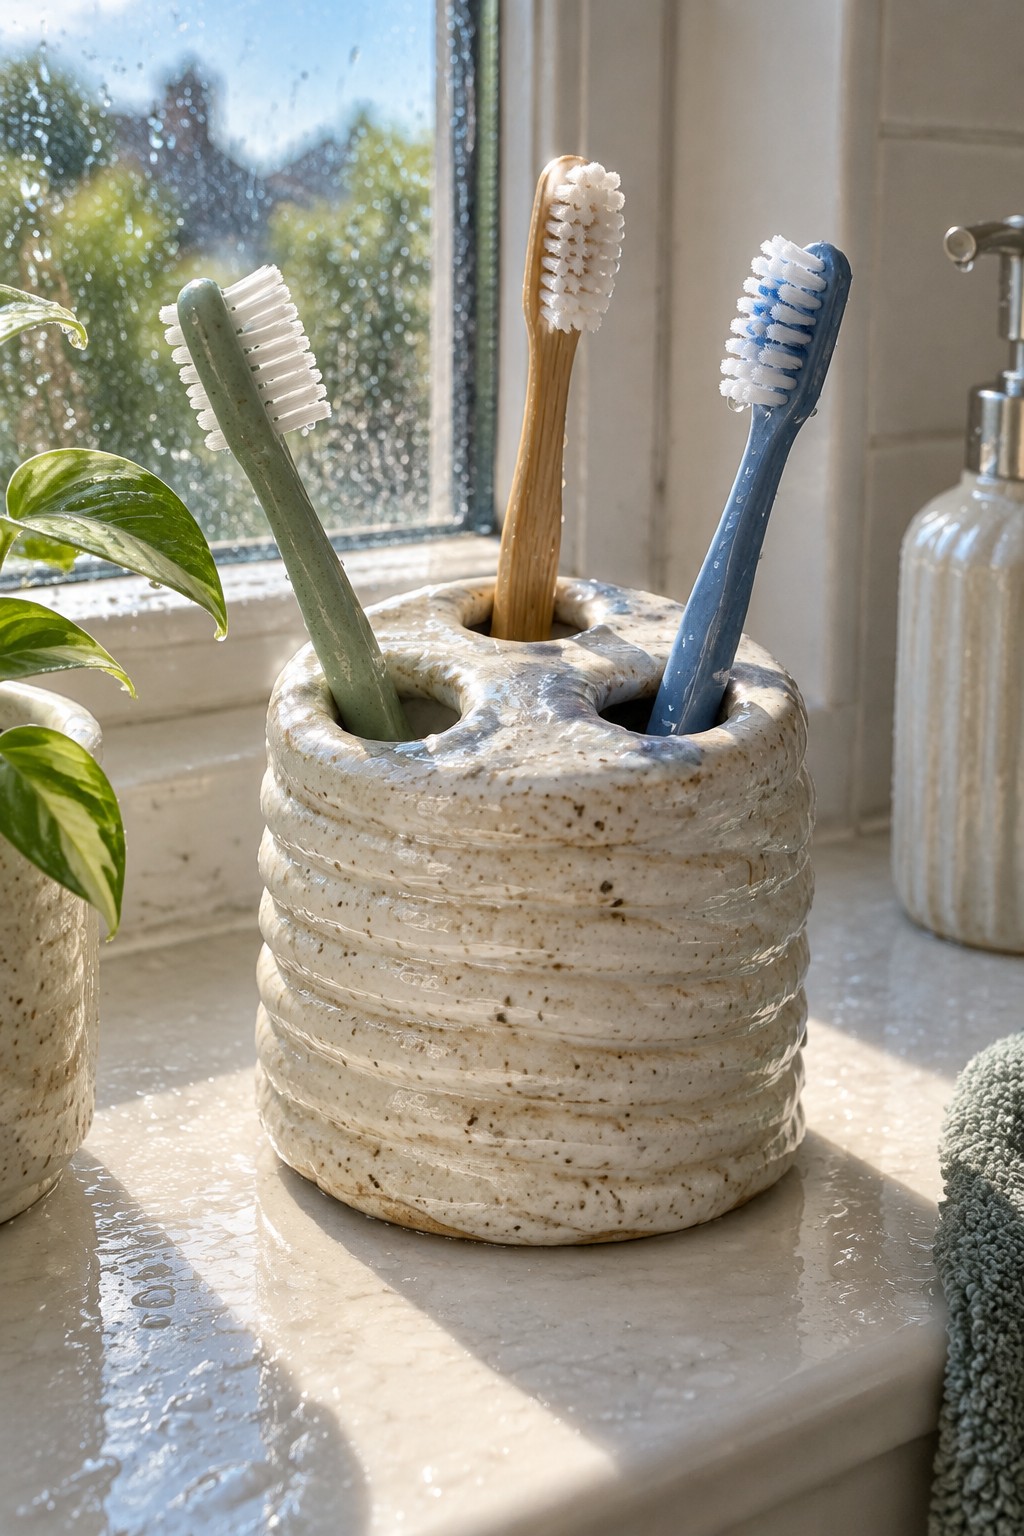
A coil-built toothbrush holder starts with ropes of clay stacked into a short cylinder, then pinched or cut at the top to create separate openings for each brush. The visible coil lines give the surface a ridged texture that helps the piece feel solid and stable on a wet countertop. This approach keeps the project simple while producing a functional bathroom item that holds three or four brushes upright without tipping.
What makes this idea useful is how the same coil cylinder can be adjusted for different needs by changing the number or size of the top openings. A version with just two holes works for a smaller bathroom, while adding a flat base turns the shape into a pencil cup for a desk. The compact size fits narrow windowsills or shelf edges where larger containers would not, and the speckled surface hides water spots better than a smooth glaze would.
Stacked Coil Candle Holder
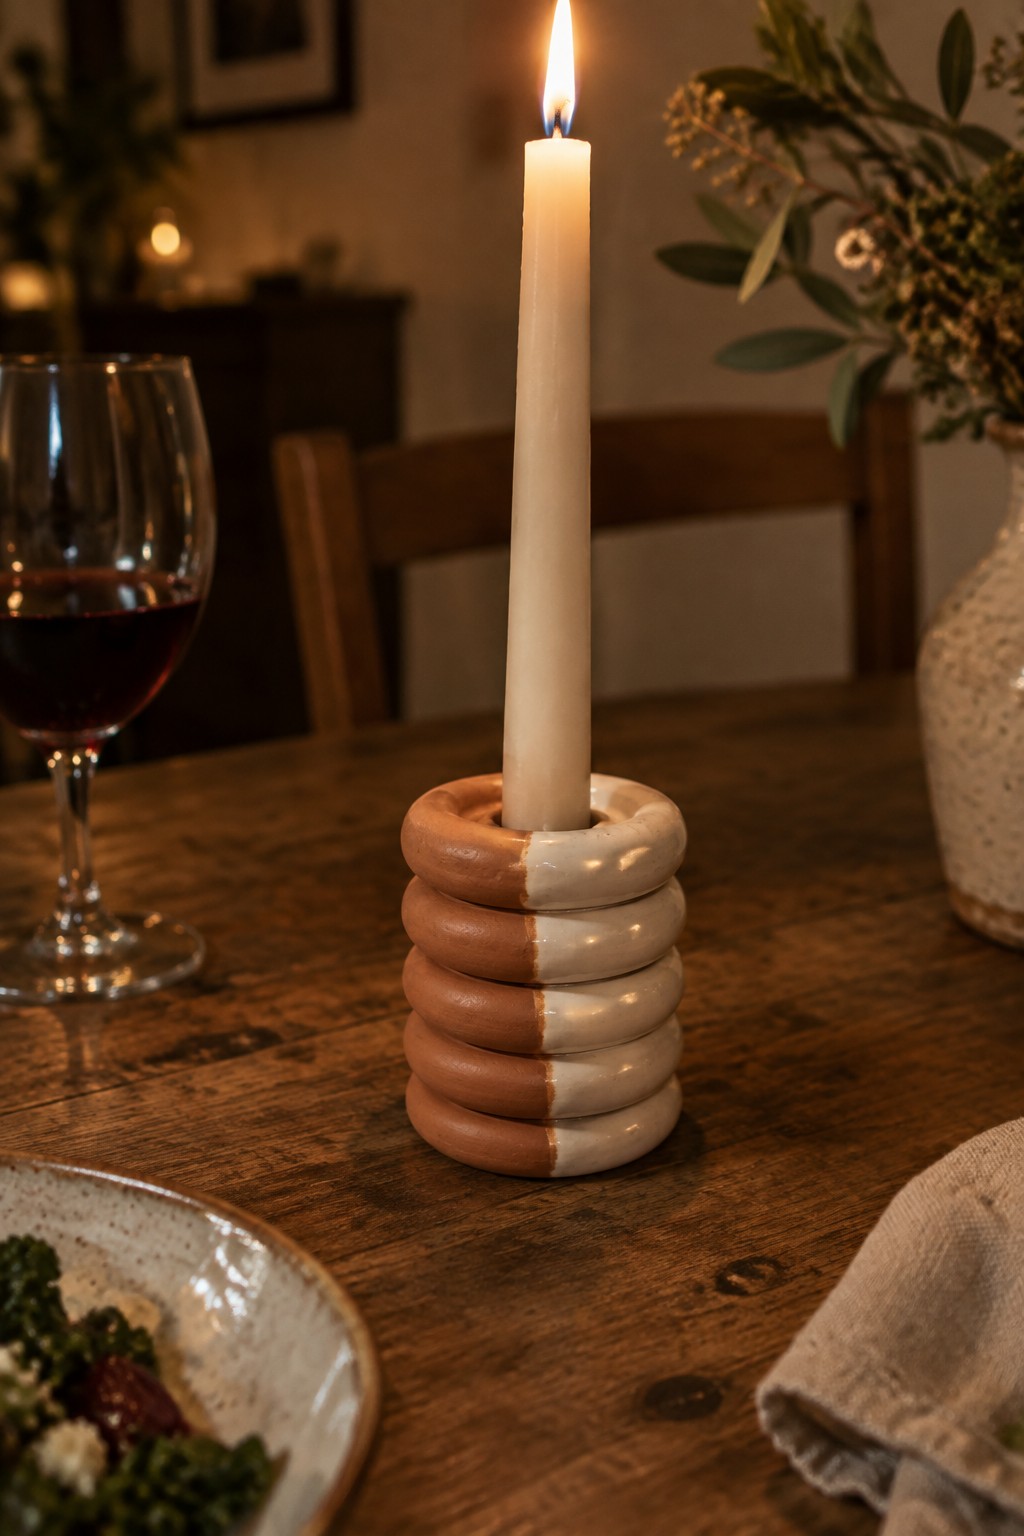
A candle holder built from stacked clay rings uses basic coil construction to create a stable base for a taper candle. Each ring is formed separately then stacked and joined before bisque firing, with a two-tone glaze applied so the seam between colors lines up with the ring divisions. The simple cylindrical shape keeps the focus on the coil lines and the contrast between the terracotta and white sections. This approach fits the candle holder category and requires only rolling, shaping, and stacking skills.
What makes this idea useful is how the ring count can be changed to match different candle heights or table scales. The two-tone glaze treatment can be swapped for a single color or left unglazed if you want a more matte finish. In a kitchen or dining space the holder works alongside everyday dishes without competing for attention. You could also use the same stacking method to make a small bud vase by narrowing the top ring or a desk pencil cup by widening the base rings.
Coiled Clay Star Ornament

A coiled clay star ornament is built by rolling clay into thick strips and layering them in an overlapping woven pattern to create a five-pointed star shape. The project results in a hanging decor object with a hole at the top point for string or twine. The visible coil texture and the way the strips interlock give the star its structure and surface interest without any glaze or added color. This fits into simple clay decor projects that focus on form and basic hand-building.
What makes this idea useful is how the woven coil method can be scaled up or down depending on where you plan to hang it. Smaller versions work as package tags or tree ornaments while larger ones suit wall displays or seasonal centerpieces. The same strip technique can be reworked into other flat shapes like leaves or geometric forms if you want to repeat the project with different outlines. For a gift, something like this needs only air-dry or low-fire clay and natural twine to finish.
Spiral Cone Ring Holder

A coil-built ceramic ring holder shaped like a tall tapered cone gives rings a series of horizontal ridges to rest on. The form is built from stacked coils that create even spacing, and the blue-green glaze with brown tones highlights the ridges without covering the handmade texture. This type of holder works as both a practical storage piece and a small decorative object that stands upright on a flat surface.
The narrow footprint makes it easy to place on a dresser, nightstand, or bathroom counter where space is limited. You can adapt the same coil method to create shorter versions for bracelets or adjust the ridge spacing for different ring sizes. A piece like this works especially well as a gift because it combines jewelry organization with a clear handmade pottery shape that feels finished on its own.
Scalloped Rim Shallow Bowl

A small shallow bowl with a ruffled rim gives you a compact dish that works for dips, sauces, or small snacks. The terracotta body stays unglazed on the outside while the interior gets a simple white glaze that catches light and makes the contents stand out. The scalloped edge comes from pinching and shaping the clay while it is still soft, which adds texture without extra tools. This shape stays practical because the wide opening and low sides make contents easy to reach.
The small scale means you can make several at once and nest them for storage or gifting. You could repeat the same rim on a larger platter or turn the form into a ring dish by adding a small divot in the center. In a kitchen it holds butter or salt nicely, while on a desk it keeps paperclips or earrings contained. The contrast between the matte exterior and glossy inside helps the piece read clearly in photos, which is useful if you want to share the finished work online.
Coil Napkin Rings with Varied Textures

Napkin rings built from short coils of clay give you a fast project that turns into a full set for the table. Each ring stays small and cylindrical so the coils stay manageable while you practice joining and smoothing. One version uses blue slip dots on a light base, another keeps the vertical coil ridges exposed, and the third stacks coils into horizontal bands finished with a teal glaze. The different surface treatments show how the same basic form can shift in look without extra tools.
What makes this idea useful is how quickly you can make six or eight rings that actually get used at meals. The compact size means they take little clay and dry without cracking, and you can change the texture to match whatever dishes or linens you already own. For a gift, something like this works because people rarely have handmade versions, and the same coil method scales down further into tiny herb markers or cord holders.
Small Coil Pots with Organic Rims and Simple Glaze Tests

Small coil pots give beginners a direct way to practice rolling coils, stacking them evenly, and shaping the rim without needing a wheel. These compact vessels show slightly irregular walls with visible thumb and finger marks that come from pressing the coils together. The different glaze colors on each piece let you test how the same form reacts to various finishes while keeping the focus on the handmade shape. This style works as a basic project for making small holders or catch-all dishes.
The small scale makes these easy to finish in one or two sessions and simple to adapt into ring dishes, tiny planters, or desk organizers. You can vary the rim flare or add a shallow groove near the base to change the look without adding new techniques. In a kitchen or bathroom, a set in one glaze color creates a quick matching group for soap or spice storage. The straightforward construction also translates well to slightly taller versions if you want to try the same idea for small cups.
Frequently Asked Questions
What kind of clay works best for these beginner coil projects? Air dry clay is ideal for beginners because it requires no kiln and is easy to handle at home. Start with a moist, pliable clay that holds its shape well when rolled into coils. Keep a spray bottle of water nearby to prevent drying during construction.
How can I make sure my coils stick together securely without cracking? Score the edges of each coil with a tool or fork before adding the next one, then apply a small amount of slip made from clay and water. Press the coils firmly together and smooth the seams inside and out. Work in thin layers and let sections dry slightly before adding height to reduce stress on the structure.
Which of the 24 projects are best for someone with no prior pottery experience? The simplest options include basic pinch and coil bowls or small trays that use only a few coils. These allow you to practice rolling even coils and joining them before moving to taller forms like simple vases or coiled plates. Focus on projects that stay under six inches in height at first.
How long should I let coil projects dry before applying any finish? Allow the completed piece to dry slowly at room temperature for at least one to two weeks depending on thickness and humidity. Check for coolness to the touch, which indicates remaining moisture. Once fully dry, you can sand rough spots and apply paint or sealant if using air dry clay.
What common tools beyond clay do I need to complete these projects successfully? A basic rolling pin or slab roller helps create even coils, while a scoring tool, sponge, and wire cutter are essential for joining and shaping. Keep a bucket of water and plastic wrap on hand to manage moisture levels throughout the building process.

Pottery Path is my cozy corner of the internet where I share clay ideas, pottery inspiration, and simple projects you can recreate at home. I love exploring everything from air dry clay to handbuilt pottery to cute minis that brighten your day. My goal is to make clay crafting feel easy, fun, and welcoming for anyone who wants to try it.
You will find beginner friendly tutorials, creative pottery painting ideas, and lots of warm inspiration for slow and happy crafting. If you enjoy hands on creativity, this space will feel like home.