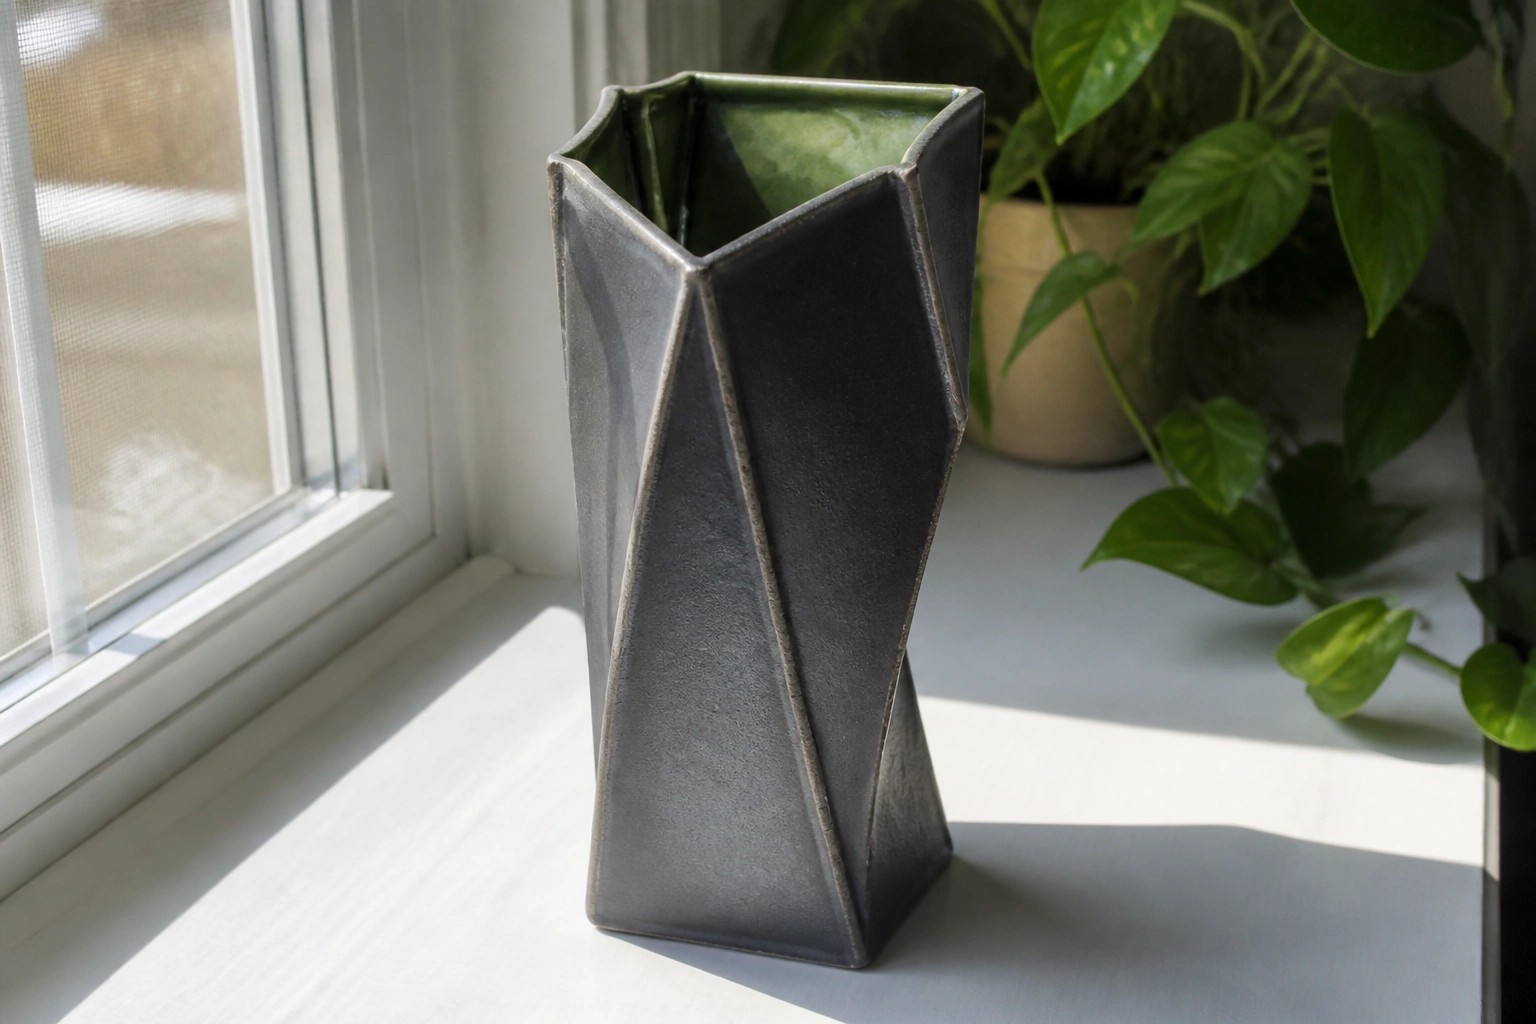
I’ve been working with slab pottery for a while and lately I’ve tried pushing the forms a bit further than my usual plates and trays.
Some of these shapes came from just playing with the clay on the table and seeing what held up after firing.
I added details like ridges or cutouts on a couple of pieces and they changed how the whole thing felt.
It is not always easy to keep everything even but the results are worth the extra time.
These twenty ideas are ones I kept coming back to in my own studio.
Geometric Faceted Vase Built from Joined Slabs
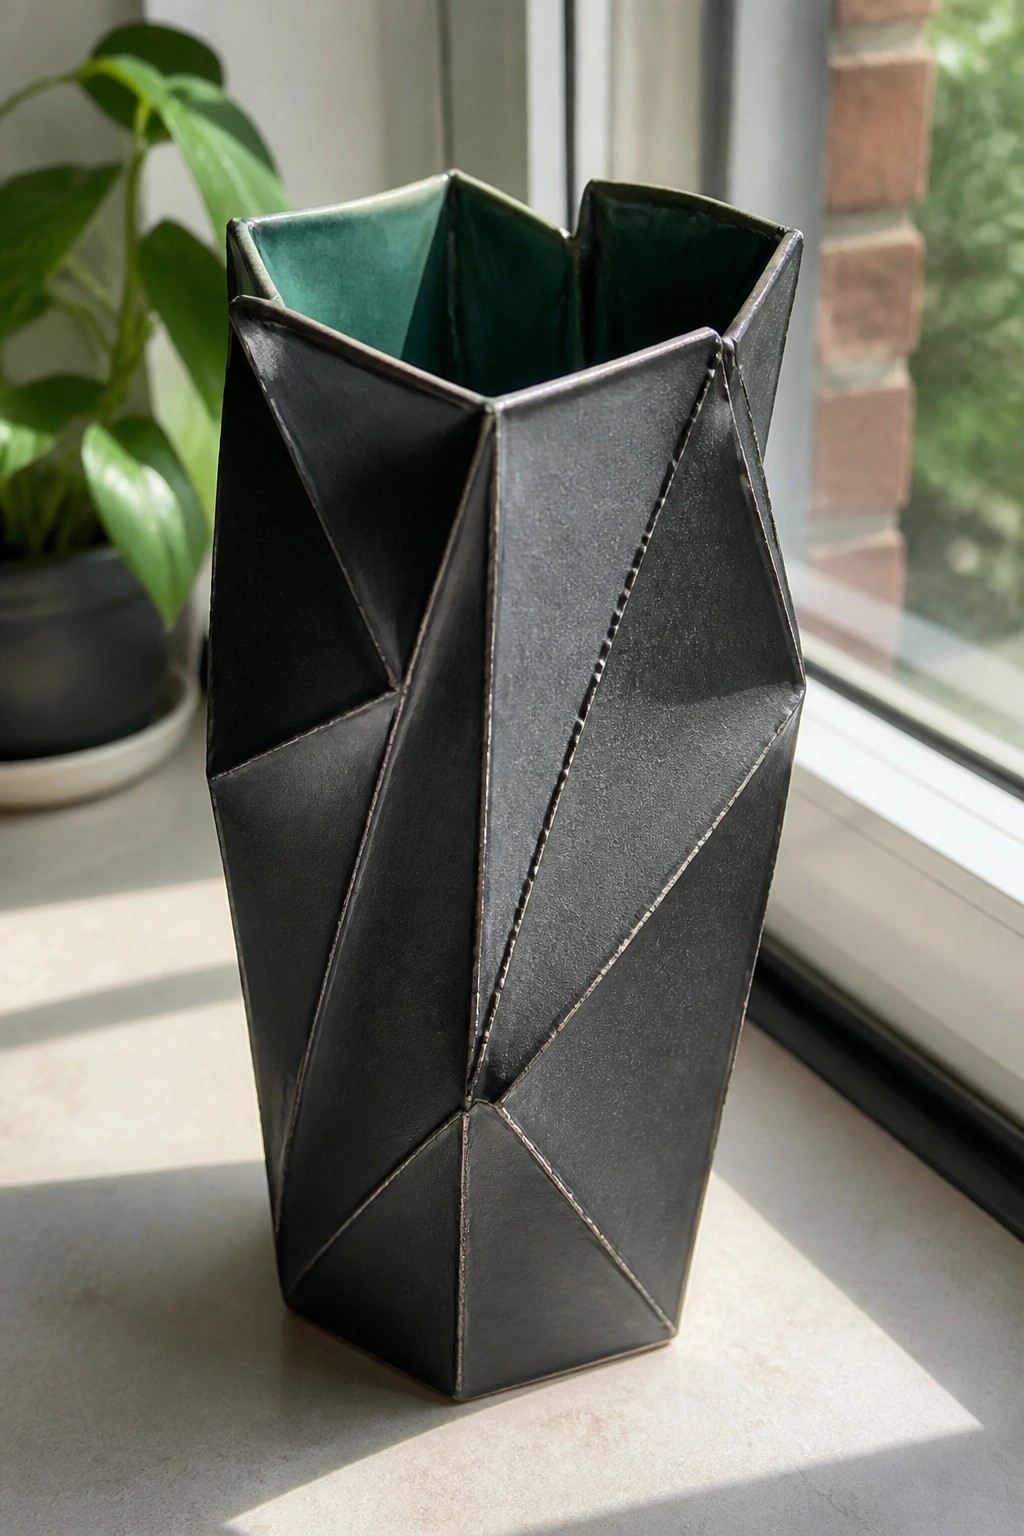
A slab-built vase with multiple angled panels forms a tall, irregular hexagonal shape that tapers slightly toward the base. Flat clay slabs are scored and joined along crisp edges to create the faceted surface, then the piece is glazed in matte black on the exterior with a glossy dark green inside the rim and walls. This method produces a bold, architectural silhouette that emphasizes sharp lines and shifting planes rather than curves or symmetry.
What makes this idea useful is the way the faceted construction can be adjusted by changing the number or width of the panels. You could repeat the same angled joins to make a shorter version for a desk or try wider slabs for a broader planter base. The two-tone glaze keeps the focus on the form while the interior color gives depth when viewed from above. For a gift or shelf display, the same panel layout works well in smaller sizes or with a different exterior color to match existing decor.
Slab Tray with Impressed Grid and Curved Notches
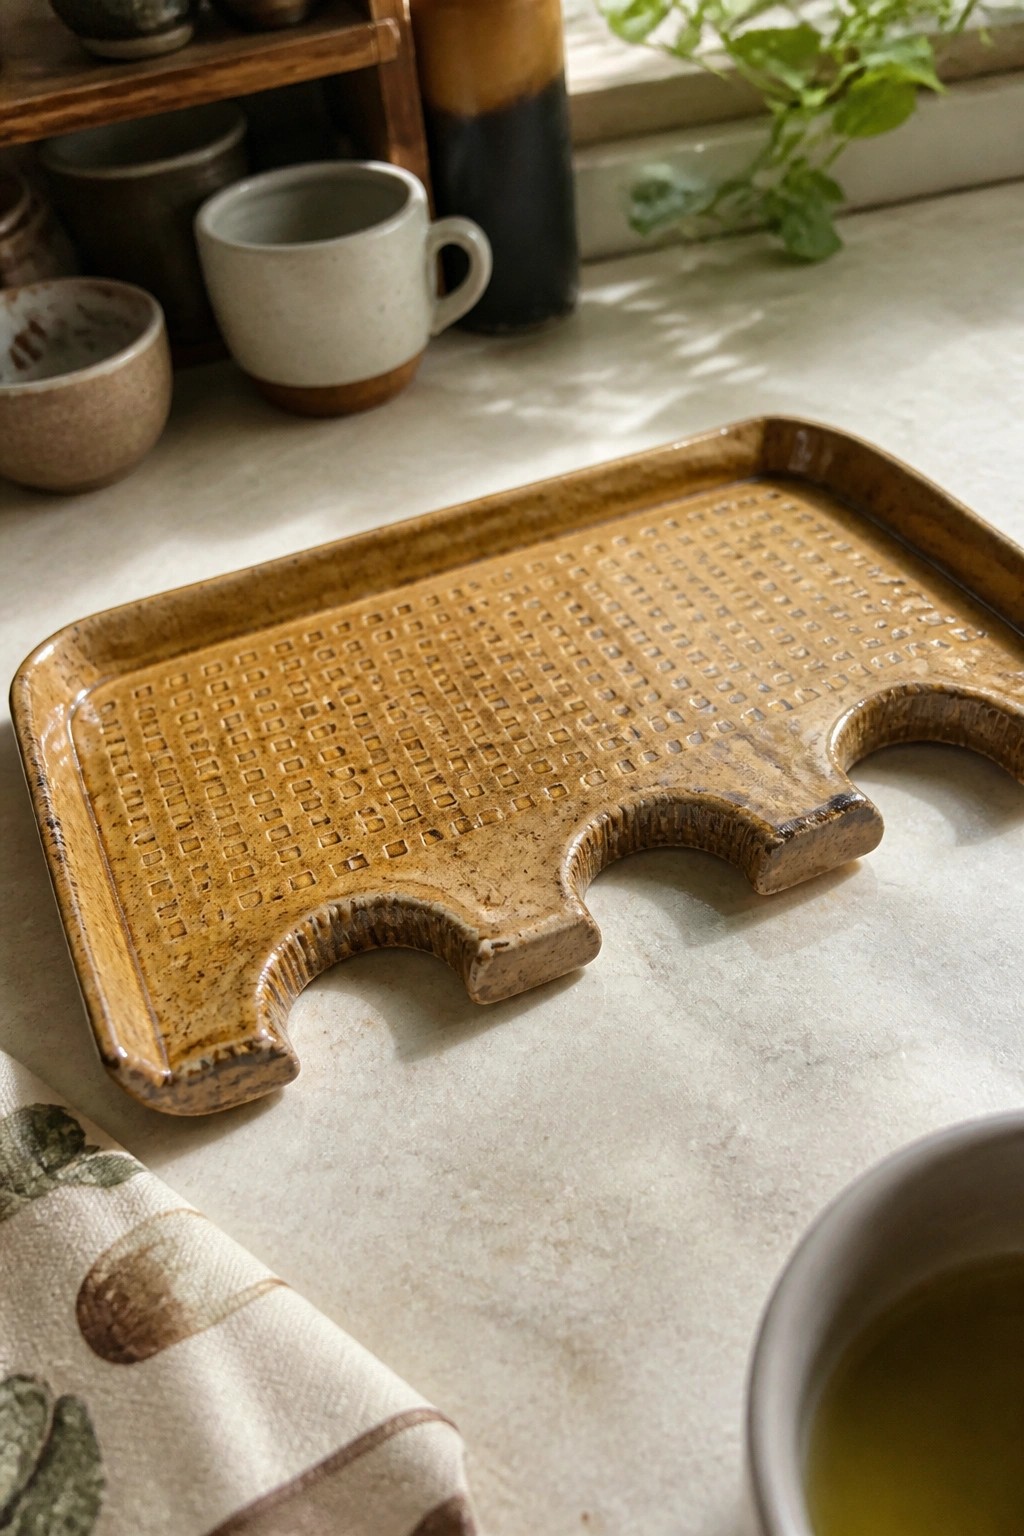
A slab tray starts with a flat sheet of clay cut into a wide rectangle, then two U-shaped notches are removed from one long edge to create built-in grip areas. A grid of small squares is pressed into the surface while the clay is still soft, giving the tray a repeating texture that breaks up the flat plane. Once glazed in a warm brown tone, the piece reads as a single cohesive object that can hold food, tools, or small items. The notches and grid together turn a basic rectangle into a more considered form without requiring complex assembly.
The shape does a lot of the work here because the notches serve as both handles and visual detail at the same time. In a kitchen this tray works well for serving bread or holding utensils, while the same idea adapts easily to a desk catch-all or bathroom soap tray by shrinking the size or changing the grid spacing. You could rework the notches into deeper curves so the tray sits over the rim of a bowl, or swap the square grid for lines if you want a quicker texture. The overall form stays simple enough to build from one slab yet stands out because of the bold cutouts and surface pattern.
Faceted Rim Bowl with Brushed Interior
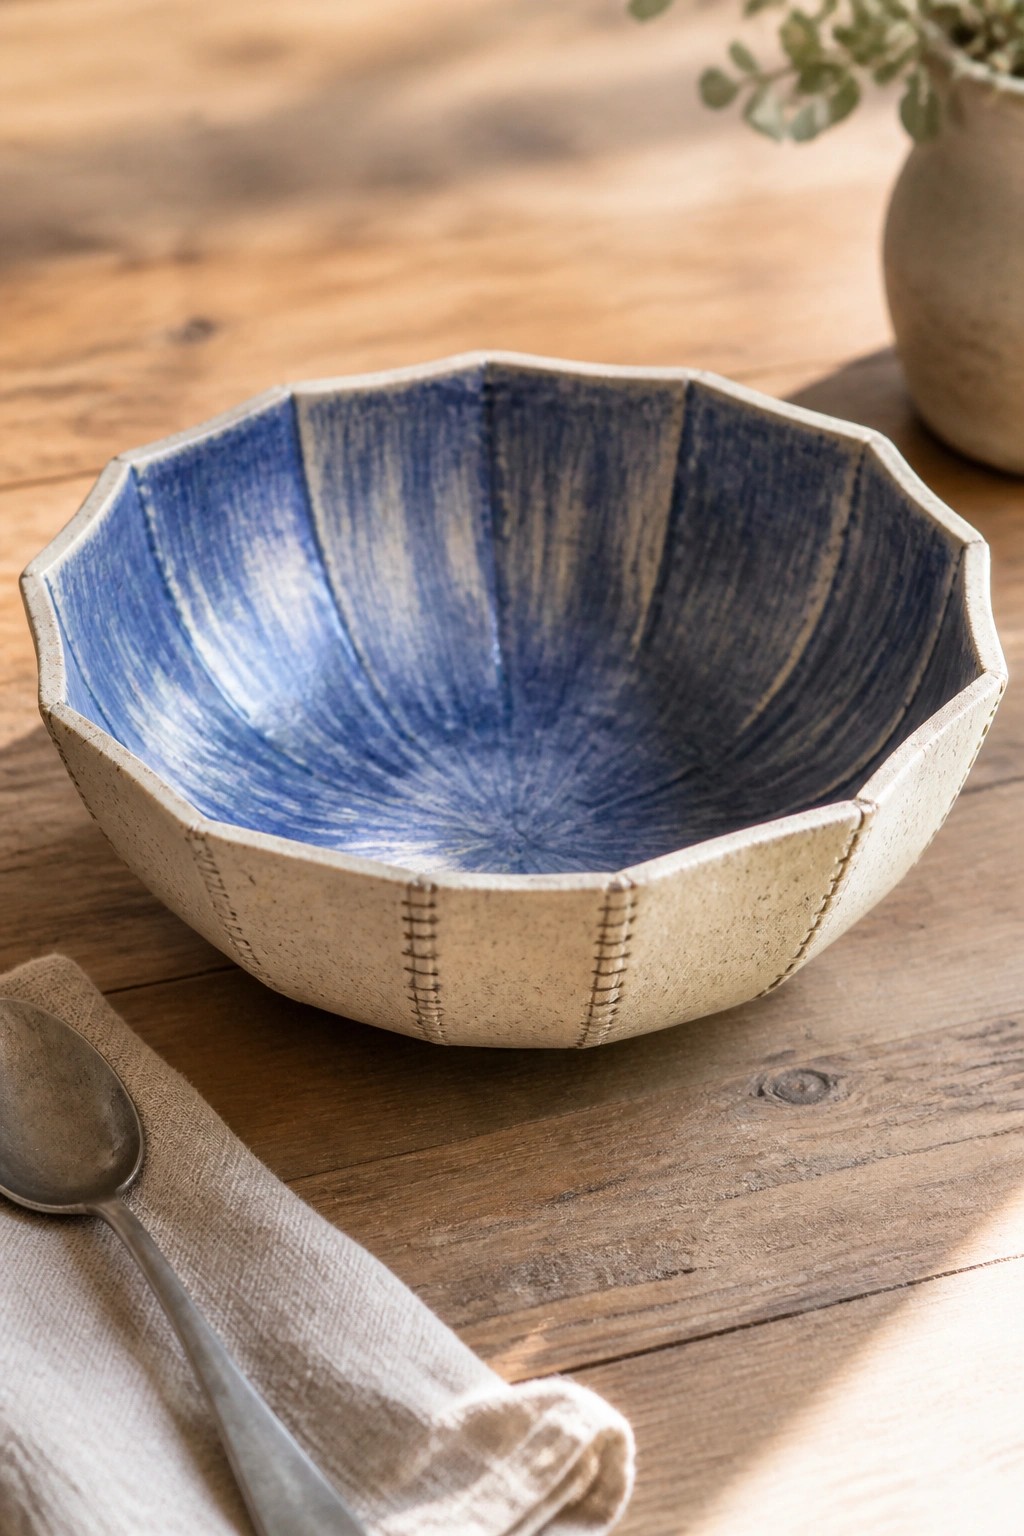
This bowl uses a cut rim that creates flat facets around the top edge for a geometric outline. The interior carries a deep blue glaze applied in wide, radiating brush strokes that draw the eye to the center. The exterior stays unglazed with vertical textured lines that add surface interest while keeping the focus on the glazed inside. It works as a versatile serving bowl or decorative piece for a table or shelf.
What makes this idea useful is how the faceted rim can be repeated on bowls of different depths or diameters. The brushstroke glaze pattern adapts easily to other curved forms like trays or plates. You could simplify the exterior texture to plain clay or add it to a lidded jar for a matching set. In a kitchen, this kind of piece stands out on open shelving because the color contrast and shape read clearly from a distance.
Faceted Slab Planter with Angular Sides
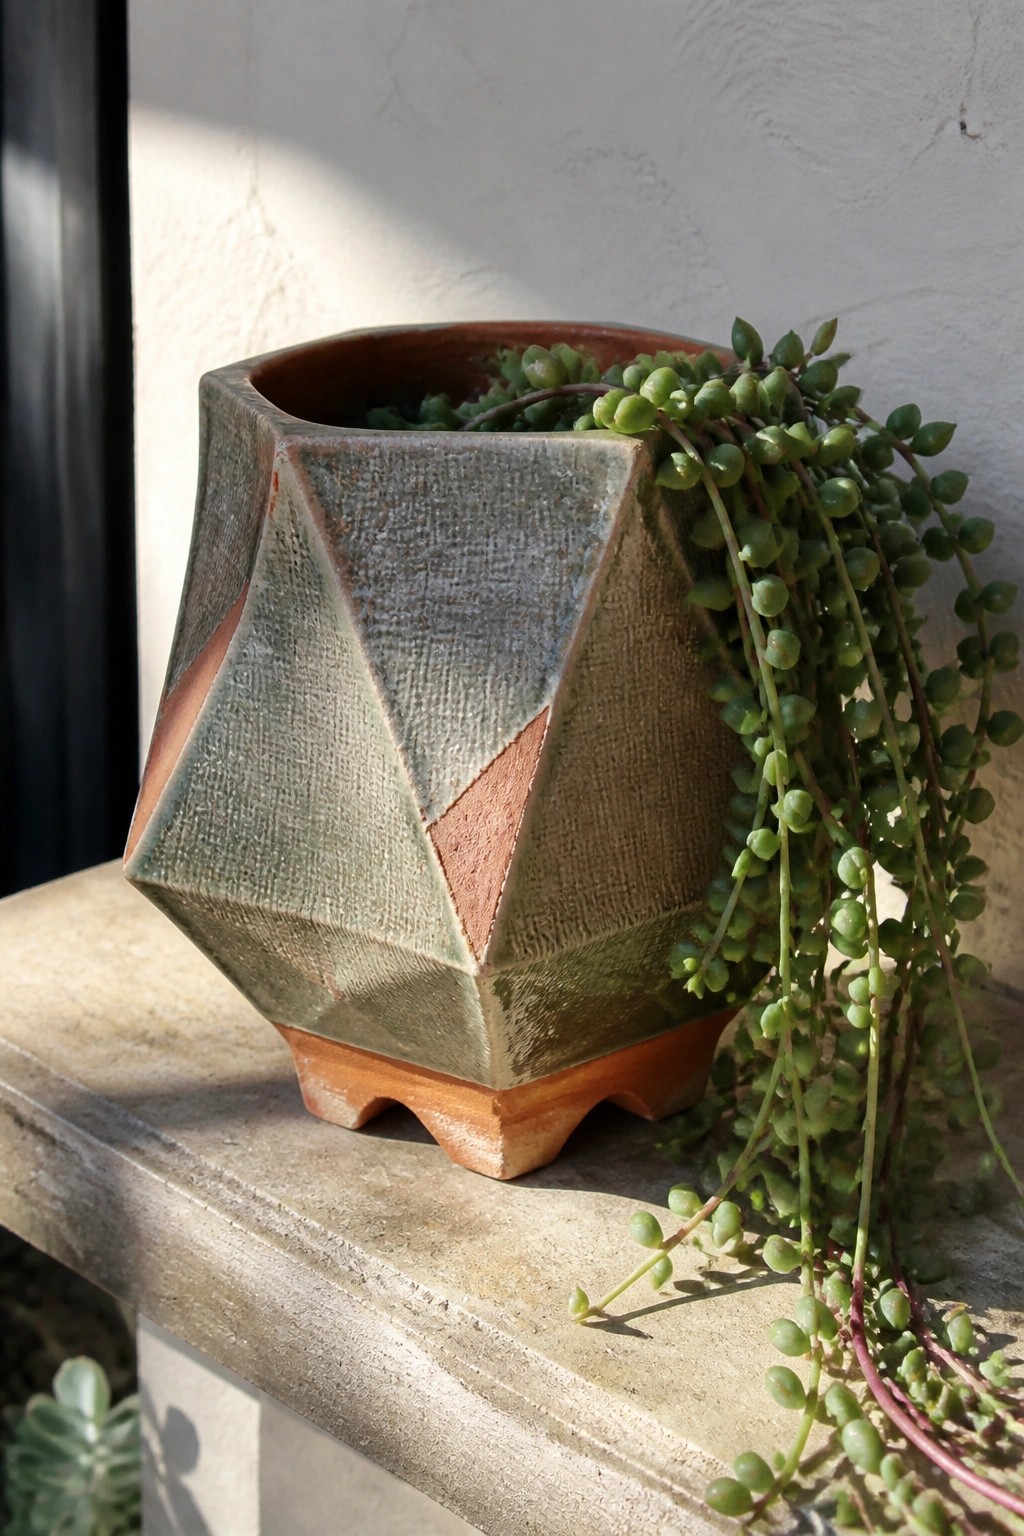
A slab-built planter formed from flat clay pieces joined at sharp angles creates a multi-faceted geometric shape that reads as a solid, sculptural object. The design uses repeated triangular and trapezoid sections to build volume while keeping the walls relatively thin and stable. A mottled glaze in earthy greens and browns settles into the textured surface, emphasizing the edges where the slabs meet and giving each plane a slightly different tone. This method fits the category of decorative planters that double as standalone forms on a shelf or ledge.
The shape does a lot of the work here because the flat facets catch light and shadow in a way that makes the piece look more complex than the construction actually requires. You could adapt the same idea by changing the number of sides, scaling it up for larger plants, or switching to a single matte glaze to simplify the finish. For a windowsill or desk, the angular form gives strong contrast against trailing plants without needing extra surface details. The same slab layout could also be reworked into a shorter, wider version for a catch-all tray or small vase.
Sculpted Organic Forms on Joined Slab Wall Panels
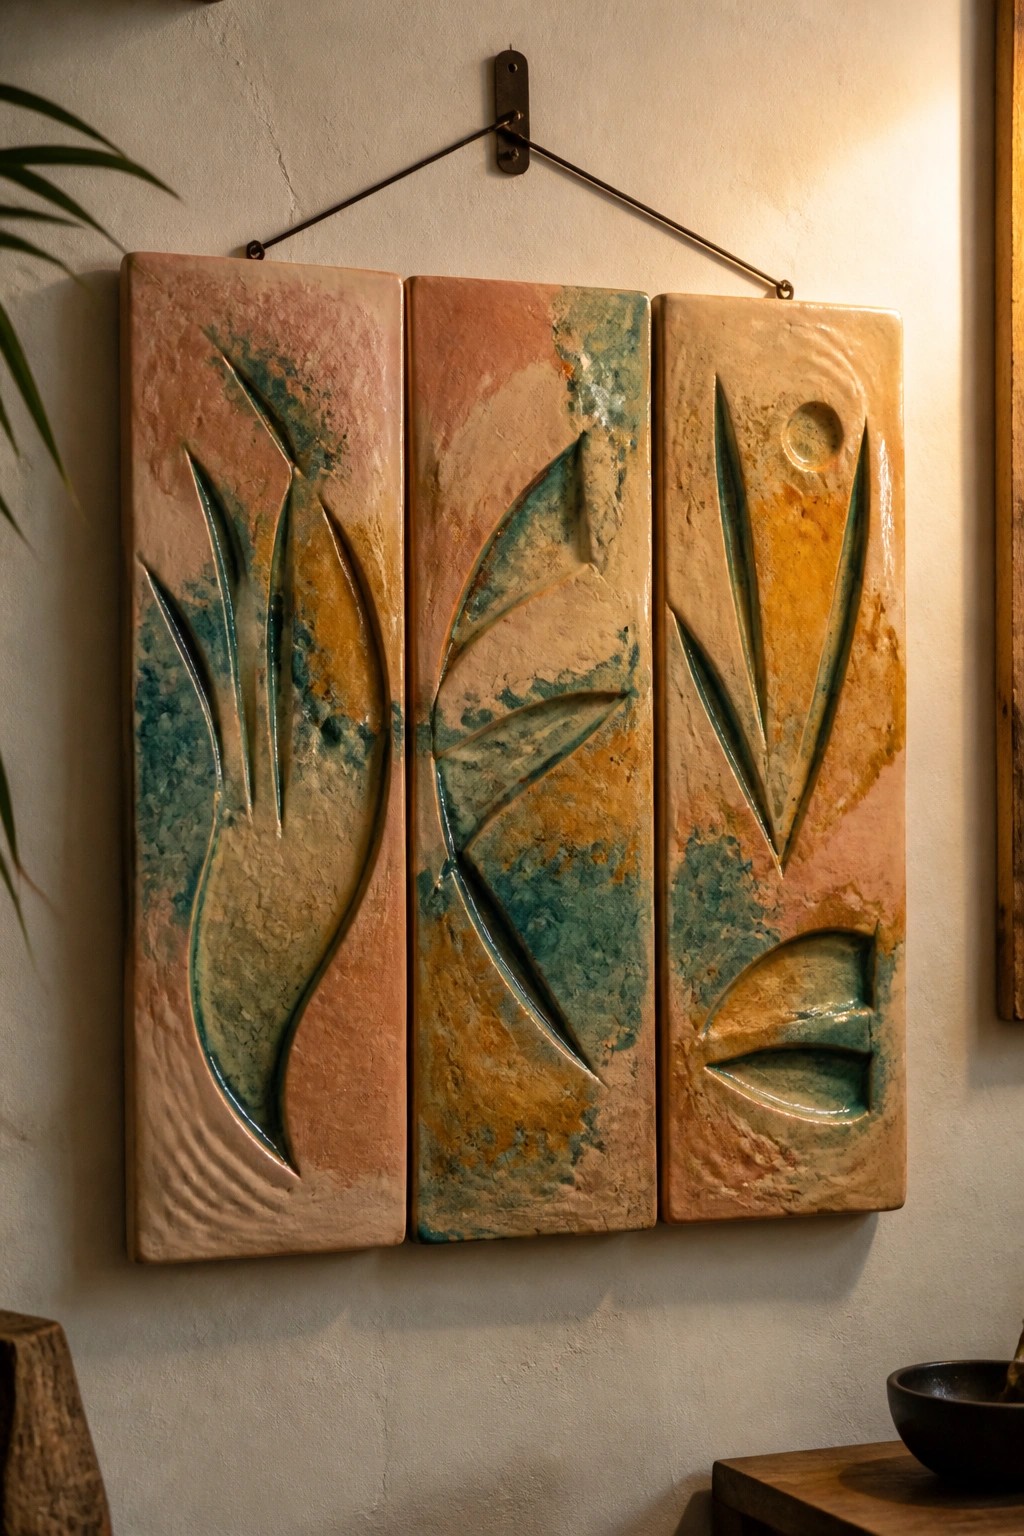
Three tall rectangular slabs form a connected wall hanging where each panel carries raised and recessed organic shapes that resemble stylized leaves or blades. The forms are built by layering and carving clay on the flat slabs before any glazing, which lets the design stand out through actual depth rather than just surface color. Glazes in peach, teal, and ochre tones pool in the carved areas and streak across the textured surface to create variation across the set. This project sits in the advanced slab category because it requires planning the layout, managing multiple panels, and controlling how glazes interact with the sculpted relief.
What makes this idea useful is that each slab can be made and fired separately, then linked with wire for hanging, which reduces the risk of warping a single large piece. The narrow vertical shape fits well in hallways or above furniture where wide art would feel cramped. You could adapt the same approach by changing the motif to simple overlapping arcs or by using fewer glaze colors if the full effect feels too involved. The strong contrast between raised edges and recessed areas also helps the piece read clearly in photos, which is why similar slab triptychs perform well on Pinterest boards focused on textured wall decor.
Curved Slab Candle Tray with Pressed Botanicals
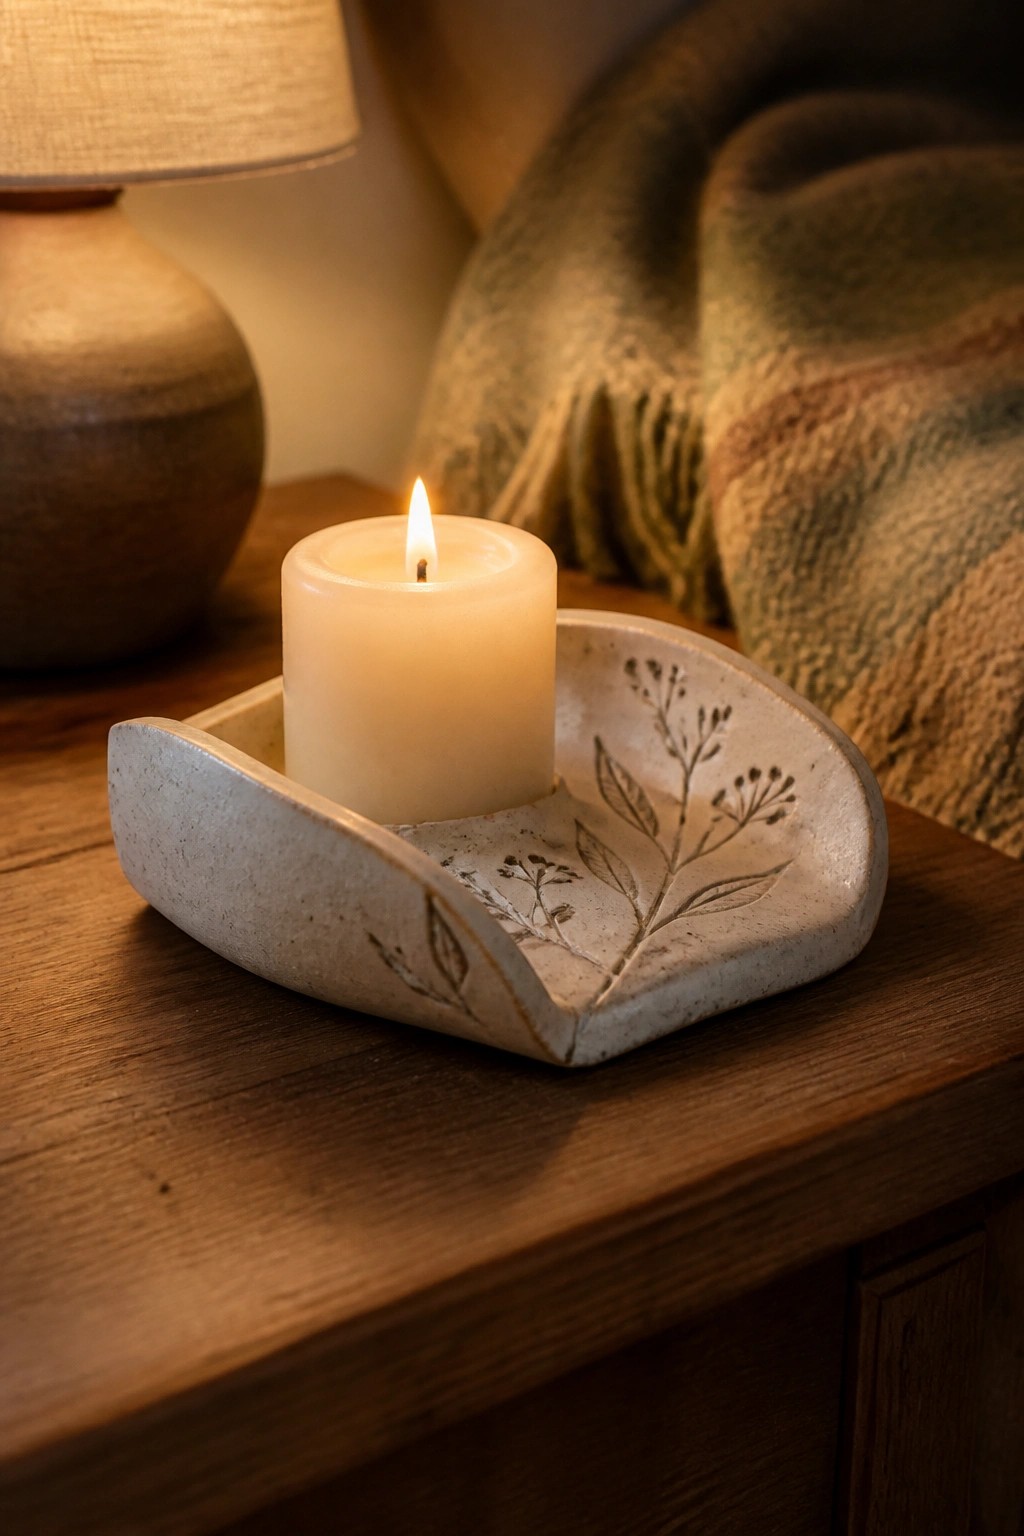
A slab-built candle tray starts with a rolled sheet of clay cut into an organic shape and then gently curved upward at the edges to form a shallow basin. The maker adds interest by pressing or carving simple botanical motifs like leaves and seed heads directly into the surface before the clay dries. This creates a low, stable holder that keeps a pillar candle secure while the impressed patterns catch light and shadow without adding bulk. The approach works as a small decorative piece that combines basic slab construction with surface texture.
What makes this idea useful is how the irregular curve lets you adjust the depth easily for different candle sizes or repurpose the shape as a ring dish. You could swap the botanical stamps for geometric lines or leave the surface plain if you want a quicker version. In a bedroom or on a side table, the compact scale fits without crowding other objects. The same slab method could be adapted into a soap rest or small spoon rest by flattening the curve slightly and refining the rim.
Slab-Built Pitcher with Sweeping Spout and Two-Tone Glaze
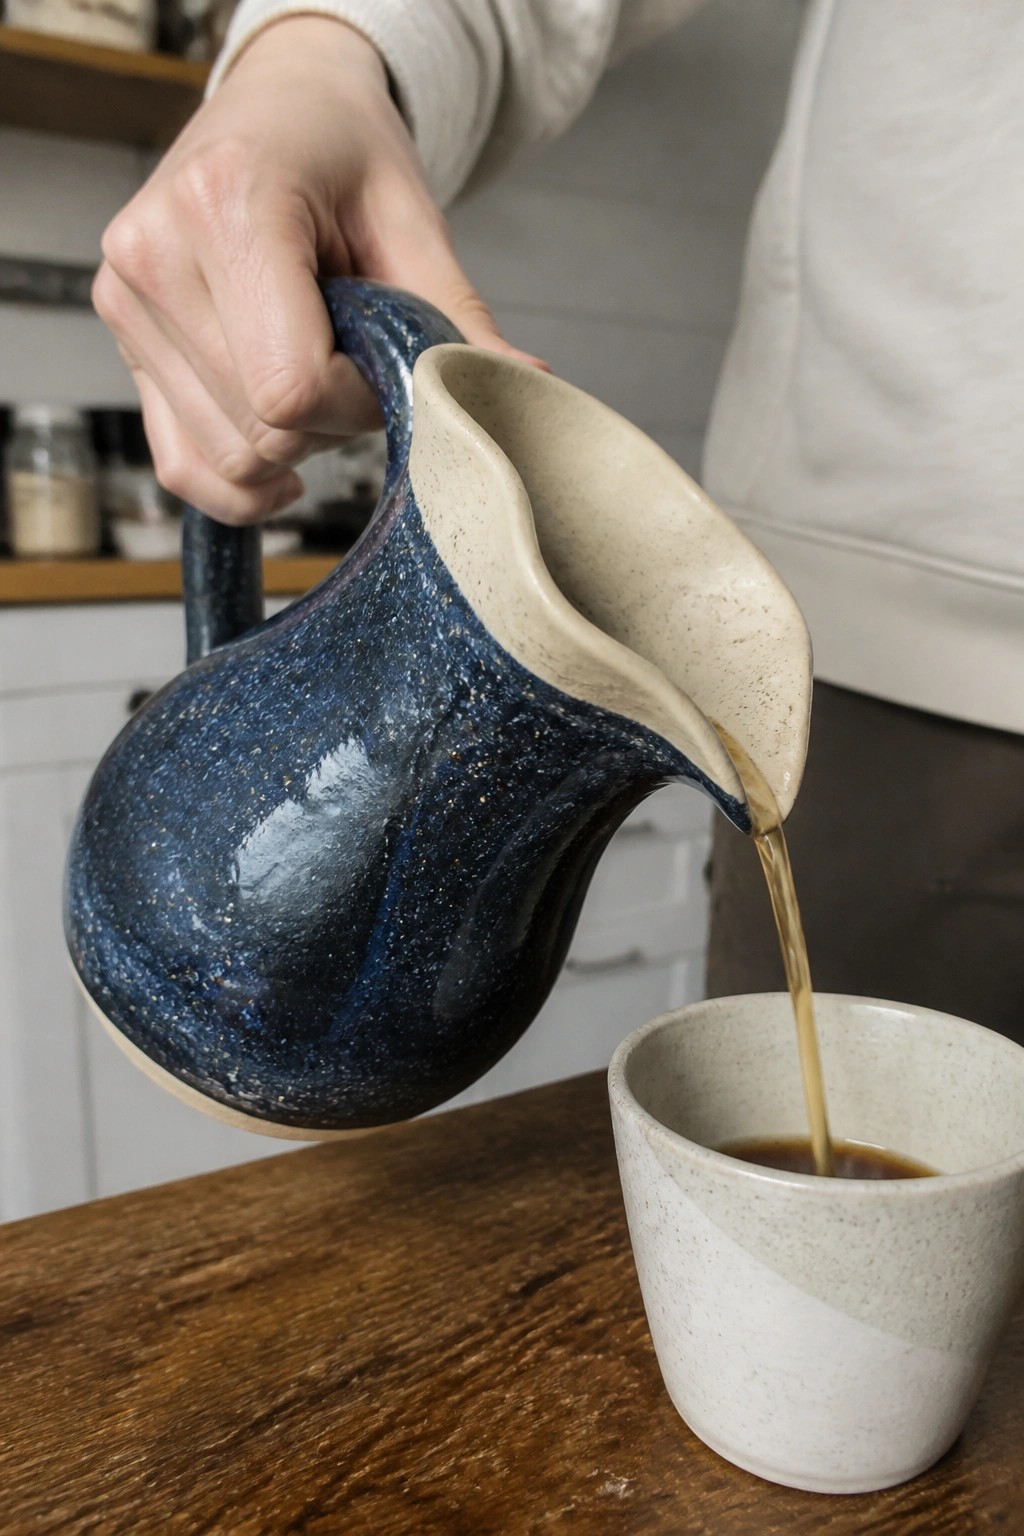
This pitcher is formed from slabs joined into a rounded, bulbous body that narrows toward the base. A wide, exaggerated spout is added at the top to control flow during pouring, while the exterior receives a dark speckled glaze and the rim and interior stay light. The handle is attached low on the body for balance when the pitcher is full.
What makes this idea useful is the way the dramatic spout turns a standard pitcher into a functional serving piece for coffee, tea, or water at the table. You could scale the same slab pattern down for a cream pitcher or widen the body for a larger water jug. The two-tone glaze treatment is easy to repeat on other slab forms where you want the opening to stand out visually.
Slab-Built Mug with Scattered Dot Pattern
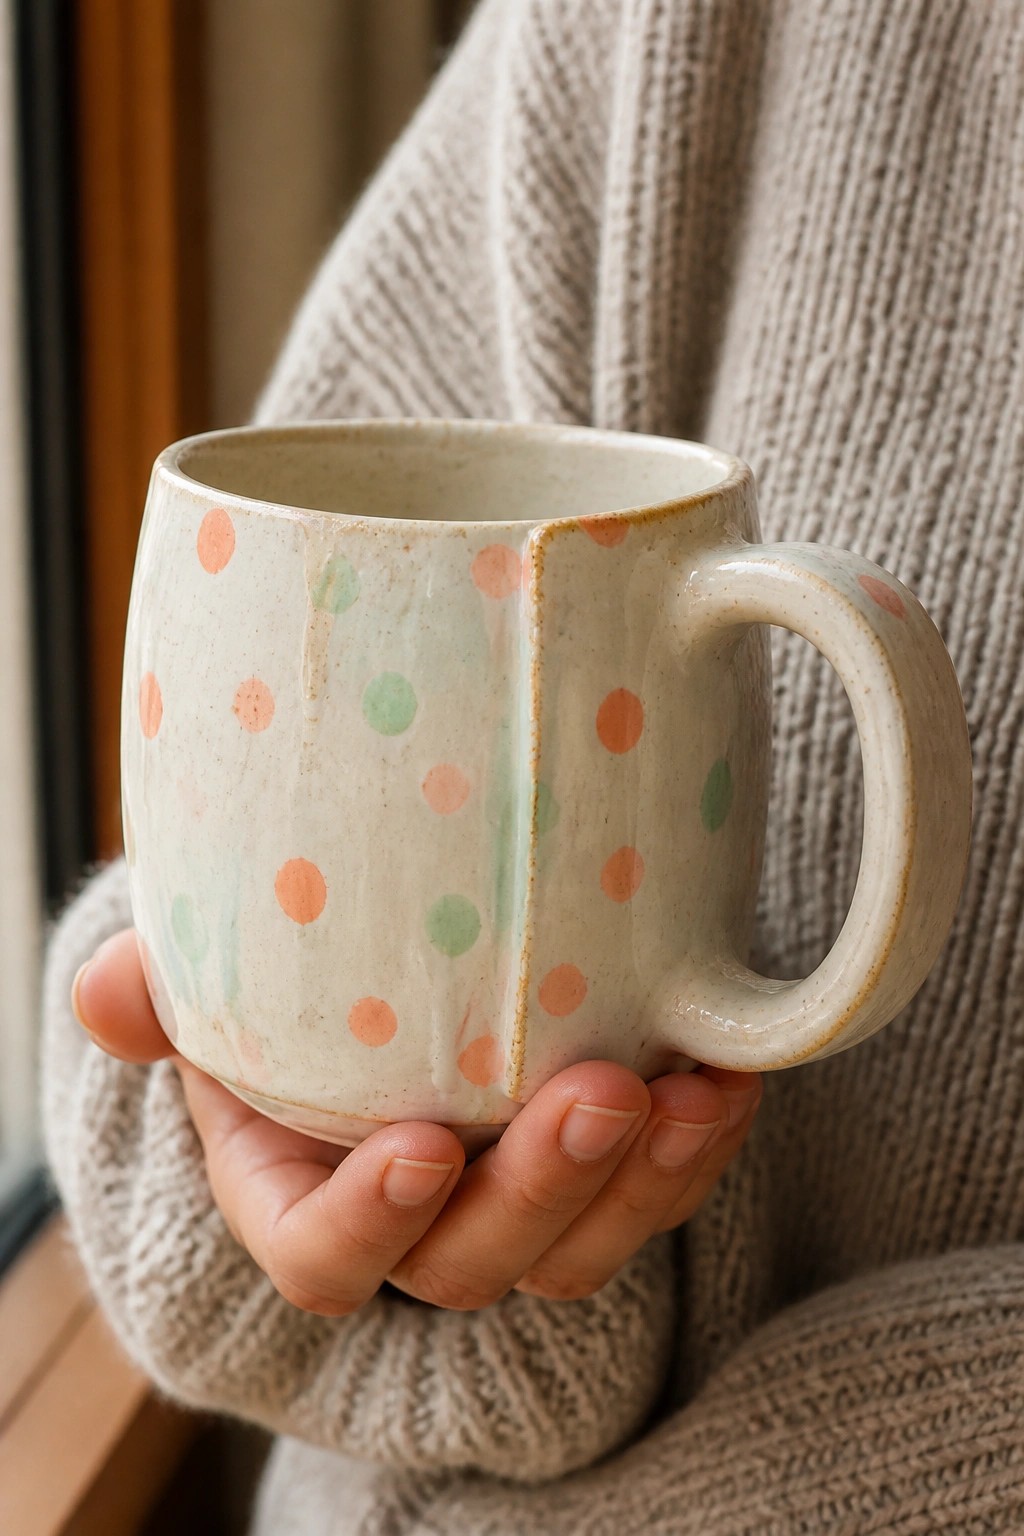
A slab-built mug starts with flat clay sheets joined along vertical seams to form a slightly faceted cylinder that feels solid in the hand. This version carries an off-white speckled surface finished with loose orange and mint green dots applied at different sizes and spacings. The handle attaches cleanly at the seam line and the rim stays level for practical drinking. The project belongs to the painted-motif mug category and keeps the focus on surface pattern rather than complex sculpting.
What makes this idea useful is how the dot layout can be adjusted with simple circle stamps or slip trailing without changing the mug shape. A piece like this works especially well as a kitchen mug or desk cup where the pattern shows from multiple angles. The small scale makes this easy to adapt by swapping dot colors for seasonal palettes or repeating the same dots on a low tray. For a gift, something like this stands out on a shelf because the color contrast reads clearly even in a quick photo.
Leaf-Shaped Slab Spoon Rest
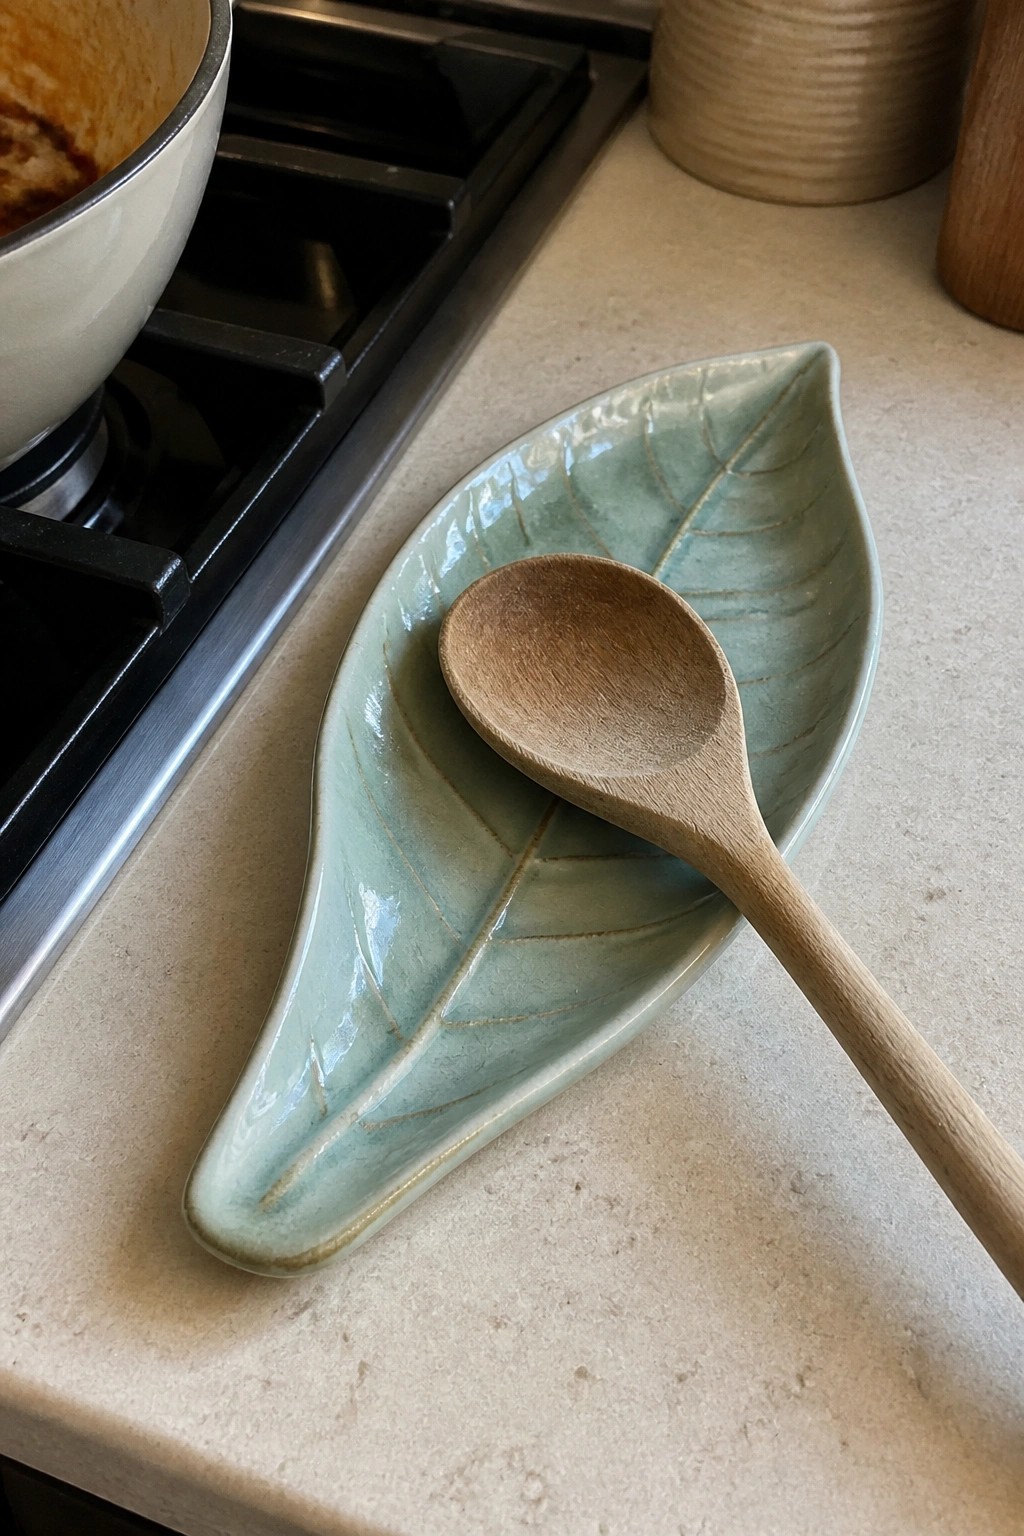
A slab-built leaf spoon rest gives you a simple way to keep cooking utensils off the counter while adding a natural shape to the kitchen. The form starts as a flattened oval that is pinched and trimmed into a pointed leaf, then the veins are pressed in with a tool before the final shaping and glazing. A soft green glaze pools slightly in the lines to make the texture visible without extra steps. This fits the small kitchen item category and stays functional while using the slab method for clean edges.
What makes this idea useful is how the same leaf template can be scaled up for a larger tray or narrowed into a chopstick rest. The impressed veins give enough surface interest that the piece stands out next to a stove or on open shelving. You could rework the shape into a small soap dish for a bathroom by adding a shallow well in the center, or keep the current size for holding tea bags or garlic cloves. The compact form also photographs cleanly for project sharing.
Yarn Bowl with Bold Spiral Cutout
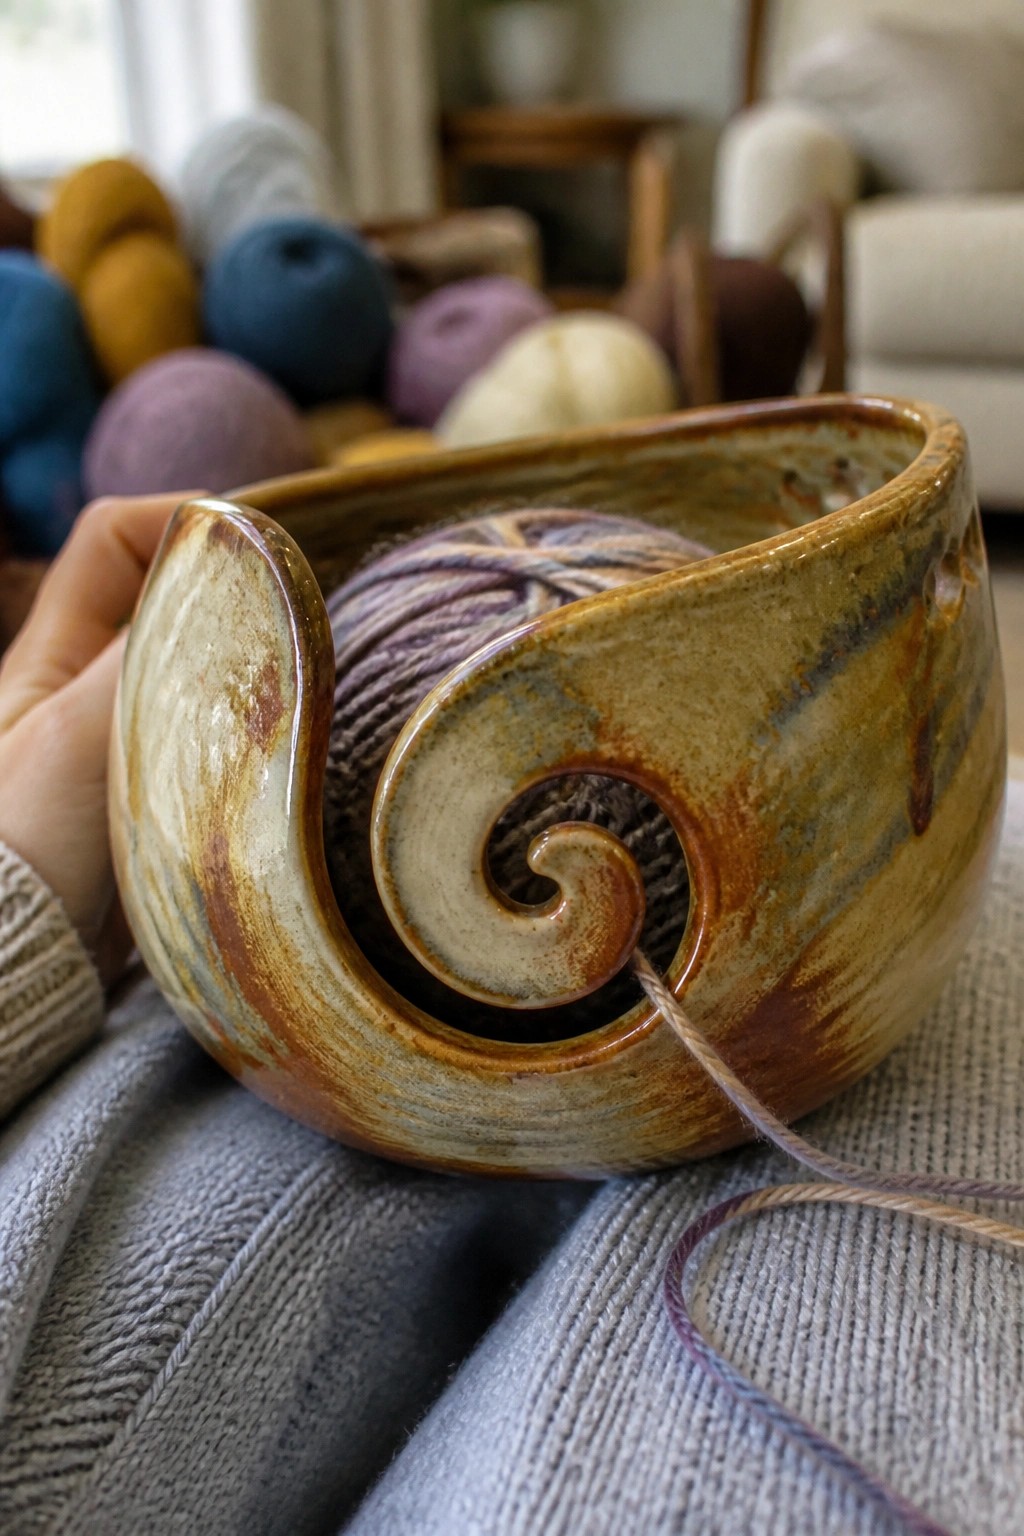
A yarn bowl formed from slabs uses a large spiral opening cut into one side to control how the yarn feeds out. The cutout creates a channel that keeps the strand from tangling while the rounded body holds the ball in place. Earthy layered glazes emphasize the curve of the spiral and the rim without adding extra decoration. This approach turns a basic bowl shape into a specialized holder for fiber work.
What makes this idea useful is the way the spiral slot solves a practical problem without extra parts. You could scale the same cutout down for a smaller desk version or widen it for thicker yarns like macrame cord. The compact size fits easily on a lap or side table during long projects. For a different use, the same form works as a small fruit bowl once the spiral detail is removed or simplified.
Slab Built Toothbrush Holder with Divided Top
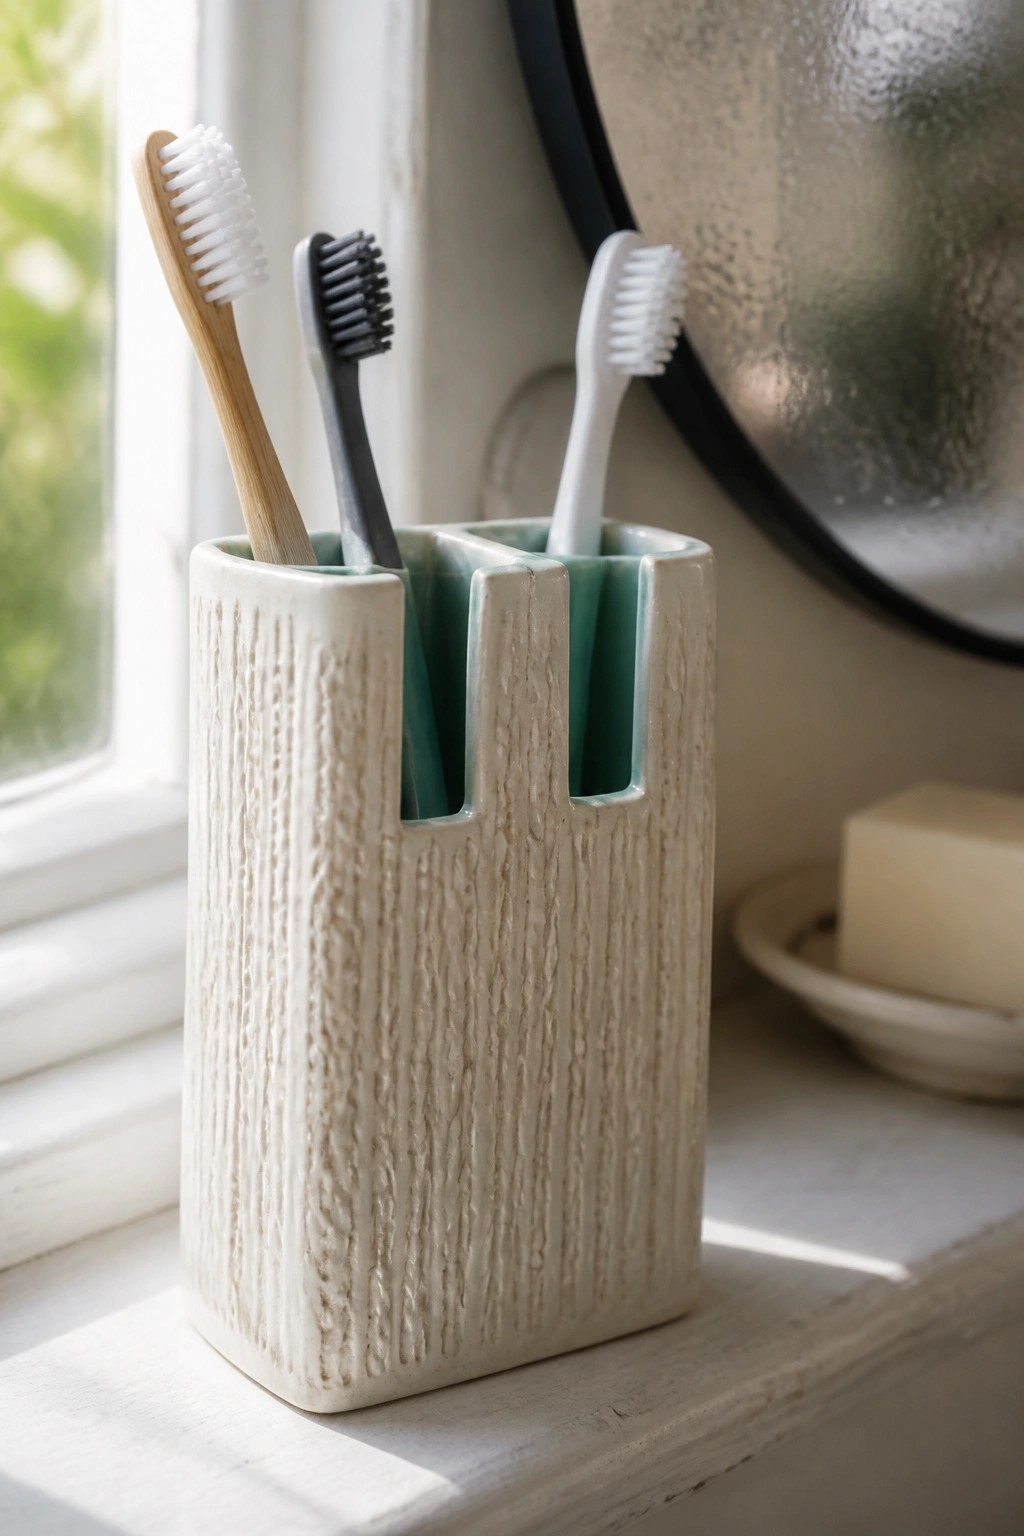
A slab constructed toothbrush holder uses a rectangular form with internal vertical walls to create three separate compartments. The exterior carries a pressed texture while the interior glaze color shows through the open slots at the top. This design keeps multiple brushes upright and separated without needing extra hardware or fittings.
What makes this idea useful is how the divided top prevents brushes from touching while the narrow footprint fits on a windowsill or small counter. You could rework the same slab layout for two or four slots or change the height to hold makeup brushes instead. The contrast between the textured outside and the glazed inside adds detail with minimal extra steps. For a bathroom setup this shape pairs easily with a matching soap dish made from the same slabs.
Divided Slab Salt Cellar with Fitted Lids
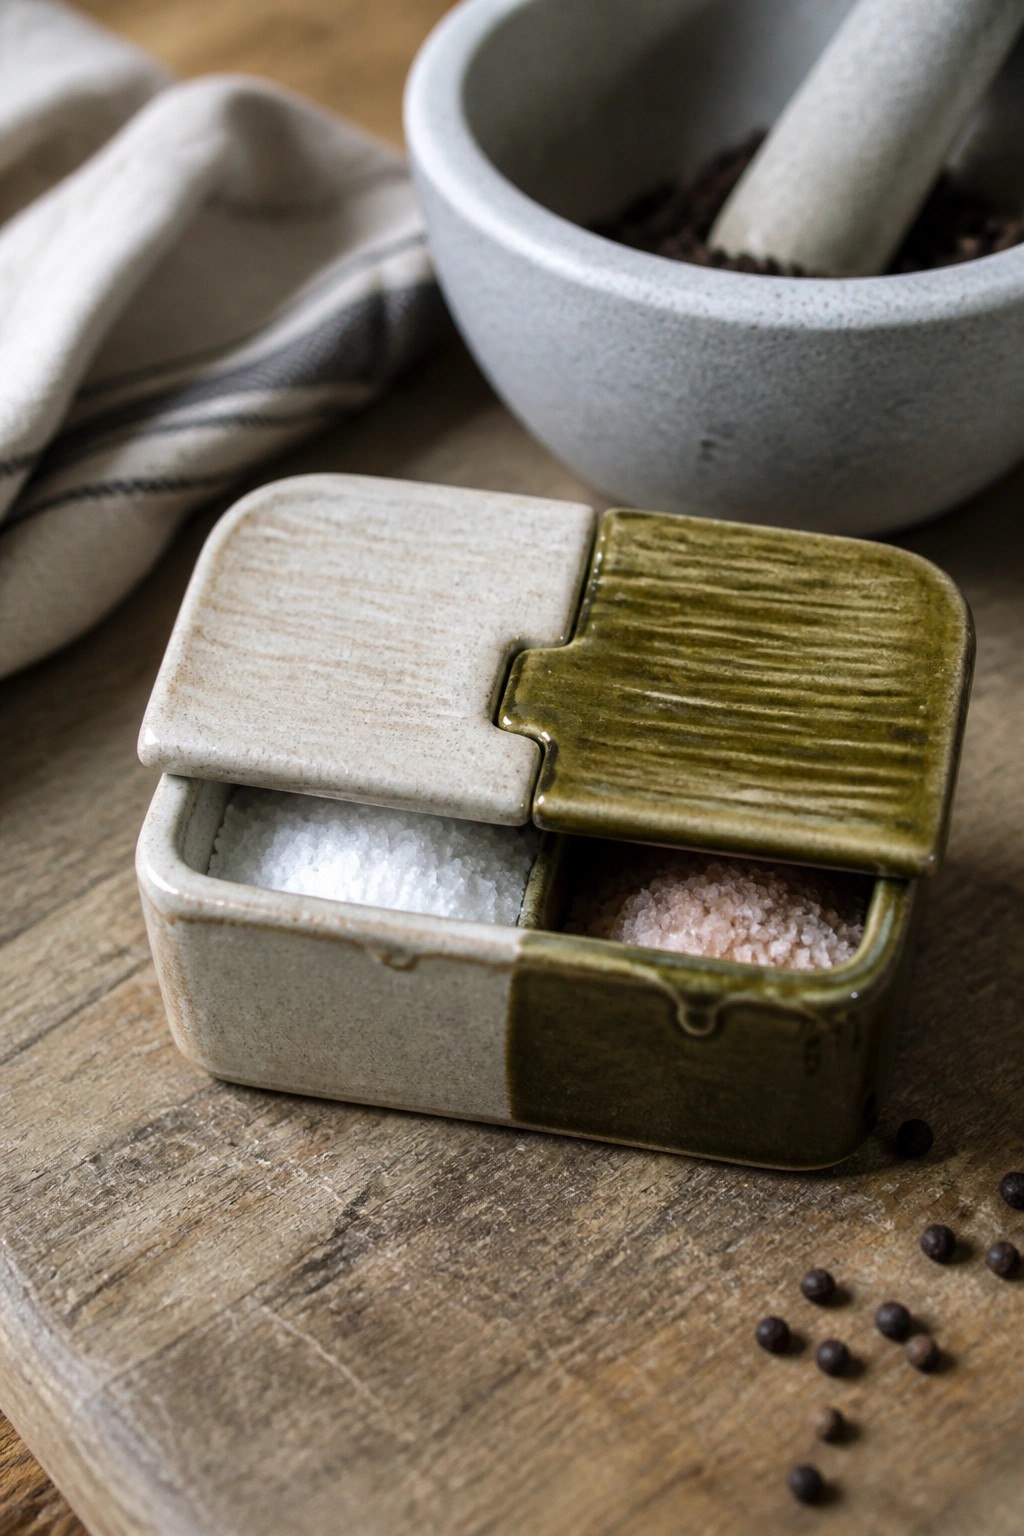
A slab-built divided container makes a compact kitchen salt cellar that holds two different seasonings side by side. The rectangular form uses two separate fitted lids, one in a matte off-white glaze and the other in a textured olive green, so each compartment can be opened independently. The clean division and flush lid fit keep the piece practical while the contrasting glazes add visual separation without extra decoration. This approach fits slab projects that emphasize precise construction and simple two-tone glazing.
What makes this idea useful is how the divided layout solves the common problem of mixing salts or spices in one dish. You could rework the same slab template into a small tea bag holder or a desk supply tray by adjusting the internal walls. The compact size fits easily next to a stove or on a dining table, and the lids protect contents from dust. Scaling the box slightly larger or adding a third compartment lets you adapt it for other kitchen items while keeping the core construction straightforward.
Slab-Built Cat Figurine with Incised Patterns
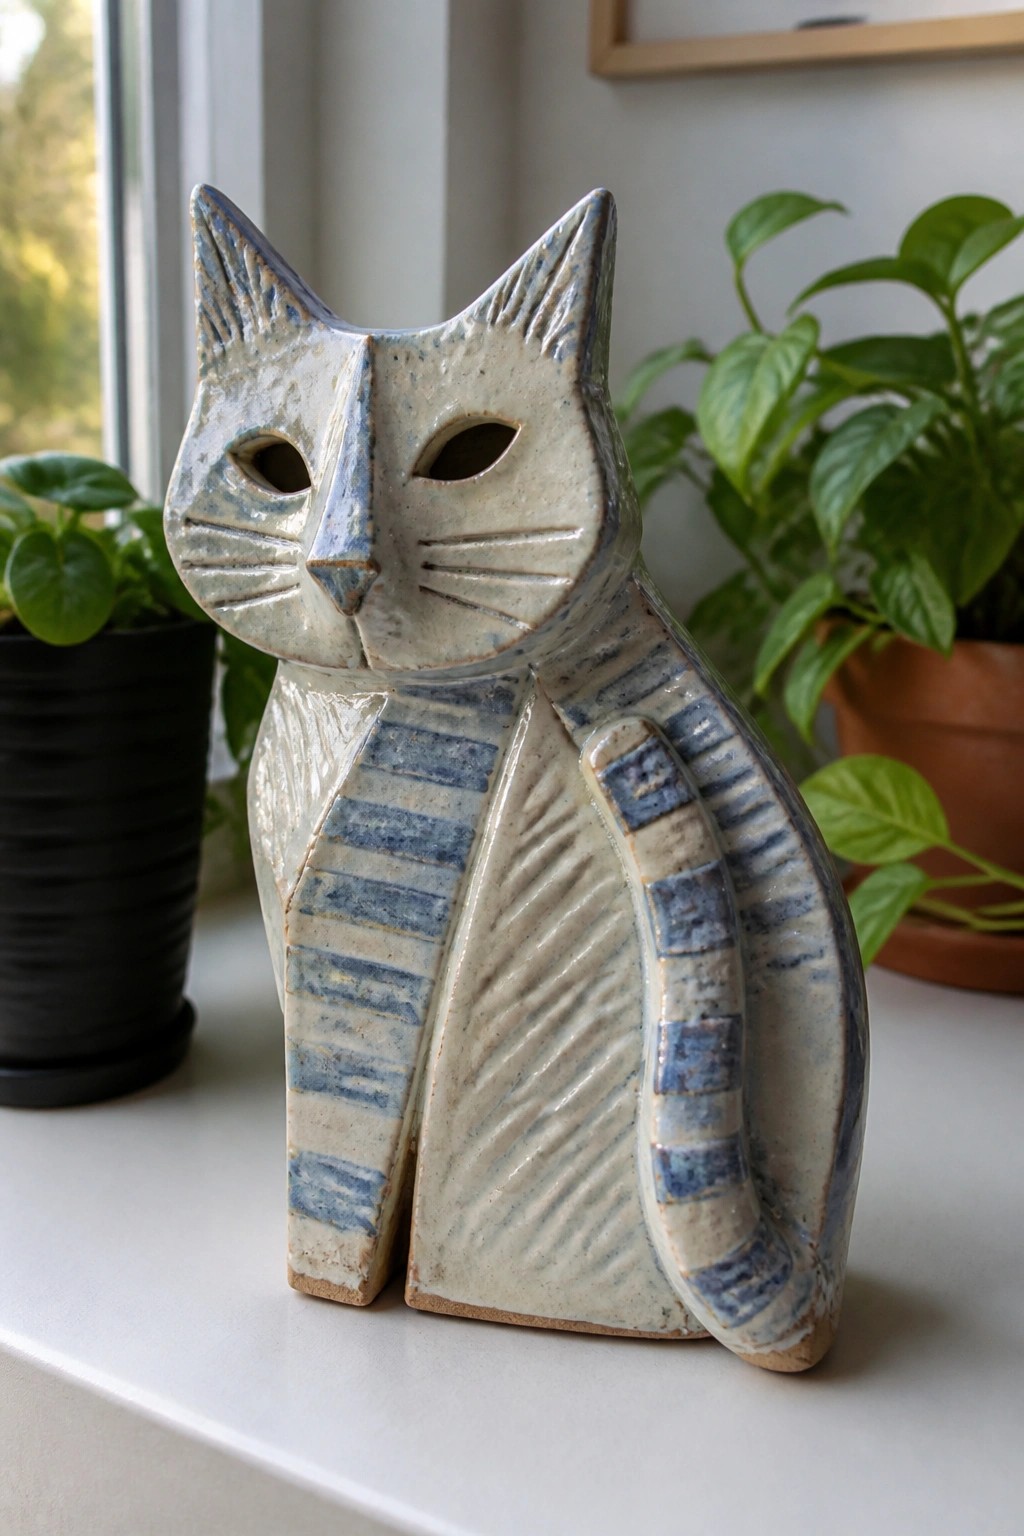
A slab-constructed ceramic cat figurine serves as a compact decor object that relies on angular planes and carved surface lines for its impact. The flat sides allow easy assembly while the incised whiskers, stripes, and body texture add definition without extra volume. The blue and white glaze bands emphasize the geometric form and keep the piece visually balanced at a small scale.
What makes this idea useful is how the slab method lets you build upright animal shapes that hold their form during drying and firing. The same approach works for other simple animals or abstract figures by adjusting ear height and tail curves. You can scale it down for desk use or repeat the stripe pattern in different colors to match existing room decor. For a gift, this type of piece stands out because the carved details show clear handwork without requiring advanced wheel skills.
Oval Slab Tray with Built-In Dip Well
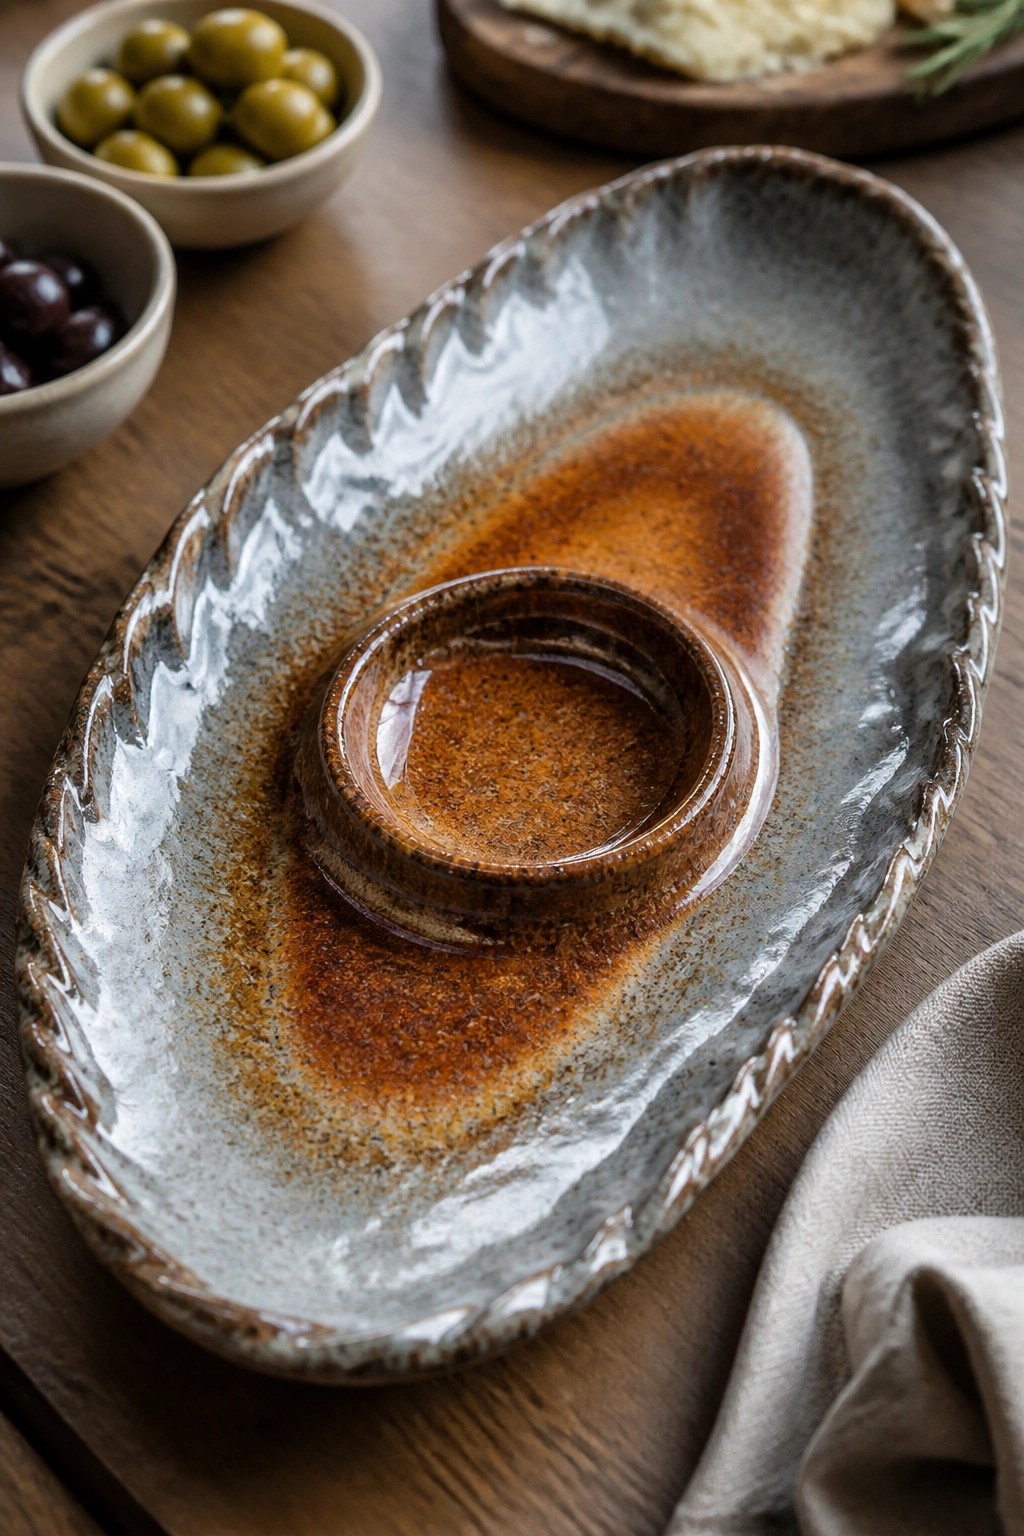
A slab-built oval tray uses a recessed center bowl to separate dips or sauces from the main serving surface. The elongated form leaves room on either side for arranging olives, bread, or small bites while the integrated well keeps items from sliding together. The reactive glaze shifts from warm rust to cooler gray across the surface, highlighting the handmade ridges along the rim.
This layout works well for serving appetizers on a countertop or table because everything stays in one stable piece. You could shorten the oval for a more compact version or widen the center well if you want to hold a larger ramekin. The same slab approach also translates to a longer cheese board by stretching the shape and skipping the well entirely.
Faceted Slab Utensil Holder with Panel Textures
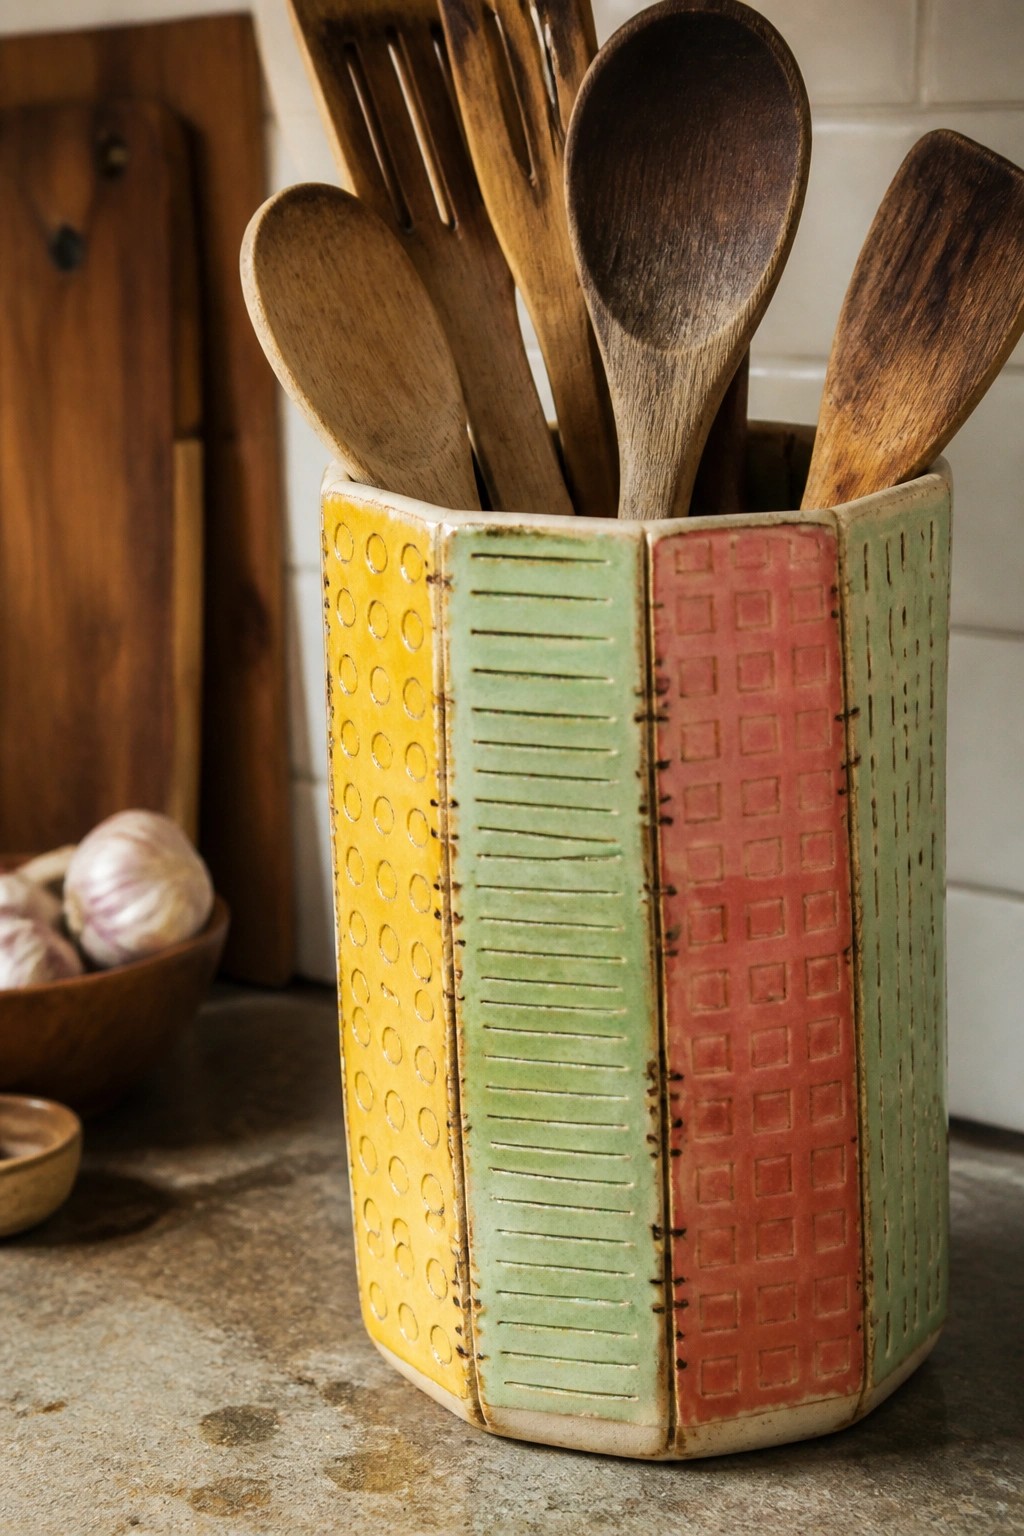
A slab-built utensil holder uses flat clay sections joined into an angular, multi-sided form that stands upright on a countertop. Each face carries a different impressed pattern—circles on one, horizontal lines on another, squares on the third, and dots on the fourth—before the sections are assembled and glazed in separate colors. The result is a kitchen container that functions as everyday storage while the varied surfaces and color blocks give it visual weight.
What makes this idea useful is that the flat panels make it simple to test multiple textures on a single piece without extra tools. The same construction works for a desk pencil cup or a bathroom holder by changing the height or diameter slightly. Keeping the facets but limiting the piece to two glazes reduces the steps while still producing a strong pattern contrast that photographs clearly for reference.
Slab-Built Jar with Stepped Lid and Chevron Texture
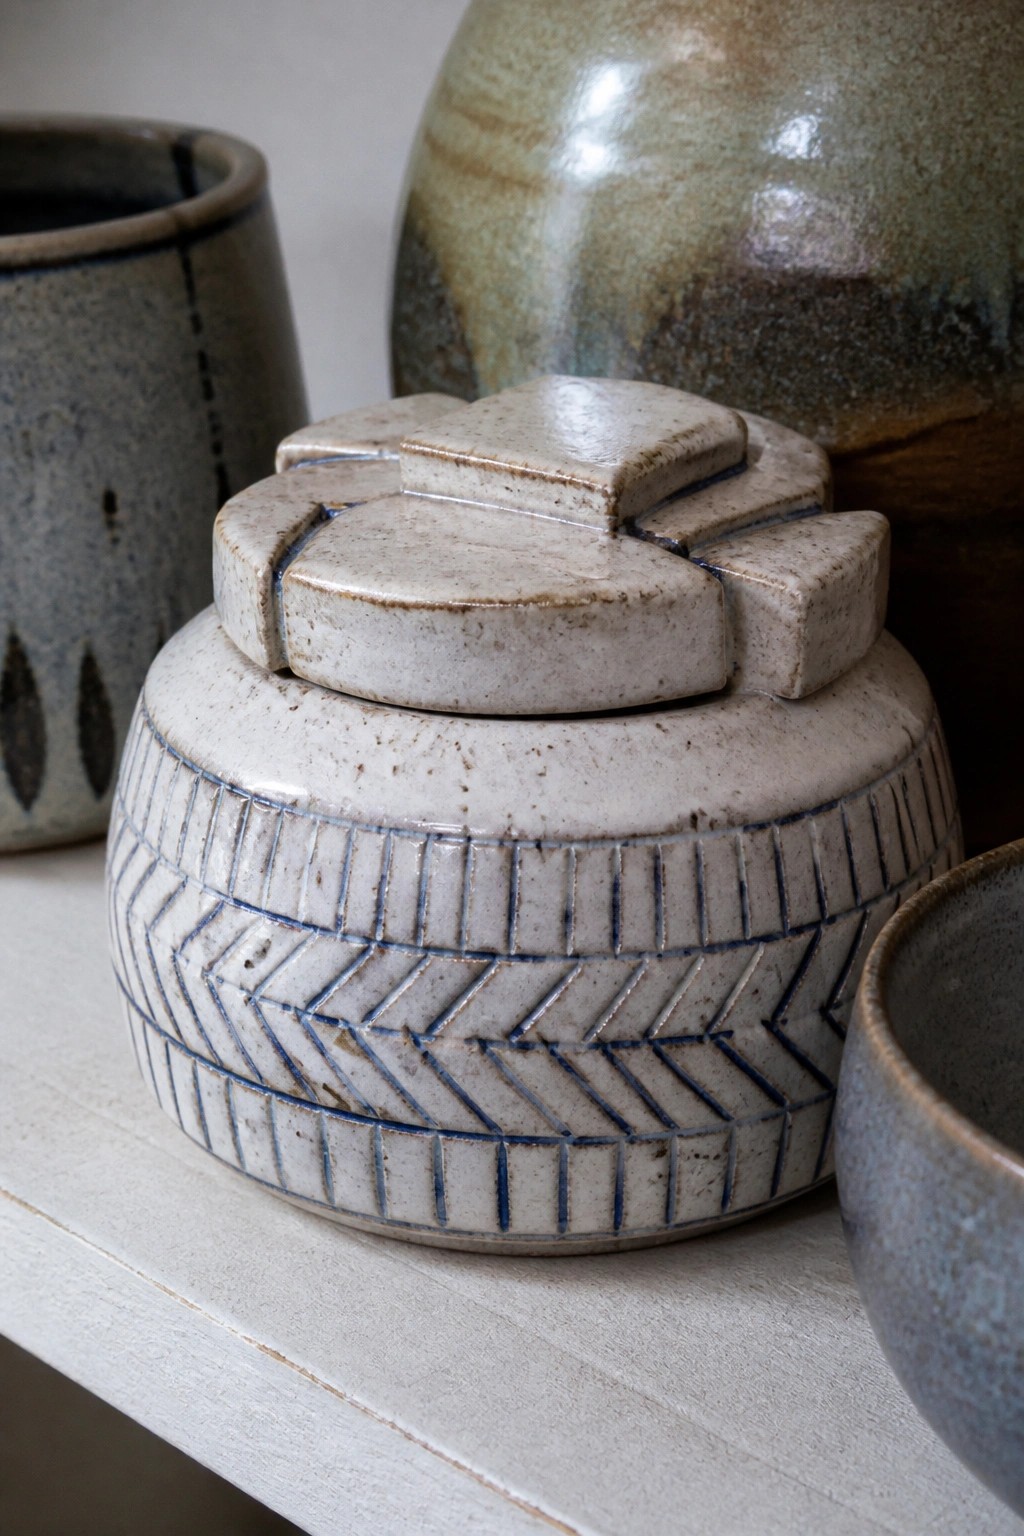
A slab-constructed lidded jar pairs a rounded body with a complex angular lid built from cut and assembled pieces. The lid uses stacked square and rectangular forms to create a stepped profile topped by a small square knob. The body carries repeated bands of incised chevrons that are filled with blue slip or underglaze, set against a light speckled clay surface.
What makes this idea useful is the way the lid turns a basic cylinder into a more architectural form that still functions as a container. The pattern works especially well on the curved surface because the repeating chevrons create movement without overpowering the shape. You could adapt the same lid construction for a rectangular box or shorten the body to make a small trinket holder. In a kitchen or on an open shelf the piece reads as both storage and decor, and the clean contrast between the plain lid and the patterned body photographs sharply for sharing.
Slab-Built Soap Dish with Drainage Slots
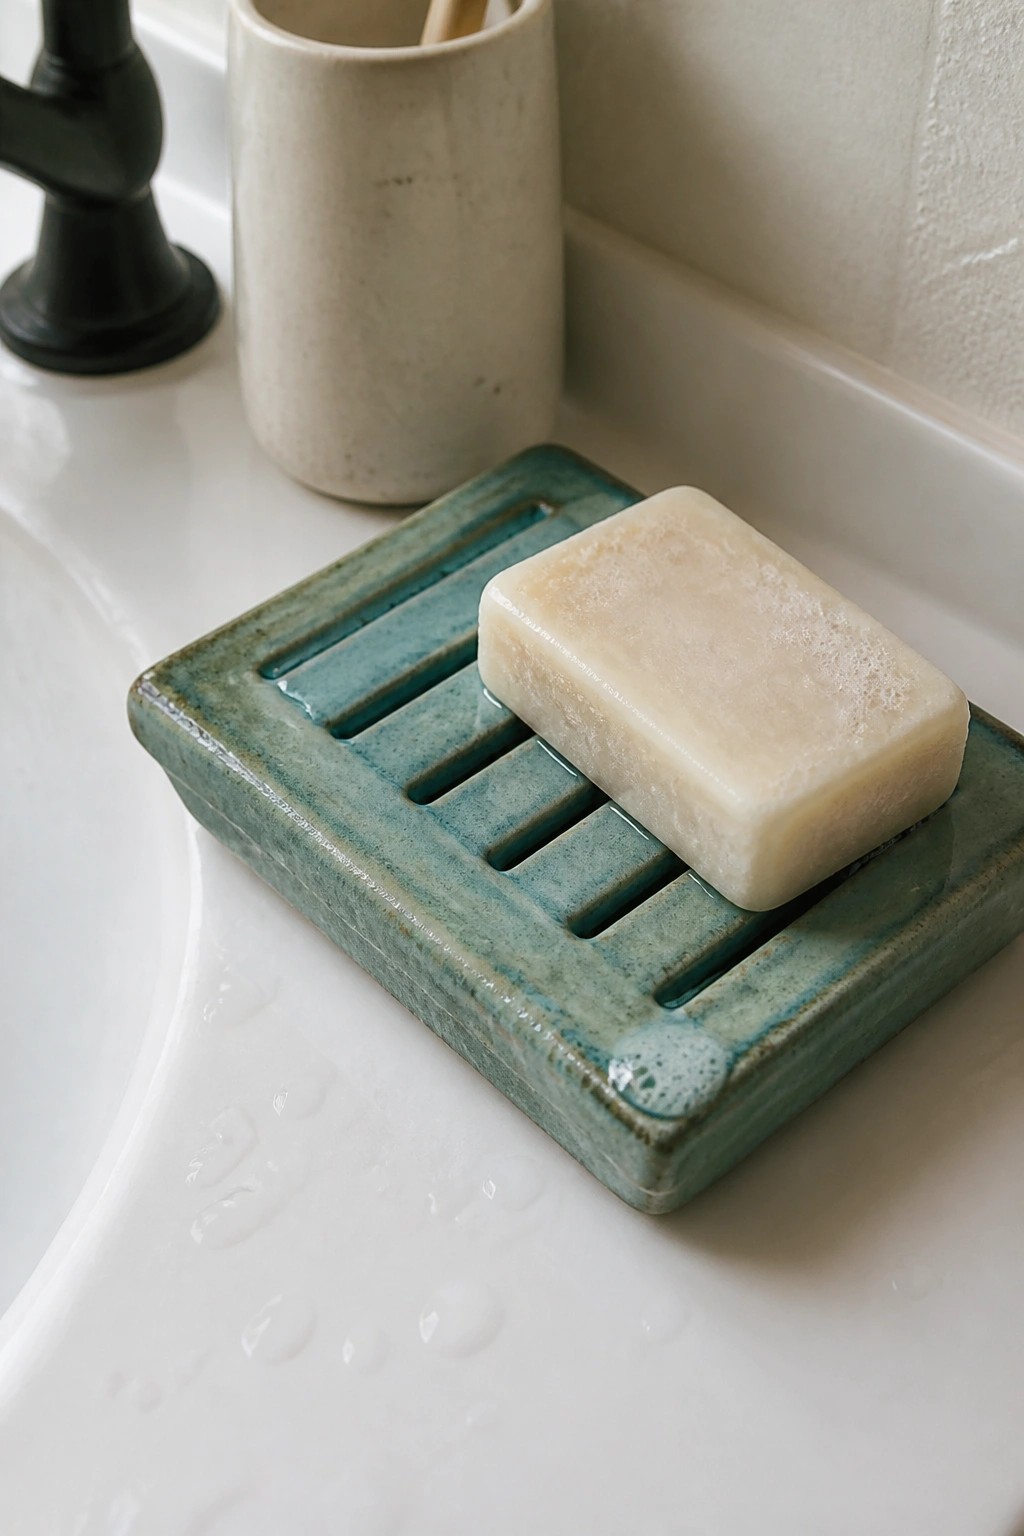
A rectangular soap dish built from slabs uses parallel slots cut through the base to let water drain away from the bar. Low walls on all four sides keep the soap contained while the piece sits flat on a sink or ledge. The teal glaze covers the entire form and settles into the grooves, creating contrast without extra decoration.
What makes this idea useful is how the cut slots handle drainage in one piece instead of relying on added feet or a separate tray. You could scale the same layout down for a smaller dish or widen the spacing if you want to use it for a sponge instead. In a bathroom the solid color and simple rectangle fit with most fixtures without competing for attention. The slab method also lets you swap the glaze or change the overall proportions quickly for a different sink size.
Rectangular Slab Canister with Cutout Motif
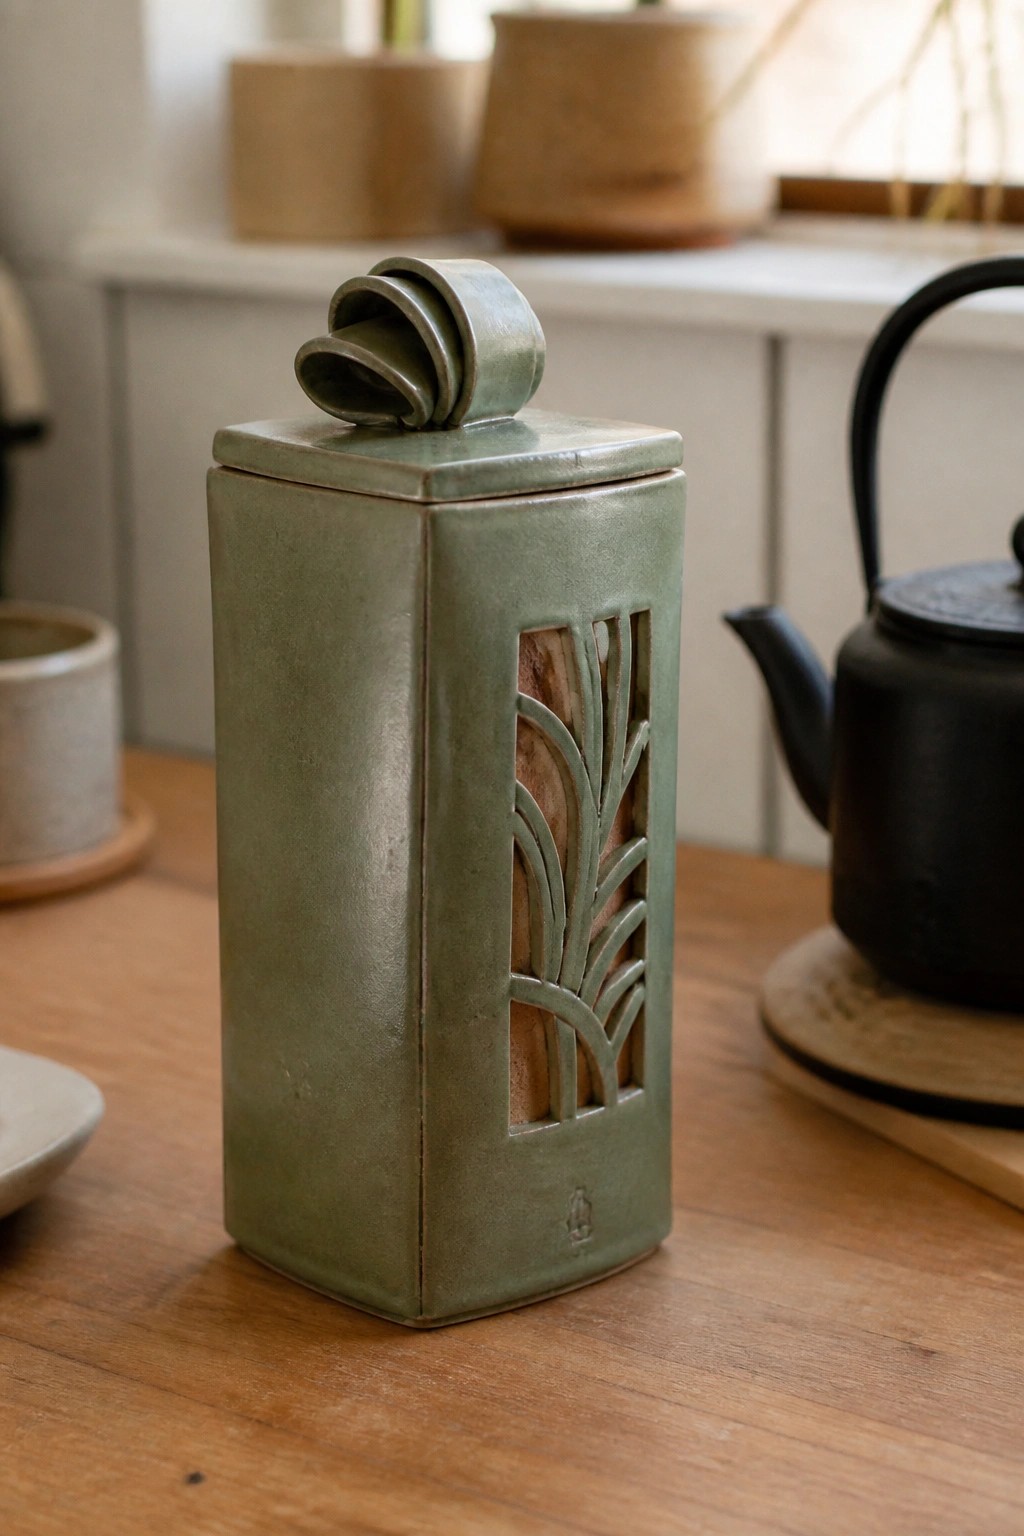
A tall rectangular canister built from slabs gives a clean, architectural shape that works well for storage. The vertical cutout reveals a stylized reed pattern in the exposed clay against the matte green glaze, creating contrast without adding separate pieces. The lid carries a rolled clay scroll as a handle, turning a simple cover into a focal point. This combines slab construction with a single surface detail for a finished kitchen or pantry piece.
The shape does a lot of the work here because the flat sides make the cutout easy to plan and execute. Use the same slab method for smaller matching jars or adapt the reed motif into a simpler line pattern if you want less detail. It fits well on open shelves where the height and window effect stand out next to round jars. For gifts, the lid handle offers a quick way to personalize the form without changing the overall size.
Arched Slab Napkin Holder with Contrasting Impressed Sides
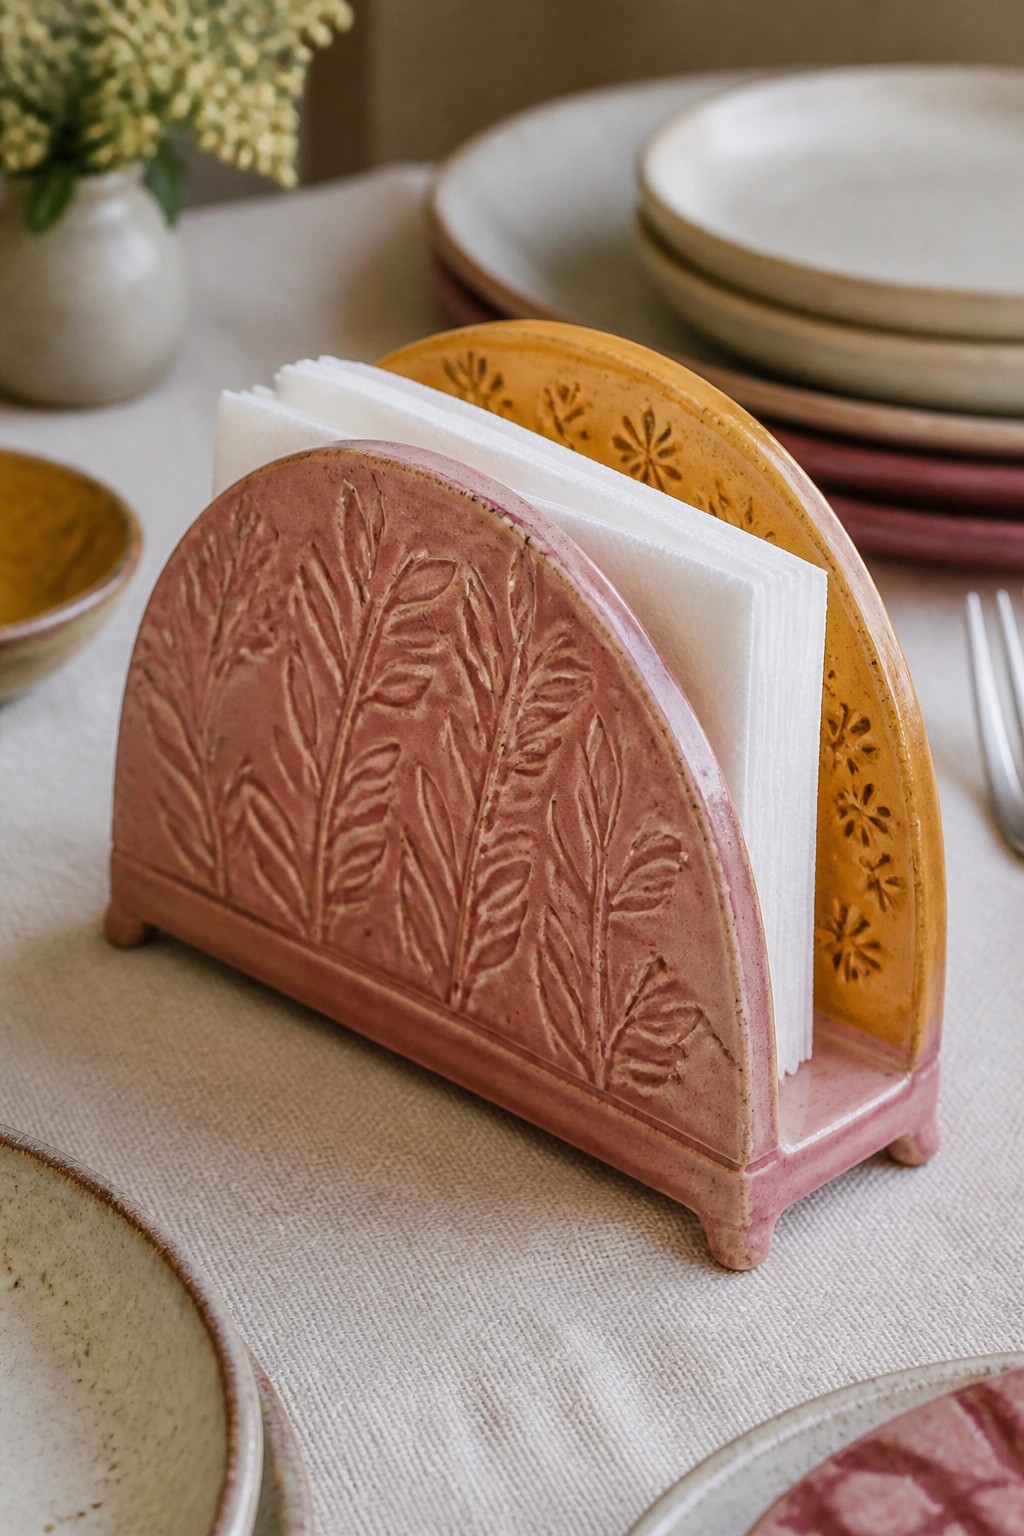
A slab-built napkin holder uses two arched panels joined at the base to keep napkins upright and easy to grab. One side carries pressed leaf textures while the other shows repeated stamped flower patterns, each highlighted by a different glaze color. The form stays low and stable so it sits flat on a table without tipping.
What makes this idea useful is how the same arched shape can be adjusted wider or narrower to fit cocktail napkins or larger dinner napkins. You can swap the leaf and flower stamps for other pressed textures like ferns or geometric stamps to match different tableware. In a kitchen or dining area the holder keeps paper or cloth napkins organized while the two-tone surface makes it easy to coordinate with existing plates and bowls. The small footprint also lets you adapt the basic construction into a desk letter holder or recipe card stand.
Textured Slab Incense Tray with Linear Groove
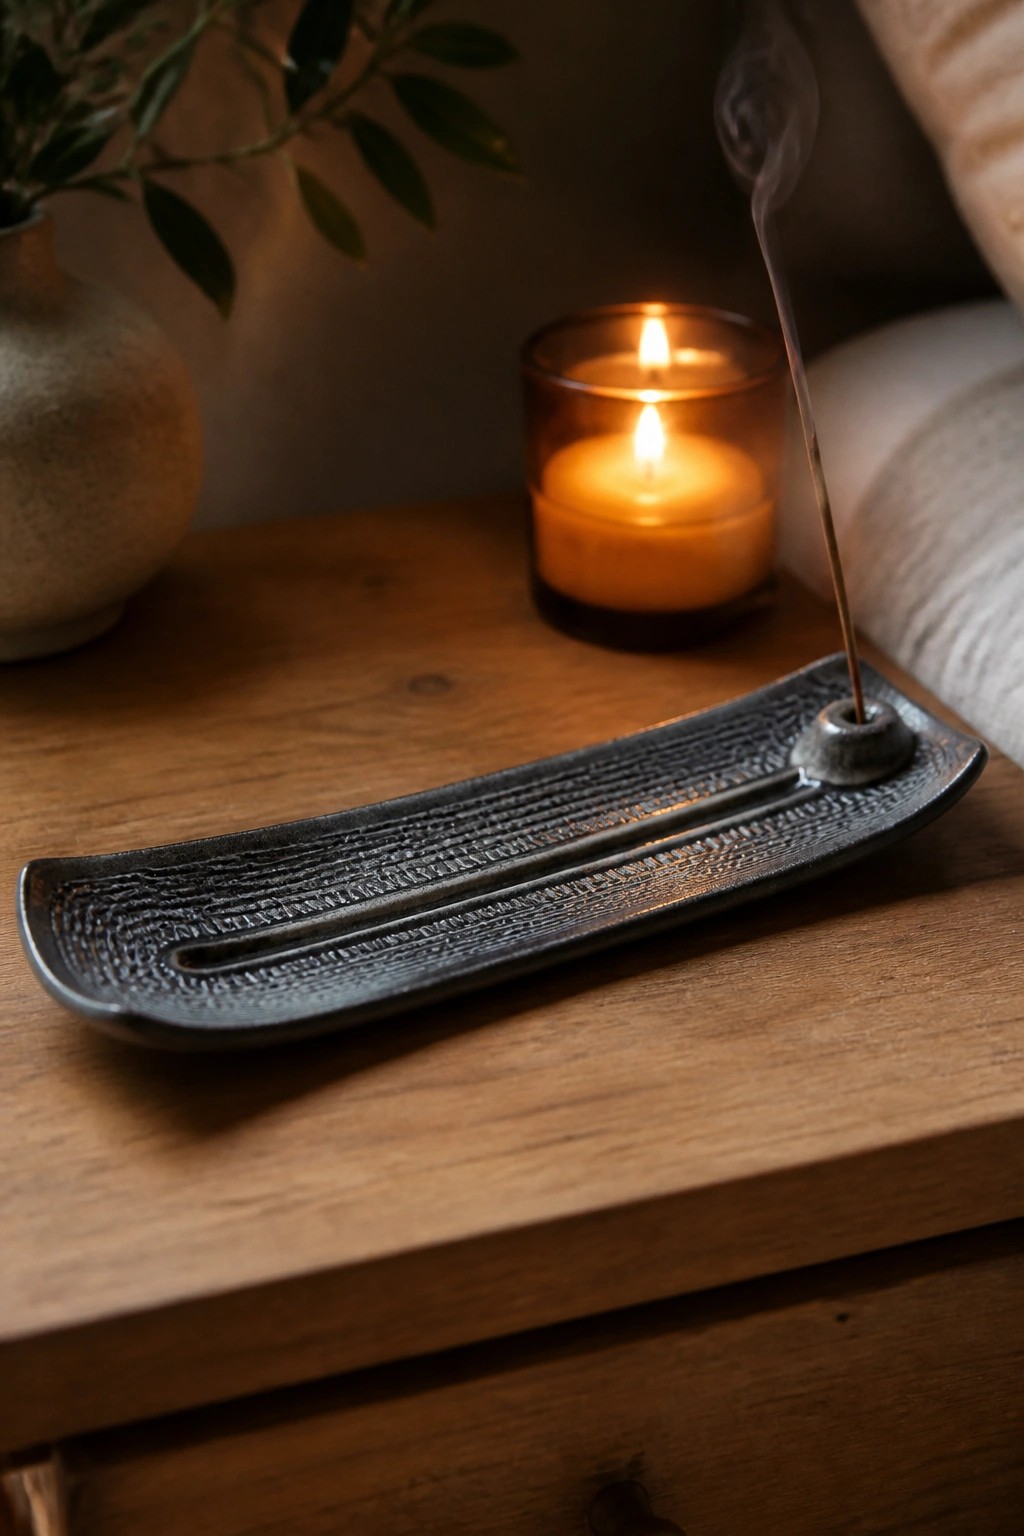
A long rectangular tray built from slabs serves as an incense holder by combining a flat base with a narrow central groove and a small raised cup at one end to hold the stick upright. The surface shows repeated linear impressions rolled or stamped into the clay, then finished with a dark matte glaze that makes the texture stand out. This creates a simple, functional piece that manages ash while keeping a low profile on a surface.
What makes this idea useful is how the narrow shape slides easily onto crowded tabletops or shelves. You could change the texture by swapping the stamp pattern or shorten the tray to fit a smaller space like a desk corner. The groove keeps the design practical for daily use, and the same slab method could be adapted into a wider version for holding crystals or small tools. A piece like this stands out on Pinterest because the clean lines and visible texture read clearly even in small photos.
Frequently Asked Questions
What tools and materials are best suited for creating bold slab pottery shapes with intricate details?
Start with a high-quality stoneware or porcelain clay that has good plasticity and strength for large forms. Use a sturdy slab roller or rolling pins with guides for even thickness, along with templates made from cardboard or wood for precise bold shapes. For creative details, gather items like texture mats, stamps, carving tools, and slip trailing bottles. Always keep your workspace clean and use plastic sheets to prevent drying during construction.
How do I ensure my advanced slab pieces maintain their structure without collapsing or cracking?
Build forms in stages and allow partial drying between attachments to reduce stress on joints. Score and slip all connections thoroughly, then reinforce seams with coils of clay on the inside. Support large bold shapes with props like foam or newspaper during drying, and cover pieces loosely with plastic to control moisture loss evenly. Test small prototypes first to refine your approach before scaling up.
What techniques help add unique creative details to slab pottery without overpowering the bold forms?
Layer textures by pressing objects like lace or leaves into the clay at the slab stage, then carve or incise lines after assembly for depth. Attach hand-built elements such as handles or protrusions using slip, and experiment with inlays of contrasting clay colors. Keep details focused on key areas like rims or bases to maintain visual balance, and consider underglaze painting before bisque firing for added dimension.
Which firing and glazing methods work well for these advanced slab ideas?
Bisque fire slowly to around cone 04 to avoid thermal shock in larger pieces. For glazing, apply multiple thin layers of high-fire glazes that can withstand bold forms, and consider wax resist techniques to highlight creative details. Test glazes on sample tiles made from the same clay body, and use kiln stilts or shelves with proper spacing to prevent warping during the final firing to cone 6 or higher.
How can beginners adapt these 20 ideas if they lack experience with complex slab work?
Start by simplifying one or two bold shapes from the list, such as angular vases or geometric bowls, and practice basic slab joining on smaller scales. Watch tutorials on scoring and slipping techniques, then gradually incorporate details like surface carving. Join a local pottery studio for feedback, and document your process with photos to track improvements and build confidence over multiple projects.

Pottery Path is my cozy corner of the internet where I share clay ideas, pottery inspiration, and simple projects you can recreate at home. I love exploring everything from air dry clay to handbuilt pottery to cute minis that brighten your day. My goal is to make clay crafting feel easy, fun, and welcoming for anyone who wants to try it.
You will find beginner friendly tutorials, creative pottery painting ideas, and lots of warm inspiration for slow and happy crafting. If you enjoy hands on creativity, this space will feel like home.