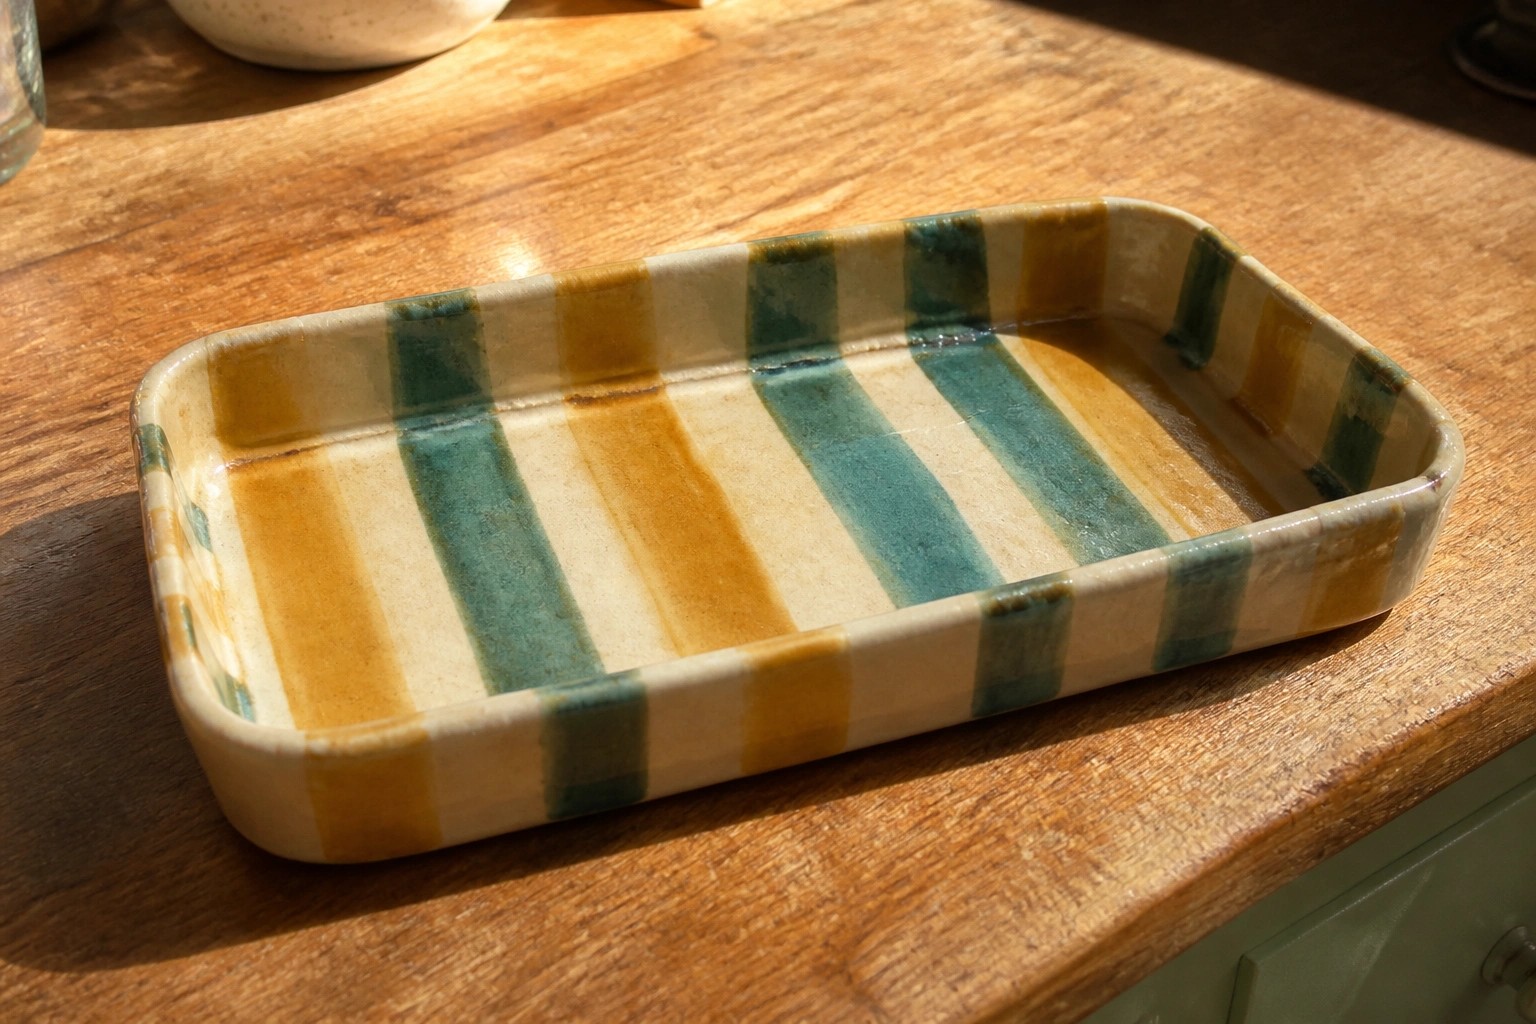
I got into slab pottery a few years ago because it felt more approachable than other methods.
These projects rely on simple rolling and cutting steps that do not need much equipment.
I tried a handful of them myself and noticed they helped me feel steadier with each attempt.
The list here focuses on small pieces that build basic skills without rushing the process.
They worked for me when I wanted to practice regularly and see real progress.
Striped Rectangular Slab Tray
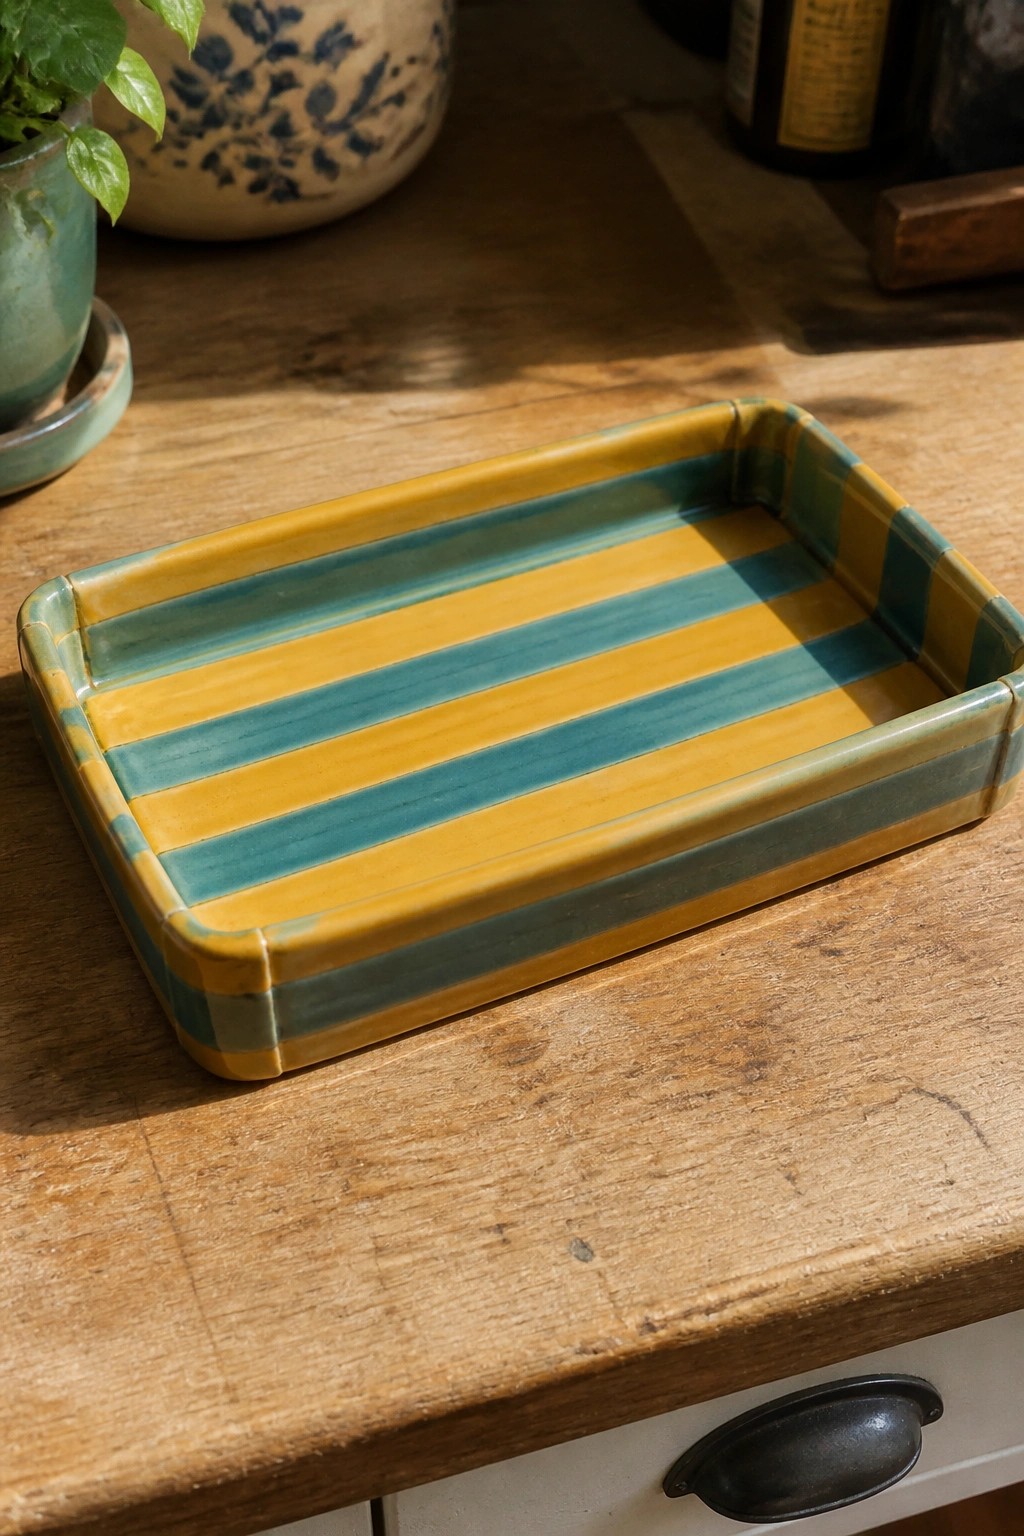
A rectangular tray built from slabs works well with a simple striped glaze pattern. The design uses alternating bands of yellow and teal across the base, with matching vertical stripes on the short sides. This approach keeps the surface flat while the color blocks add visual interest without needing extra carving or texture. The tray stays functional for holding small items while the pattern makes it stand out.
What makes this idea useful is how easily the stripe layout can be repeated or changed to other color pairs. It fits on a coffee table or kitchen counter for keys and mail, or as a plant saucer in a bright spot. You could scale the same slab method down for a soap dish or up for a larger serving piece. The clean lines also translate well to other slab projects like coasters or shallow boxes.
Painted Smiley Face Mug
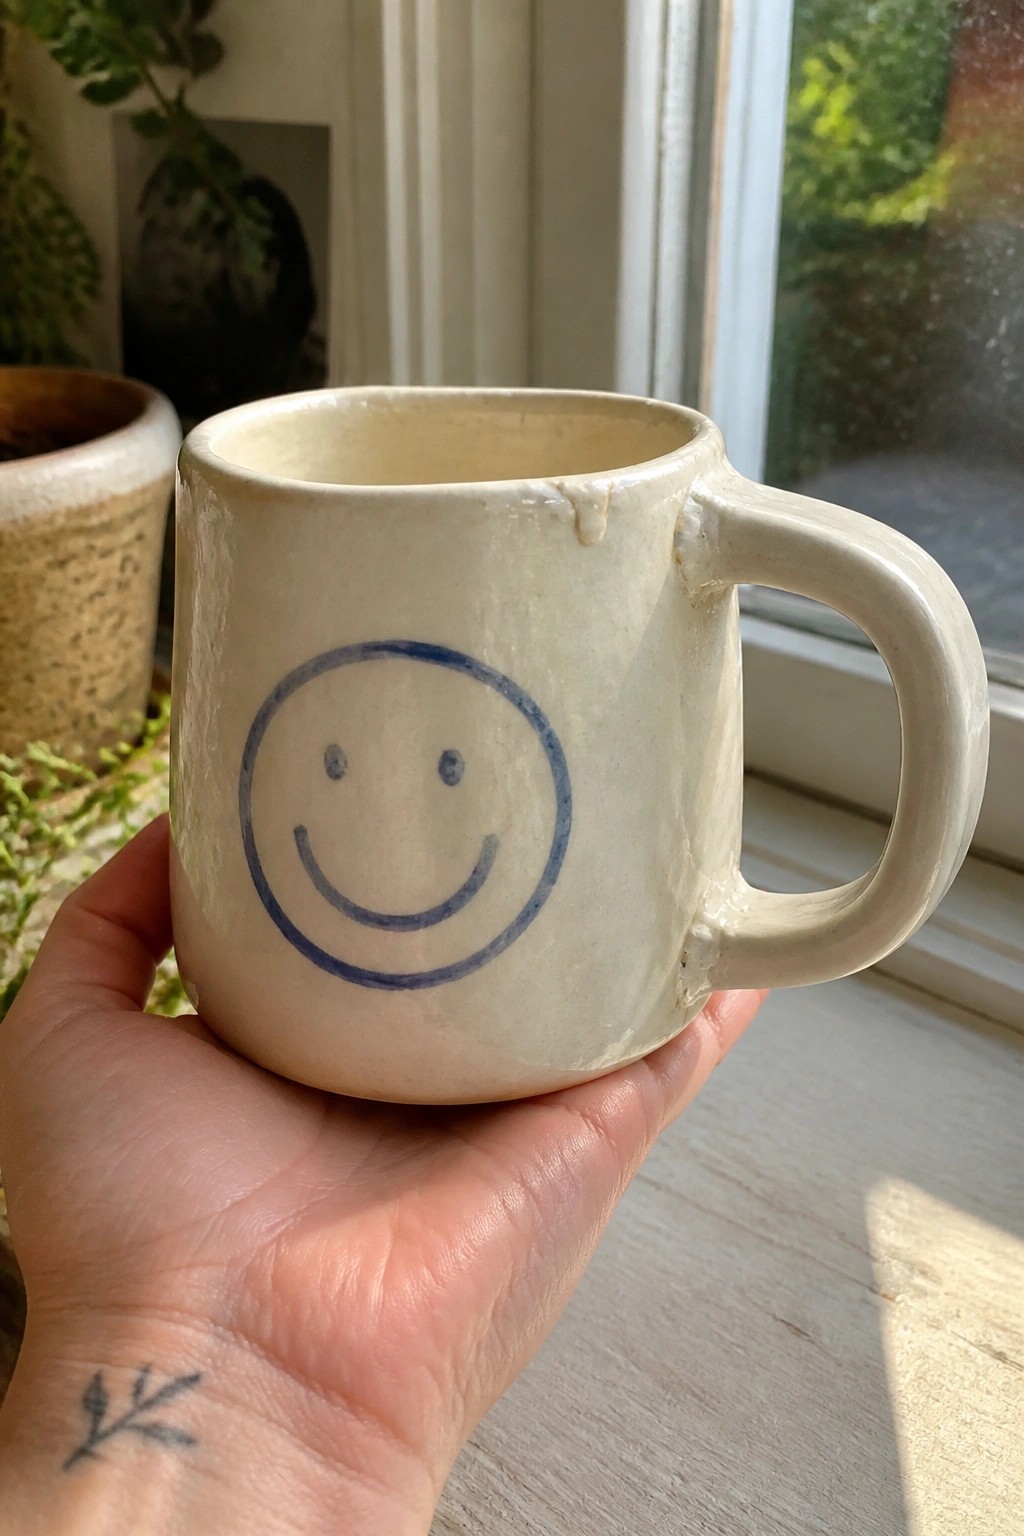
A handbuilt ceramic mug carries a simple blue smiley face painted directly on the front surface. The round motif sits centered on the body, using basic line work that stays visible even after glazing. This approach turns an ordinary mug into a kitchen item that still functions for daily drinks while adding a clear visual element.
What makes this idea useful is how the painted face requires only underglaze and a steady hand, so you can finish the piece in one session after the form is made. The same motif adapts easily to a set of small cups or a matching sugar bowl without changing the slab construction method. In a kitchen or on a desk, the compact shape keeps it practical for holding pens or spoons while the design makes the object easy to spot in photos for sharing online.
Two-Section Slab Bowl
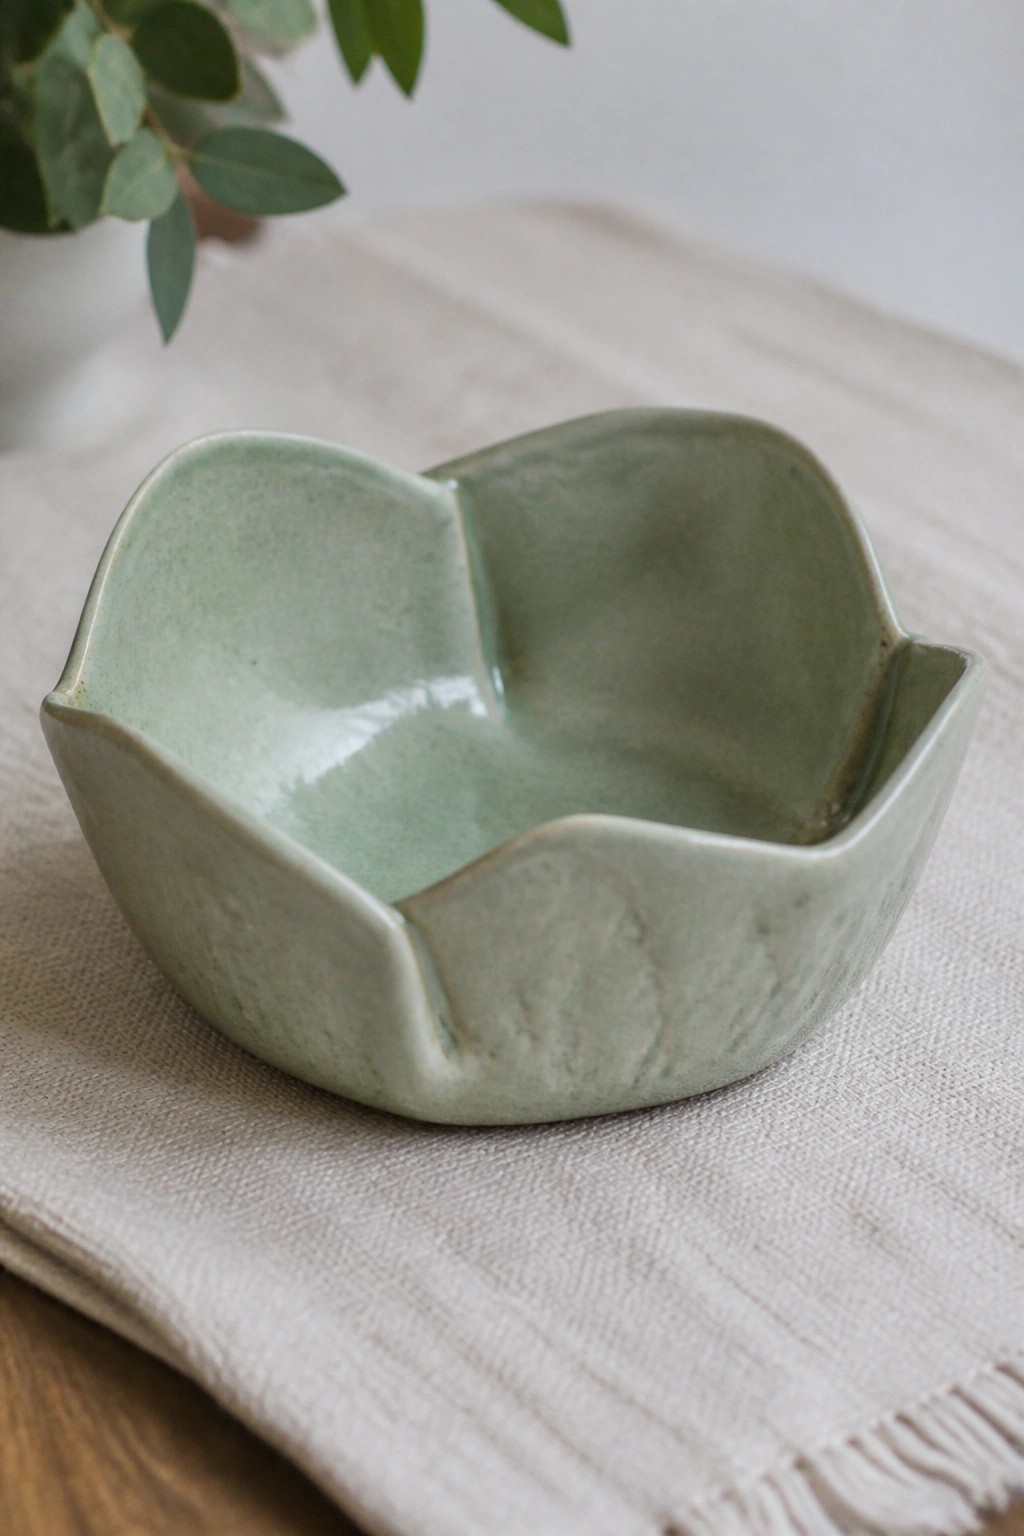
A two-section slab bowl gives you separate spaces in one small dish, useful for snacks, dips, or small kitchen items. The rim is shaped by pinching and folding the clay edges to create soft waves and a slightly organic outline. A single soft green glaze covers the whole piece and lets the slab seams and surface texture remain visible.
The shape does a lot of the work here because the division is built right into the base form. You can change the depth or curve the rim differently to turn the same idea into a jewelry tray or a small planter saucer. For a gift this style works well because it looks finished without needing extra decoration or handles.
Pressed Leaf Slab Tile Wall Hanging
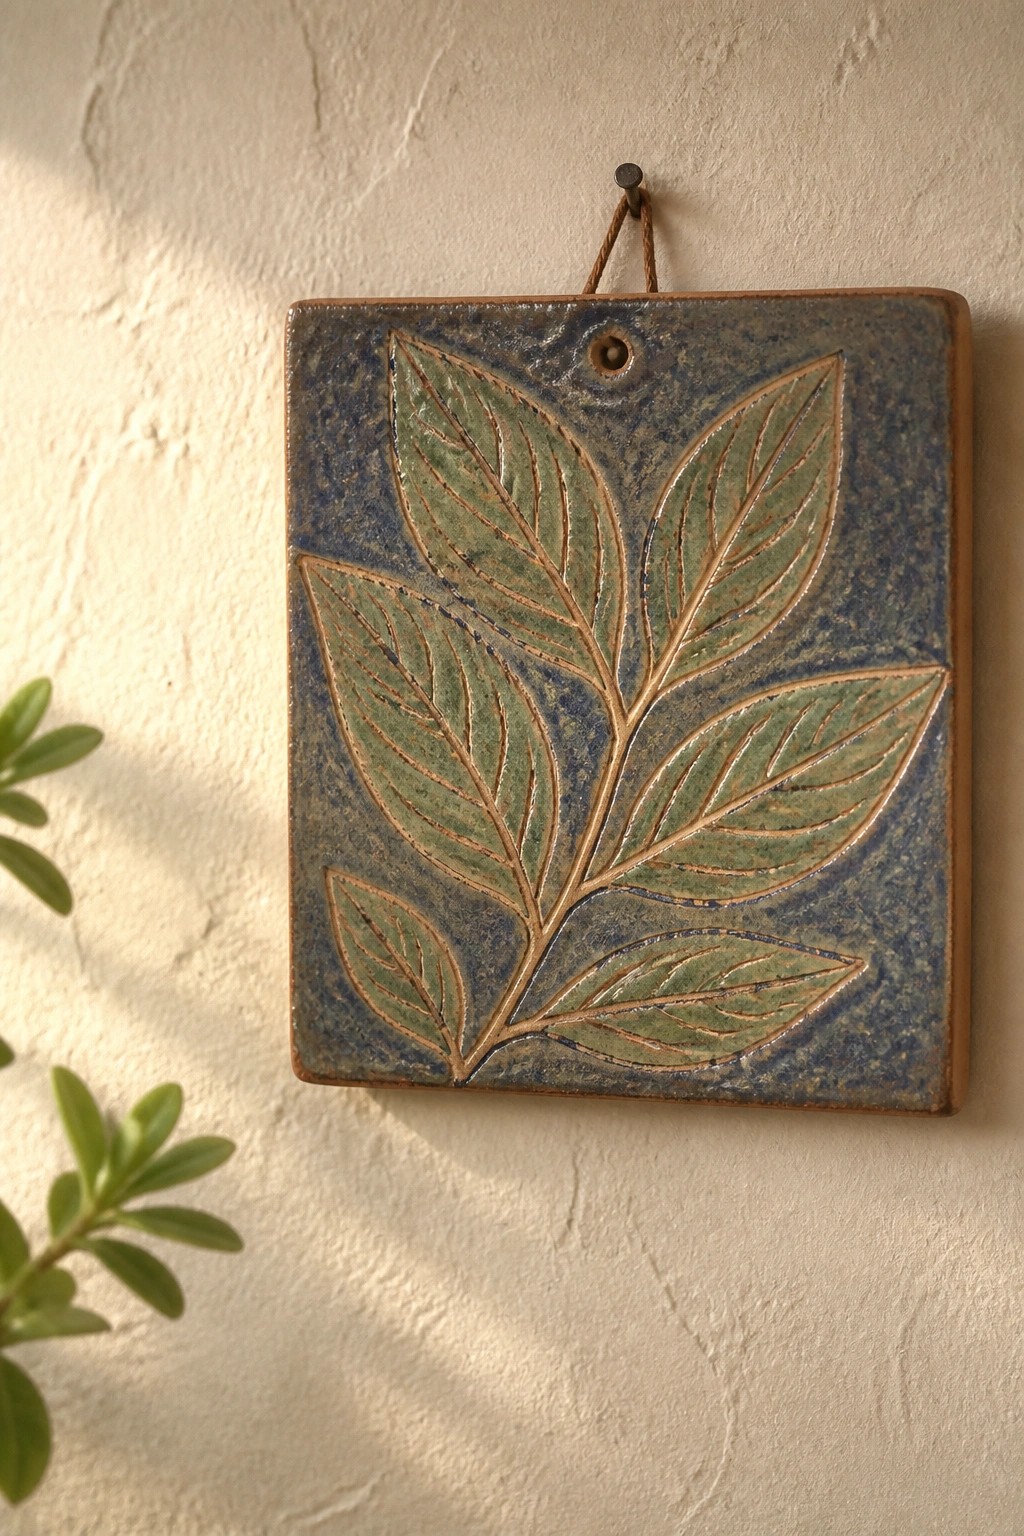
A flat square tile made from a rolled slab of clay offers a straightforward way to create wall decor using a single leaf or branch motif. Pressing or carving the foliage into the surface before glazing adds clear outlines and texture that stand out once fired. Blue and green glazes applied in sections keep the design readable while the drilled hole at the top makes hanging simple with cord or wire.
What makes this idea useful is how easily the same slab and leaf technique can be adapted to different sizes or repeated for a set of matching tiles. A smaller version works as a trivet or plant stand base, while the same leaf press can be applied to the side of a shallow tray or box. The design stays beginner-accessible because it relies on basic rolling, texture transfer, and selective glazing rather than complex construction.
Square Slab Planter with Contrasting Interior Glaze
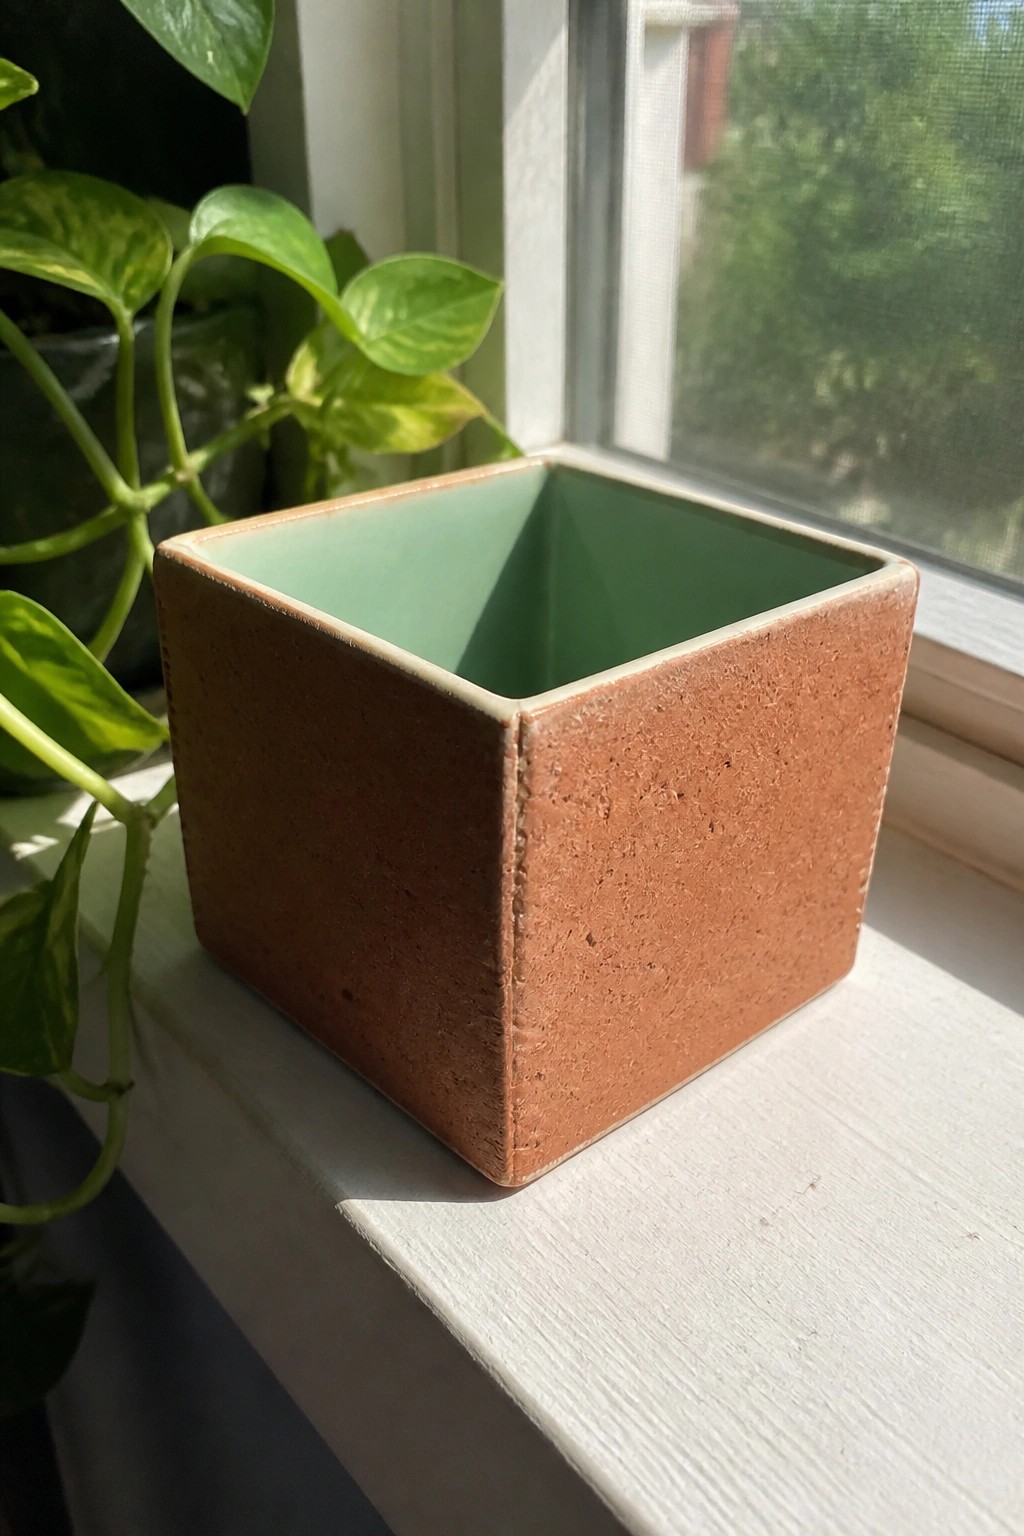
A square planter formed from four flat clay slabs creates a clean geometric container that suits small houseplants. The exterior stays matte with a natural clay texture while the inside receives a solid layer of light green glaze for contrast. This approach keeps the focus on basic slab construction and simple glazing without added surface decoration. The result is a compact pot that works as both a functional planter and a decorative object on a windowsill or shelf.
What makes this idea useful is how the flat sides stack and join quickly once the slabs are cut to size. You can adapt the same template by changing the interior glaze color or scaling the dimensions up for a larger plant. A drainage hole added before firing makes the piece more practical for live plants. The square shape also stacks well in photos, which helps when sharing the finished piece online.
Polka Dot Rectangular Slab Tray
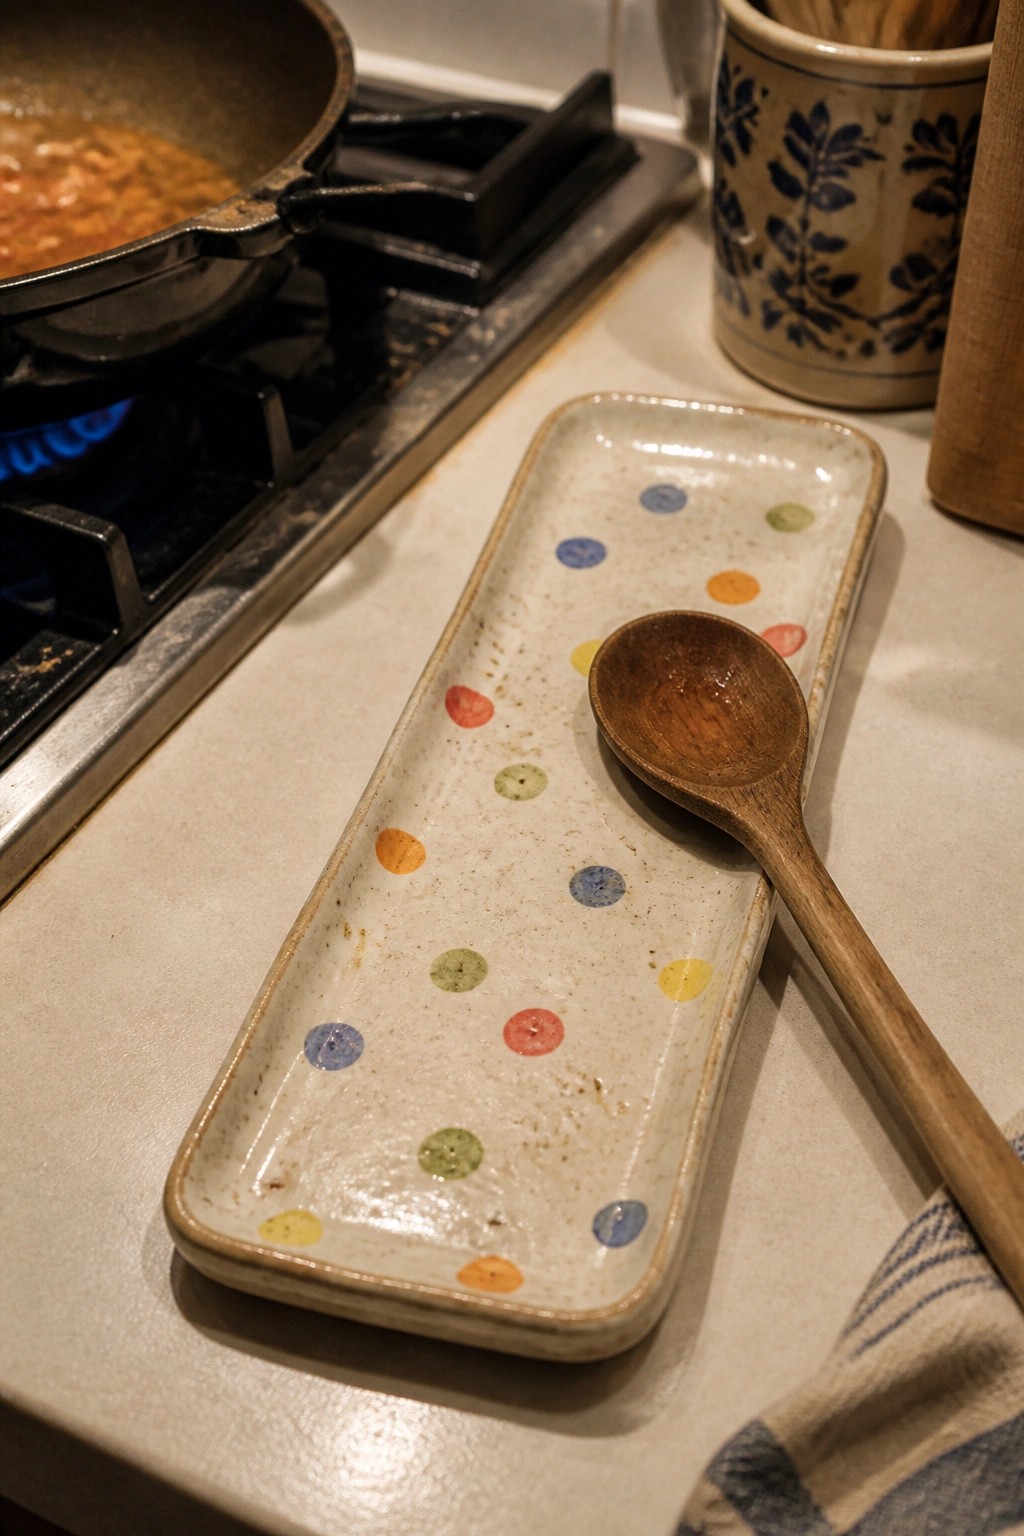
A rectangular slab tray built from a flat clay sheet and decorated with scattered painted dots creates a simple kitchen item that doubles as a spoon rest or small serving dish. The dots use multiple colors placed at random intervals across a light speckled glaze, which keeps the surface lively while the elongated shape fits utensils without taking up much counter space. This approach stays beginner-friendly because it relies on rolling out a slab, cutting straight edges, and adding surface color rather than complex construction.
The painted dots make the design easy to personalize by changing color choices or spacing, and the same slab method can be adapted into a shorter version for a single spoon rest or lengthened into a narrow trivet. In a kitchen the shape holds wooden spoons or small tools neatly while the durable glaze handles daily use and occasional washing. You could rework the idea with fewer colors or different motifs to match existing dishware without needing new molds or advanced techniques.
Small Pink Ring Dish
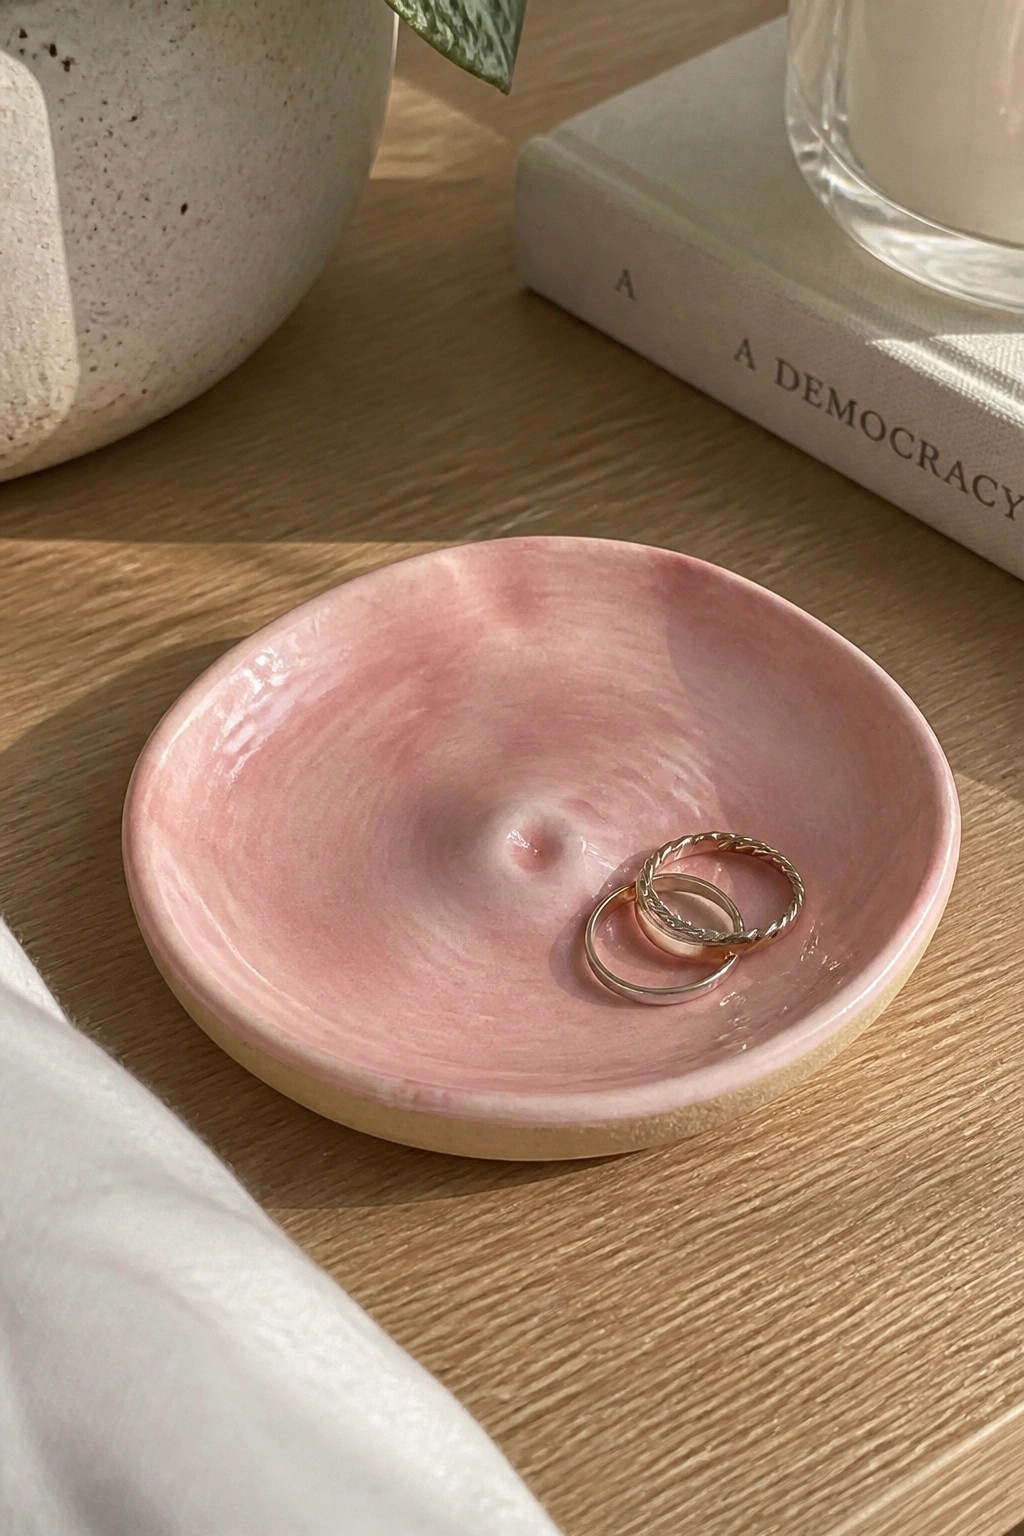
A shallow round dish formed from a single slab of clay makes a practical ring holder. The pink glaze covers the interior with a glossy finish that highlights the gentle curve and slightly irregular rim. This simple shape fits the ring dish category and keeps the project focused on basic slab rolling and shaping.
What makes this idea useful is how fast it assembles with one thin slab pressed over a small hump or bowl form. Set it on a dresser or bathroom shelf to hold everyday jewelry. You can swap the glaze color or stretch the same slab into a slightly larger tray for keys or loose change. The compact size also works well for quick practice pieces when you want to test new glazes without committing to bigger forms.
Slab Built Soap Dish with Drainage Slots
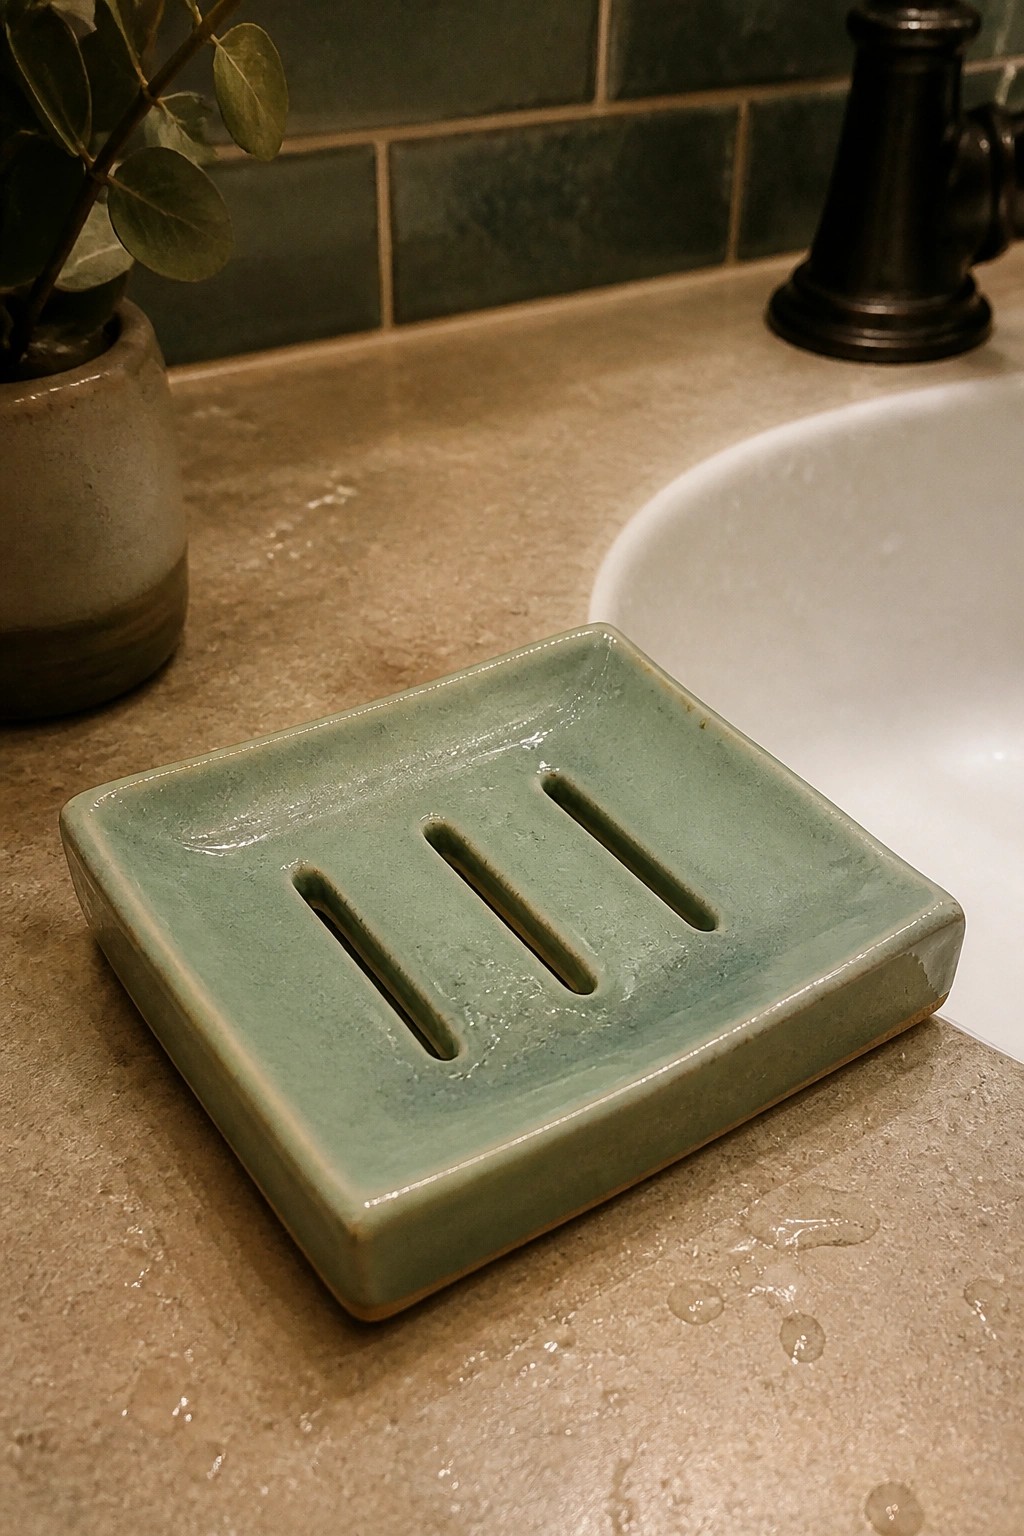
A square soap dish formed from clay slabs works well as a bathroom item because the flat base and raised edges keep a bar of soap contained while three parallel slots cut through the center let water drain through. The light green glaze gives it a clean look that fits most bathroom colors without standing out too much. This project stays simple since it only requires rolling out slabs, cutting a square shape, and adding the slots before glazing.
What makes this idea useful is that the same slab method can be scaled up for a larger tray or shortened into a small spoon rest for the kitchen. The drainage slots are easy to adjust in width or number depending on the size of soap you use most often. For a gift, something like this takes little time to repeat in different glaze colors so you can match a few sets to different bathrooms. The small footprint also makes it practical on crowded counters where a round dish might take up more space.
Scalloped Tea Light Holder
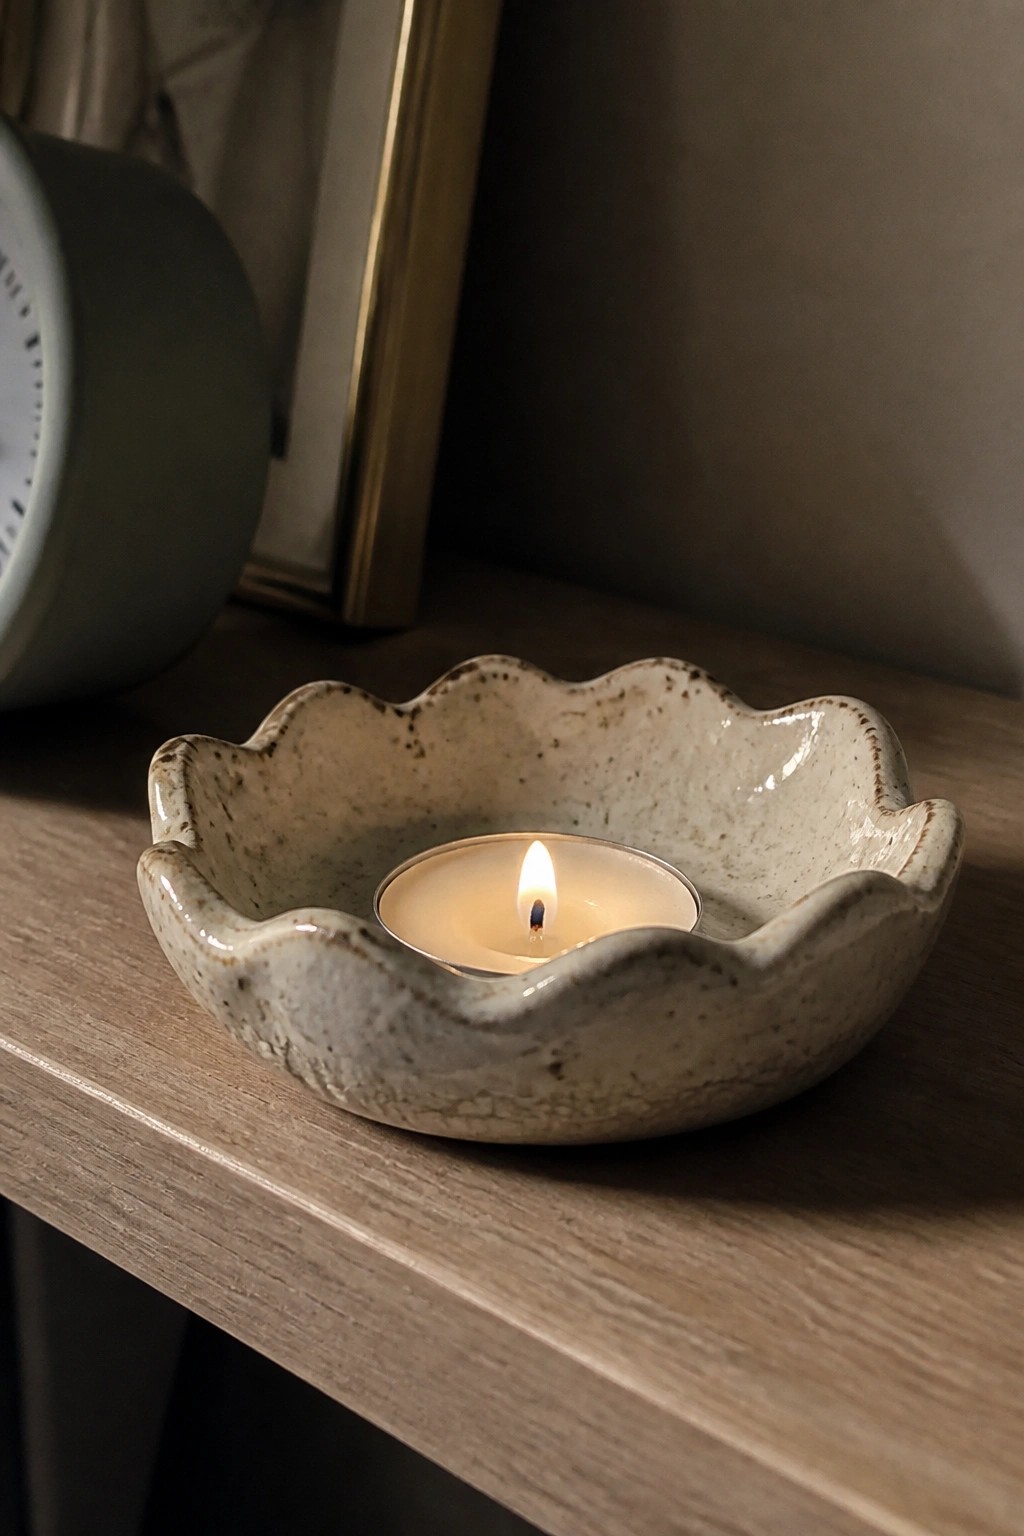
A small slab-rolled dish with a cut or pinched wavy rim holds a standard tea light candle. The irregular scalloped edge and speckled glaze create visual interest through simple shaping and surface texture rather than added decoration. This project stays in the candle piece category and keeps the overall form shallow and wide for easy slab construction.
What makes this idea useful is how the wavy rim gives the dish character while still fitting ordinary tea lights without extra supports. You could adapt the same base shape into a ring dish or small trinket bowl by changing the depth or skipping the candle well. The small scale makes it a quick slab project that works on a shelf, desk, or bathroom counter, and the rim style can be simplified to straight edges or varied with different cutters for future versions.
Two-Tone Utensil Holder with Scored Lines
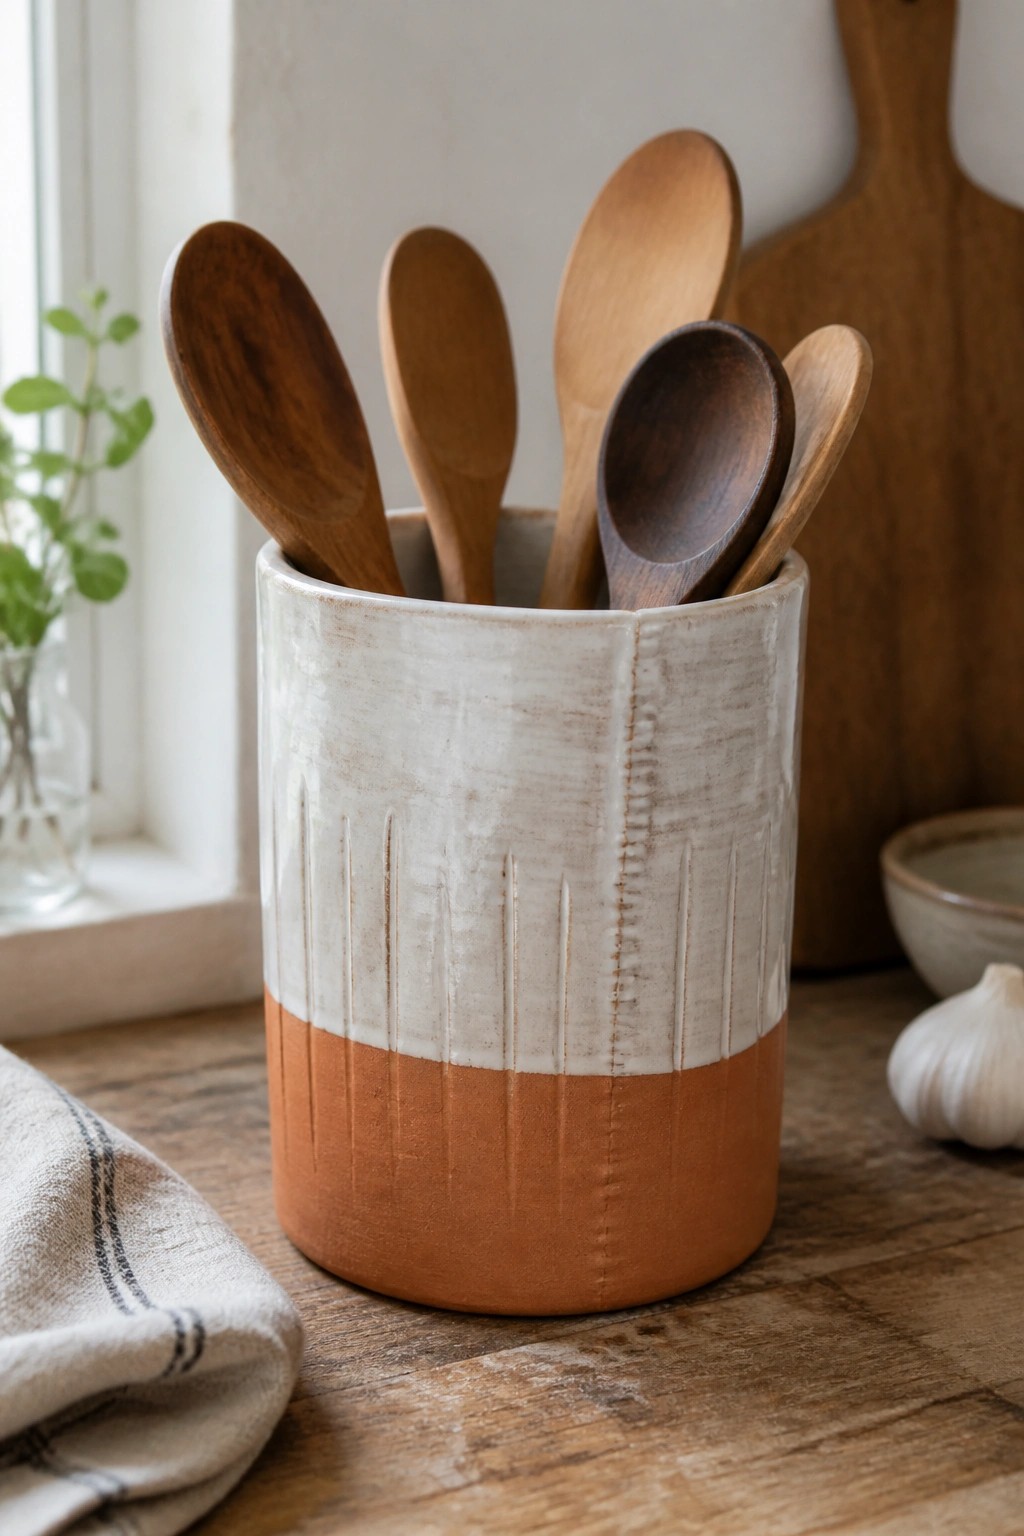
A basic cylinder made from a rolled slab forms a sturdy kitchen utensil holder when finished with a lower terracotta section and an upper white band. Vertical score lines cut into both color zones add texture and break up the smooth surface without requiring extra attachments. The color split keeps the form simple while the lines give it enough detail to stand out on a counter.
The shape does a lot of the work here because a straight cylinder rolls quickly from a slab and joins with one seam. You could adapt the design by reversing the color placement, shortening the terracotta band, or adding the same scoring to a shorter version for a desk pencil cup. In a kitchen this holder keeps spoons and spatulas within reach while taking up little space, and the same proportions work for a small bathroom cup or a larger herb planter.
Square Ceramic Coasters with Painted Motifs
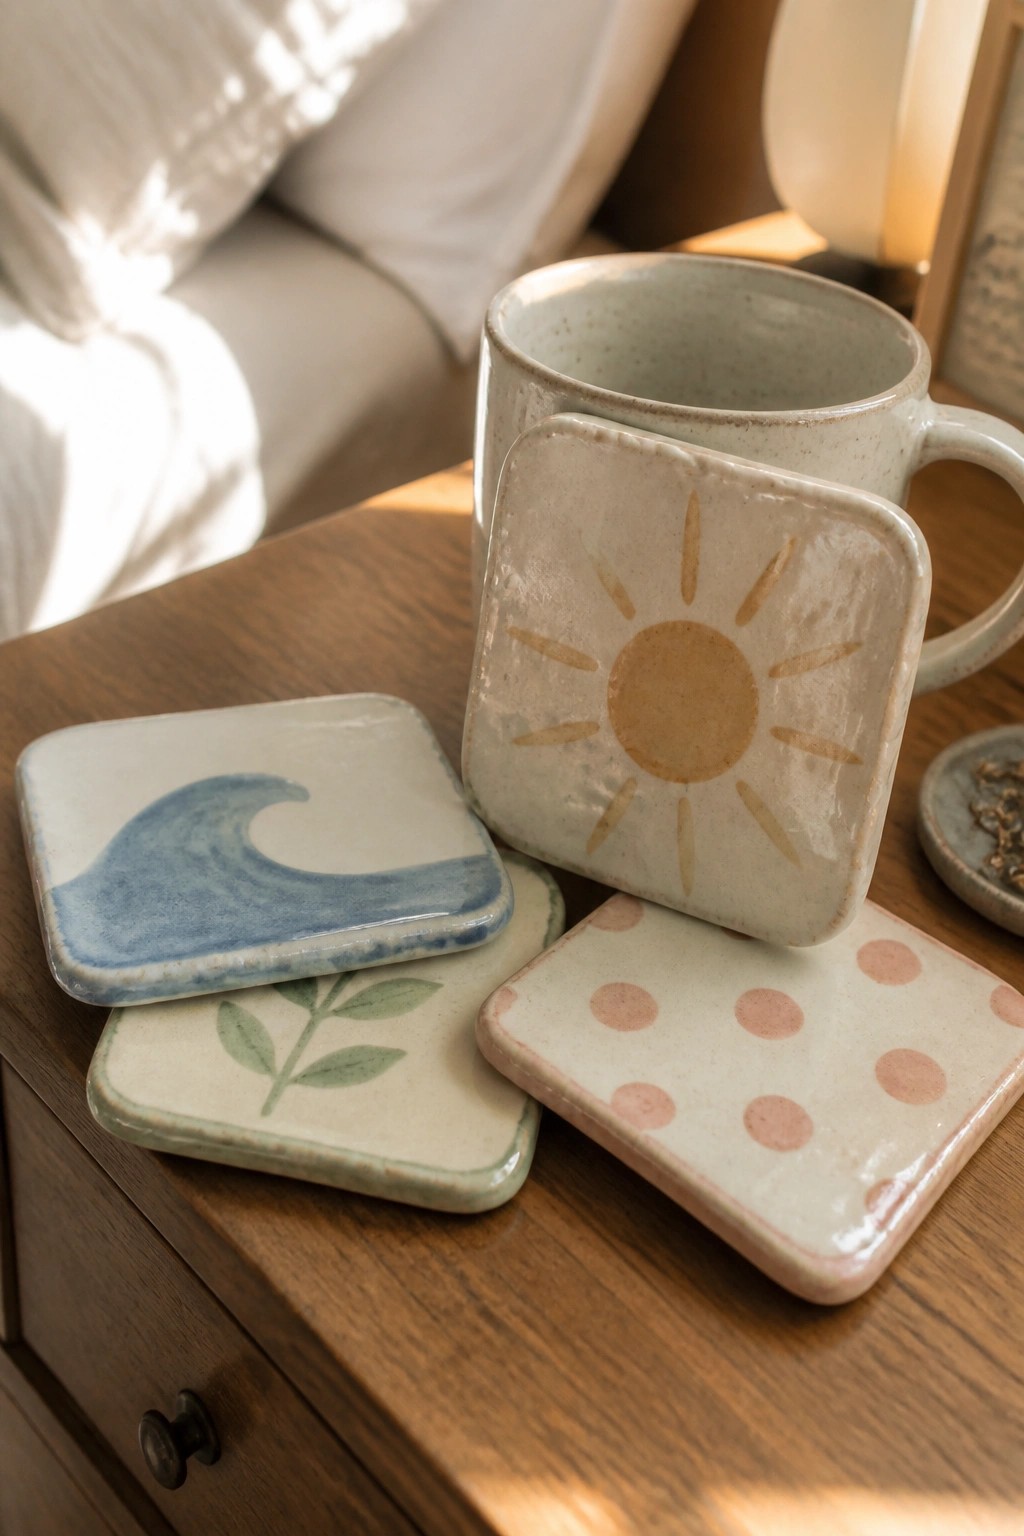
Square slab coasters are cut from flat clay sheets and decorated with simple painted designs before glazing. The examples include a blue wave, a sun with rays, a green leaf branch, and pink dots on light clay bodies. These pieces stay functional as drink rests while the motifs stay visible under a clear glaze layer.
The shape does a lot of the work here because squares stack flat and fit under most mugs without taking up extra space. You can swap the sun motif for stars or change the dots to stripes to match a different room. Sets of four like this work well as quick gifts or as a first project when you want to practice even rolling and clean edges. Scaling the same idea up slightly turns the coasters into small trays for jewelry or keys.
Embossed Floral Slab Tray
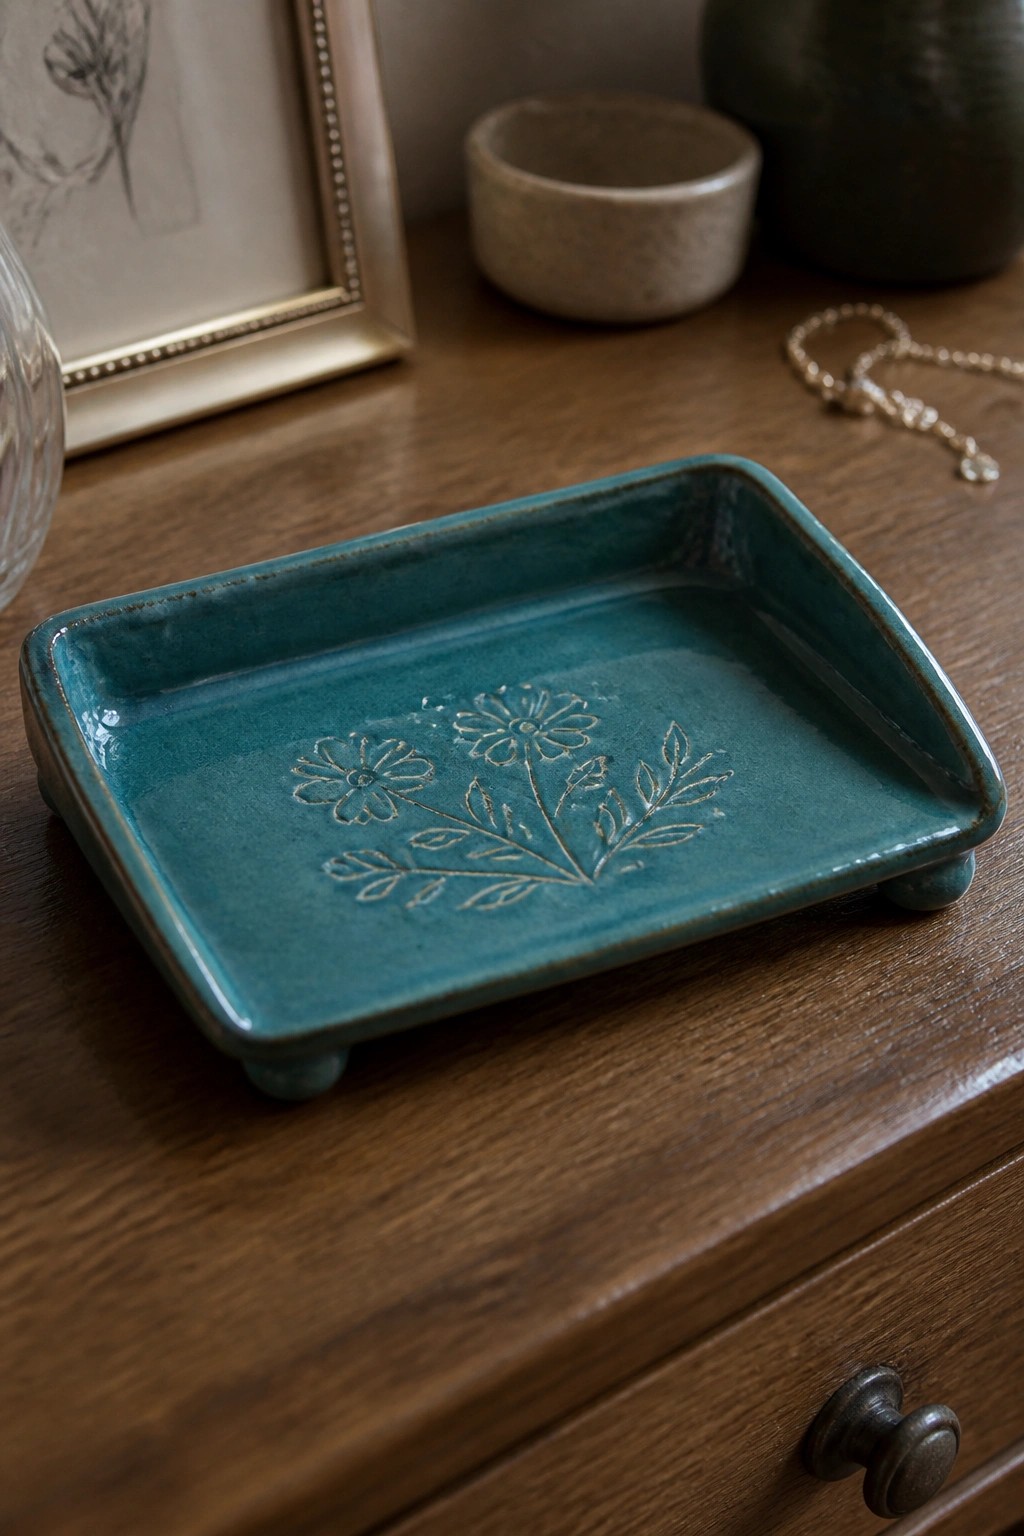
A rectangular tray built from a flat slab of clay creates a stable base that needs only simple side walls added around the edges. The central floral design comes from pressing or carving a motif of flowers and leaves directly into the surface before the piece is glazed in a glossy teal that pools slightly in the recessed areas. Small rounded feet raise the tray just enough to sit cleanly on furniture. This style works as a compact catch-all for jewelry, keys, or small desk items.
The shape does a lot of the work here because the low sides and modest size make it quick to form and dry evenly without warping. You can scale the same slab method down for a ring dish or widen it for a soap tray in the bathroom. Changing the impressed pattern to leaves or abstract lines lets you personalize it without learning new techniques. This kind of project stands out on Pinterest when the glaze color contrasts with the lighter clay body in the design.
Slab Incense Holder with Impressed Lines
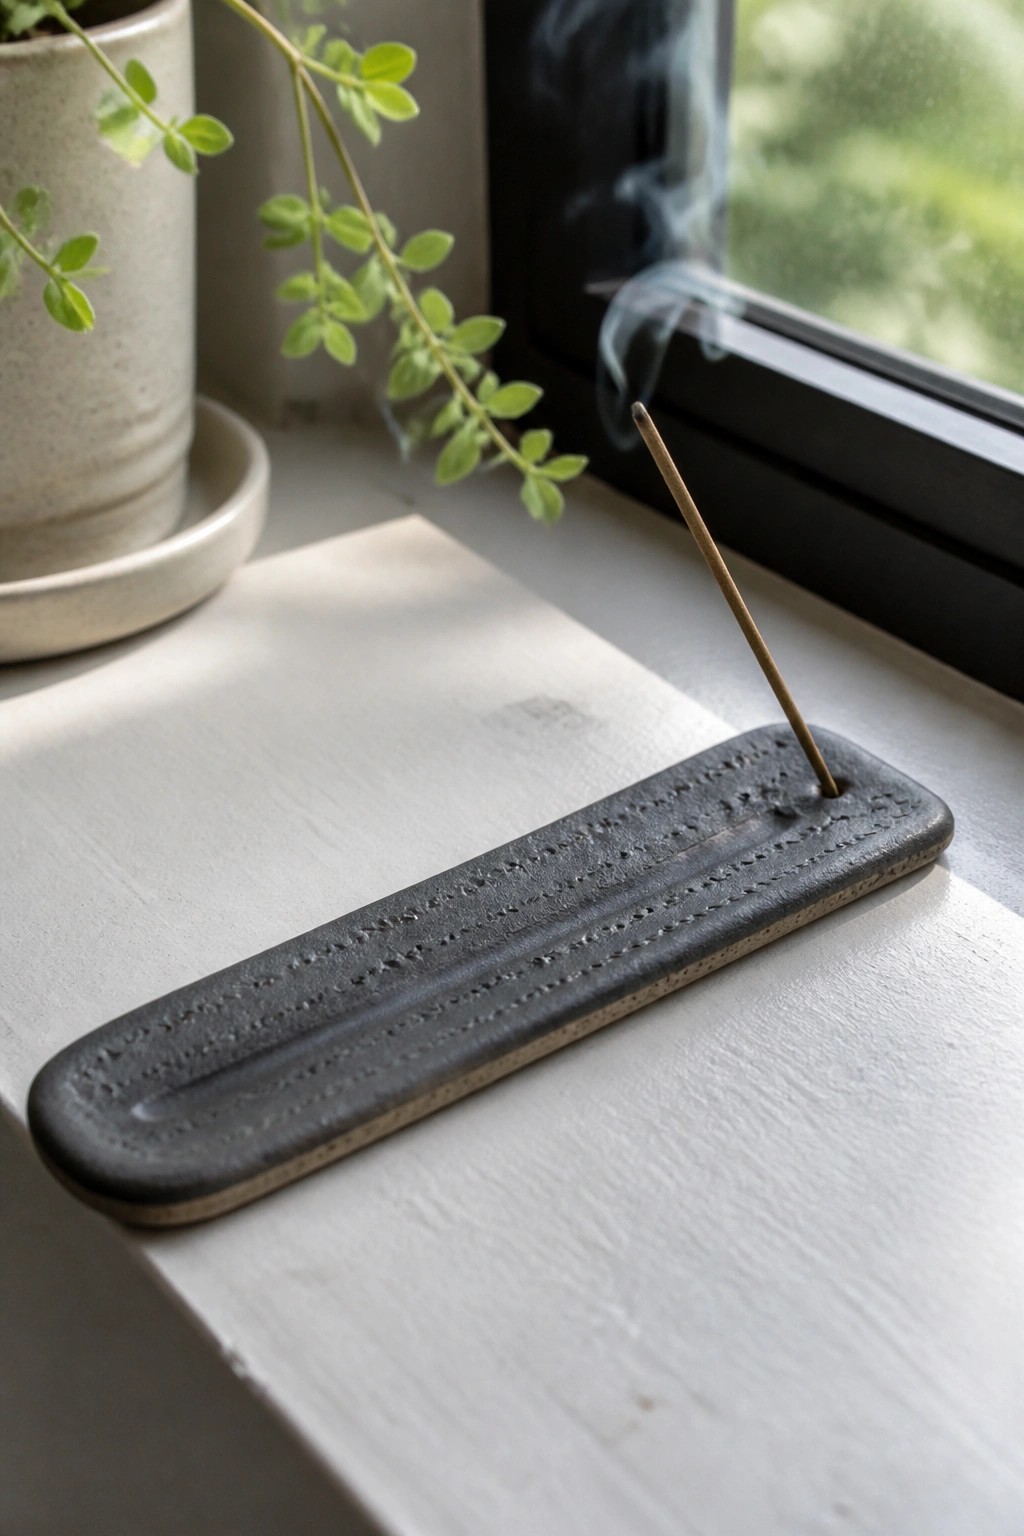
A single rectangular slab of clay makes this incense holder. One end has a small hole to keep the stick upright and a shallow channel running down the center to catch ash. The rows of impressed lines give the surface some structure while the dark finish keeps the overall look simple and clean. This type of holder fits the slab project category because it needs only basic rolling, cutting, and texturing before firing.
What makes this idea useful is how little clay and space it requires. You can shorten the slab for a tighter desk spot or lengthen it to hold multiple sticks at once. Swapping the line pattern for dots or leaving the surface plain changes the look without extra steps. In a bathroom or entryway, the flat shape tucks into small spots where a round holder would not fit as well.
Square Slab Box with Impressed Lid Detail
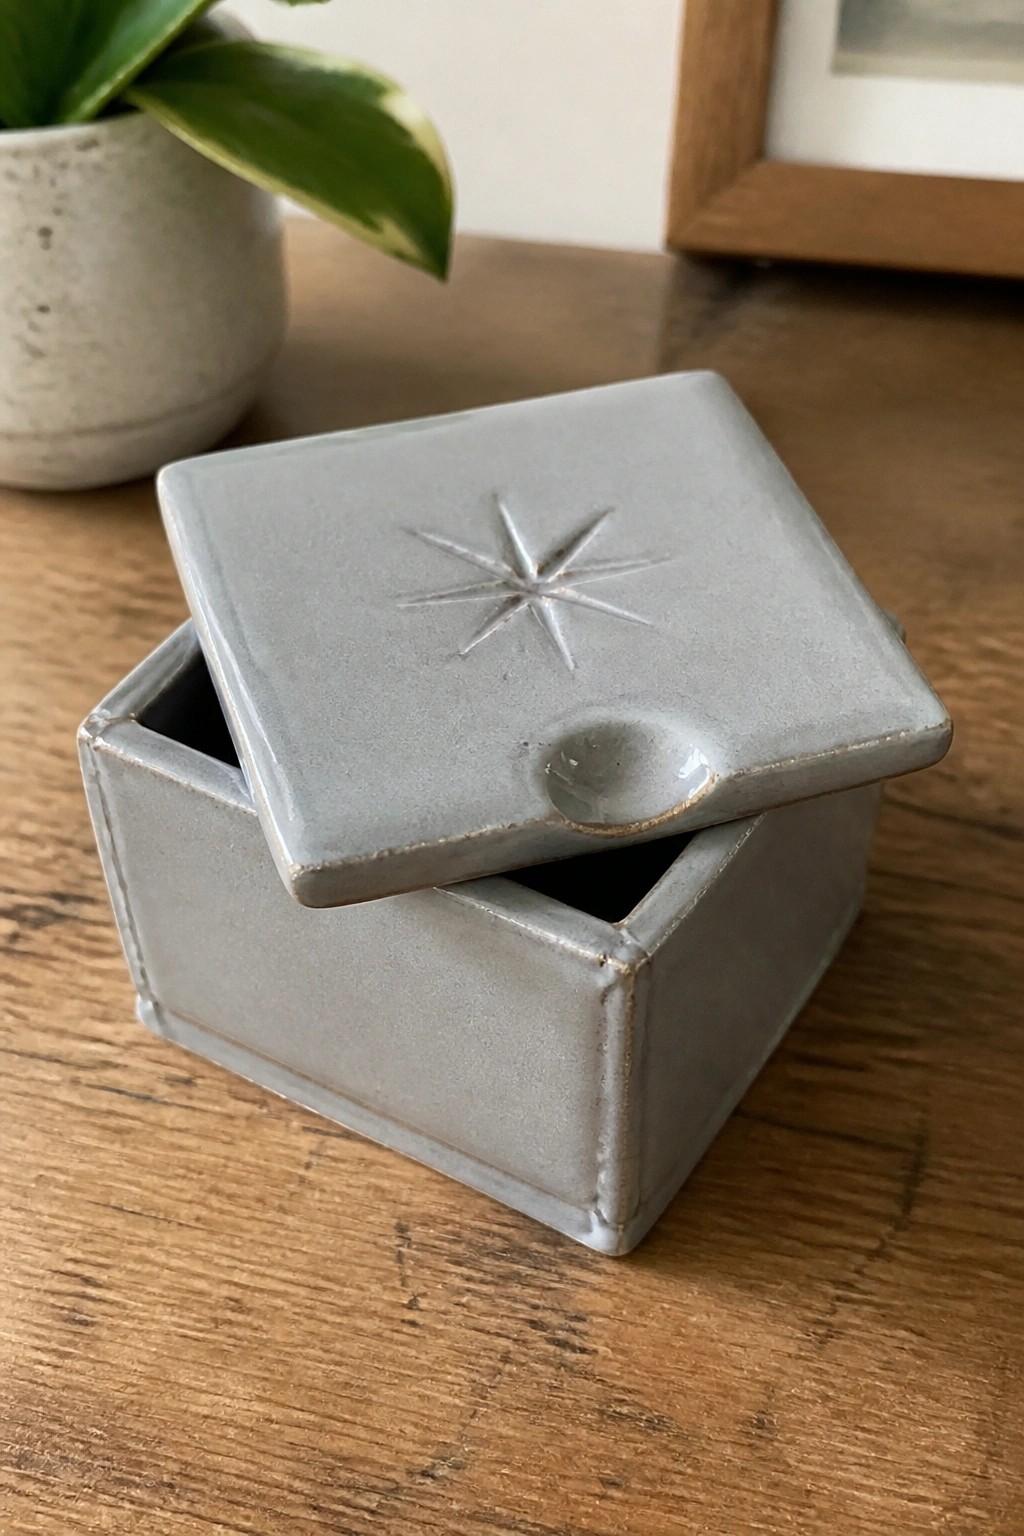
A square box built from clay slabs gives you a straightforward storage piece that works for small items like jewelry, matches, or desk odds and ends. The lid sits flush on top and carries an impressed star pattern in the center plus a small circular depression near one edge that doubles as a finger pull. The matte gray glaze keeps the surface simple while the sharp corners and flat planes highlight the slab construction. This kind of project stays in the small decor or tabletop storage category and needs only basic measuring and scoring to assemble.
The shape does a lot of the work here because the square form stacks easily and uses minimal clay. You can swap the star stamp for any other motif or texture without changing the build steps. A piece like this fits on a nightstand, bathroom counter, or office shelf where a round container would look out of place. For a first slab project it scales down well if you want to test fitting a lid before moving to larger boxes.
Striped Ceramic Napkin Rings
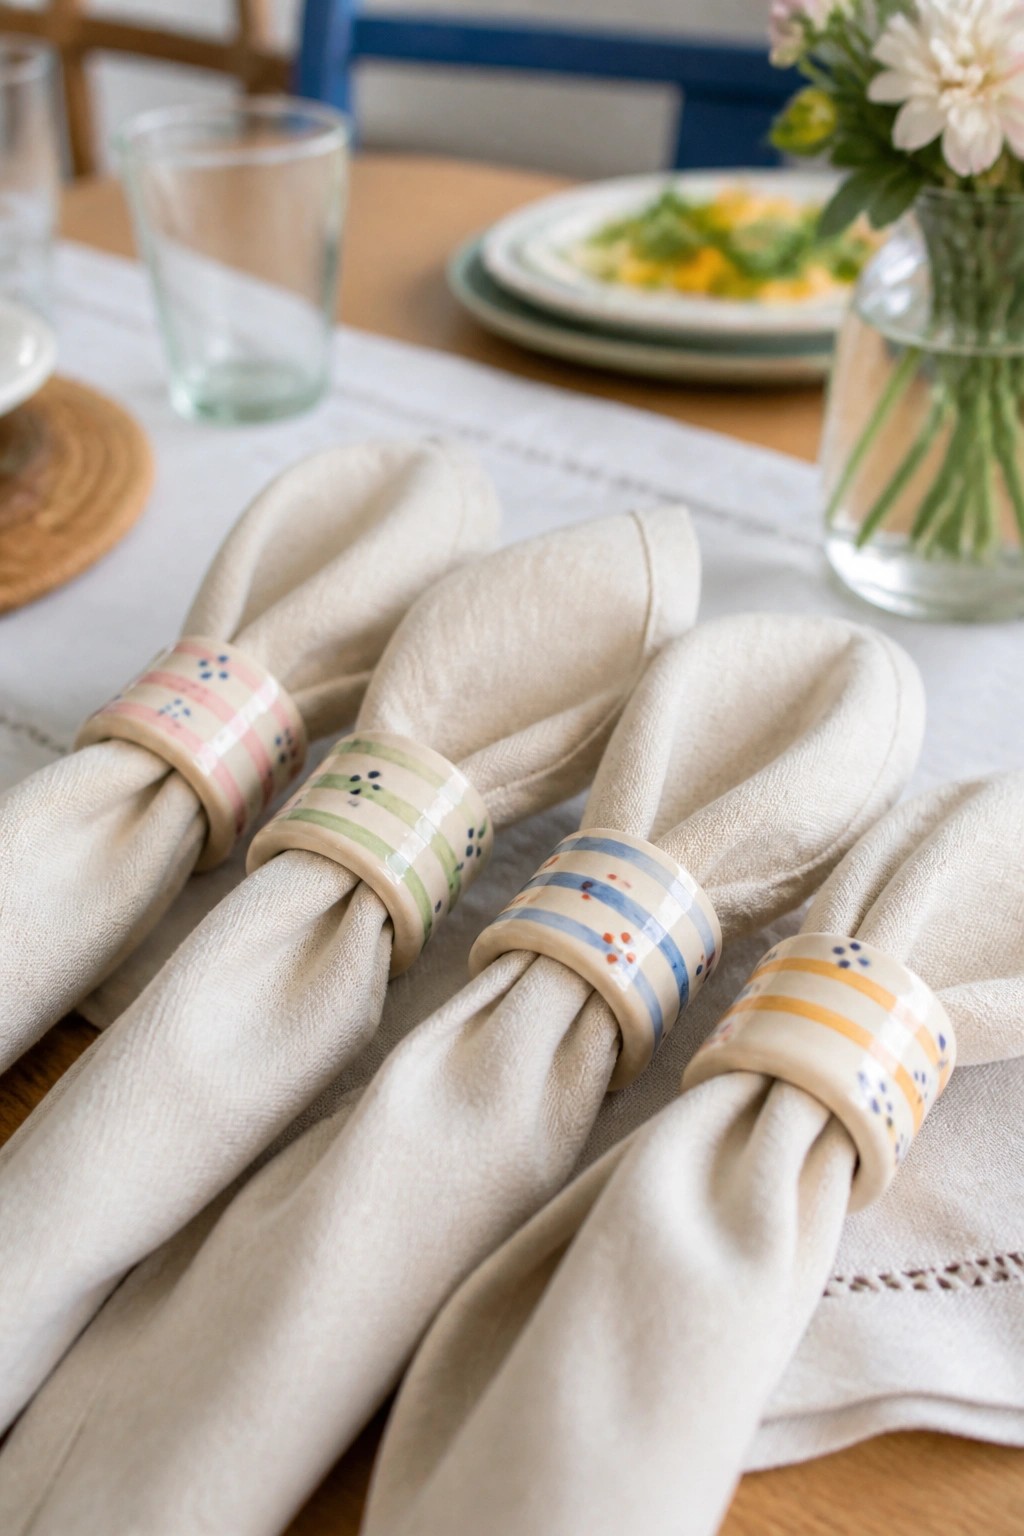
Ceramic napkin rings are formed by rolling a thin slab of clay into a short cylinder and joining the seam cleanly. The rings are then glazed with simple horizontal stripes and scattered dots in soft pastel tones that sit on a light base. This keeps the project focused on surface decoration rather than complicated construction. The finished rings sit neatly around folded fabric and work as small table accessories.
What makes this idea useful is that the same slab method can be adjusted to different diameters for cloth napkins, rolled towels, or even small candles. You can swap the stripe colors or spacing to match existing dishes or try a single bold band instead. In a dining area these rings take up little space on a shelf yet give a coordinated handmade detail. The design also translates easily to a set of matching spoon rests if you flatten one side of the ring before firing.
Rectangular Slab Tray
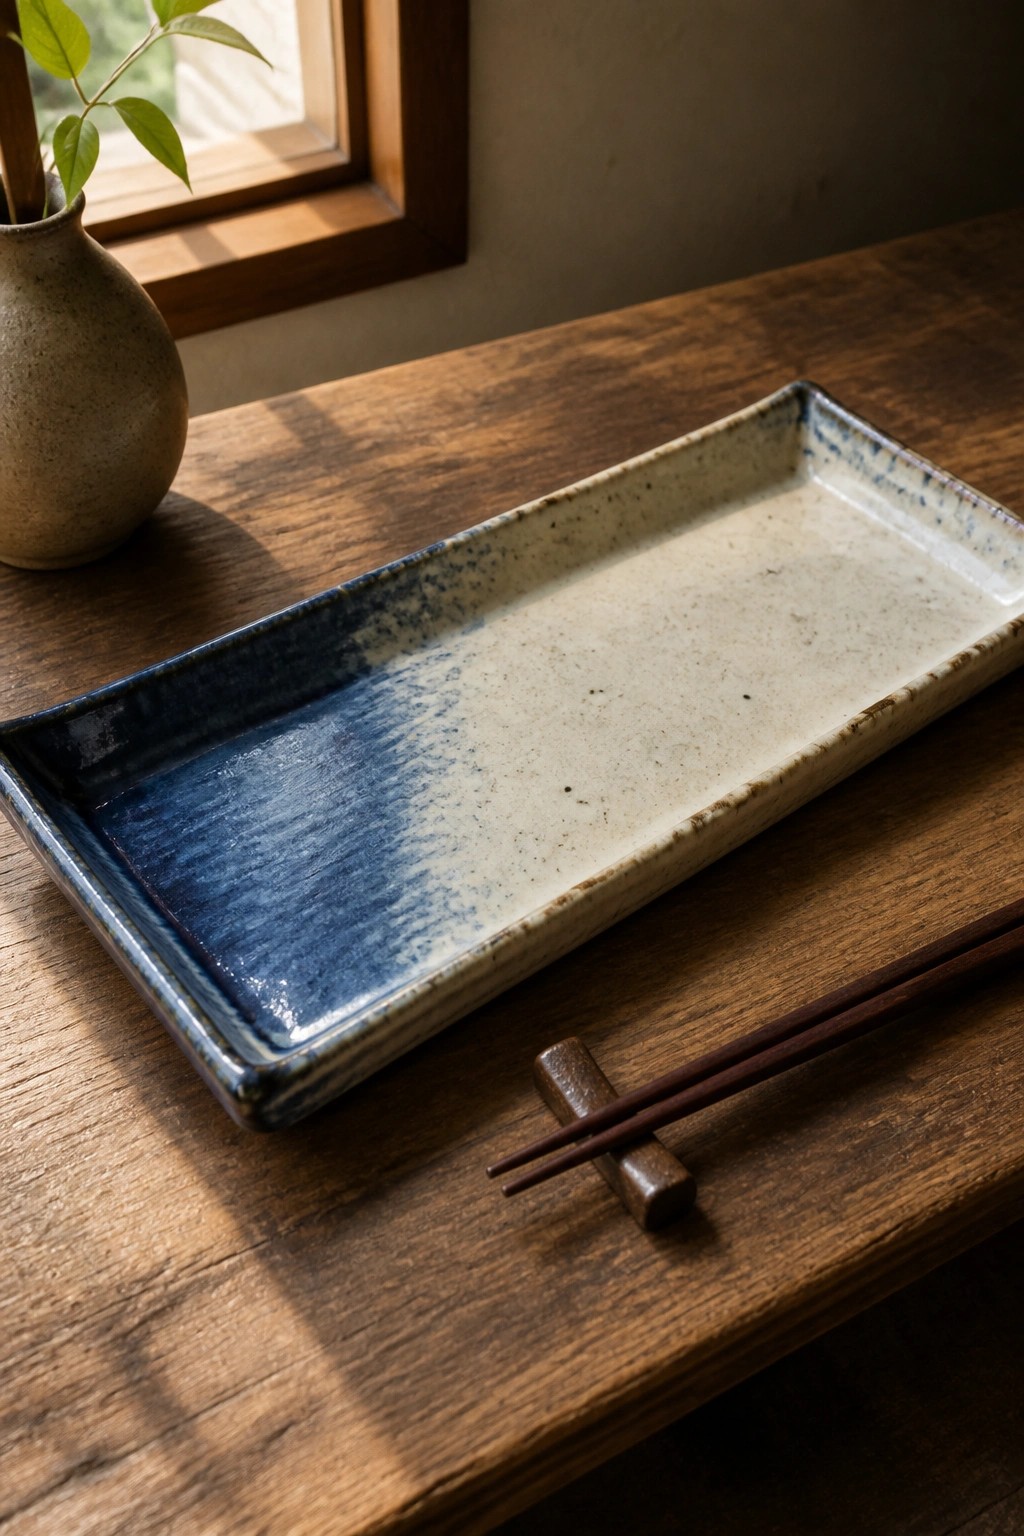
A rectangular tray formed from a single slab of clay makes a practical serving piece for small plates or shared dishes. The design features a deep blue glaze covering one end that fades into a lighter speckled surface, giving visual interest through color shift rather than added patterns. This shape works as a kitchen item because the low sides keep contents contained while the flat base stays stable on a table.
What makes this idea useful is how the long narrow proportions suit appetizers or sushi without needing much counter space. You can adapt it by changing the glaze blend to other colors or leaving one section unglazed for a two-tone effect. The same slab construction could scale down into a smaller version for desk use or shorten into a soap dish for the bathroom. For a gift this shape stands out on Pinterest because it looks finished with minimal surface detail.
Tiny Salt Cellars
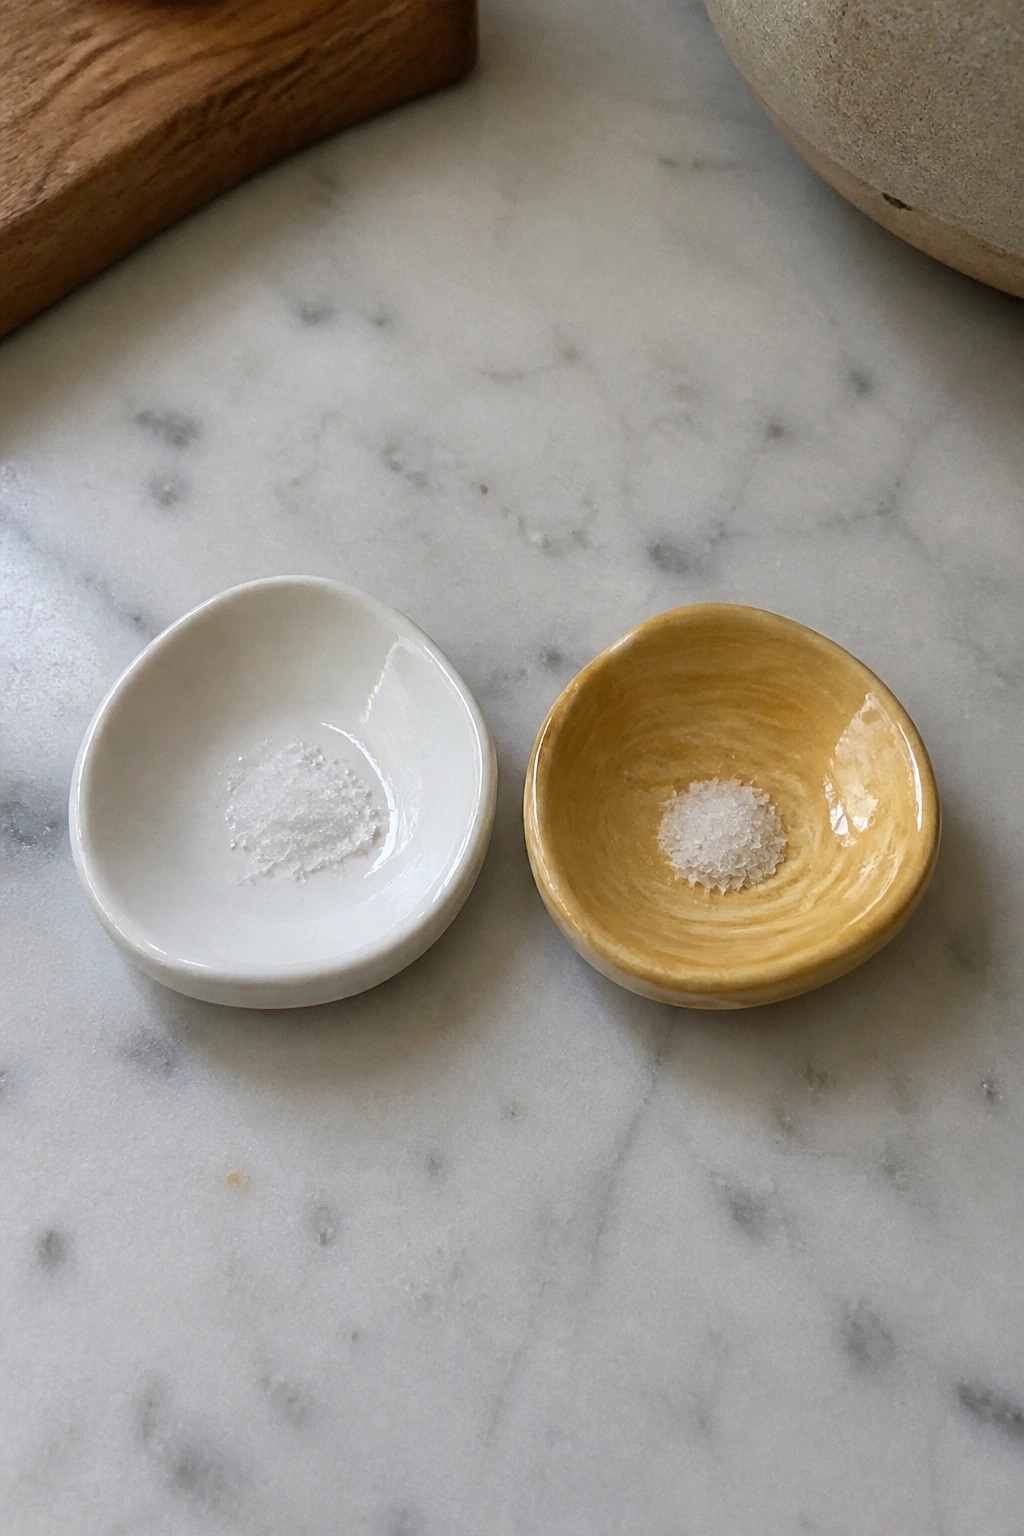
Small slab-built dishes like these serve as individual salt cellars or spice holders. Form them by rolling out a thin slab, cutting a circle or oval, and gently pressing it into a shallow curve before smoothing the rim. A glossy white glaze keeps the surface simple while a yellow one with visible tool marks adds texture without extra steps.
The small scale makes them quick to produce and easy to fit into a single kiln load. Set them on a kitchen counter or dining table so salt stays within reach during cooking or meals. You can repeat the same shape in different glazes for a matching set or shrink it further to make ring dishes or tea bag rests.
Ceramic Cat Ring Holder
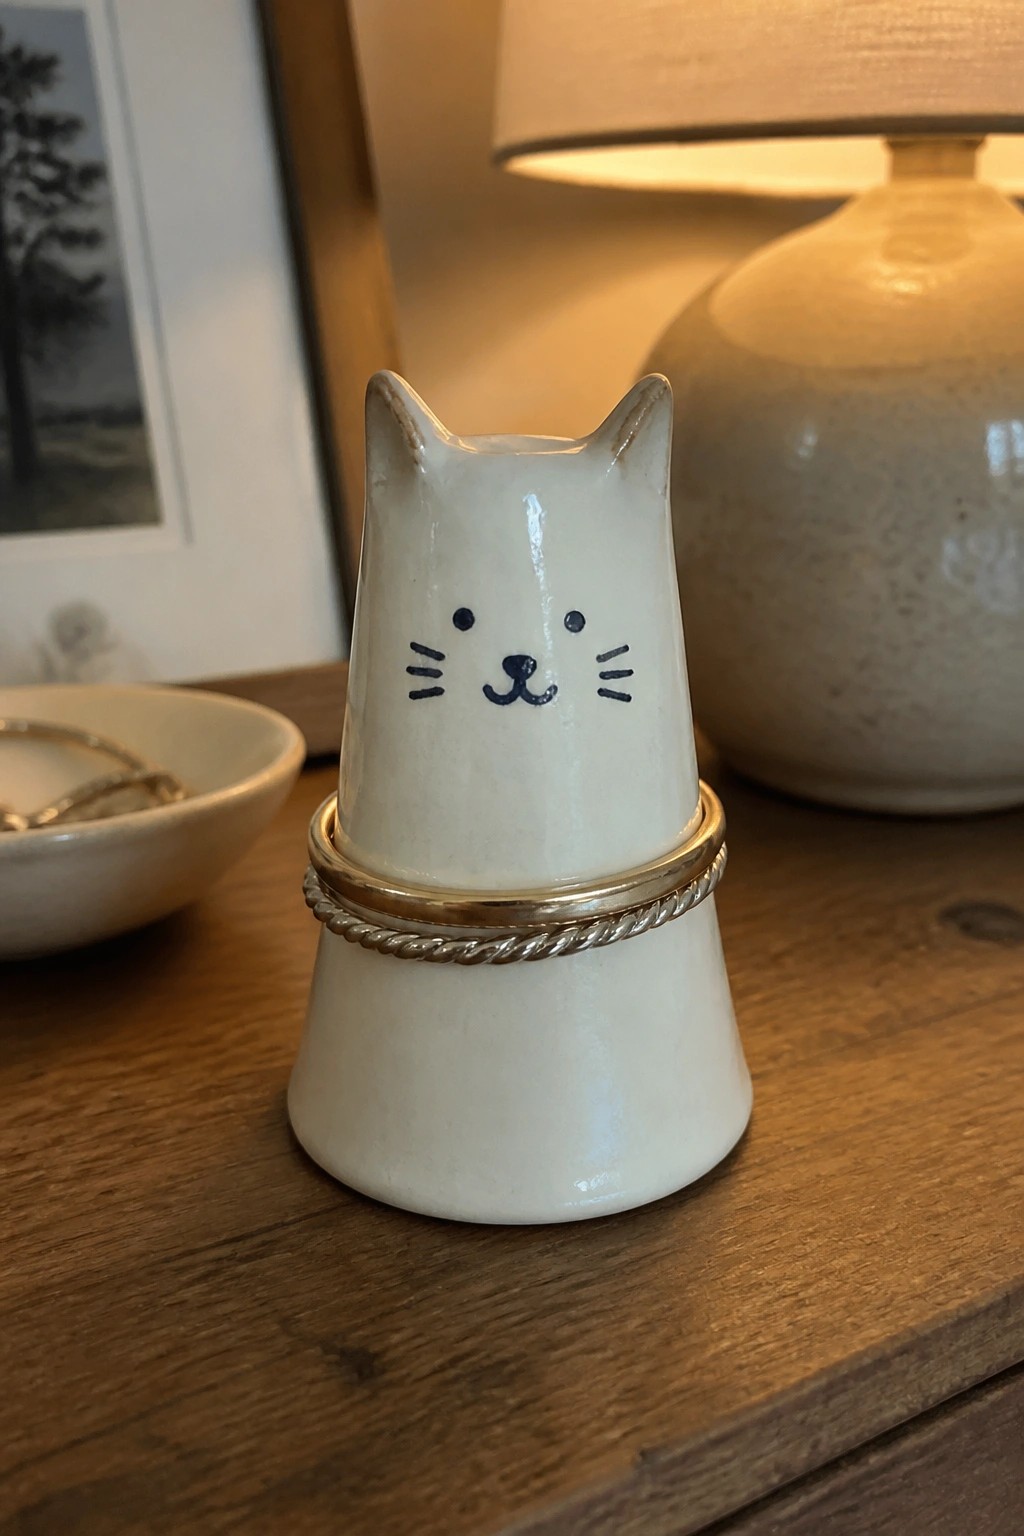
A small ceramic ring holder formed as a cat combines a tapered base with a rounded upper section that includes two upright ears. The face uses simple painted dots and lines for eyes, nose, whiskers, and mouth, while a thin metallic band sits at the narrowest point to hold rings in place. This project falls into the holder category and works as a compact desk or bedside piece that keeps jewelry visible and easy to grab.
The small scale makes this easy to adapt with basic slab or pinch methods for different animals by changing ear shape and face details. You can place one on a bathroom counter or vanity without taking up much room. For a gift version, swap the band color or adjust the painted features to match someone’s style. A piece like this stands out on Pinterest because the functional band and minimal face give it a clear, repeatable look.
Cat-Shaped Ring Cone
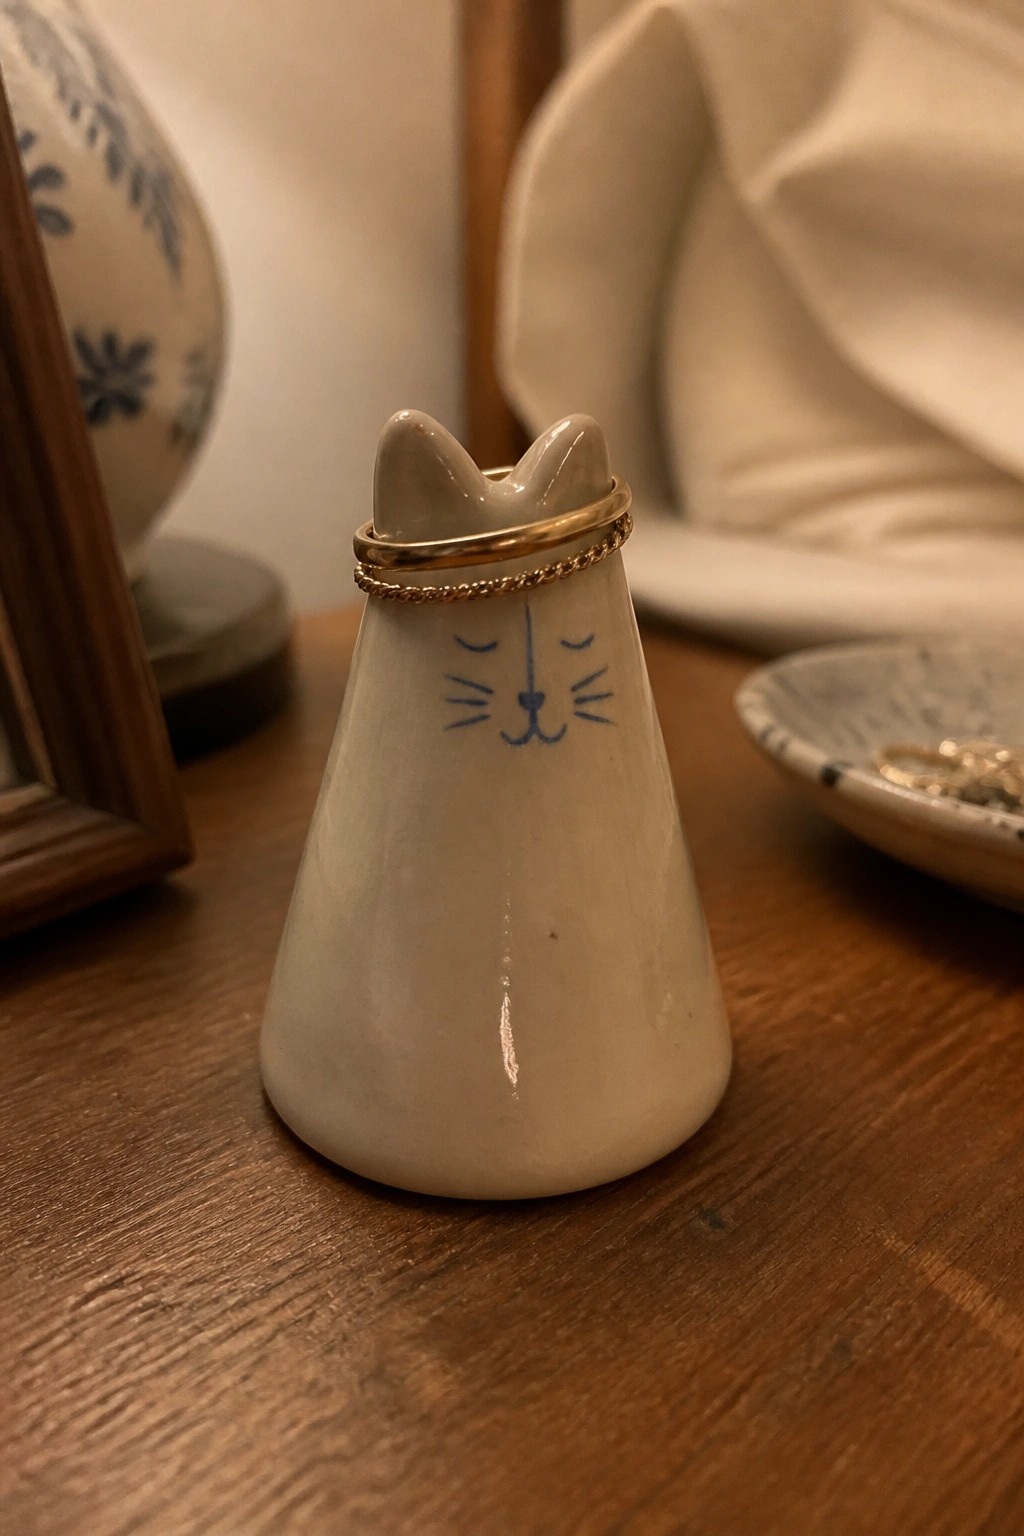
A tapered ceramic cone with a simple cat head on top serves as a ring holder. The wide base keeps it stable while the narrowing shape lets rings rest at different heights. Blue painted lines form the eyes, nose, and whiskers on the front, keeping the surface mostly plain otherwise. This fits the small holder category and works as both jewelry storage and a compact desk or vanity piece.
The small scale makes it easy to try without using much clay or shelf space. You can change the face to other animals or leave it plain and add a stamped pattern instead. For a different use, make the same cone shape taller to hold bracelets or shorten it into a shallow tray for earrings. In a bathroom or bedroom, this kind of piece keeps rings in one spot without taking up much room.
Frequently Asked Questions
What supplies are essential to start slab pottery projects as a beginner?
You will need air dry or kiln fire clay, a rolling pin or slab roller, basic tools like a knife, scoring tool, and sponge, plus a work surface covered in canvas or plastic. Start with a small bag of clay and avoid expensive items until you complete a few projects. These simple supplies let you jump into the easy projects right away and build skills fast without extra costs.
How thick should clay slabs be for beginner projects to avoid cracking?
Aim for slabs about a quarter inch thick using a rolling pin and guides like wooden strips on either side. This thickness provides enough strength for shaping while allowing even drying. Roll gently and check consistency by eye or with a ruler. Thinner slabs dry faster but risk warping so test on one small project first to gain confidence before trying larger ones from the list.
What is the best way to join slab pieces securely during construction?
Score both edges with a tool to create texture then apply slip made from clay and water like glue. Press pieces together firmly and smooth the seam with a damp sponge or finger. Let the join set for a few minutes before handling further. This method works well across the beginner projects and prevents separation during drying or firing which builds reliable results quickly.
How long does it typically take to finish one of these easy slab projects from start to finish?
Most projects can be built in one to two hours with basic shaping and joining. Drying takes several days depending on humidity and thickness while firing or air drying adds more time. Plan to work in stages over a week to allow proper drying between steps. This paced approach helps beginners complete multiple projects fast and see progress without frustration.
How can I personalize the 19 projects to make them my own while keeping them simple?
Add textures with household items like lace or leaves pressed into the clay before cutting shapes. Experiment with different sizes or combine two projects such as making a slab tray with attached handles. Use underglazes or paints after firing for color without complex techniques. These small changes keep projects accessible yet unique and speed up your confidence as you create pieces that reflect your style.

Pottery Path is my cozy corner of the internet where I share clay ideas, pottery inspiration, and simple projects you can recreate at home. I love exploring everything from air dry clay to handbuilt pottery to cute minis that brighten your day. My goal is to make clay crafting feel easy, fun, and welcoming for anyone who wants to try it.
You will find beginner friendly tutorials, creative pottery painting ideas, and lots of warm inspiration for slow and happy crafting. If you enjoy hands on creativity, this space will feel like home.