I have been trying slab pottery on and off for a couple of years now and it feels like one of the easier ways to get started with clay.
Making footed trays and dishes lets me practice rolling even slabs and joining edges without too much fuss.
I find that adding a simple foot to a dish changes how the piece sits and gives me a chance to work on balance.
Over the past few months I have collected some projects that build on each other so I can try one new step at a time.
These are the kinds of things I keep coming back to when I want a quiet afternoon in the studio.
Striped Rectangular Tray with Low Feet
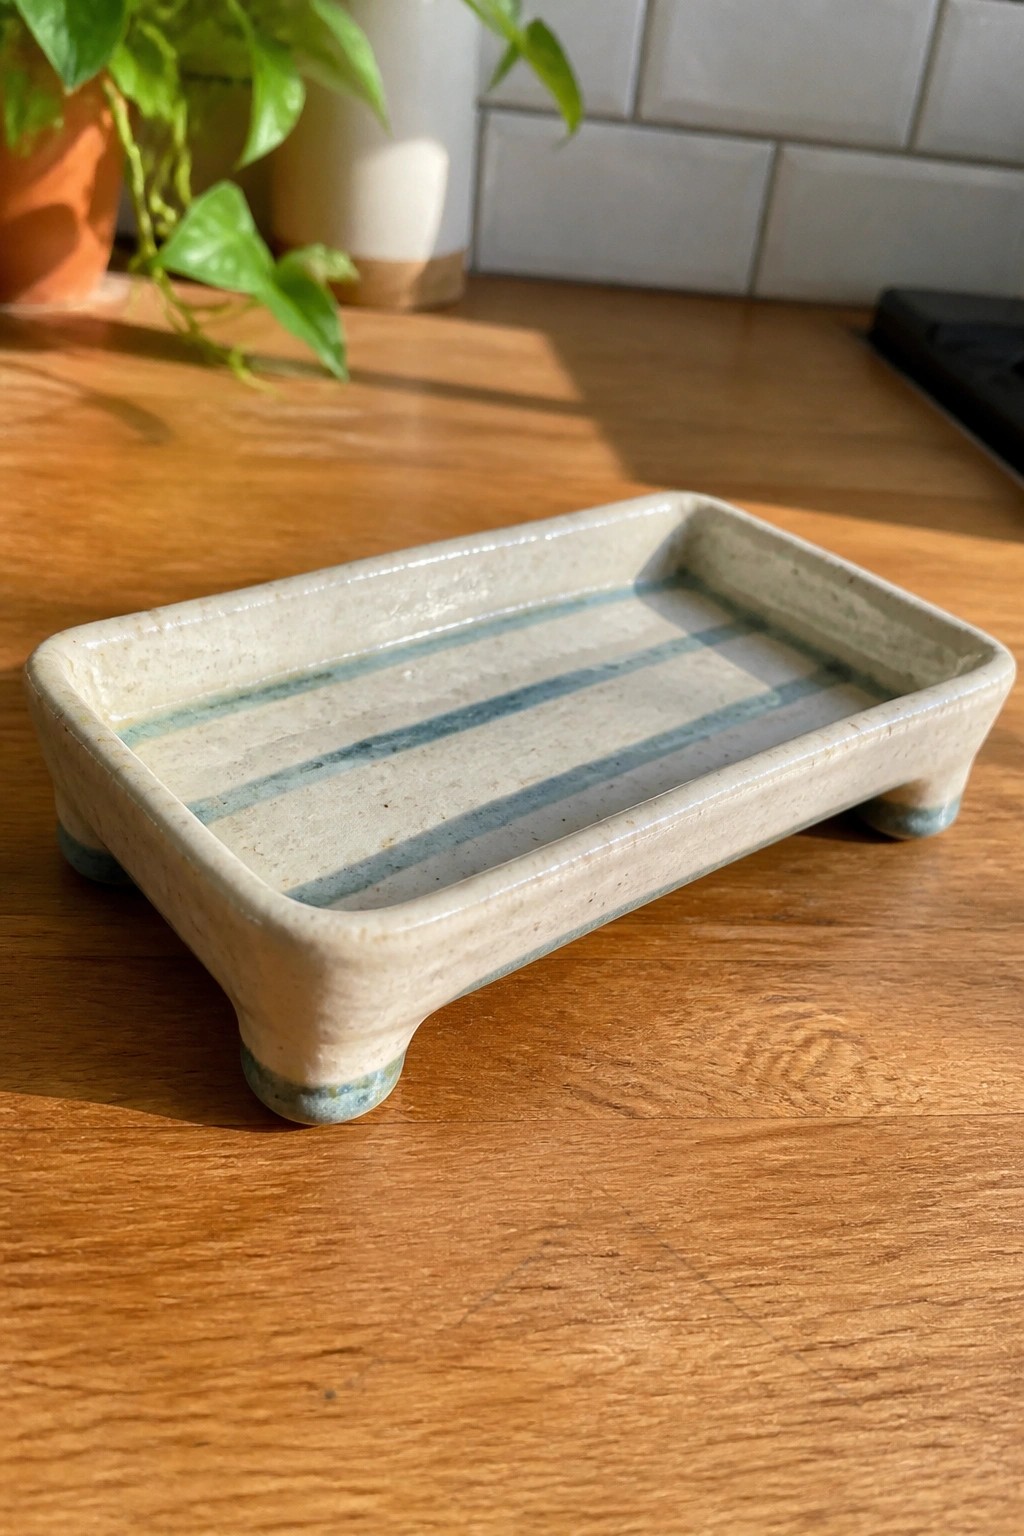
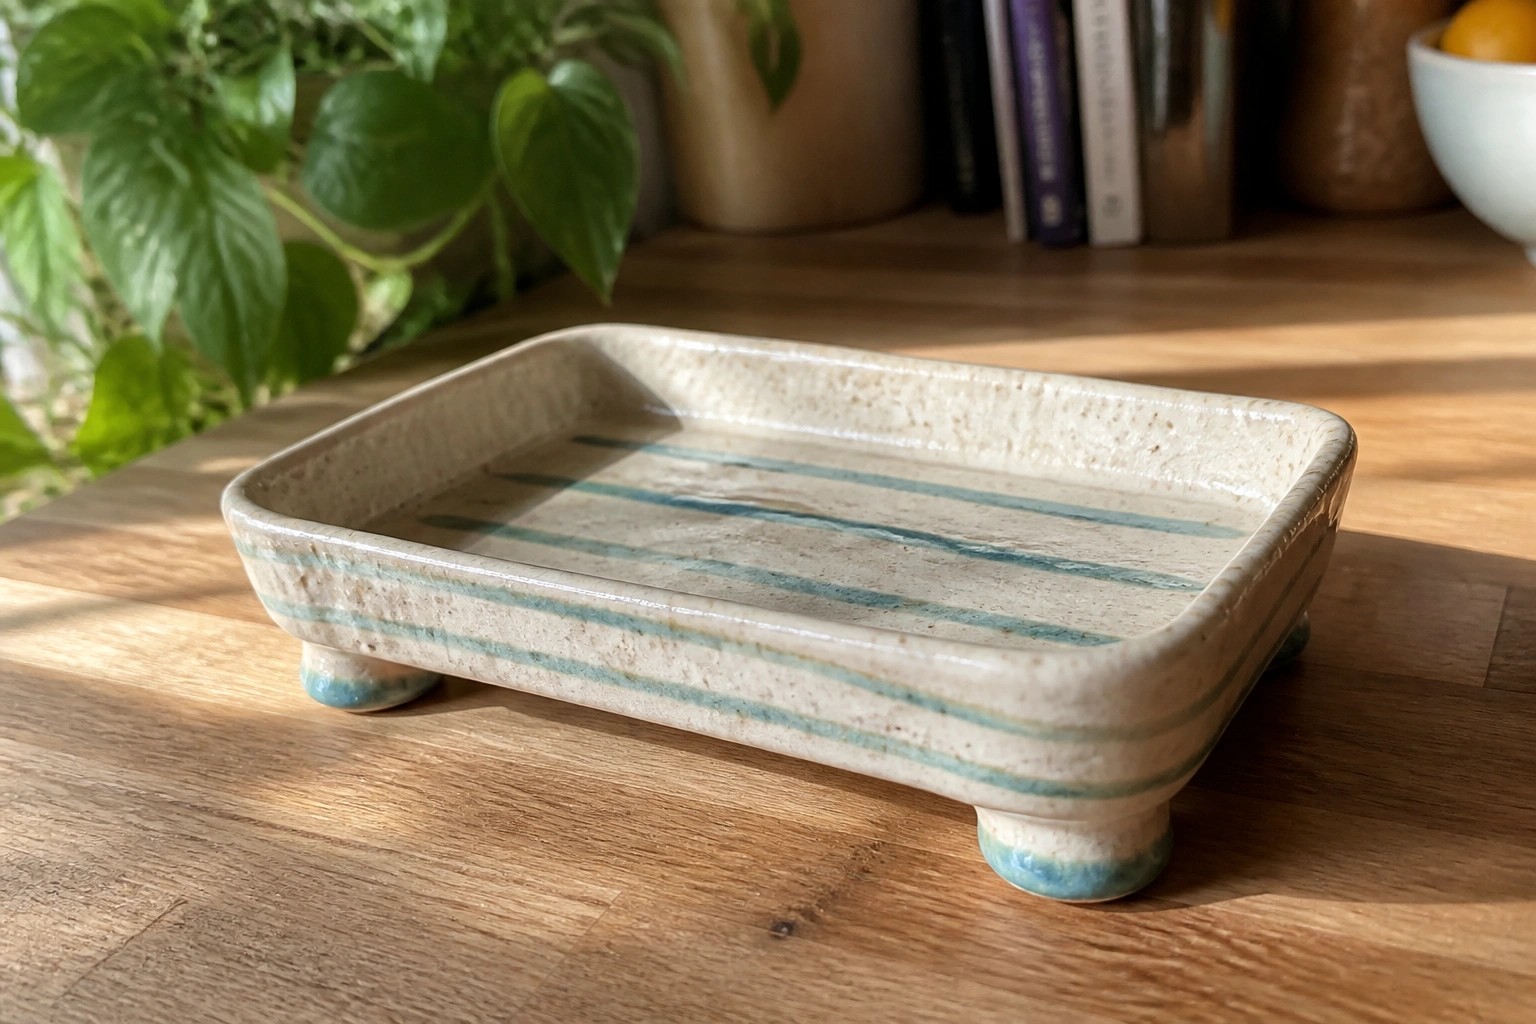
A rectangular tray formed from slabs creates a low, stable dish that works for holding soap, jewelry, or small kitchen items. The surface uses a light speckled clay body with three simple horizontal stripes of blue-green glaze running across the center. Low rounded feet raise the base slightly and keep the piece from sitting directly on wet counters. This layout keeps the focus on clean lines and repeated color bands rather than complex shaping.
What makes this idea useful is how the stripe pattern can be changed to one color, more bands, or even a different glaze without altering the slab construction. The compact size fits easily on a bathroom sink or nightstand while the feet keep the bottom dry. You could scale the same base into a longer version for a desk tray or shorten it into a square dish for keys. The straightforward design also photographs clearly for sharing ideas online.
Heart-Shaped Slab Ring Dish with Leaf Stamp

A small heart-shaped dish formed from a rolled slab makes a compact ring holder that sits flat on a surface. The leaf pattern is created by pressing a stamp or sprig into the clay before the glaze is applied, so the design stays visible after firing. A single soft pink glaze gives the piece a smooth finish while letting the impressed details catch light.
What makes this idea useful is how little clay and time it requires compared to larger trays. The same heart template can be resized or swapped for a round or oval shape if you want a version that holds earrings or keys instead. Keeping the rim simple and using one glaze color keeps the focus on the stamped detail, which helps the finished piece photograph well for sharing or selling.
Striped Slab Mug
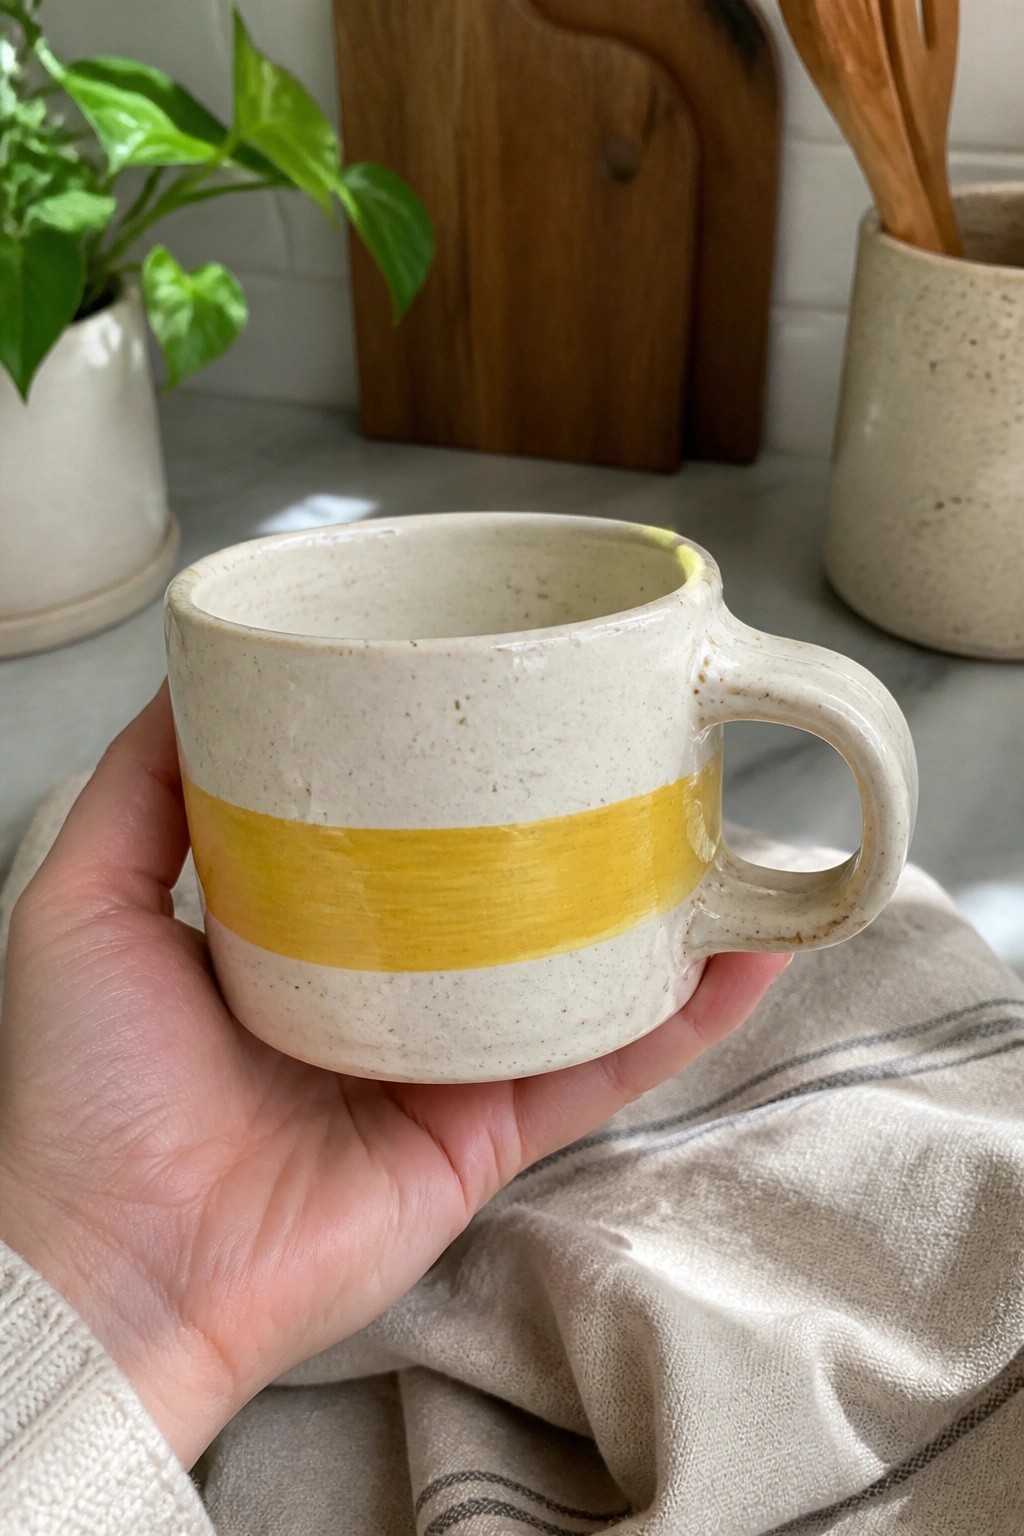
A slab-built mug with a single wide stripe keeps the focus on clean forming and simple surface decoration. The yellow band runs horizontally around the middle of the speckled clay body, giving the piece clear visual weight without extra layers or patterns. This style works as a basic kitchen item that still shows off the texture of the clay and the contrast of the glaze.
The shape does a lot of the work here because the straight sides make it easy to tape off a straight stripe before glazing. You can swap the yellow for any color or adjust the width to match other pieces in a set. This kind of mug fits well on a kitchen counter or as a small gift, and the same stripe idea translates directly to a small slab tray or dish if you want to stay within the footed projects.
Square Slab Planter for Small Succulents

A square planter built from clay slabs gives a clean, blocky shape that works well for succulents or small houseplants. The thick walls stand upright easily and the open top leaves room for soil and roots. A light glaze on the upper rim adds a subtle color break while the rest of the surface keeps a dry, textured finish that matches the plant rather than competing with it.
What makes this idea useful is how the compact size fits on a narrow shelf or windowsill without crowding other items. You can adapt the same slab construction to make a longer rectangular version or drill a drainage hole in the base before firing. In a kitchen or bathroom, this shape doubles as a holder for small tools or soap if you skip the plant. The plain form also makes a good starting point for testing different rim treatments or surface textures on future pieces.
Curved Slab Spoon Rest with Beaded Edges

A simple slab project like this creates a spoon rest by rolling a flat clay sheet into a curved trough shape that holds the handle steady. The maker added small rolled coils along the edges for a dotted texture before applying a glossy brown glaze that pools slightly in the center. This approach keeps the form low and stable while giving the piece a finished kitchen look that works with wooden utensils.
What makes this idea useful is how easily the same slab method scales to different lengths or widths for bigger utensils. You can swap the brown glaze for a matte white or speckled finish to match other dishes in your set. The curved shape also adapts quickly into a small butter dish or tea bag holder if you shorten the slab and add a foot. In a kitchen, this kind of rest keeps counters clean without taking up much space on a shelf or near the stove.
Scalloped Footed Dish for Snacks
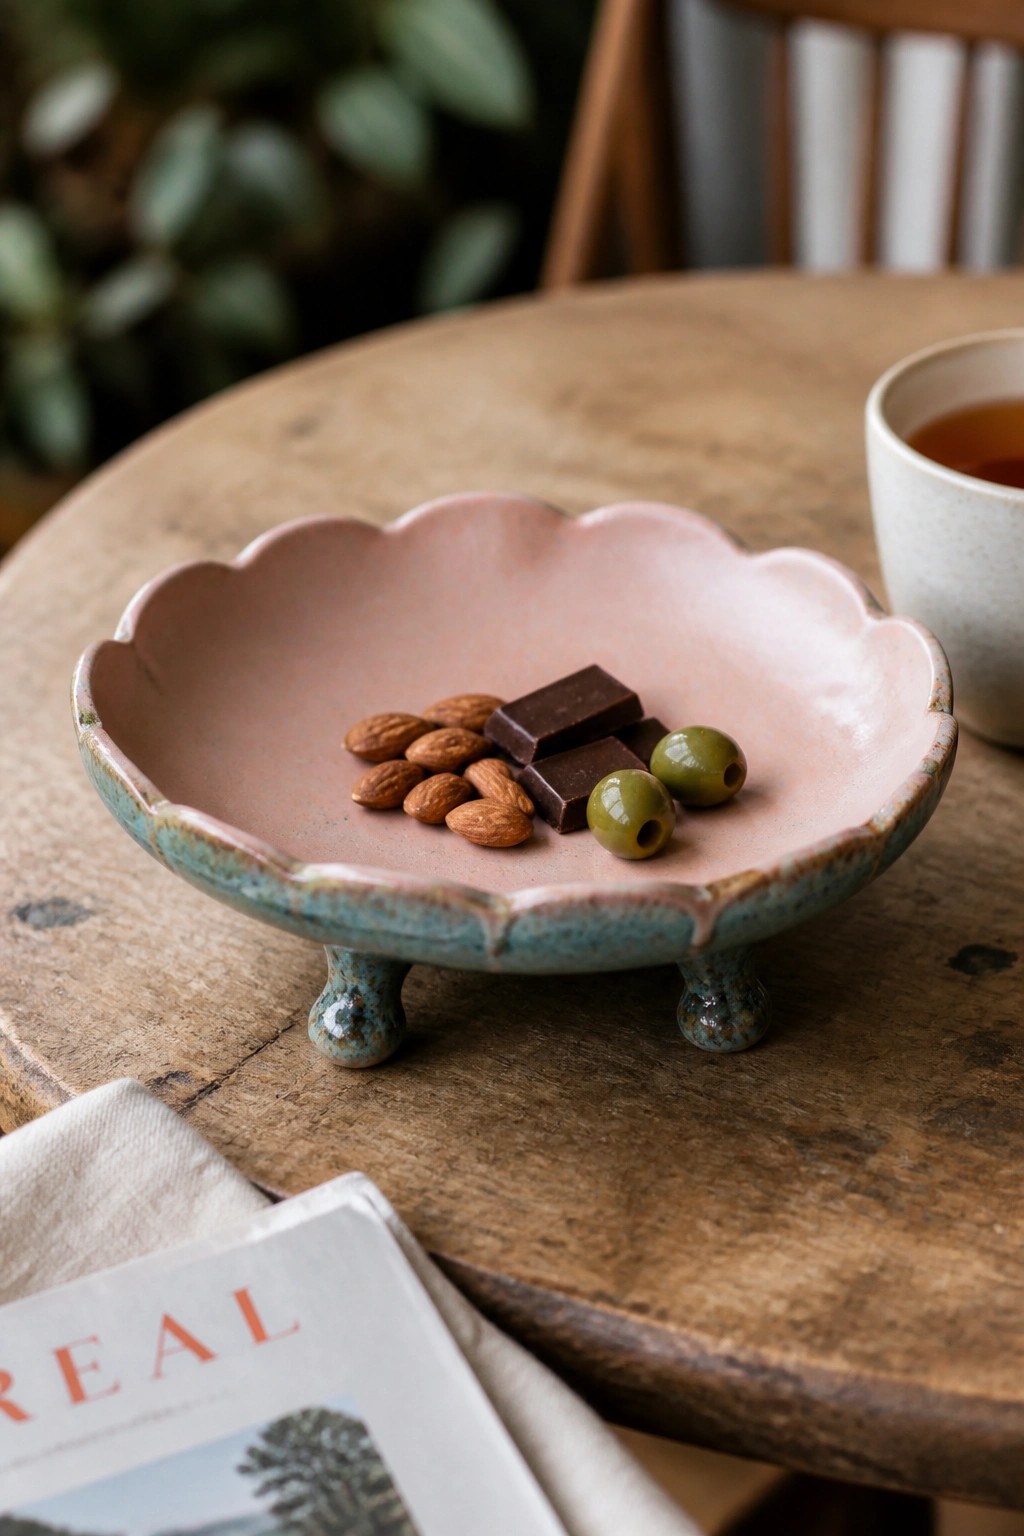
A small footed dish built from slabs works well as a snack server when you add a scalloped rim and short legs. The wavy edge gives it a finished look while the feet lift the base off the table. Using contrasting glazes on the inside and outside makes the shape stand out without extra decoration.
What makes this idea useful is how the footed base keeps the dish stable on any surface. You can scale the same slab pattern up for a larger tray or down for individual ring dishes. Try different rim cuts or switch the glaze colors to match your kitchen or table setting. In a kitchen this kind of piece keeps small items like nuts or olives contained without taking much space.
Slab Tiles with Painted and Relief Motifs

Rectangular slab tiles like these give beginners a straightforward way to practice rolling even slabs and experimenting with surface decoration. One tile uses underglaze painting to create a daisy motif with blue petals and a yellow center, another combines flat color blocks in pink, green, and navy, and the third features a raised leaf design formed by pressing or carving into the clay before glazing. The neutral clay body lets the painted and sculpted details stand out without competing colors or textures. These pieces fit the category of small decorative wall objects that can be hung individually or grouped.
What makes this idea useful is how easily the same slab approach scales to other sizes or functions. You could shorten the rectangles into coasters, add feet to turn them into small trays, or repeat the leaf relief across a larger panel for a backsplash accent. The mix of painting and simple sculpting lets you test both color work and texture on one project without needing complex molds. For a gift, a set of three tiles with related motifs works well because they read as a coordinated collection but require only basic slab skills.
Footed Rectangular Soap Dish with Drainage Grooves

A simple slab-built soap dish gives you a compact bathroom tray that keeps bar soap from sitting in water. The rectangular form uses short feet to raise the piece off the counter while shallow grooves pressed into the top help excess water run off. The speckled glaze adds a light texture across the surface without complicating the construction. This approach fits the footed tray category and works well as a beginner project that combines slab rolling with basic shaping.
What makes this idea useful is how the raised feet solve a common problem with wet soap on counters. You can adapt the same base shape and groove layout for a small jewelry tray or a holder for cotton swabs by changing the overall size. In a bathroom setting the piece stays practical even on narrow ledges, and the straightforward slab method lets you try different glaze colors or edge treatments without new skills. For a gift this size travels easily and looks finished with minimal extra detail.
Slab Salt Cellars in Contrasting Glazes

These small dishes function as salt cellars or spice holders made from basic slab or pinched forms. One takes an elongated oval shape while the other is rounder, each with a low profile and a slightly pinched lip for easy scooping. The dark matte glaze on the first and the speckled light green on the second demonstrate how simple form changes paired with different surface finishes create variety without extra steps.
What makes this idea useful is how quickly you can produce a set for kitchen use or small gifts. The compact size keeps material use low and lets you focus on even slab thickness and clean edges. You could add small slab feet underneath to match the footed dish projects elsewhere in this list or repeat the same shape in a single glaze for a more uniform look.
Blue Wave Slab Tray With Feet

A rectangular footed tray built from a single slab gives you a flat serving or display surface with low sides and four small supports underneath. Broad, curving blue brushstrokes create a repeating wave pattern that runs the length of the piece against the light clay. The design stays simple because the pattern does most of the visual work while the raised feet keep the tray from sitting flush on a table.
What makes this idea useful is that the wave motif can be widened, narrowed, or changed to another color to suit different rooms or seasons. The long rectangular shape works well for holding jewelry, small snacks, or kitchen tools, and the feet prevent moisture rings on wood surfaces. You could shorten the form into a soap dish or widen it into a shallow plant tray without changing the basic construction. The painted stripes give enough detail to photograph clearly for Pinterest while staying easy to repeat on future pieces.
Irregular Slab Dish for Tea Lights

A basic slab-rolled piece forms this low, footed dish with a gently wavy rim and a centered well sized for a tea light. The matte speckled surface finish keeps the look understated while the raised foot adds stability and slight elevation. This project fits the small candle piece category and works well as a beginner slab exercise focused on shaping and trimming rather than complex construction.
The shape does a lot of the work here by letting the dish sit flat without tipping even on uneven surfaces. You could adapt the same template by widening the rim for a soap dish or shrinking the well for a ring holder. In a bedroom or desk setting this scale makes it easy to batch out several versions with different edge treatments. For a gift, something like this needs only a simple change in glaze color to match different rooms.
Polka Dot Divided Slab Tray
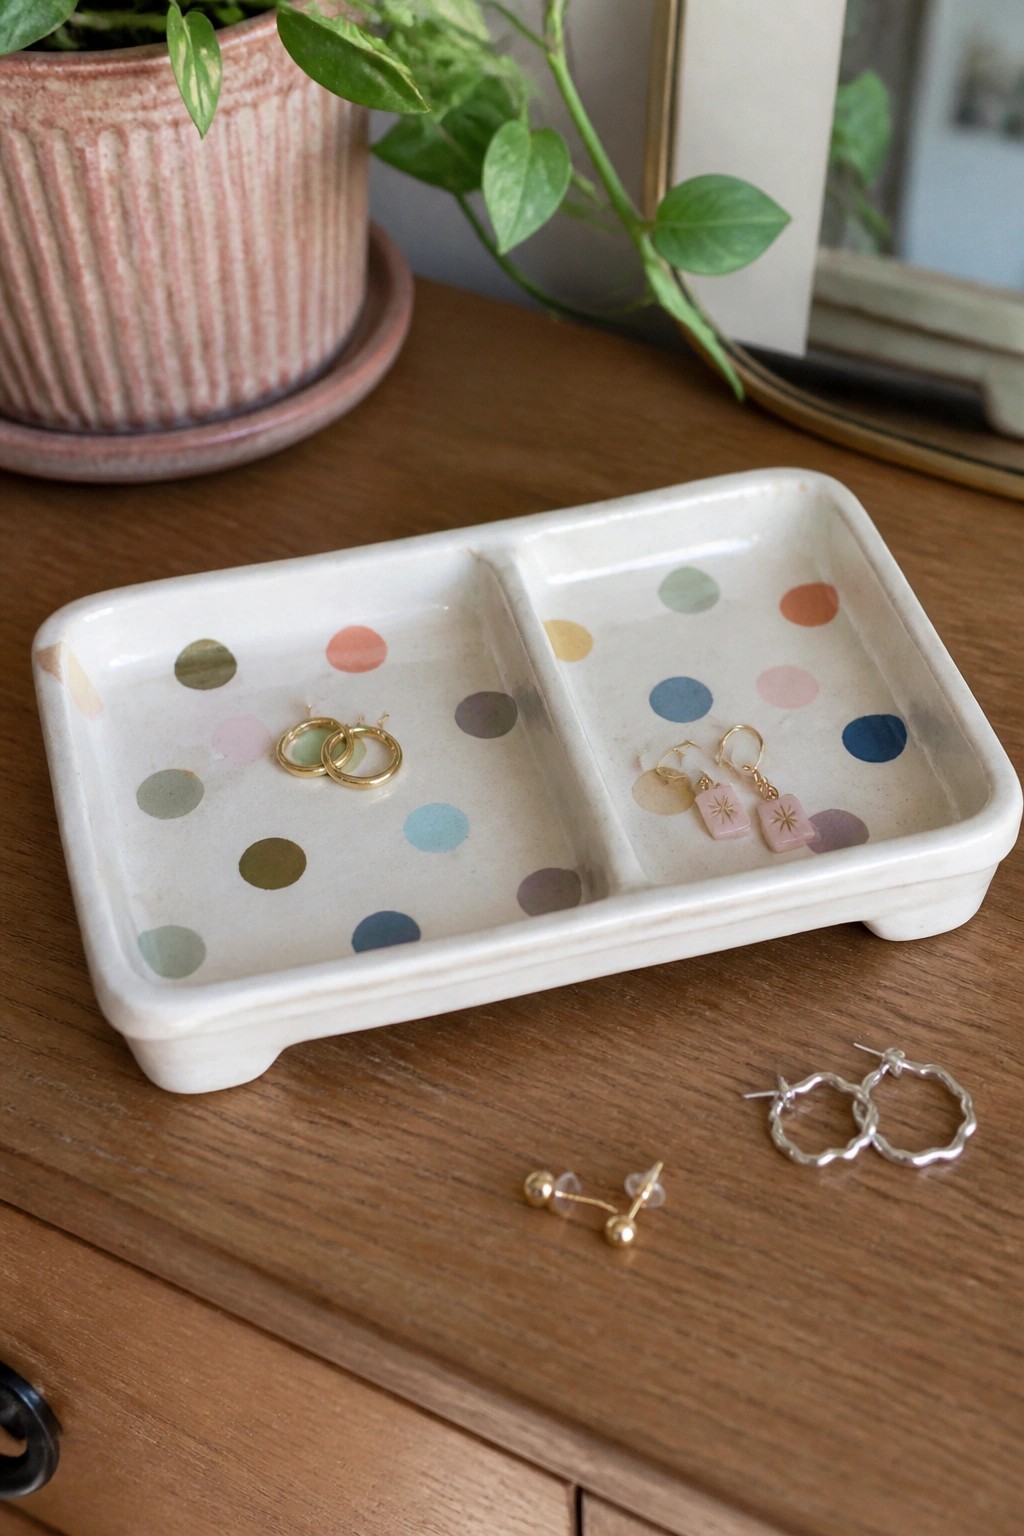
A two-compartment tray formed from slabs creates a simple organizer for small jewelry. The low walls and footed base keep the piece stable on a flat surface while the interior stays easy to access. Painting irregular polka dots in soft, varied colors across the base adds pattern without requiring precise lines or multiple glazes. This style of tray fits the slab category well because the flat construction supports both the divided layout and the painted surface.
The shape does a lot of the work here by turning one slab into two usable sections without extra assembly. You could adapt the idea by resizing the compartments for rings or changing the dot colors to coordinate with a specific room. In a bathroom or on a nightstand this kind of tray keeps daily items contained while still looking intentional. The painted detail helps the finished piece stand out on Pinterest because the pattern reads clearly even in a small thumbnail.
Divided Square Slab Utensil Caddy
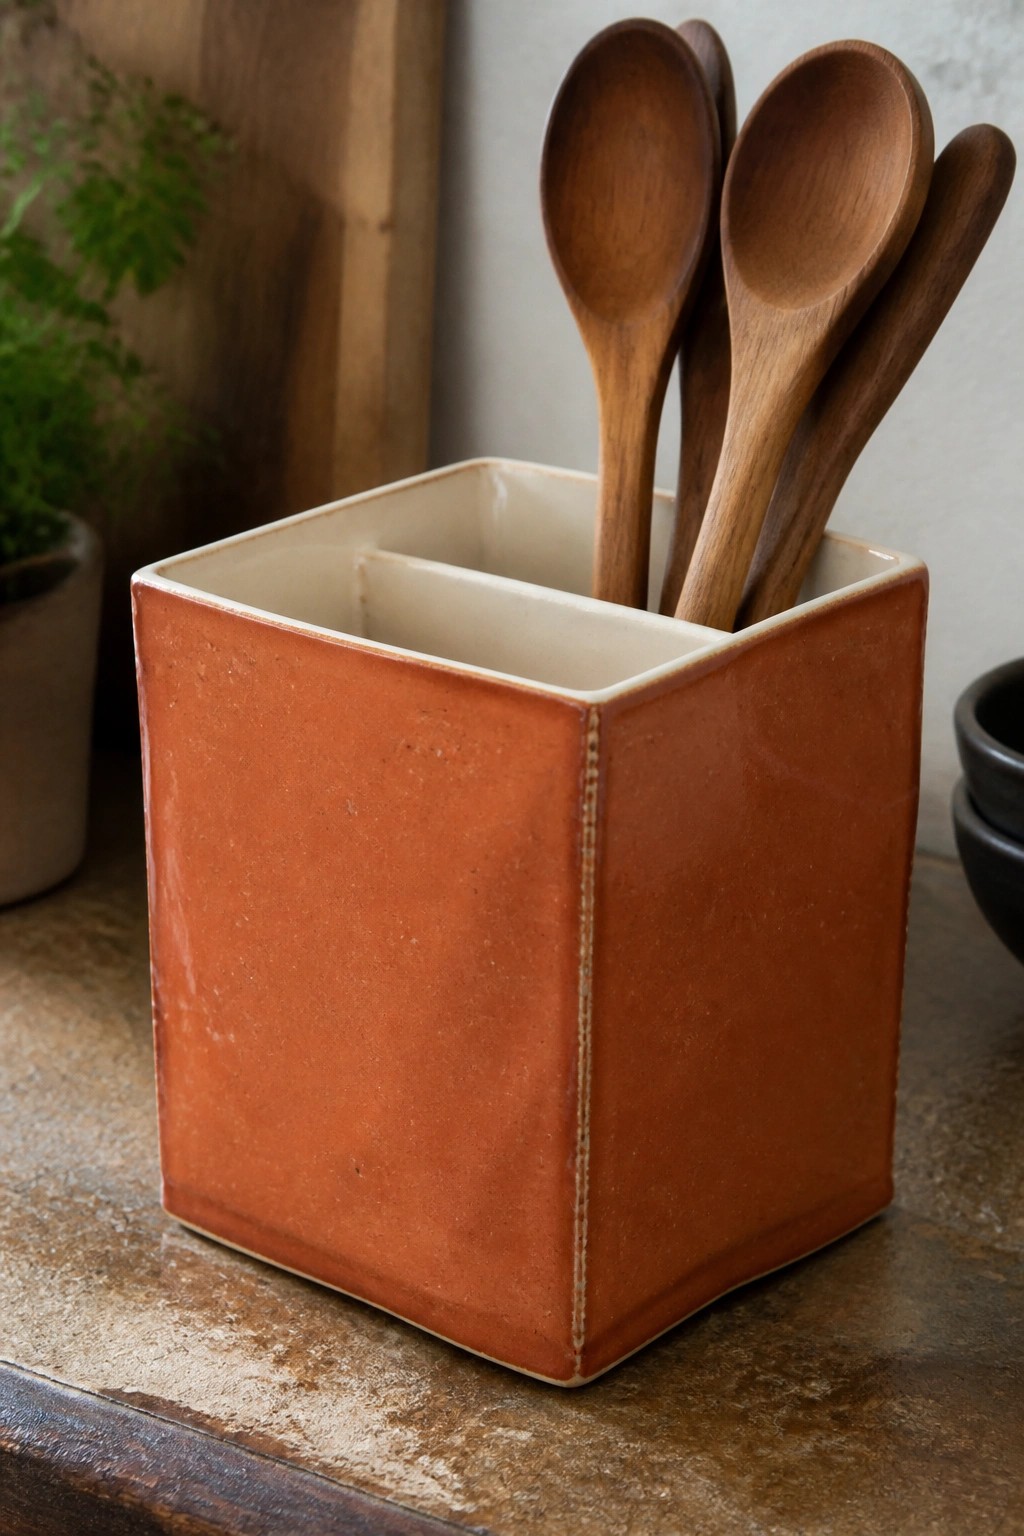
A square slab-built holder with a single vertical divider creates two separate compartments for kitchen tools. Flat slabs form the sides and base while an interior wall keeps spoons or spatulas from mixing together. The red exterior glaze and light interior create a clear contrast that emphasizes the straight edges and simple geometry.
This shape works well on a countertop where cooking utensils need daily access without taking up much space. You can adapt the idea by adjusting the divider position, making the holder taller for longer tools, or adding a second divider for three sections. The same slab method also translates easily to a desk organizer or bathroom caddy. For a different look, swap the solid red glaze for a matte finish or leave the exterior unglazed.
Slab Built Tea Bag Rest
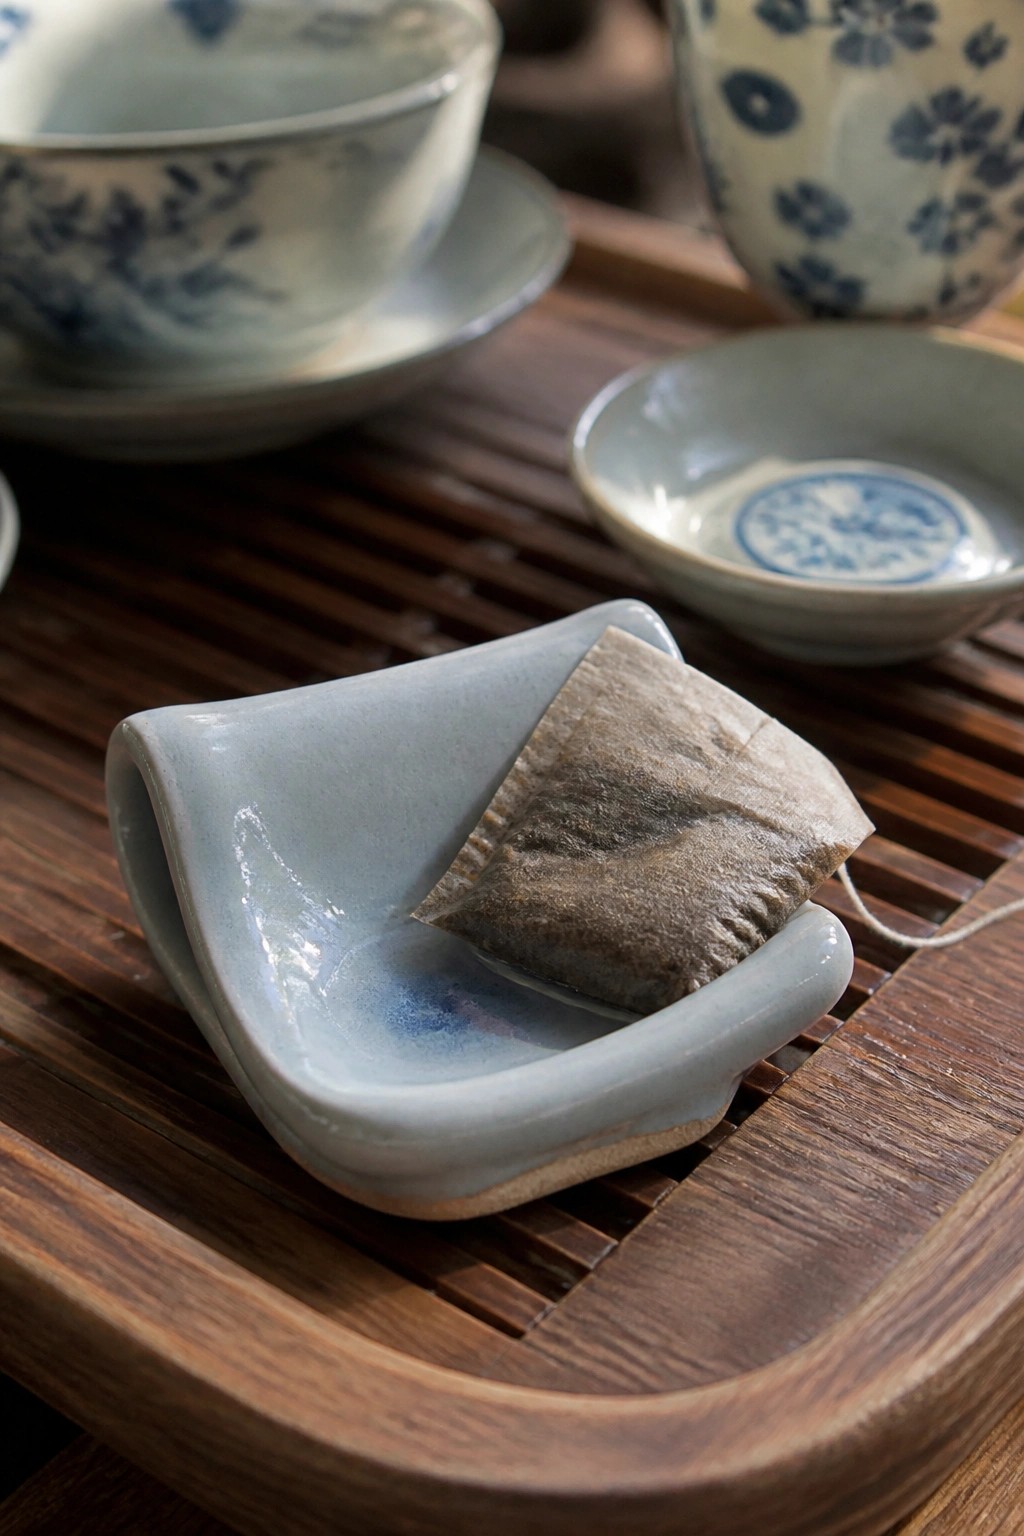
A small slab dish like this serves as a simple tea bag holder. Cut an irregular curved shape from a rolled slab, then gently fold one edge upward to form a shallow basin that catches drips. The light blue glaze keeps the surface smooth and easy to wipe clean while the organic outline gives it a relaxed look.
What makes this idea useful is how the curved edge stops liquid from running onto the table. You can scale the same shape down for ring dishes or widen it slightly for spoon rests by adjusting the slab size before forming. In a kitchen this piece stays handy next to the kettle and pairs easily with other slab trays or bowls you make in the same session.
Citrus Slice Slab Dishes
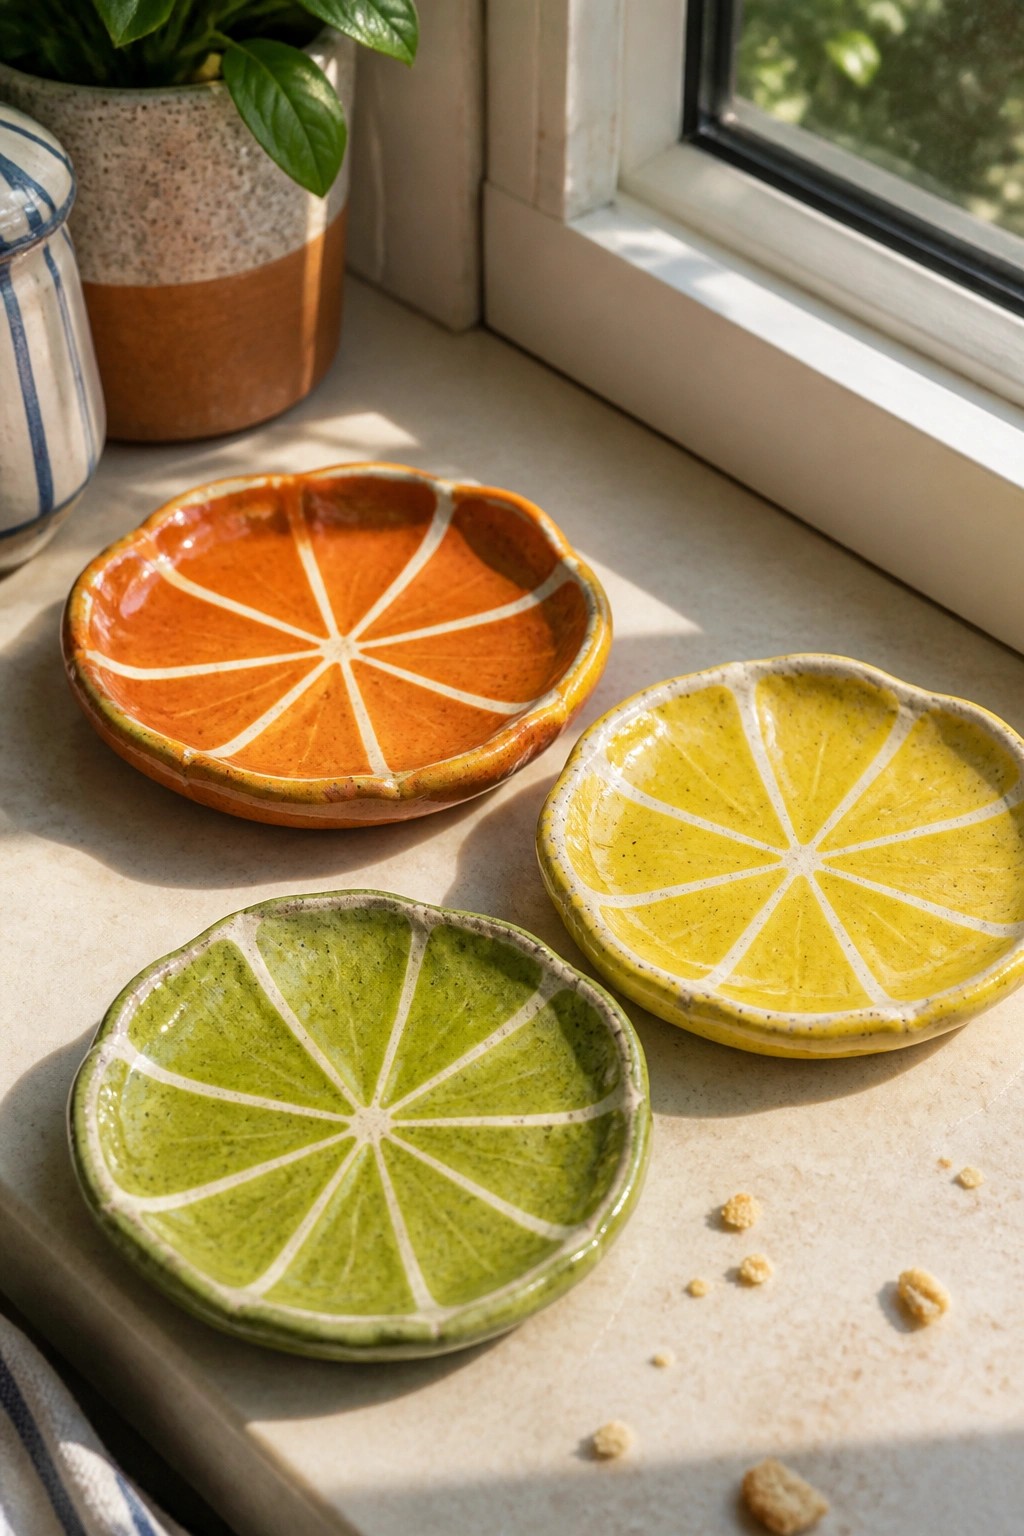
These small dishes are formed from flat slabs of clay cut into scalloped circles and then pressed or carved with radiating lines to suggest citrus segments. Bright, single-color glazes in orange, yellow, and green cover the surface while the white lines stay unglazed or are painted on to create contrast. The result is a set of shallow, functional dishes sized for rings, keys, or small snacks that clearly read as orange, lemon, and lime slices.
What makes this idea useful is the simple way a basic circle slab turns into something recognizable with just a few scored lines and a food-safe glaze. The small scale works well on a windowsill, nightstand, or kitchen counter without taking up much space. You could adapt the same shape into a soap dish by making it slightly deeper or turn the motif into coasters by skipping the bowl curve entirely. The painted segments also translate easily to other fruits or vegetables if you want to build a matching set.
Slab-Rolled Cylinder Holder with Painted Fish
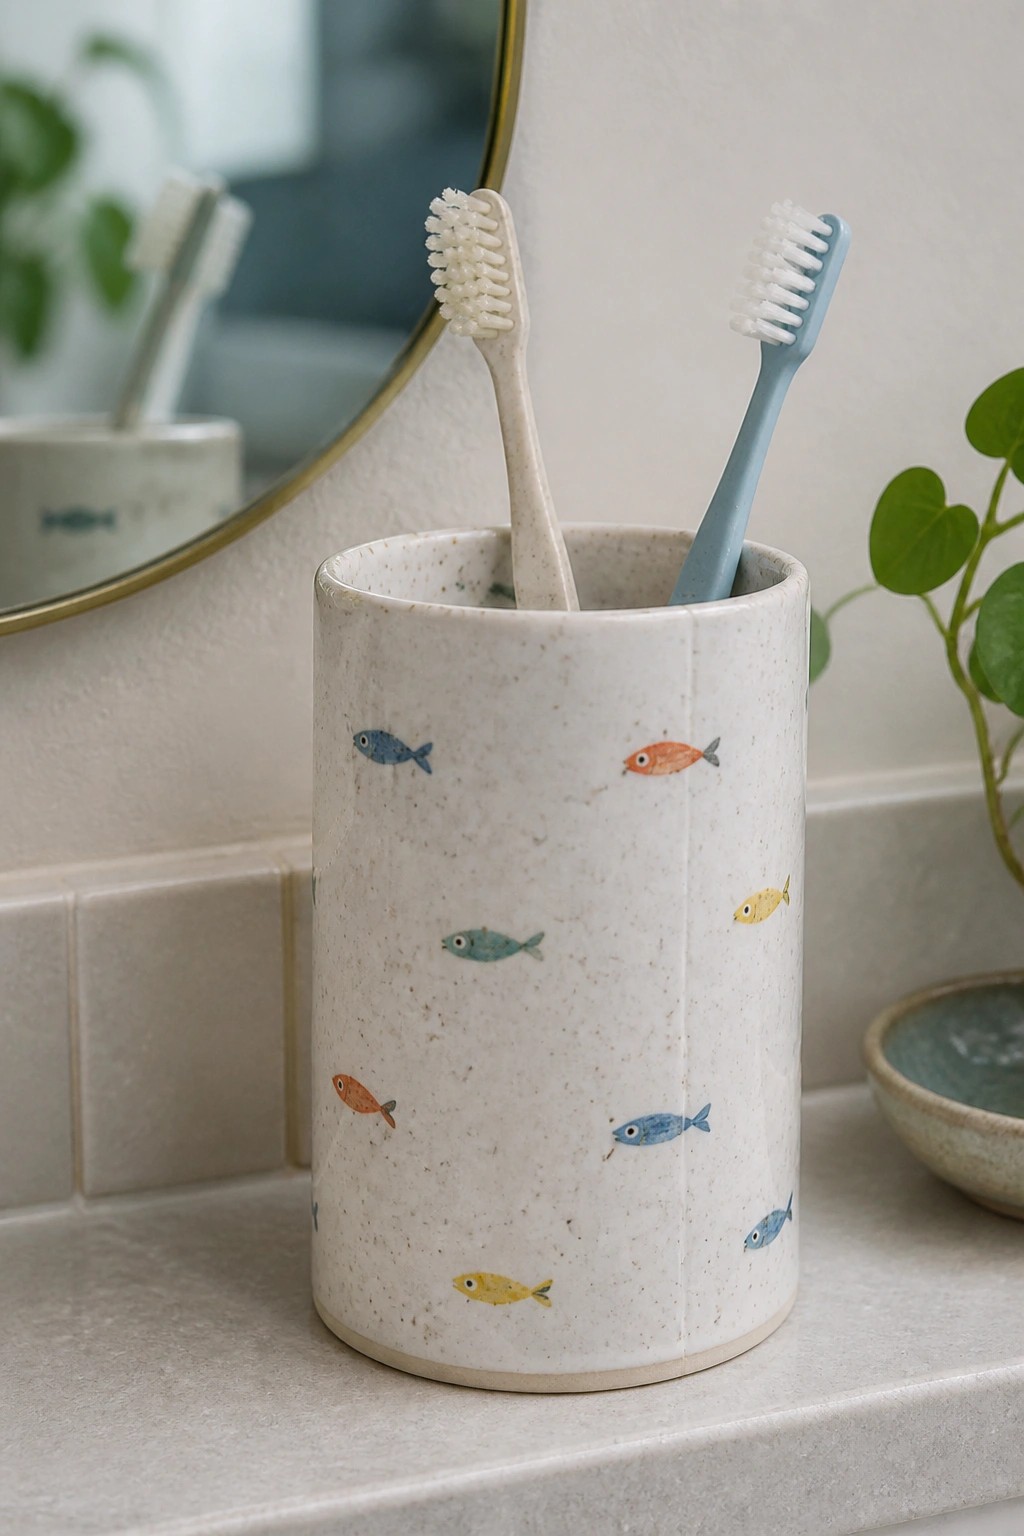
A slab rolled thin and joined into a cylinder makes a simple toothbrush holder sized for a bathroom counter. Small fish in blue, orange, and yellow are painted on the surface before a clear speckled glaze is applied, so the motifs stay crisp against the light clay. The even walls and open top keep the piece practical while the scattered fish give it a clear decorative focus.
The compact shape works well for small storage needs and finishes quickly, leaving time to test different painted motifs. You can swap the fish for leaves, stars, or simple lines to match kitchen or desk use instead. Because the form comes from a single slab, the same pattern can be adapted into a taller pencil cup or a shorter ring dish without changing the construction steps.
Wavy Rim Slab Bowl with Two-Tone Finish

A slab-rolled bowl with a cut or pinched wavy rim creates an irregular edge that still sits flat and stable. The form uses the natural clay color on the outside and a single soft green glaze on the inside that pools slightly along the curves. This keeps the project simple while giving the piece a clear inside-outside contrast. It works as a small serving dish or fruit bowl in the dish category.
The shape does a lot of the work here since the wavy rim adds visual interest with almost no extra steps. You could repeat the same slab template at a smaller size to make matching side dishes or stretch it into a shallow tray. In a kitchen setting the two-tone look pairs easily with plain dinnerware without competing for attention. For a beginner project the method is easy to tweak by changing the glaze color on the interior or adjusting the depth of the flare.
Slab Trays with Colored Corner Accents

Rectangular trays built from clay slabs work well when kept simple in shape but given one strong accent. Here the off-white surface is broken by a single corner in a saturated glaze, with each tray using a different color such as green, blue, or terracotta. The contrast draws attention to the clean edges and makes the set easy to read when stacked or displayed together.
What makes this idea useful is how little extra work the corner detail actually requires while still giving the piece a finished look. You can adapt the same approach by changing the glaze colors to match kitchen tiles or by making all trays the same size for a matching set. The shape also lends itself to small desk trays or shallow catchalls, and the nesting sizes give you options for storage without adding feet or handles.
Footed Slab Dish for Small Items

A round shallow dish built from a slab of clay gains stability from three small feet pinched onto the base. The single green glaze covers the interior evenly while allowing some variation in tone across the surface. This approach keeps the form simple yet functional as a compact tray or holder that sits flat without direct contact to the table.
What makes this idea useful is the lifted base that works well as a plant saucer or jewelry catchall without leaving marks. Scale the diameter up or down depending on whether you need a desk tray or a soap dish. The same slab construction adapts quickly to an oval or square shape if you want to try different proportions for bathroom or kitchen use.
Slab-Built Whale Planter with Feet

A slab-formed planter shaped like a whale gives a compact way to display a small plant. The body is built from clay slabs joined into a rounded bowl, then lifted on three short feet with a tail added at one end. A single eye and curved line create the face using underglaze or paint after the first firing. This keeps the project focused on basic slab construction while producing a ready-to-use container.
The small scale fits easily on a narrow ledge or desk without taking over the space. You can adapt the same footed shape and swap the tail for ears or horns to make other animals. For gifts the form works well because it needs only a few slabs and a simple painted detail. The feet also help the piece photograph cleanly for plant accounts.
Small Footed Dish with Painted Strawberry Motif

A small footed dish like this starts as a simple slab rolled out and shaped into a shallow form, then lifted on a short coil foot for better stability on a table. The surface uses underglaze to paint a single strawberry in the middle and scattered dots in multiple colors around the rim, keeping the decoration loose and easy to repeat. This keeps the slab work basic while the painted details make the finished piece stand out without needing extra texture tools or carving. The light speckled glaze lets the clay body show through, which helps the colors pop without extra layers.
What makes this idea useful is how the foot raises the dish just enough to look intentional when used for butter, small snacks, or rings on a nightstand. You can swap the strawberry for any fruit or simple shape and adjust the dot colors to match a different theme or season. The compact size works well for testing slab thickness and foot attachment on a single piece without much material. For Pinterest, the bright central motif against the neutral background photographs cleanly and suggests easy variations for other small dishes.
Frequently Asked Questions
What tools and materials do beginners need to get started with slab pottery projects like footed trays and dishes?
Start with a basic set that includes a rolling pin or slab roller, canvas or canvas-covered boards to prevent sticking, a ruler and scoring tool for clean cuts, a sponge and water bucket for smoothing, and low-fire clay that is easy to work with. Add a fettling knife for trimming edges and some simple stamps or texture mats for decoration. These items allow you to roll even slabs, cut shapes accurately, and assemble footed pieces without frustration. Many beginners also keep a spray bottle handy to keep clay moist during construction.
How can I make sure my clay slabs stay flat and avoid cracking when building trays?
Roll your clay to a consistent thickness of about a quarter inch using guide sticks on either side of the slab. Work on a porous surface like canvas so the clay can dry evenly from both sides. After cutting and assembling your tray or dish, cover it loosely with plastic for the first day or two to slow drying, then gradually expose it to air. Scoring and slipping joints thoroughly before attaching feet or sides helps create strong bonds that resist cracks later.
What is the easiest method for attaching feet to slab-built dishes so they stay secure during firing?
Cut small coils or slabs for the feet and let them firm up slightly before attachment. Score both the foot and the bottom of the dish, apply slip generously, and press the foot on with a gentle twisting motion to create a good seal. Support the dish on a foam pad while attaching to prevent distortion. Allow the whole piece to dry slowly and evenly, checking that the feet are level so the finished item sits stably on a table.
How do the 21 skill-building ideas help beginners advance from basic trays to more detailed footed dishes?
The ideas are arranged to start with simple flat slabs cut into basic shapes and gradually introduce techniques like adding texture, building low walls, and attaching feet. Early projects focus on even rolling and clean seams, while later ones add elements like handles or divided compartments. This progression lets you master one skill at a time, such as controlling drying rates or refining edges, before moving to complex footed forms that require precise assembly.
What glazing and firing tips work well for beginner slab pottery to achieve durable results?
Apply glaze in thin, even coats after the piece is fully bone dry and bisque fired. Test glazes on small test tiles first because slab pieces can absorb glaze differently than thrown pottery. Fire according to your clay manufacturer’s guidelines, usually to cone 04 for low-fire work, and make sure pieces are supported on kiln shelves to avoid sagging. Leave space between items so heat circulates evenly and reduces the chance of warping in footed trays.

Pottery Path is my cozy corner of the internet where I share clay ideas, pottery inspiration, and simple projects you can recreate at home. I love exploring everything from air dry clay to handbuilt pottery to cute minis that brighten your day. My goal is to make clay crafting feel easy, fun, and welcoming for anyone who wants to try it.
You will find beginner friendly tutorials, creative pottery painting ideas, and lots of warm inspiration for slow and happy crafting. If you enjoy hands on creativity, this space will feel like home.