I started making pottery with slabs a while ago because it seemed less intimidating than throwing on a wheel.
Using slump molds helps keep the shapes consistent and simple for beginners like me.
I’ve come up with eighteen different bowl designs that use this technique.
They range from basic to a bit more decorated but all stay easy to do at home.
My hope is that these will give you some starting points for your own projects.
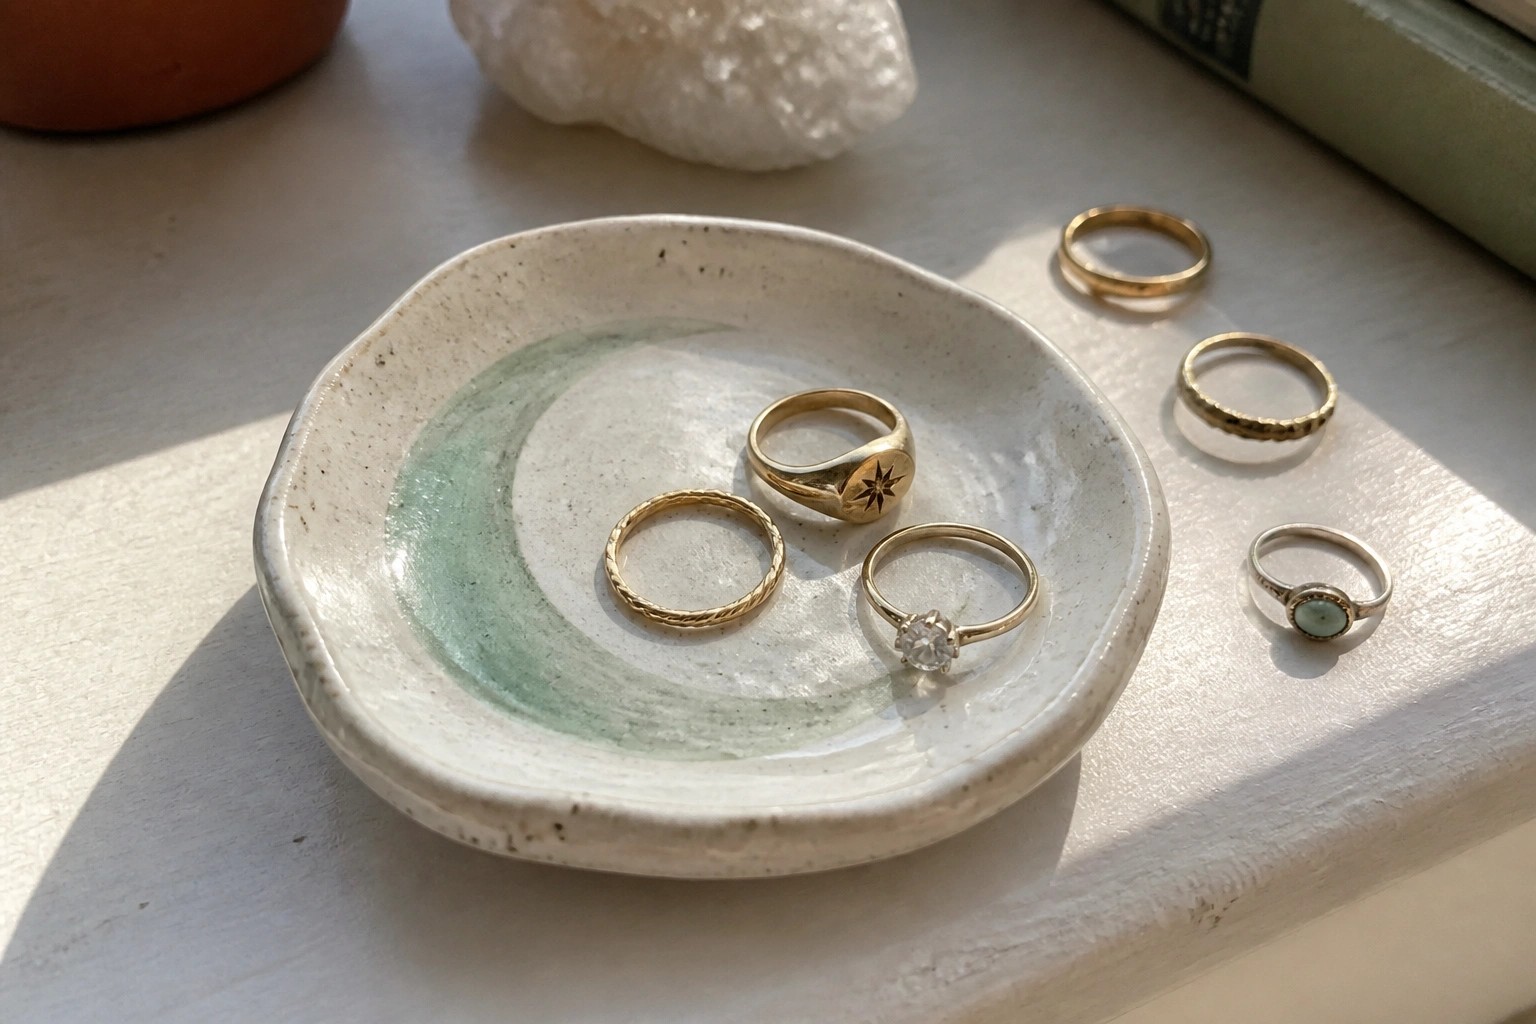
Crescent Moon Ring Dish
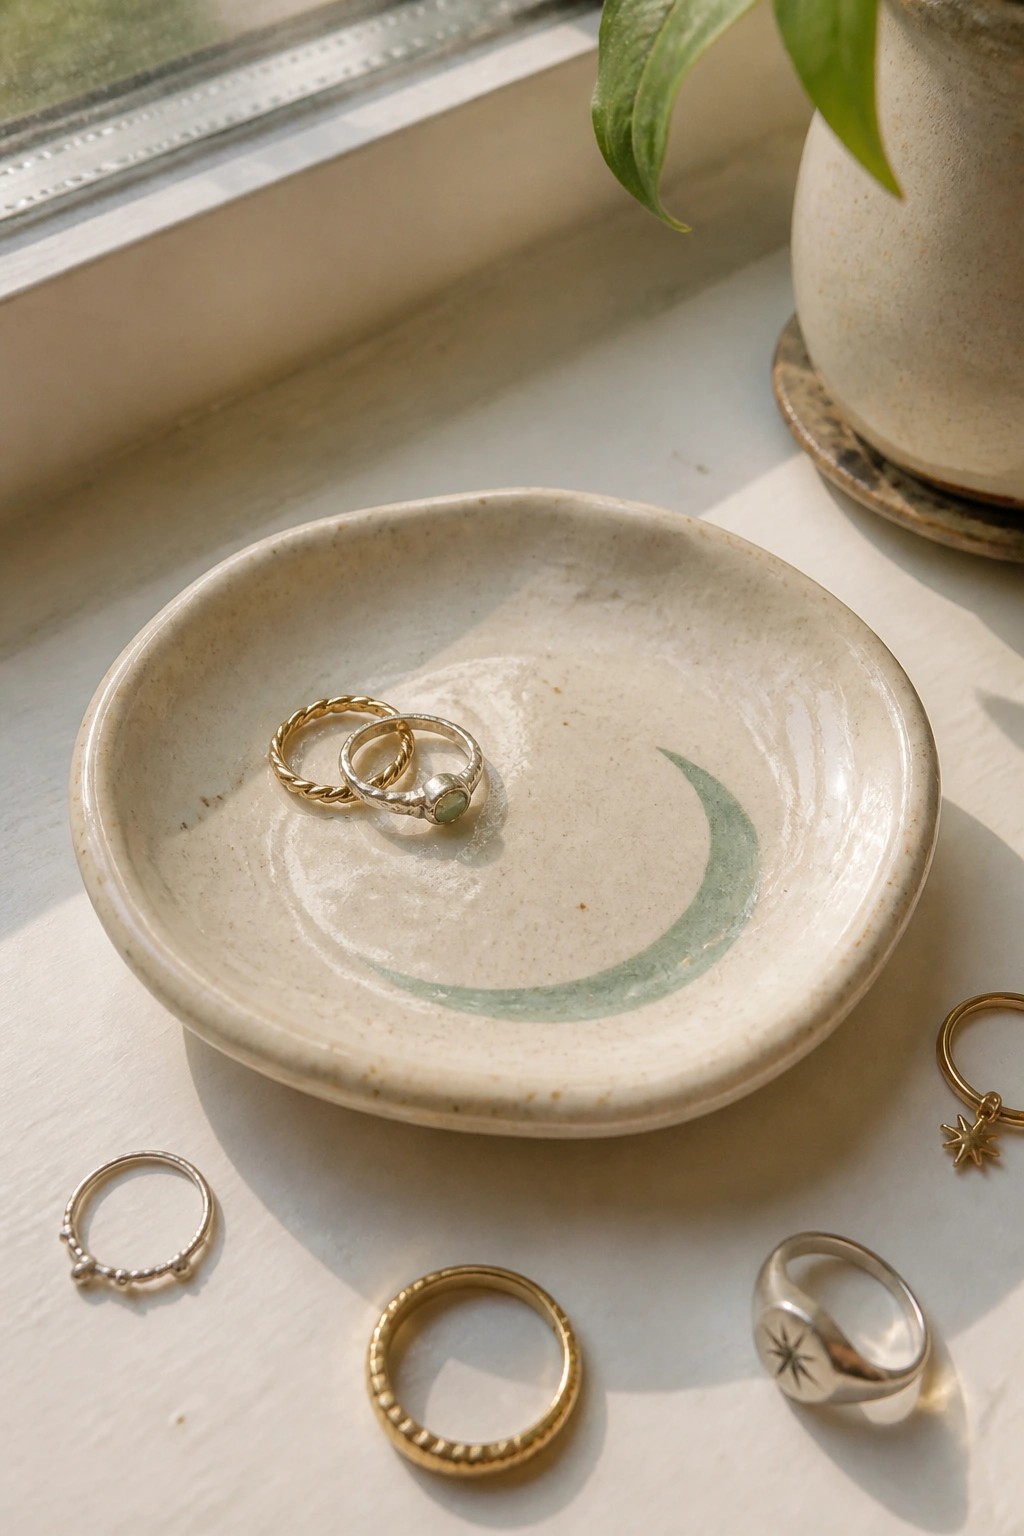
A small slump-molded bowl becomes a practical ring dish when you add a simple crescent moon painted in green underglaze. The shallow, wide shape keeps rings contained without taking up much space, and the curved motif sits off-center to balance the plain clay surface. This project falls into the jewelry holder category and works well for beginners because the slab is formed over a mold and the design is added with basic brushwork before the final firing.
What makes this idea useful is how the moon motif can be swapped for stars, dots, or a single initial without changing the mold. The compact size fits easily on a nightstand or bathroom shelf where people actually drop rings at the end of the day. You could also press the same slab into a slightly deeper mold to turn it into a small catch-all for earrings or loose change.
Slump-Molded Spoon Rest with a Single Stripe

A long, narrow tray formed over a slump mold creates a simple spoon rest that keeps utensils off the counter during cooking. The yellow glaze paired with one vertical blue stripe gives the piece a straightforward graphic style that works without added carving or texture. This shape stays shallow enough to hold a spoon or small spatula while the dipped end at the bottom helps catch drips. It fits the kitchen item category and stays easy to produce with basic slab techniques.
What makes this idea useful is how the elongated form directly solves a common kitchen problem without needing extra parts. You can shorten the slab for a more compact version or widen it slightly to hold two spoons at once. The stripe itself is quick to paint with underglaze before the final glaze, and changing the color pair lets you match different kitchen schemes. In a kitchen, this kind of piece keeps counters tidy and can also serve as a small tray for oil or seasoning dishes.
Speckled Pink Slump Bowl Turned Succulent Planter

A small rounded bowl formed over a slump mold works well as a compact planter when glazed in a mottled pink with white speckles. The low, wide shape keeps the pot stable on a shelf while the glossy finish reflects light and contrasts with the green of the plant. This approach turns a basic slab form into a functional holder that suits small succulents or cuttings without needing extra drainage modifications if you add a hole before firing.
What makes this idea useful is the simple round profile that groups easily with other small pots. You can swap the pink speckle for solid colors or matte finishes to match different rooms, or scale the same slump mold up slightly for larger plants. The size stays practical for windowsills or bookshelves where bigger pots would crowd the space. For a gift, repeat the same bowl shape in two or three glaze colors so the set looks coordinated but not identical.
Smiley Face Mug from a Slump Mold Bowl

A small ceramic mug formed from a slump mold bowl uses a brown streaked glaze and a painted smiley face on the interior base. The low rounded shape keeps the face visible when the mug is nearly empty. This approach fits the mug category and adds a single painted detail that appears only during use.
What makes this idea useful is how the same slump mold shape can be repeated to make a set of cups with different faces or simple symbols. The small size suits espresso or tea and leaves room on the rim for a handle. The painted detail can be swapped for other underglaze drawings without changing the form, making it easy to adapt for gifts or kitchen use.
Slump Mold Tea Light Dish

A shallow round bowl made with a slump mold gives this project its wide stable rim and centered well for a tea light. The form keeps the candle cup level while the outer edge stays low enough to let light spread without blocking the flame. A glossy teal glaze with light speckling covers the surface and creates a simple reflective finish that works with the flame. This turns a basic slump mold bowl into a compact candle piece that fits on small surfaces.
What makes this idea useful is how the same mold shape can be made again in different glaze colors to create matching sets for shelves or tables. The small overall size makes it easy to fit into gift boxes with a few extra tea lights. You could widen the rim slightly on the next version or try a matte glaze to change the look while keeping the same construction steps. In a bathroom or bedroom this shape stays practical because it contains wax without taking up much space.
Rectangular Slab Soap Dish
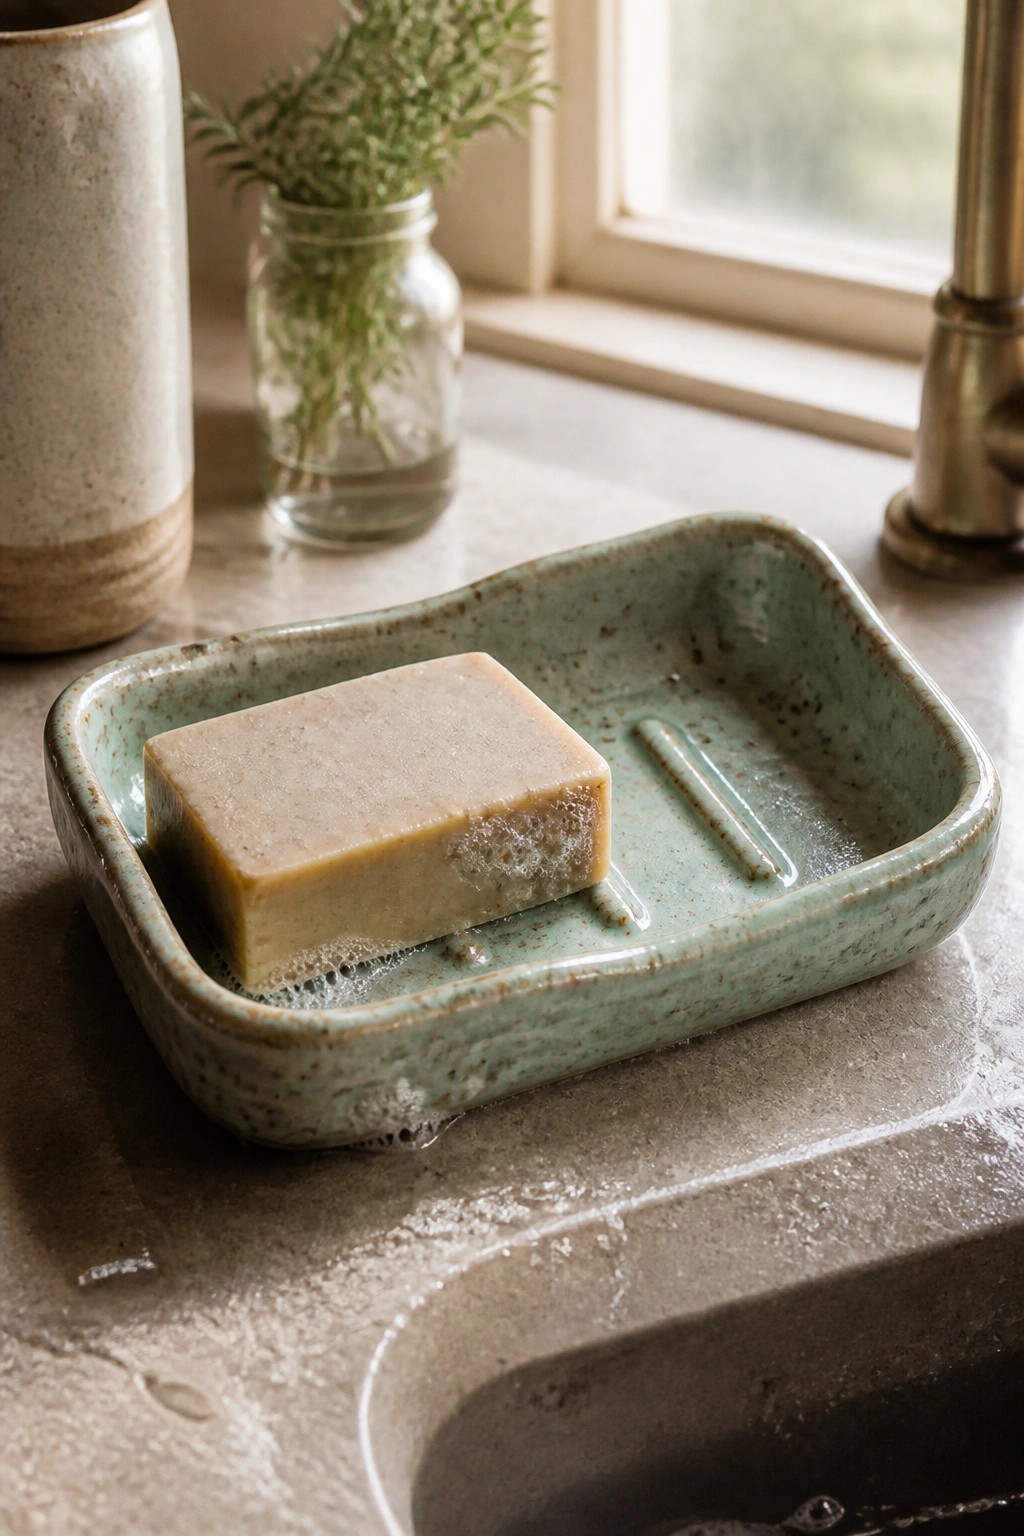
A rectangular soap dish built from a single slab of clay creates a simple bathroom item that holds a bar steady. The form uses a low rim and an interior raised ridge to lift the soap and let water drain away. A speckled blue-green glaze covers the surface, giving it a durable finish while showing the clay texture underneath. This project stays in the slab category and works directly with slump molds to shape the base and sides.
What makes this idea useful is how the ridge detail keeps soap from sitting in water. The proportions adapt easily if you need a wider or longer version for a different sink area. You could skip the ridge and make the same tray into a small catch-all for bathroom counters or a plant saucer. The compact size also photographs well for sharing, since the clean lines and single glaze color read clearly in a grid.
Speckled Blue Jewelry Bowl From a Slump Mold

A small slump-mold bowl with a blue speckled glaze works well as a jewelry dish. The rounded irregular shape and mottled surface come from the slump process and a simple glaze application that shows the clay texture underneath. This type of piece keeps rings, earrings, and small chains together on a dresser or nightstand.
The compact size makes it easy to place on a vanity without crowding other items. You can repeat the same mold with a different glaze color or add a subtle rim detail to change the look. This approach stands out for beginners because the speckled finish adds interest while the basic form stays straightforward to form and fire.
Cat Ear Pet Bowl with Paw Print Details

A slump-mold bowl formed with a scalloped rim and two pointed ears turns a basic round shape into a cat head outline. Paw prints stamped or carved into the interior base and along the outside walls add a clear motif without needing extra colors or layers. The warm terracotta clay with lighter slip or underglaze marks creates contrast that reads well even after firing. This project stays in the pet bowl category while using only slab construction and simple surface stamping.
The shape does a lot of the work here by making the bowl instantly recognizable as cat-related the moment it sits on the floor. You can repeat the same ear rim on a smaller scale to make matching treat dishes or swap the paw prints for a single name stamp if you want to personalize one for a specific pet. The design adapts quickly to a low planter or small catch-all by keeping the same rim but skipping the interior prints. A piece like this shows up well in search results for pet pottery because the silhouette stays legible in small photos.
Citrus Slice Nesting Bowls
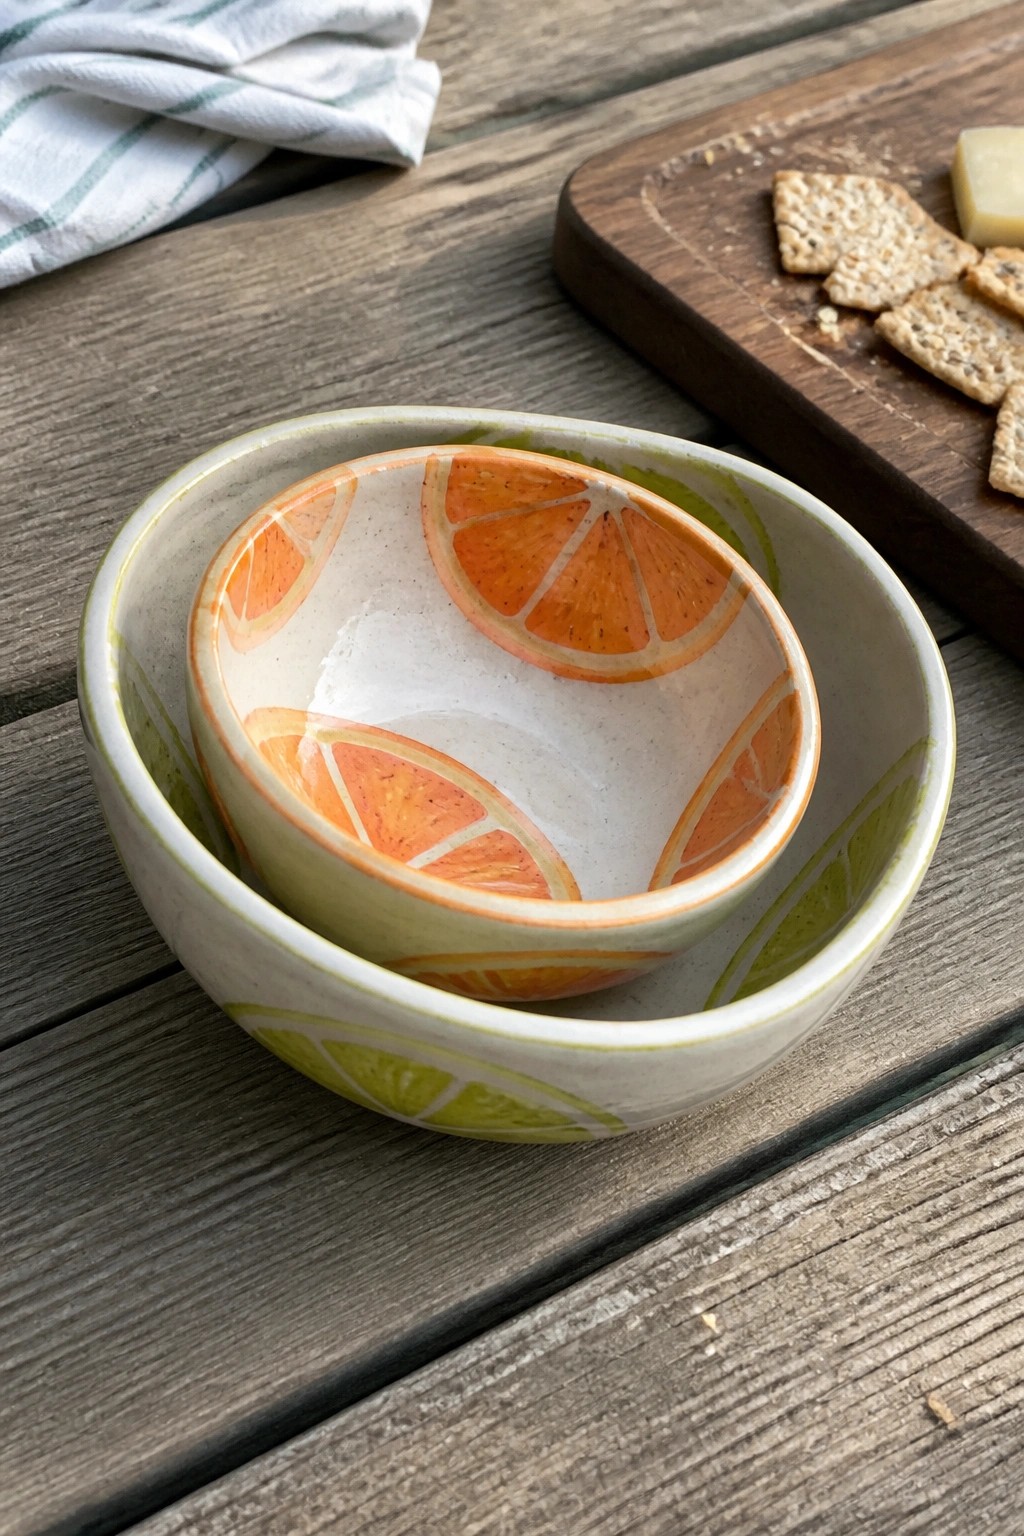
Slab-built bowls formed over slump molds gain a clear purpose when the interiors are painted with simple orange and lime slices. The fruit sections are applied in flat color blocks with light outlines so the design reads quickly from a short distance. This keeps the focus on the curved form while turning the bowls into a matching set that can sit together or be used separately.
What makes this idea useful is how the painted slices can be swapped for other fruits or repeated in a single color for a more uniform look. The bowls suit snack portions or small sides on a table and stack neatly for storage. The same motif works on a larger serving bowl or a set of ramekins if the scale of the fruit is adjusted to fit the new size.
Wall Pocket Planter from a Slump-Molded Slab

A slab-built wall planter starts with a simple rounded form slumped over a mold to create a shallow bowl shape. The flat back and single hanging hole turn it into a piece that mounts directly on a wall while still holding soil and a small plant. The visible texture on the clay surface and the muted green glaze keep the focus on the plant rather than on extra decoration. This approach stays within slab techniques but shifts the finished object from a tabletop bowl into hanging storage.
What makes this idea useful is how the same slumped shape can be made narrower or wider to fit different plant sizes without changing the basic construction. The compact scale works well in bathrooms, hallways, or kitchens where floor space is limited. You could leave the surface unglazed for a drier look or add a small drainage hole at the bottom if you want to grow something that needs it. The same form also adapts easily into a shallow herb pocket or a holder for kitchen tools if you change the hanging angle.
Wave Carved Slump Mold Bowl

A slump-mold bowl with a low profile and irregular wavy rim gives you a simple base for adding surface detail. The exterior carries a repeating wave pattern pressed or carved into the clay, while the inside is coated in a solid turquoise glaze that stops at the rim. This approach keeps the form functional as a pet bowl or shallow catch-all while the sculpted lines add texture and movement to the side view.
The shape does a lot of the work here because the slump mold already creates a stable, wide base that sits flat on counters or floors. You can adapt the wave motif by using a simple stamp or loop tool to repeat the pattern around the outside before the clay dries. In a kitchen or mudroom this kind of piece stays practical without taking up much space, and the same wave treatment can be scaled down for a ring dish or tray. The clear motif also photographs cleanly for project shares.
Flower Petal Ring Dish from a Slump Mold

A small slab of clay is cut into a rough circle, then draped over a simple mold to form a shallow bowl with five rounded petals. After firing, a soft pink glaze covers the surface and gold flecks are brushed on before a thin gold rim is added. The result is a compact dish that works as a ring holder or catch-all for small items on a vanity or nightstand.
The shape does a lot of the work here because the scalloped edge gives it instant visual interest without extra carving. You can make the same dish in other colors or leave the gold out for a cleaner look that still reads as handmade. Because it stays small, it is easy to produce from scraps and quick to fire, so it is a practical project when you want several matching pieces for gifts or to sell.
Two-Tone Green Slump Mold Serving Bowl

A slump mold bowl starts with a rolled slab that settles over a form to create a soft, rounded shape without much trimming. This version keeps the outside in a muted green glaze while the interior and rim stay lighter with visible speckles from the clay body. The simple color break emphasizes the texture left by the slab and gives the bowl a finished look that still reads handmade. It works as a basic kitchen piece sized for salads or side dishes.
What makes this idea useful is how the two-tone glaze choice turns a plain form into something that stands out without extra carving or handles. The shape adapts easily to different sizes if you use the same mold with smaller or larger slabs. You could swap the green for any matte glaze that leaves the interior light, or try a single color and let the rim pick up variation during firing. For a beginner project the result photographs well for sharing and doubles as a practical piece that holds up to daily use.
Multi-Candle Centerpiece Bowl
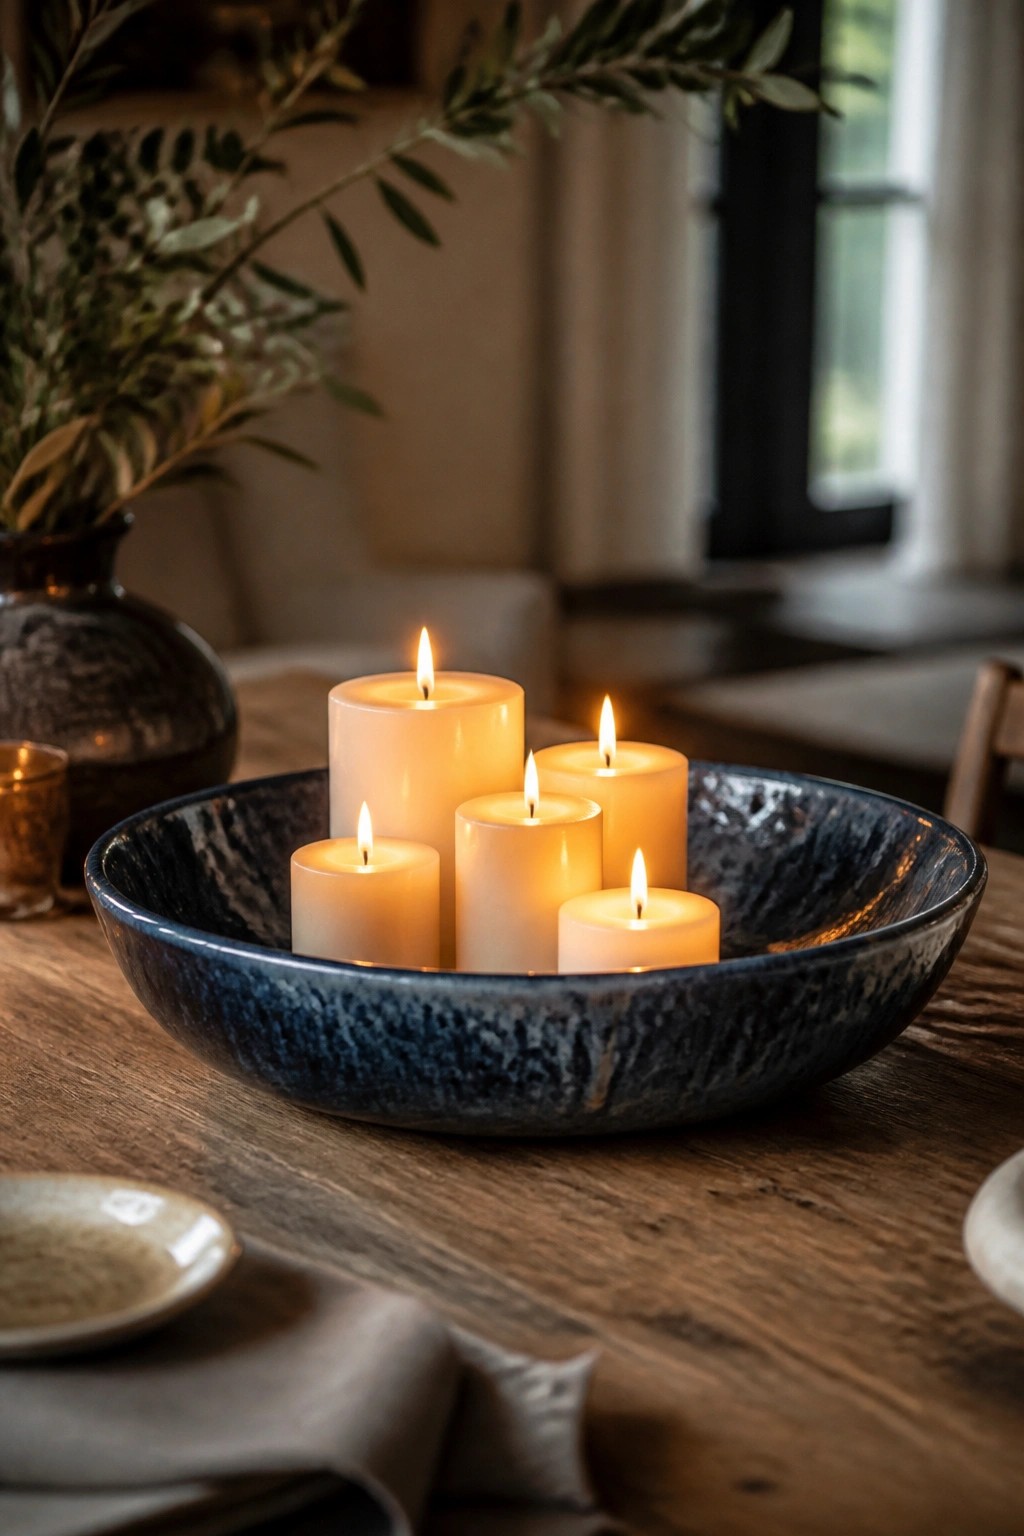
A wide, low ceramic bowl made with a slump mold gives you a stable base for grouping several pillar candles together. The dark, mottled glaze creates contrast that makes the candles the main focus while the rough surface adds visual weight. This turns the bowl into a functional decor piece that holds the candles in place without needing extra hardware or stands.
What makes this idea useful is how the bowl contains any wax drips on the table. You could scale the same form down for a smaller version that holds two or three candles on a mantel or shelf. A lighter glaze would change the look for a brighter room while keeping the same shape. The slump mold method keeps the rim even, so the piece stays balanced even when filled with candles of different heights.
Divided Slump-Mold Toothbrush Holder

A small round bowl formed over a slump mold gains function when a vertical slab divider is added down the center. This creates two separate compartments sized for toothbrushes or similar small items. Simple faces painted on each outer wall add a quick decorative layer while the speckled clay surface provides subtle texture without extra glazing steps. The result is a compact bathroom caddy that stays stable on a counter or sill.
What makes this idea useful is the way the same divided bowl shape can be scaled slightly larger for makeup brushes or kept narrow for a single-person setup. The painted faces are easy to change to simple lines or omit entirely if a plain look is preferred. Because the piece stays small, it works on crowded bathroom ledges where larger holders would not fit. The same slump-mold base can also be reworked into a desk organizer by adjusting the divider height.
Asymmetrical Pouring Bowl Made From a Slump Mold

A small slab-built bowl formed over a slump mold works well as a sauce pourer when one side is pinched into a narrow lip. The interior glaze in a warm amber tone lets the dark liquid show clearly while the speckled exterior stays matte and simple. This shape keeps the piece stable on the table yet easy to tilt with one hand.
What makes this idea useful is how the slump mold creates a wide base that still pours cleanly without a separate spout attachment. The same form adapts quickly to a small creamer, a salad dressing server, or a narrow vase for single stems by changing only the rim detail. For kitchen use it fits neatly beside a plate of dumplings or roasted vegetables and takes little shelf space when stored. The scale also makes it a quick project to repeat in different glaze colors for matching sets.
Yarn Bowl with Integrated Feeding Notch

A slump-mold yarn bowl turns a simple rounded form into a practical holder for knitting or crochet projects. The rim includes a wide notch paired with a drilled hole so the yarn strand can pull through cleanly without rolling away. Subtle horizontal ridges on the side add light texture while the glossy purple glaze keeps the surface easy to wipe clean.
What makes this idea useful is how the notch and hole solve a common yarn-tangling problem without adding extra parts. You can keep the same basic slump-mold shape and change only the notch width or glaze color to match different yarns or room colors. This kind of bowl works well on a couch arm or side table during a project and can double as a small catch-all when not in use. For a gift, the same form is easy to repeat with a different notch style or a matte finish instead.
Organic Slab Salt Cellar with Matching Spoon

A small slab-formed bowl makes a practical salt cellar or seasoning dish. The soft, irregular rim comes from draping a slab over a simple mold and letting the edges settle naturally before trimming. A matte crackle glaze in off-white keeps the surface light and easy to wipe clean while the tiny matching spoon adds a functional pair without extra parts. This approach fits the kitchen item category well because the compact size and open shape work for salt, sugar, or small spices.
What makes this idea useful is how little clay it requires, so you can batch out several in one session. The same slump-mold shape adapts quickly to a sugar bowl or herb dish by changing the glaze color or skipping the spoon. In a kitchen it sits neatly on the counter beside a cutting board or stovetop. For gifts you can add a single painted dot on the handle or swap the crackle glaze for a solid matte tone to match different dish sets.
Frequently Asked Questions
What supplies do beginners need to create slab pottery bowls using slump molds?
Start with a basic pottery kit that includes earthenware or stoneware clay, a rolling pin or slab roller for even thickness, a non-stick work surface like canvas or plastic, and a slump mold made from plaster or bisque. Add tools such as a wire cutter, sponge, and ribs for smoothing. For the 18 ideas in the article, gather simple decorations like stamps, underglazes, or slip for texture. Always work in a well-ventilated area and have access to a kiln for firing.
How do I prepare and drape a clay slab over a slump mold without tearing it?
Roll out your clay to about a quarter-inch thickness on a flat surface, then let it rest briefly to reduce stickiness. Gently lift the slab and center it over the inverted slump mold, allowing gravity to help it settle into the shape. Use a damp sponge to press the clay evenly against the mold and smooth out wrinkles. Trim excess clay around the edges with a knife once it firms up slightly. This method works well for the beginner bowl ideas and helps maintain consistent form.
What are effective ways to decorate slab pottery bowls made with slump molds as a beginner?
Apply texture with found objects like leaves or fabric before draping the slab, or add slip trailing and carving after the form sets. For the ideas featured, experiment with underglaze painting in simple patterns once the piece is leather-hard. Avoid overloading with details at first to prevent cracking during drying. Bisque fire first, then glaze with food-safe options for functional bowls. Practice on small test pieces to refine your style.
How can I prevent cracking or warping when drying slump-mold bowls?
Cover the formed bowl loosely with plastic for the first day or two to slow drying and promote even moisture loss. Place it in a draft-free spot and rotate it occasionally. For the slab techniques in the article, ensure the clay slab has uniform thickness from the start. Once leather-hard, remove from the mold carefully and continue drying slowly. If cracks appear, score and slip the area to repair before firing.
Where can I source affordable slump molds or make my own for these pottery projects?
Purchase ready-made plaster slump molds from pottery supply stores or online retailers that cater to beginners. To make your own, pour plaster into a bowl shape and let it set, then sand smooth. Many of the 18 ideas use household items like glass bowls as temporary molds. Start with inexpensive options and upgrade as your skills grow through practice with slab pottery.

Pottery Path is my cozy corner of the internet where I share clay ideas, pottery inspiration, and simple projects you can recreate at home. I love exploring everything from air dry clay to handbuilt pottery to cute minis that brighten your day. My goal is to make clay crafting feel easy, fun, and welcoming for anyone who wants to try it.
You will find beginner friendly tutorials, creative pottery painting ideas, and lots of warm inspiration for slow and happy crafting. If you enjoy hands on creativity, this space will feel like home.