
I started using paper templates for my slab pottery a while ago because it helped me get consistent shapes without much fuss.
It turned out to be a good way to practice basic techniques while making useful things around the house.
Over time I came up with a bunch of simple projects that don’t require fancy tools or advanced skills.
This article shares twenty of them that I think work well for anyone just getting started with slabs.
I hope you find a few that fit what you want to try next.
Slab Mug Built from a Paper Template
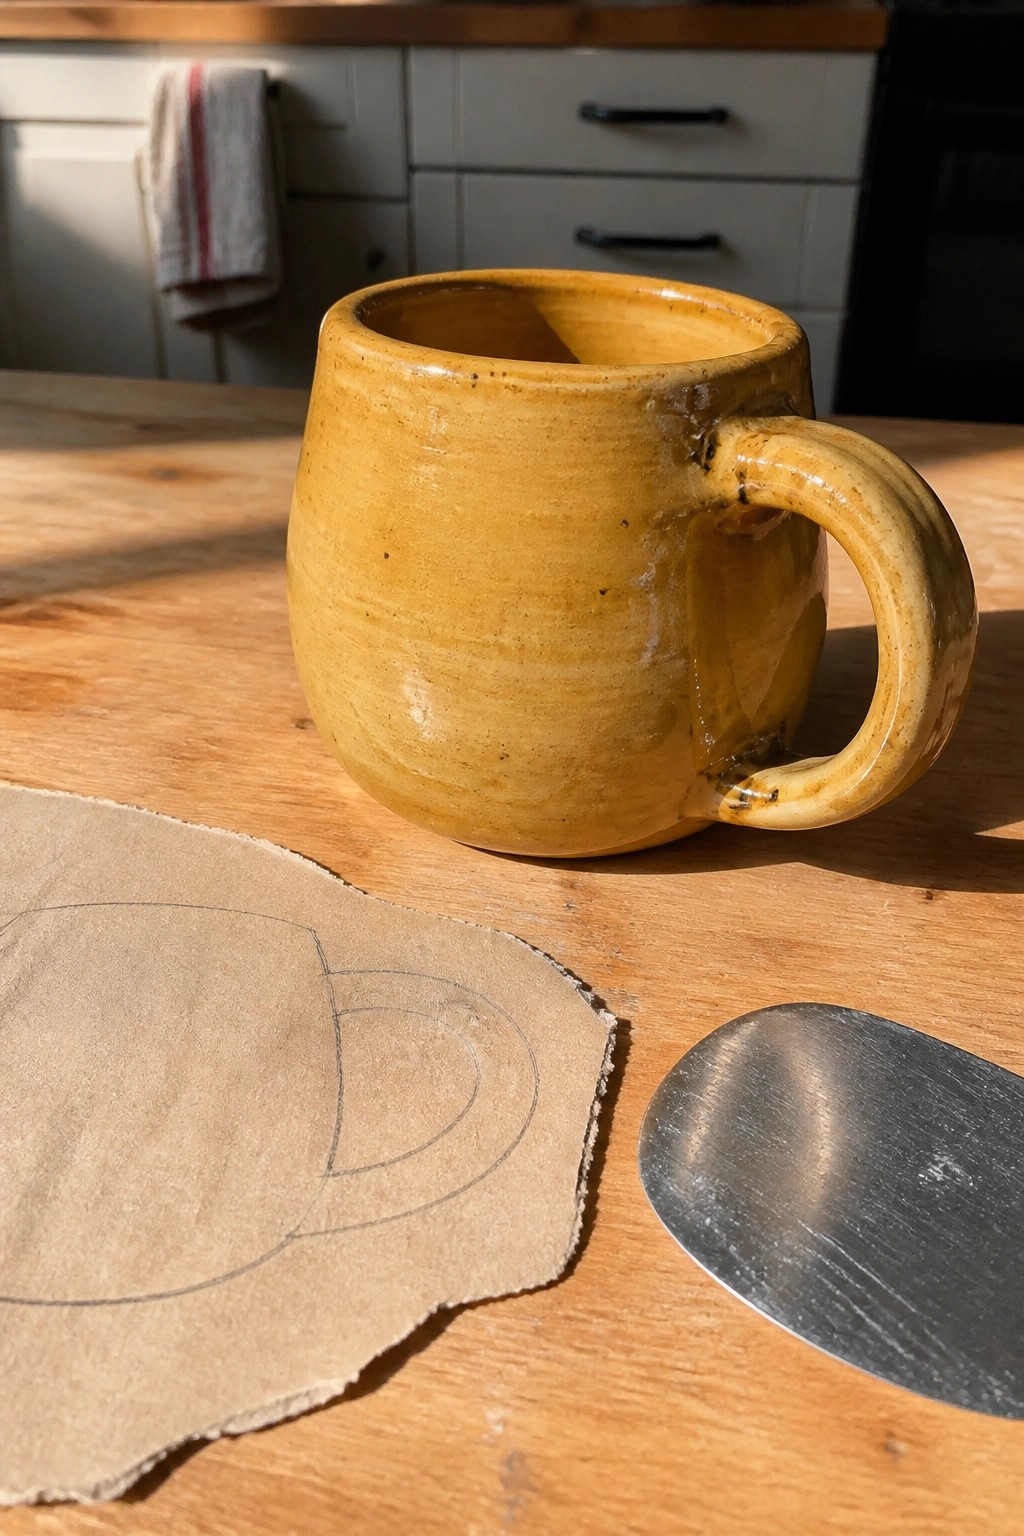
A slab mug starts with a paper template that lets you cut matching shapes for the body and base from rolled clay. The template keeps the curve even so the sides meet cleanly when joined, and the handle gets added from a separate strip. The result is a simple, rounded drinking vessel that works well as a kitchen item for daily use. The yellow glaze on this example highlights the slightly textured surface that comes from hand-built slab work.
What makes this idea useful is that the template removes the need to freehand the shape, so proportions stay reliable even on early attempts. You can trace the same drawing multiple times to make a matching set or adjust the height on the paper to create taller or shorter versions. In a kitchen this kind of piece holds up well for coffee or tea because the sturdy walls resist cracking from temperature changes. The same template approach can be reworked into a small pitcher by extending the body height and adding a spout.
Rectangular Tray Cut from a Paper Template
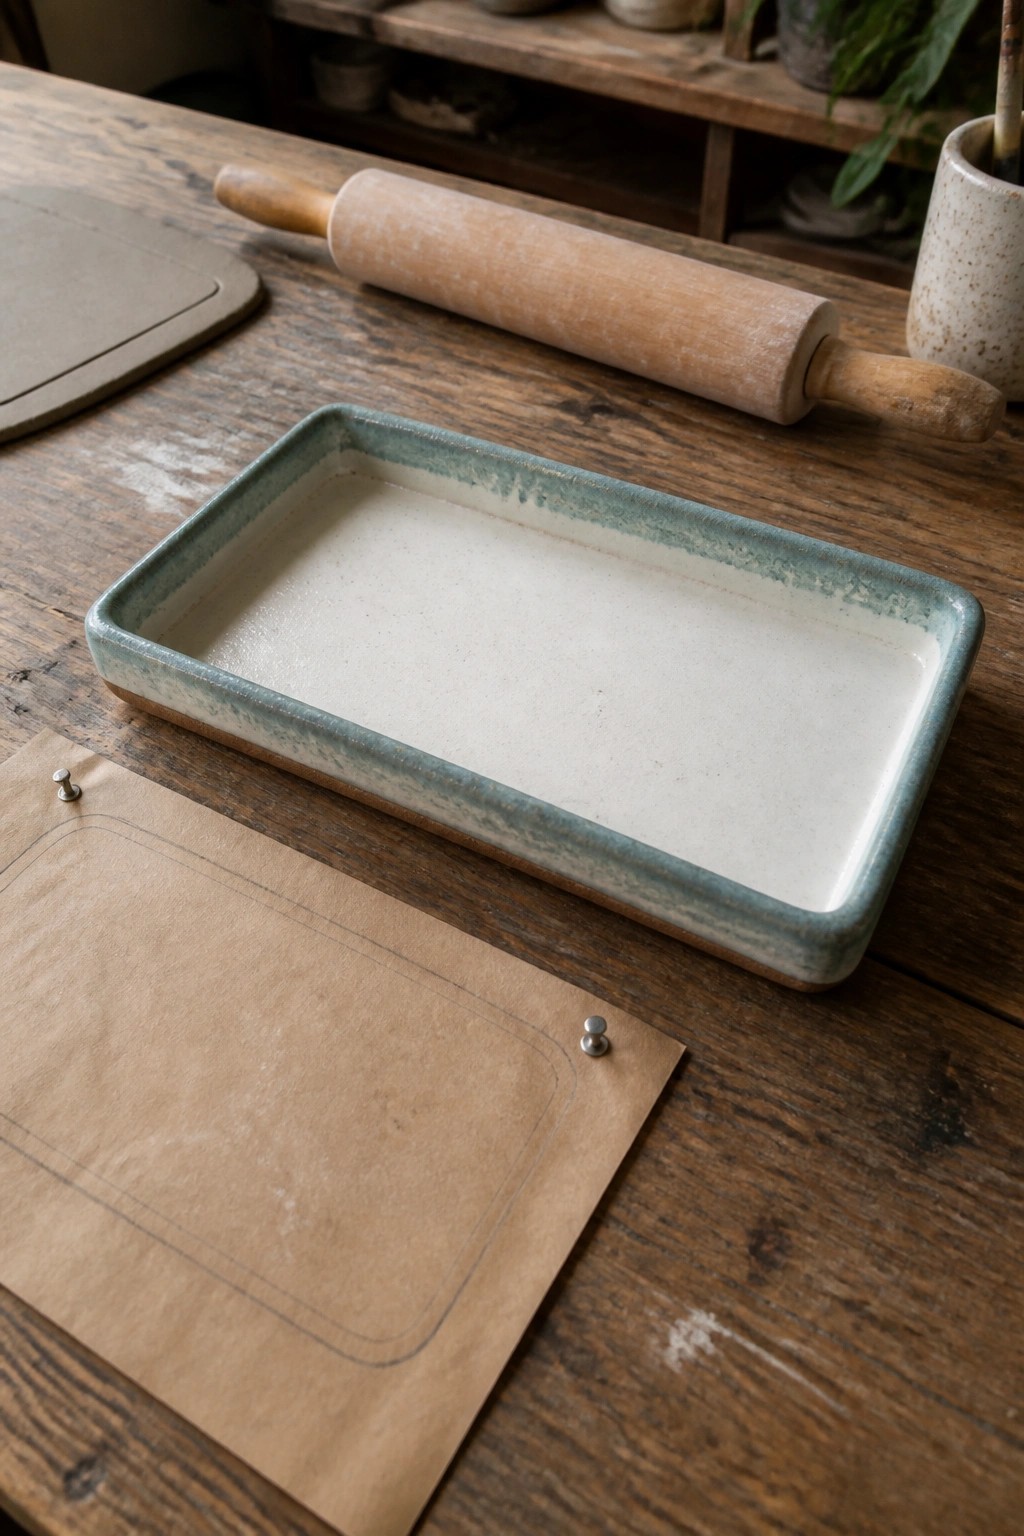
A rectangular tray built from clay slabs uses a paper template to mark and cut the base and side walls to matching sizes. The form stays low and flat with softly rounded corners, making it easy to assemble without complex joins. A simple white glaze on the interior paired with a blue-green rim keeps the surface clean while the exposed clay edge adds a natural finish. This project falls into the kitchen or desk tray category and works as a small catch-all or serving piece.
What makes this idea useful is how the template removes guesswork on proportions so you can quickly resize it for different uses. The same shape scales down easily into a soap dish or ring tray by shortening the template length and width. A piece like this works especially well on a kitchen counter for holding utensils or on a desk for mail and keys. You could swap the rim color or add a subtle texture to the base if you want to change the look without altering the construction.
House Planter Built from a Slab Template
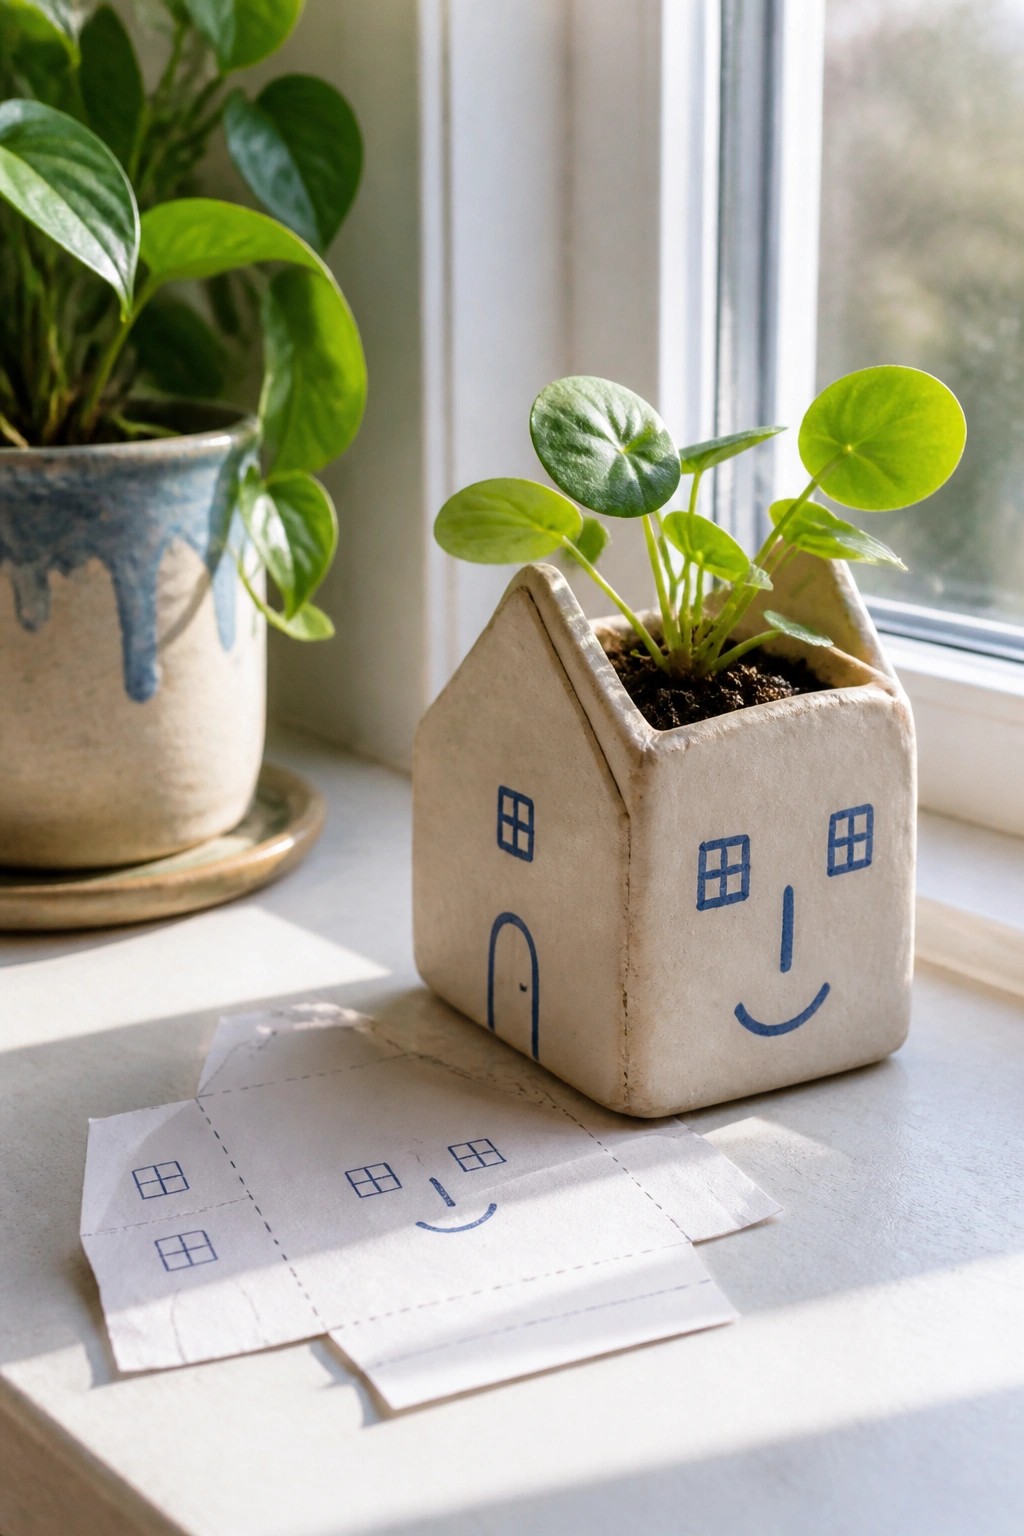
This project uses a flat paper template to cut clay slabs that assemble into a small house-shaped planter. The front and sides feature simple line drawings of windows, a door, and a curved smile that turn the form into a face without adding bulk or extra pieces. The unglazed clay surface keeps the focus on the clean edges and drawn details while the open top holds a small plant.
What makes this idea useful is how the template controls the proportions so the walls meet evenly at the corners. The small scale works well on a windowsill or desk where a full-size pot would feel too large. You can swap the face drawing for any simple motif or skip the decoration entirely and use the same template for a plain house shape. The flat sides also make it straightforward to add underglaze lines before the first firing if you want color without a full glaze layer.
Wavy Rimmed Shallow Bowl
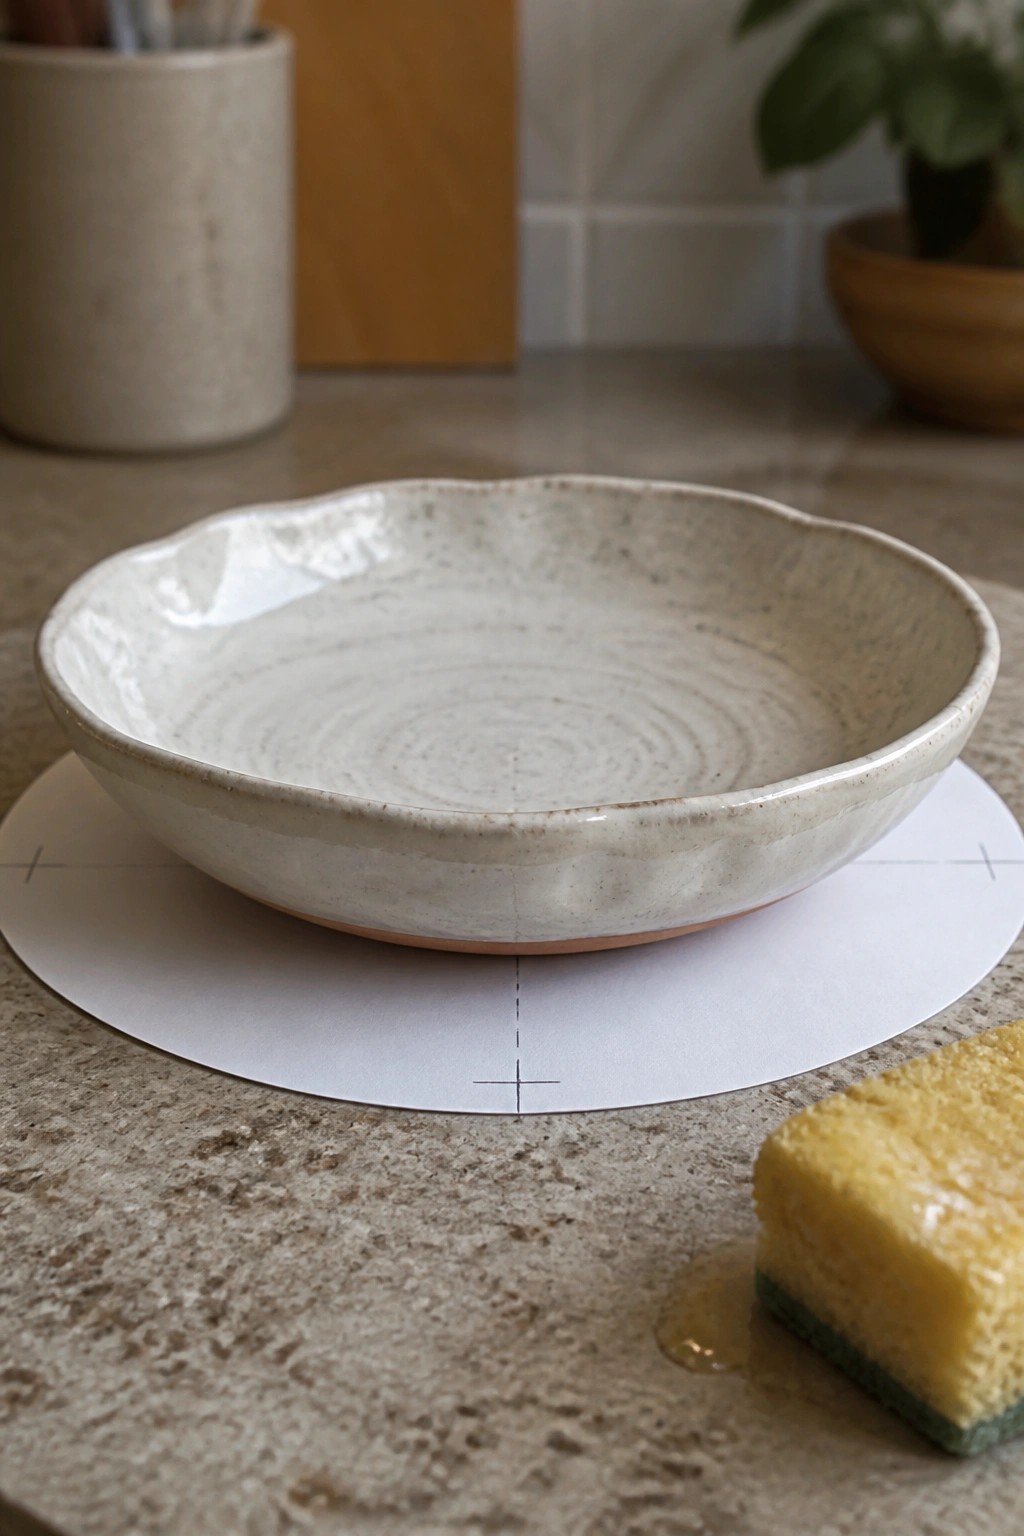
A shallow bowl formed from a rolled slab gives you an easy way to create a wide, low profile piece for snacks or fruit. The irregular wavy edge comes directly from cutting around a paper template that lets the rim curve in and out naturally. Light speckled glaze over the interior shows the subtle rolling texture while the unglazed foot keeps the form simple.
What makes this idea useful is how the template controls the overall diameter and rim shape without needing much trimming. You can enlarge or shrink the same pattern to make a smaller dish for keys or jewelry. The low sides also work well stacked in a cabinet or left out on a counter as everyday tableware.
Leaf Imprint Striped Hanging Tile
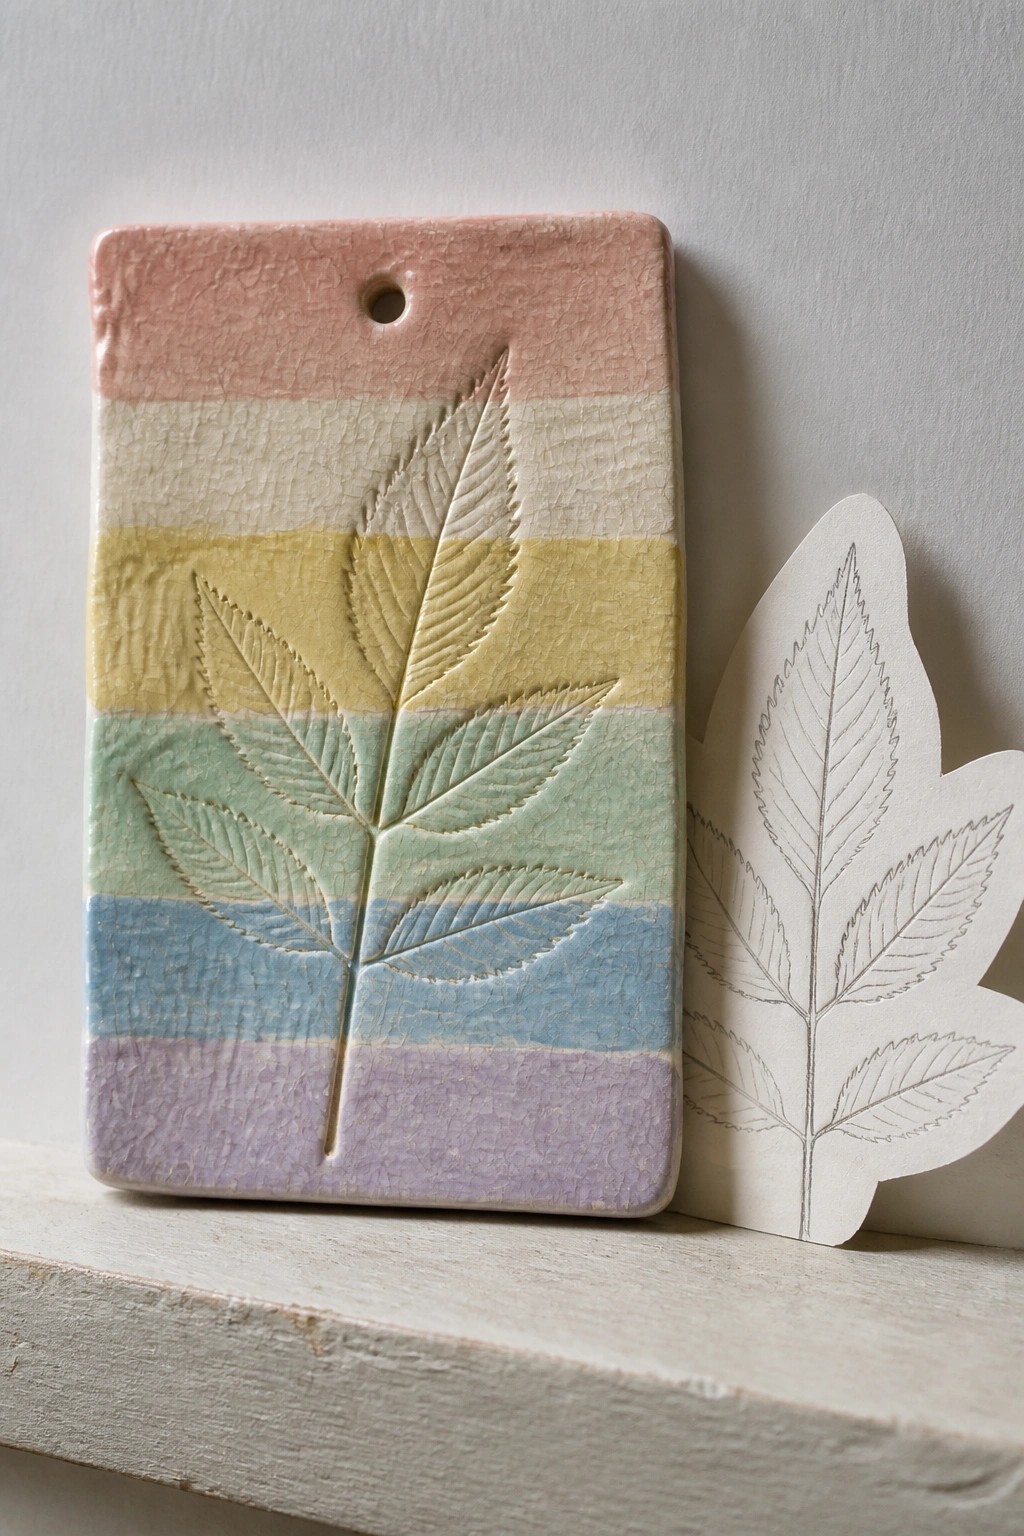
A rectangular slab tile with a hole drilled near the top makes an easy hanging decor piece. Horizontal bands of pastel glazes in pink, yellow, green, blue, and purple create a striped background while a single large leaf stays raised in the center through simple impression. The leaf comes from pressing a paper template into the clay, which transfers the vein pattern clearly without extra carving tools.
What makes this idea useful is how the paper template lets you repeat the same leaf shape across multiple tiles or resize it quickly. The narrow rectangular format works well on a narrow wall, in a bathroom, or grouped with other small slabs on a shelf. You could change the stripes to solid colors or swap the leaf for a different outline like a fern or simple flower using the same template approach. For a smaller version, cut the slab down and skip the hanging hole to turn it into a desk or windowsill accent.
Slab Spoon Rest from a Paper Template
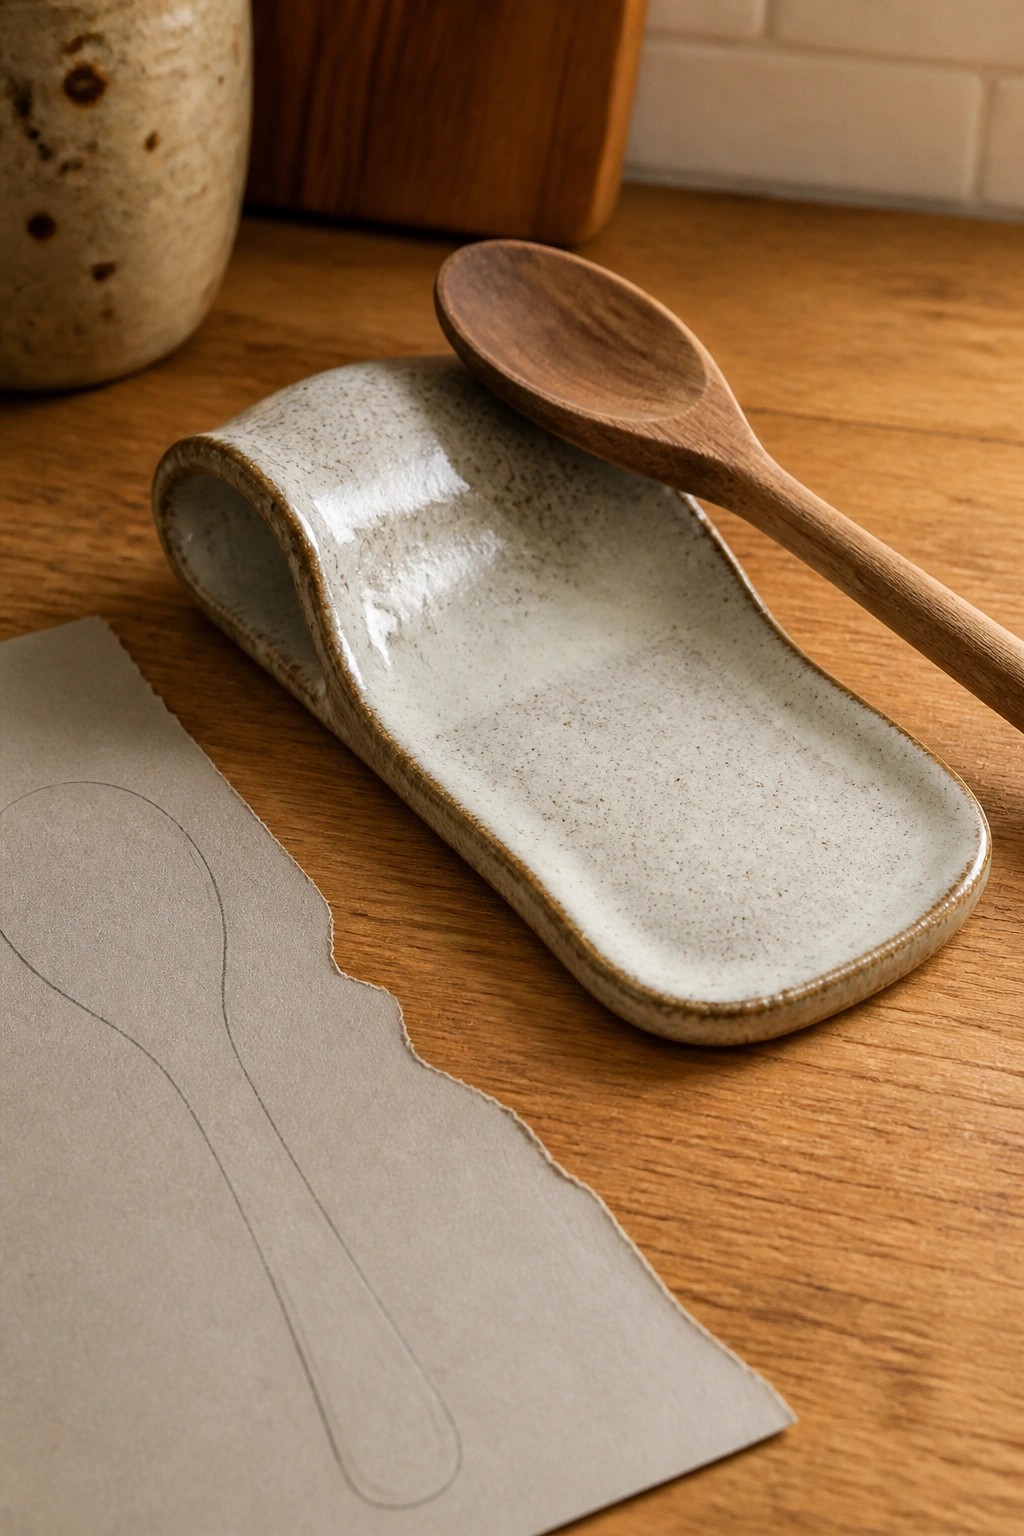
A spoon rest cut from a flat slab of clay gives you a stable place to set cooking utensils without marking the counter. The paper template defines the elongated shape with one end gently curved upward so the spoon handle rests across the top. A light speckled glaze covers the surface and leaves the clay edges exposed for contrast. This kitchen item stays small enough to keep near the stove while still holding a full-size wooden spoon.
What makes this idea useful is how the template lets you adjust length and curve to match different spoon sizes or even turn it into a rest for tongs. The raised end keeps the utensil from rolling away, which works especially well on a busy prep surface. You could simplify the template into a straighter rectangle for a more minimal look or widen it slightly for a small spatula rest. For a gift, something like this takes little clay and still feels like a practical addition to any kitchen.
Flower Ring Dish from a Paper Template
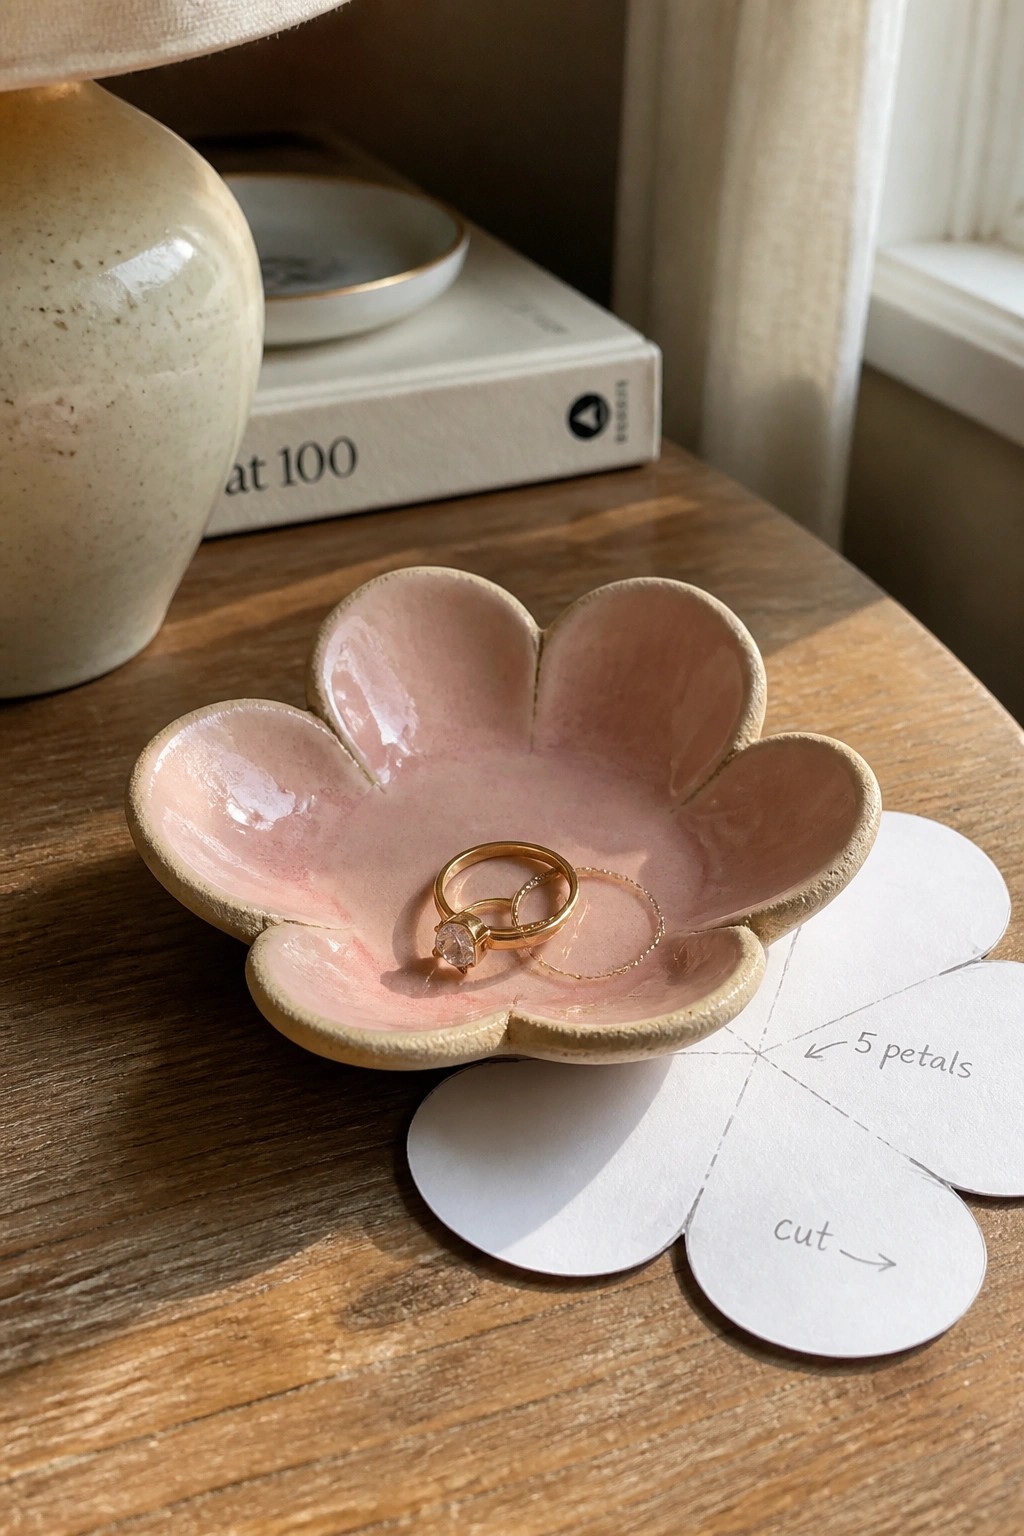
A five-petal flower ring dish made from a rolled clay slab creates a shallow, open tray for small jewelry. The paper template lets you cut even, rounded petals quickly, and the finished piece gets a glossy pink glaze on the inside while the outer edges stay matte. This shape works as a simple ring dish because the wide, flat center holds items without rolling and the petals add just enough height to keep things contained.
What makes this idea useful is that the same template can be printed at different sizes or with fewer petals to create matching trays or soap dishes. A piece like this works especially well on a dresser or bathroom shelf where space is limited. You could swap the glaze for a solid color or leave the petals unglazed for contrast. The template approach also makes it easy to repeat the project in batches for gifts without redrawing the shape each time.
Square Slab Tea Light Holder
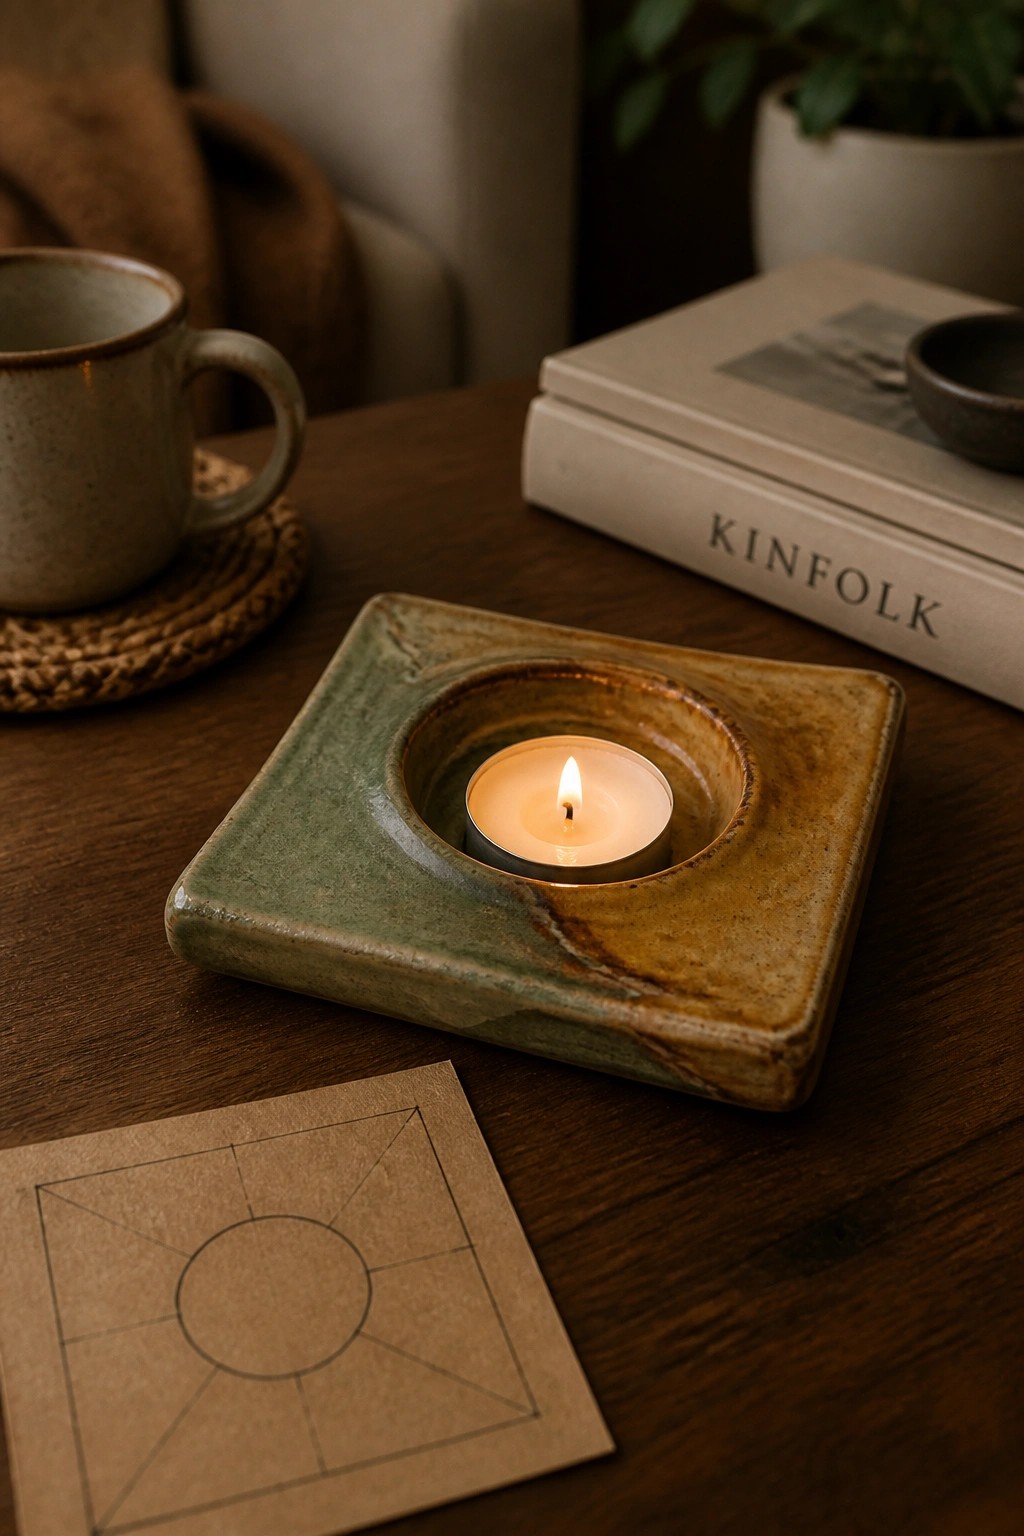
A square tea light holder cut from a flat clay slab gives beginners a straightforward way to make a functional candle piece. The paper template guides the outer square shape and the inner circle for the recessed well, so the candle sits level and contained. Rolling the slab evenly and pressing the template down keeps the walls low and the base stable without extra supports. The green and brown glaze shows how simple surface texture from the slab can catch color variations during firing.
What makes this idea useful is that the same template can be resized or rotated to create matching sets for tables or shelves. The small footprint works on a desk or windowsill and leaves room to experiment with different edge trims or added feet before drying. This shape also translates easily into a shallow ring dish or soap rest by skipping the center well and adjusting the depth slightly.
Rectangular Slab Soap Dish with Drainage Slots
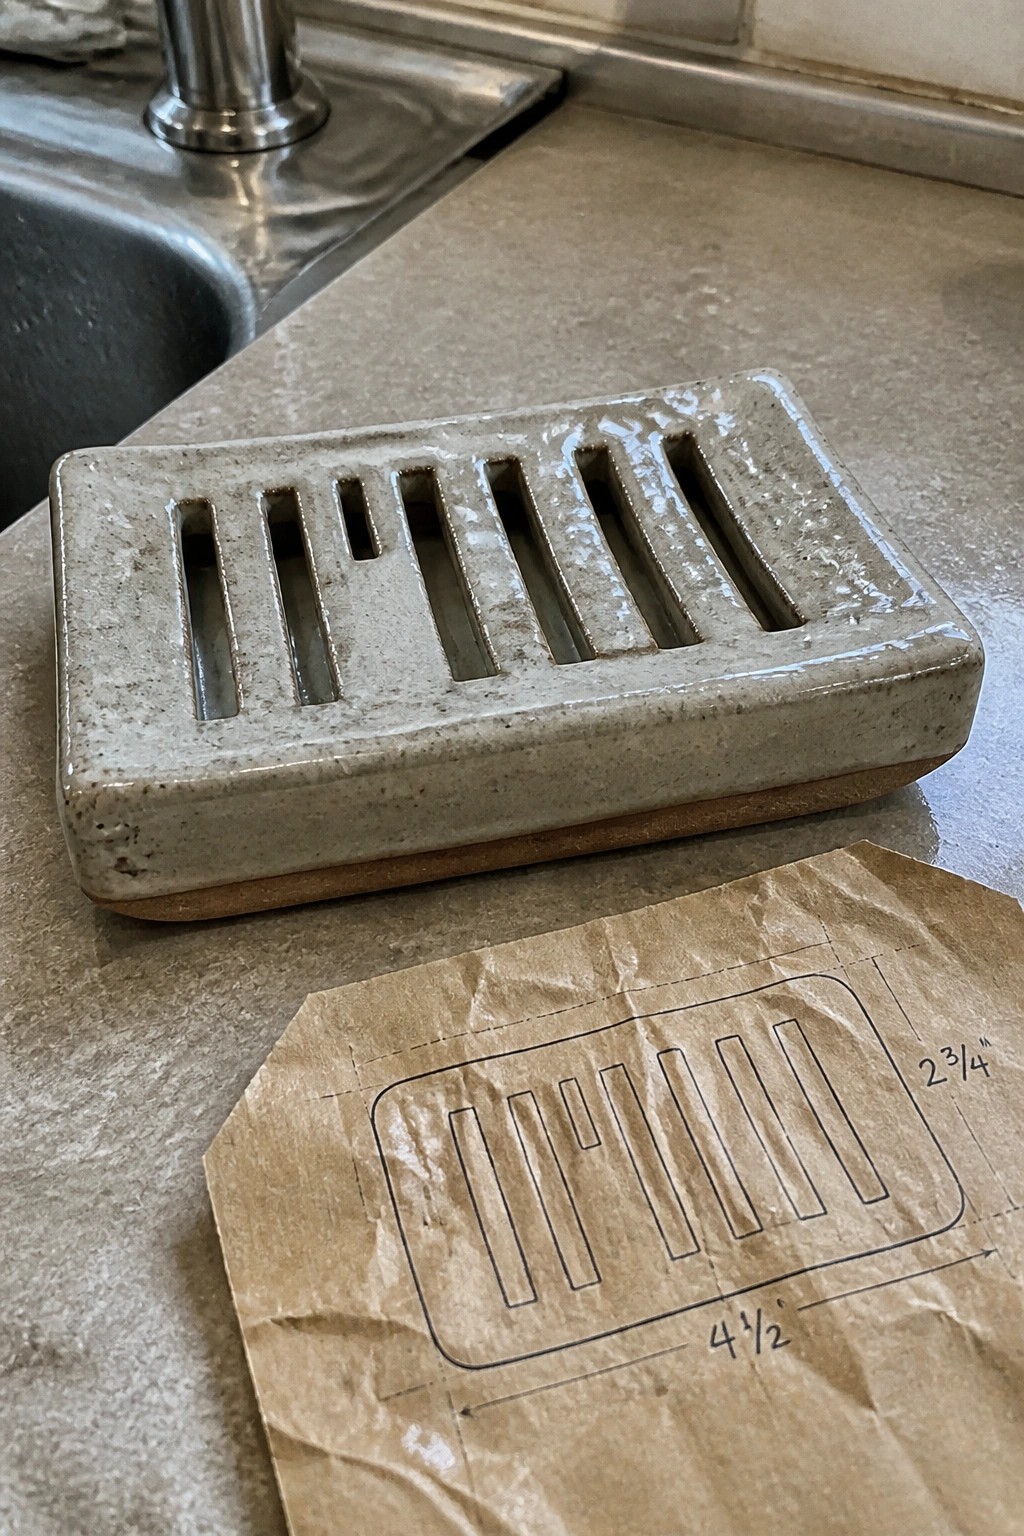
A slab-built soap dish makes a practical bathroom or kitchen item. The rectangular shape includes several long parallel slots cut into the top so water drains away from the soap bar. A light speckled glaze covers the surface and gives it a slightly textured finish that works well with the handmade form. The project relies on a simple paper template to keep the base and walls consistent during construction.
What makes this idea useful is how the slots prevent soggy soap and help it last longer. The compact size sits neatly on a sink ledge or shower shelf without taking much space. You could scale the template up for a larger sponge holder or swap the slot layout for a more open design. In a kitchen this shape also works for holding sponges or scrubbers near the sink.
Slab-Built Pitcher with Paper Template Spout
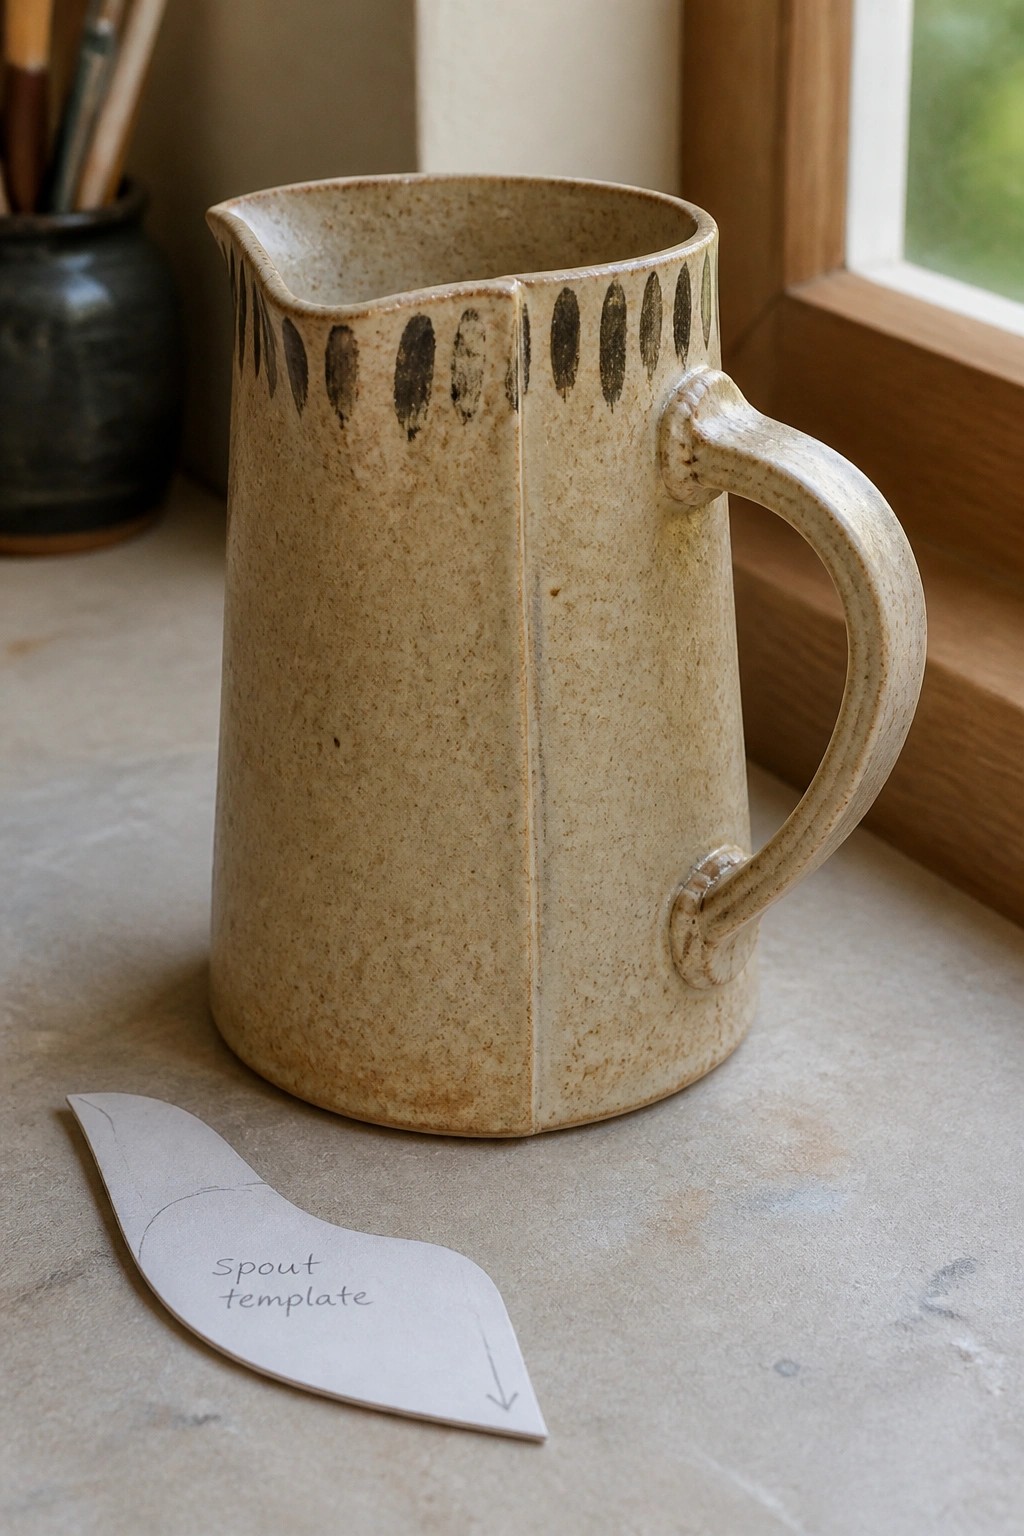
A slab pitcher starts with flat clay sheets rolled to an even thickness and joined into a tapered cylinder. The spout is cut using a paper template that gives a consistent curve and lip angle for smooth pouring. Black oval marks fired onto the rim provide simple contrast against the speckled matte surface, while the pulled handle attaches at two points for balance.
What makes this idea useful is how the template removes the need to freehand the spout shape. This size works well for milk, cream, or small-batch dressings on a kitchen counter. You can reuse the same template on a shorter cylinder to make a creamer or swap the oval marks for a single band of color. The construction stays practical for beginners who want a functional object without wheel throwing.
Scalloped Lidded Salt Cellar
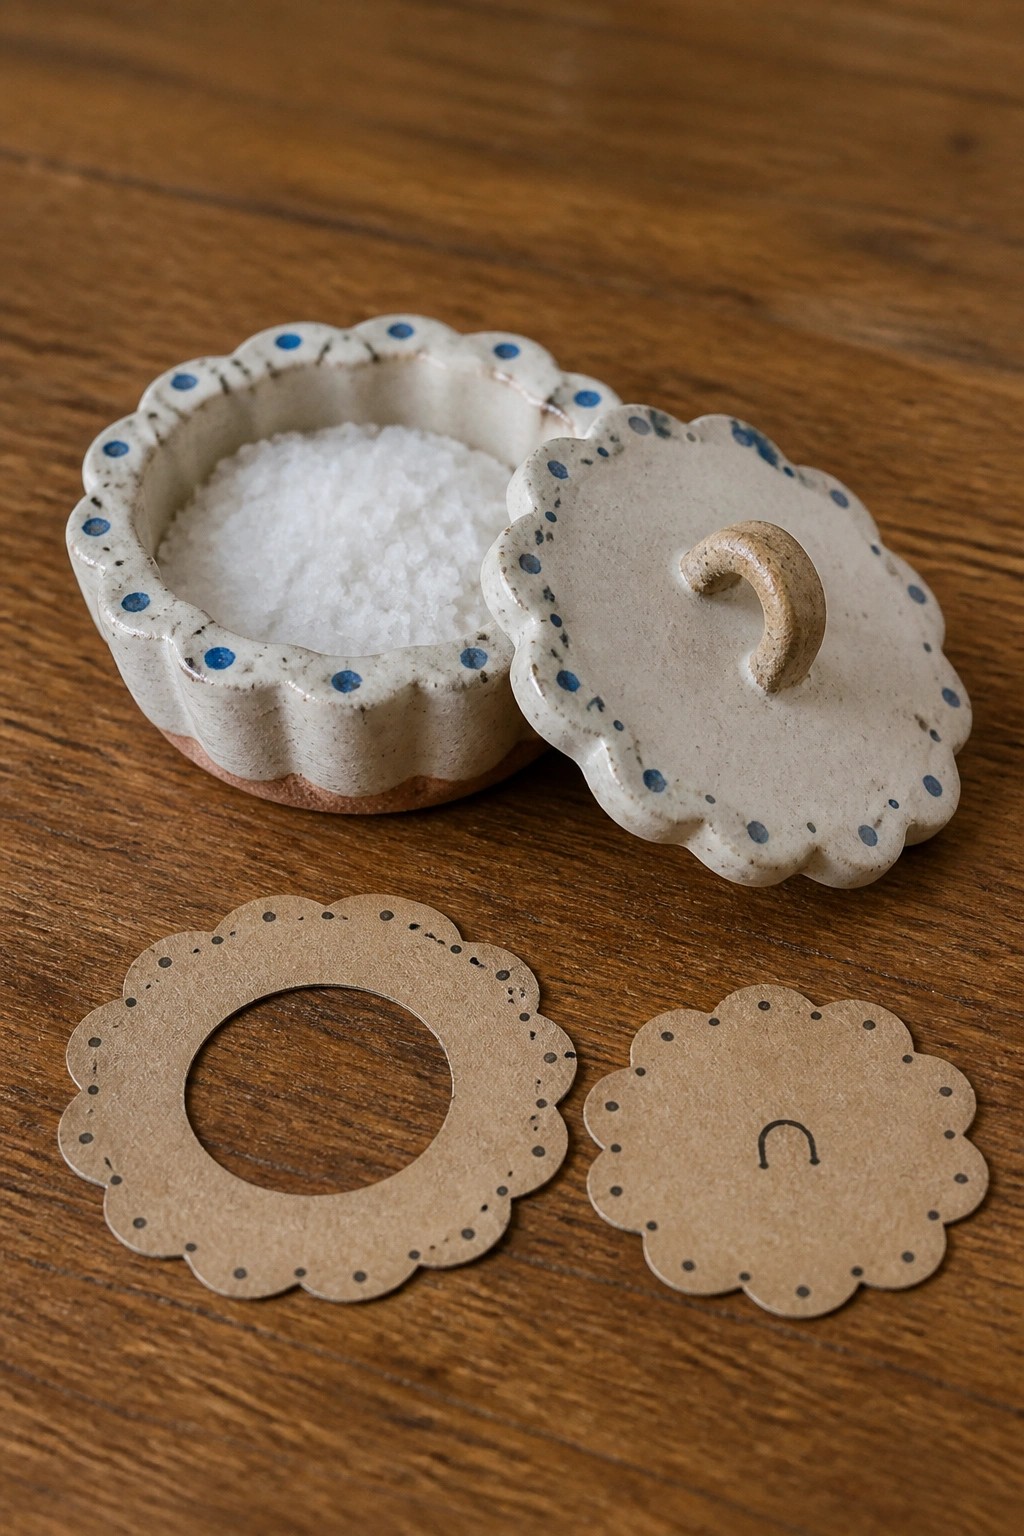
A small lidded container built from slabs makes a practical holder for salt or spices. Cut both the base and lid from clay using the same scalloped paper template, then add a simple looped handle cut from a second template. Blue dots spaced around the rim create contrast against the light clay without needing complex decoration. The result is a compact kitchen item that sits easily on a counter or shelf.
What makes this idea useful is how the templates handle the repeating scalloped edge so you do not have to draw it freehand each time. You could reuse the same shapes to make a small butter dish or a covered sugar bowl by adjusting the depth. The dots are quick to paint on before the bisque firing and help the piece look complete. For a gift, something like this packs flat and still feels like a finished kitchen object.
Multi-Compartment Striped Toothbrush Holder
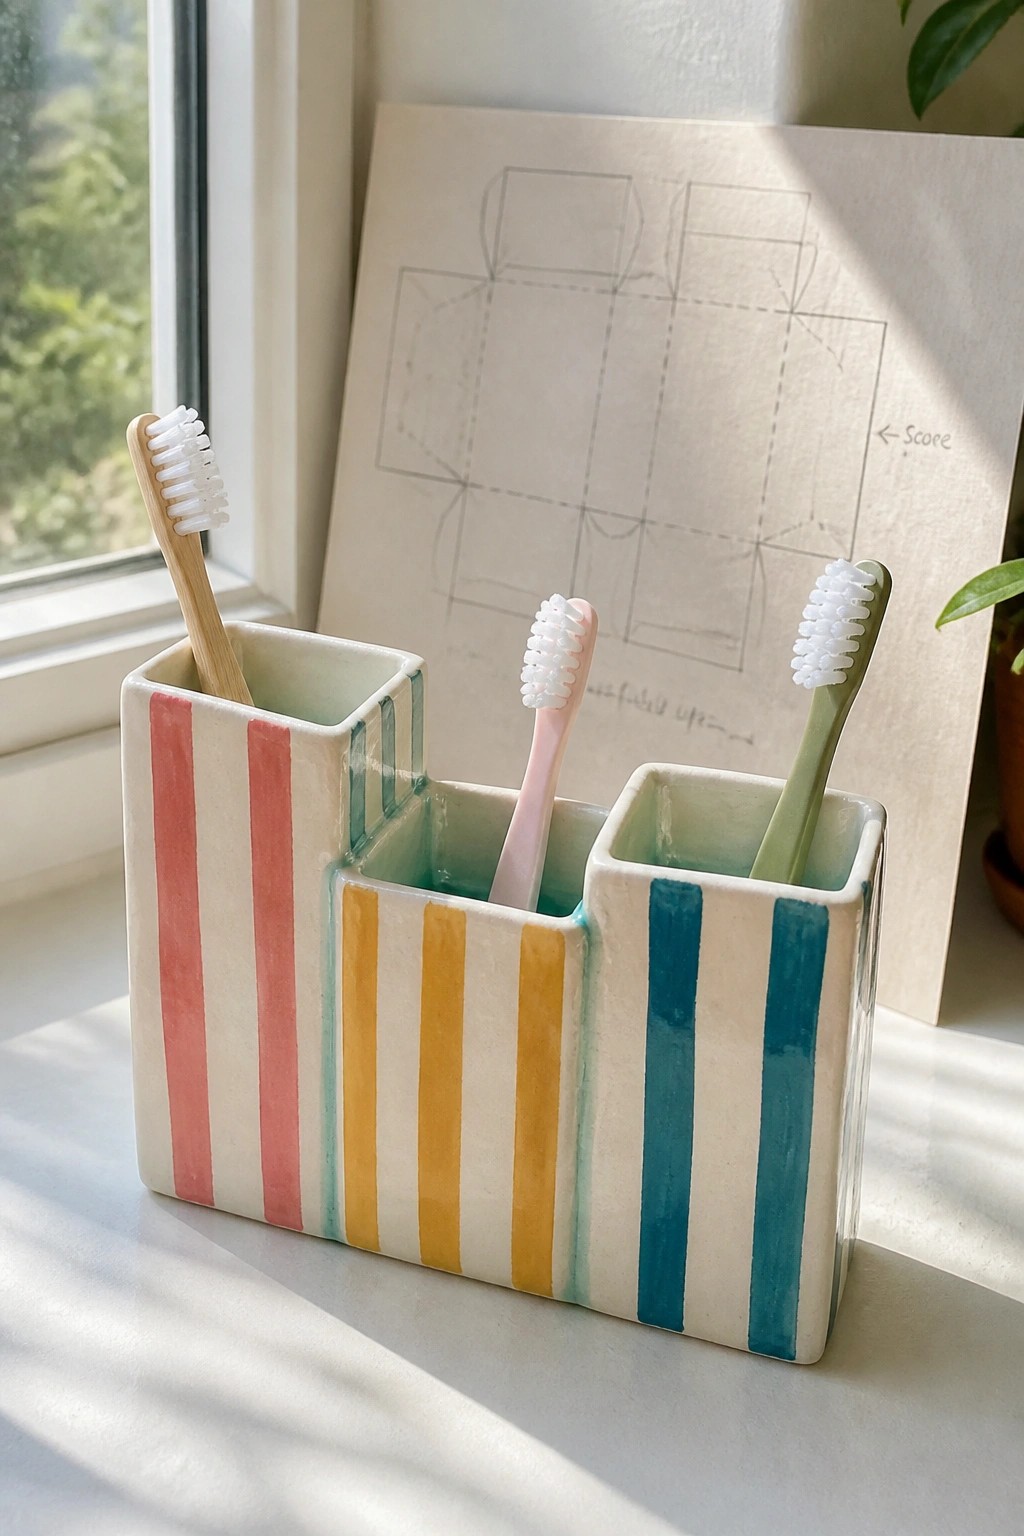
A slab-built ceramic toothbrush holder with three connected compartments keeps brushes upright and separated in one compact piece. Vertical stripes in red, yellow, teal, and blue on a light clay base give each section a distinct look while the rectangular form stays flat-sided and easy to build from a single template. The open tops and low walls make it simple to lift brushes out without extra handles or lids.
What makes this idea useful is how the same template layout can be widened or narrowed to fit two, four, or five slots depending on how many people share the bathroom. The stripe pattern is quick to paint with underglaze before firing and helps the holder stand out on a counter without needing added texture or lids. This shape also works as a small desk caddy for markers or a kitchen spot for cooking utensils once the template is adjusted for different heights.
Spiral Yarn Bowl from a Slab Template
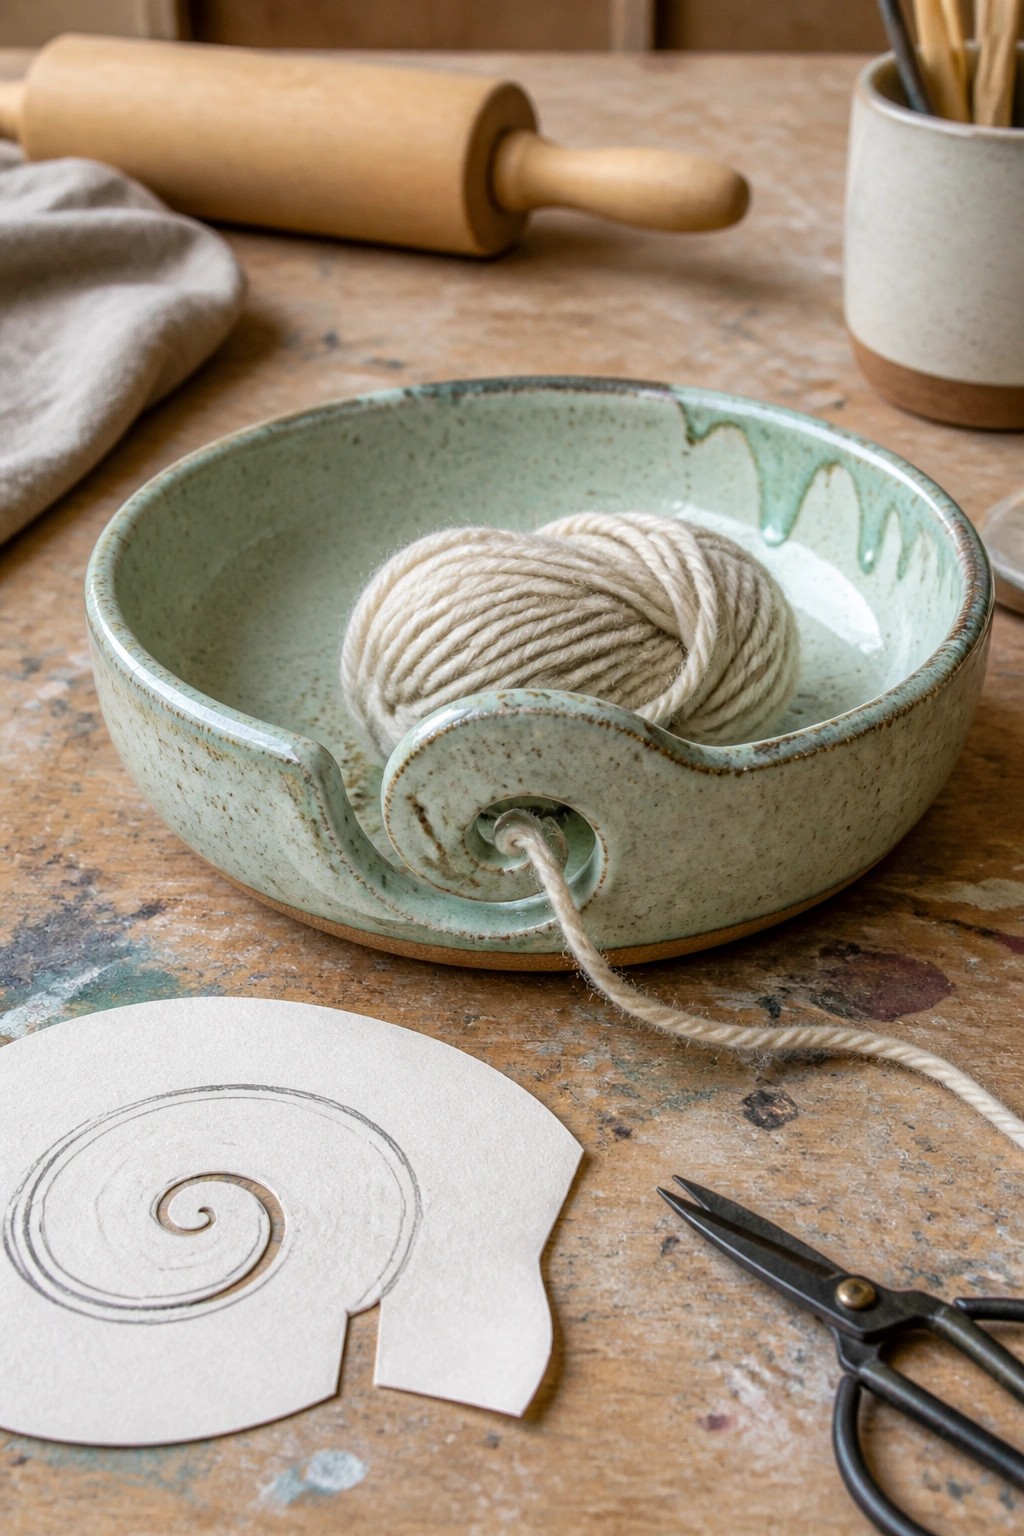
A slab-built yarn bowl uses a paper template to cut a spiral opening along the rim so yarn feeds out smoothly from a ball resting inside. The rounded form keeps the yarn contained while the swirl cutout acts as a built-in guide that prevents tangles during knitting or crochet. This approach turns a plain bowl into a dedicated craft tool without needing extra hardware or attachments.
What makes this idea useful is how the template method lets you create the exact opening size and curve on the first try, then repeat it for matching sets. You can scale the spiral down for a small desktop version or widen it for thicker yarns, and the same cutout shape works on a shallow tray for embroidery floss. In a craft room this piece keeps supplies tidy and visible at once, which helps it perform well in project photos.
Slab Napkin Holder with Botanical Painting
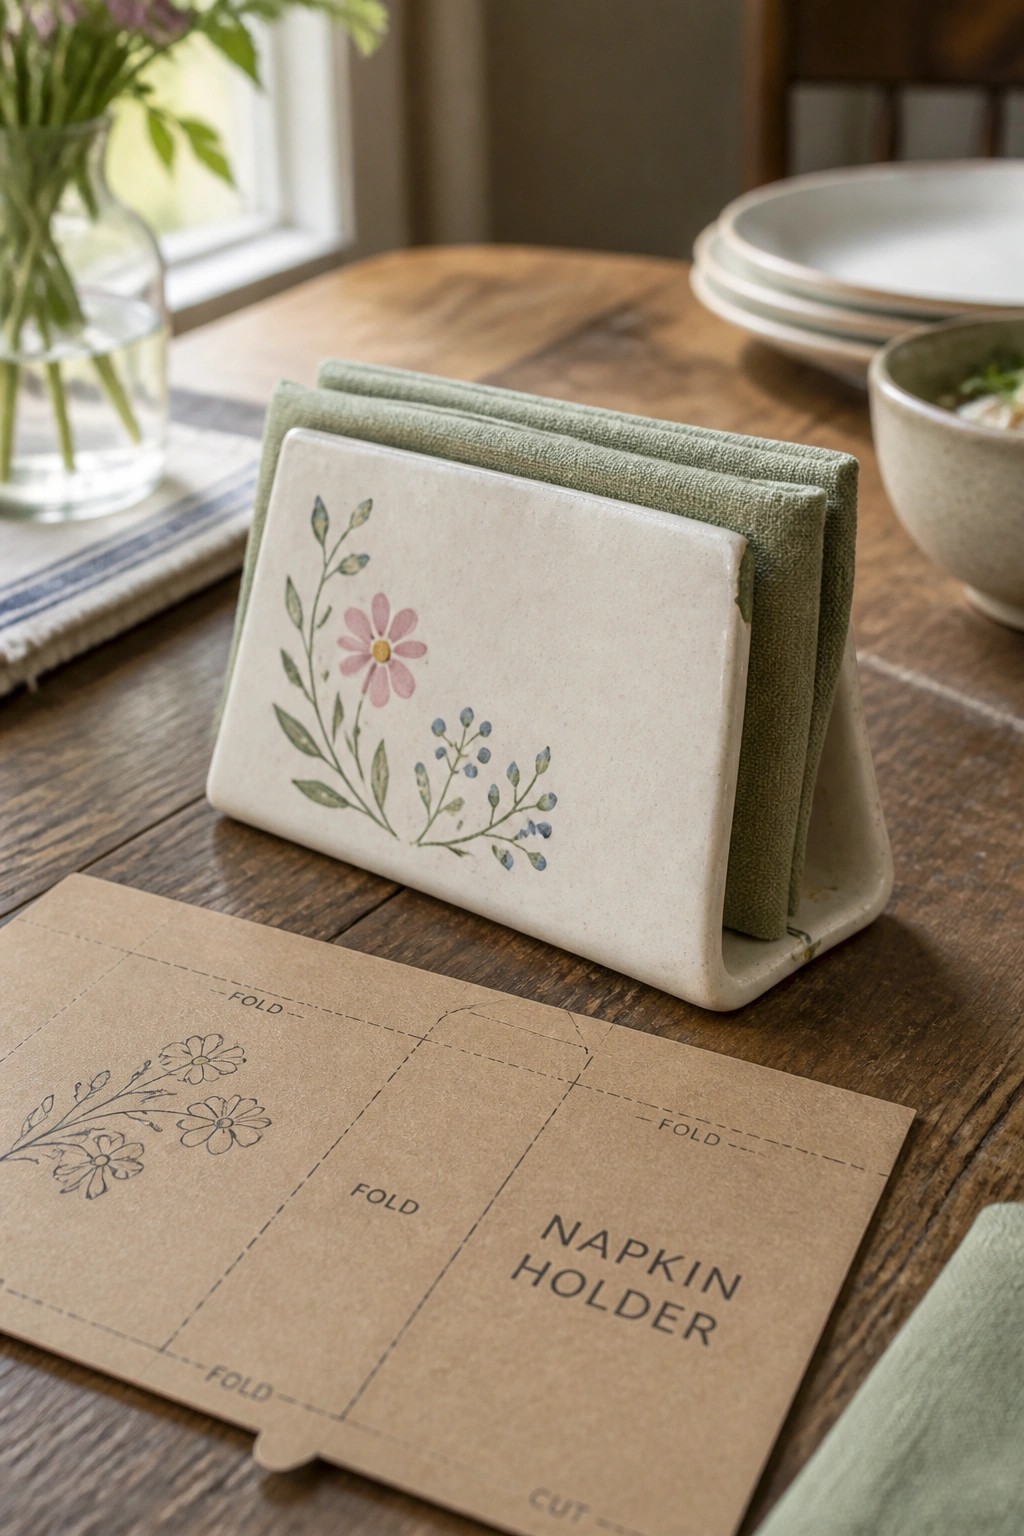
A slab napkin holder starts with a simple paper template that you cut, fold, and drape over to form the upright stand shape from clay. The flat front surface works well for adding a painted floral design of pink daisies and small blue berries on a matte white finish. This kitchen item keeps folded napkins upright and accessible while the illustration stays contained to one visible panel.
The shape does a lot of the work here because the angled base stays stable without extra supports or trimming. You could reuse the same template to make a shorter version for holding mail or recipe cards. In a kitchen, this kind of piece fits on a dining table or counter and pairs easily with cloth napkins for everyday use or as a quick gift. The painted motif can be swapped for other line drawings to match different table settings.
Cat-Shaped Slab Planter
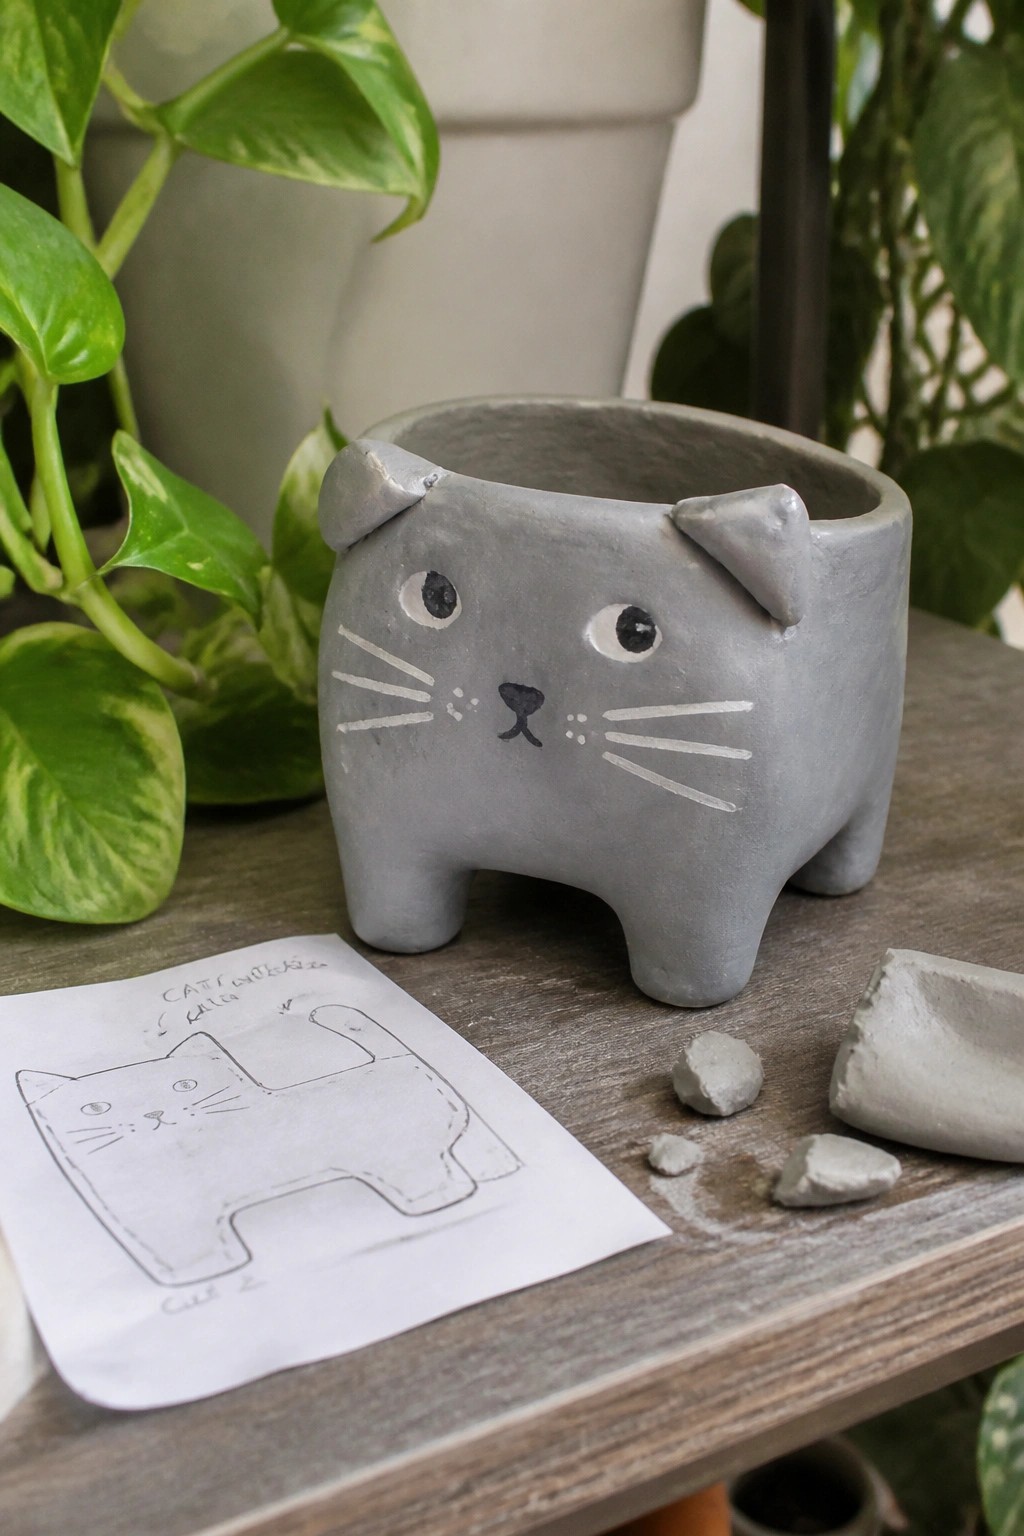
A slab-built cat planter starts with a paper template to cut the main body shape from a flat piece of clay, then adds separate slabs for the ears and four short legs. The open top forms the planting area while the legs raise the piece off the surface. Painted details like eyes, nose, and whiskers are added after the clay dries but before firing, keeping the surface smooth and the form simple.
What makes this idea useful is how the template method keeps the body proportions consistent without needing advanced sculpting skills. The compact size works well on a desk or shelf for a small succulent or herb. You could swap the painted face for different colors or patterns, or reuse the same template cuts to build a dog or rabbit version for a small collection.
Slab-Built Utensil Crock from a Paper Template
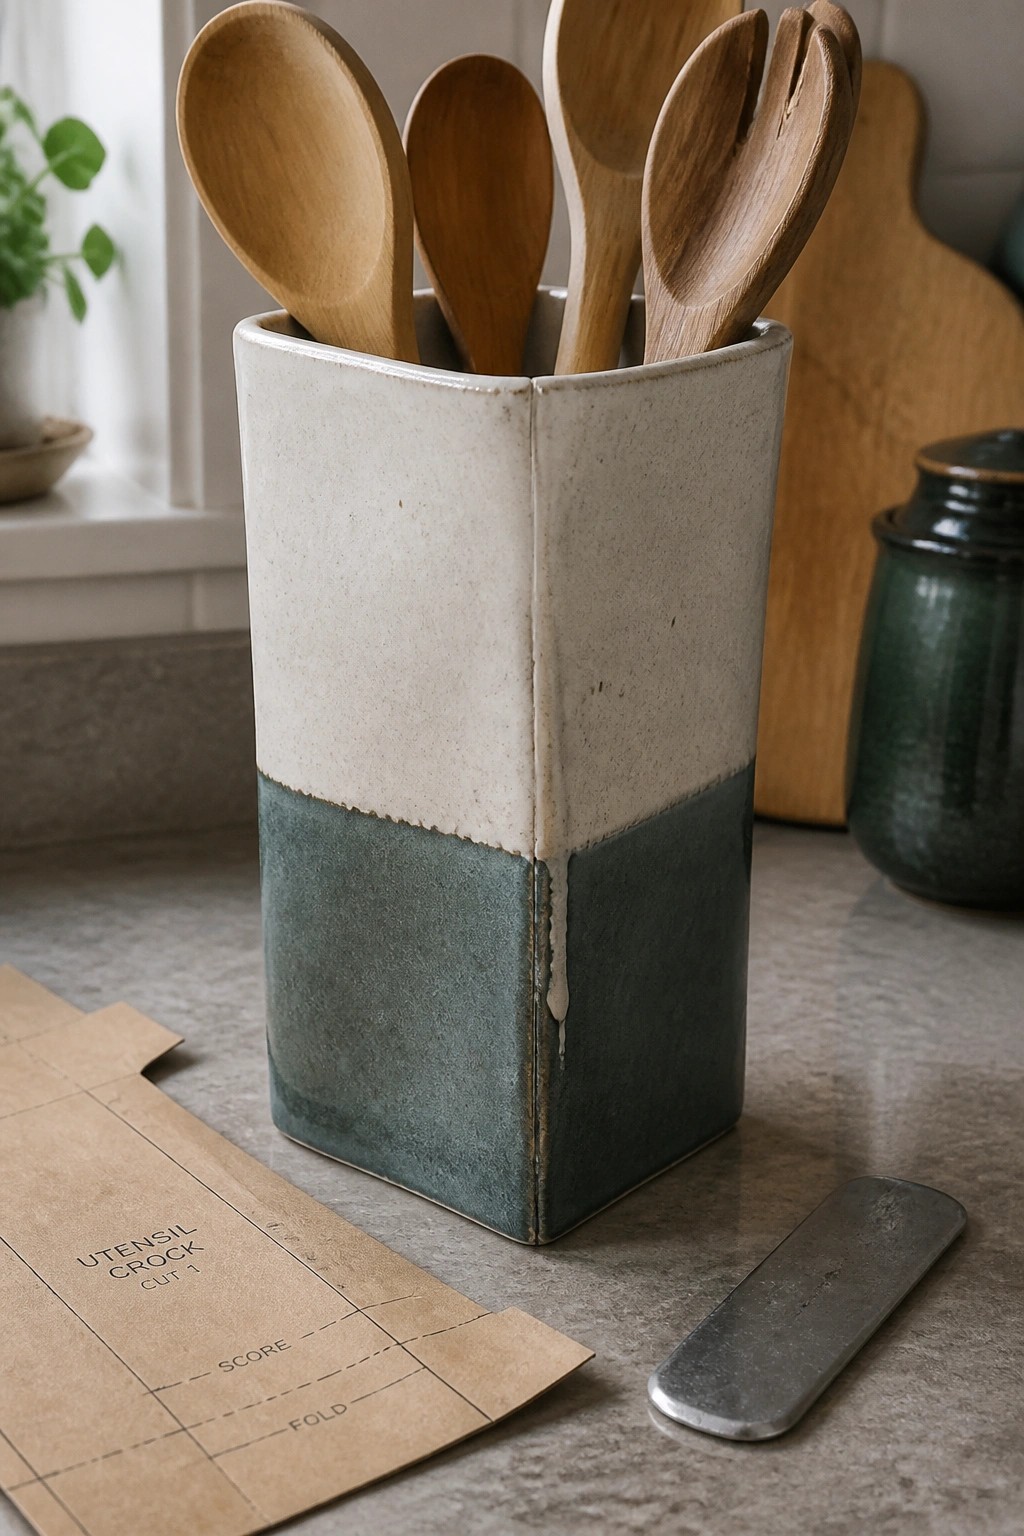
A square utensil crock made from clay slabs gives you a sturdy holder for spoons and spatulas. The shape comes directly from a paper template that shows where to cut, score, and fold the single piece of clay into four sides and a base. A clean horizontal glaze line separates a light upper section from a darker green lower section, which keeps the finished piece simple and balanced on a countertop.
What makes this idea useful is how the template handles the math on angles and measurements so you can focus on assembly. You can resize the template to make a taller version for whisks or a shorter one for smaller tools. The same slab approach works for a narrow desk caddy or a bathroom toothbrush holder by adjusting the width. Changing the glaze split or using a single solid color lets you match it to whatever dishes or cabinets you already have.
Tea Bag Rest
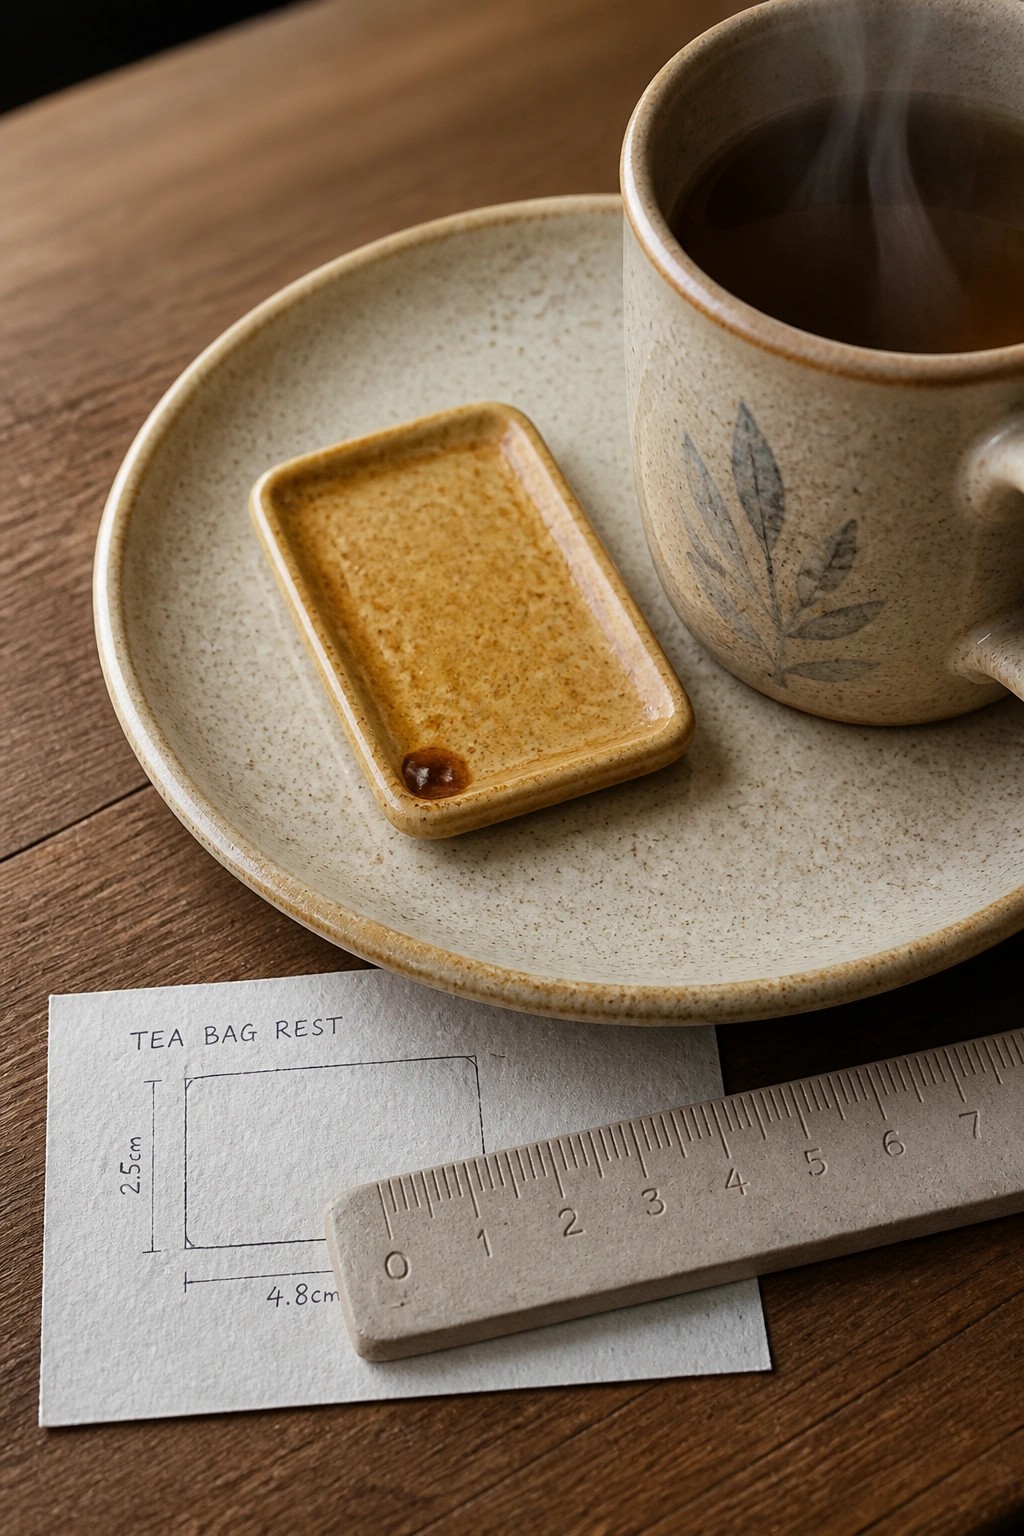
A small rectangular slab of clay forms a compact tea bag rest with low sides that catch drips from a used bag. The flat base measures roughly 4.8cm by 2.5cm, giving it a tidy footprint that fits on a saucer or tray next to a mug. The speckled glaze in warm earth tones keeps the surface practical while hiding minor marks from daily use.
What makes this idea useful is the paper template that lets you cut consistent shapes without measuring each time. The small scale makes it easy to batch out several at once or adjust the length to fit wider mugs. You could rework the same template into a tiny spoon rest or a matchbox holder by changing only the height of the walls.
Ridged Soap Dish Made from a Paper Template
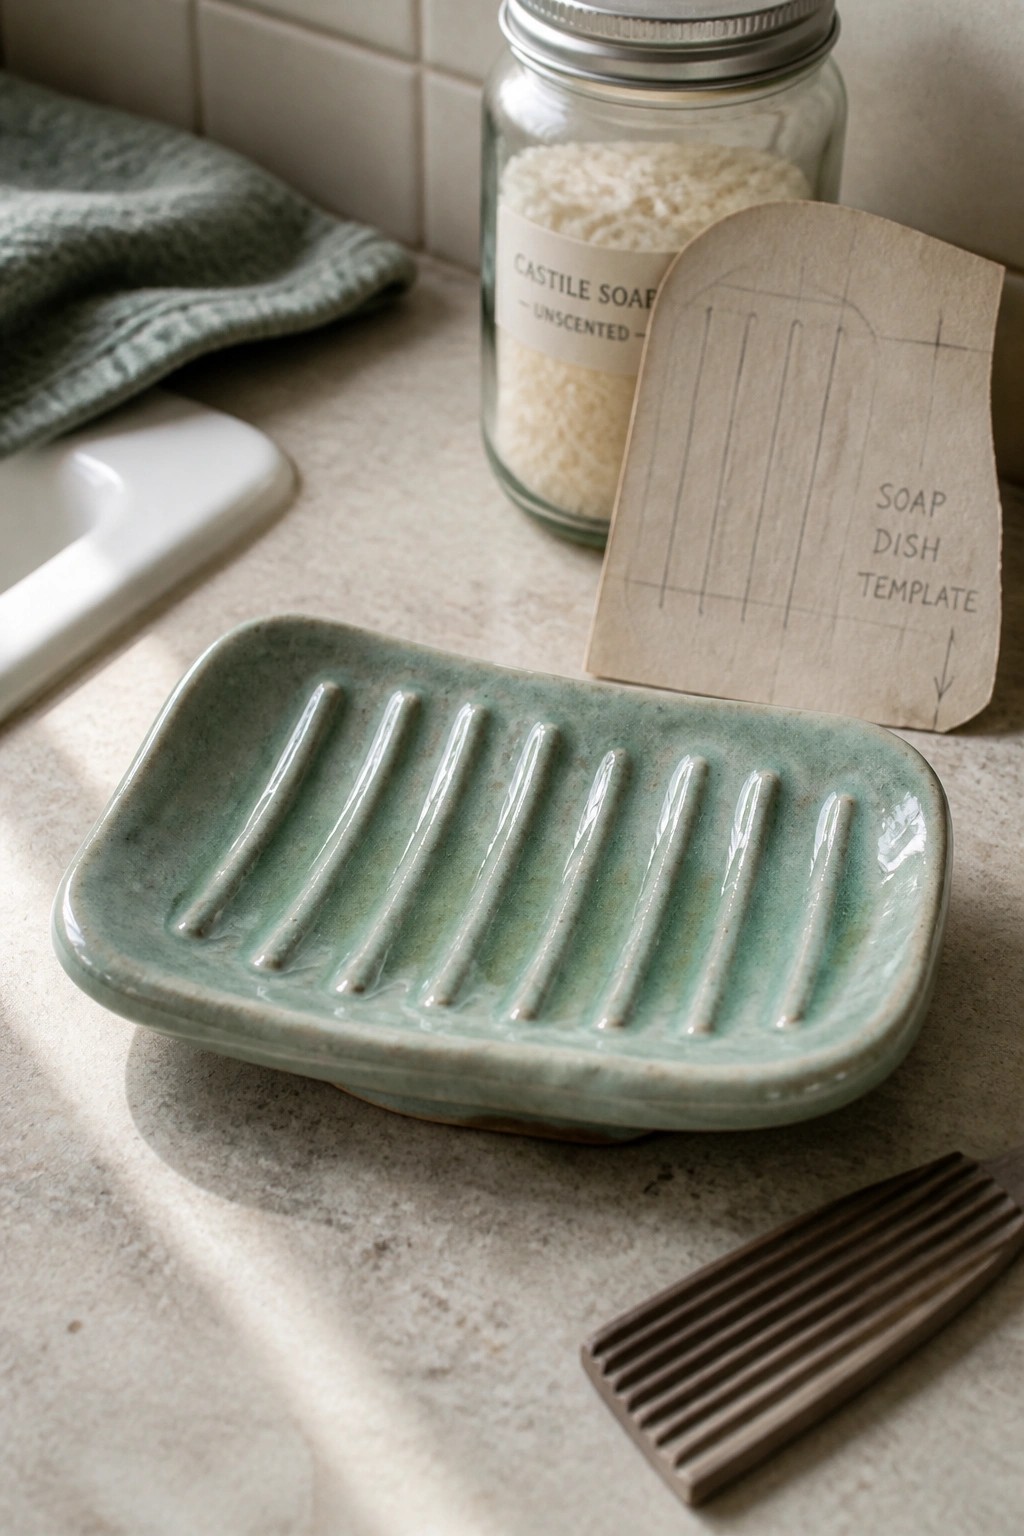
A rectangular soap dish built from a clay slab works well as a bathroom item that keeps bar soap from sitting in water. Parallel ridges formed into the base create channels for drainage while the low walls contain the bar. The light green glaze covers the surface evenly and gives the piece a simple finished look without extra decoration. This project uses a paper template to cut the slab shape and mark the ridge placement before assembly.
What makes this idea useful is how the template removes guesswork so the dish comes out the same size each time. The ridged surface can be adjusted by changing the spacing or number of lines if you want a version for a larger sponge or a smaller travel bar. In a bathroom this shape fits on the edge of a sink or tub and stays practical without taking up much space. You could reuse the same template approach to make a matching tray for cotton balls or a small holder for toothbrushes by stretching the proportions slightly.
Incense Holder Slab
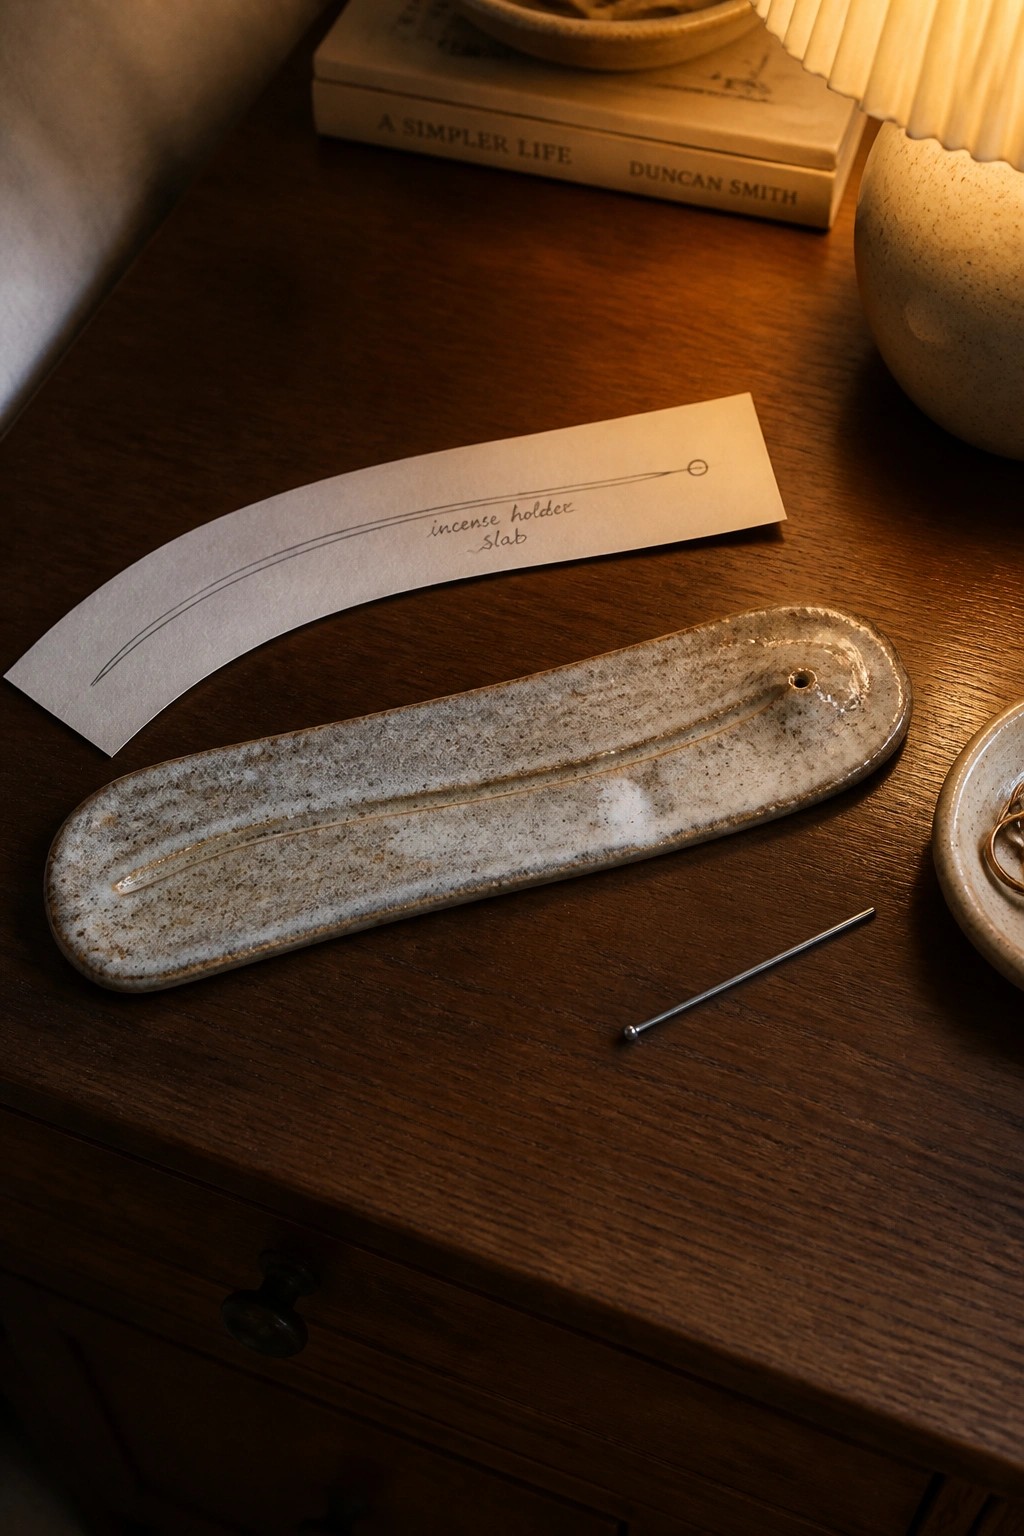
An incense holder slab starts with a simple paper template that guides the cut of a long, narrow clay strip. Once formed, a shallow channel is pressed or carved down the center to hold a stick, and a small hole is added near one end for hanging or decoration. The speckled surface comes from a light application of glaze that settles into the clay texture during firing. This approach keeps the piece flat and stable while using minimal clay.
What makes this idea useful is how the template lets you tweak the curve or length before cutting the slab. The finished holder sits neatly on a desk or shelf without needing extra feet or stands. You could shorten the same shape for a travel version or widen the channel slightly to fit thicker incense sticks. The template method also makes it straightforward to repeat the project in different glaze colors for matching sets.
Narrow Slab Tray with Center Groove
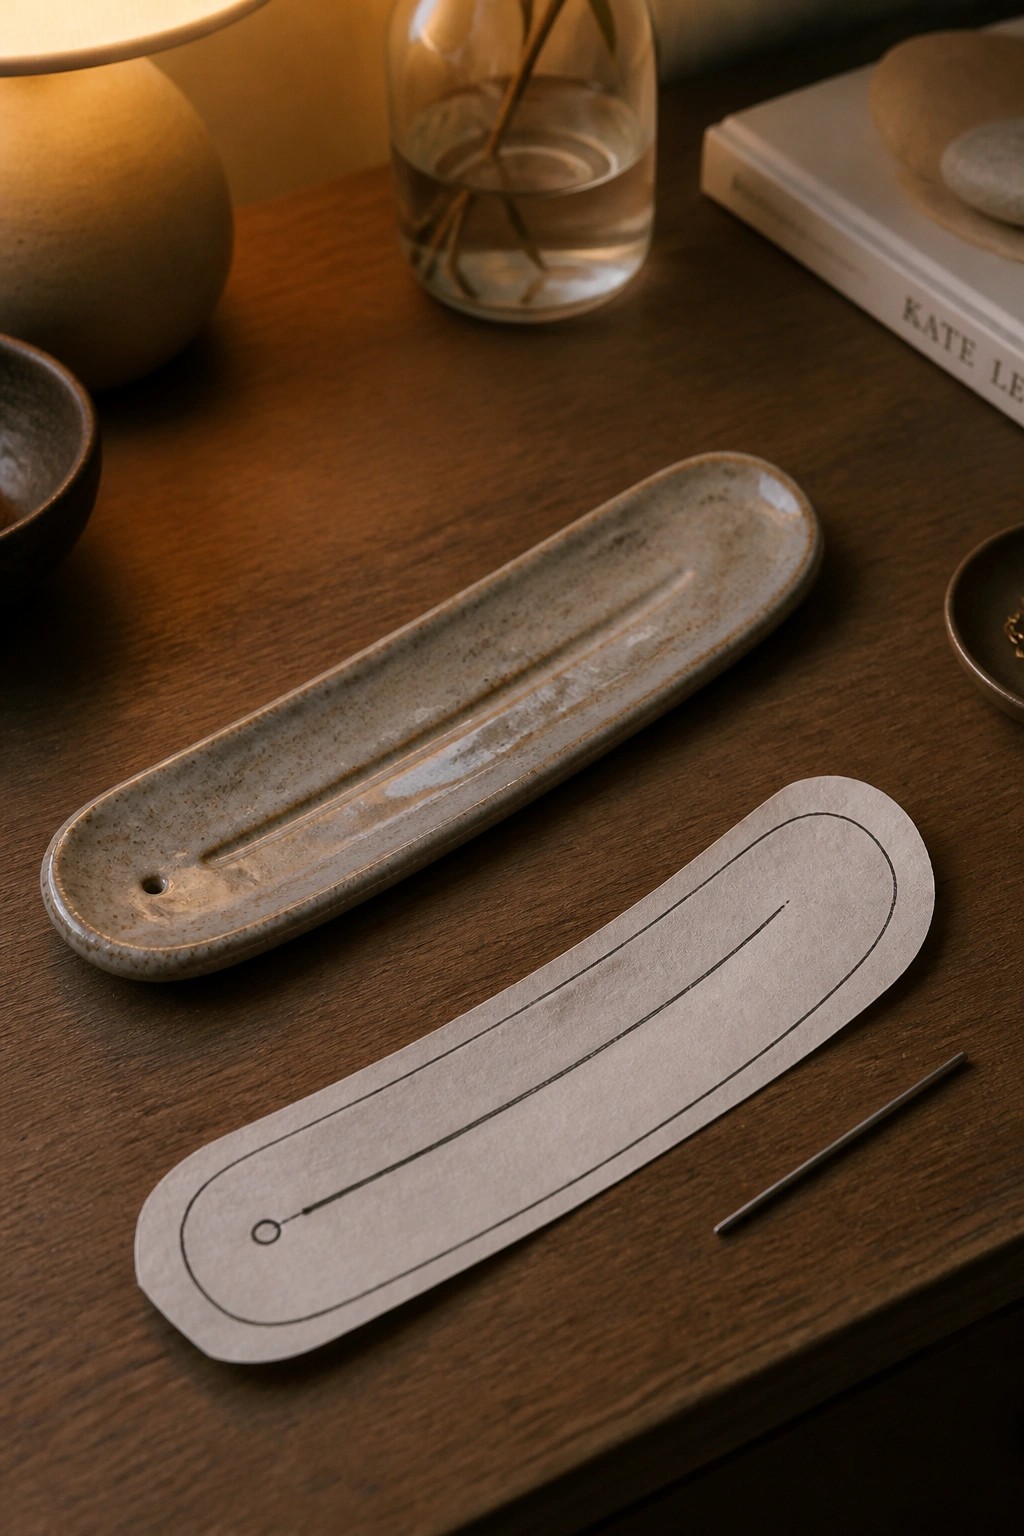
This project uses a paper template to cut and shape a long, narrow slab of clay into a tray with a shallow central channel and a small hole at one end. The finished piece measures roughly the length of a standard incense stick or a few small tools, making it easy to roll out, trim, and assemble without needing advanced skills. The speckled matte glaze highlights the clay’s natural texture while keeping the surface practical for holding items. The simple linear form works well as a desk tray, incense holder, or catch-all for rings and small objects.
What makes this idea useful is how the template removes guesswork from getting even sides and a balanced shape. You can adapt the same outline for a shorter version to hold chopsticks or a wider one for a soap dish. The groove adds function without extra steps, and the hole lets you hang it or thread cord through if needed. For a gift, this shape stands out because it stays flat during drying and firing, which reduces warping issues common with beginners.
Frequently Asked Questions
What tools and materials are essential for starting slab pottery projects with paper templates?
Beginners should gather a basic set including rolling pins or slab rollers for even clay thickness, a sharp knife or needle tool for cutting, a sponge and water for smoothing seams, and paper for templates. Use low-fire clay like earthenware for easier handling, along with a work surface like canvas to prevent sticking. Always keep a spray bottle handy to maintain clay moisture during construction.
How do I create and use paper templates effectively for consistent shapes?
Start by drawing or printing simple designs on sturdy paper like cardstock, then cut them out to trace onto rolled clay slabs. Place the template on the clay and cut around it with a knife while the clay is leather hard for clean edges. This method helps ensure uniformity across multiple pieces like trays or boxes, and you can reuse templates by storing them flat.
What type of clay works best for these beginner projects, and why?
Earthenware or stoneware clays with grog added are ideal because they hold shape well during slab construction and reduce cracking risks. Avoid porcelain at first as it can be too delicate for beginners handling templates. These clays fire at accessible temperatures in home or community kilns and allow for easy glazing afterward.
How can I avoid common issues like cracking during drying?
Dry projects slowly by covering them loosely with plastic for the first few days to control moisture loss, then gradually expose them to air. Keep slab thickness consistent at about a quarter inch and score and slip joints thoroughly when assembling. Place pieces on a dry, absorbent surface like wood or plaster to draw out moisture evenly from the bottom.
What are some tips for customizing or scaling the projects beyond the basic templates?
Experiment by combining templates, such as adding handles to a basic plate shape or layering slabs for textured effects with stamps or found objects. Scale up by enlarging templates proportionally on a photocopier, but maintain even thickness to prevent warping. Test small versions first to refine proportions before committing to larger pieces.

Pottery Path is my cozy corner of the internet where I share clay ideas, pottery inspiration, and simple projects you can recreate at home. I love exploring everything from air dry clay to handbuilt pottery to cute minis that brighten your day. My goal is to make clay crafting feel easy, fun, and welcoming for anyone who wants to try it.
You will find beginner friendly tutorials, creative pottery painting ideas, and lots of warm inspiration for slow and happy crafting. If you enjoy hands on creativity, this space will feel like home.