I started pottery as a hobby a while back and handbuilding quickly became my go to approach.
Slab coil and pinch techniques work well for beginners because they rely on simple tools and patience rather than speed.
I’ve tried many small projects over time and learned what shapes hold up best during drying and firing.
Putting together this list of 24 ideas felt like a good way to share some practical options for new potters.
Each one uses those basic methods to make things like trays mugs or decorative pieces.
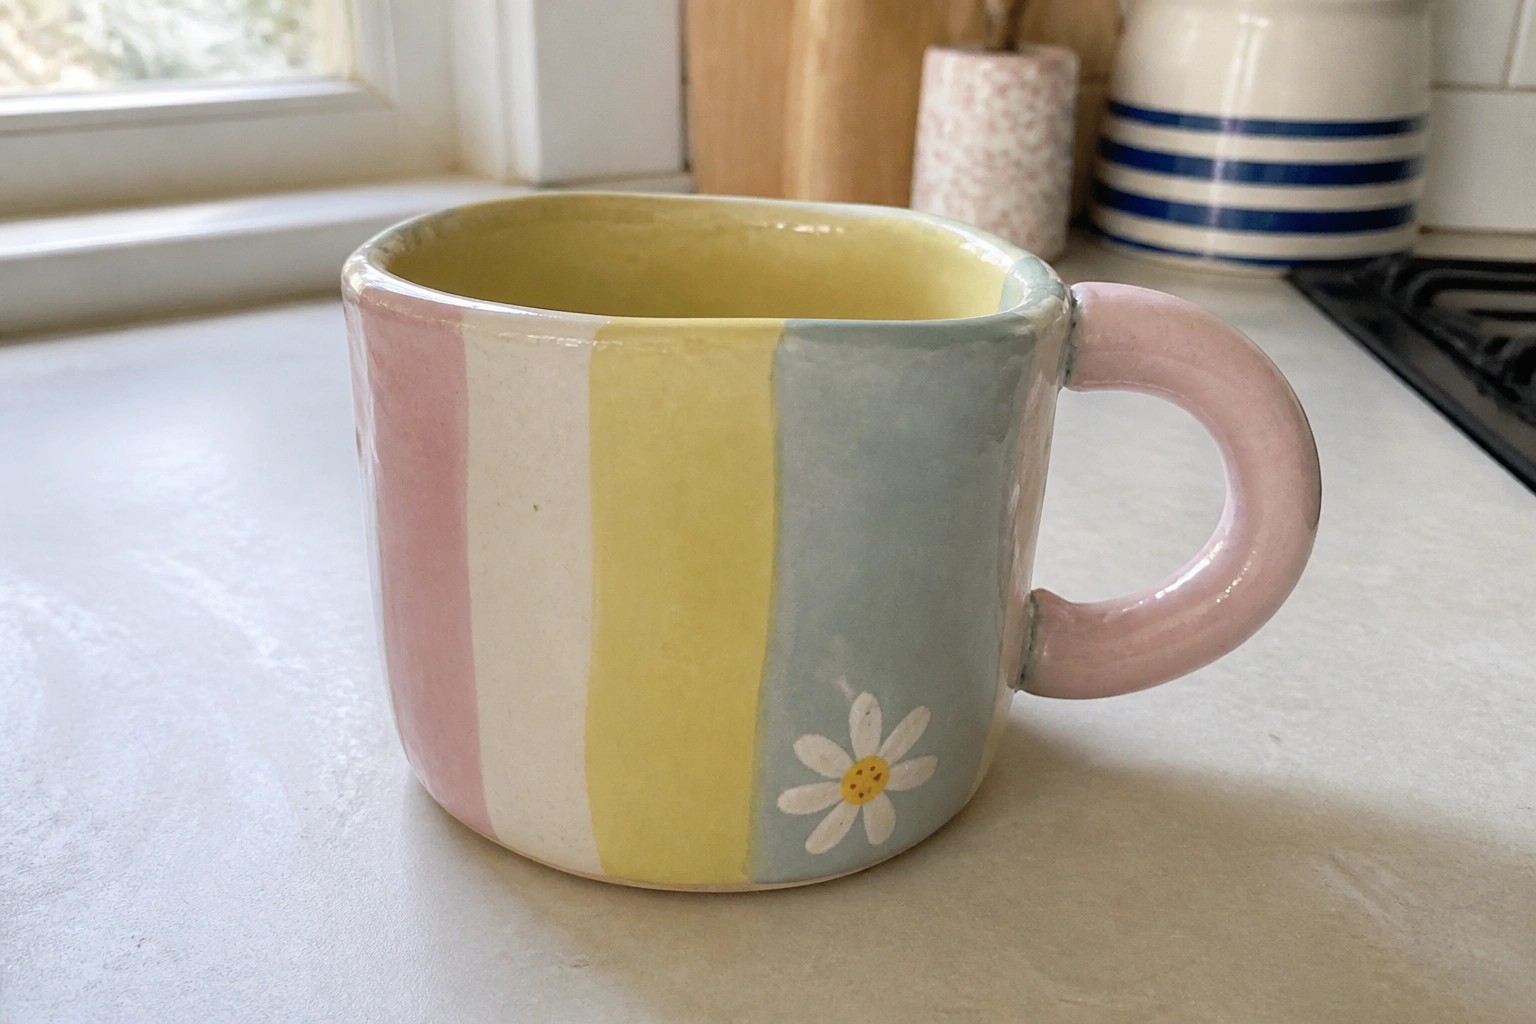
Striped Mug with Painted Daisy Motif

A handbuilt mug covered in vertical stripes of blue, pink, and cream gives a simple way to play with color on a basic cylinder form. The small daisy painted on one side breaks up the stripes without needing complex carving or extra clay pieces. The handle carries the same stripe colors, which keeps the design consistent from every angle.
What makes this idea useful is how the stripe layout can be changed to match other kitchen items or scaled down for smaller cups. A piece like this works especially well as an everyday mug or a quick gift project since the painted flower is easy to adjust to other simple shapes like stars or leaves. You could repeat the same stripe pattern on a small pitcher or tray to build a matching set without starting from scratch.
Wide Speckled Ceramic Bowl
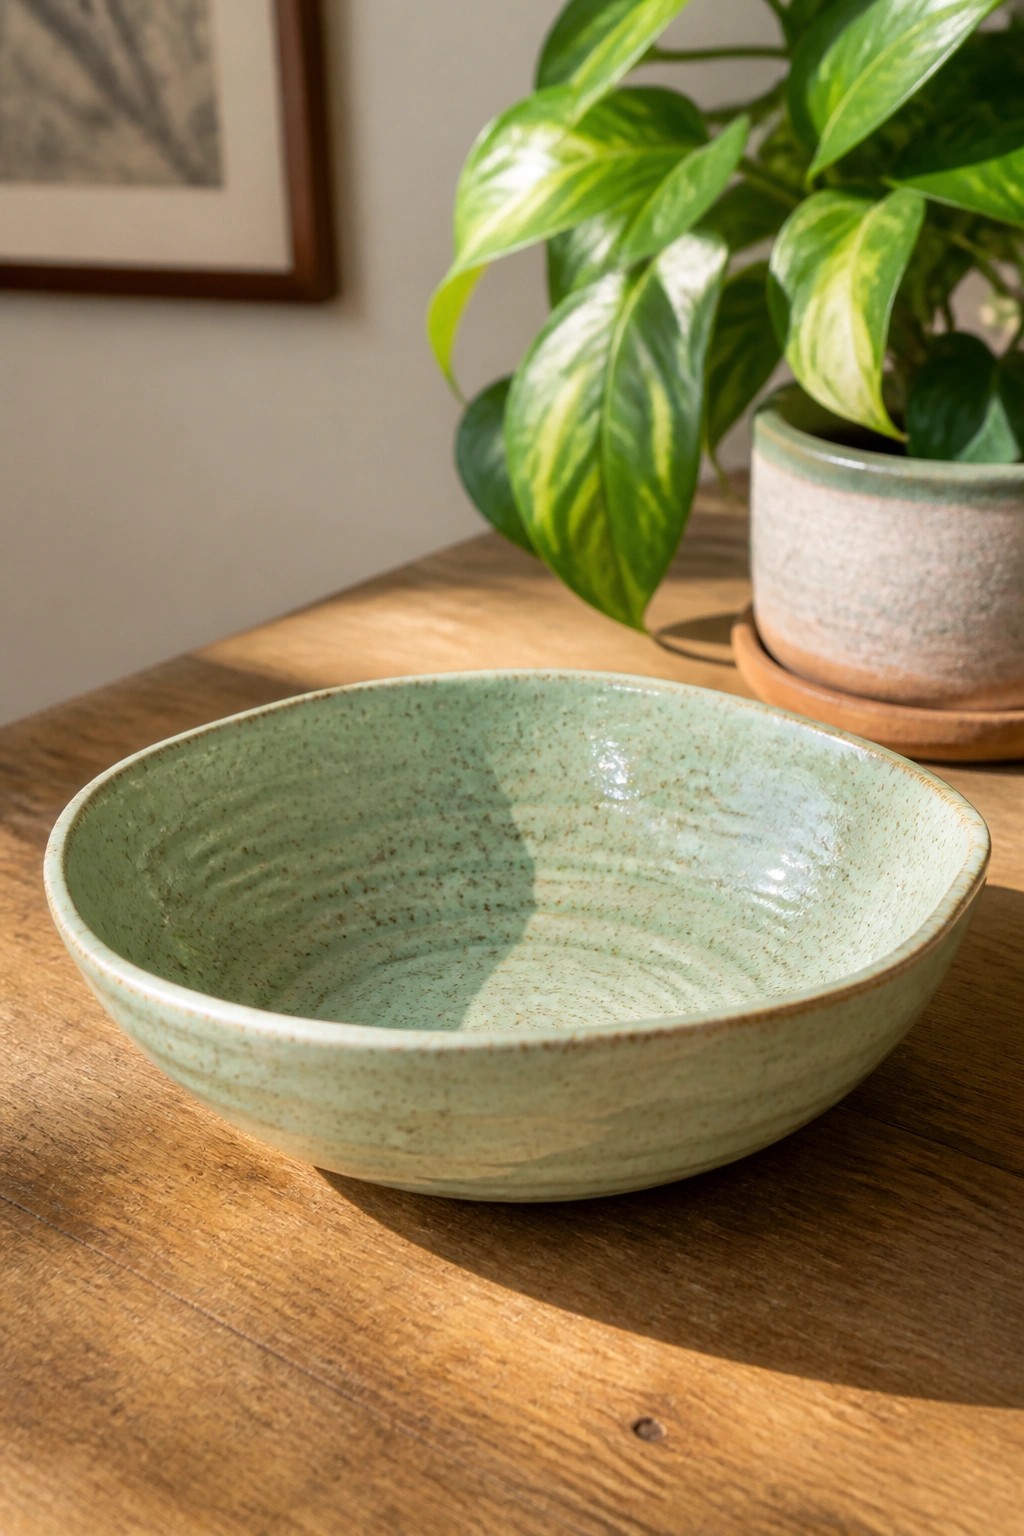
A shallow, wide ceramic bowl with a light green glaze that breaks over brown speckles creates an easy everyday piece. The open shape and soft color variation across the surface make it work well for holding fruit, snacks, or small kitchen items. Handbuilt construction shows in the gentle rim and the way the glaze pools into faint rings inside the bowl.
What makes this idea useful is how the wide form fits multiple spots like a kitchen counter or dining table without taking much vertical space. You could build the same shape with slabs or coils and swap the glaze for a matte finish or a deeper tone to match different rooms. This bowl works especially well as a simple project because the profile stays basic while the glaze adds interest. For a gift, the same idea scales down into a smaller version for jewelry or keys.
Scalloped Slab Tray

A small round tray formed from a rolled slab gives you a flat base with a decorative rim that stands out in any setting. The scalloped edge is created by cutting or pinching the clay before it dries, and the crackled surface comes from a simple textured slip or underglaze application. A single color on the rim creates contrast against the lighter center without needing multiple glazes or complex patterns.
This shape works well as a ring dish on a dresser or a small tray for butter and cheese on a picnic table. You can repeat the same slab and edge cut for a larger version to hold soap in the bathroom or keep the size as is for a desk organizer. Swapping the rim color or trying a different texture on the base lets you match it to other handmade pieces without changing the basic construction.
Rectangular Slab Tray with Rolled Handles and Leaf Impressions
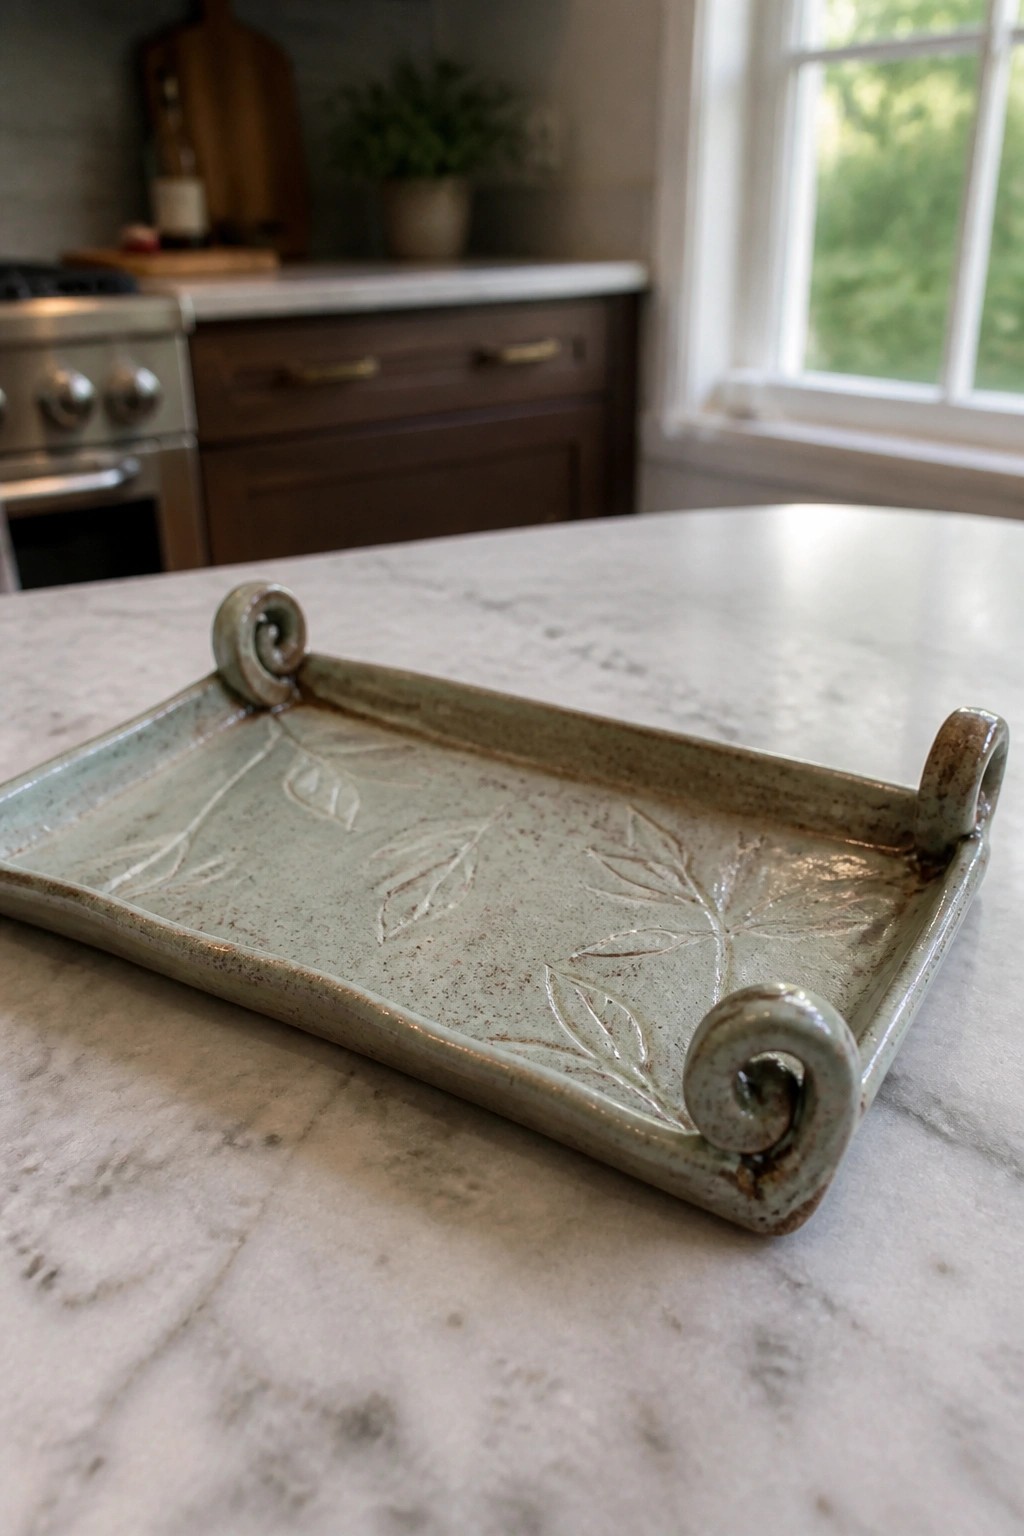
A flat slab forms the base of this rectangular tray, with the short ends rolled into spiral handles for easy lifting. Leaf shapes pressed into the surface create a repeating pattern that shows up clearly once the soft green glaze is applied. The speckled finish and slightly irregular edges keep the piece looking handmade rather than uniform. This approach works as a simple kitchen or bathroom tray that can hold small bottles, soaps, or utensils.
What makes this idea useful is how the slab construction stays basic while the rolled handles add a finished detail without extra parts. You could swap the leaf impressions for other pressed textures like ferns or fabric and still use the same shape. In a kitchen the tray keeps items organized on a counter, and the same method scales down easily into a ring dish or soap holder. The green glaze with brown flecks also photographs well if you want to share the finished piece online.
Pinch Pot Cat Figurine

A rounded pinch pot forms the main body of this cat figurine, with two small pinched ears attached at the top. Basic facial features are added by pressing or carving eyes, a nose, and whiskers into the surface while the clay is still soft. The compact shape and minimal details keep the project simple while producing a clear animal form that works as a standalone decor piece.
This kind of figurine fits easily on a desk, shelf, or windowsill without taking up much room. You can reuse the same rounded body and ear construction to make other animals by swapping out the face details or adding a tail. The small size also means it requires little clay and can be completed in one or two sessions, which helps when testing new sculpting ideas or making several versions at once.
Coiled Planter with Ridges for Small Plants

A small planter built from stacked coils creates a compact pot suited for succulents or similar low-water plants. The coils form the walls and leave clear horizontal ridges that give the surface texture and strength without added tools. A muted green glaze with brown speckling covers the outside while leaving the interior simple, and a small pinched detail on the rim adds a basic accent. This project stays within the coil category and produces a functional container rather than a flat tray or dish.
What makes this idea useful is how directly the coil method translates to a round, stable shape that holds soil well. You can keep the ridges exposed or smooth them slightly before glazing, and the same size works on a windowsill or grouped with other pots. For a different version, try a wider base or skip the side detail to make the build even quicker. The ridged surface also photographs clearly for sharing, which helps it stand out when people search for handbuilt planters.
Pinched Clay Tea Light Holders

These small, low-profile holders are formed by pinching clay into rounded, open shapes that sit flat and contain a standard tea light. The rims stay slightly irregular to give each one a soft, handmade contour, while the glazes blend muted tones with gentle marbling that shifts as the flame flickers. The compact size keeps the focus on the light rather than the vessel itself. They belong in the candle piece category and double as quick decorative accents on shelves or tables.
The shape does a lot of the work here because the wide opening and low walls make the project forgiving for beginners while still looking finished. You can adapt the same pinch method to make ring dishes or tiny salt cellars by narrowing the rim or adding a foot. Cluster several together on a tray for a simple centerpiece, or scale one up slightly for a single larger candle. The marbled glaze effect photographs cleanly, which helps the idea perform well when shared as a project reference.
Slab Built Spoon Rest with Scalloped Edge

A spoon rest made from a rolled slab gives you a flat surface that keeps counters clean while cooking. The irregular outline with one scalloped side adds a finished edge using only a simple cutting tool. Scattered blue dots on a speckled off-white glaze create an easy pattern that reads clearly from a distance.
The shape does a lot of the work here because it stays low and stable yet still holds a spoon without sliding. You could repeat the same slab cut for a longer version that fits two utensils or shorten the form into a small butter dish. The dot motif works on any light glaze and needs no extra tools beyond a brush, so the idea adapts quickly to other kitchen pieces like a small trivet or a soap dish for the bathroom.
Heart Shaped Ring Dish
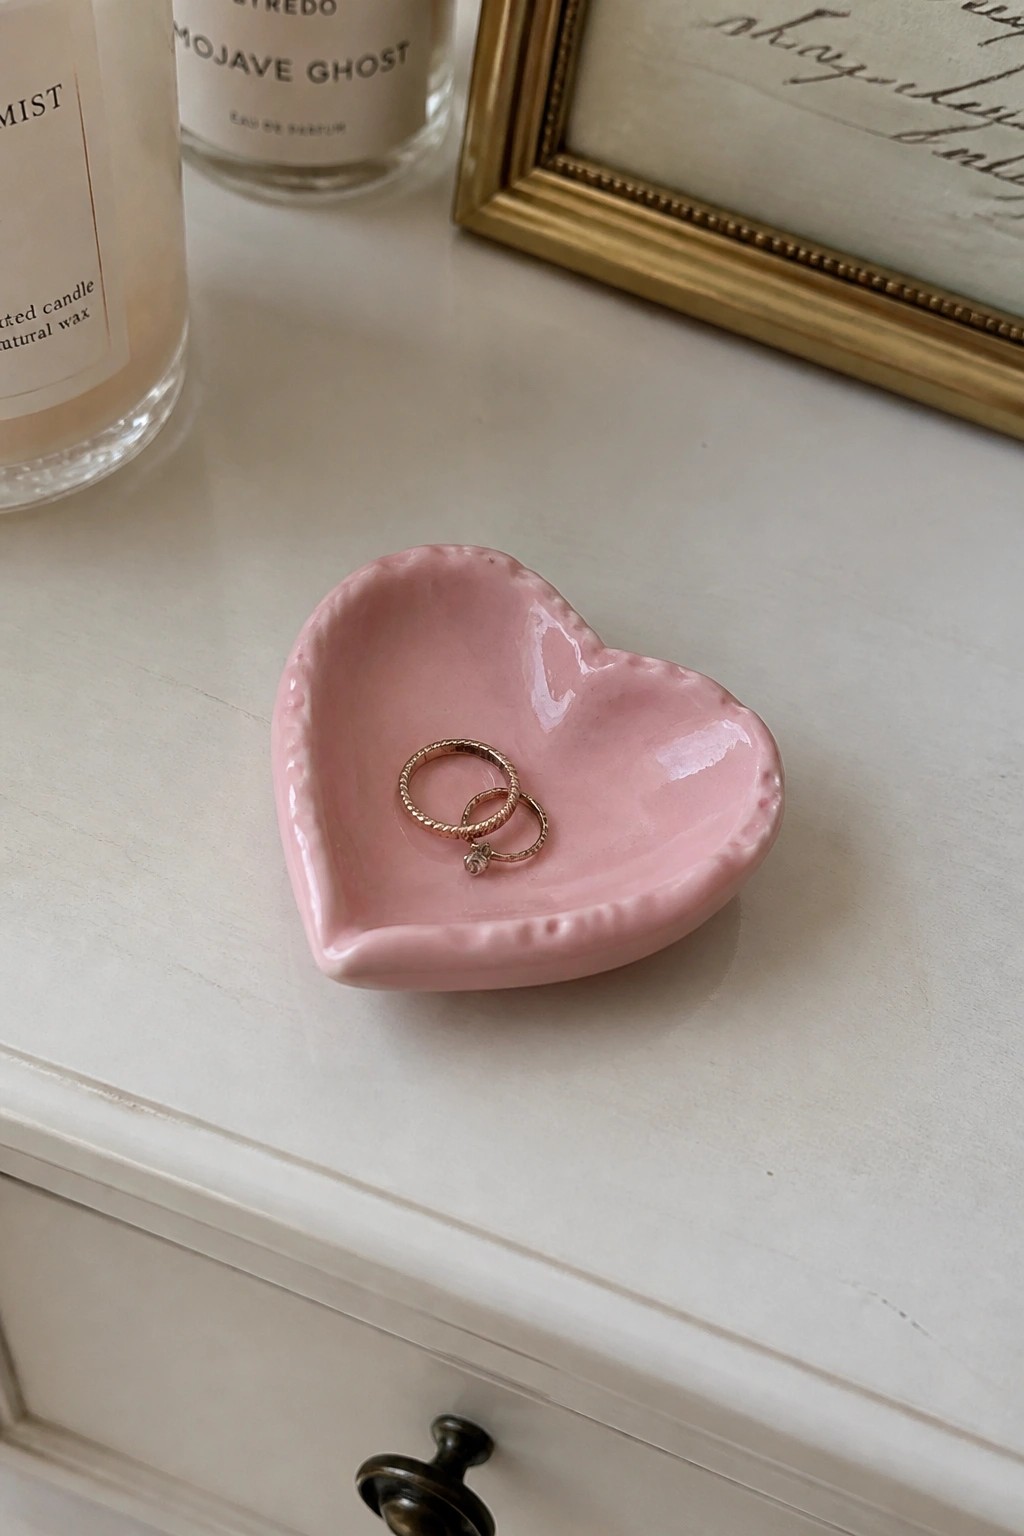
A small heart-shaped ceramic dish serves as a dedicated spot for rings and other small jewelry pieces. The shallow curved form with raised edges keeps items from sliding off while the glossy glaze creates a smooth, easy-to-wipe surface. This type of project fits the ring dish category and can be formed by pinching or using a simple slab cut into a heart outline. The compact size and single-color glaze keep the focus on the shape without added decoration.
What makes this idea useful is how well the shallow tray works on a nightstand or vanity where space is limited. The heart outline can be swapped for other simple shapes like ovals or rectangles using the same slab method, or the glaze color can be changed to match different rooms. For a gift, the dish can be made slightly larger to hold more pieces or left plain so the recipient can add their own details later. The small scale also means it uses little clay and dries quickly, making it a straightforward first project to repeat in different sizes.
Coiled Clay Toothbrush Holder

A coil-built toothbrush holder forms a simple cylinder that holds brushes upright on a bathroom counter or shelf. The horizontal ridges come from stacking and smoothing coils, which also create grooves for glaze to settle and show variation. Punching a few small holes near the base allows water to drain so the brushes stay drier. This bathroom item stays functional because the shape is straightforward to build and the surface texture highlights any glaze you choose.
What makes this idea useful is how quickly you can adjust the height or width to match the space you have. You could make a shorter version for kids’ brushes or widen it slightly for an electric toothbrush handle. The same coil method works for a matching soap dish or small cup using leftover clay. The textured surface and pooled glaze give it enough detail to stand out in photos without needing extra carving or painting.
Twin Condiment Bowls on a Slab Tray

A simple kitchen set made from two small bowls and a matching tray works well for holding salt, sugar, or spices. The bowls sit side by side on an oval base that keeps them stable, while the different interior colors create quick visual contrast without extra decoration. The rounded forms and low profile make the whole piece easy to move around a counter or table. This approach fits the category of functional kitchen items that can be built with basic slab and pinch methods.
The shape does a lot of the work here because the shared tray turns two separate bowls into one organized unit. You could adapt the idea by using a single bowl on a smaller tray for just one seasoning or by adding a third section for multiple spices. In a kitchen this kind of piece keeps everyday items handy without taking much space. For a gift, the same layout works with different glaze colors or a slightly taller spoon to match the scale.
Yarn Bowl with Side Notch

A yarn bowl is a simple clay project built to hold a ball of yarn while feeding the strand out through a notch cut into the rim. The rounded form keeps the yarn contained, and the curved opening on the side prevents tangling or rolling as you work. This example uses a speckled glaze with a darker rim to create a durable surface that holds up to everyday craft use.
What makes this idea useful is the notch, which turns an ordinary bowl into a tool that keeps yarn steady during knitting or crocheting. You can adjust the notch width or bowl depth to fit different yarn sizes, or make a smaller version for thread or embroidery floss. In a living room or craft space, this shape sits flat on a lap or table without taking much room. For gifts, the same idea works well because it solves a practical problem while remaining quick to form with basic slab or pinch methods.
Slab-Built Cloud Wall Plaque
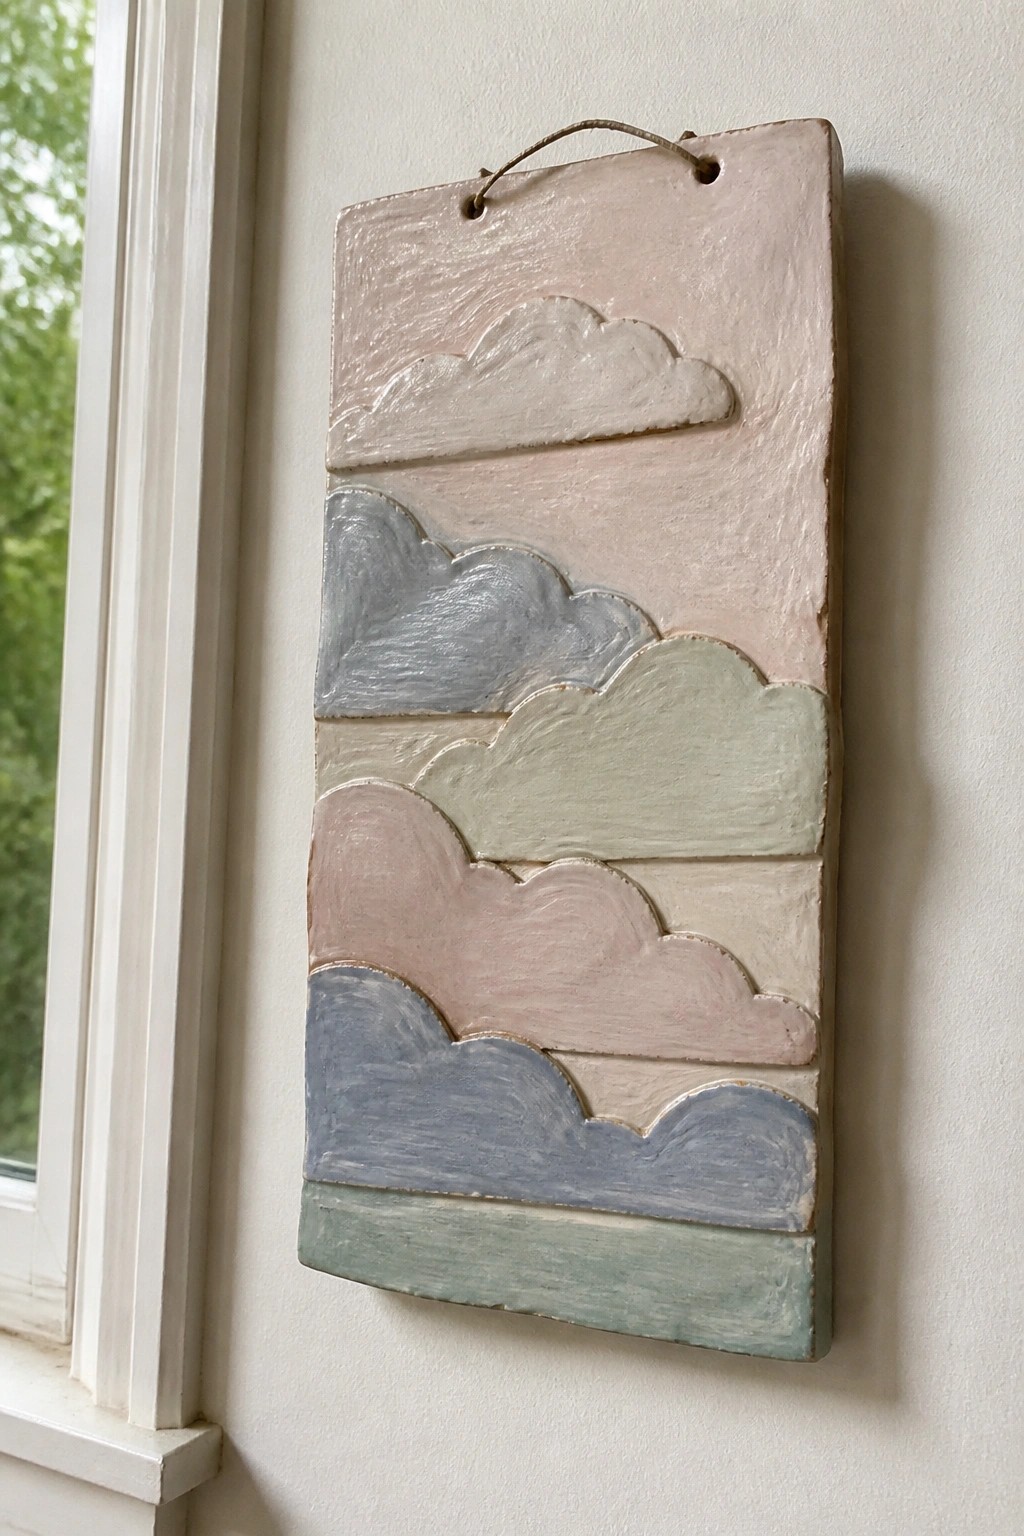
A flat rectangular slab forms the base for this wall plaque, with separate cloud shapes cut from clay and layered across the surface in horizontal bands. Each cloud is textured and painted in soft pastel tones of blue, green, and pink so the raised edges create simple depth without extra carving. The piece hangs from a cord through two holes at the top, making it a straightforward decor object that relies on slab construction and basic surface layering.
What makes this idea useful is the way the horizontal bands let you change colors or cloud sizes without rebuilding the whole form. You could shrink the plaque for a desk accent or stretch the same layout into a longer version for a hallway. The drilled holes and cord keep it easy to hang anywhere, and the cloud motif can be swapped for other simple shapes like waves or hills if you want to adapt it for a different room.
Lemon Slice Ring Dish
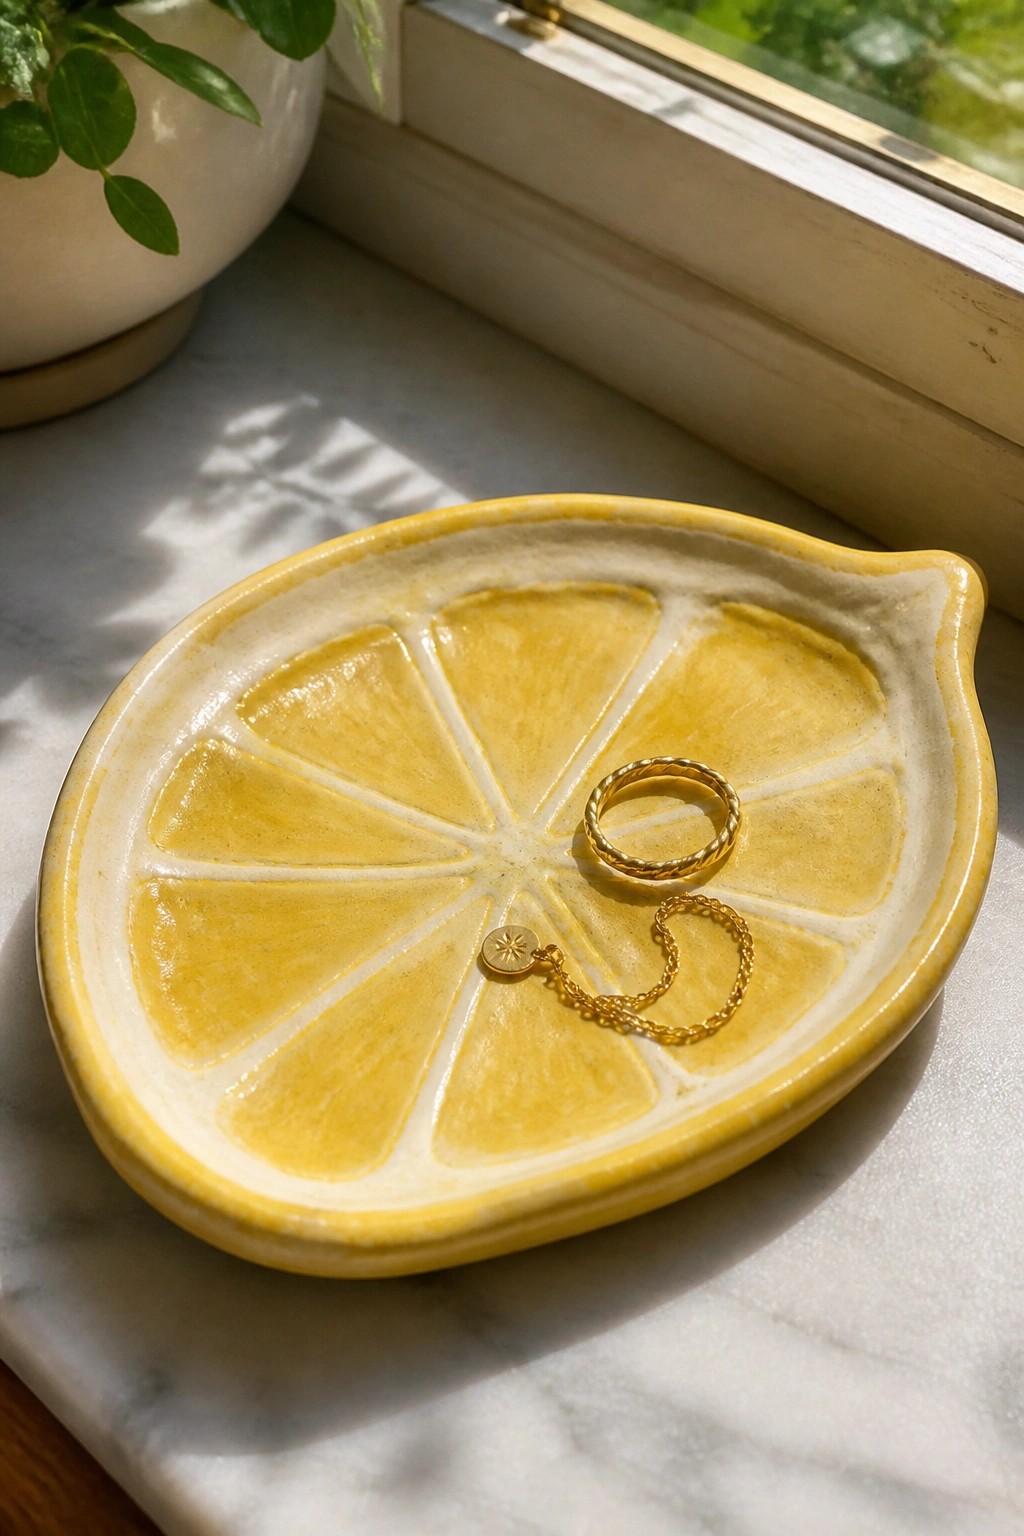
A clay ring dish formed in the shape of a lemon slice creates a small tray for holding jewelry. The oval base gets divided with raised lines to suggest fruit segments, then covered in a yellow glaze that leaves the divisions in a lighter tone. This approach turns a basic slab or pinch form into a functional holder that stays compact on a surface.
What makes this idea useful is how the oval shape and segment lines guide the eye without extra decoration. You can swap the yellow for orange or green to match other fruit themes or scale the whole piece down for a necklace-only version. In a bathroom or bedroom it keeps rings and chains in one spot, and the same slab method works for a matching soap rest if you widen the form.
Mini Handbuilt Creamer Pitcher

A small handbuilt pitcher like this serves as a creamer for coffee or tea. The rounded body, simple spout, and attached handle create a compact form that pours easily without taking up much table space. The light green glaze covers most of the surface while leaving the base and some edges exposed, which keeps the handmade shape visible.
What makes this idea useful is the small scale that works for daily kitchen use or as a gift set with matching mugs. You could rework the same body into a tiny vase for herbs or a holder for sugar packets. The shape adapts well if you flatten the sides slightly or change the handle curve to match other pieces in a set.
Slab-Built Incense Tray with Stamped Motifs
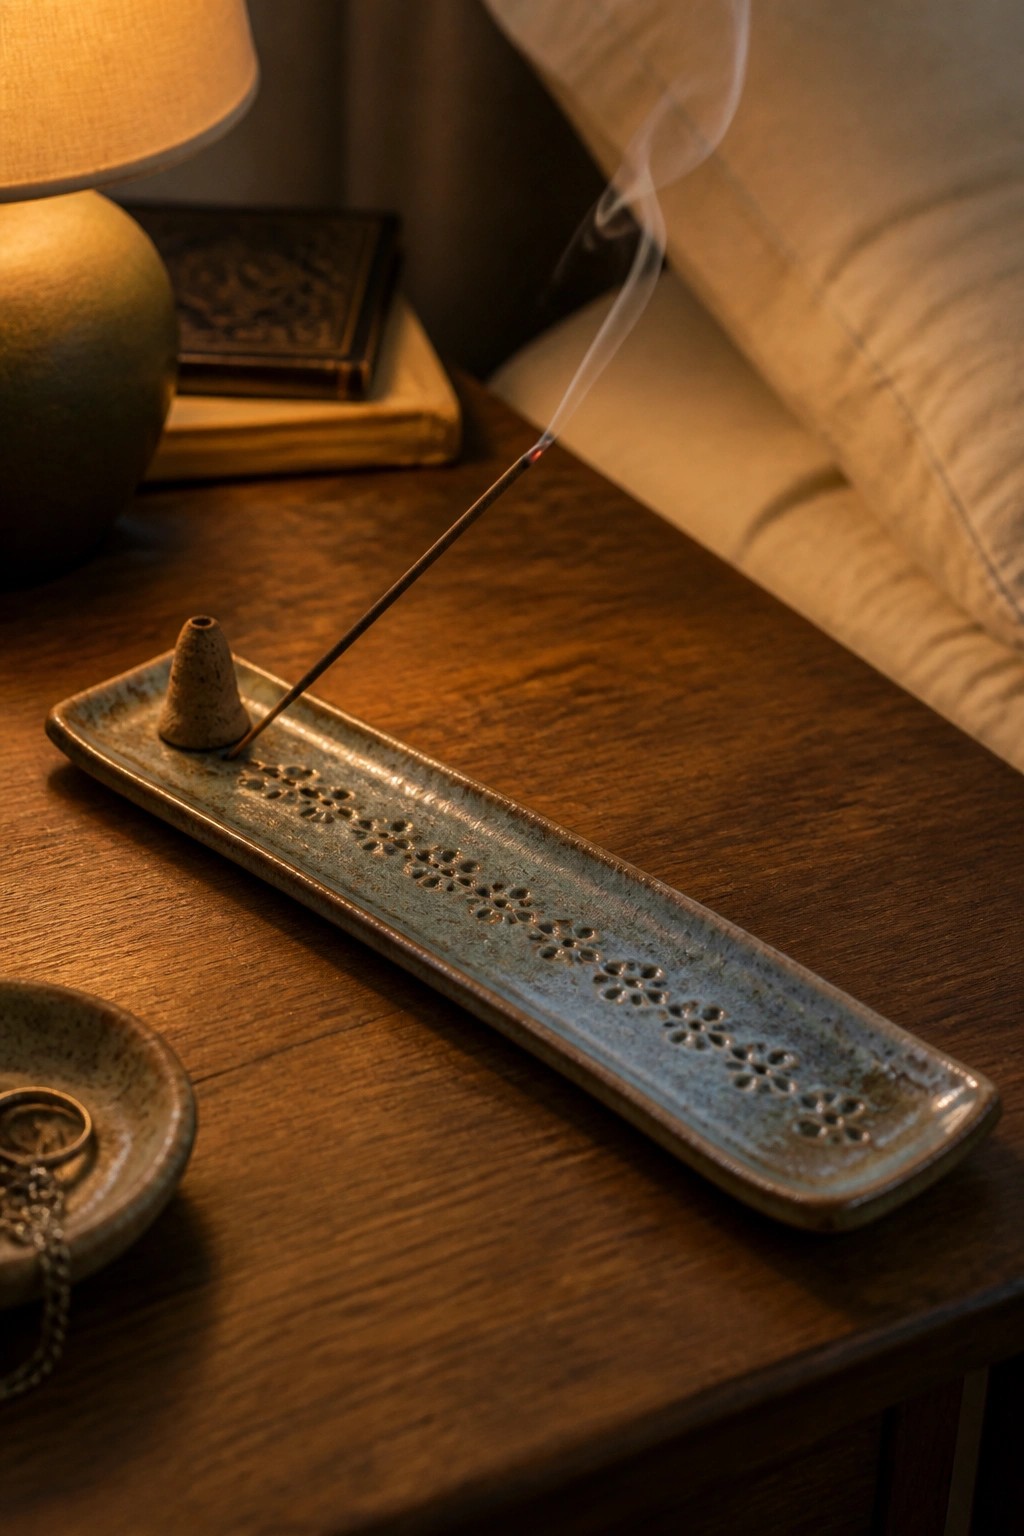
A rectangular slab forms the base of this incense holder while a small pinched cone at one end supports the stick. The tray includes a shallow channel area that collects ash, and repeating stamped flower shapes run down the center for pattern. A muted blue-green glaze covers the surface and highlights the texture of the stamps without overpowering them.
The shape keeps the stick stable and contains ash on a bedside table or desk. You can change the stamp design or skip it entirely for a plain version that still functions the same way. Shortening the slab turns the idea into a ring dish, while keeping the cone allows the same piece to double as a small catch-all. The stamped detail gives the tray enough pattern to photograph well for sharing.
Pinch Pot Mini Cups in Soft Pastel Glazes

These small cups are formed by pinching clay into a compact vessel with a rounded body and a defined foot at the base. Each one receives a single solid glaze in a muted tone, letting the simple shape and slight surface texture carry the design. The matching proportions across the set make them easy to produce in multiples while still feeling individual. This approach works well as a starter project for drinkware or small kitchen storage.
What makes this idea useful is how the compact size reduces material waste and speeds up drying time. You can adapt the same form into match holders or small herb planters by changing the rim width slightly. In a kitchen these pieces handle espresso shots or spice portions without taking up much counter space. The color choice keeps the focus on the handmade shape rather than added decoration, so the project stays beginner-accessible even when making a set.
Rectangular Soap Dish with Rolled Clay Ridges
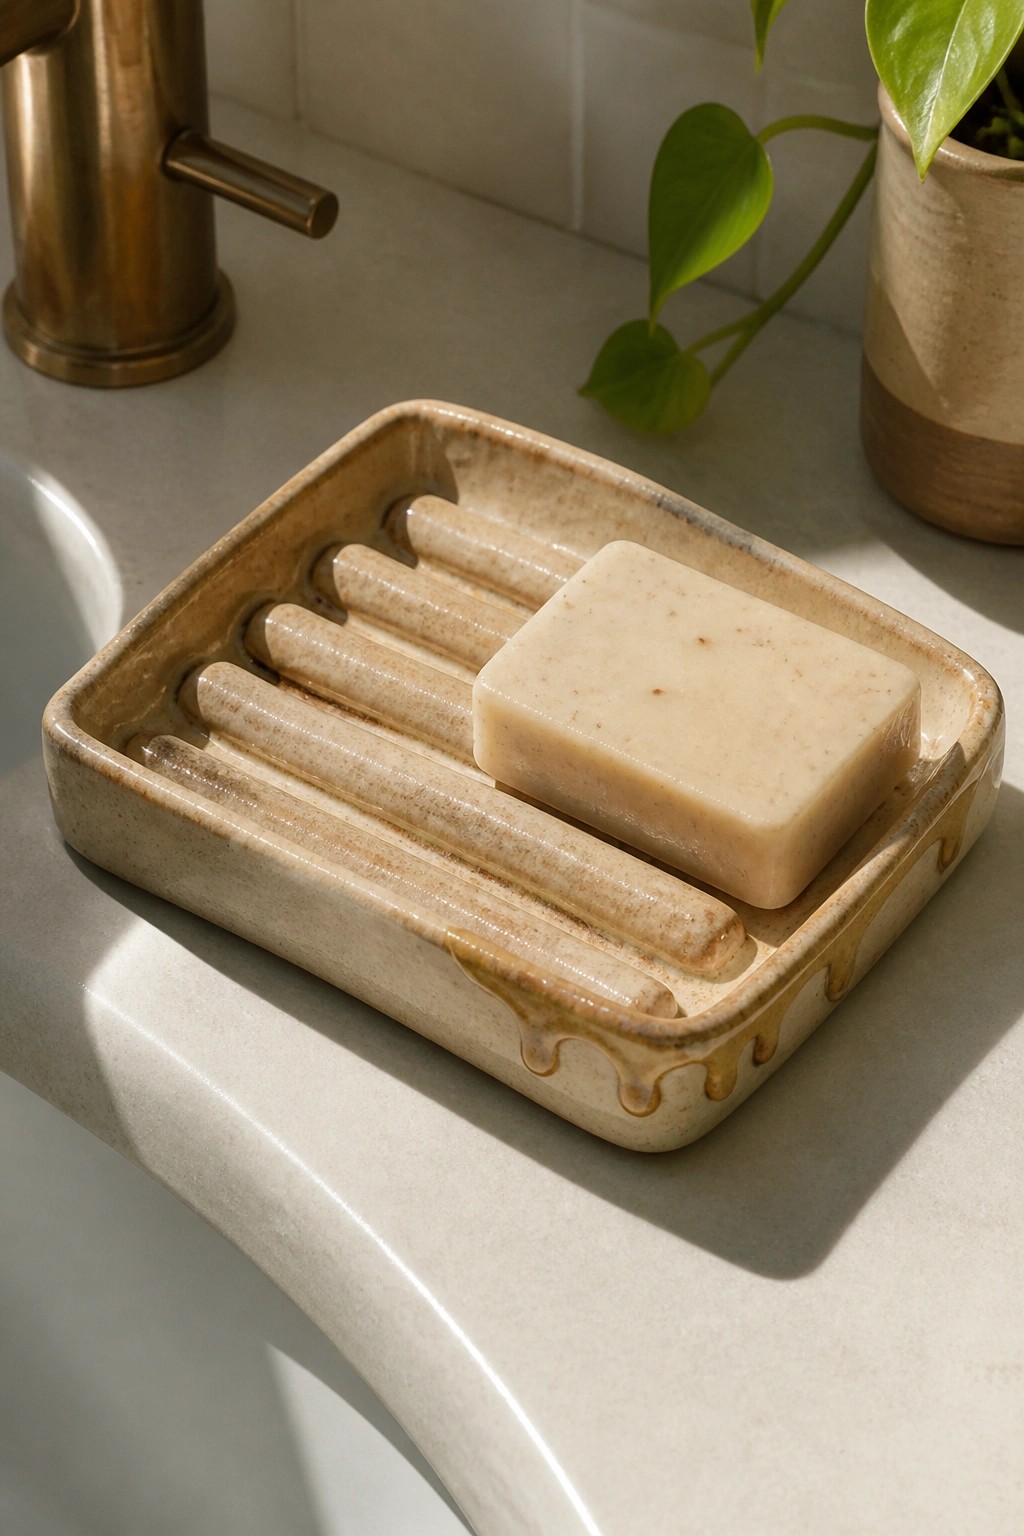
A flat slab forms the base of this soap dish while several parallel coils create raised ridges that lift the bar and let water drain through. The rectangular shape fits neatly on a sink ledge or shower shelf, and the earthy glaze that runs down the sides adds a simple finished surface without extra carving or painting. This bathroom item stays compact and functional, using only slab and coil techniques to separate the soap from pooled moisture.
What makes this idea useful is how the ridges do the main work of keeping soap dry while the slab keeps the overall build straightforward. You could shorten the length for a smaller travel version or swap the glaze color to match tile in a different room. The same ridge layout works for a sponge tray next to the kitchen sink if you widen the base slightly.
Pinch Pot Animal and Fruit Planters

These planters are formed by pinching clay into compact rounded shapes that mimic animals and fruit, then adding simple sculpted details like ears, a tail, or a leaf before glazing. The hedgehog uses a scored texture for its back, the whale includes a curved tail and fin, and the pear has a stem element attached at the top. Basic painted faces with minimal lines keep the focus on the form rather than fine detail. This method works well for small succulent planters because the closed shapes hold soil securely while staying compact.
The shape does a lot of the work here because the rounded bodies naturally support a plant without needing extra drainage features in the design. You could adapt the same pinched form into other simple subjects like a turtle or mushroom by changing just the added details and glaze colors. Grouping several together in different glazes makes an easy windowsill display or small gift set. For another version, skip the faces entirely and let the sculpted elements stand on their own.
Tall Coiled Vase With Horizontal Ridges

A tall vase formed from coils creates a narrow neck that opens into a gently tapered body covered in even horizontal ridges. The white glaze sits lightly over the surface so the texture stays visible while the form remains simple and functional. This project fits the vase category and works as a decor object that can hold one stem or a small bunch without extra details.
What makes this idea useful is how the ridges give the piece visual weight while the narrow neck keeps it stable on a table. You could shorten the same shape into a bud vase for a windowsill or stretch it taller for larger stems. In a kitchen or dining space the clean white surface pairs with wood or linen without competing for attention. The coil texture also translates easily to a slab version if you want to skip the rolling step.
Slab-Built Leaf and Star Dishes for Small Servings

These dishes are cut from rolled clay slabs into leaf and star outlines, then shaped with slightly raised edges to hold small amounts of food. The leaf versions include simple vein lines pressed into the surface before glazing, while the stars rely on their outline for interest. Soft green and blue glazes with visible speckling keep the focus on the forms without overpowering them. This approach fits the slab technique well since the flat shapes require minimal construction beyond cutting and smoothing.
The shape does a lot of the work here because the outlines make each piece distinct even when glazed in similar tones. You could repeat the same slab method with different cookie cutters to build a full set for dips or sauces. These work especially well on a table next to chopsticks or small plates, and the compact size means they stack easily for storage. For variety, try the same idea with oval or heart cutters to match different table settings.
Handbuilt Match Holder Dish

A handbuilt ceramic tray combines a wide, shallow oval dish with a small raised circular compartment that holds a bundle of matches. The deep blue glaze shows uneven brushstrokes and slight pooling that give the surface texture without extra decoration. This shape keeps matches contained while still offering space for a matchbox or striker strip beside them. The project fits the holder category and works well as a simple slab-and-pinch build for keeping near candles or a fireplace.
What makes this idea useful is the built-in compartment that stops matches from scattering across a table. The small overall size lets you place it on a mantel, bookshelf, or bedside table without taking much room. You could adapt the same form by widening the main tray for incense sticks or by making the inner bowl deeper for cotton swabs in a bathroom. Changing the glaze color to match your existing candle jars turns the piece into a quick coordinated set.
Nested Bowls with Simple Painted Patterns
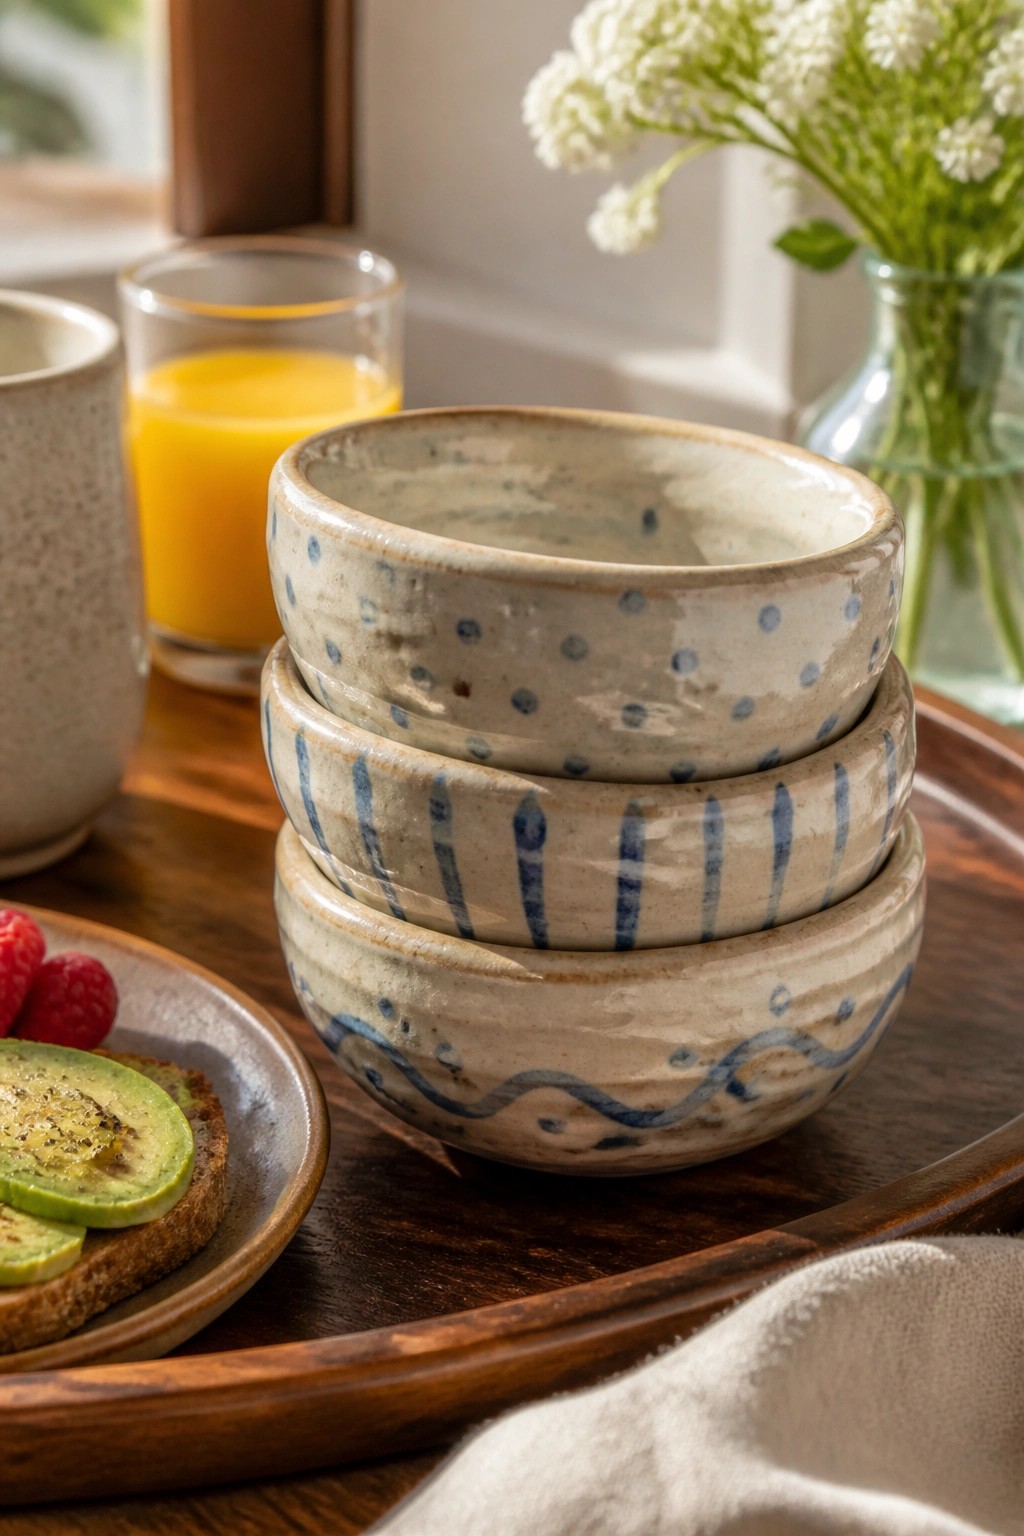
These nesting bowls are built as a matching set with slight size variations so they stack neatly for storage. Each one carries a different blue painted motif on the exterior, including dots, vertical strokes, and wavy lines, applied over a light speckled clay surface. The approach keeps the forms straightforward while using the painted details to create variety without extra shaping work. This type of project fits the kitchen item category and works as everyday serving or eating bowls.
What makes this idea useful is that the same basic bowl shape can be repeated three or four times and then differentiated only through the surface patterns. You could simplify it further by using just one motif style across the whole set or expand it by adding a rim color. In a kitchen these bowls sit well on open shelves or a tray and handle both dry snacks and wet foods without issue. The small scale also makes it easy to test out new brushwork ideas or rework the same forms into slightly deeper versions for soup.
Slab Coasters with Pressed Nature Designs

These square coasters are formed from flat slabs of clay, each one carrying a single carved or stamped motif. One holds a sun with radiating lines, another shows simple clouds, the next has rolling waves, and the bottom features a leafy branch. Matching glazes in soft earth tones sit inside the recessed areas while the raised surfaces stay lighter, making the patterns easy to read without extra decoration. The result is a compact, stackable set that stays practical while showing off basic slab work.
The small square format keeps the project quick to roll, cut, and finish, so you can make a full set in one session. You could swap the motifs for stars, fish, or geometric lines and still keep the same glaze color story. These pieces protect tabletops from mugs or glasses and double as small trivets for candles or plants. The stacked look also photographs cleanly for sharing, which helps the idea stand out when people search for simple slab projects.
Frequently Asked Questions
What materials and tools do I need to begin these pottery projects? Start with a bag of low fire clay or air dry clay if you lack access to a kiln. Gather a rolling pin for slabs, a wire cutter, wooden ribs, a needle tool, slip, and a sponge. These items help create clean shapes and strong joins across slab coil and pinch methods. Many beginners find success practicing on a canvas mat to prevent sticking.
How do I keep my coiled or pinched pots from collapsing during construction? Work in stages by letting each section firm slightly before adding height. Roll coils to even thickness and always score plus slip the contact points for a secure bond. Support the walls with your hand from inside while pinching or coiling to maintain shape. Air dry slowly in a covered space to avoid rapid shrinkage that leads to cracks.
Which of these ideas work best for making functional items like bowls or trays? Slab techniques suit flat items such as trays and plates while pinch and coil methods build curved bowls and small vases. Choose projects that start simple and add feet or handles only after the main form firms up. Once bisque fired these pieces can hold dry goods or serve as planters after proper glazing.
How long should I let my handbuilt pieces dry before firing or sealing? Dry work slowly over seven to fourteen days in a room without direct heat or drafts. Check readiness by feeling the base which should be cool and dry to the touch. Uneven drying causes warping so rotate pieces daily and cover them loosely with plastic at first.
Can I combine slab coil and pinch methods in a single project? Yes this mixing creates unique textures and stronger structures. Begin with a slab base then attach coils for height and finish with pinched accents like leaves or rims. Score every joint thoroughly and add slip to prevent separation during drying. The twenty four ideas offer many starting points for such combinations.

Pottery Path is my cozy corner of the internet where I share clay ideas, pottery inspiration, and simple projects you can recreate at home. I love exploring everything from air dry clay to handbuilt pottery to cute minis that brighten your day. My goal is to make clay crafting feel easy, fun, and welcoming for anyone who wants to try it.
You will find beginner friendly tutorials, creative pottery painting ideas, and lots of warm inspiration for slow and happy crafting. If you enjoy hands on creativity, this space will feel like home.