
I started with pinch pots because they seemed like the easiest way to get my hands on some clay without needing much equipment.
Over time I have found lots of ways to shape them into everyday items that actually get used.
Here are 21 ideas that focus on keeping things simple while still making something nice.
I like how these projects let me work at my own pace and fix mistakes as I go.
Many of them end up as gifts or little additions to my kitchen and garden.
Pinch Pot Mug with Painted Daisy
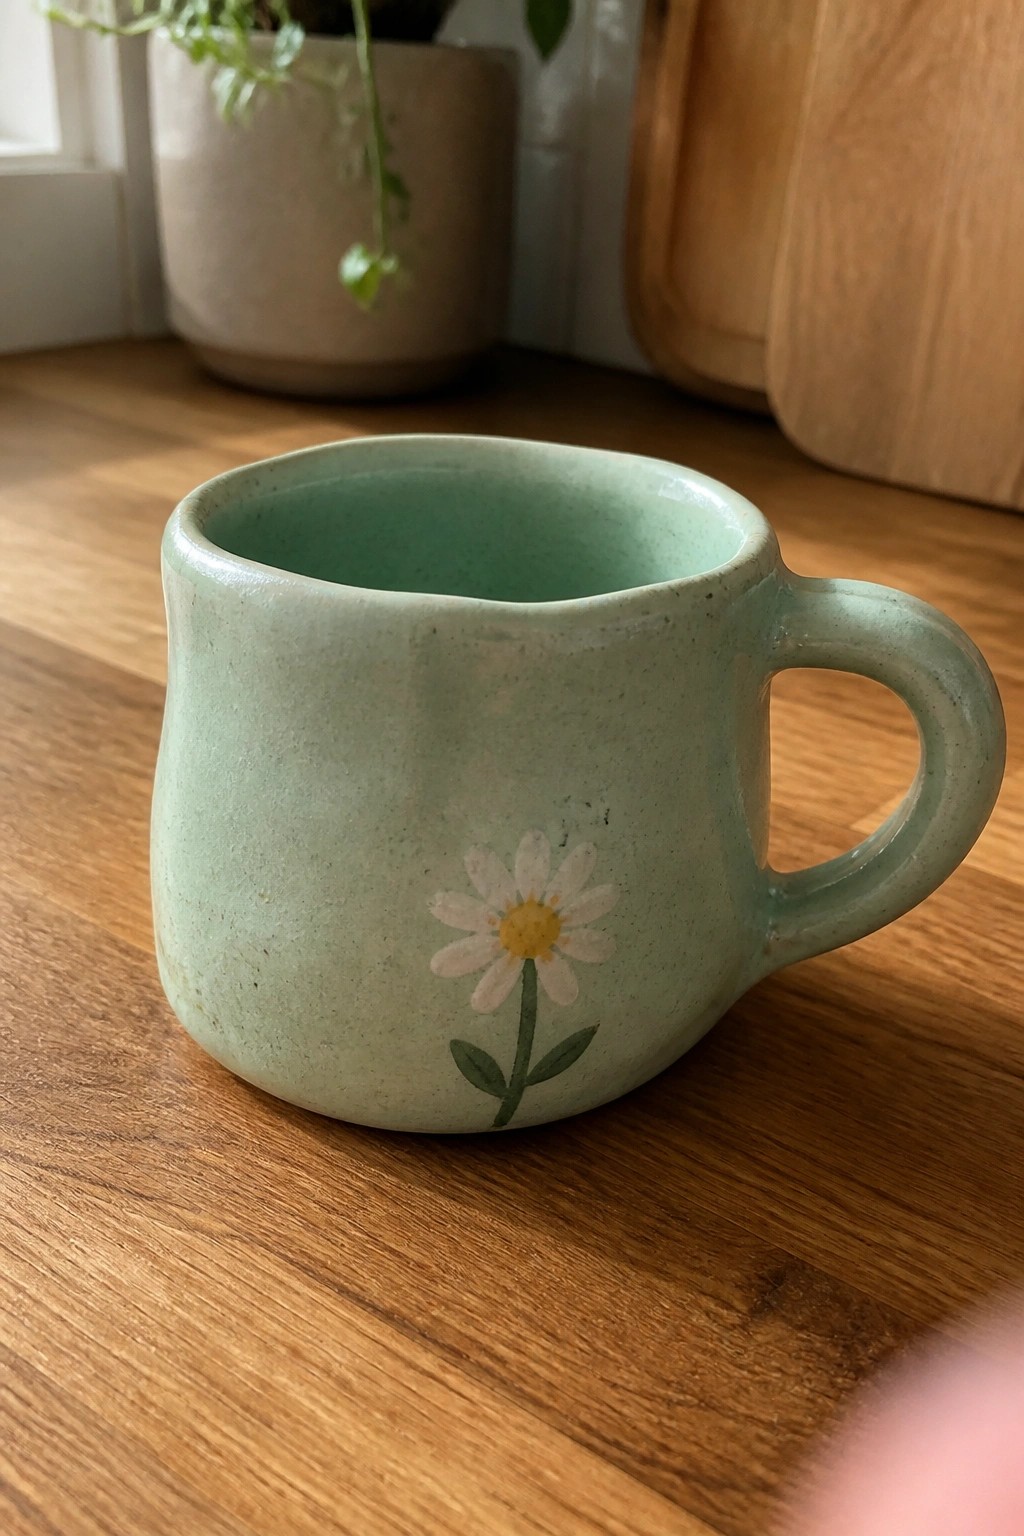
A small mug made from a basic pinch form gains a clear focal point from a single painted daisy placed on the front. The light green speckled glaze creates a neutral background that lets the white petals and yellow center show up without extra decoration. A simple pulled handle keeps the form functional while the rounded body stays easy to shape by hand.
What makes this idea useful is that the painted flower can be swapped for other simple motifs like leaves or dots to match different color schemes. The compact size works well for desk use or as a small gift that does not take much clay or space on a shelf. You could repeat the same pinch base and change only the painted detail to create a set of matching cups with minimal extra work.
Scalloped Rim Pinch Bowl
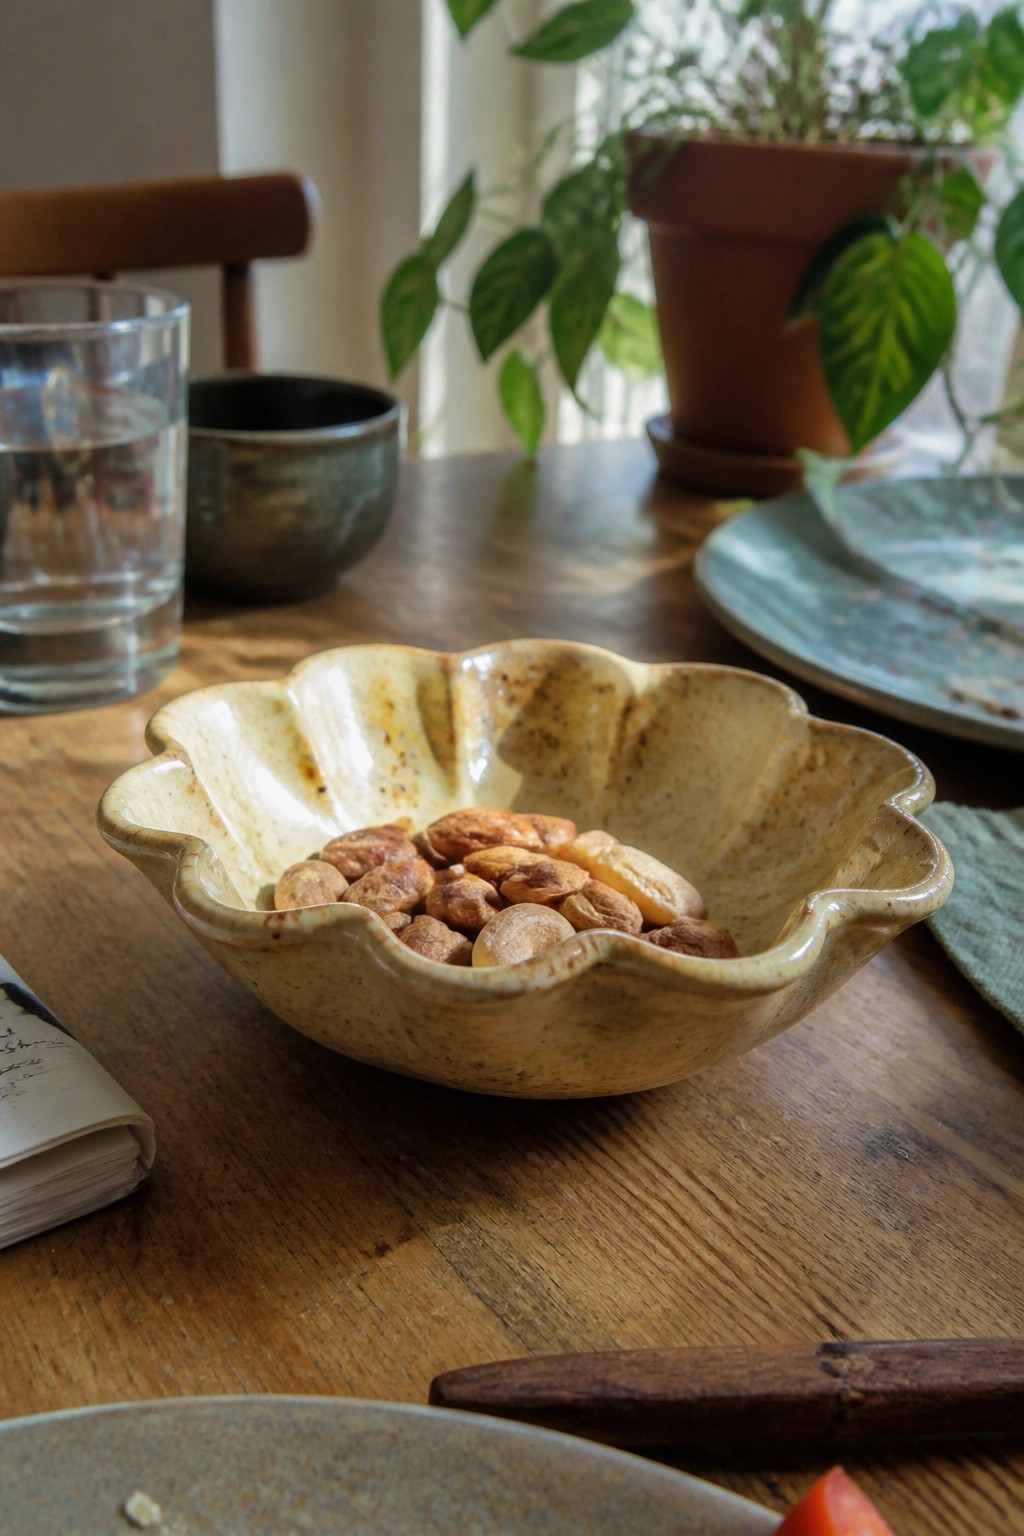
A handbuilt pinch bowl with a scalloped rim creates an easy serving piece for snacks or small kitchen items. The wavy edge is formed by pinching and folding the clay outward while it is still soft, then a simple speckled glaze adds subtle texture and color without extra decoration. This shape stays practical as a bowl while the rim detail gives it more visual weight than a plain round form.
The small scale keeps the project quick to build and fire, so it works well as a first pinch form attempt. You can repeat the same rim treatment on a flatter disk to make a ring dish or stretch it slightly taller for a small planter tray. In a kitchen setting the scalloped edge helps the bowl stand out on a table or counter even when it holds everyday items like nuts or salt.
Wavy Rim Ring Dish
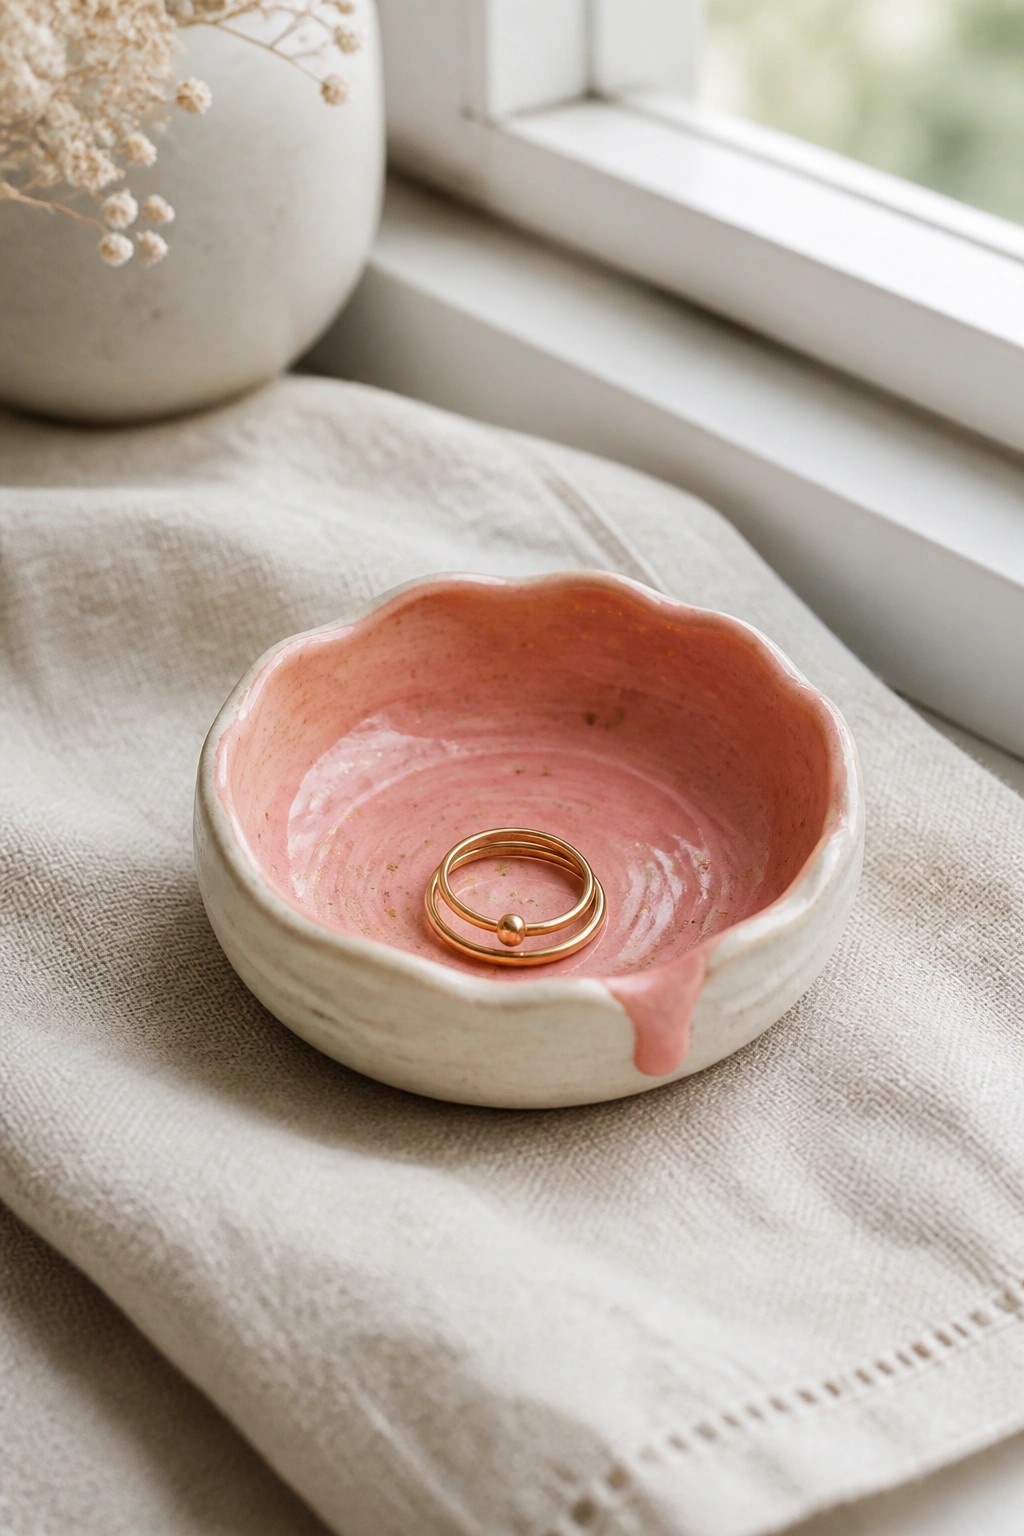
A small ring dish starts with a simple pinch form shaped into a shallow bowl. The rim gets pinched and pulled outward in sections to create soft waves around the edge. A pink speckled glaze covers the inside while the exterior stays light, letting the form stay visible and functional for holding jewelry.
What makes this idea useful is how little clay and time it takes while still giving you a finished piece ready for daily use. The small scale makes it easy to adapt by adjusting the depth for earrings or changing the glaze color to suit a desk or vanity. This shape also works well as a quick gift since the wavy rim adds interest without needing extra tools or attachments.
Small Pinched Planter for Succulents
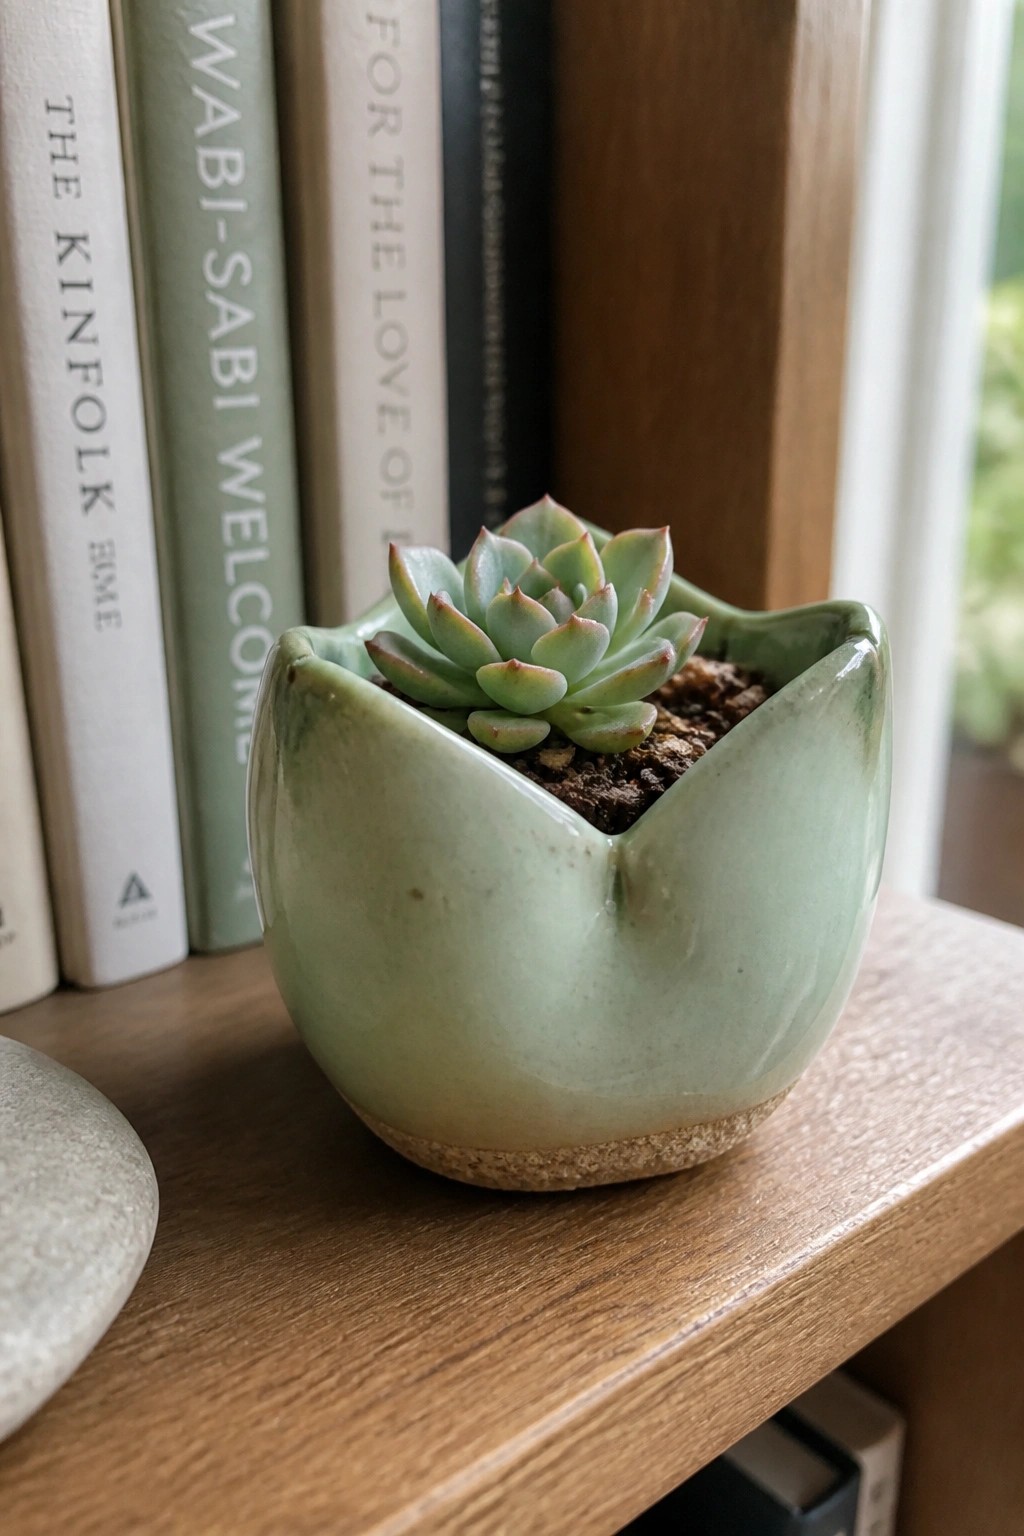
A basic pinch pot can be shaped into a compact succulent planter by keeping the walls even and letting the rim stay slightly uneven. The soft green glaze covers most of the surface while the lower edge is left unglazed to show the clay body. This approach keeps the form simple yet gives the planter enough visual weight to stand on its own next to books or on a narrow shelf.
What makes this idea useful is how little clay and time it requires while still producing a finished object that holds a small plant. The same pinched shape works well grouped in twos or threes with different glaze colors or resized into a slightly wider version for a small cactus. You can also flatten the base more during pinching to turn the idea into a shallow dish for propagating cuttings instead.
Scalloped Tea Light Holder
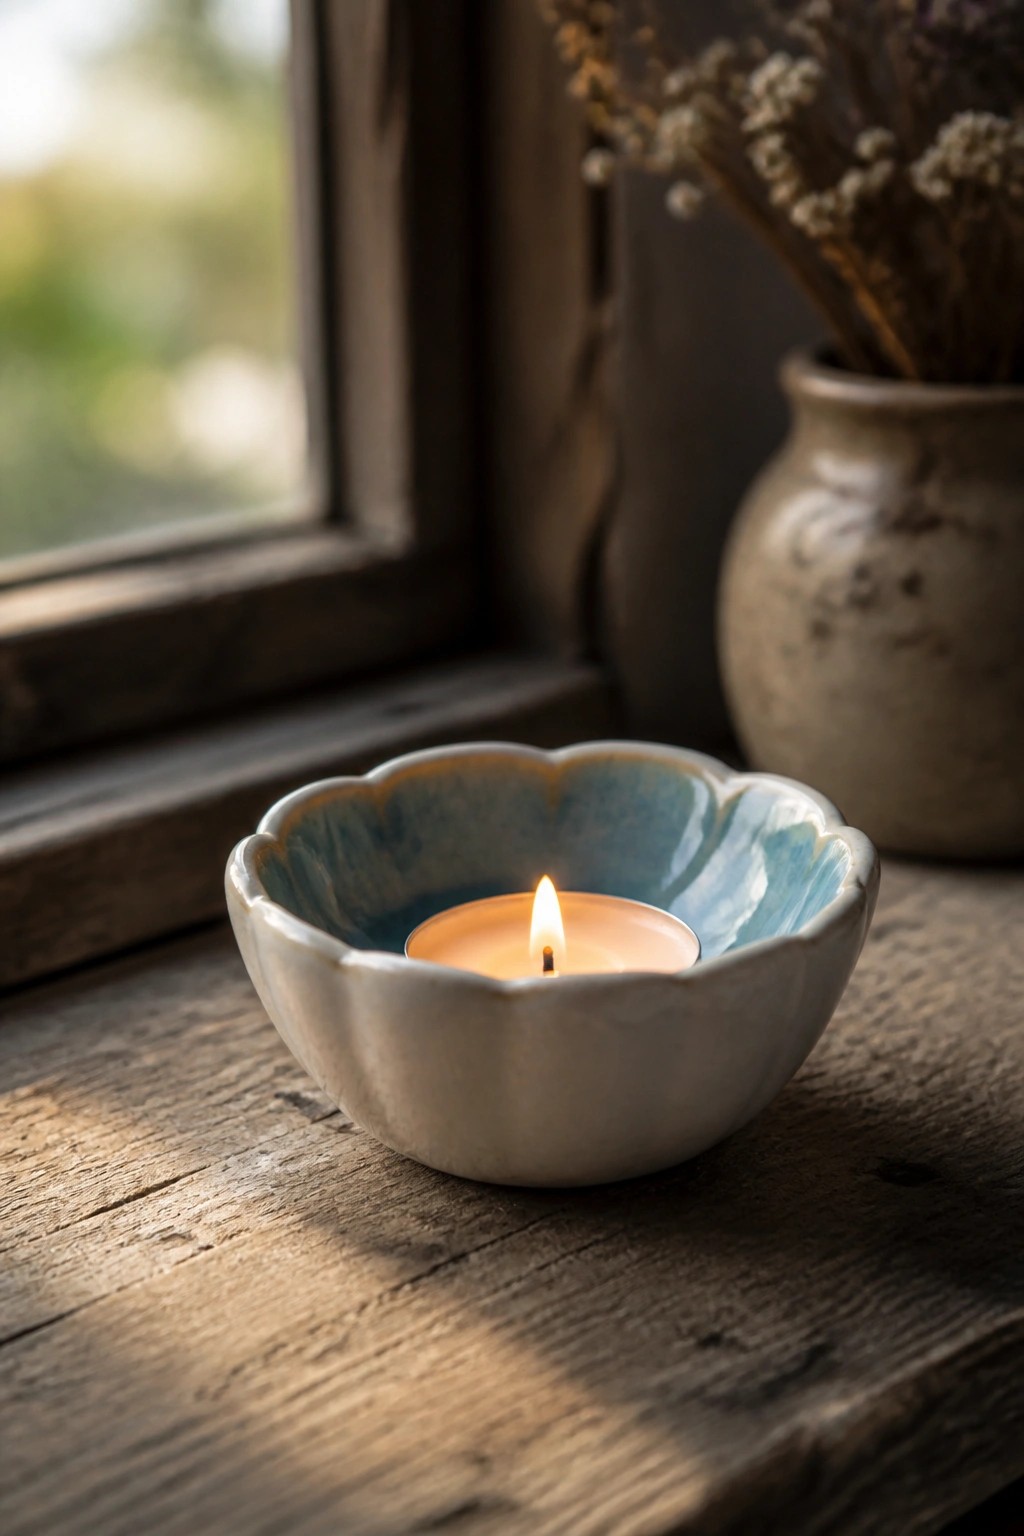
A simple pinch pot can be opened into a shallow bowl and the rim pinched outward at intervals to form soft scallops. The inside gets a light blue glaze that catches in the curves while the outer surface stays pale and matte. This keeps the whole piece compact enough to sit on a narrow ledge or tray while safely containing a standard tea light.
The small scale makes this easy to adapt by flattening the rim or making the scallops deeper for a different look. It works well as a quick gift or desk piece because it needs no handles or lids. You could rework the same base shape into a ring dish or small soap holder by leaving the center unglazed.
Pinched Oval Spoon Rest
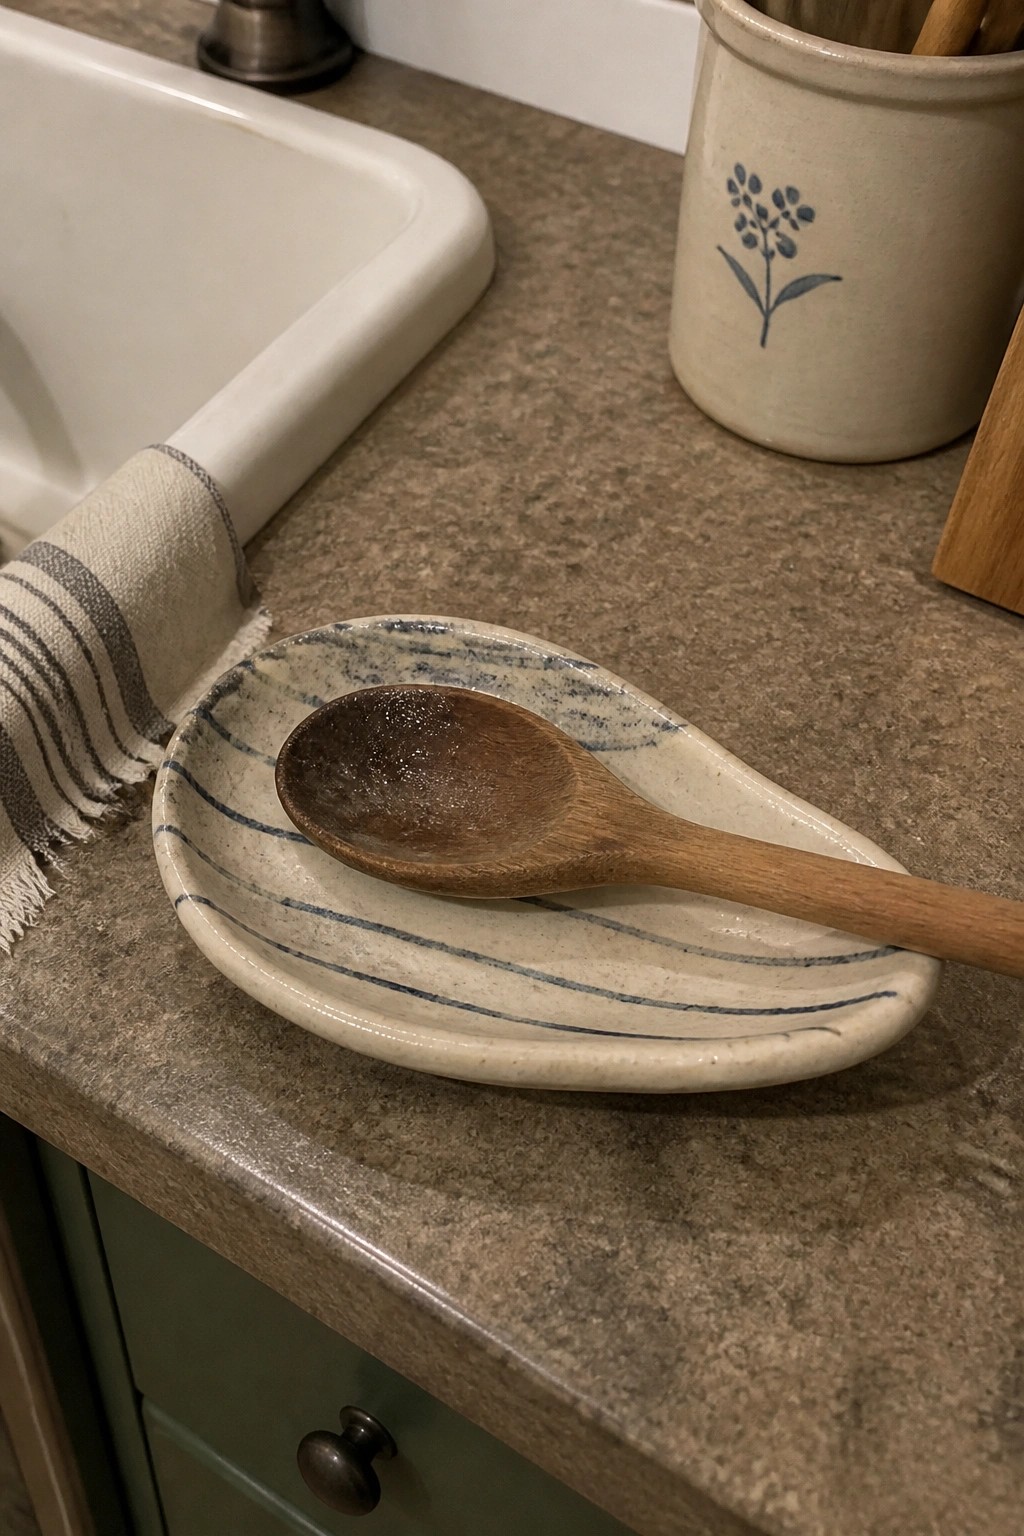
A shallow oval tray pinched from a slab of clay makes a practical spoon rest for the stove or counter. The repeating blue lines across the surface keep the design simple while still giving the piece some visual structure. This shape works as a basic kitchen item because it stays flat and low, letting a spoon rest without rolling off.
What makes this idea useful is how the same pinched oval can be made slightly deeper or wider to fit different utensil sizes. The line pattern can be swapped for a single band or small dots if you want less detail work. In a kitchen this form keeps the spoon contained and pairs easily with a nearby utensil crock or jar.
Flower Shaped Ring Dish
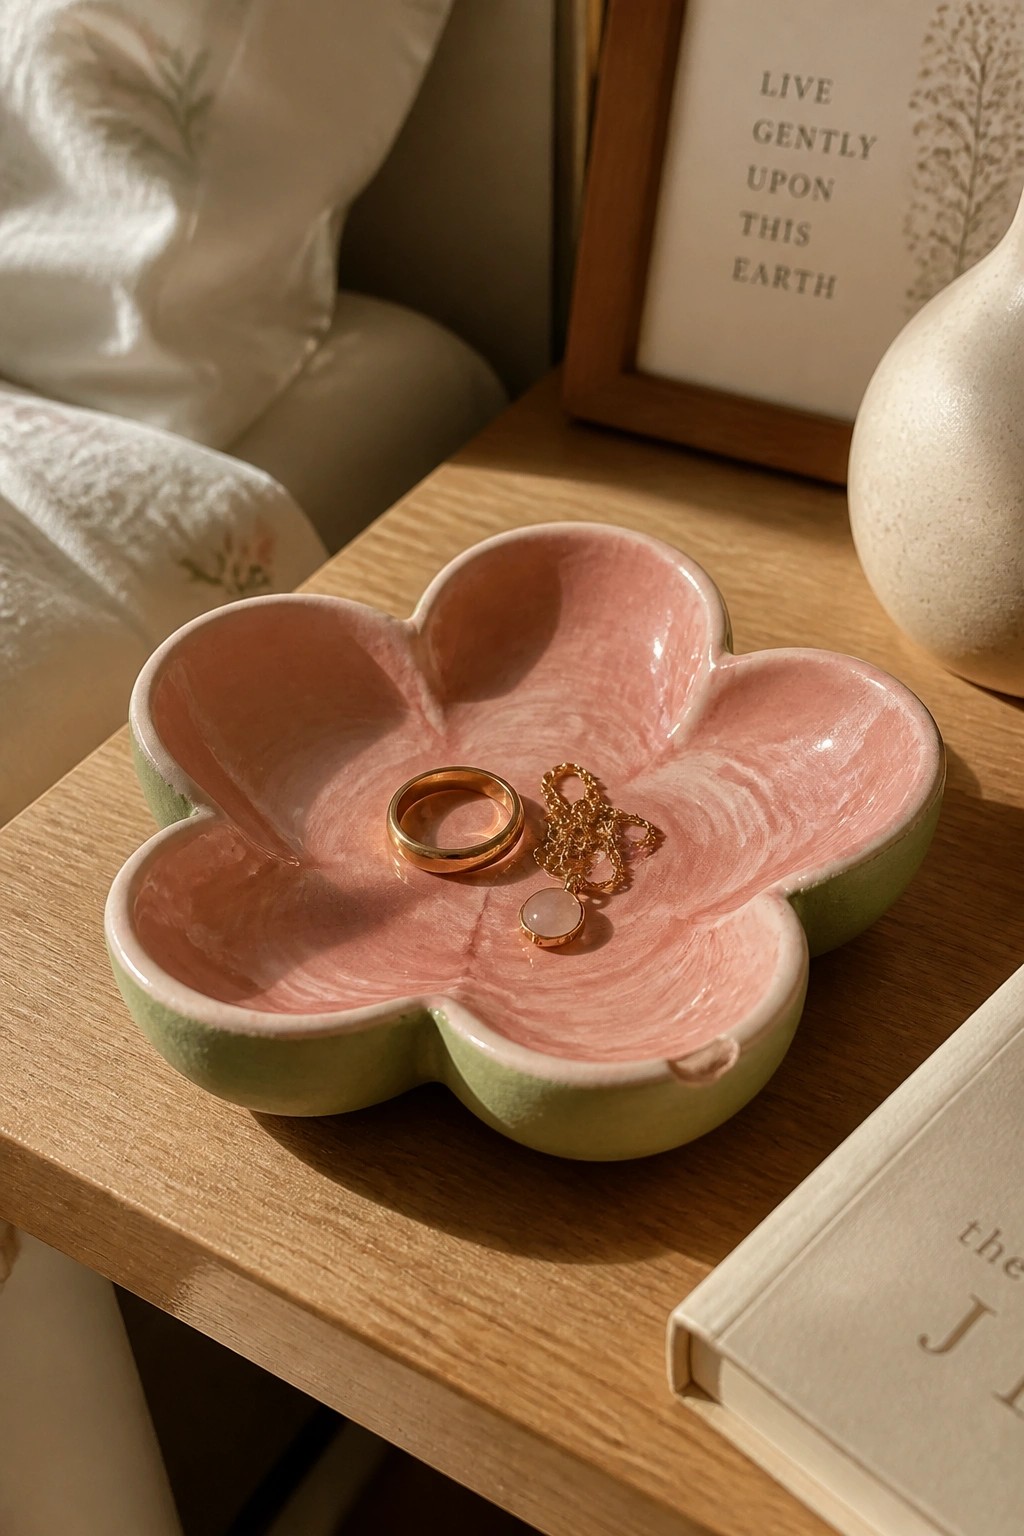
A flower shaped ring dish begins as a small pinched slab with the rim pulled outward into five rounded petals. The interior receives a pink glaze while the outer edges stay green to define the petal form. This produces a compact tray suited for rings and small chains. The scalloped edge gives the dish its shape without requiring extra tools or attachments.
What makes this idea useful is how the petal rim turns a plain dish into a clear jewelry holder that fits on a dresser or nightstand. You can change the glaze colors or make the petals slightly deeper to hold thicker pieces. The same pinched base works for a version with fewer petals or a flatter profile for earrings. This shape shows up well in photos because the outline is simple and repeatable.
Divided Pinch Pot Salt Cellar
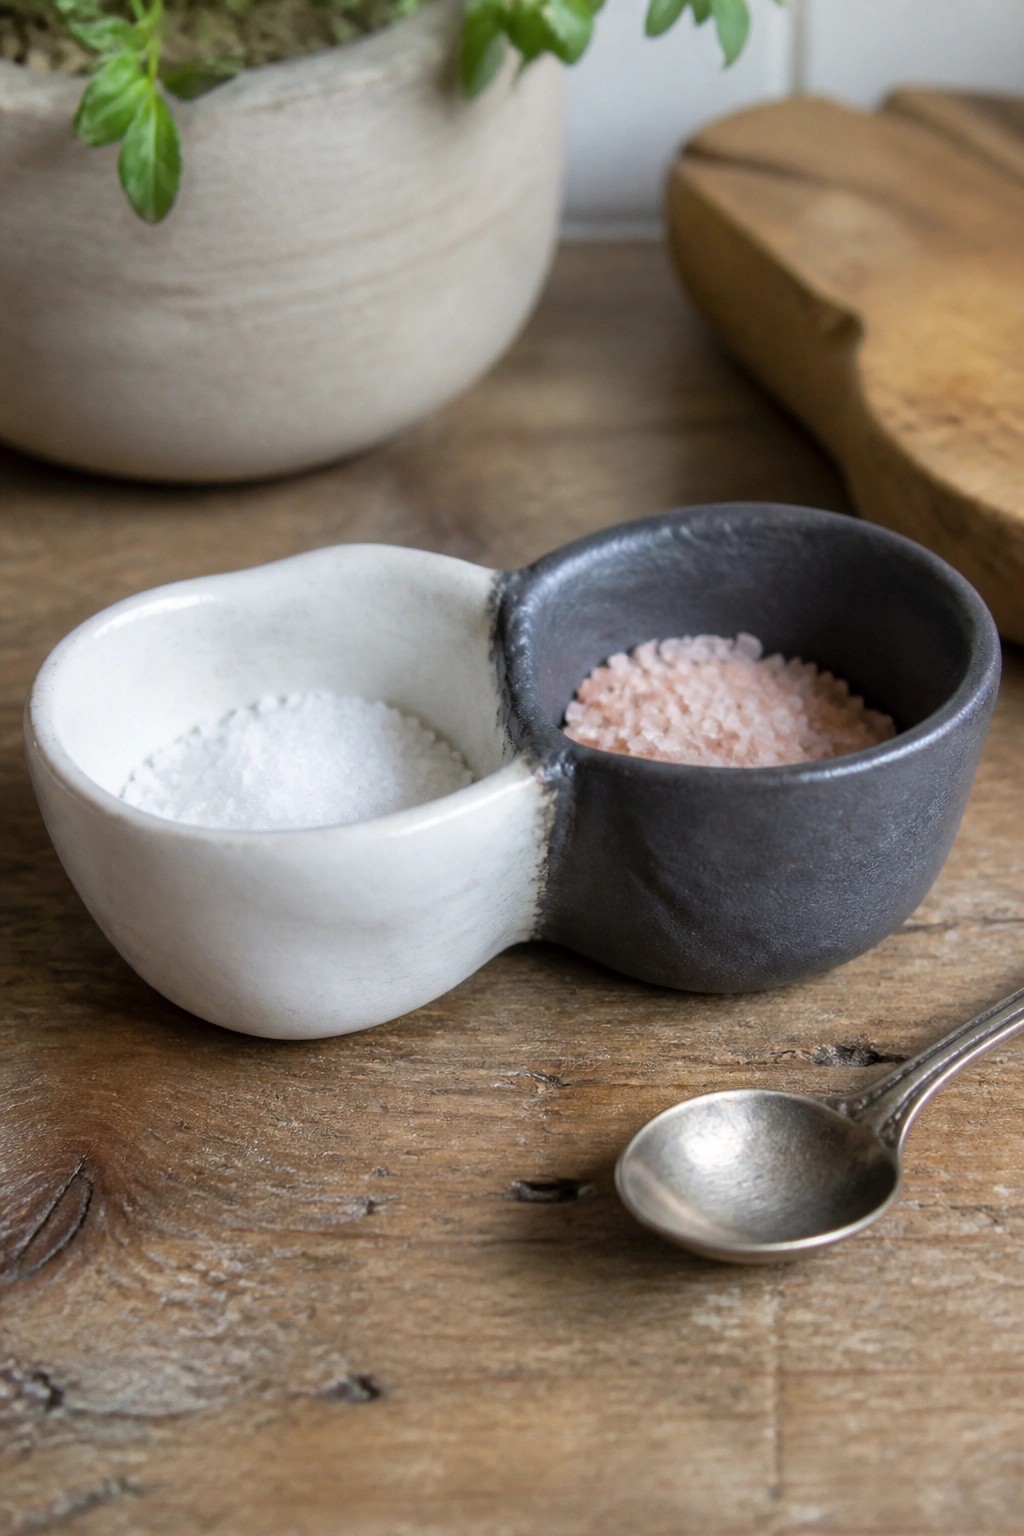
A divided salt dish formed by joining two pinch pots side by side gives you separate wells for different seasonings in one compact piece. One side uses a light glaze and the other a dark finish so the contents stay easy to tell apart. This kitchen item works well for table salt on one side and a coarser variety like pink Himalayan salt on the other.
The connected shape keeps everything stable on a countertop without extra trays. You could adapt the same idea by adding a third well for pepper or making the wells slightly deeper for spices. In a kitchen this kind of piece cuts down on small jars cluttering the table. For a gift it pairs naturally with a small metal spoon.
Pinch Pot Bud Vase with Fluted Texture
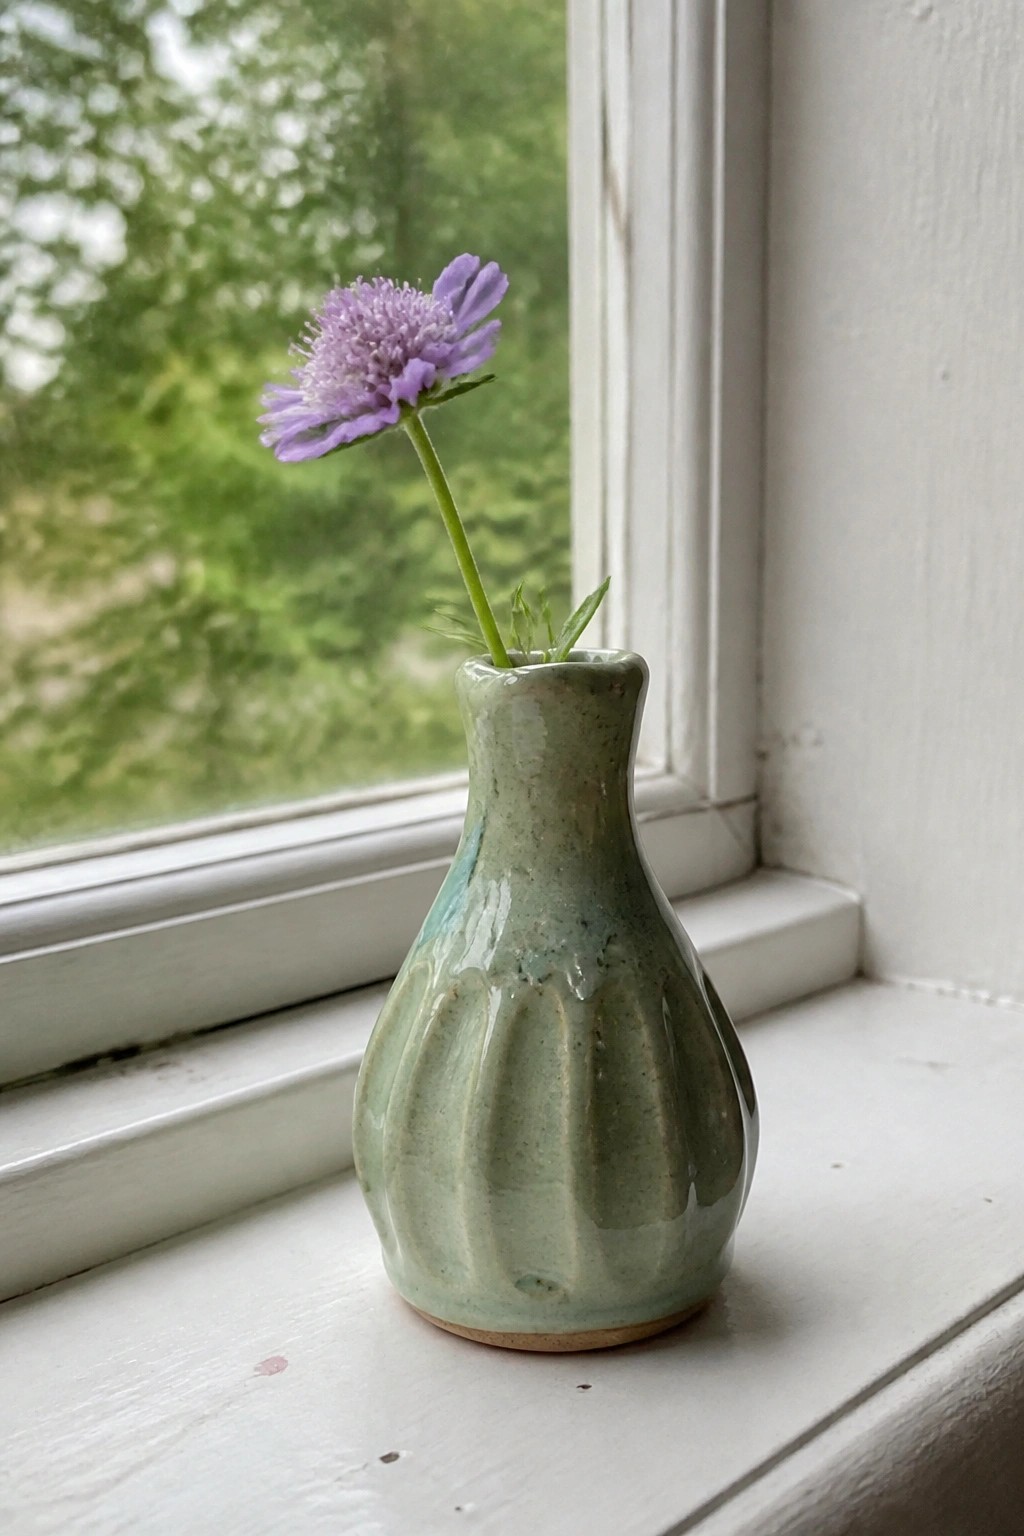
A small bud vase made from a basic pinch form works well for holding single stems or small bunches. The clay is pinched upward into a narrow neck and wider base, then the lower section is gently shaped with vertical ridges that catch the light and add surface interest. A soft green glaze with subtle speckling covers the form, leaving a natural clay rim at the foot. This keeps the project simple while producing a finished piece that reads as a deliberate vase rather than a plain cup shape.
The small scale makes it quick to form and fire, so you can make several in one session and test different neck widths or ridge patterns. Place it on a windowsill, desk, or shelf where a single flower or cutting needs a holder without taking much space. You could adapt the same pinch method into a slightly wider version for a toothbrush holder or a shorter one for incense. The fluted texture stands out in photos, which helps if you want to share the finished pieces online.
Polka Dot Creamer
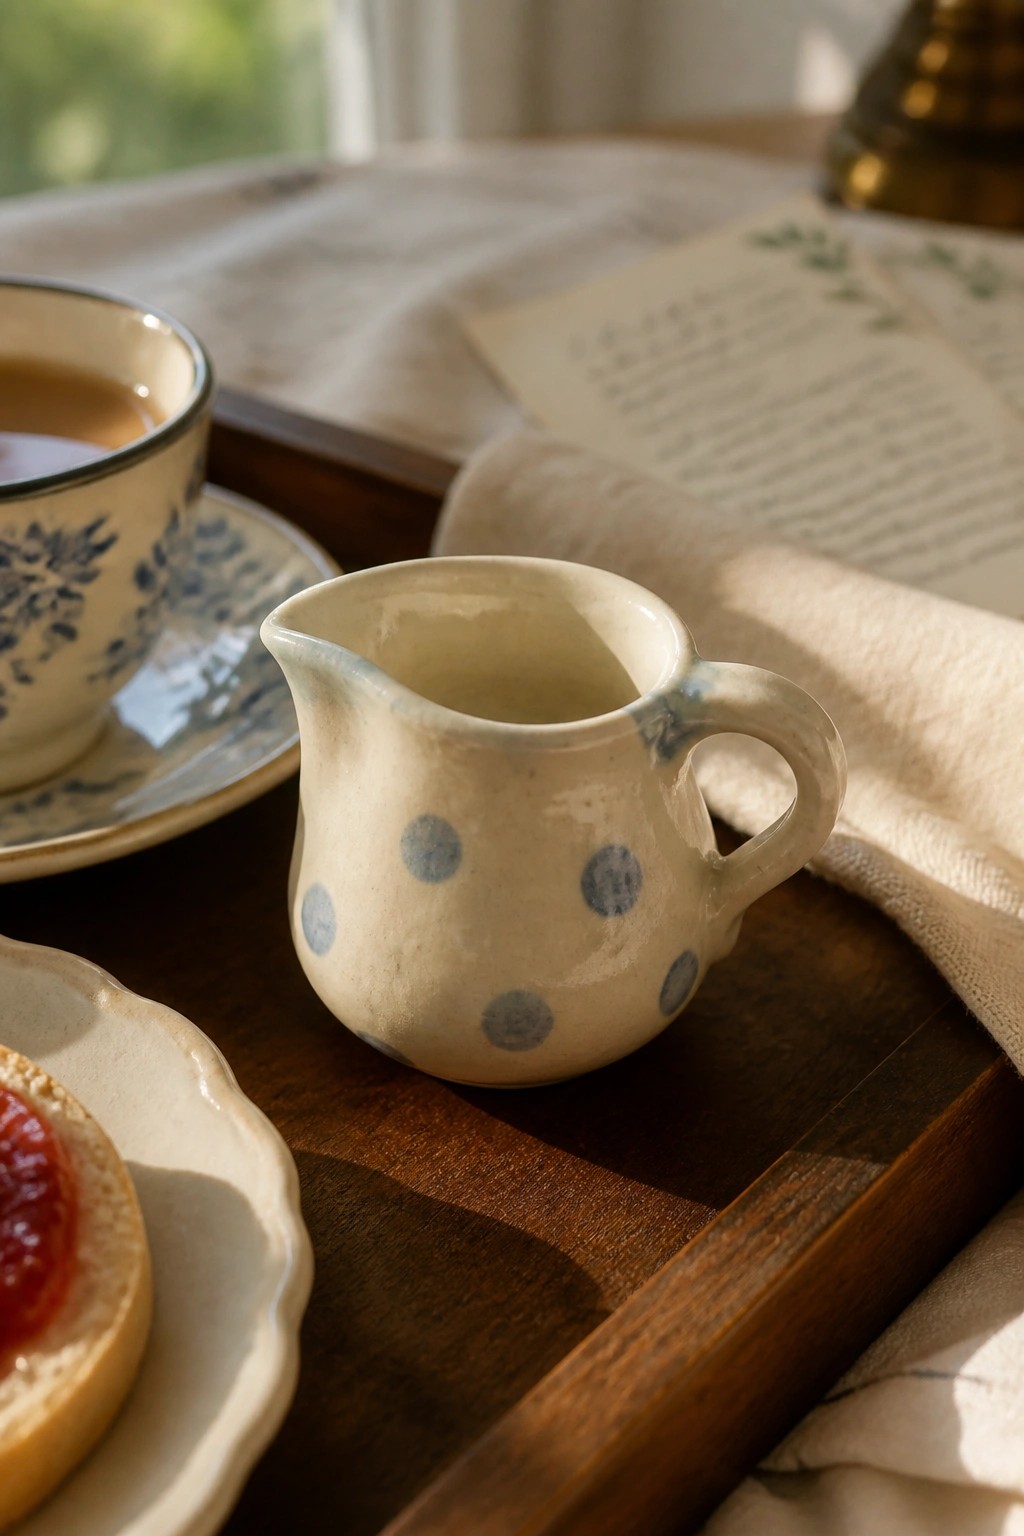
A small creamer pitcher makes a straightforward pinch pot project for beginners. Form the body from one pinched mound, then shape a spout on one side and attach a simple pulled or rolled handle. The light clay base with loose blue dots creates an easy surface pattern that reads clearly without extra tools or layers.
What makes this idea useful is how the compact size works on a table setting or next to a teapot. You can swap the dot color or spacing to match existing dishes, or leave off the handle to create a basic pouring cup instead. The spotted finish photographs well for sharing and stays simple enough to repeat in different sizes.
Cat Face Pinch Pot Holder
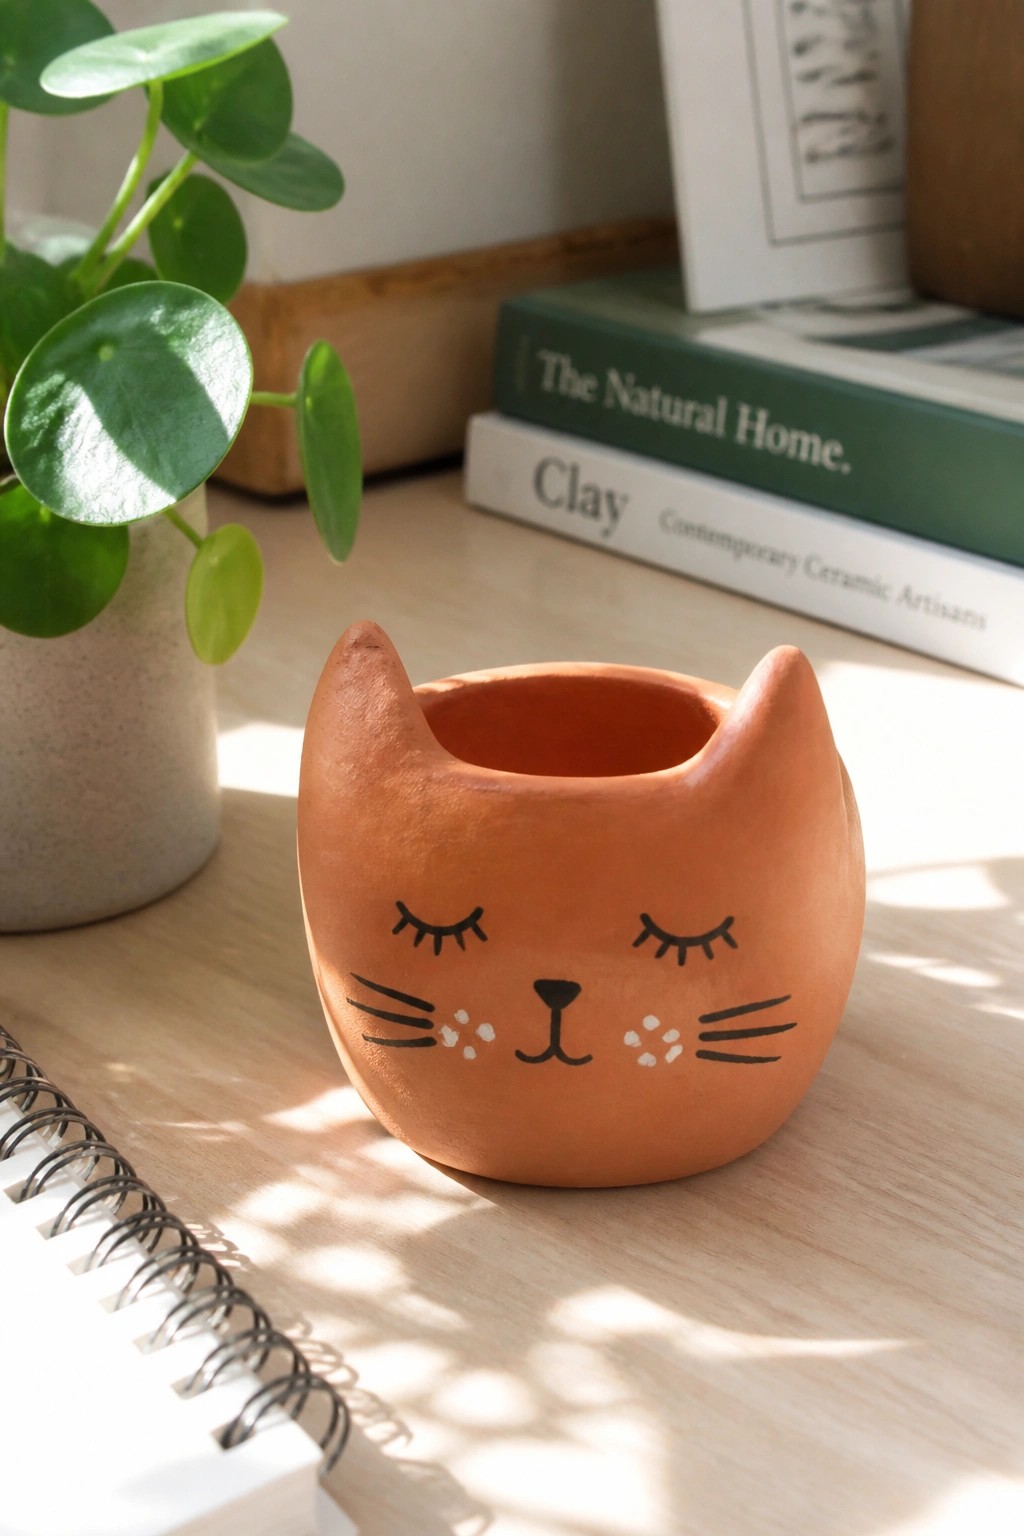
A basic pinch pot formed into a cat head creates a small holder or mini planter that fits on a desk or shelf. Start with a simple rounded bowl, pinch the rim upward to form ears, and add painted details like closed eyes, whiskers, and a nose on the front surface. The unglazed terracotta color keeps the focus on the shape and the black-and-white face markings. This approach works as a straightforward decor object because the painted features add personality without requiring extra clay attachments.
What makes this idea useful is how the painted motif turns a plain pinch pot into something identifiable with minimal extra effort. It works especially well as a tiny plant holder or catch-all for small items like keys or clips. The same form can be adapted by changing the ear shape or swapping the face for a different animal to create a matching set. For a gift, something like this stands out because the compact size and clear theme make it easy to customize with colors or expressions.
Speckled Pinch Pot Bowls for Salt and Seasonings
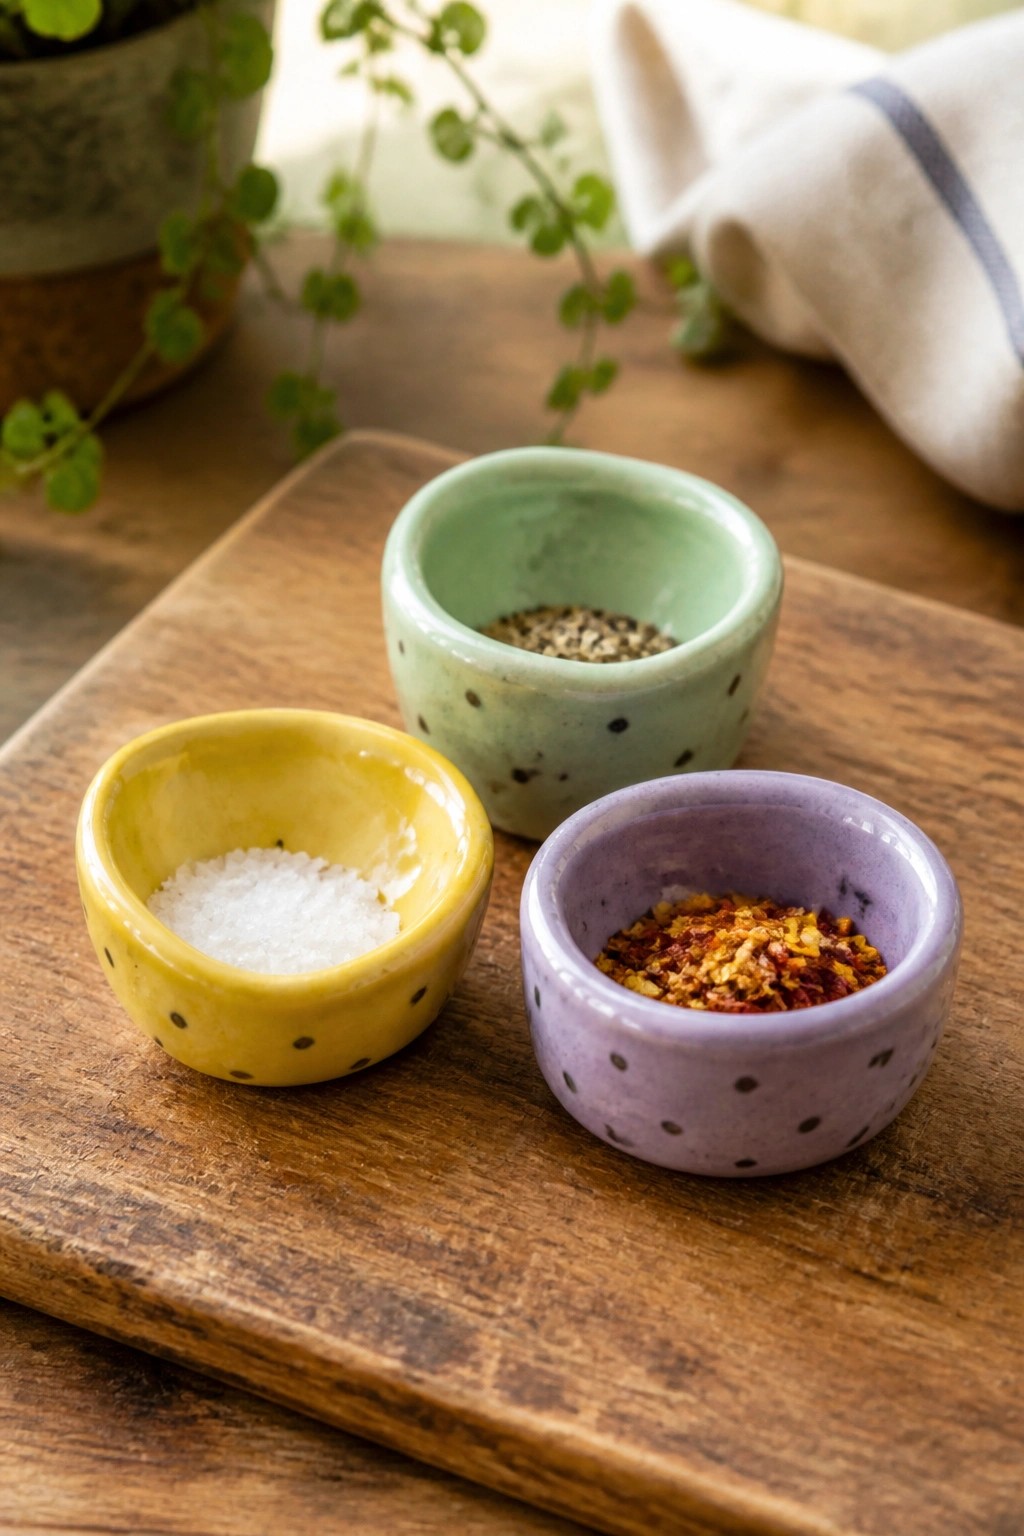
These small bowls are formed by pinching clay into compact rounded shapes and then glazing them in solid colors with scattered dark specks. They function as individual dishes for salt, crushed red pepper, or peppercorns on a table or counter. The bright yellow, lavender, and mint glazes keep the set easy to tell apart while the speckles add a simple pattern across all three.
The small scale makes these quick to form and fire, so you can make several at once without using much clay. They work well next to the stove or in a picnic setup and adapt easily by changing the glaze colors or making a few wider versions for larger spices. A set of four in different shades would also translate well into a matching set of tiny ring dishes or tea bag holders.
Pinch Pot Toothbrush Holder
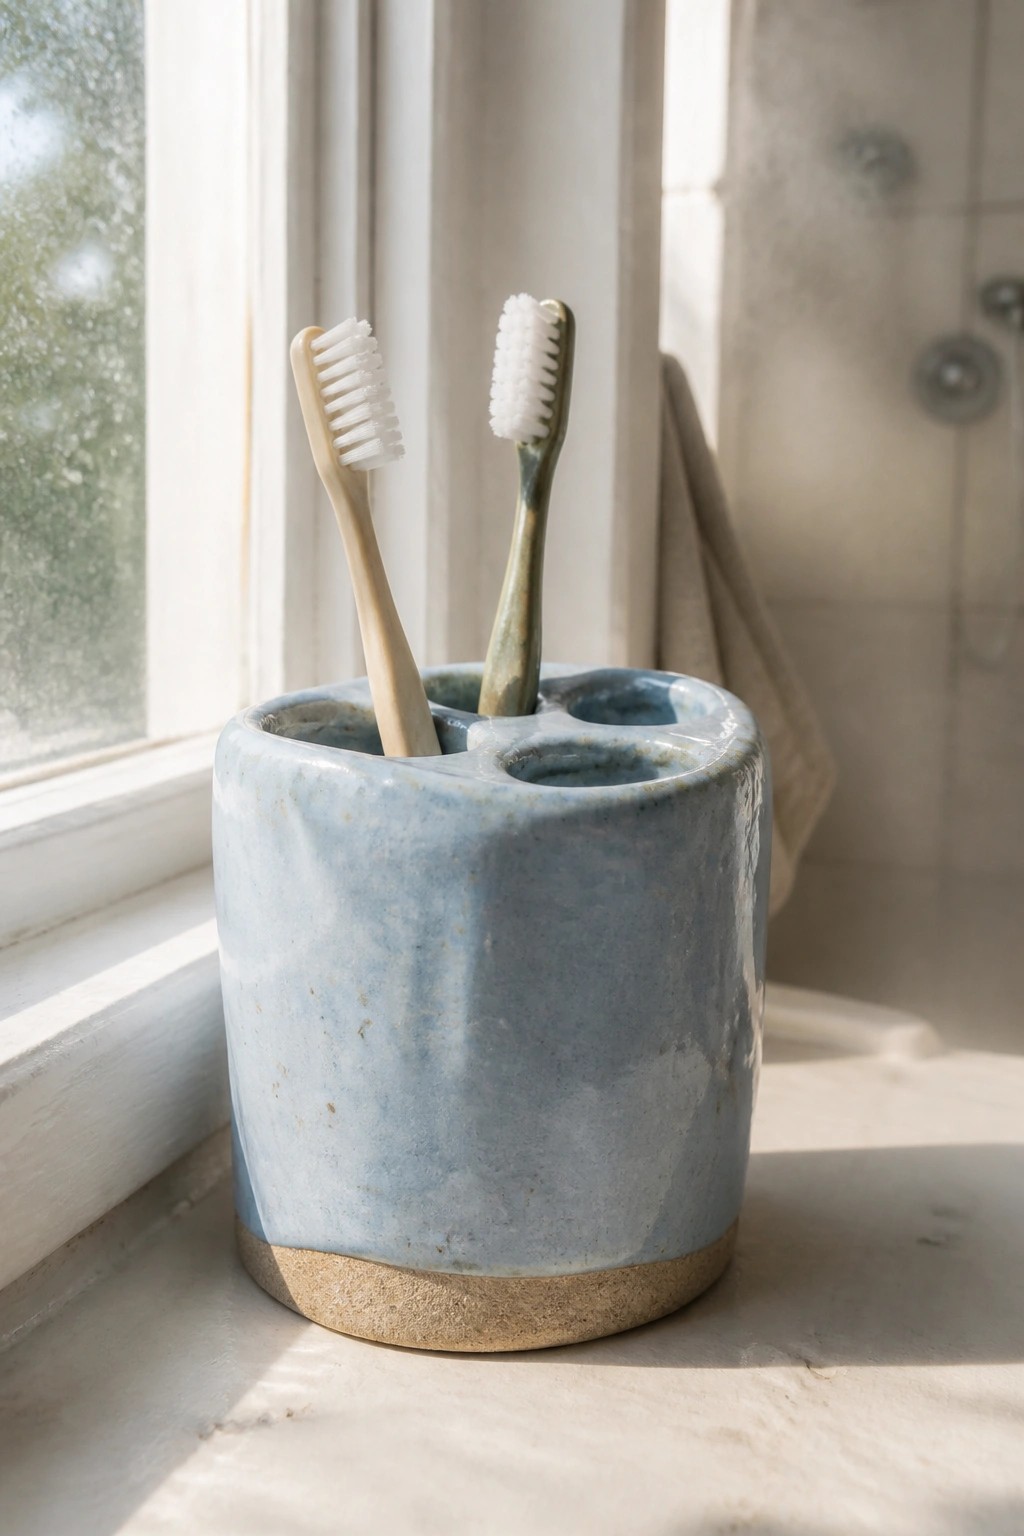
A handbuilt ceramic toothbrush holder starts as a simple cylinder or thick pinch pot with several openings formed across the top. This lets two or more brushes stand upright without touching, keeping the bathroom counter clear. The blue speckled glaze paired with an unglazed base gives the piece a practical, low-maintenance finish that handles daily moisture well.
What makes this idea useful is how quickly the same basic shape can be adjusted for one or four brushes depending on household size. It works especially well on a narrow ledge or beside the sink where space is limited. You could rework the form into a makeup brush cup or a small kitchen utensil holder by changing the hole pattern and keeping the same height and foot. The straightforward construction also makes it a quick project to repeat in different glaze colors for gifts.
Pinch Dish with Three Glazed Wells
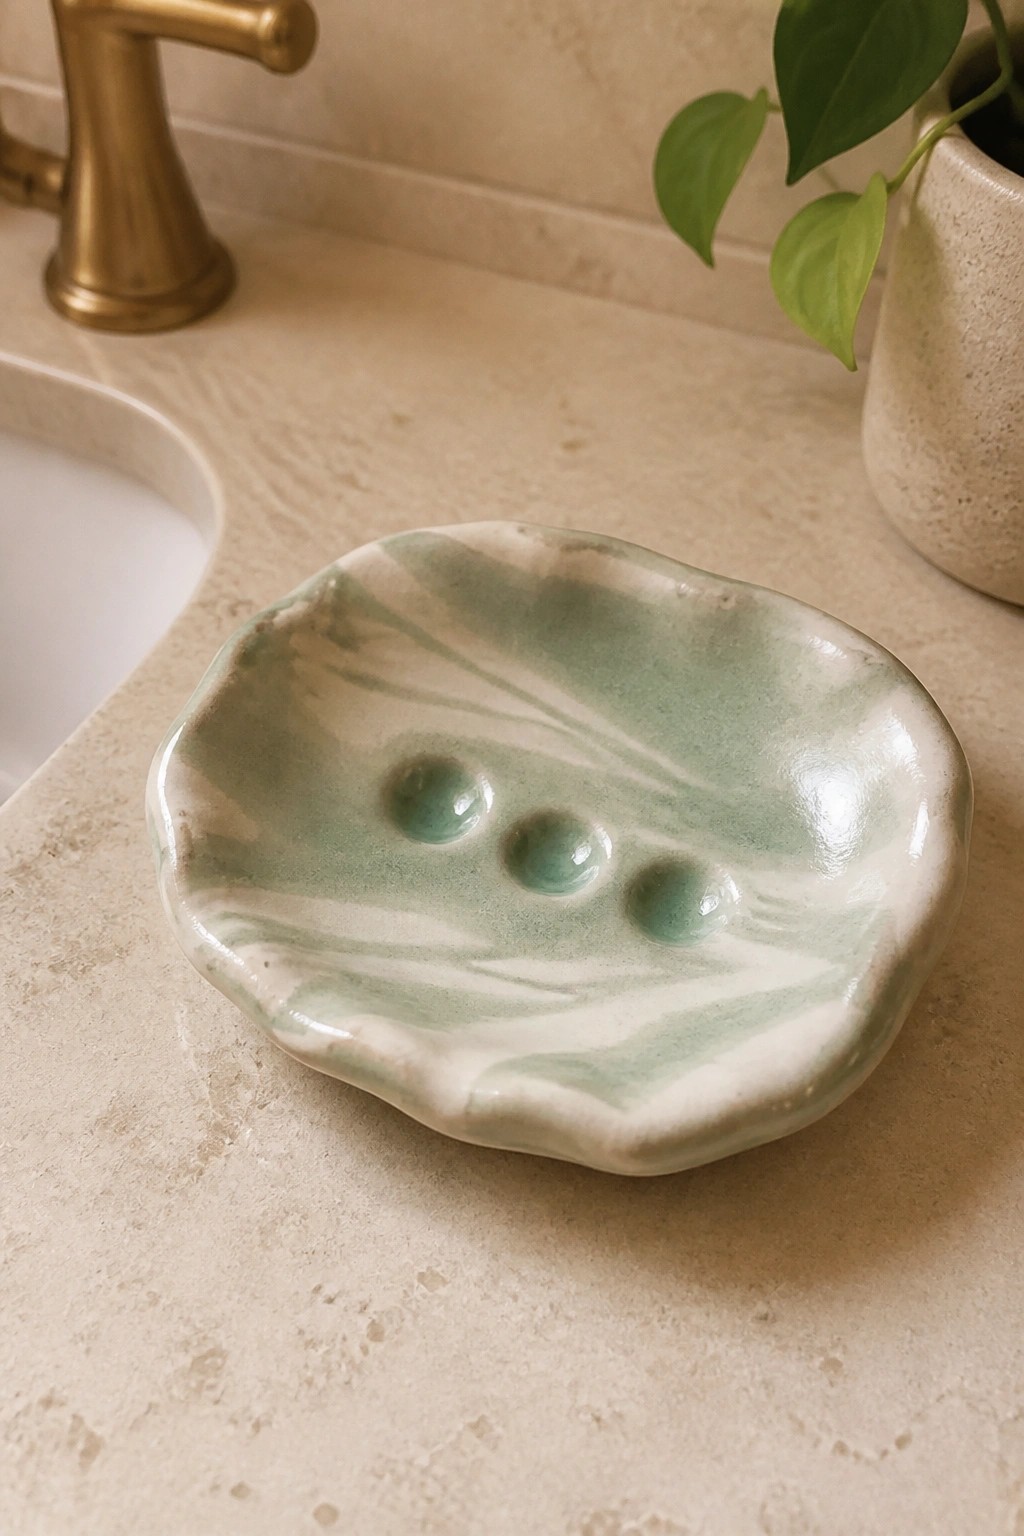
A simple pinch slab forms the base for this shallow, wavy-edged dish that features three small rounded wells pressed into the center. The soft marbled green and white glaze flows across the surface and settles into the wells, creating contrast that draws attention to the functional spots. This style of piece serves well as a ring dish or compact soap holder for a bathroom counter.
The small overall size makes it quick to form and fire, so you can test glaze combinations without using much clay. You could easily adapt the idea by adding more wells, making the dish slightly deeper for actual soap use, or switching to a single center well for a basic ring holder. In a kitchen it could hold small measuring spoons or jewelry near the sink.
Pinch Form Ring Cone
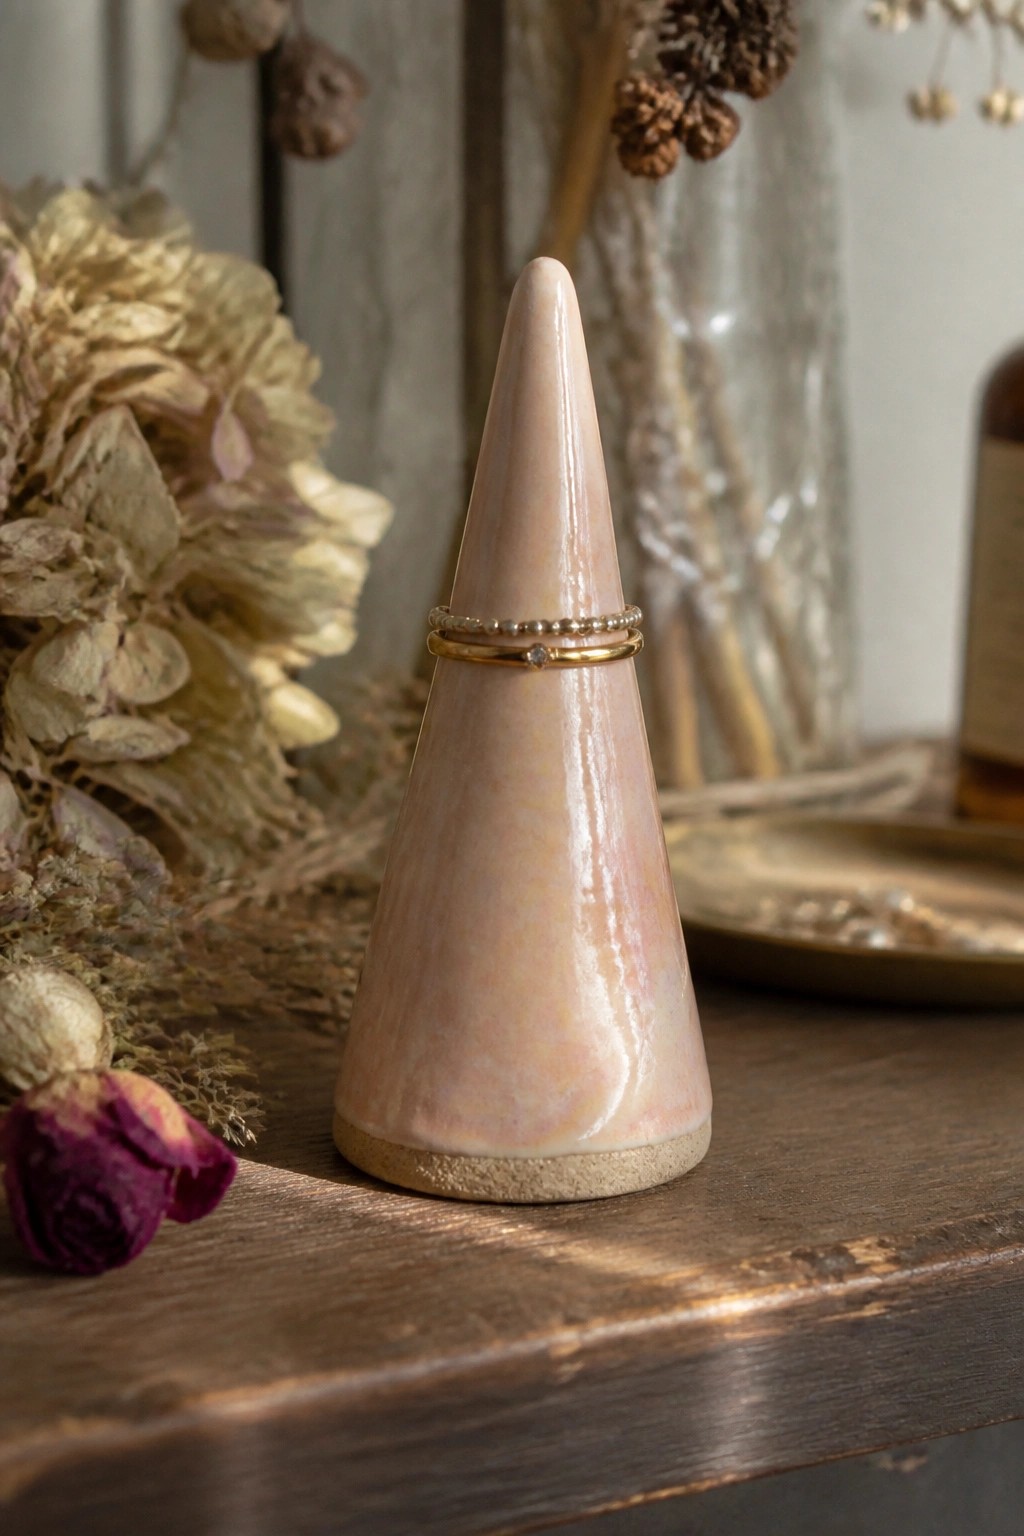
A cone-shaped ring holder built from a simple pinched clay form gives rings a place to rest at different heights along the taper. The marbled pink glaze adds soft color variation across the surface while the unglazed base keeps the piece stable on a flat surface. This project stays in the jewelry storage category and stays small enough to fit on a dresser or bathroom shelf.
What makes this idea useful is how the basic cone shape can be pinched taller or wider to hold more rings or larger bands. Try a single solid glaze color or skip the marbling if you want a faster finish that still looks intentional. The small scale means it uses little clay and can be made in one session, so it works well as a first attempt at functional forms before trying trays or small vases.
Sun Face Hanging Ornament
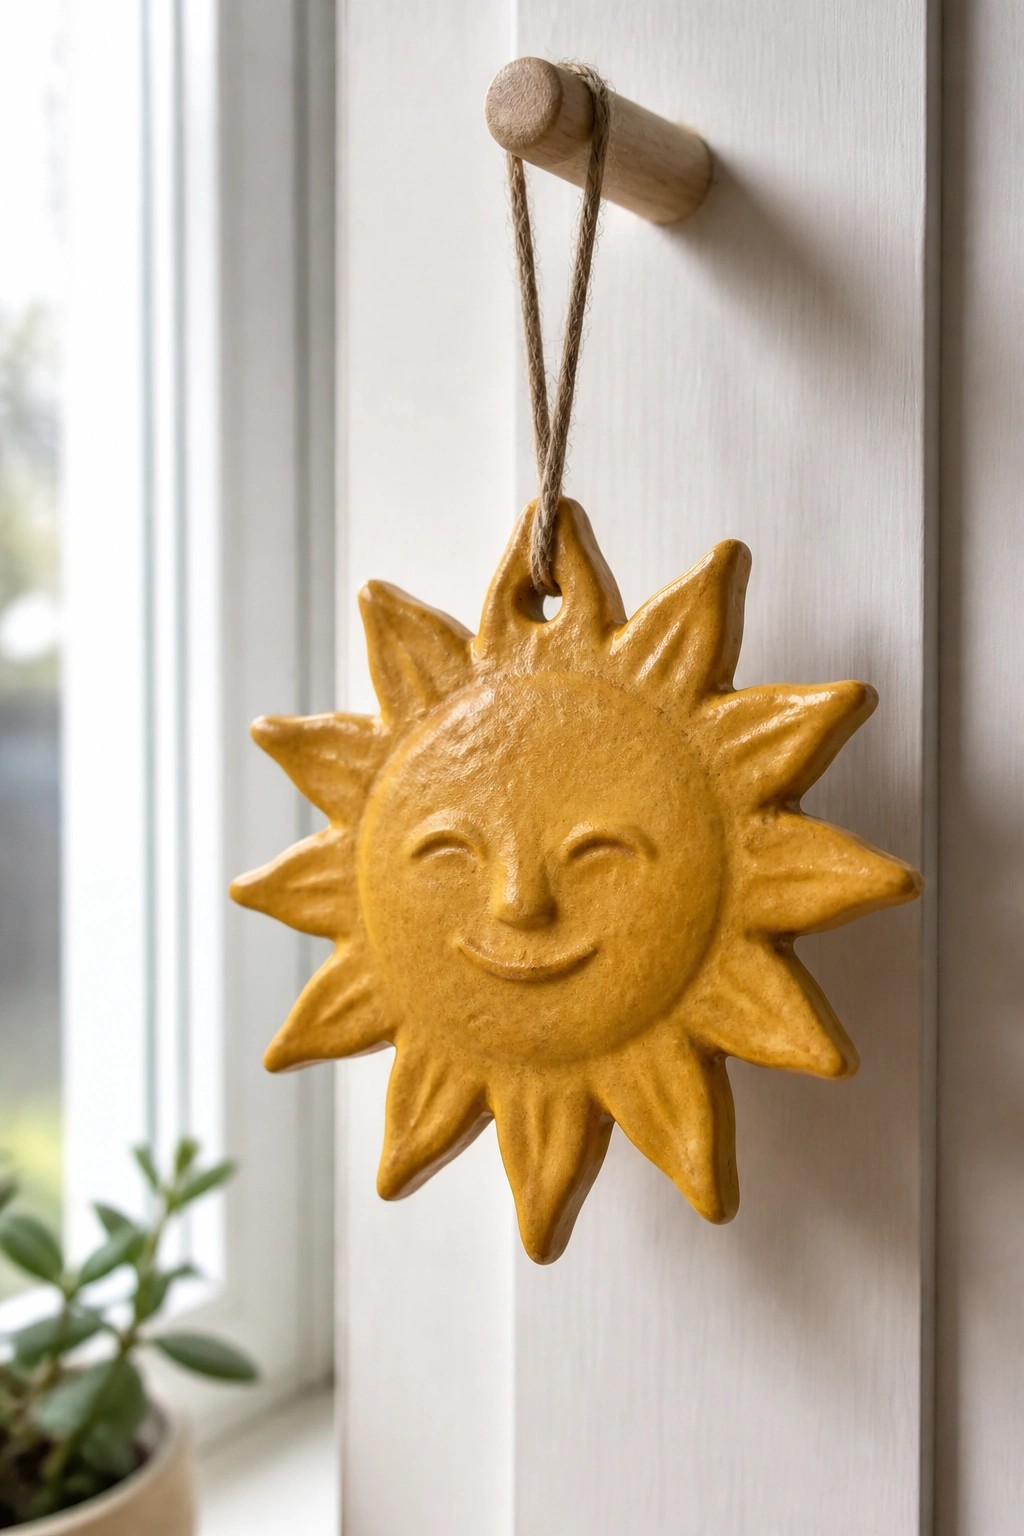
A flat clay circle forms the base for this sun ornament. Add triangular rays around the edge by pinching or cutting the clay, then press in simple eyes and a mouth to create the face. After firing, apply a single yellow glaze and thread twine through a small hole at the top for hanging. The design stays effective because the rays and face stay bold even on a small scale.
What makes this idea useful is how easily it adapts to different sizes or colors. You can make several at once from one slab of clay and hang them in a row near a window or on a peg rail. For a gift, swap the yellow glaze for a different color or leave the rays unglazed for contrast. The small scale also lets you test the same shape as a magnet or drawer pull without using much clay.
Small Pinch Dish with Wavy Rim
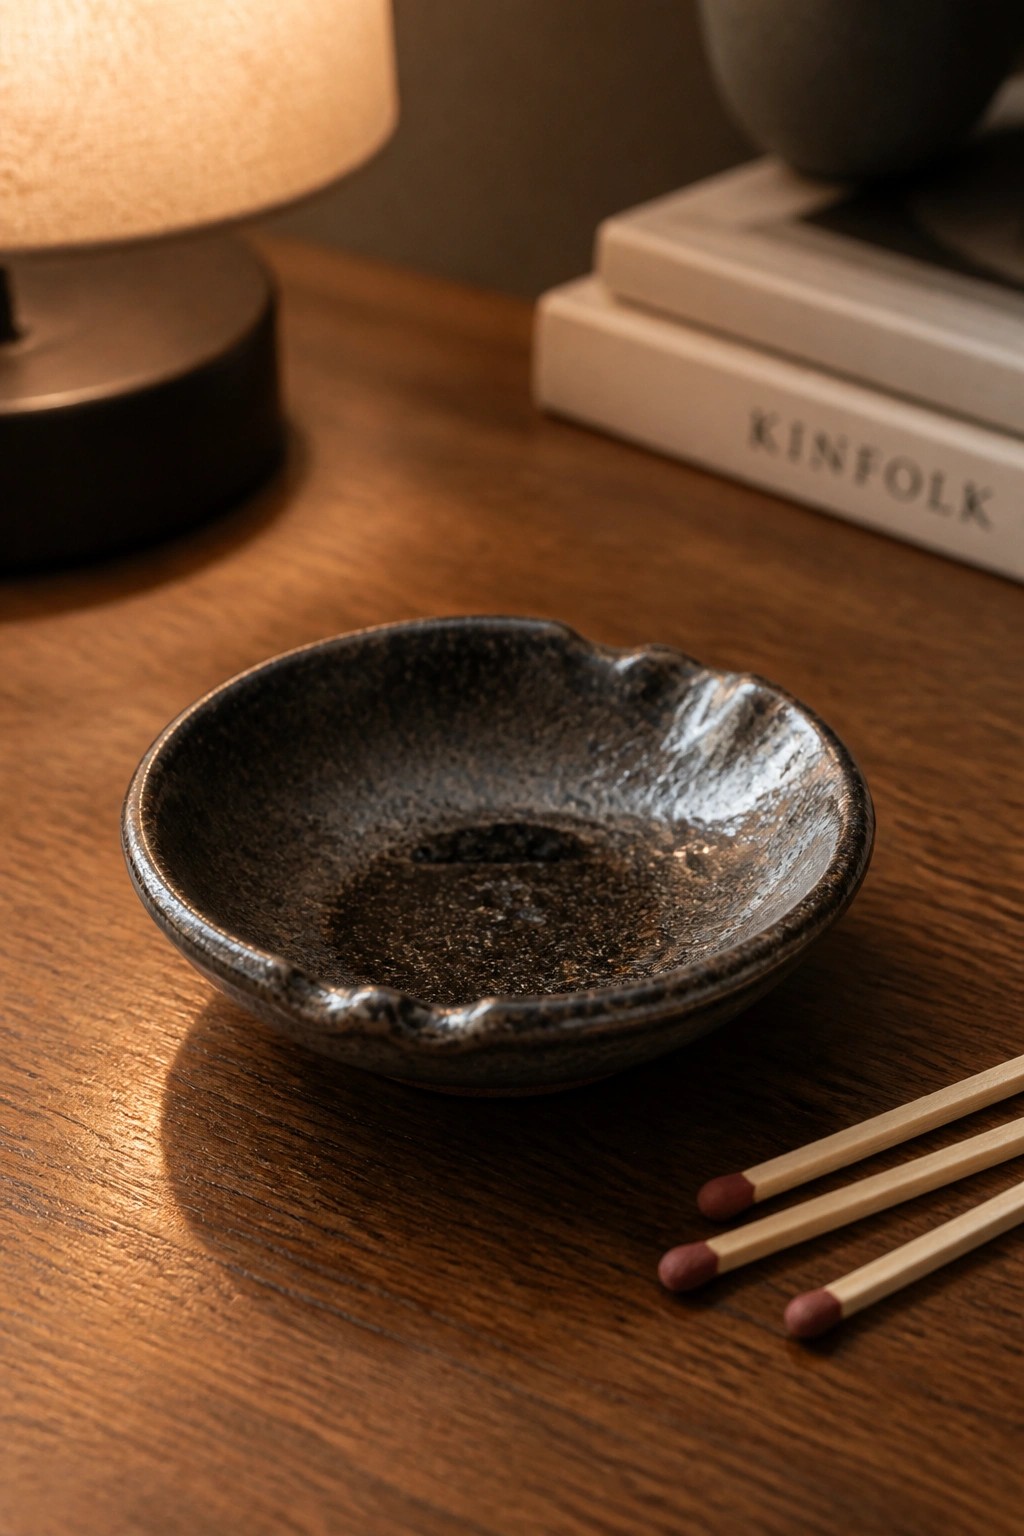
A basic pinch bowl formed from a single ball of clay makes a useful small dish once you flatten the base and pull the walls outward into a shallow curve. Leaving the rim slightly uneven adds visual interest without extra tools or carving. The dark speckled glaze keeps the finished piece simple while giving it enough depth to stand out on its own.
What makes this idea useful is how the compact size works for holding matches, rings, or loose change on a bedside table or desk. You can repeat the same pinch method in different sizes to create a matching set or adjust the rim shape for a more oval tray. The single glaze color also makes it quick to produce multiples if you want to test different clay bodies or firing temperatures.
Pinch Slab Incense Holder
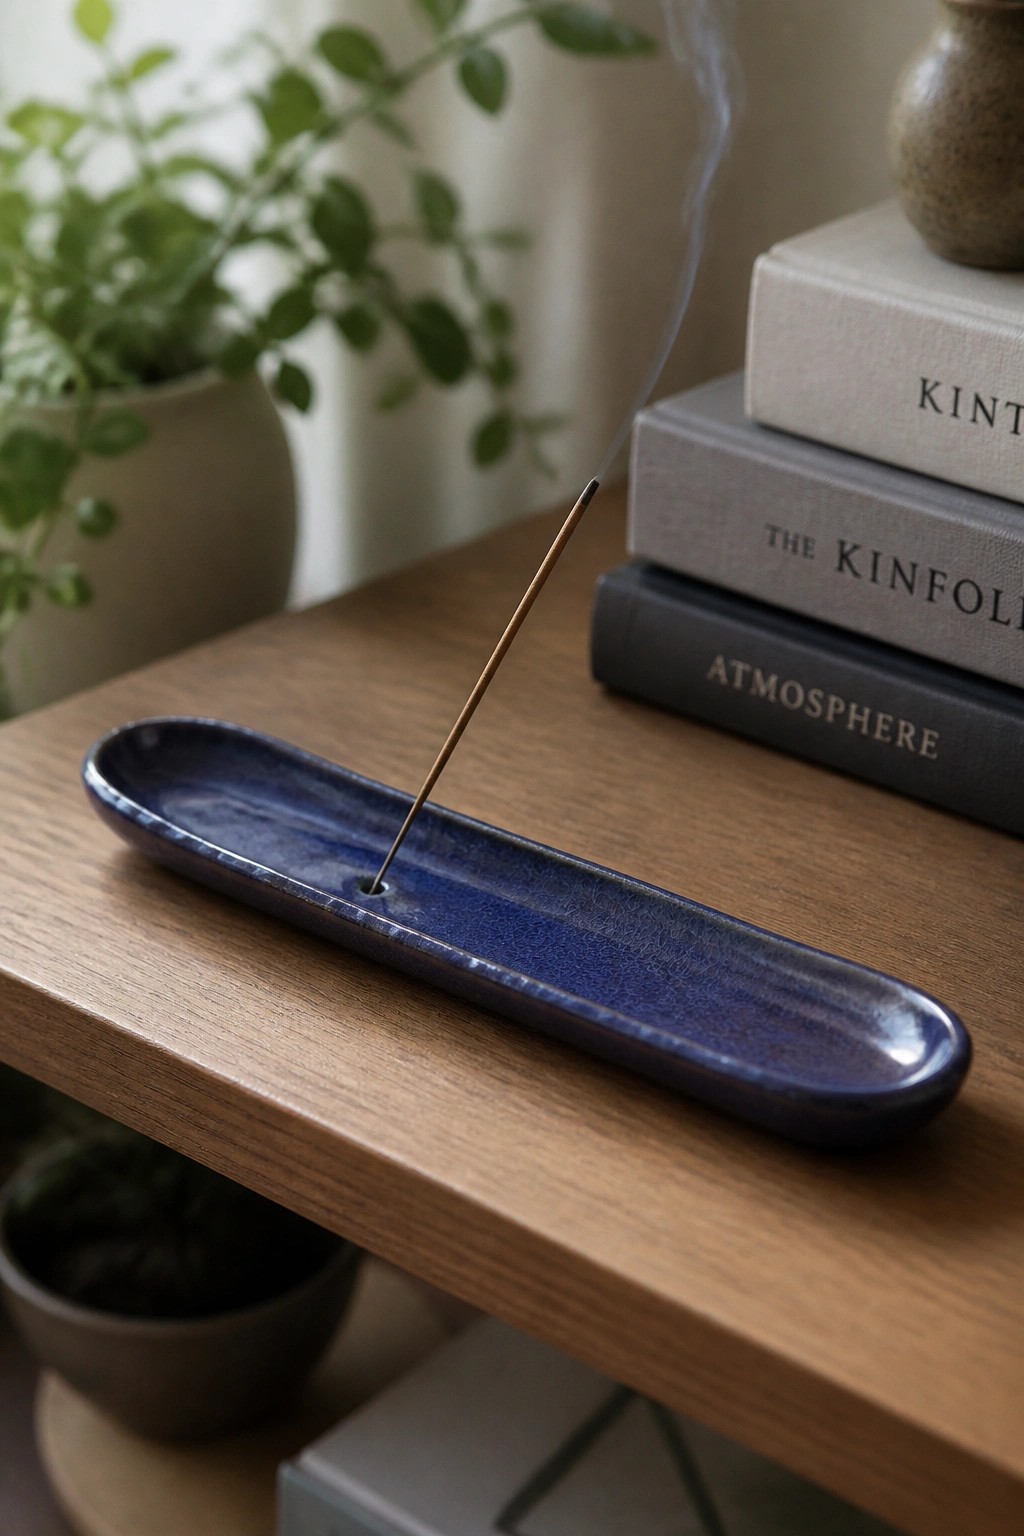
A narrow oval tray formed from a simple pinch or slab makes a practical incense holder. Create the base shape first, then push a small hole near one end while the clay is still soft to keep the stick upright. A single deep blue glaze with crackle texture covers the surface and helps hide any small marks from handbuilding.
What makes this idea useful is how the long, low shape contains ash without taking up much table space. You could shorten the form for a desk version or widen it slightly to hold two sticks at once. The same base shape works as a small tray for matches or a narrow plant saucer if you leave out the hole.
Pear Shaped Ring Dish
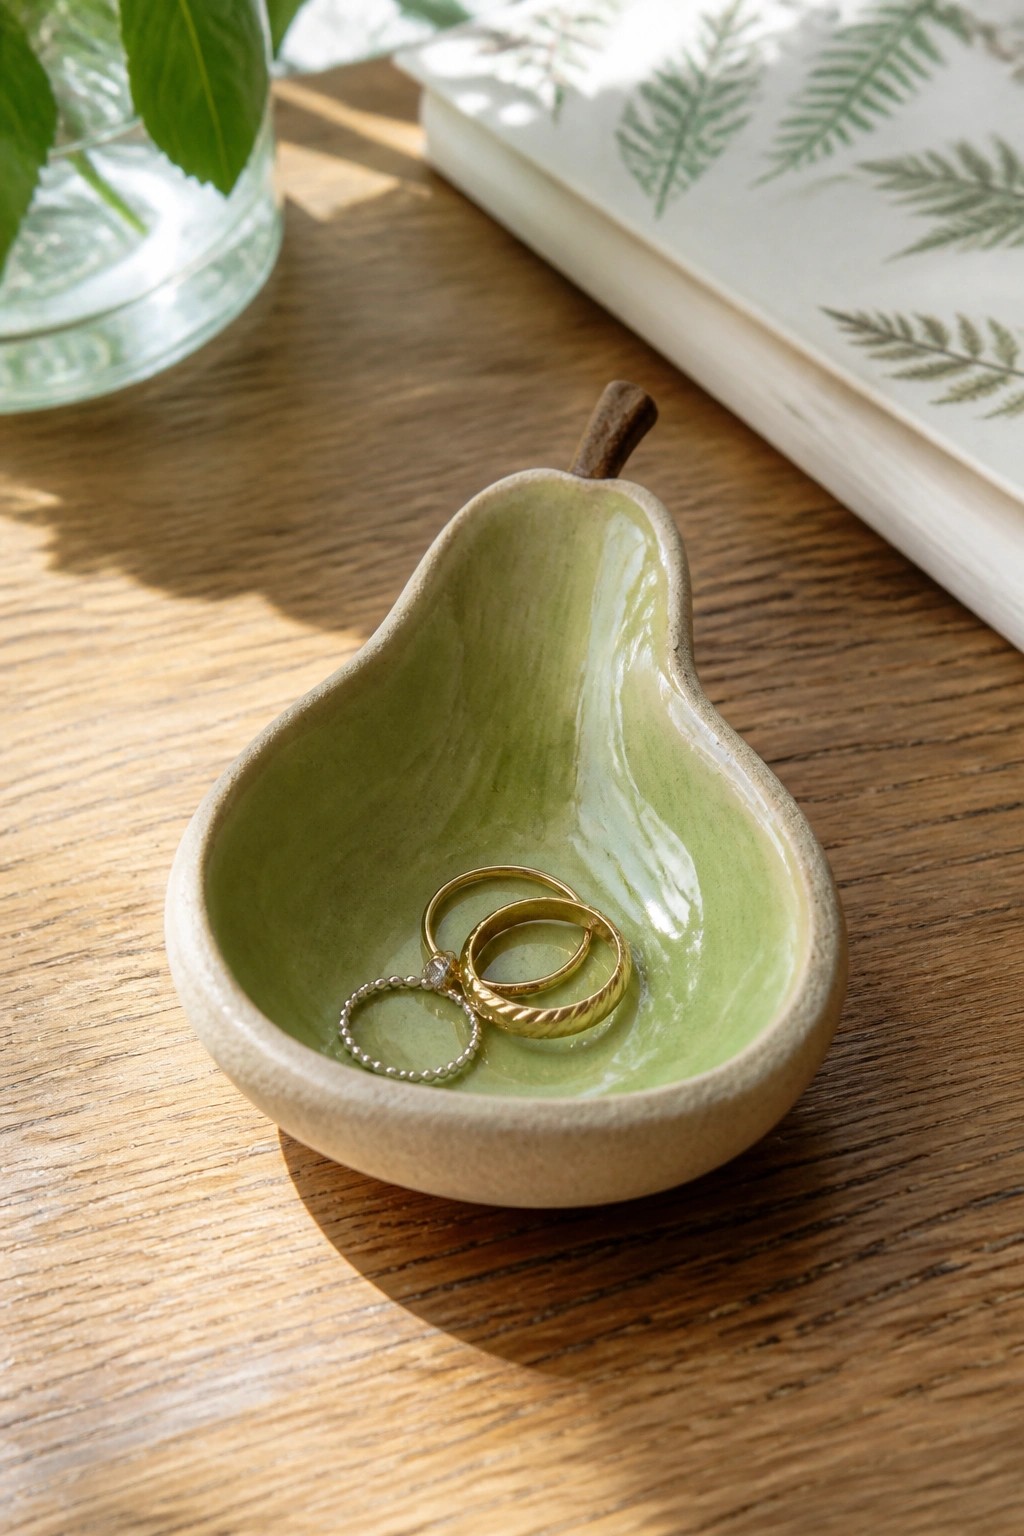
A small pear-shaped ring dish works well as a beginner pinch pot project because the form stays simple while the fruit shape adds clear visual interest. Pinch a ball of clay into an oval bowl, then pull a short stem from extra clay and attach it at one end before smoothing the join. A light green glaze on the inside contrasts with the unglazed exterior and helps the dish read as a pear without extra decoration. The open center and low sides make it practical for holding rings or small jewelry on a nightstand or dresser.
The shape does a lot of the work here since the fruit outline is easy to recognize even with basic pinching and minimal trimming. A piece like this works especially well as a gift because it stays small, uses little clay, and can be reworked into other fruits or vegetables by changing the stem and overall proportions. For a first project it also gives practice with even walls and a stable base without needing advanced tools.
Pinch Pot Spouted Dipping Bowl
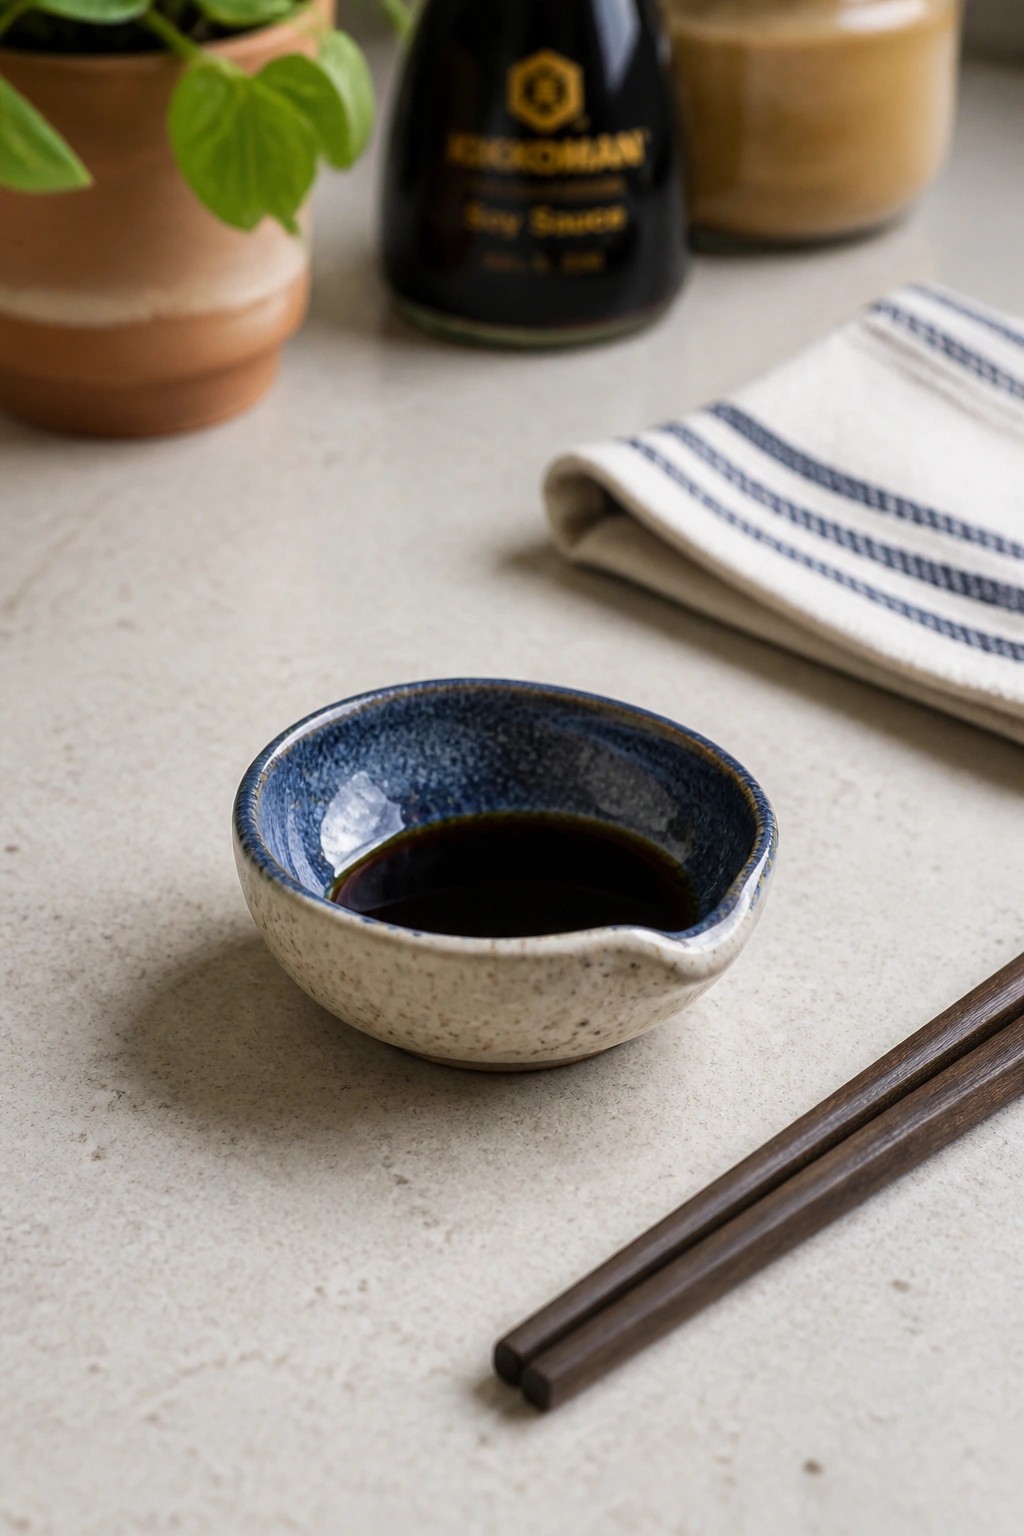
A small handbuilt bowl with one pinched spout makes a practical dipping dish for soy sauce or other table condiments. The form starts as a simple pinch pot that is then shaped at the rim to create a narrow pouring or dipping edge. A speckled blue glaze on the inside contrasts with the lighter clay body on the outside, keeping the surface casual and letting the texture of the clay remain visible.
The small scale and spout make this shape easy to place next to a plate without taking up much room. You can repeat the same pinch-and-spout method at a slightly larger size to hold salad dressing or at a smaller size to hold a single ring or earring. The spouted edge adds function while the overall form stays simple enough to finish in one session.
Heart-Shaped Ring Dish
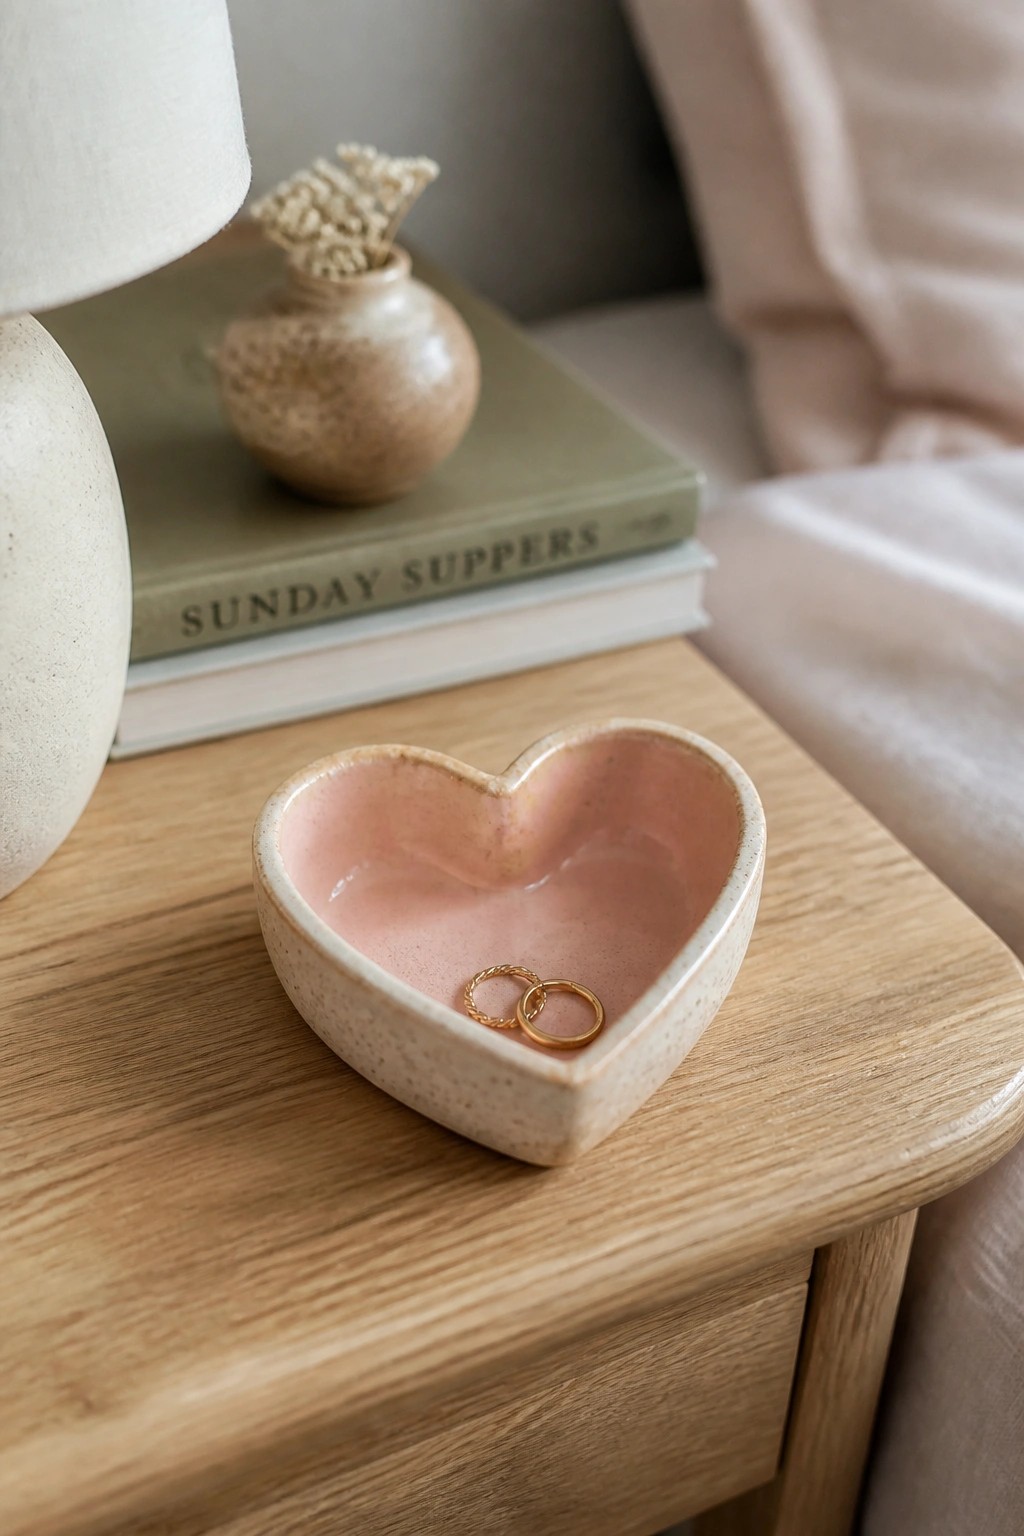
A small heart-shaped pinch pot works well as a ring dish for holding jewelry on a bedside table or dresser. Start with a basic pinch form, then gently shape the rim into a heart while the clay is still soft. A single interior glaze in a soft pink leaves the speckled clay body exposed on the outside for a clean contrast.
What makes this idea useful is how little clay it requires and how quickly it can be repeated in different sizes. The heart outline gives the dish a clear function without needing extra handles or feet. You could swap the pink glaze for a matte white or deep blue to match other pieces in the same room, or scale it up slightly to hold keys or loose change.
Frequently Asked Questions
What supplies do I need to try these pinch form pottery ideas?
Start with a basic air dry or earthenware clay that is easy to work with for beginners. You will also want a small bowl of water for smoothing, a rolling pin or similar tool for flattening slabs, and simple household items like spoons or toothpicks for adding texture. No kiln is required if you choose air dry clay, though access to a community kiln opens up more glazing options later.
How can I avoid common issues like cracking when making pinch pots?
Work slowly and keep the clay evenly moist by dipping your fingers in water as needed. Build the walls gradually rather than forcing them thin too quickly, and cover finished pieces with plastic wrap to slow drying. If cracks appear, gently smooth them with a damp finger and let the piece dry more evenly in a shaded spot away from direct heat or drafts.
Are these beginner projects suitable for children or family activities?
Many of the pinch form ideas work well for supervised kids aged eight and up since they require no special equipment beyond basic clay and hands. Choose simpler shapes like bowls or ornaments first to build confidence. Always use non toxic clays and supervise closely during any painting or finishing steps.
What finishing techniques work well with handbuilt pinch forms?
Once the clay is fully dry or bisque fired, apply acrylic paints for color or underglazes if firing is possible. You can also rub in wax or sealers for a matte finish on air dry pieces. Adding texture before drying with stamps or natural items like leaves creates interesting surfaces that hold up well without extra tools.
How do I come up with more ideas beyond the 21 listed?
Look at everyday objects around your home such as cups or trays and adapt their shapes using the same pinching method. Experiment with combining two pinch forms for handles or lids, or try different clay colors for patterns. Sketch quick ideas on paper first to test proportions before committing to clay.

Pottery Path is my cozy corner of the internet where I share clay ideas, pottery inspiration, and simple projects you can recreate at home. I love exploring everything from air dry clay to handbuilt pottery to cute minis that brighten your day. My goal is to make clay crafting feel easy, fun, and welcoming for anyone who wants to try it.
You will find beginner friendly tutorials, creative pottery painting ideas, and lots of warm inspiration for slow and happy crafting. If you enjoy hands on creativity, this space will feel like home.