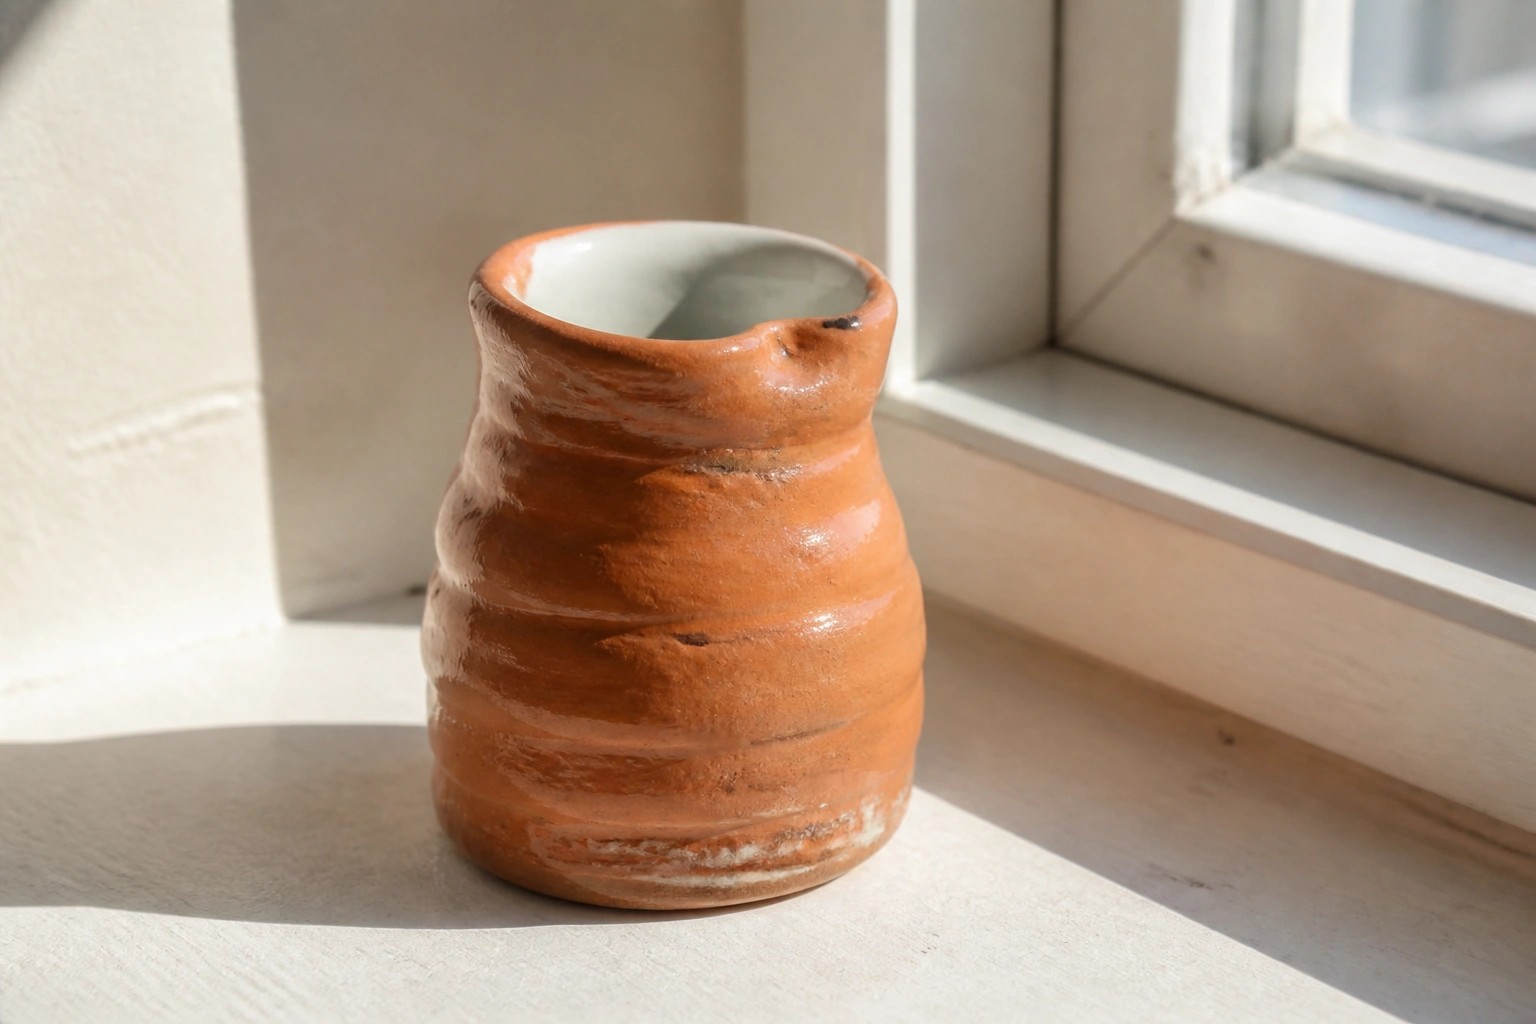
I’ve been messing around with coil pottery for a while now and small vase shapes have turned out to be the easiest way to practice without getting frustrated.
These projects all stick to simple forms that let you focus on building up the walls evenly.
I came up with the list after trying a bunch of versions in my own workspace and keeping what actually worked.
They use basic coils and don’t need fancy tools or big setups.
If you’re just starting out I hope a few of them fit what you’re looking for.
Stacked Coil Vase with Horizontal Ridges
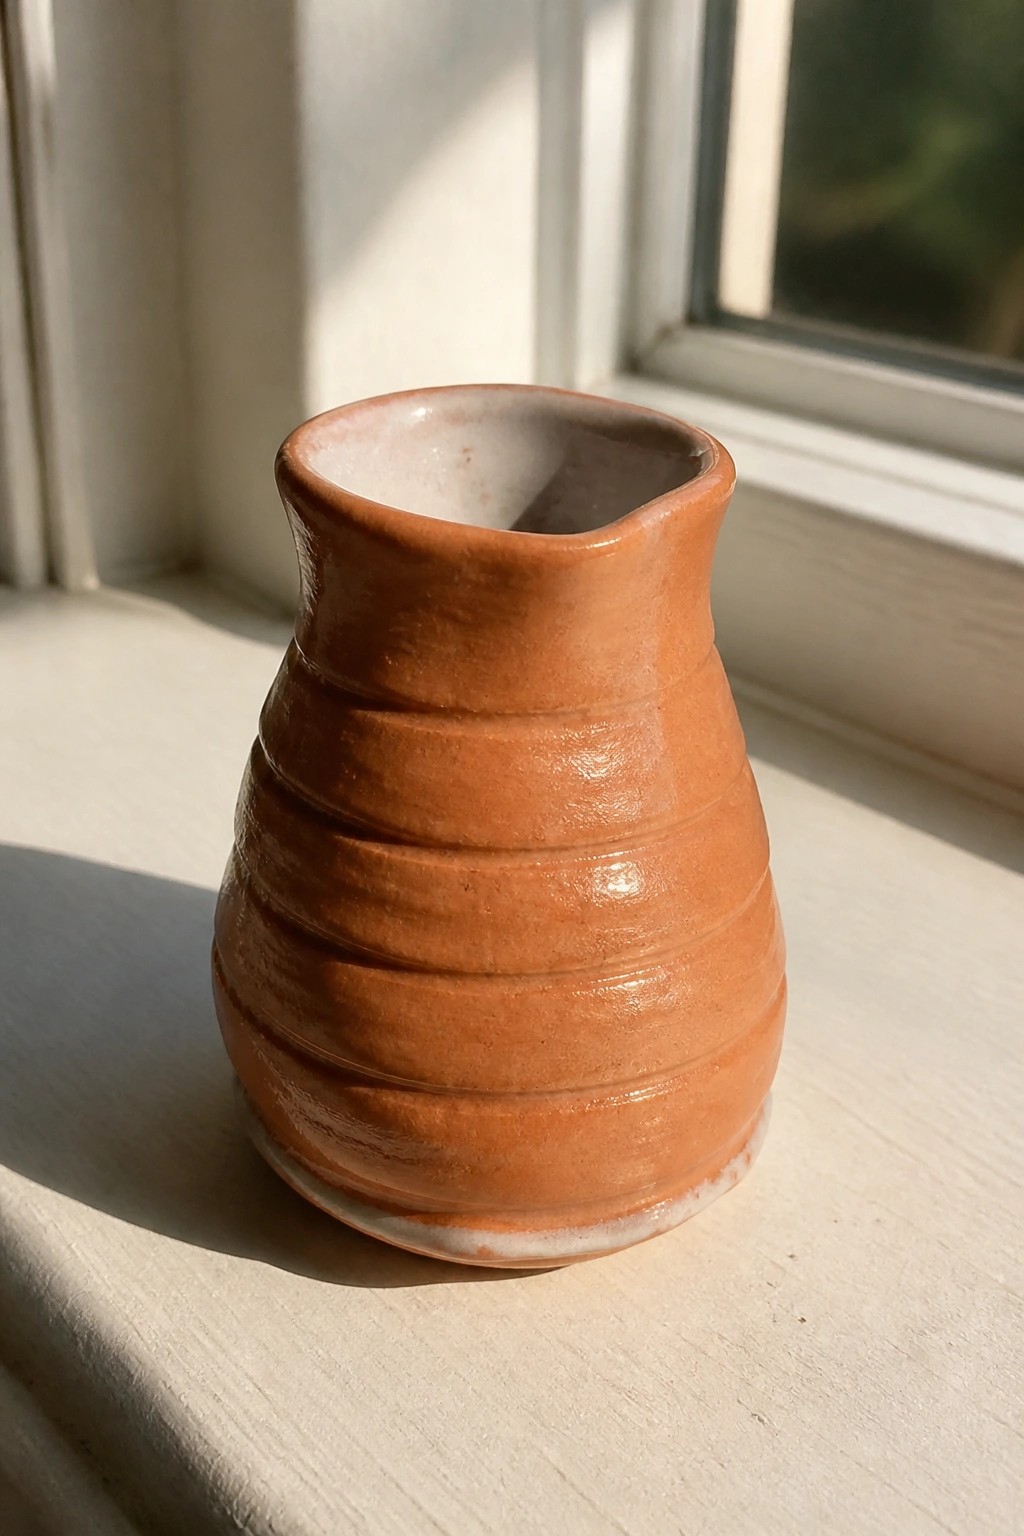
A coil-built vase like this starts with thick ropes of clay stacked and joined to create a rounded body that narrows at the neck. The coils remain visible as even horizontal ridges that give the surface its main texture. The warm terracotta color pairs with a lighter rim to keep the form simple while still showing clear construction lines. This approach stays within beginner coil projects because it relies on basic shaping and joining rather than added carving or slips.
The small scale lets you finish the piece in one or two sessions and place it on a desk or narrow shelf for holding dried flowers or a single stem. You can adjust ridge depth by changing coil thickness or smoothing selected bands to create contrast on the same shape. Repeating the form in different heights produces a quick set of matching vases without new techniques. The visible coil texture also photographs clearly for Pinterest because the lines create natural shadow detail.
Wall Pocket Vase Built from Coils
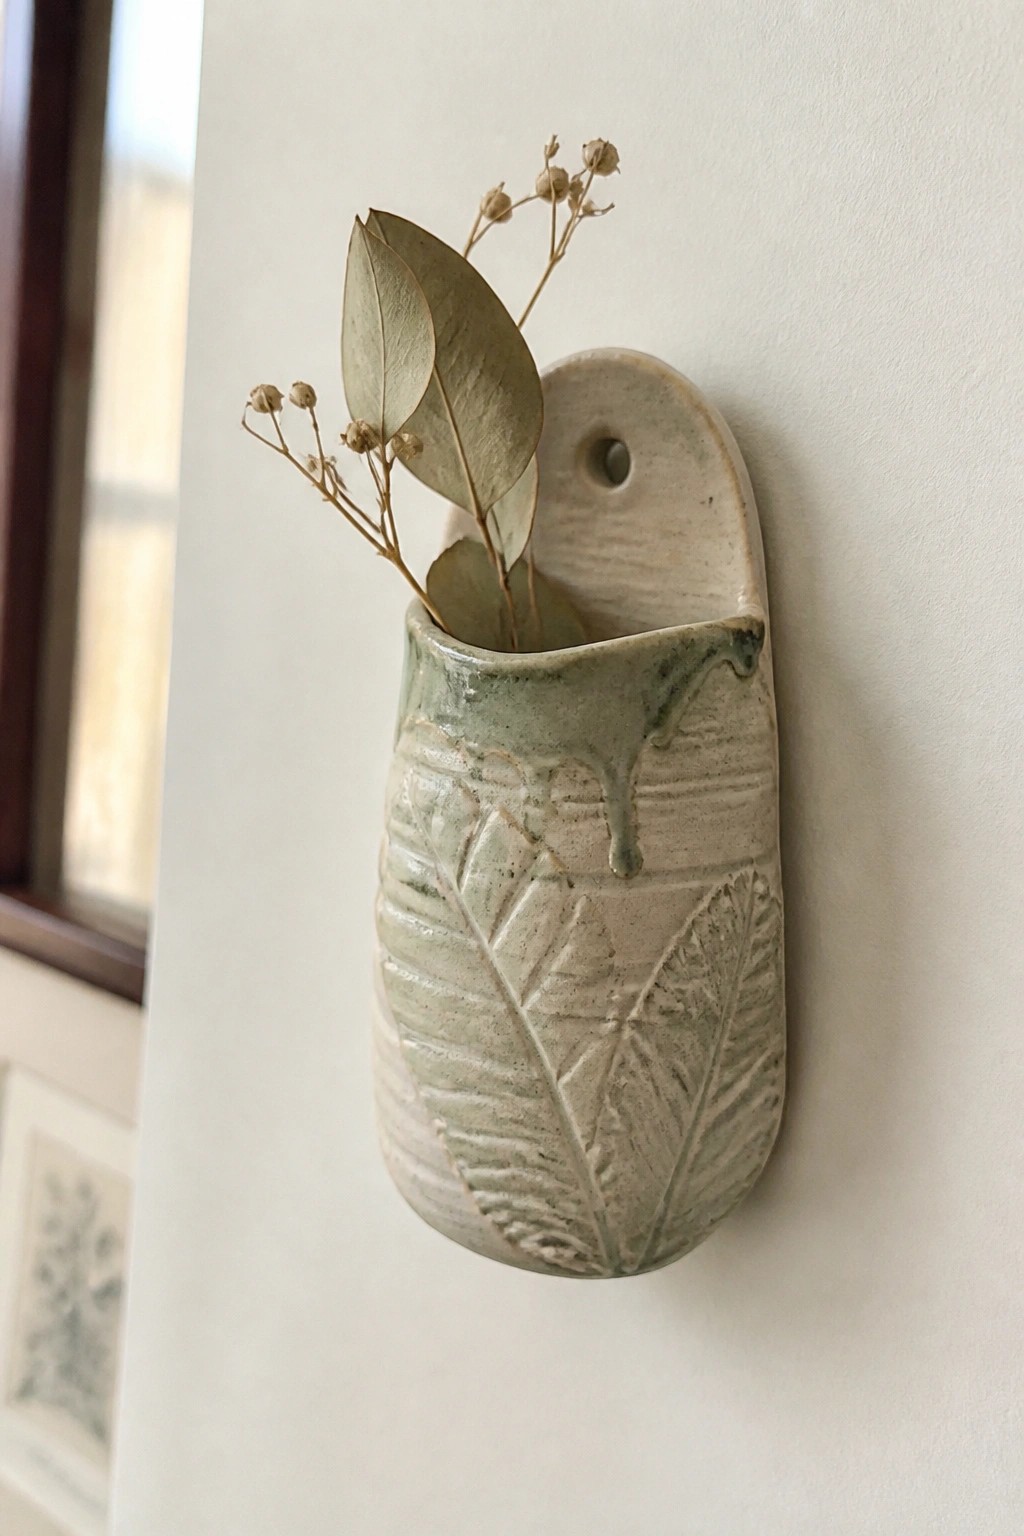
A wall pocket vase gives you a small hanging container that stays flat against the surface. Coils are stacked and pinched into a rounded pouch shape with a flat back, then a hole is added near the top for hanging. Leaf shapes are pressed into the clay for texture before a light green glaze is applied, letting it settle into the lines and run slightly at the rim. The finished piece holds a few dried stems or small cuttings in a compact form.
What makes this idea useful is how the flat back and single hole let you hang it in tight spots like above a sink or along a narrow hallway. You can change the look by pressing different leaves for texture or switching to an unglazed finish that keeps the clay color visible. The same coil shape works for a shorter version that holds just one stem or a taller one for more height. In a small space this style keeps the vase off counters while still showing off simple dried arrangements.
Small Coiled Vase with Raised Horizontal Ridges

A basic coil vase gains structure and surface interest when each coil is left slightly raised instead of fully smoothed. This produces a compact rounded form with even horizontal bands that run from base to rim. The soft green glaze sits in the grooves to emphasize the texture while keeping the overall shape simple. The finished piece works directly as a small planter for succulents or other compact plants.
What makes this idea useful is that the ridge pattern comes from the building method itself rather than added decoration. You can vary coil thickness or spacing on the next version to change the look without learning new techniques. The same compact shape also adapts easily into a small vase for dried stems or a narrow holder for makeup brushes. A piece like this photographs cleanly for project sharing because the repeating lines create clear visual rhythm.
Speckled Tea Light Holder
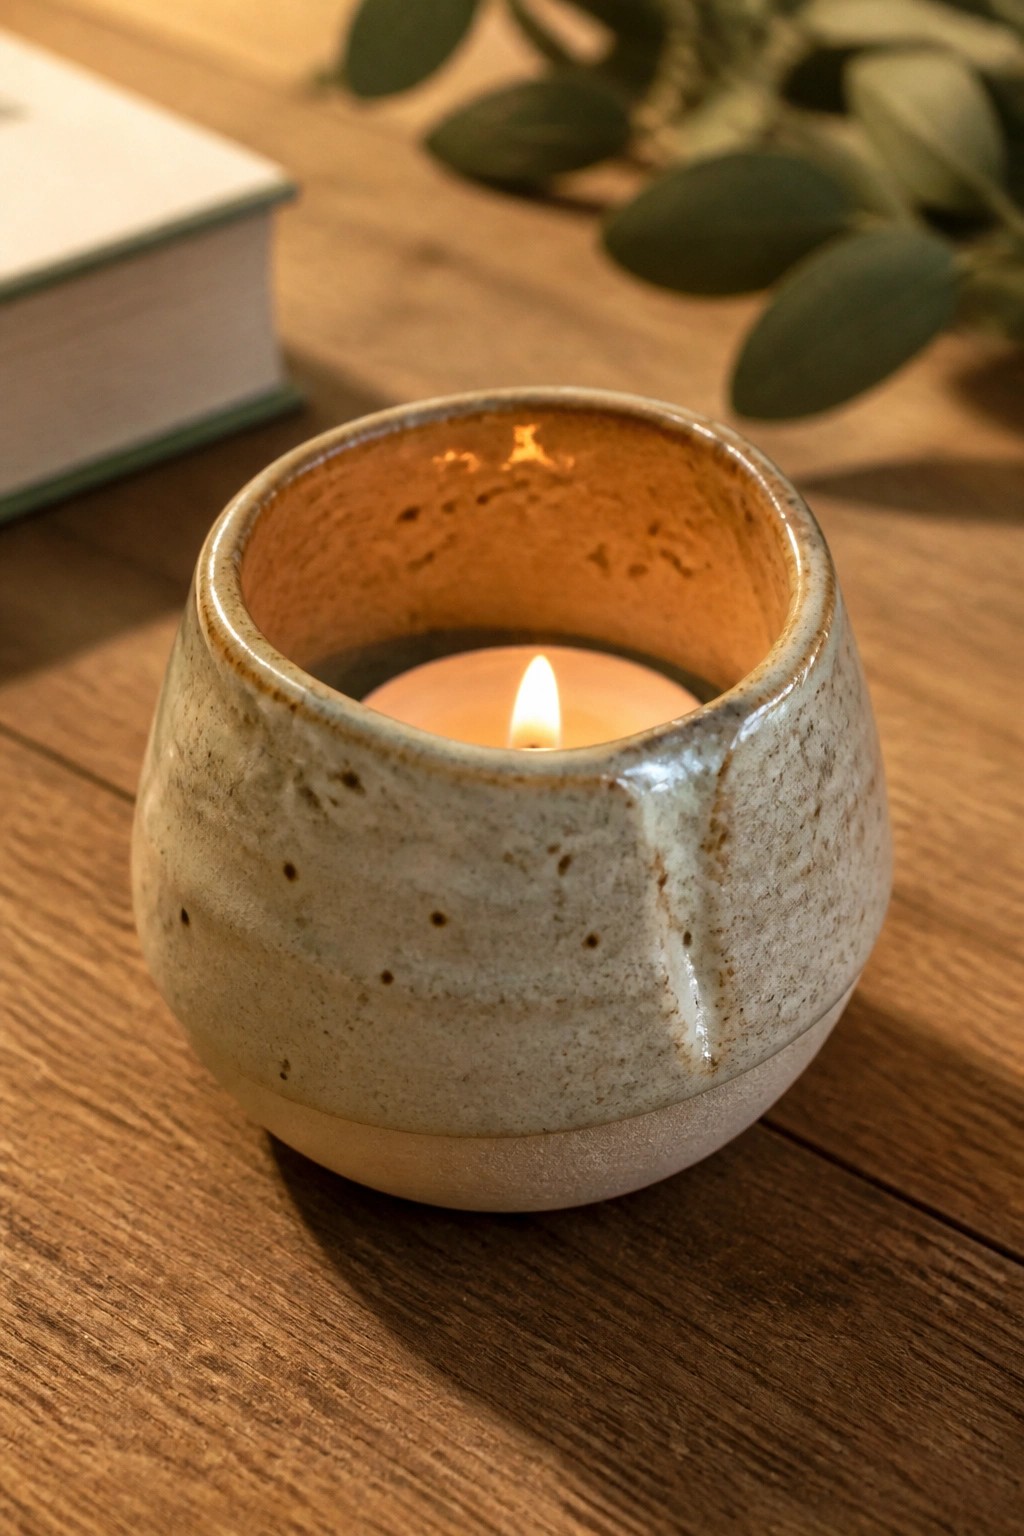
A small coil-built vessel with a rounded body and wide rim makes a simple tea light holder. The form stays low and stable so the candle sits safely inside without tipping. A speckled matte glaze in neutral tones highlights the handmade texture while keeping the piece understated enough to pair with other table items.
What makes this idea useful is how the same rounded shape works as a tiny planter or match holder with almost no changes. You can widen the base slightly for better balance or leave the rim uneven for a more relaxed look. The compact size means it takes little clay and space on a shelf, so it fits easily into a set of matching pieces for a desk or side table.
Polka-Dot Cluster Vase Toothbrush Holder

A coil-built ceramic toothbrush holder made by joining three small vase forms at the base creates separate compartments for brushes while keeping everything in one piece. The cream glaze with scattered gold dots gives the surface visual interest without adding texture that could trap moisture in a bathroom setting. This approach turns basic vase shapes into a functional holder that sits flat on a counter and keeps bristles from touching each other.
What makes this idea useful is the way the connected vase forms solve the problem of storing several brushes in limited space. You can adapt it by changing the number of necks, using a solid color instead of dots, or widening the openings for larger handles. For a gift, something like this works well because it stays small and uses everyday items as the finishing touch. The same clustered shape could be reworked into a small desk organizer for markers or makeup brushes.
Small Coil Vase with a Side Opening
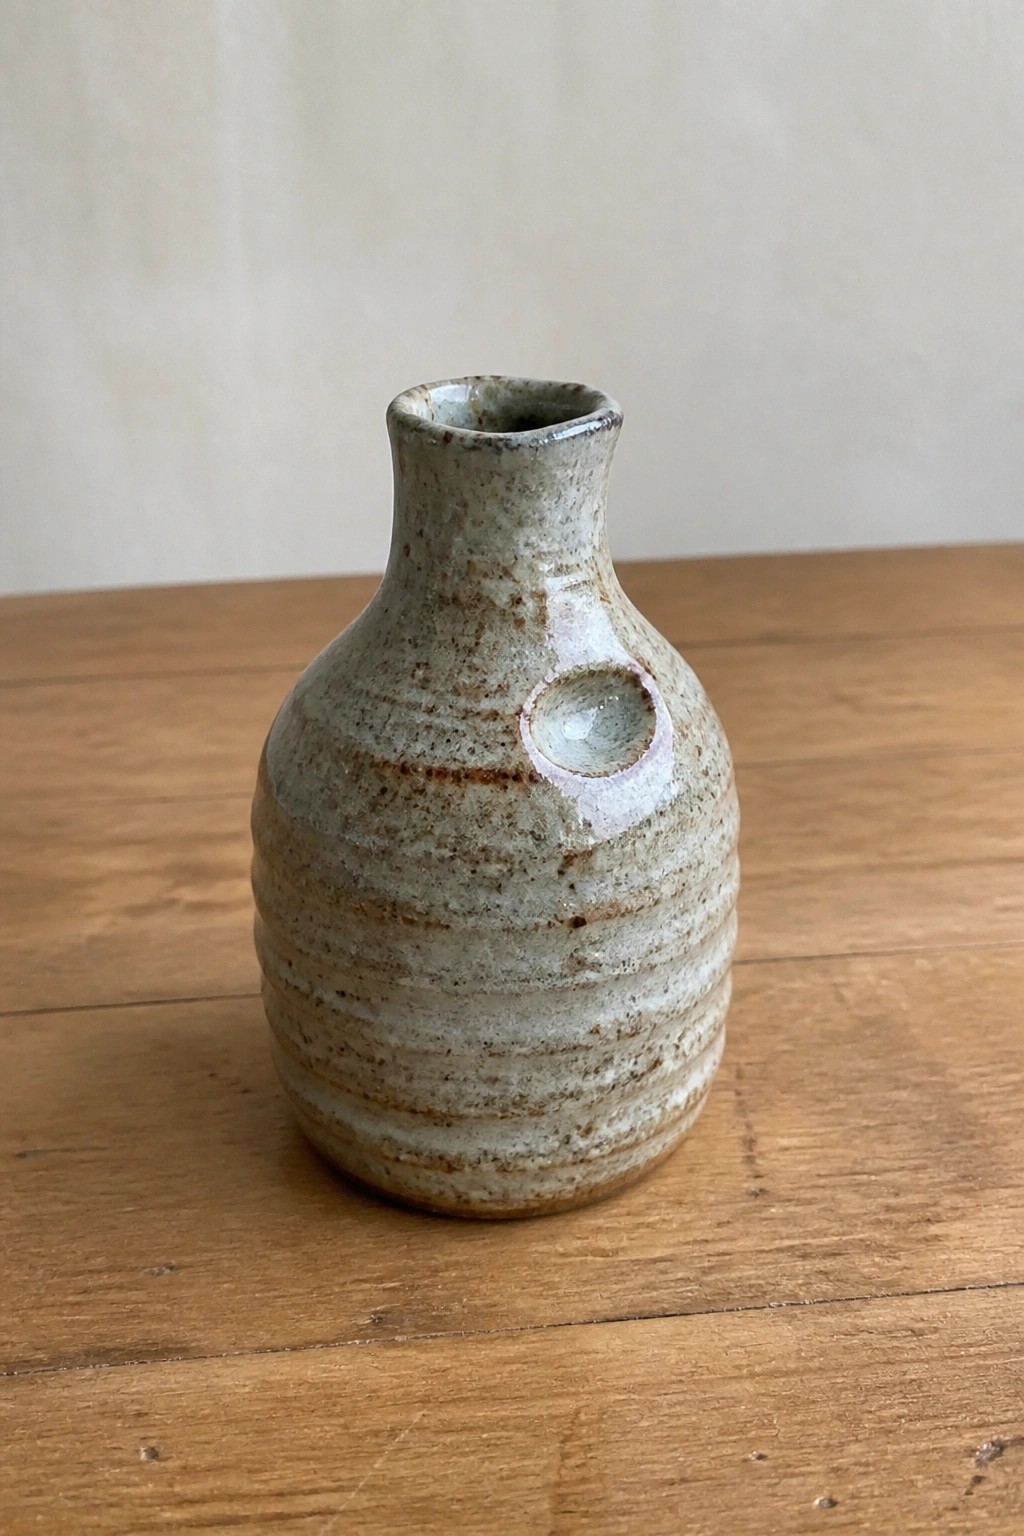
A small vase built from coils forms a rounded body that tapers into a short neck, with a clean circular hole cut through the wall before firing. The coils create visible horizontal ridges that give the surface texture, while a light speckled glaze in neutral tones keeps the emphasis on the shape rather than bright color. This approach fits beginner projects that focus on basic coil construction and simple alterations to the form itself.
What makes this idea useful is how the compact size works on a desk, shelf, or bathroom counter without taking much space. The side opening can stay as a single accent or be adapted into two or three smaller holes for a different look. Beginners can build the vase first, then decide whether to add the hole or skip it for a more standard shape. The same coil method and scale also work for making small bud vases or desk holders by changing only the neck width.
Pinched Neck Coil Vase
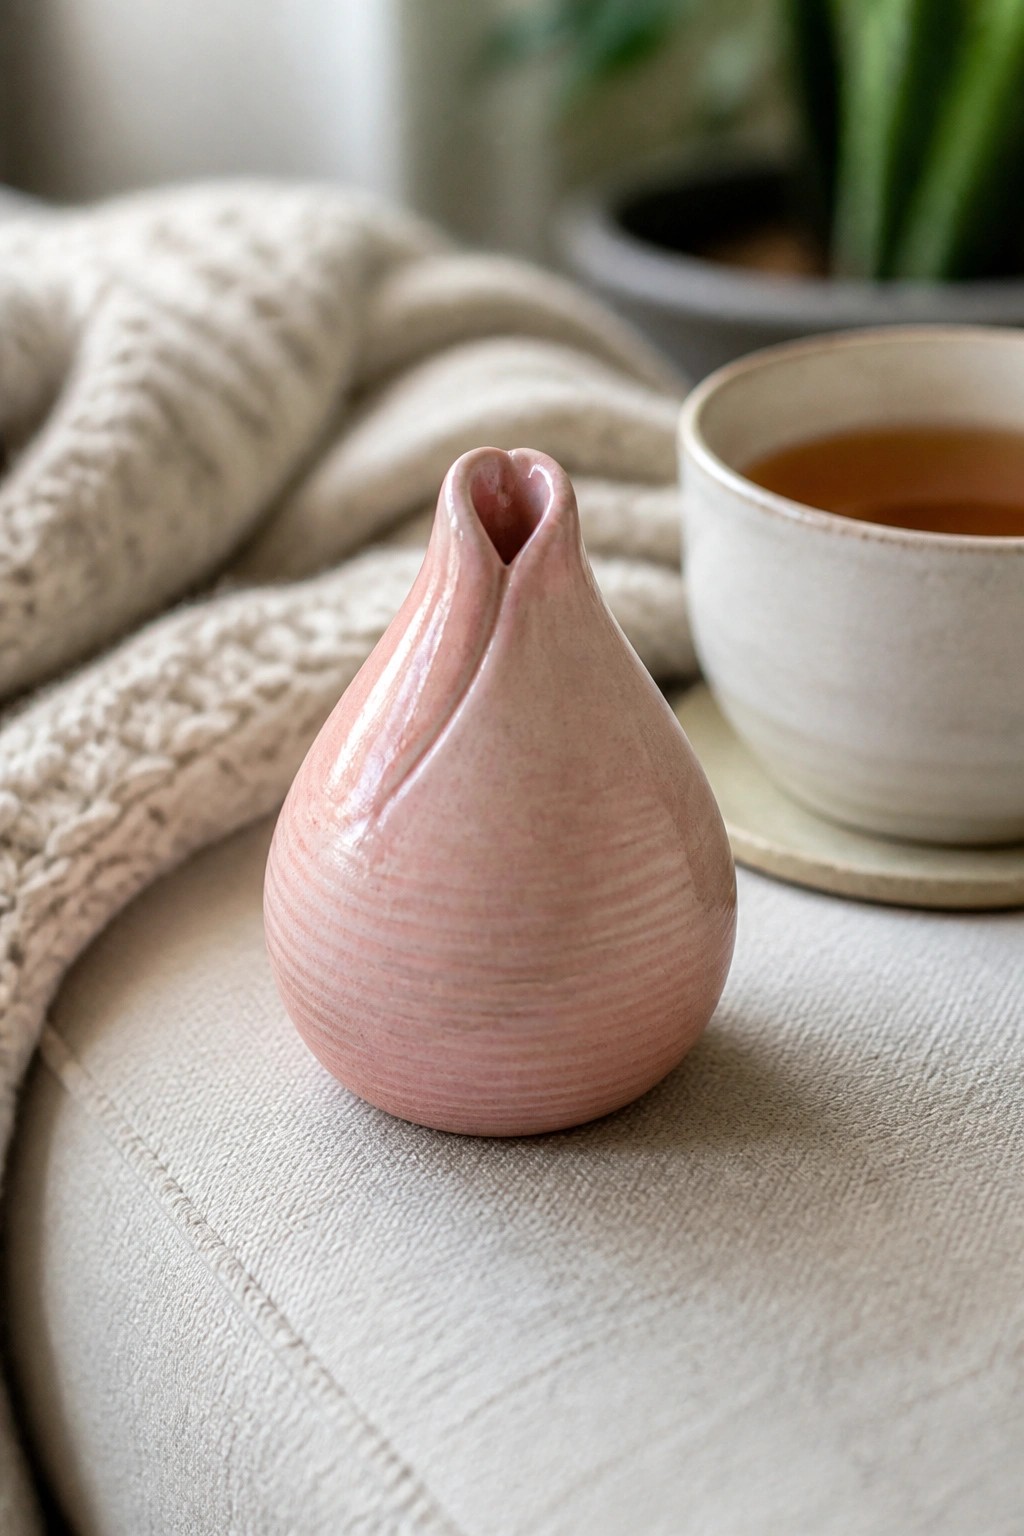
A small coil-built vase starts with stacked rings that form a rounded teardrop shape before the top coils are brought inward and pinched to create a narrow folded opening. The horizontal ridges from the coils remain visible under the glossy pink glaze, giving the surface a subtle linear texture without extra carving. This shape stays compact and works as a simple vase form that can hold a few stems or stand on its own.
The small size keeps the build quick and manageable for practice with coil joining and even wall thickness. You can adapt the pinched neck on a wider base or stretch the same coil method into a slightly taller version for different proportions. It sits well on a desk or shelf where larger pieces would crowd the space, and repeating the form in two or three glaze colors makes an easy set for gifting.
Hanging Coil Vases for Wall Displays

Small vases built from coils work well when shaped into compact, rounded forms with a wide belly and a simple rim at the top. Each one is sized to hold just a few stems or cuttings, and the soft single-color glazes keep attention on the flowers rather than the surface. Hanging them individually from twine or cord turns the vases into a flexible wall arrangement that can be rearranged easily.
What makes this idea useful is how little clay each vase requires, so you can make a set of three or four in one afternoon. The rounded shape holds water for fresh flowers while still looking balanced when empty. You can adapt the same coil form into shorter versions for desk use or stretch it taller for herb cuttings in a kitchen. A group in different glaze colors photographs cleanly for Pinterest without needing extra props.
Small Coil Vase for Sprouting Garlic
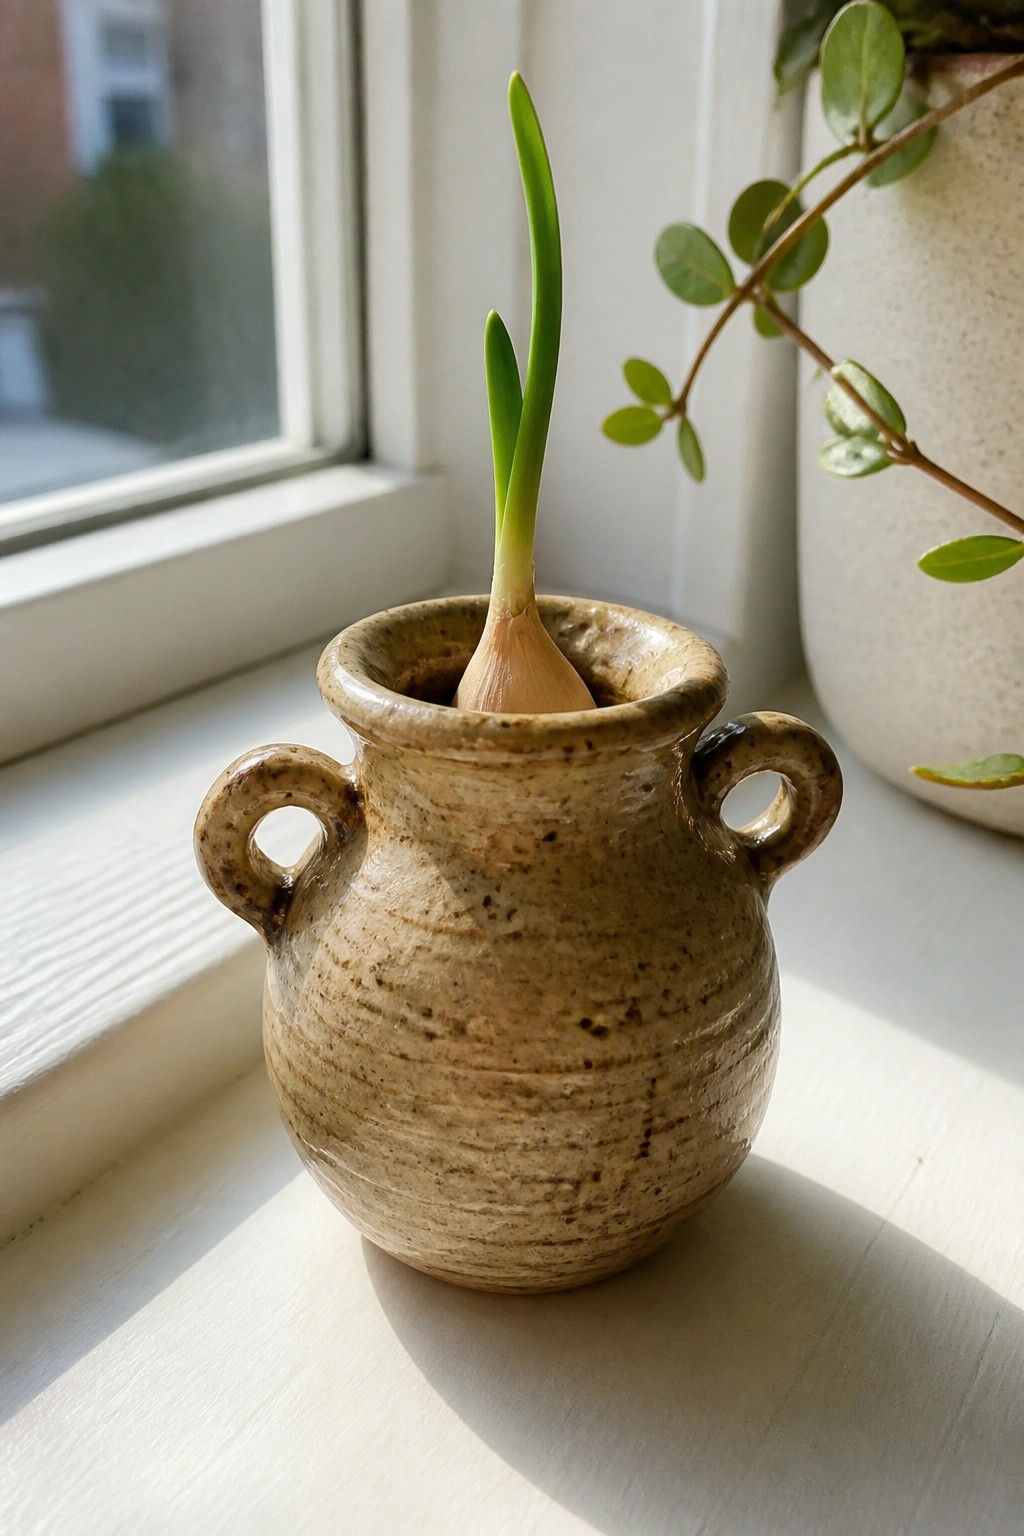
A small coil-built vase with a rounded body and two looped handles works well as a holder for a sprouting garlic bulb. The short neck keeps the bulb upright while the textured surface and earthy glaze give the piece a straightforward, kitchen-friendly finish. This form stays simple enough for beginners yet adds useful function beyond a plain cylinder.
What makes this idea useful is how the same shape adapts to other sprouting bulbs or small herb cuttings without any changes. You can leave off the handles or swap the texture for a smoother finish to match different kitchen styles. The compact size keeps material use low and makes the piece easy to place on a windowsill or counter where it stays visible and practical.
Compact Vase Tealight Holder
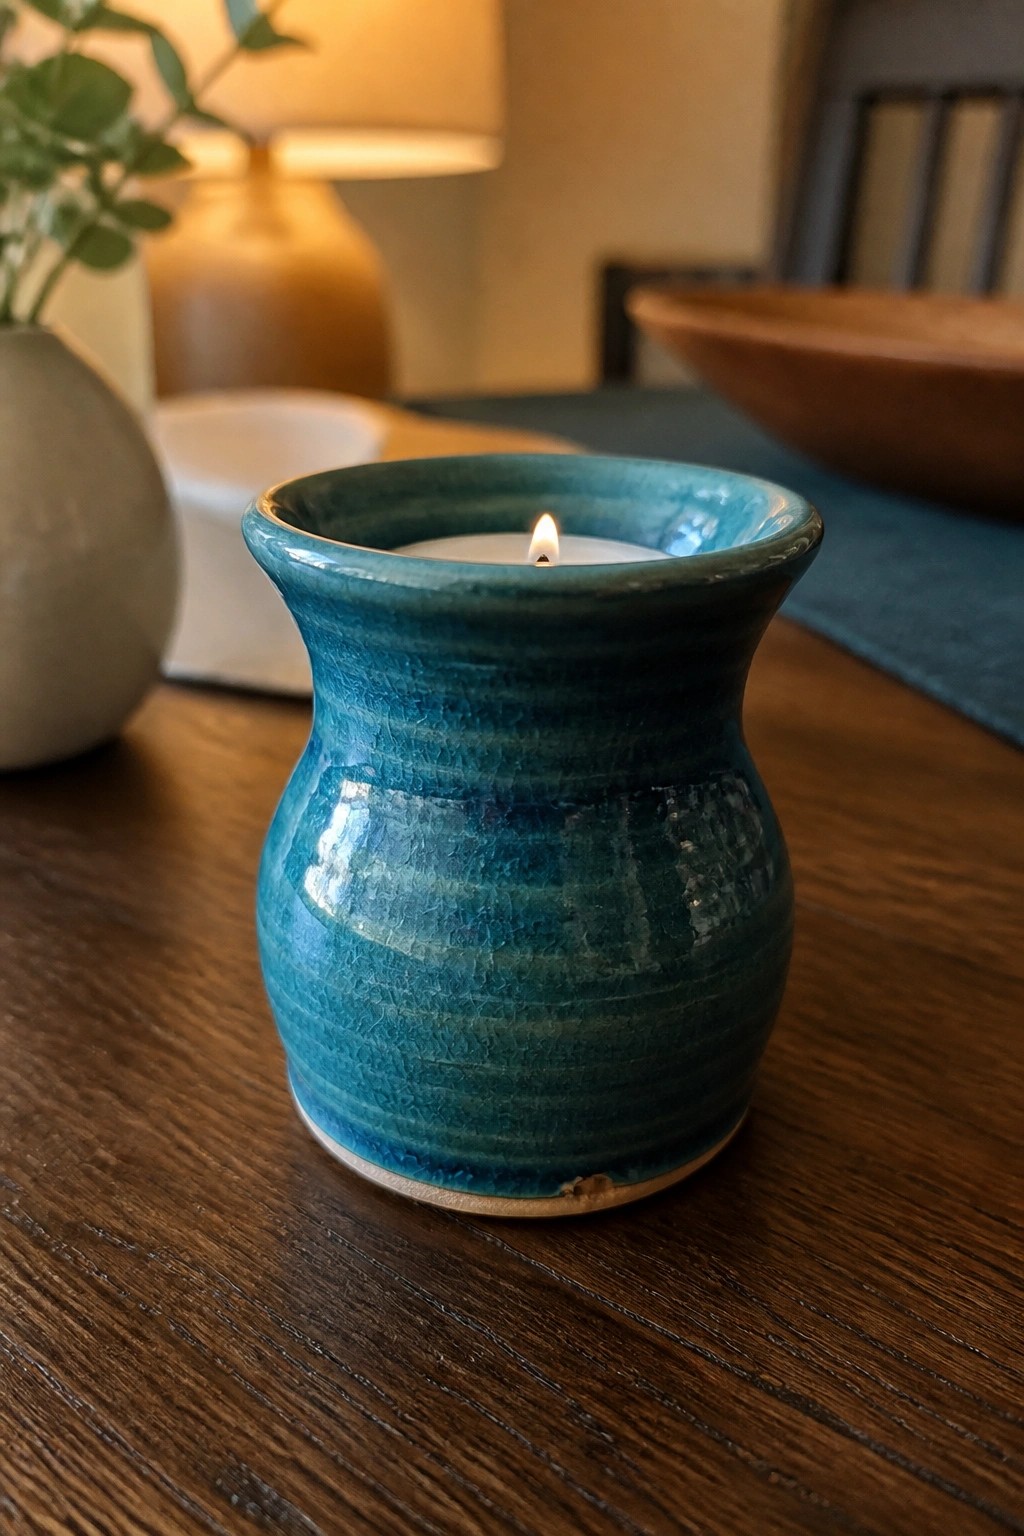
A small vase form makes a practical tealight holder when the neck is kept wide enough to fit a standard candle and the body stays low and stable. The rounded shape tapers slightly at the top to cradle the flame while the thicker base prevents tipping on a flat surface. Horizontal glaze layers in blue-green tones add subtle texture and help reflect light without overpowering the simple form.
What makes this idea useful is how the same coil-built proportions can be adjusted in height to match different candle sizes or grouped in sets. The shape does a lot of the work here by keeping the candle centered and giving the piece a finished look with minimal added detail. This would be easy to turn into a matching set for a dining table or desk, and the small scale keeps material use low for quick tests of new glaze combinations.
Whale Shaped Bud Vase

A small vase built in the shape of a whale gives a basic coil form a clear animal outline. The rounded body becomes the water-holding section while the tail and fins are added as simple extensions that define the shape. A minimal face with two dots for eyes and a short curve for the mouth keeps the focus on the overall silhouette rather than extra detail. This turns a standard small vase project into a recognizable sea creature without needing complex construction.
The small scale makes this easy to place on a desk or narrow shelf where a regular vase would feel too large. You can rework the same body and tail layout into other sea animals by adjusting fin positions and head shape. For gifts, the animal outline gives the piece a direct identity that plain coil vases do not have. This approach also photographs well for project roundups because the form reads clearly even in a small thumbnail.
Nested Coil Mini Vases with Diagonal Glaze Split
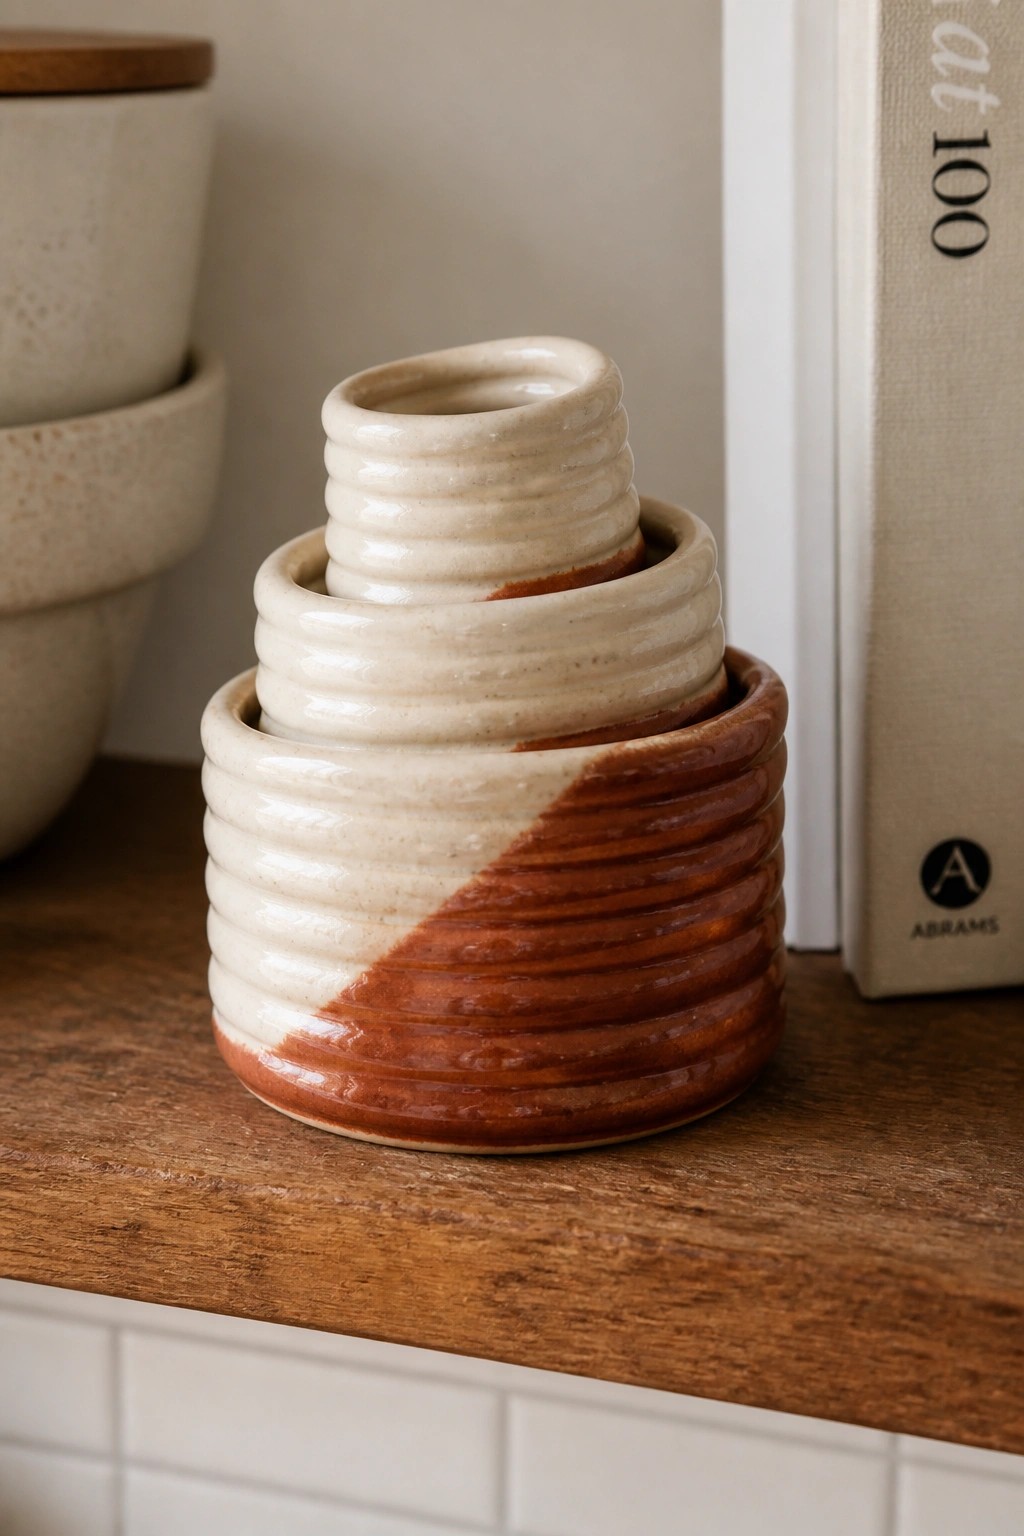
These small coil-built cylinders create a set of nesting vases that fit inside one another. Each piece uses stacked coils to form the walls and a simple two-tone glaze application where cream covers the top section and brown covers the bottom along a slanted line. The compact size keeps the forms easy to shape and the coil texture visible after firing.
A set like this works well as desk storage for small items or as a compact display on a shelf. You can simplify the project to two sizes instead of three or switch the glaze divide to a straight line to make application faster. The nesting design also makes the finished pieces easy to store or pack as a gift without taking up much space.
Coil Built Bud Vase with Circle Band

A small coil-built vase with a rounded body and tapered neck serves as a simple bud vase or holder for single stems and cuttings. The design adds a band of impressed circles around the widest section that reveal the lighter clay underneath the brown glaze. This contrast creates a clean repeating pattern that stands out against the glossy surface. The compact size keeps the form balanced and easy to handle during construction.
What makes this idea useful is how the circle band can be adjusted in spacing or size to suit different coil thicknesses. A piece like this works well on a shelf or desk to display plant cuttings without taking up much space. You could simplify the motif to fewer circles or stretch the same rounded shape into a slightly wider version for small dried arrangements. The small scale also makes the finished vase easy to photograph for project sharing.
Scalloped Coil Vase with Teardrop Pattern
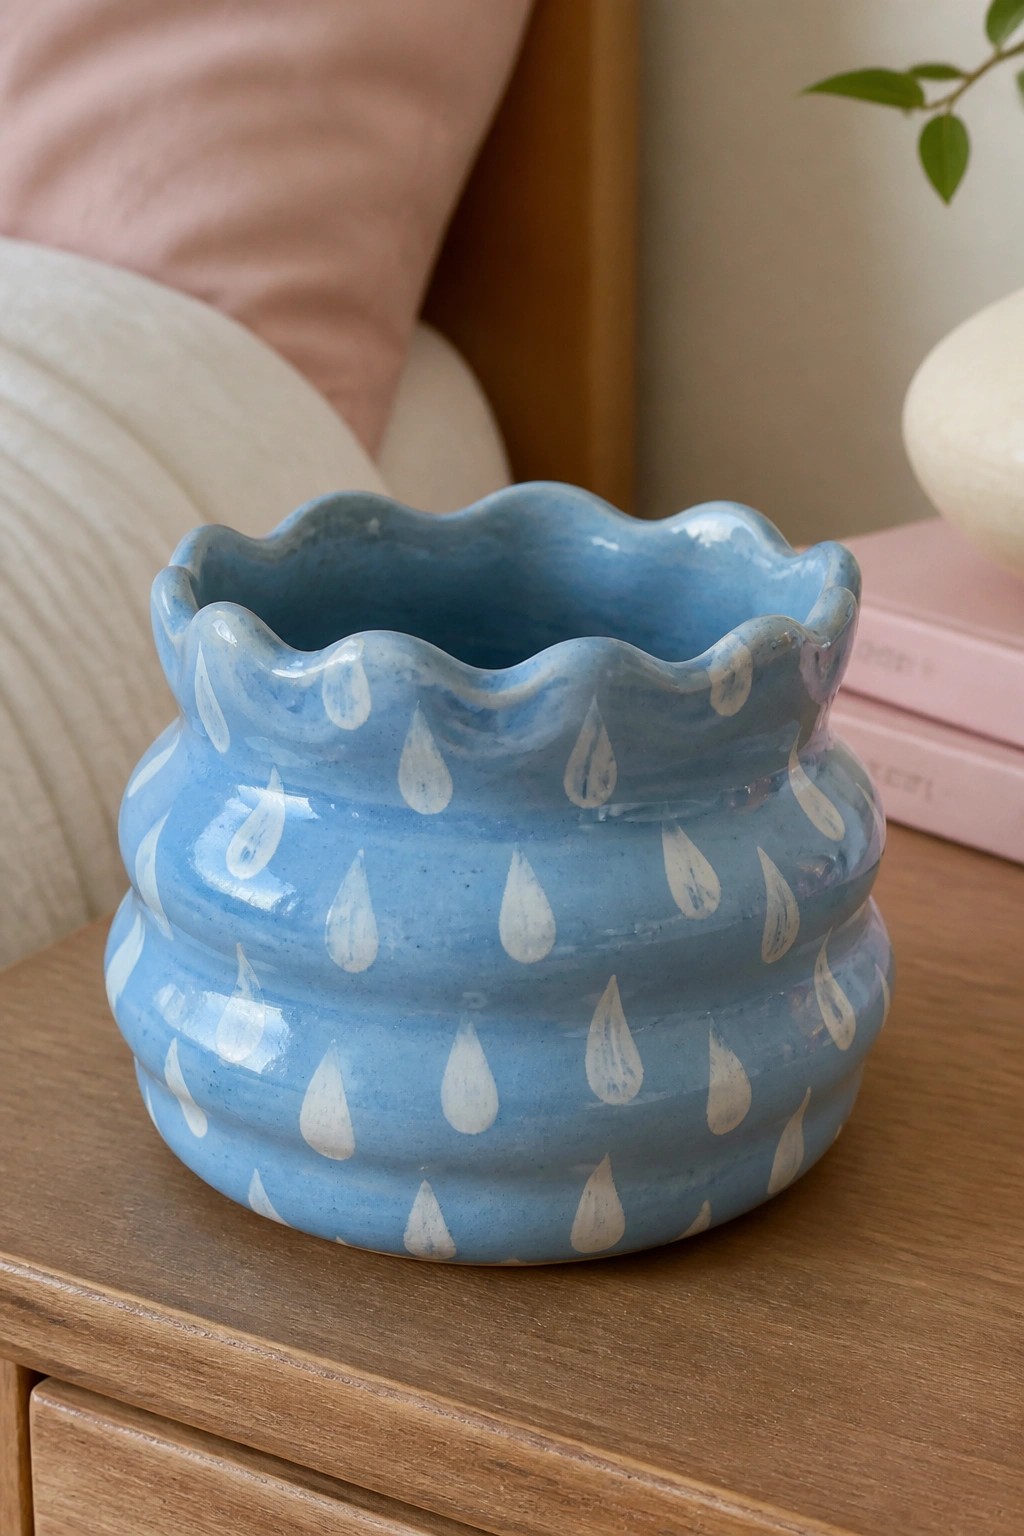
A small coiled vase with a wavy rim gives beginners an easy way to build height while adding shape at the top. The horizontal ridges left from stacking coils provide built-in guides for repeating a simple painted motif like white teardrops across the surface. The blue glaze keeps the focus on the form and the pattern rather than on complex surface carving or multiple colors.
The shape does a lot of the work here because the compact size makes it practical for a desk or shelf without taking up much space. You could swap the teardrop design for stripes or dots on the same ridged body or change the rim to a straight edge for a cleaner look. For a gift this kind of piece stands out on a table because the scalloped edge and painted detail give it more presence than a plain cylinder. The same idea adapts quickly to a small planter or catch-all by keeping the interior smooth and the exterior pattern light.
Coil Vase with Twisted Rope Rim

A small vase formed from coils starts with a rounded body that narrows into a short neck using stacked rings of clay. The neck stays narrow and structured while a single twisted coil is added at the very top to create a simple rim detail. Leaving the lower section in a dark glossy glaze and the upper part in natural clay color keeps the focus on the coil lines and the transition between sections.
The small overall size makes this shape practical for beginners who want to practice even coil placement without handling large amounts of clay. You can change the neck height or try a different twist pattern on the rim to adjust the look quickly. This vase works on a desk or shelf for holding a few stems or standing alone. The visible coils and two-tone surface also translate well in photos if you want to share the finished piece.
Coiled Shell Wall Pocket Vase
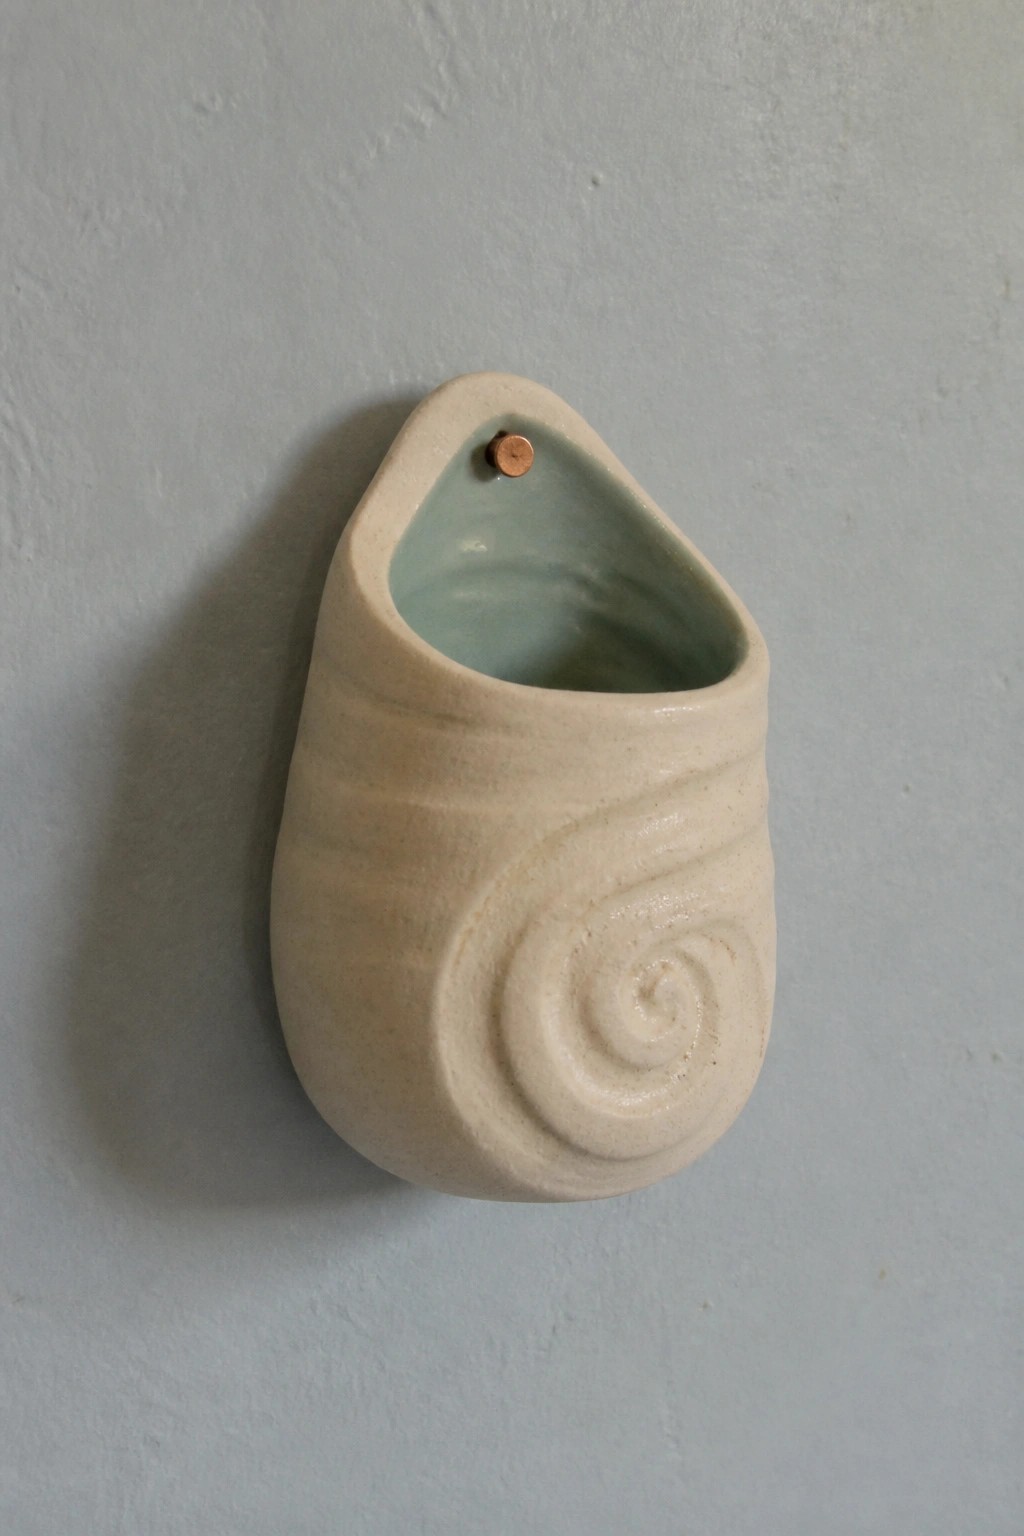
This project uses coils to build a compact wall-mounted vase shaped like a spiraled shell. The coils create the outer curves while the interior stays open as a narrow pocket for a few stems. A simple contrast glaze on the inside keeps the focus on the form without extra decoration. It works as a small decorative vase meant to hang rather than sit on a surface.
The small scale makes this easy to adapt by changing the number of coils or the depth of the pocket. Hang one near a window for a single cutting or group several in different glaze colors along a hallway. You could rework the same coil layout into a flatter version that holds air plants or turn the spiral into a more rounded shape for a different wall layout. The built-in hanging point keeps the whole piece simple to install with one small nail.
Ribbed Coil Bud Vase
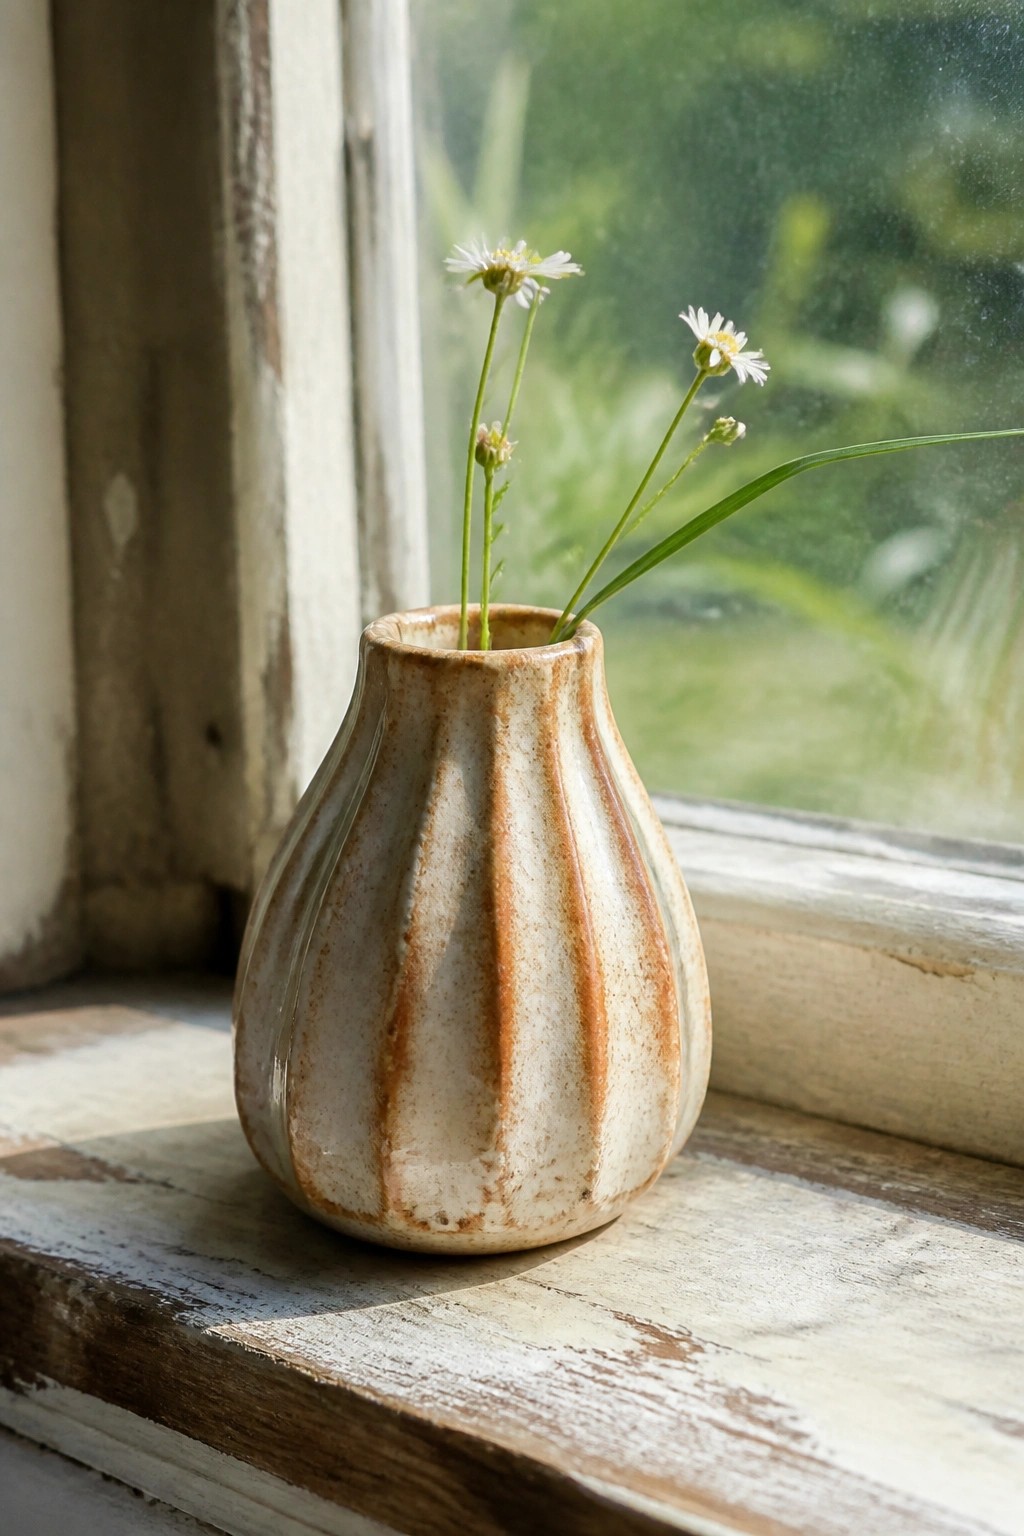
A small vase built from coils forms vertical ridges that run from base to neck and give the surface a clear handmade texture. The form stays compact with a narrow opening that suits one or two stems and a wider base that keeps it steady. A light speckled glaze with brown streaks follows the ridges and leaves the raised lines visible instead of smoothing them over.
The small scale makes this easy to adapt by shortening the coils for an even tinier version or widening the ridges for stronger shadow lines. It fits well on a narrow shelf or desk where a full-size vase would crowd the space. You can swap the streaked glaze for a single matte color or add a simple band at the rim to change the look without changing the coil structure.
Painted Faces on a Small Two-Tone Vase
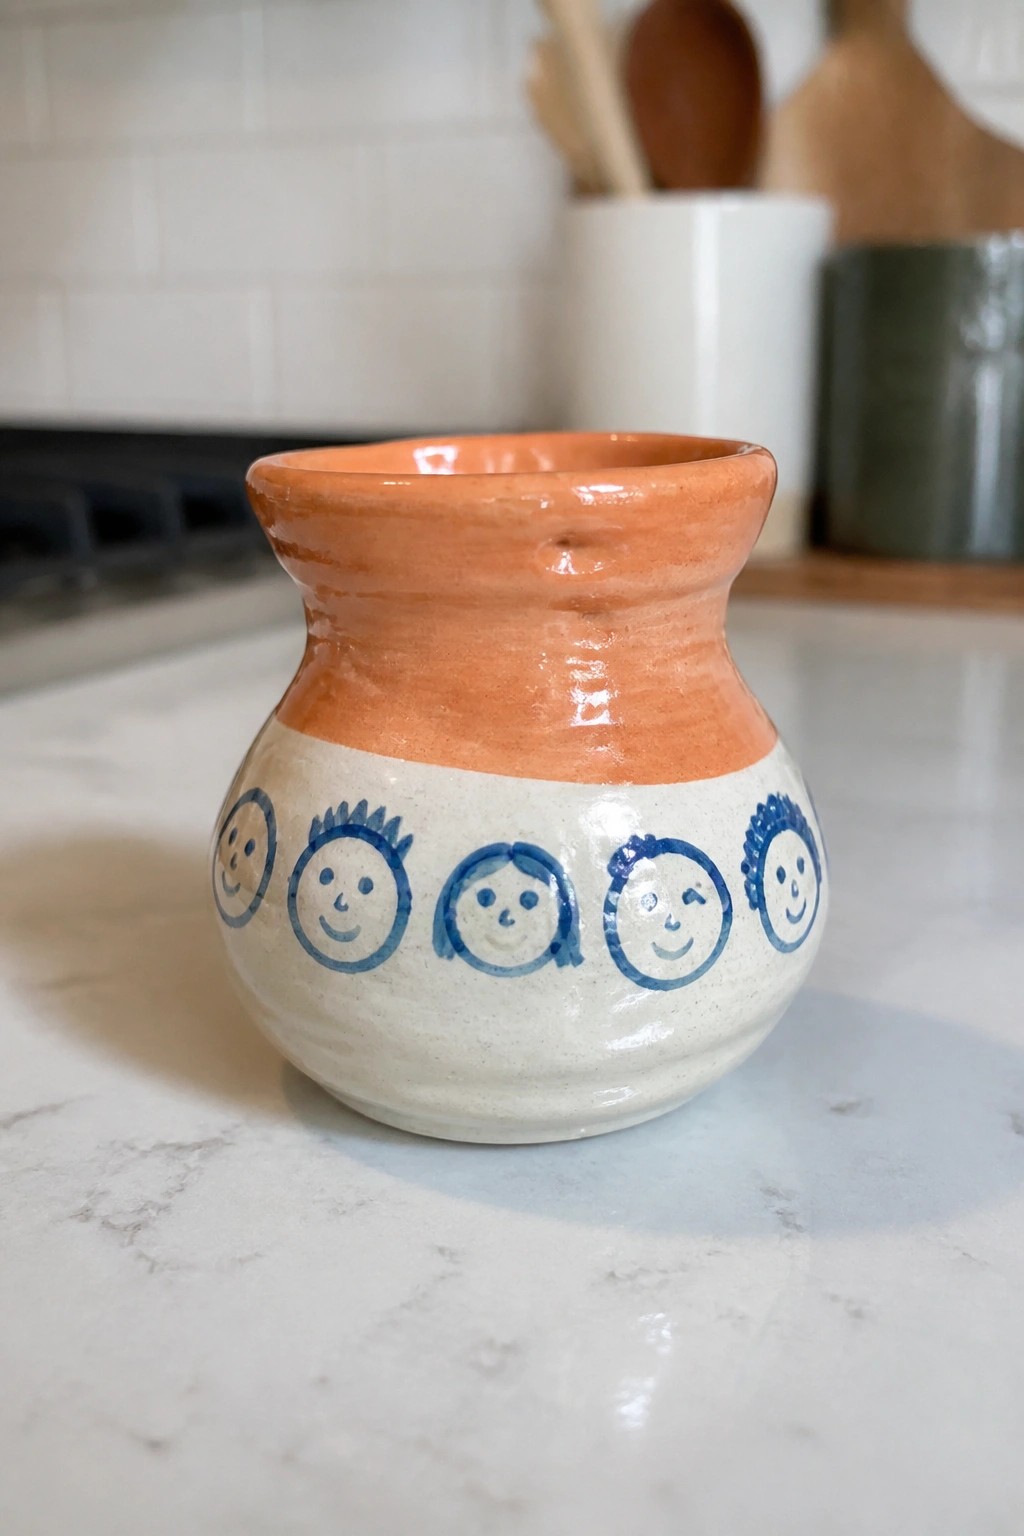
A small coil-built vase combines an orange glazed upper section with a wider off-white lower body. A single row of blue faces runs around the middle, each drawn with simple lines and circles to show different expressions. This keeps the form basic while using paint to add a repeating motif that draws the eye without extra texture or carving.
The small scale works well on a desk or shelf for holding short stems or as a standalone accent. You can adapt the face band to other small vase shapes by varying the expressions or switching to a single glaze color underneath. The painted detail stands out in photos, which helps the project show up clearly when shared online.
Double-Neck Coil Vase with Copper Join
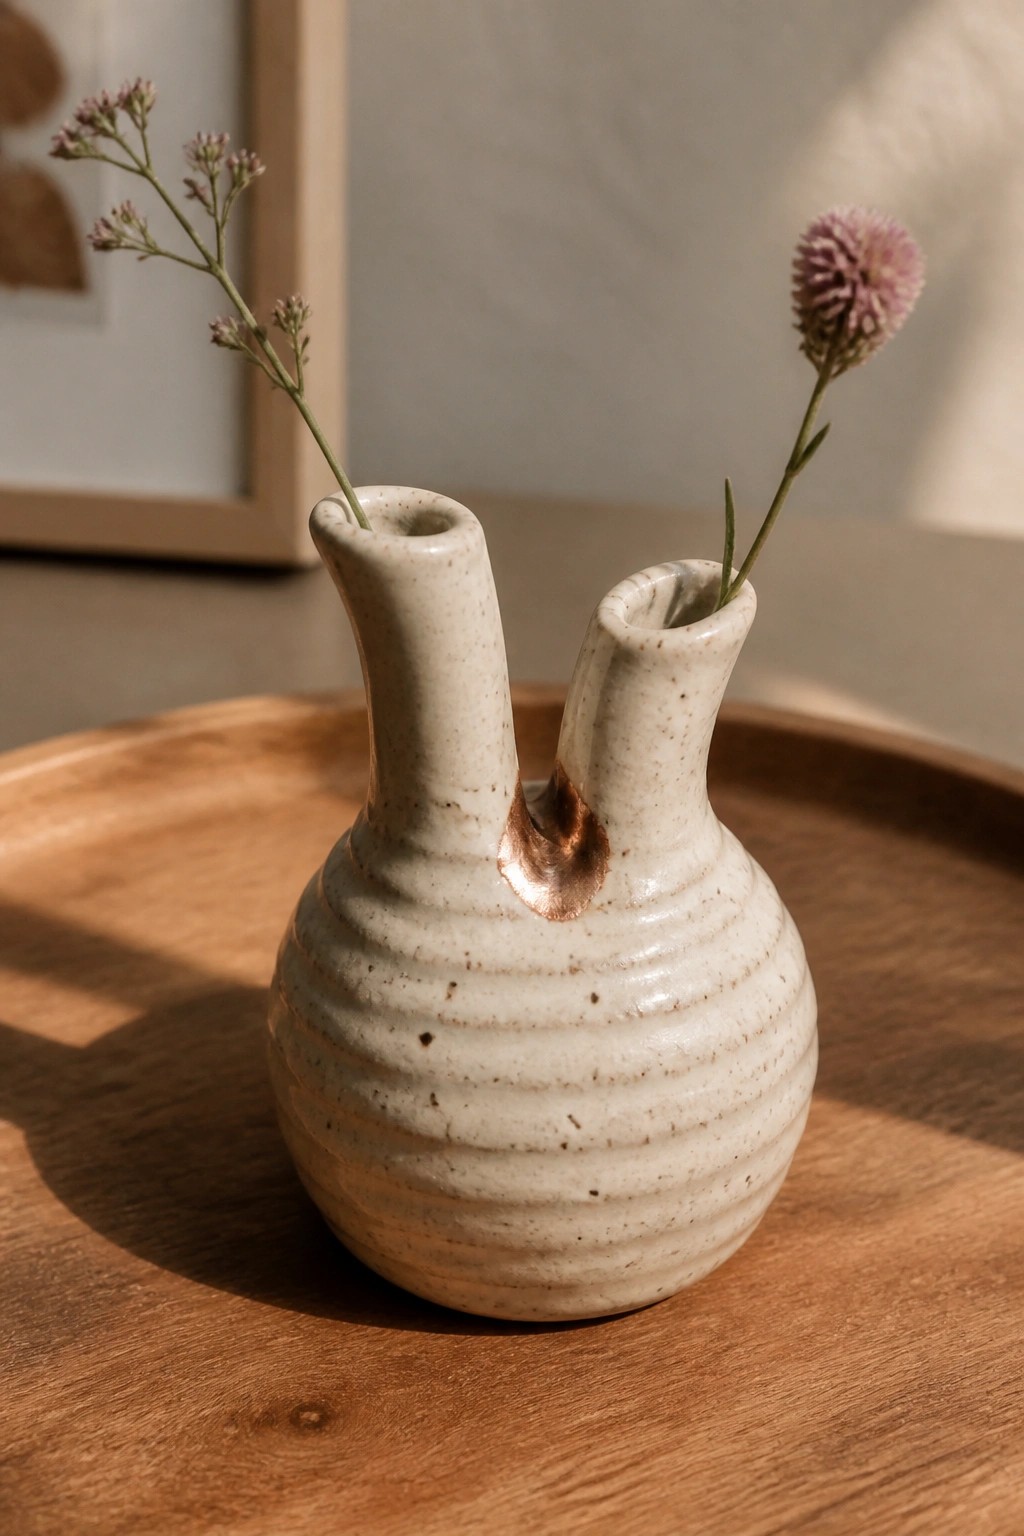
A small coil-built vase with two separate necks gives you a simple way to display single stems side by side. The rounded body carries visible horizontal ridges from the coils, finished in a light speckled glaze, while a small copper accent highlights the point where the necks meet. This form stays compact and works as a decorative piece rather than a large functional vase.
What makes this idea useful is how the split necks let you arrange two different flowers without extra holders. You can adapt the same coil shape by making the necks even or adding a third one for more stems. The copper detail is easy to copy with a small brush of underglaze before the final firing. In a living room or on a desk, this size fits without taking much space and still reads as intentional rather than basic.
Frequently Asked Questions
What basic supplies are needed to begin the coil pottery projects for small vases? Start with a suitable clay like earthenware or stoneware that is easy to work with for beginners, along with a rolling pin or slab roller for flattening coils, a scoring tool, slip for joining pieces, and basic shaping tools like wooden ribs or sponges. A small work surface and access to a kiln for firing are also essential since these projects focus on building sturdy small vase forms through coiling techniques.
How do I keep my coiled small vase forms from slumping or collapsing during construction? Build the vase gradually in stages, allowing each section of coils to firm up slightly before adding more layers, and always score and slip the joints thoroughly. Use a supportive form inside like a balloon or cardboard tube for the first few coils, and keep the walls even in thickness around one quarter inch to maintain stability as you work through the 19 beginner projects.
What are the best ways to dry and prepare these small vase projects for firing? Allow the vases to dry slowly and evenly over several days in a controlled environment away from direct heat or drafts to prevent cracks, covering them loosely with plastic at first. Once bone dry, bisque fire them in a kiln following the clay manufacturer’s temperature guidelines, which sets the foundation for any further glazing or decorating steps outlined in the projects.
How can I add unique details or variations to the 19 beginner coil vase forms without complicating the process? Incorporate simple textures by pressing objects like leaves or fabric into the coils before assembly, or vary the rim shapes and heights slightly while keeping the base form consistent. These additions build directly on the core coiling method, helping beginners personalize their vases while maintaining structural integrity.
What common mistakes should beginners avoid when following these coil pottery vase projects? Avoid making coils too thin or uneven, which can lead to weak spots, and do not rush the joining process by skipping proper scoring and slipping. Also steer clear of over-wetting the clay during building, as this weakens the structure; instead focus on consistent technique across the projects to achieve successful small vase results.

Pottery Path is my cozy corner of the internet where I share clay ideas, pottery inspiration, and simple projects you can recreate at home. I love exploring everything from air dry clay to handbuilt pottery to cute minis that brighten your day. My goal is to make clay crafting feel easy, fun, and welcoming for anyone who wants to try it.
You will find beginner friendly tutorials, creative pottery painting ideas, and lots of warm inspiration for slow and happy crafting. If you enjoy hands on creativity, this space will feel like home.