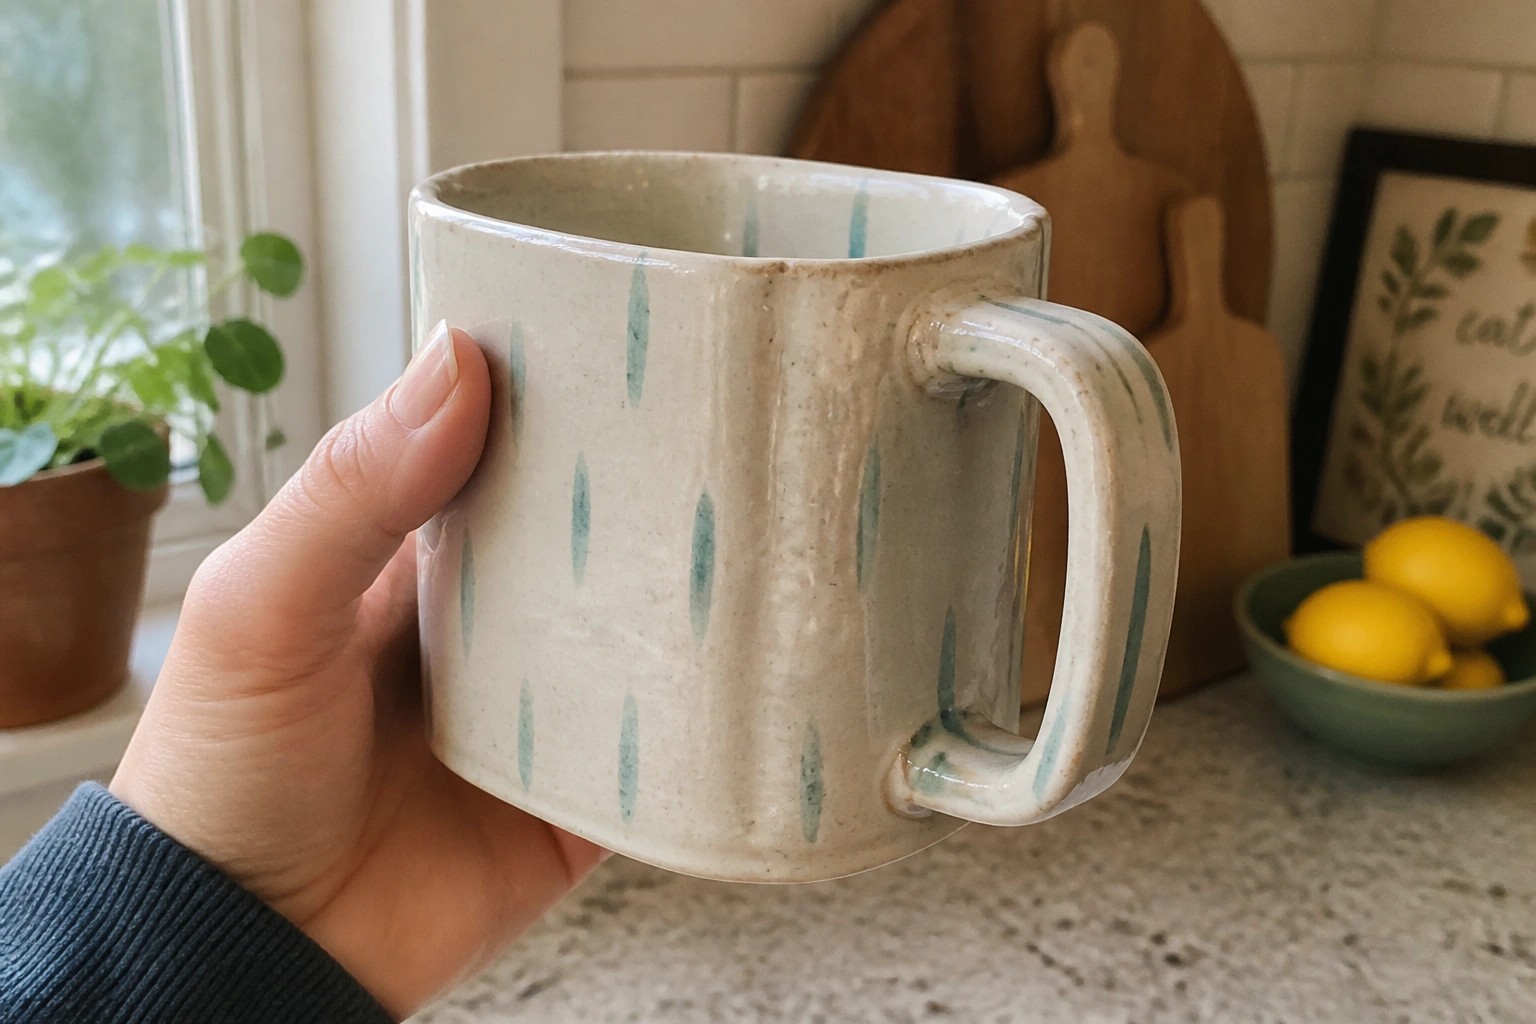
I started with slab pottery because it seemed straightforward for learning handbuilding on my own.
These projects focus on basic techniques that come up again and again in pottery.
I collected 24 beginner friendly ideas that walk through the main skills without overcomplicating things.
Some are quick and others take a bit more time but all stay simple.
Doing them myself helped me see what works well for someone just starting out.
Faceted Slab-Built Mug
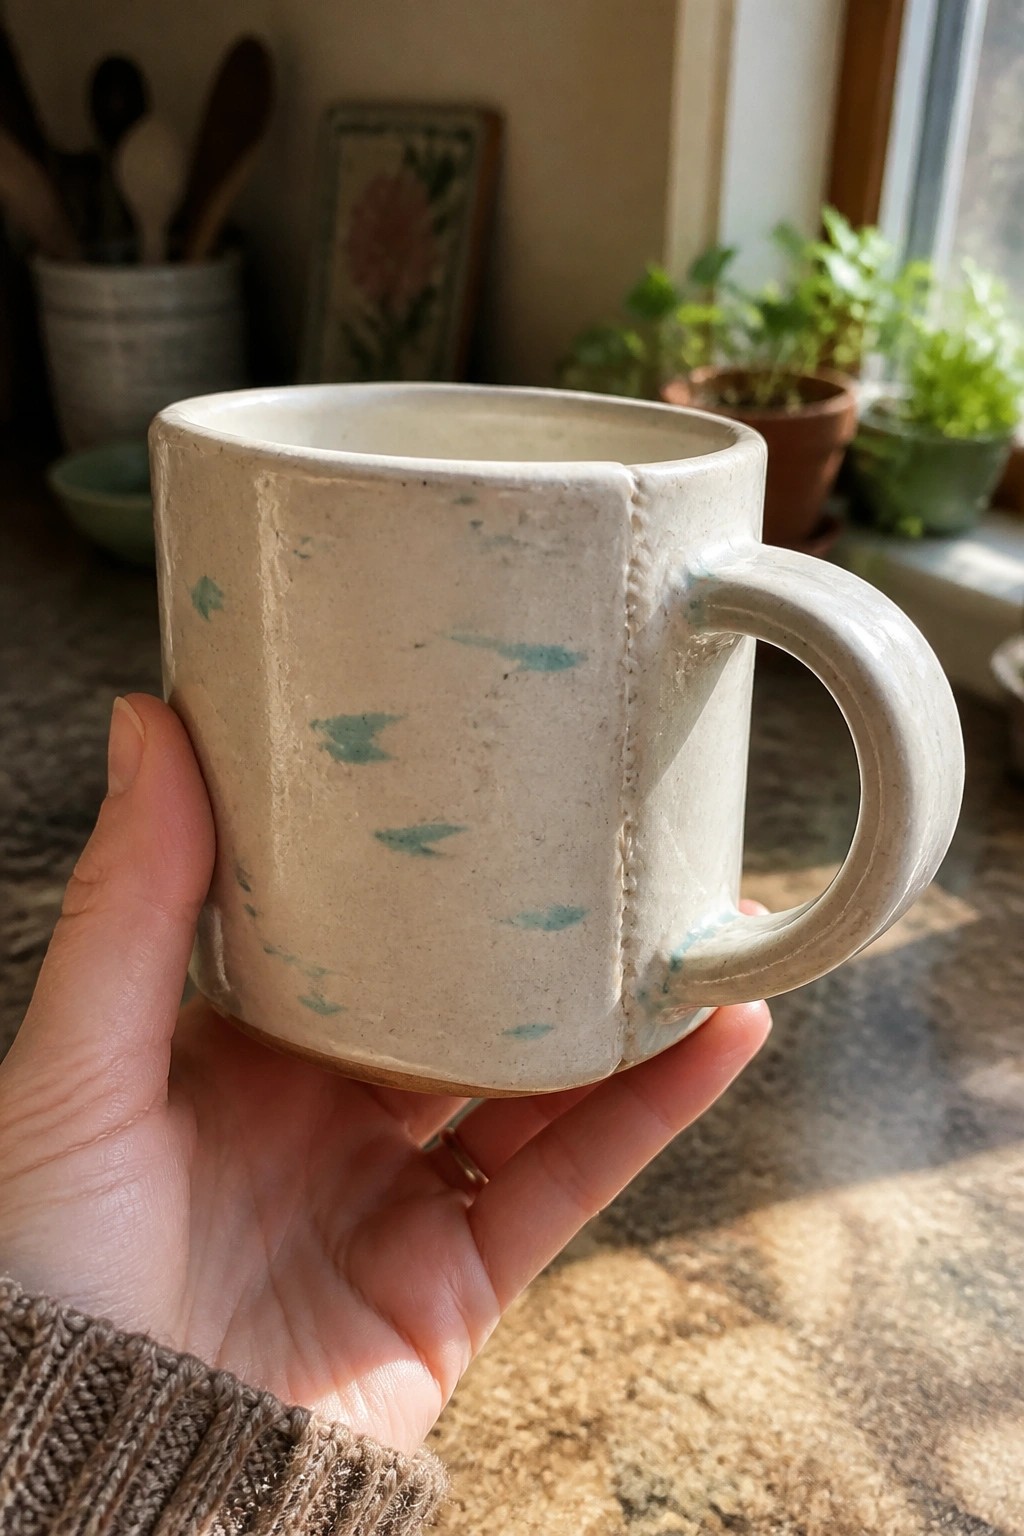
A faceted mug formed from slabs creates flat planes that give the piece structure and a comfortable grip. The cream glaze with scattered turquoise marks adds light color variation across the surface while keeping the form simple. An attached handle finishes the design for daily drinking use.
What makes this idea useful is how the angled sides make the mug easy to stack or display without rolling. You can adapt the same slab layout to build a smaller version for espresso or a wider shape for soup. The speckled glaze effect works on most light clay bodies and helps minor seam lines blend in. In a kitchen, this shape gives you a sturdy mug that still looks different from round wheel-thrown versions.
Dotted Border Rectangular Tray
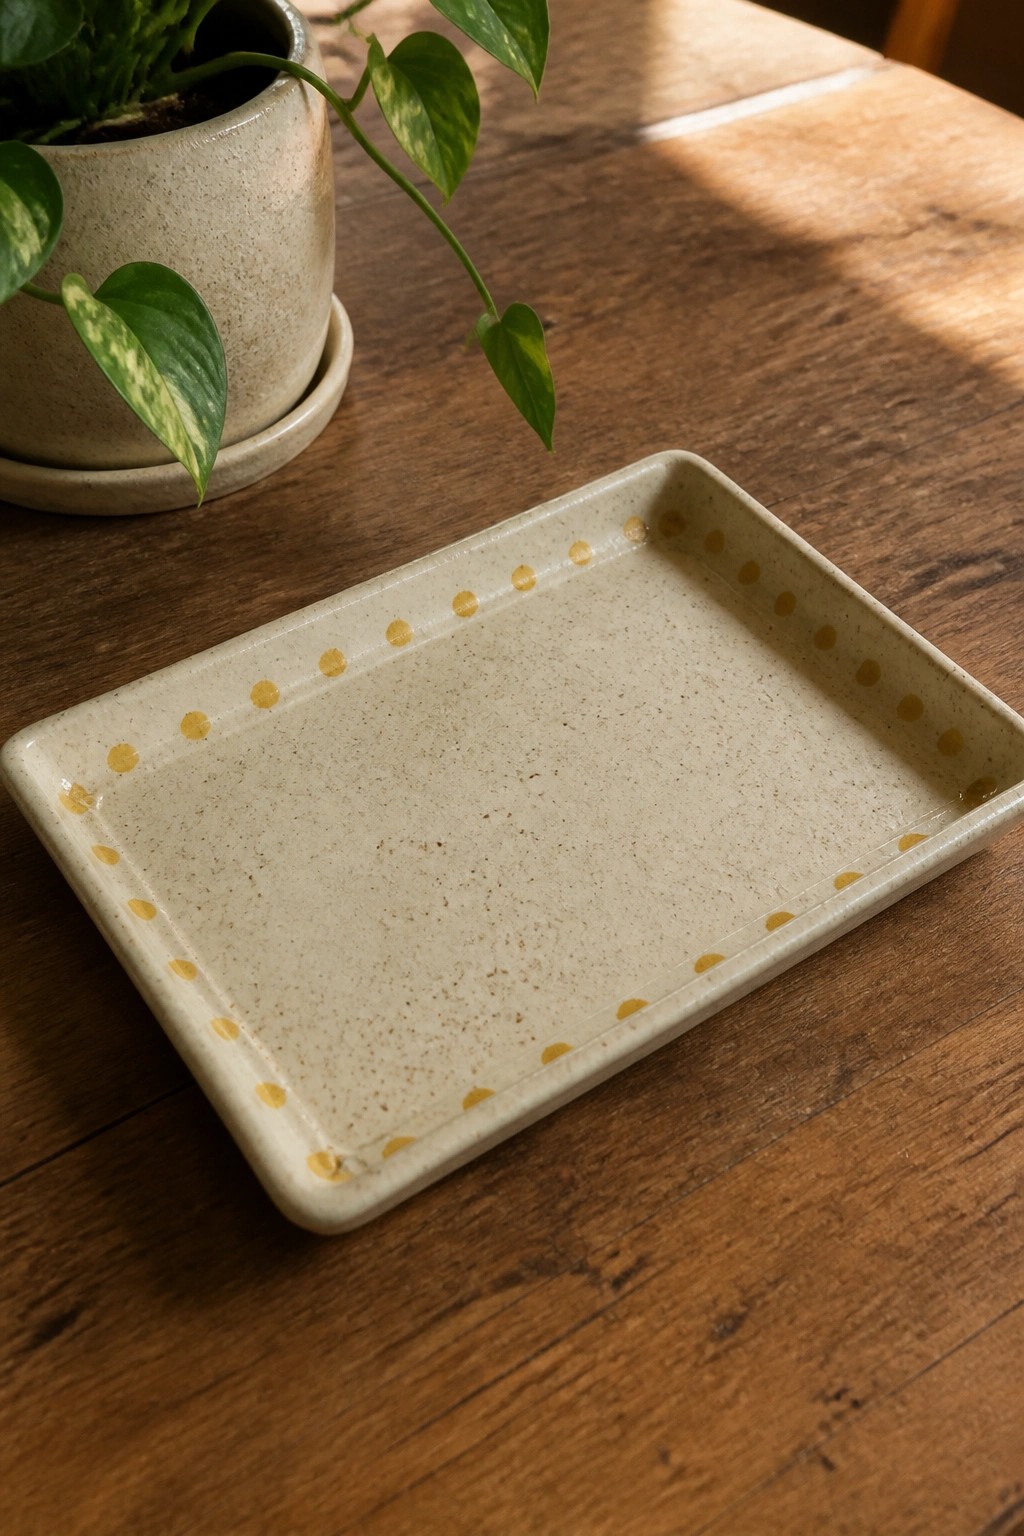
A rectangular slab tray finished with a light speckled glaze and a border of small yellow dots offers a straightforward way to practice even slab rolling and simple surface decoration. The dots run along the top edge and sides, creating a clean frame without covering the entire surface. This shape works well as a catchall or small serving piece because the flat base and low sides keep items contained.
The painted dot border can be adjusted in spacing or color to match other dishes you already own. A piece like this fits easily on a desk for keys or on a bathroom counter for jewelry. You could repeat the same rim treatment on a set of coasters or shorten the rectangle into a soap dish. The flat form also makes it simple to store flat while drying.
Two-Tone Square Slab Planter
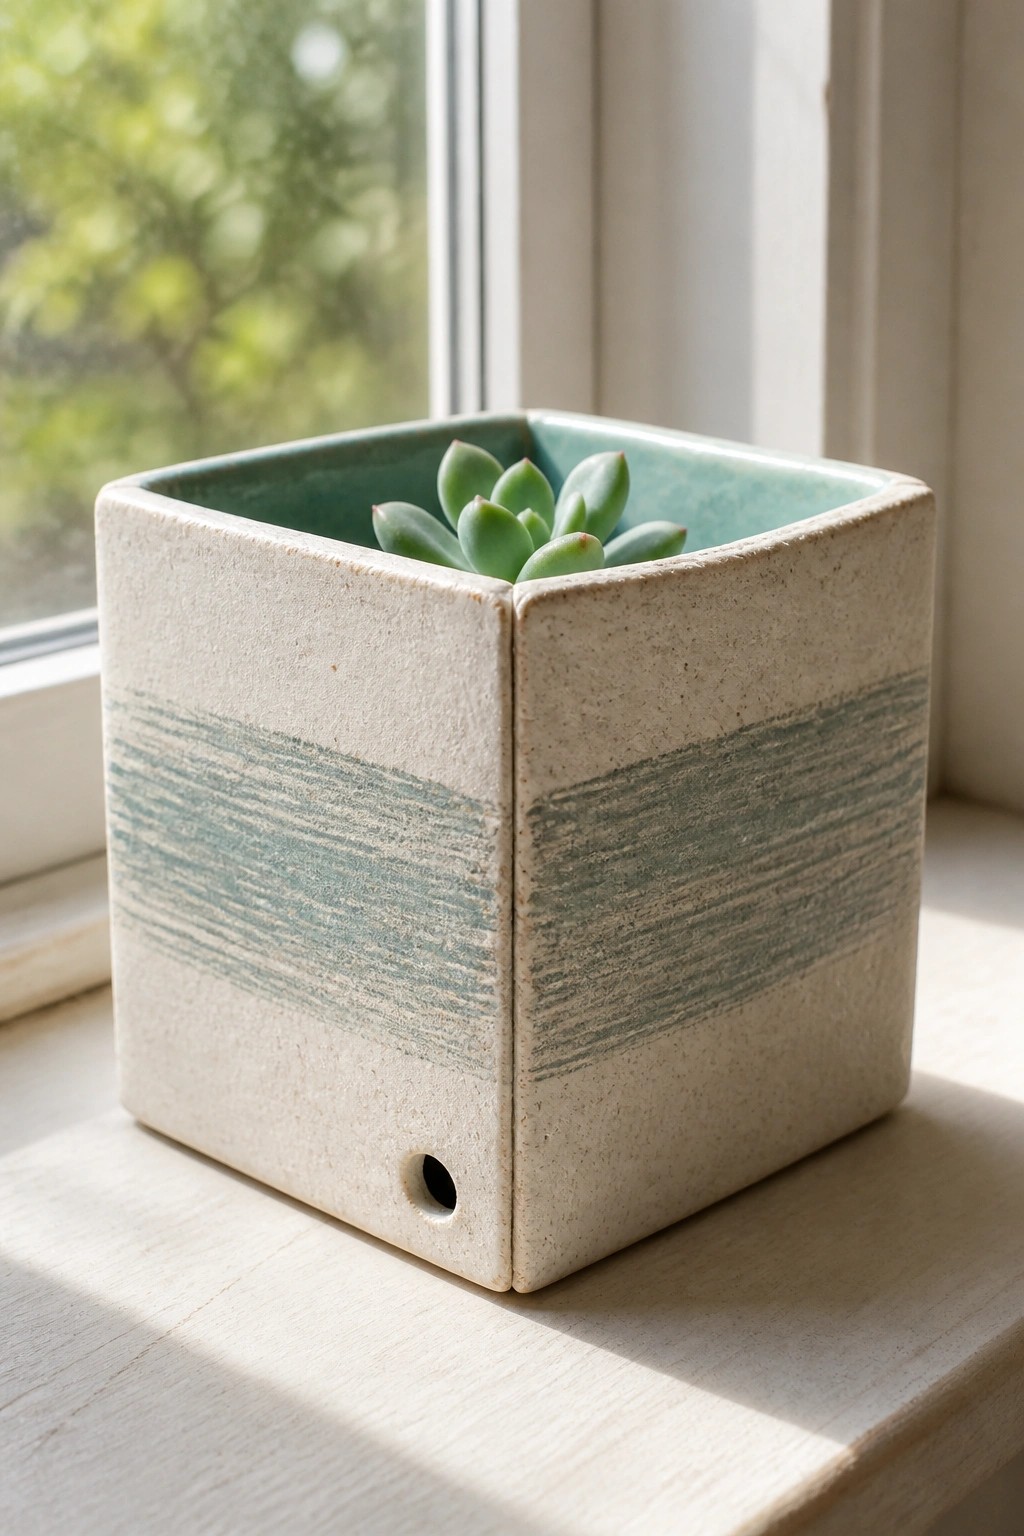
A square planter built from slabs gives a clean, stable form that suits small succulents or herbs. The project uses a light clay body for the lower section and a soft green glaze brushed over the upper rim and interior, with the brush marks left visible for texture. A small drainage hole is added near the base before firing. This combination keeps the build simple while showing how slab construction and basic glazing can create a finished piece ready for daily use.
What makes this idea useful is how the square shape stacks or lines up neatly on a shelf or windowsill without taking much space. The same slab method can be adjusted to make a shorter tray version or a taller pot for different plants. You could swap the green glaze for another color or leave more of the clay exposed to change the look. For a first slab project, the form teaches corner joins and even walls while producing something practical right away.
Floral Relief Hanging Plaque
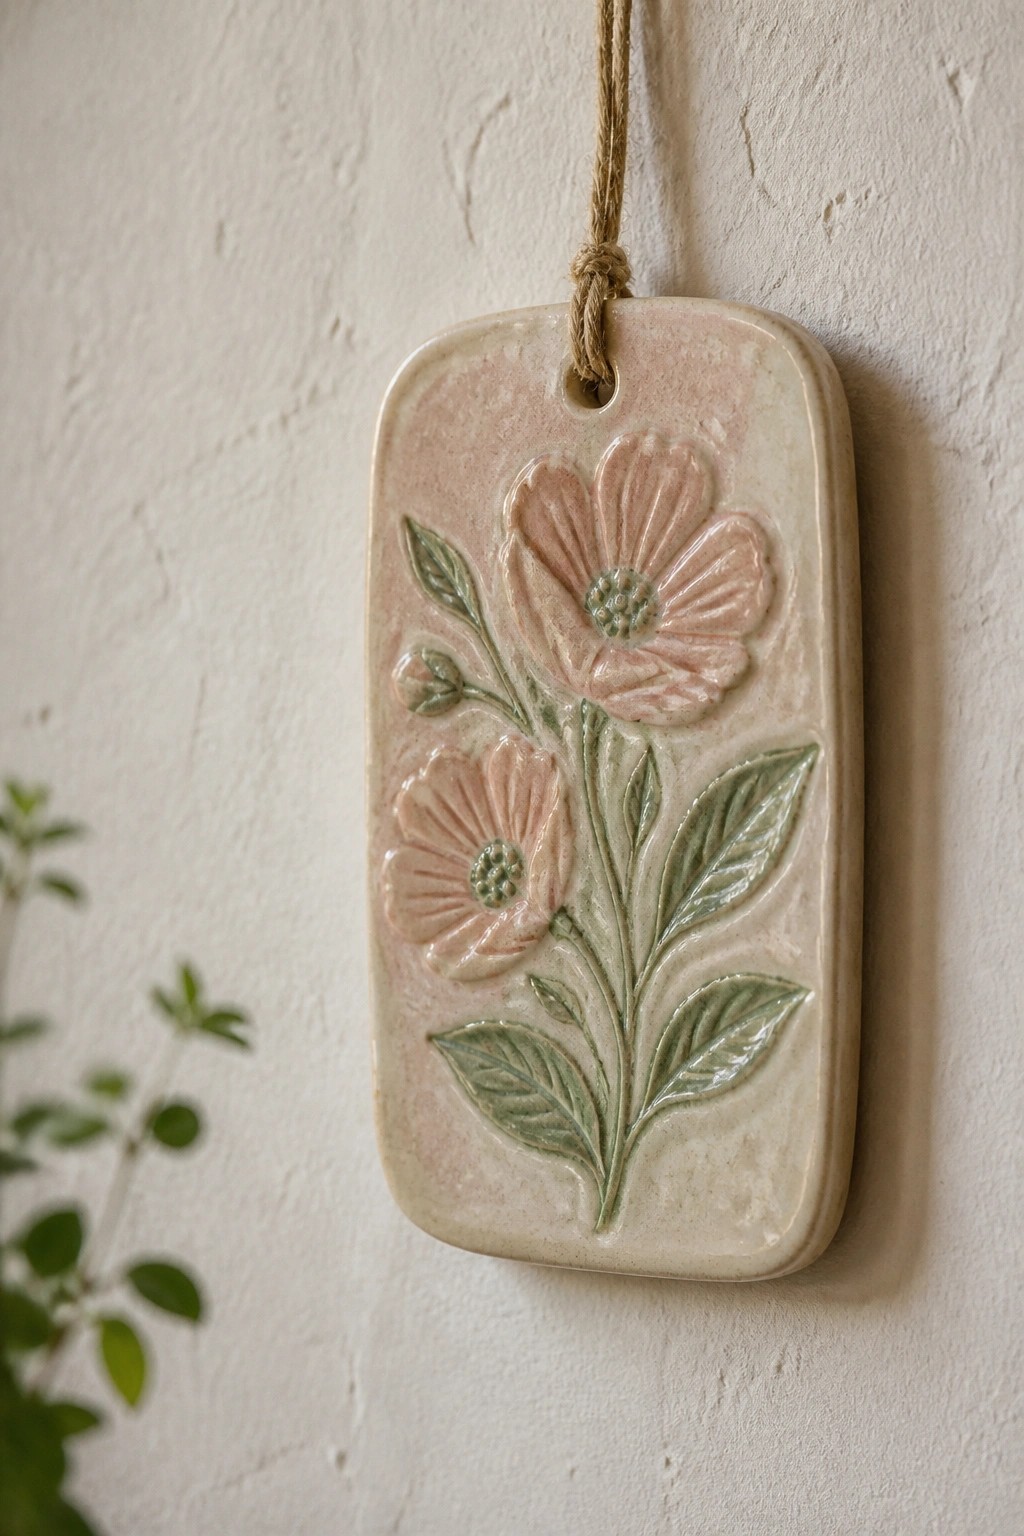
A flat rectangular slab serves as the base for this simple hanging plaque. Two flowers with stems and leaves are added in low relief across the surface. Soft pink glaze on the blooms and green on the foliage stand out against the lighter clay body. The drilled hole at the top turns the finished piece into an easy wall or door decoration.
What makes this idea useful is how the basic slab shape handles most of the construction work. You can change the size, add more flowers, or swap the motif for leaves or abstract patterns without changing the core method. The hanging format makes it practical for small spaces where a framed picture would feel too heavy. This same slab approach can be adapted into a trivet or a small sign by adjusting the hole placement and glaze choices.
Slab Built Spoon Rest Tray
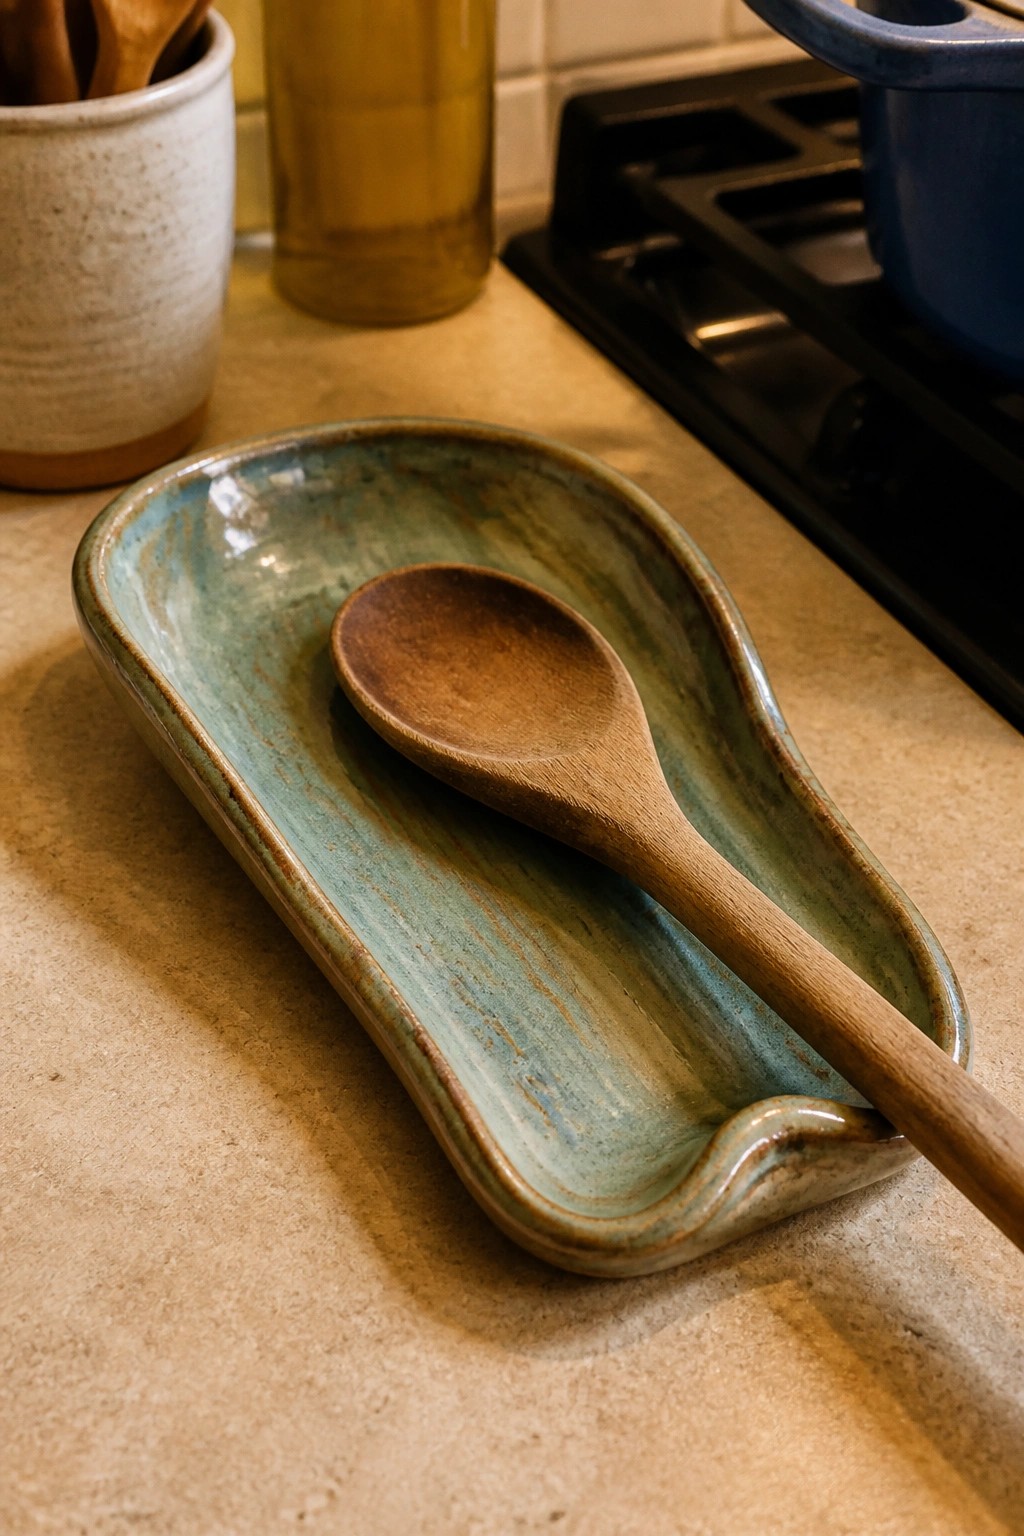
A slab built spoon rest tray gives you a long, shallow surface made for holding a cooking spoon between uses on the counter. The form starts with a flat rectangle of clay that gets gently curved and pinched along the edges to create low, irregular sides. A simple flowing glaze in teal and brown tones adds variation without extra carving or stamping.
What makes this idea useful is how well the narrow shape fits beside a stove without taking up much space. You can easily change the length or width when rolling out the slab to fit different spoon sizes or even turn the same form into a small butter dish. Adding a slight dip at one end helps the spoon sit more securely, and the same basic construction works for a matching set in different glazes.
Scalloped Slab Ring Dish
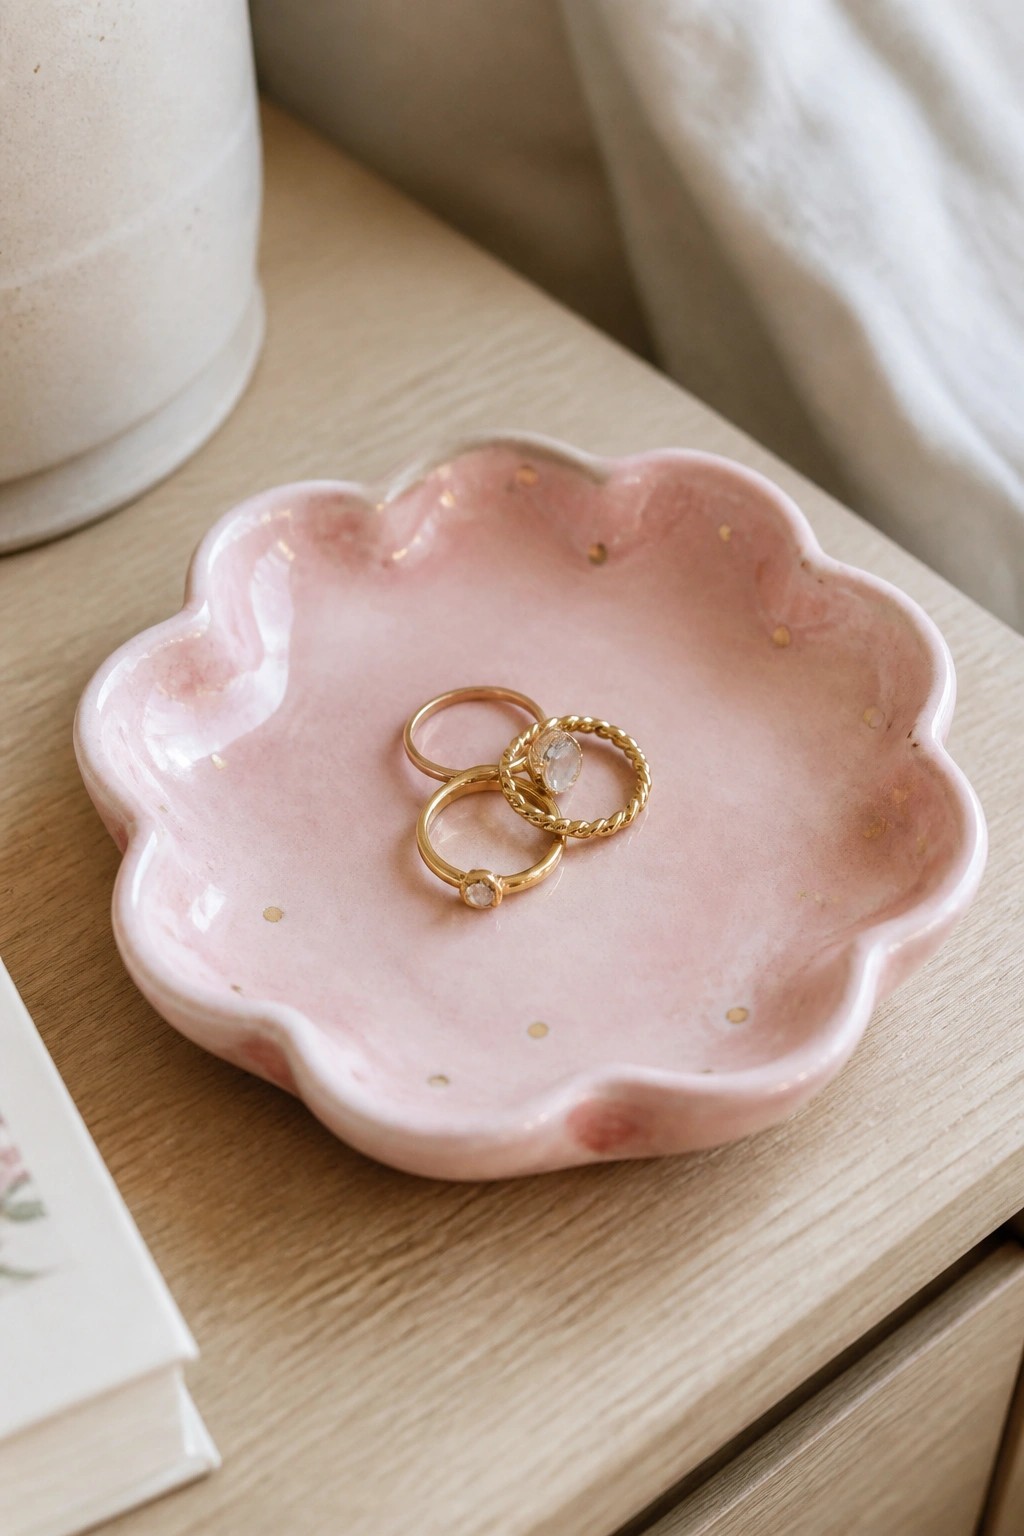
A small scalloped dish makes a practical ring holder or jewelry tray. Form it by rolling out a slab, cutting a wavy flower outline, and gently shaping the edges upward to create a shallow well. The glossy pink glaze with scattered gold dots adds contrast while keeping the surface smooth and easy to wipe clean.
What makes this idea useful is how quickly the shape can be varied by changing the scallop depth or overall size. The same slab method works for a matching soap dish or small catchall for keys. Gold accents can be swapped for other underglaze colors or left off entirely depending on the glaze you already have on hand.
Textured Tea Light Holder
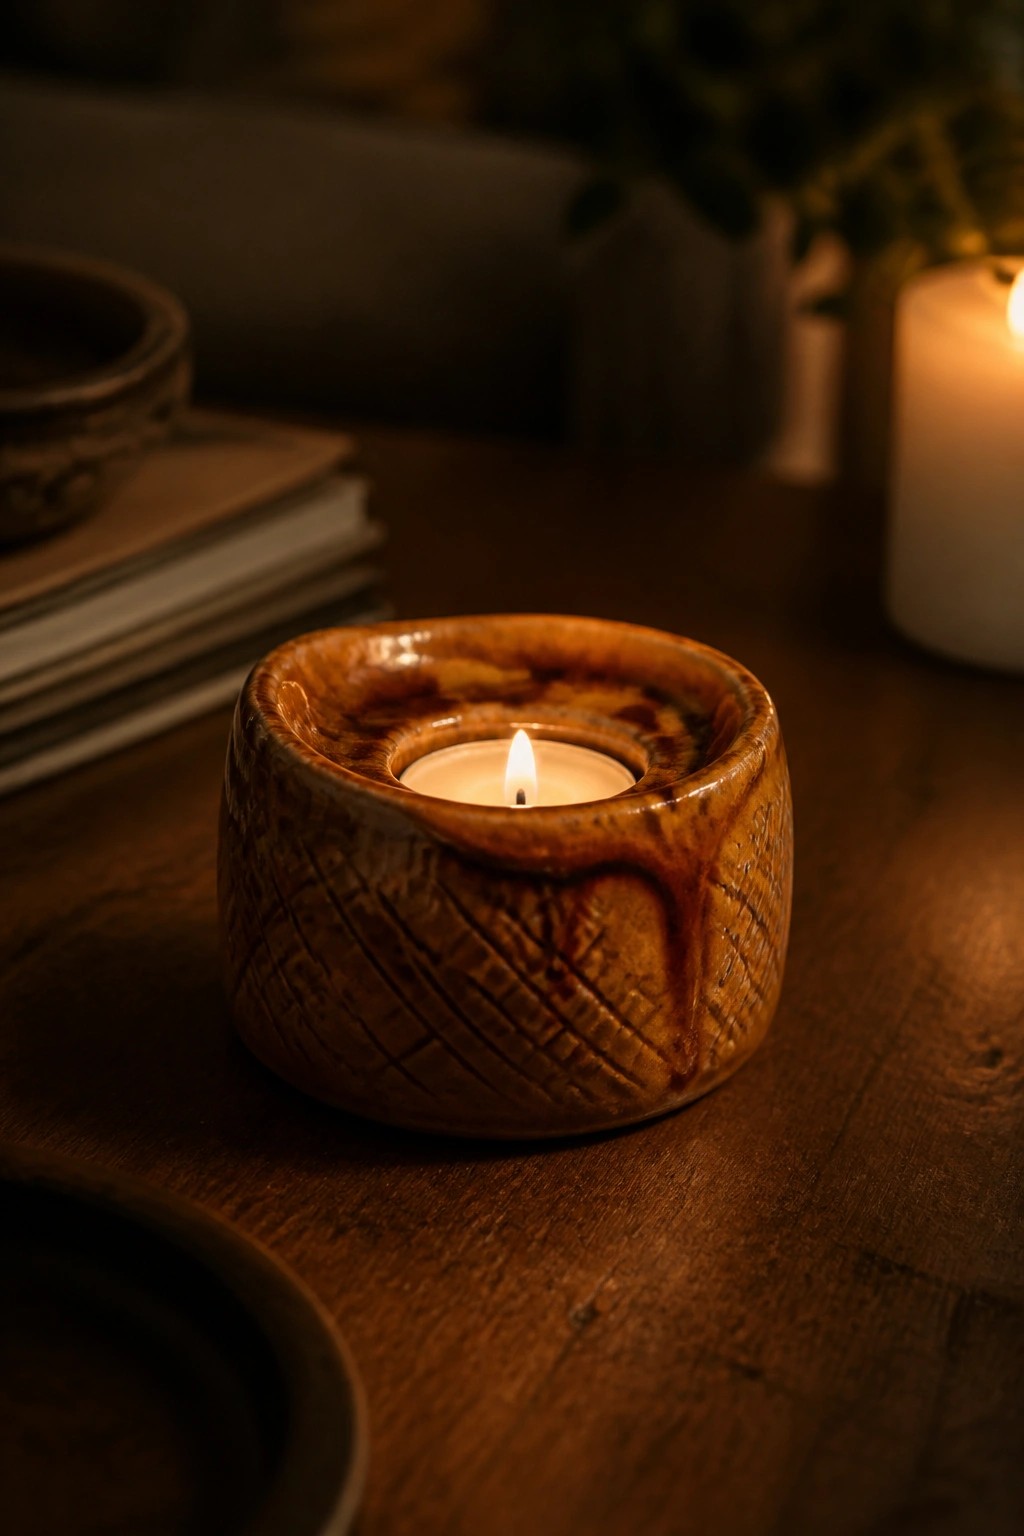
A small tea light holder made from handbuilt clay creates a simple candle piece that stays stable on any flat surface. The round form with a shallow center recess holds a standard tea light while the carved grid texture on the sides gives the surface depth once glazed. A brown glaze that settles into the lines adds contrast and makes the holder look more finished without extra steps.
What makes this idea useful is how the same basic shape can be rolled out quickly from a slab and textured with simple tools before firing. It works well on a desk or nightstand and can be adapted into a ring dish or small trinket bowl by leaving the center flat. For a gift this size travels easily and photographs well because the texture shows up clearly against the glaze.
Square Slab Coasters with Geometric Designs
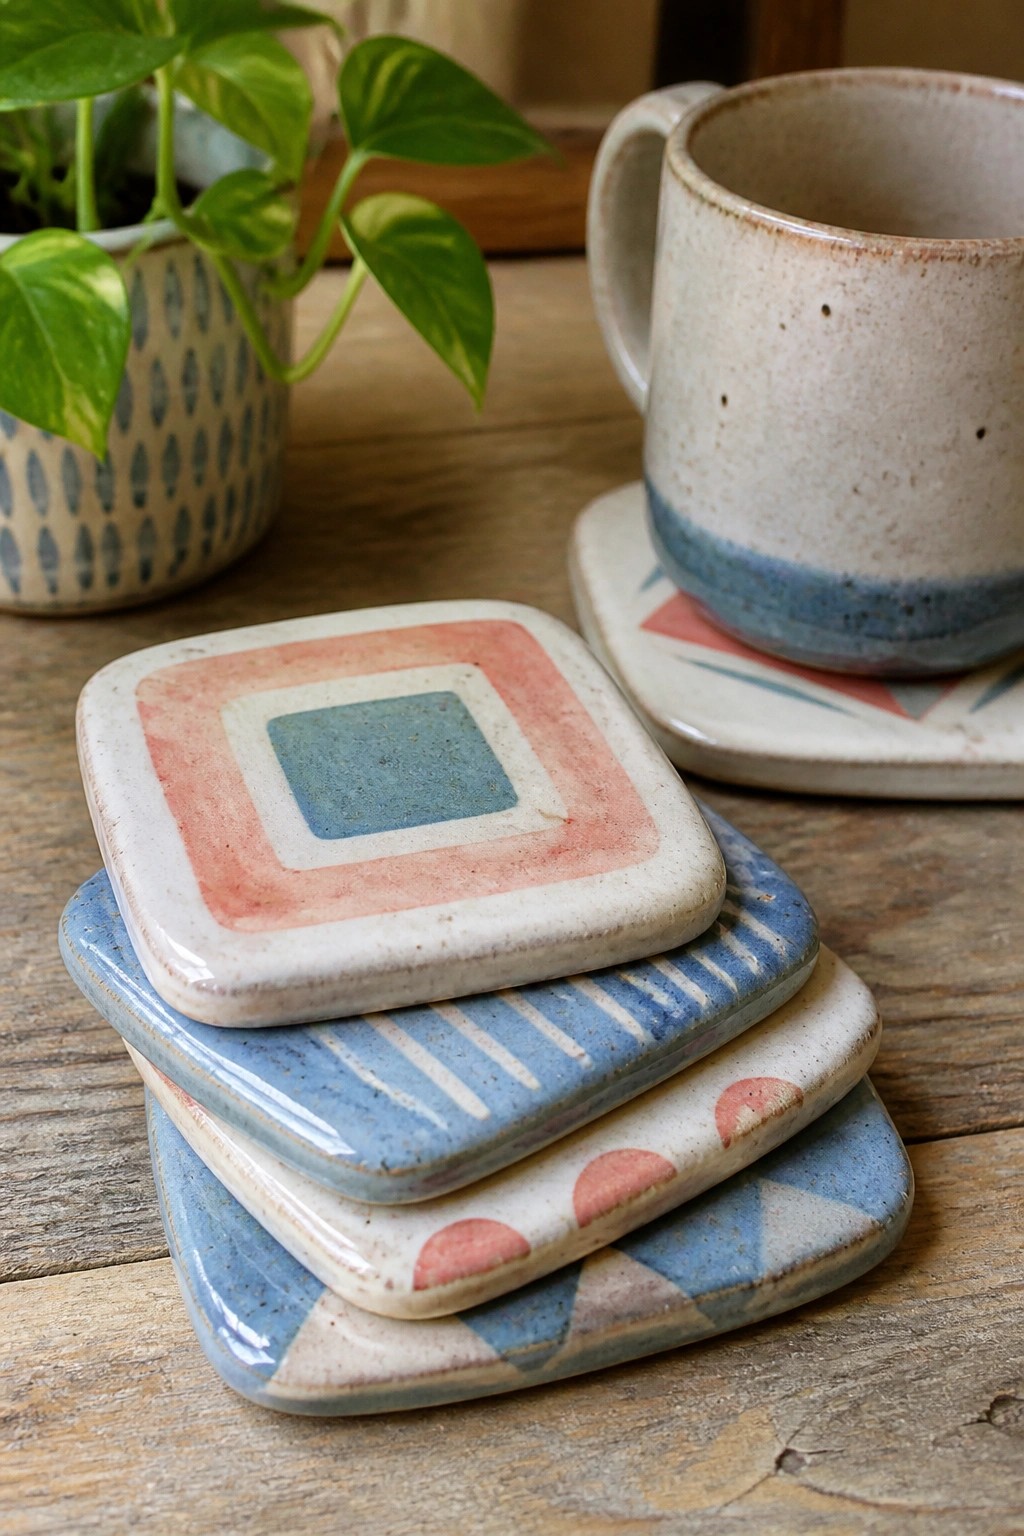
Square coasters cut from clay slabs work well for practicing even rolling and clean edges while keeping the project small. Each coaster carries a different painted pattern using basic shapes like concentric squares, stripes, triangles, or half-circles in a limited palette of pink, blue, and white. The designs stay flat and simple so the focus stays on color placement and how the glaze settles on the clay surface.
What makes this idea useful is that coasters are quick to produce in sets once the templates are cut, and the same slab can be used for matching trays or small dishes. The painted motifs are easy to swap for other simple repeats or solid color blocks, and the finished size fits standard mugs or glasses without needing much clay. A batch of these can be made in one afternoon and stored flat while drying.
Slab Napkin Holder with Heart Cutout

A slab-built napkin holder uses two upright walls joined to a flat base to create an open frame that keeps folded napkins standing upright. The simple heart cutout on one side gives a small decorative detail while keeping the overall shape clean and functional. A matte blue-green glaze covers the form, and the edges show the slight texture that comes from hand-rolled slabs.
What makes this idea useful is how the open frame works with different napkin thicknesses without needing extra supports. You could change the cutout to a different shape or skip it entirely for a plainer version. In a kitchen this kind of piece fits on a counter or table where napkins are used often, and the same slab layout can be made taller for a mail holder or shorter for a sponge caddy.
Cylindrical Kitchen Utensil Holder
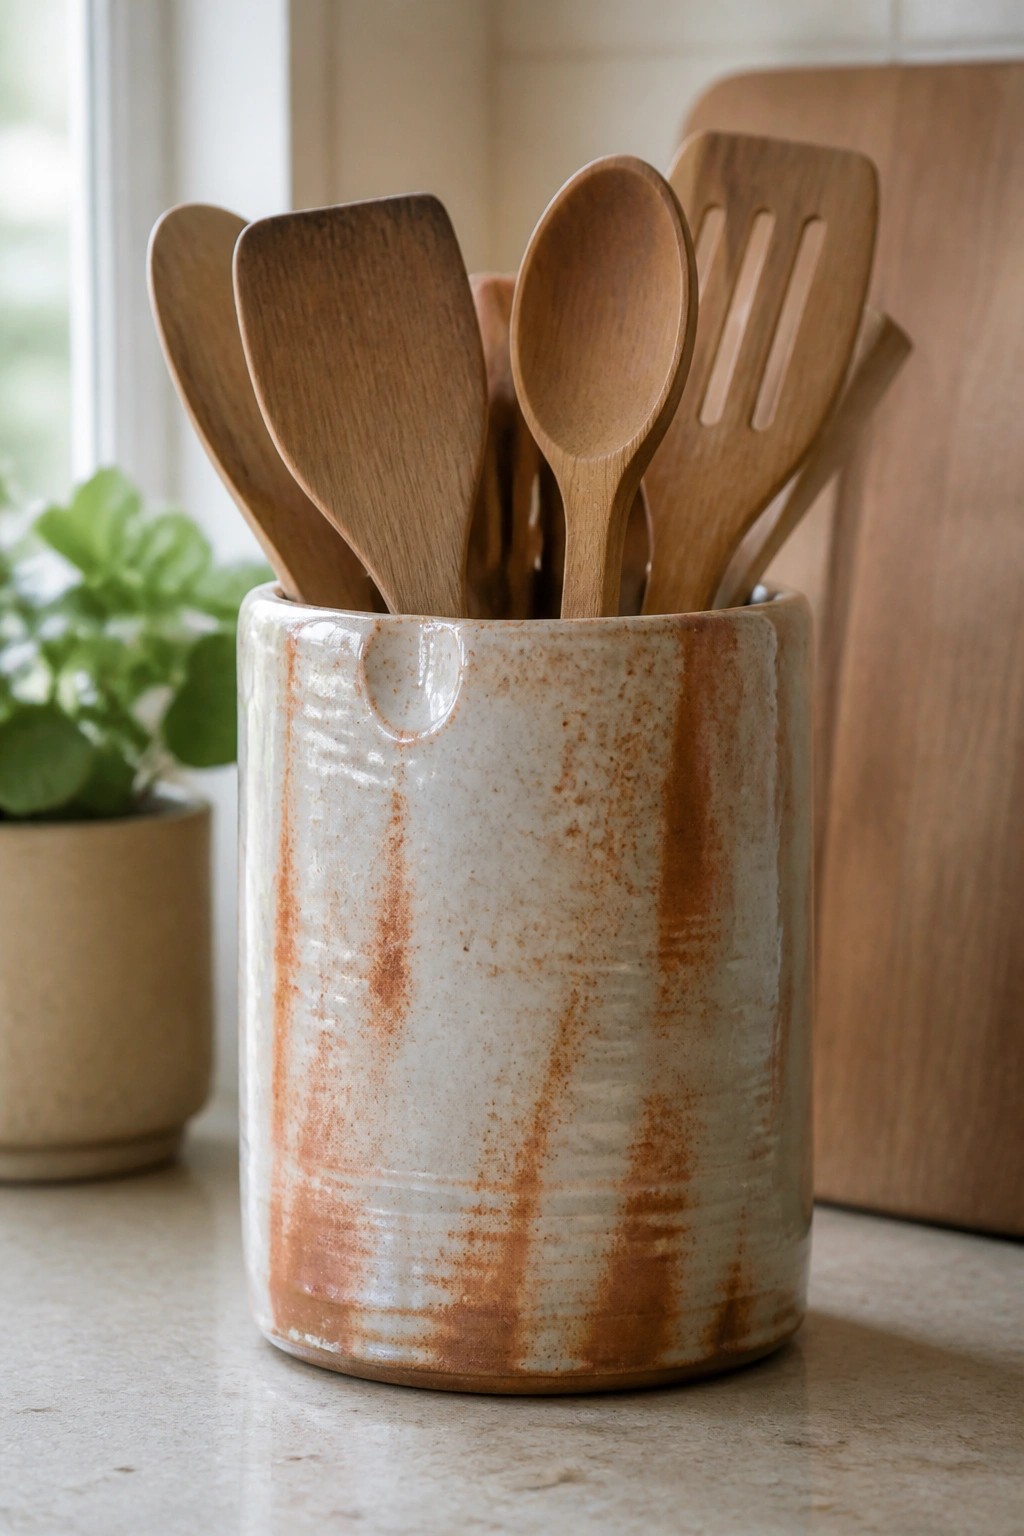
A tall cylinder formed from a single slab makes a practical utensil holder for spoons, spatulas, and other kitchen tools. The slab is rolled to an even thickness, joined along the seam, and attached to a flat circular base before the top edge is trimmed or notched. Vertical streaks in the glaze come from brushing or pouring layers that run during firing, giving the surface movement while keeping the overall shape simple and functional.
What makes this idea useful is how the diameter and height can be changed to match the number of tools you need to store. The same cylinder can be shortened into a smaller canister or widened into a vase by adjusting the slab size before assembly. A notch cut into the rim before firing lets you hang a small measuring spoon without adding extra parts. This shape also photographs cleanly for project roundups because the clean lines let the glaze pattern stand out.
Slab Built Soap Dish with Drainage Slots
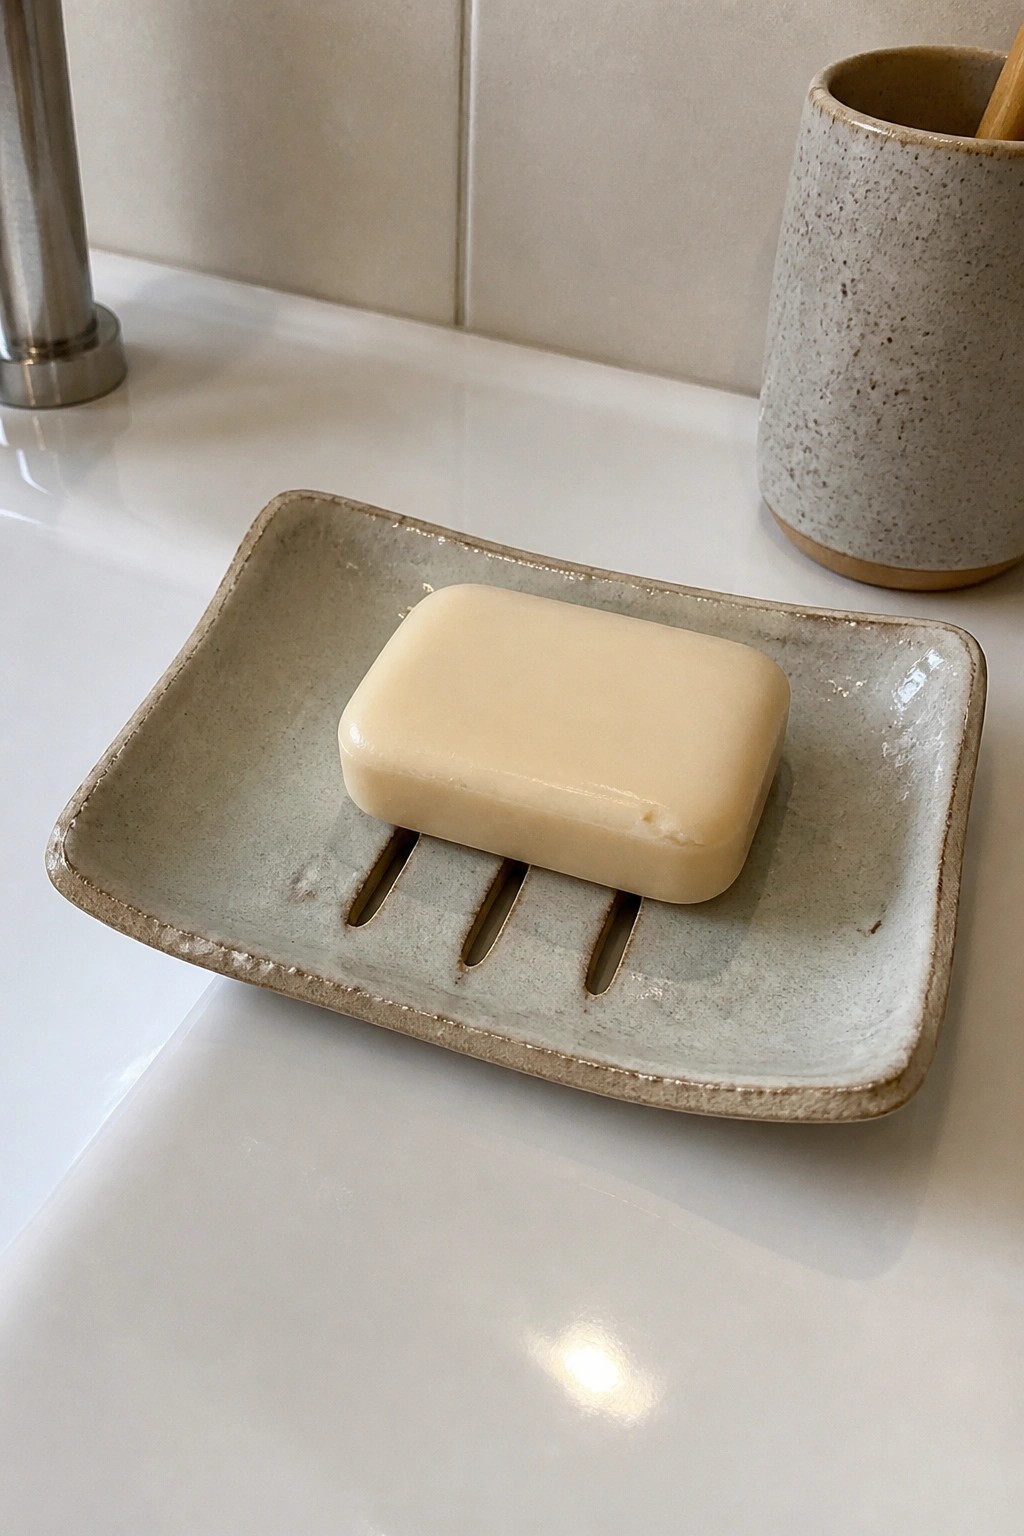
A slab soap dish gives you a flat rectangular tray with low sides and three parallel slits cut through the base for drainage. The simple form keeps soap from sitting in water while the speckled matte glaze adds subtle texture without being slippery when wet. This project uses basic slab techniques to create a bathroom item that fits on a sink ledge or counter.
What makes this idea useful is how the slits solve a common soap problem without adding extra parts. The compact size makes it easy to try as a first slab project and still produces something you can use every day. You could lengthen the tray for a larger bar or change the slit layout to straight lines or a grid pattern. In a bathroom this shape works especially well because it stays practical while teaching clean slab joining and trimming.
Smiley Face Slab Toothbrush Holder

A rectangular slab holder with three drilled holes serves as a simple toothbrush caddy for the bathroom. The flat sides provide a good surface for painting small smiley faces in different pastel colors, and the matte finish keeps the focus on those hand-painted details. This project uses basic slab construction to create a stable, upright container that fits neatly on a counter or windowsill.
What makes this idea useful is that the same slab method can be adjusted to make a wider version for multiple users or a taller one for taller brushes. The painted faces can be replaced with dots, lines, or initials to personalize it without adding much time. In a bathroom this shape keeps toothbrushes separated and off the surface, and the same form works just as well as a small desk organizer for pens or makeup brushes.
Square Slab Tray for Jewelry

A square tray built from slabs forms a shallow open box that works well as a jewelry holder. The clean right angles keep chains and rings from sliding out while the flat base gives plenty of room for small items. Using a speckled clay body on the outside and a solid contrasting glaze on the inside creates a simple two-tone finish that needs no extra carving or painting.
What makes this idea useful is how quickly the same template can be adjusted for different depths or sizes. A slightly deeper version turns into a soap dish or key tray, while a smaller one fits inside a drawer. The flat sides are easy to personalize with a stamp or underglaze line before firing. This shape shows up clearly in photos, which helps when sharing finished work online.
Slab-Built Salt Cellar with Spoon
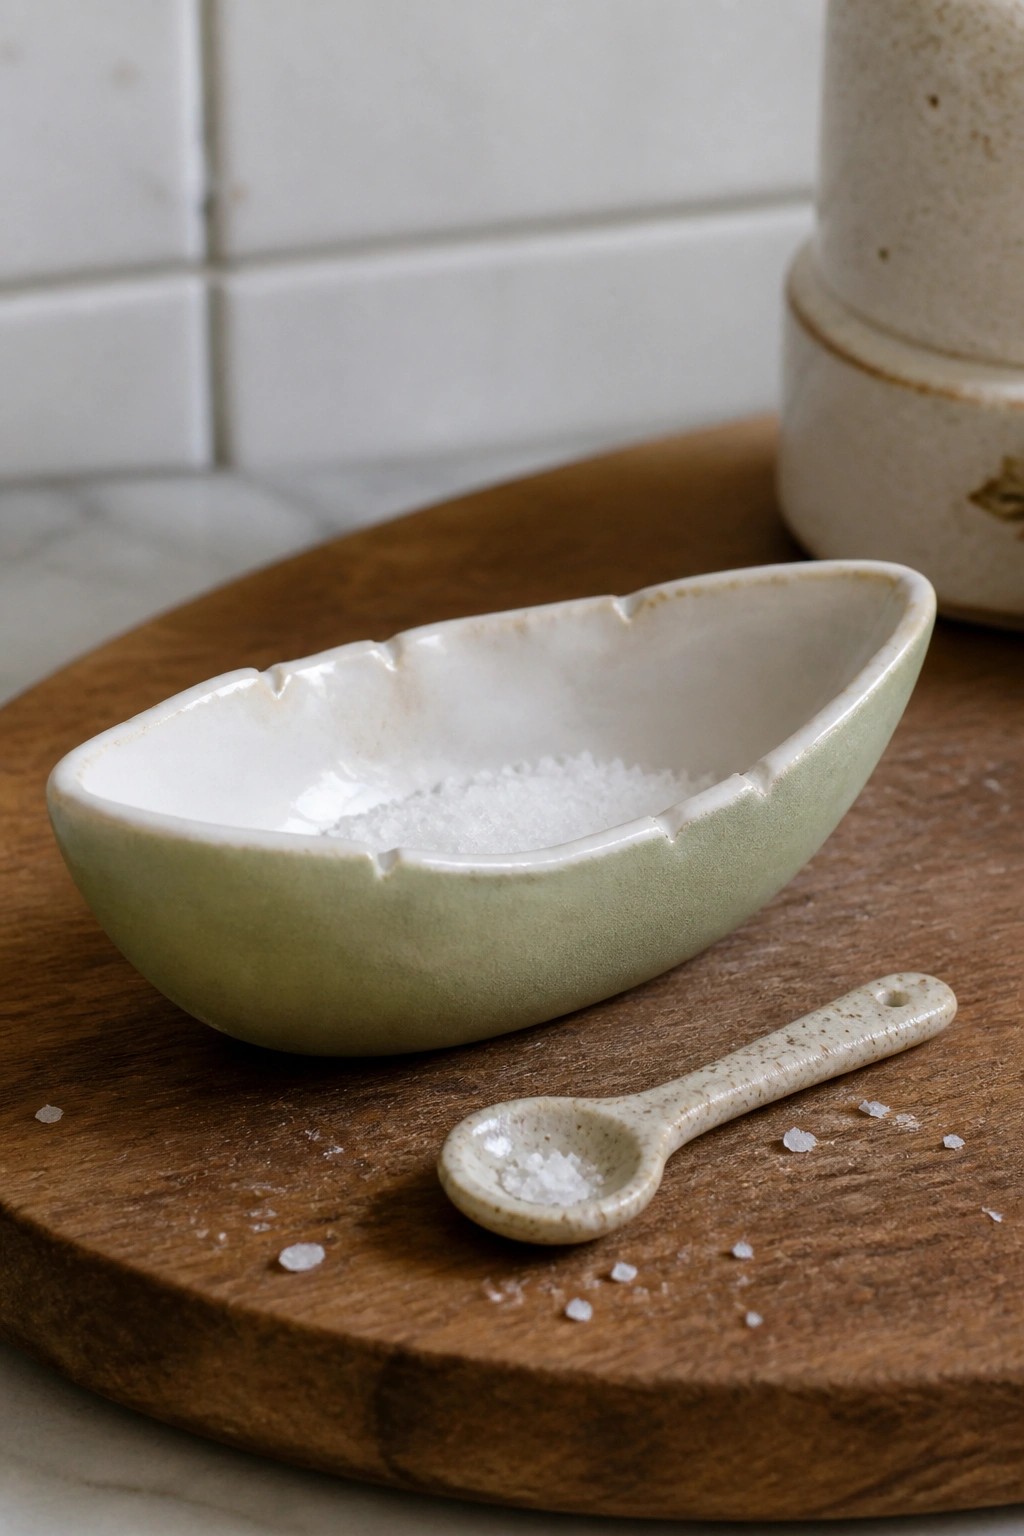
A small oval dish formed from a single slab of clay makes a practical salt cellar for the table. The pinched and slightly irregular rim creates a shallow well that holds a few spoonfuls of salt while the two-tone glaze keeps the white interior clean and easy to wipe. Adding a short-handled spoon made from the same clay turns the set into a self-contained kitchen piece that stays compact.
What makes this idea useful is the simple slab base that can be cut to any length or width before the edges are shaped. The same form works for a spice pinch bowl or a small butter dish by adjusting the depth and skipping the spoon. In the kitchen this size sits neatly next to the stove or on a tray without crowding other tools, and the matching spoon keeps everything together for daily use or as a quick gift project.
Notched Yarn Bowl for Knitting and Crochet
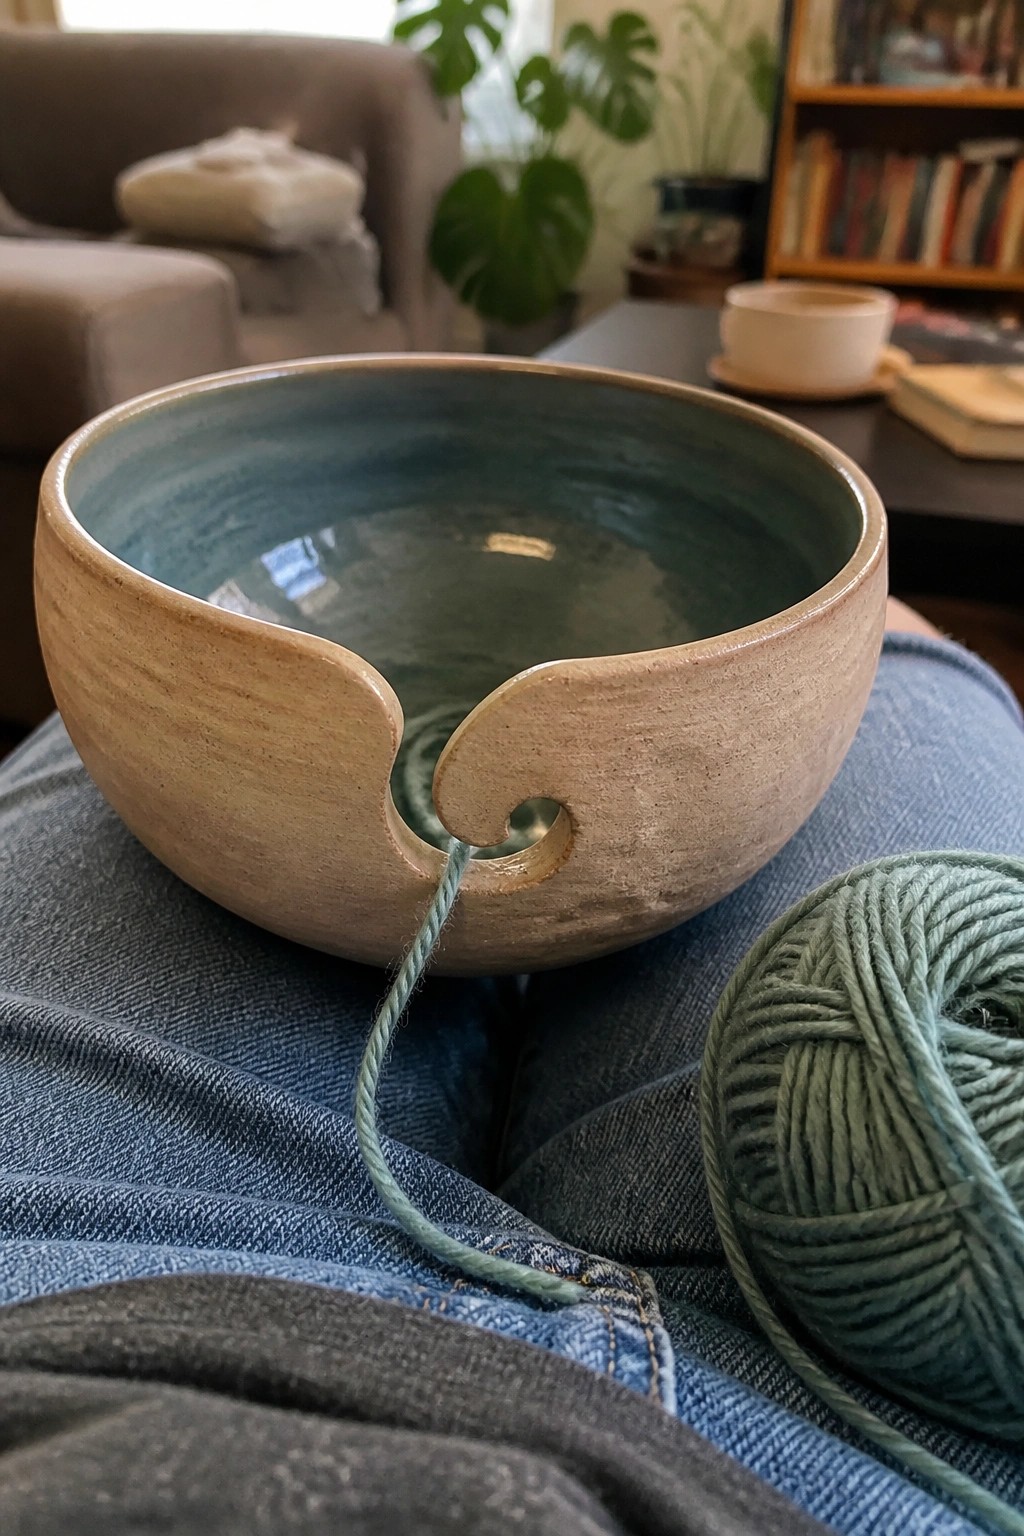
A yarn bowl is a wide, low form with a curved notch cut into the rim that lets a strand feed out while the rest of the skein stays contained. The notch is shaped like a loose spiral so the yarn does not catch or pull the bowl over. Slab construction works well here because the walls can be kept thick enough to hold the notch shape after trimming. The exterior is left matte while the interior carries a simple wash of glaze for easy wipe-down.
What makes this idea useful is how the notch turns an ordinary bowl into a working tool without adding extra parts. You can change the notch width on future versions to match chunky versus fine yarns. The same basic shape also works as a small fruit bowl or desk catch-all if you skip the cutout. For a first slab project the form stays simple while still teaching even wall thickness and rim finishing.
Bunny Slab Planter with Attached Ears
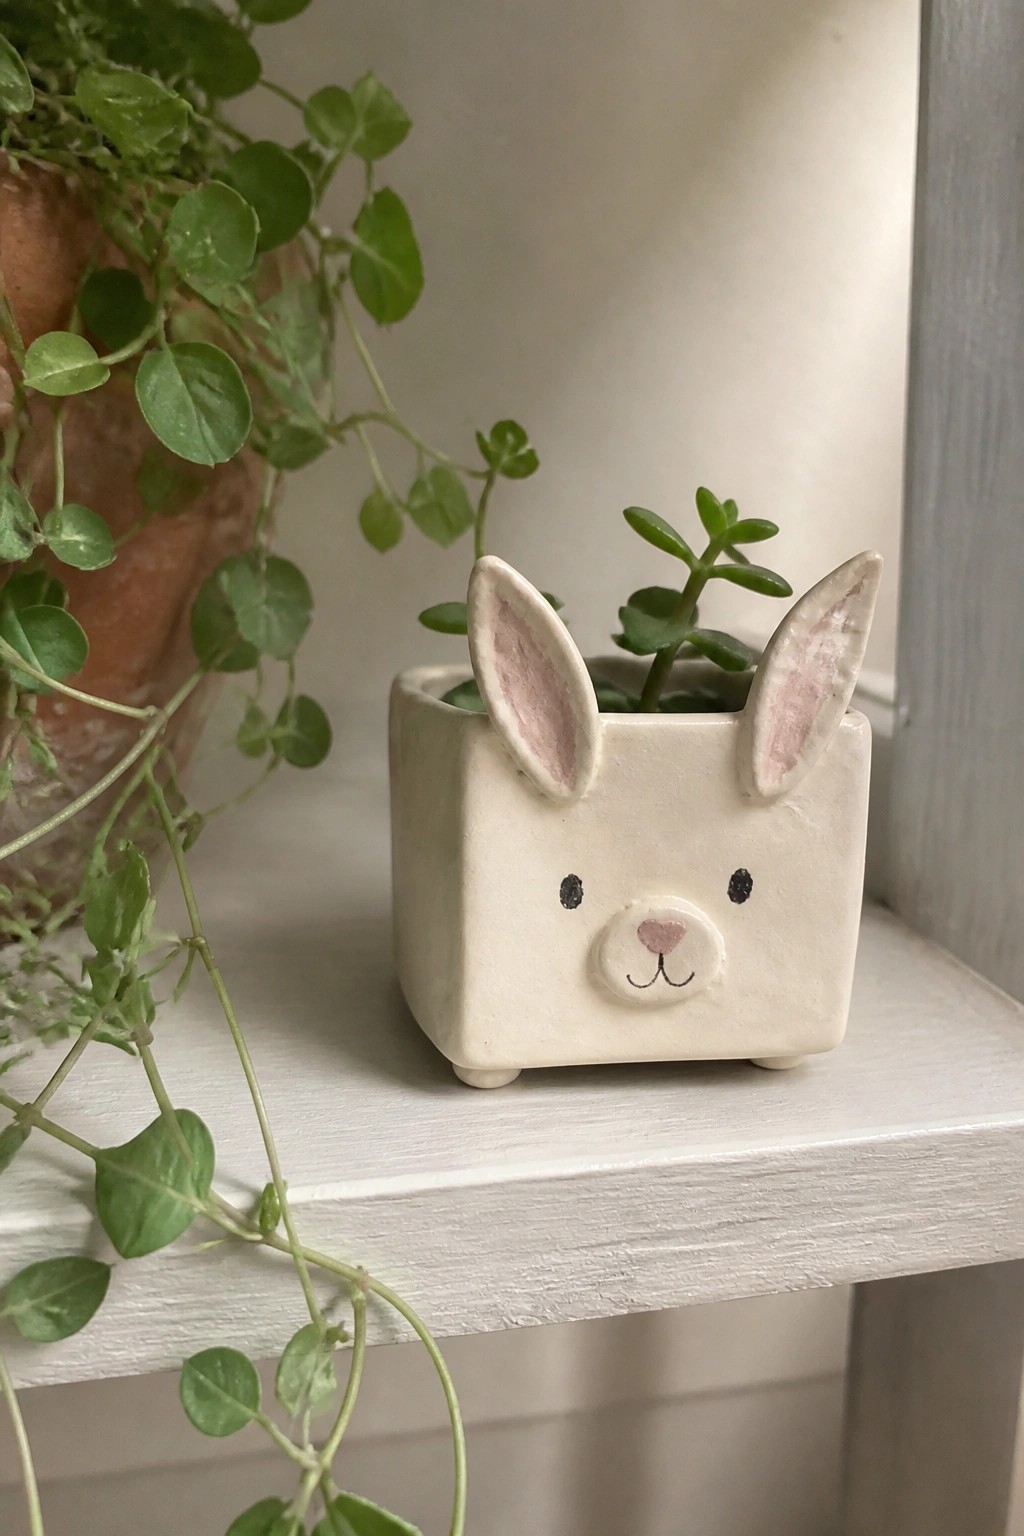
A small square planter built from slabs forms the body of this bunny project. Two separate ear shapes are joined at the top rim, and the front face receives simple painted details in black and pink for eyes, nose, and whiskers. The inner surfaces of the ears are tinted a soft pink while the rest of the piece stays a matte off-white. This combines basic box construction with low-relief additions and surface painting.
The square body keeps slab work straightforward and stable on a shelf or windowsill. You can reuse the same ear attachment method for other animal faces or change the painted features without altering the build. This shape also photographs cleanly for plant styling posts, which helps it perform well when shared online. For a different version, try taller ears or a two-tone glaze on the body instead of paint.
Leaf Impressed Wall Pocket Planter
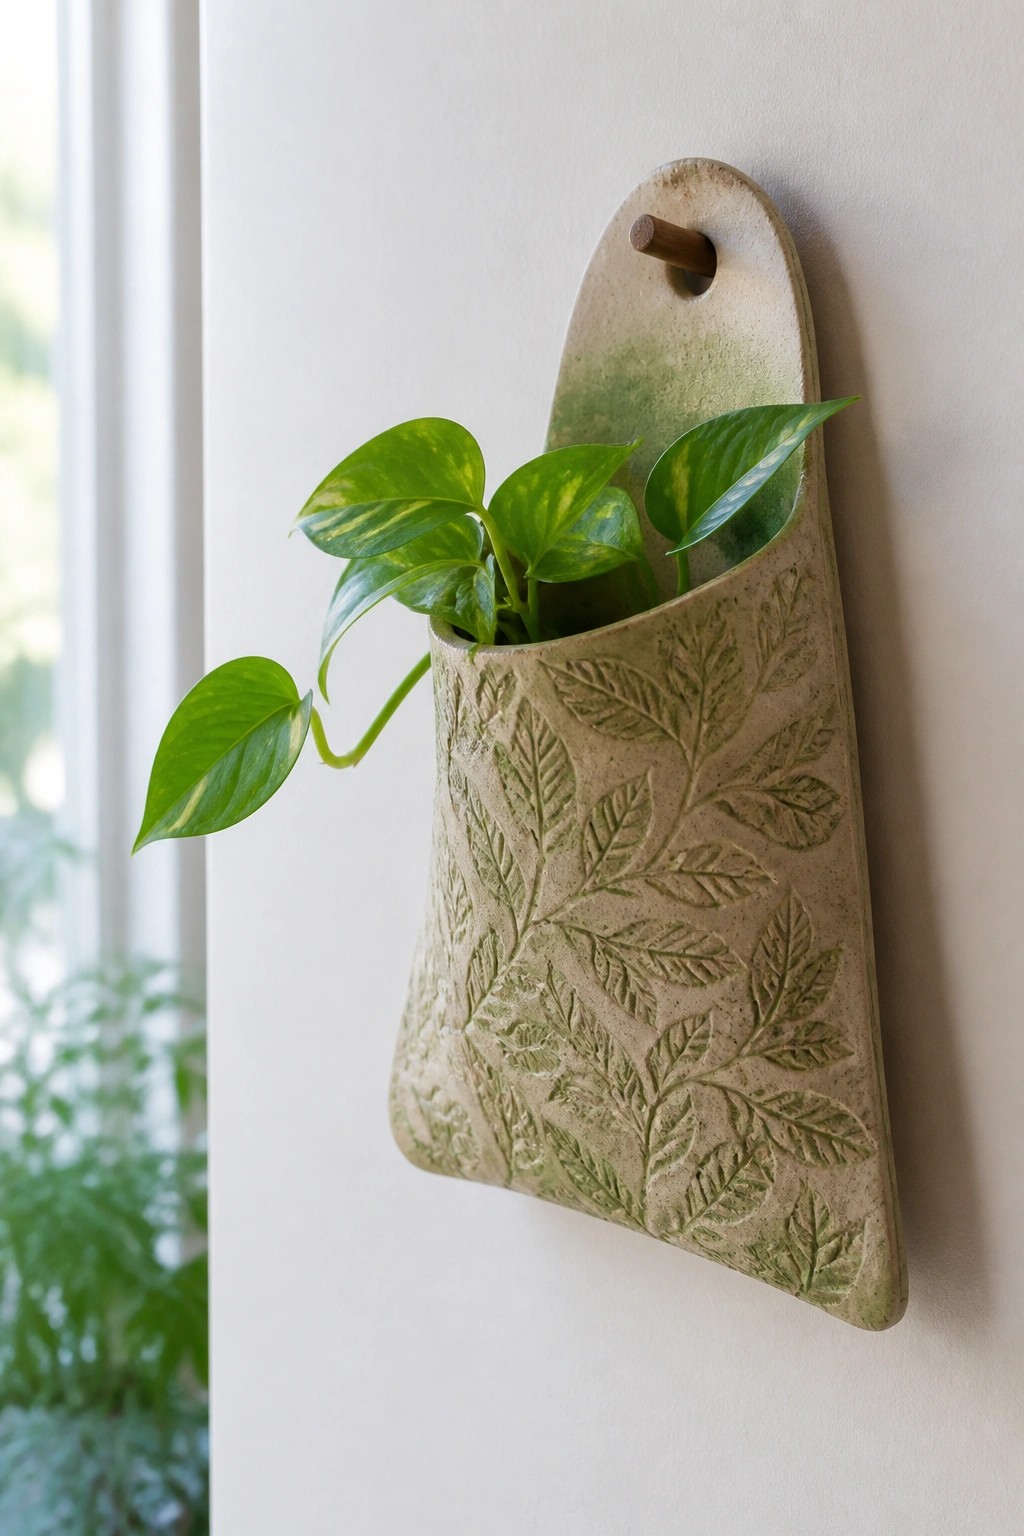
A slab built wall pocket gives you a compact planter that hangs from a single peg without needing extra hardware. The pouch shape holds a small plant while the front carries pressed leaf textures that add surface detail without extra tools. A soft green wash over the clay lets the impressions stand out and ties the piece to the plant inside.
The shape does a lot of the work here because the tapered bottom and open top let trailing leaves spill naturally without taking up counter space. You could build the same basic form larger for a bigger plant or change the leaf impressions to simple line patterns if you want a cleaner look. In a small room this kind of piece keeps plants off surfaces and works on any wall that has a hook or peg. For a gift it is easy to customize by picking different leaves for the texture and adjusting the overall height.
Fluted Shallow Bowl
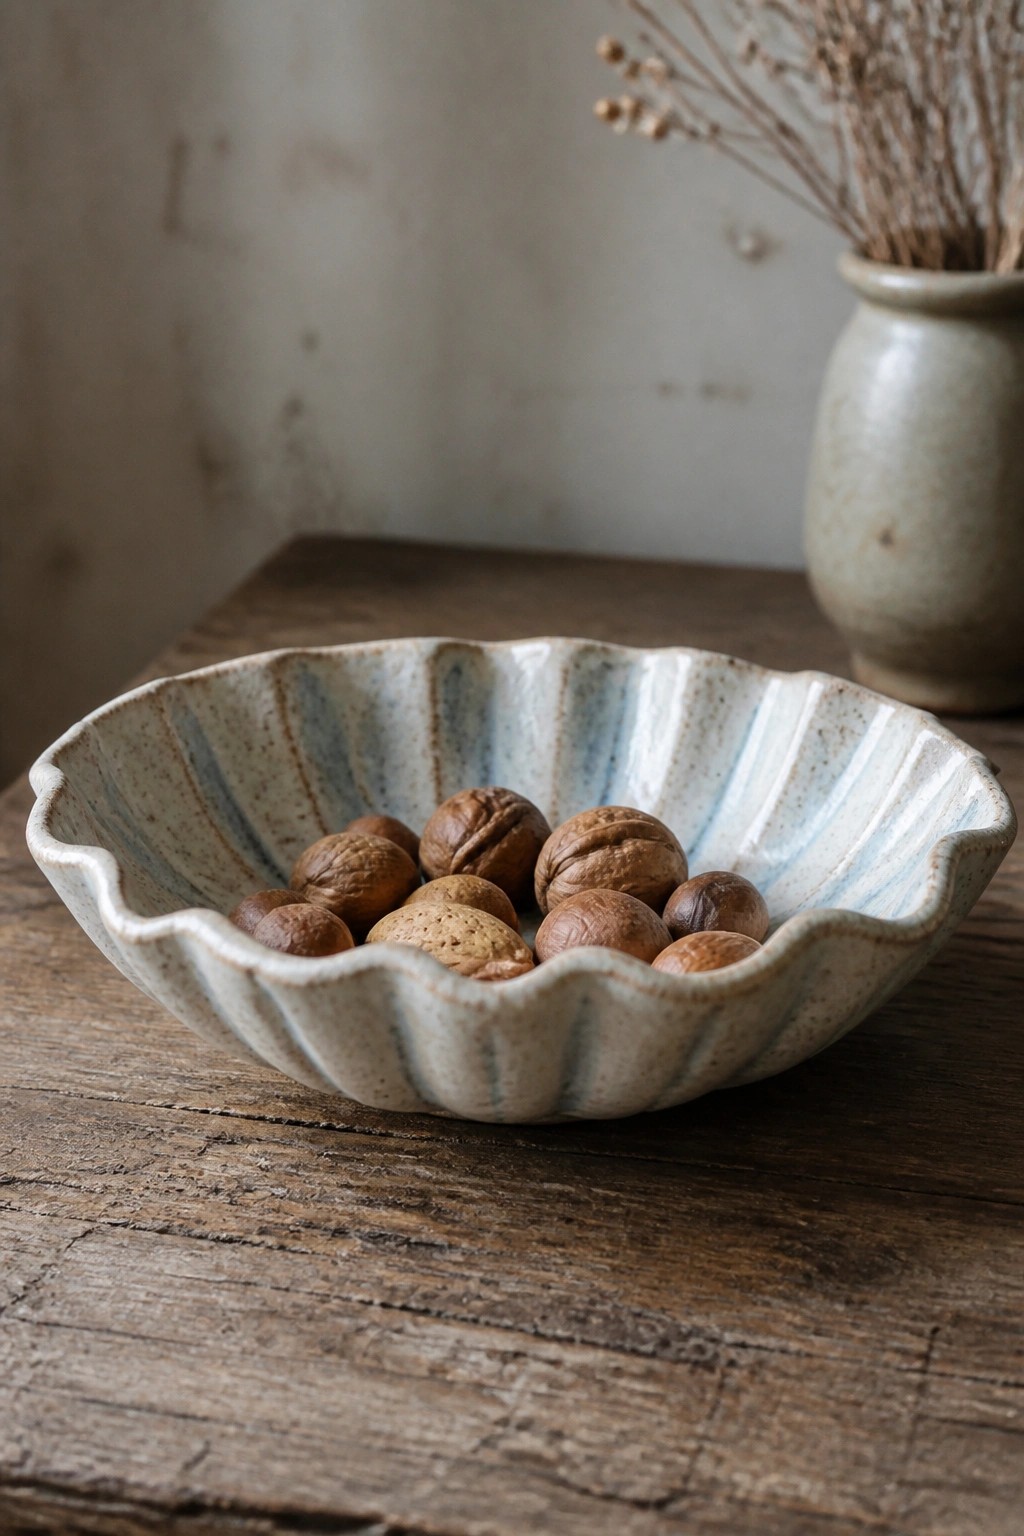
A shallow bowl formed from a single slab gains interest through repeated pinching along the rim to create soft pleats. The scalloped edge gives the form a finished look while the low profile keeps the project simple for early handbuilding practice. A light speckled glaze with faint blue streaks highlights the texture without covering the clay surface completely. This shape works as a basic slab bowl project that focuses on rim control and gentle curving rather than complex assembly.
The small scale lets you test the fluting technique on a single piece of clay before moving to larger forms. It fits on a kitchen counter for snacks or can be adapted into a tray by flattening the base more. You could repeat the same rim detail on a square slab to make a different serving piece or add a foot ring underneath for extra practice with trimming. The ridged edge photographs well because it creates natural lines and shadows that show up clearly on a feed.
Incense Holder Made from a Textured Slab
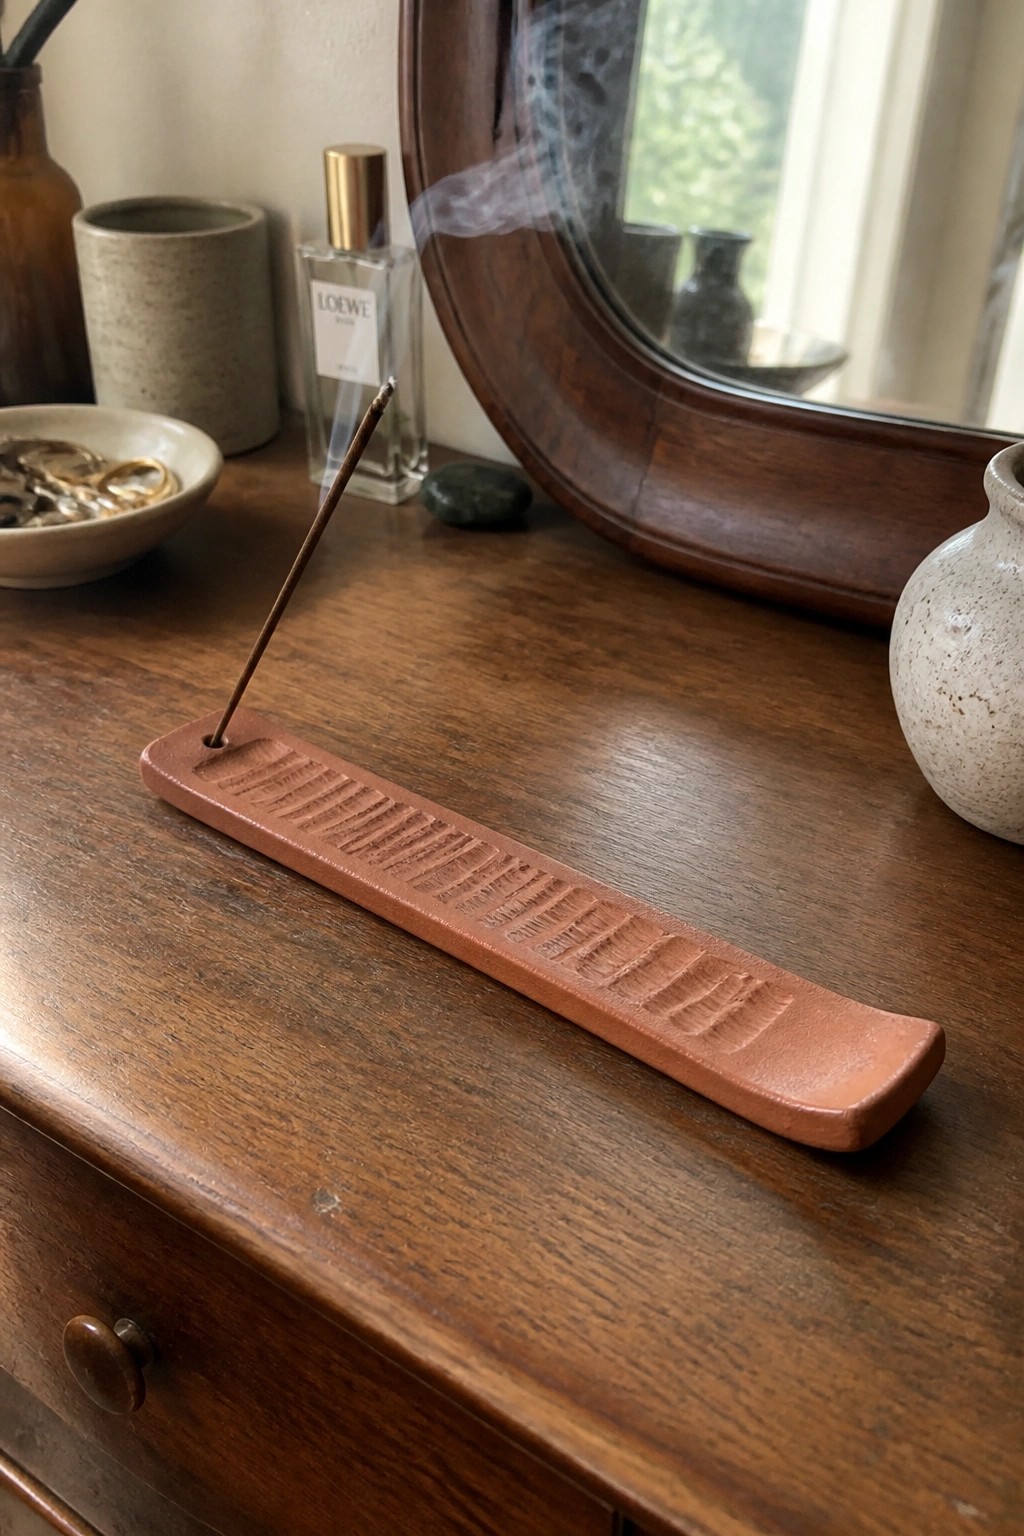
A long, narrow slab of clay forms the base for this incense holder. One end gets a small hole to hold the stick upright while parallel grooves run down the center to catch ash. The simple rectangular shape with a rounded tip keeps it stable on a flat surface and the matte terracotta surface needs no extra finish.
What makes this idea useful is how little clay and time it requires. The same slab method can be shortened into a desk version or lengthened for multiple sticks. Grooves can be spaced wider or replaced with a shallow channel if you prefer less texture. It works on a nightstand or shelf where a small, low-profile holder is needed without extra bulk.
Star-Impressed Slab Candle Holder
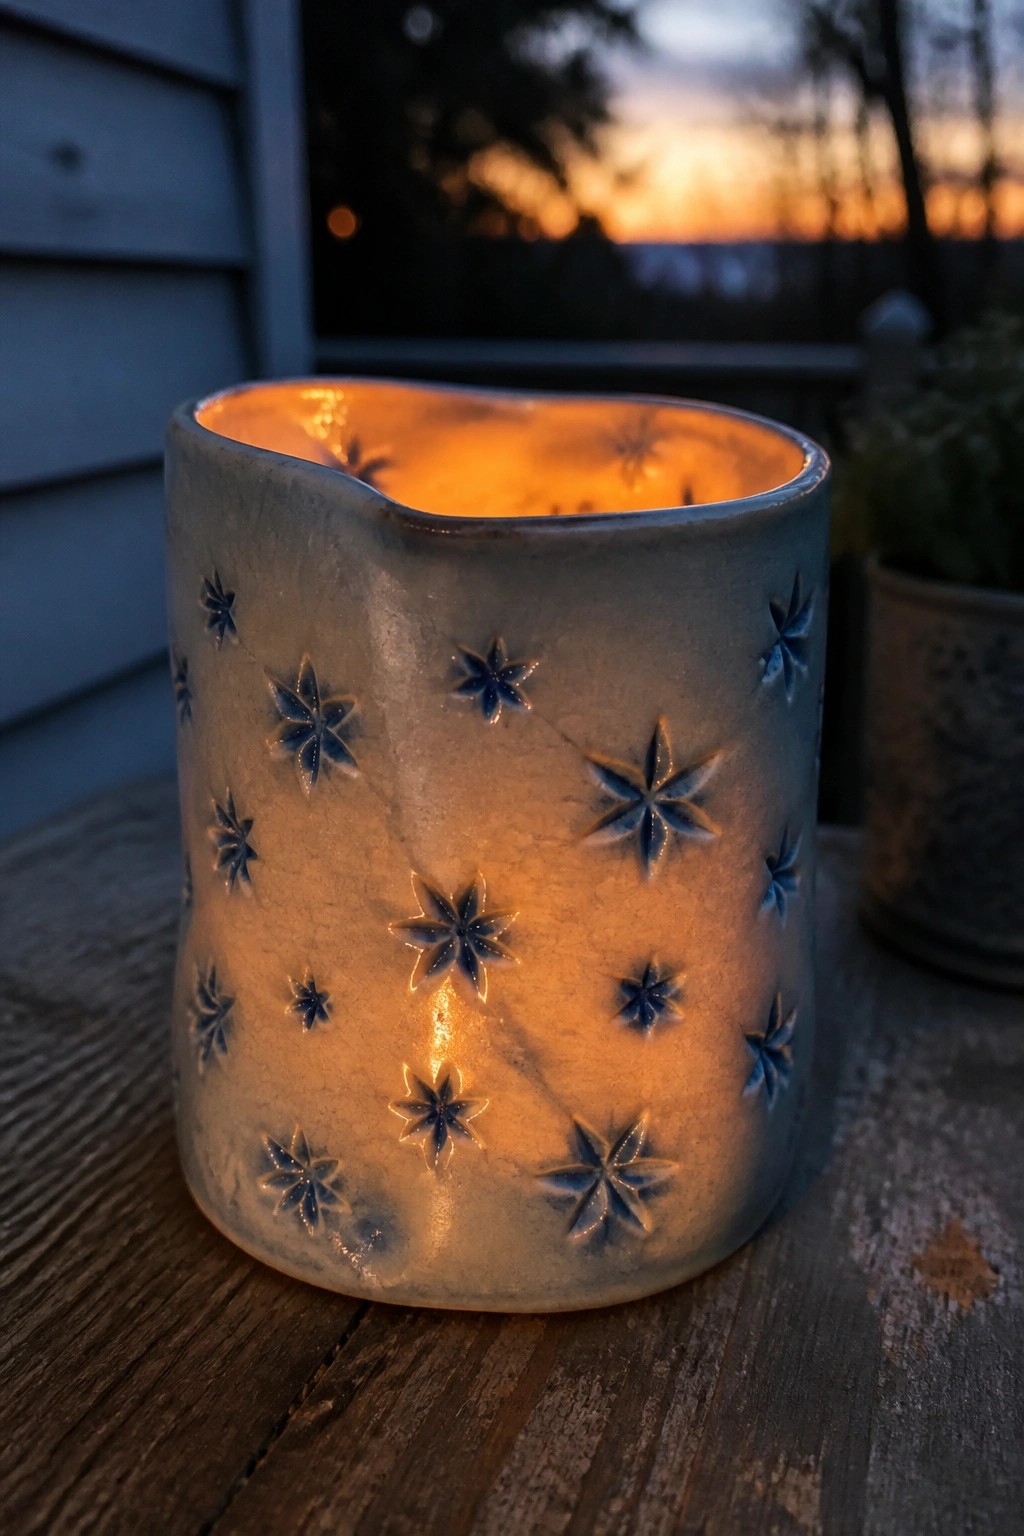
A simple cylinder made from a rolled slab works as the base for this candle holder. Repeated star shapes are pressed into the walls so light from a tea light shines through the pattern when the candle is lit. The rim is cut with a gentle wave, and a matte blue-gray glaze covers the surface without filling the recessed stars.
What makes this idea useful is how the impressed stars double as both decoration and light vents without extra carving. The compact size fits on a side table or mantel and uses a single slab plus basic stamps. You could swap the stars for leaves or circles, or stretch the same cylinder into a taller version for a different height. The stamping approach also transfers directly to a slab tray or small lidded box.
Pear-Shaped Ring Dish
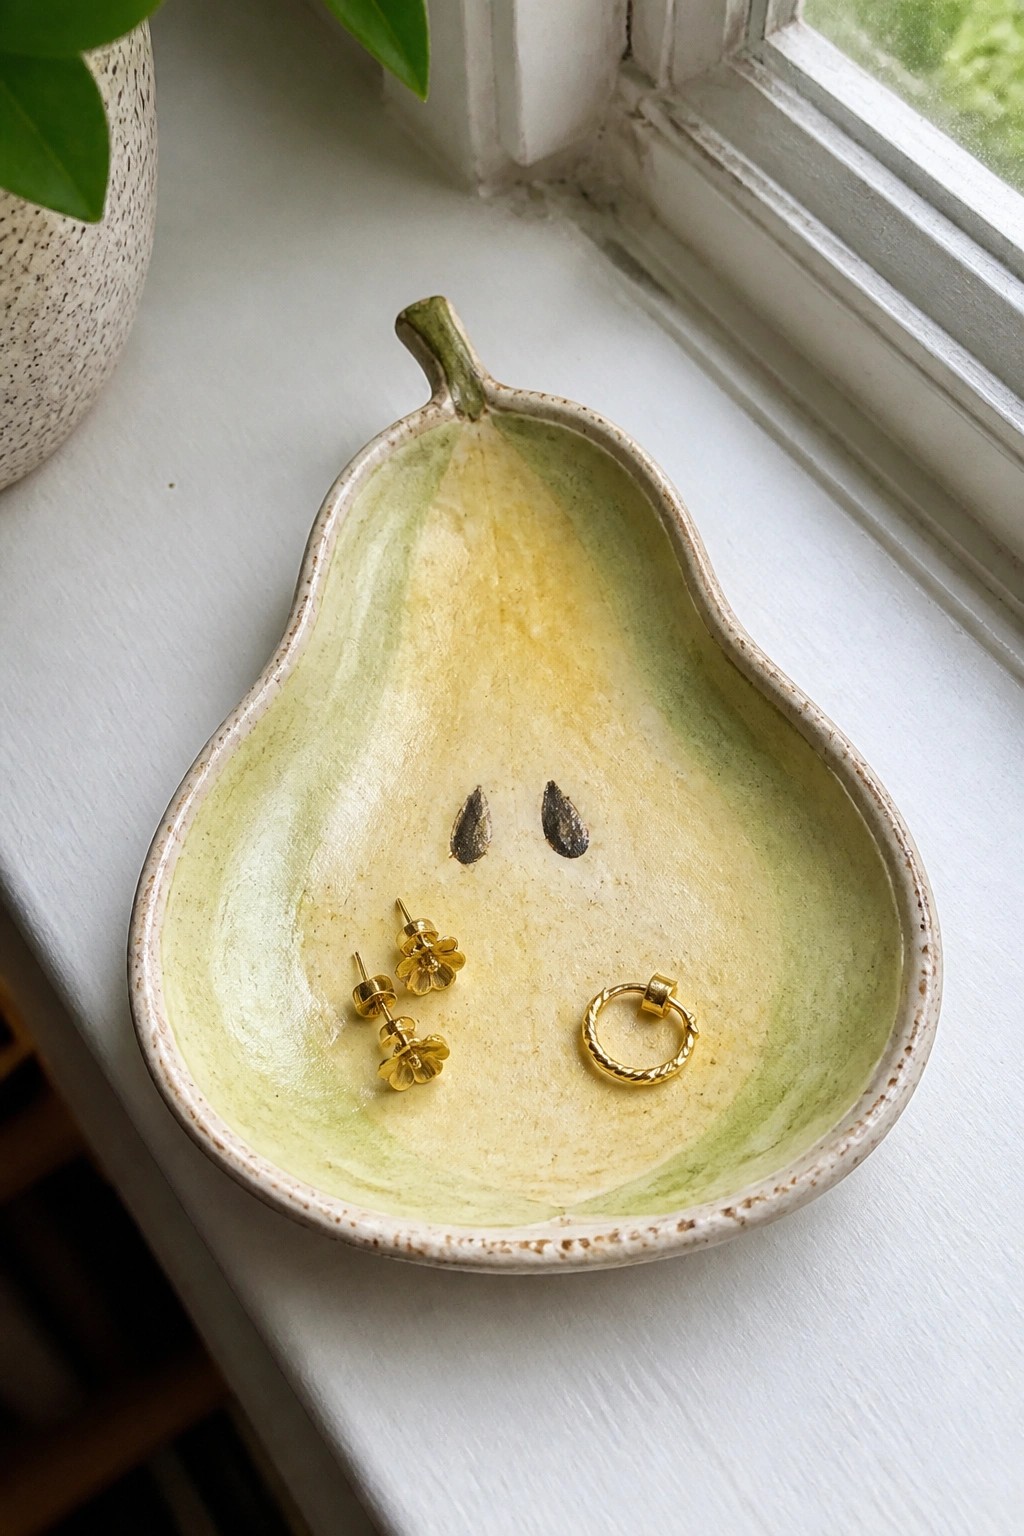
A pear-shaped ring dish gives you a compact tray for holding earrings, rings, and small studs. The clay is formed into a shallow, rounded bowl with a short stem at the top to suggest the fruit shape. Inside, a soft green-to-yellow glaze creates a simple gradient while two small dark marks add minimal detail near the center. This idea falls into the ring dish or trinket tray category and stays easy to produce with basic handbuilding.
The small scale makes this easy to adapt into other fruit shapes like apples or lemons using the same slab or pinch method. It works well on a nightstand or bathroom counter where everyday jewelry needs a dedicated spot. For a gift, you can change the glaze colors or add a different painted accent without changing the overall form. The fruit outline helps the piece stand out in photos compared to plain round trays.
Clay Cactus Figurine with Matching Dish Base

A small cactus form built from clay creates a compact decorative object that stands on its own. The main body is a rounded vertical column with two short curved arms added to one side, all formed into a recognizable saguaro shape. A green glaze with darker speckles covers the surface and settles into the texture, while the separate low terracotta dish underneath acts as a stable base. This fits the decor object category and can be made using basic handbuilding methods like slabs or coils.
The small scale makes this easy to adapt by changing the number of arms or trying a different glaze color on the same shape. It works well as desk or shelf decor because it takes little room and needs no special function. You could rework the idea into a ring holder by widening the top or turn the dish into a small tray for keys. A piece like this stands out on Pinterest when the glaze pools unevenly to suggest natural variation.
Cone Ring Holder with Low Tray Base
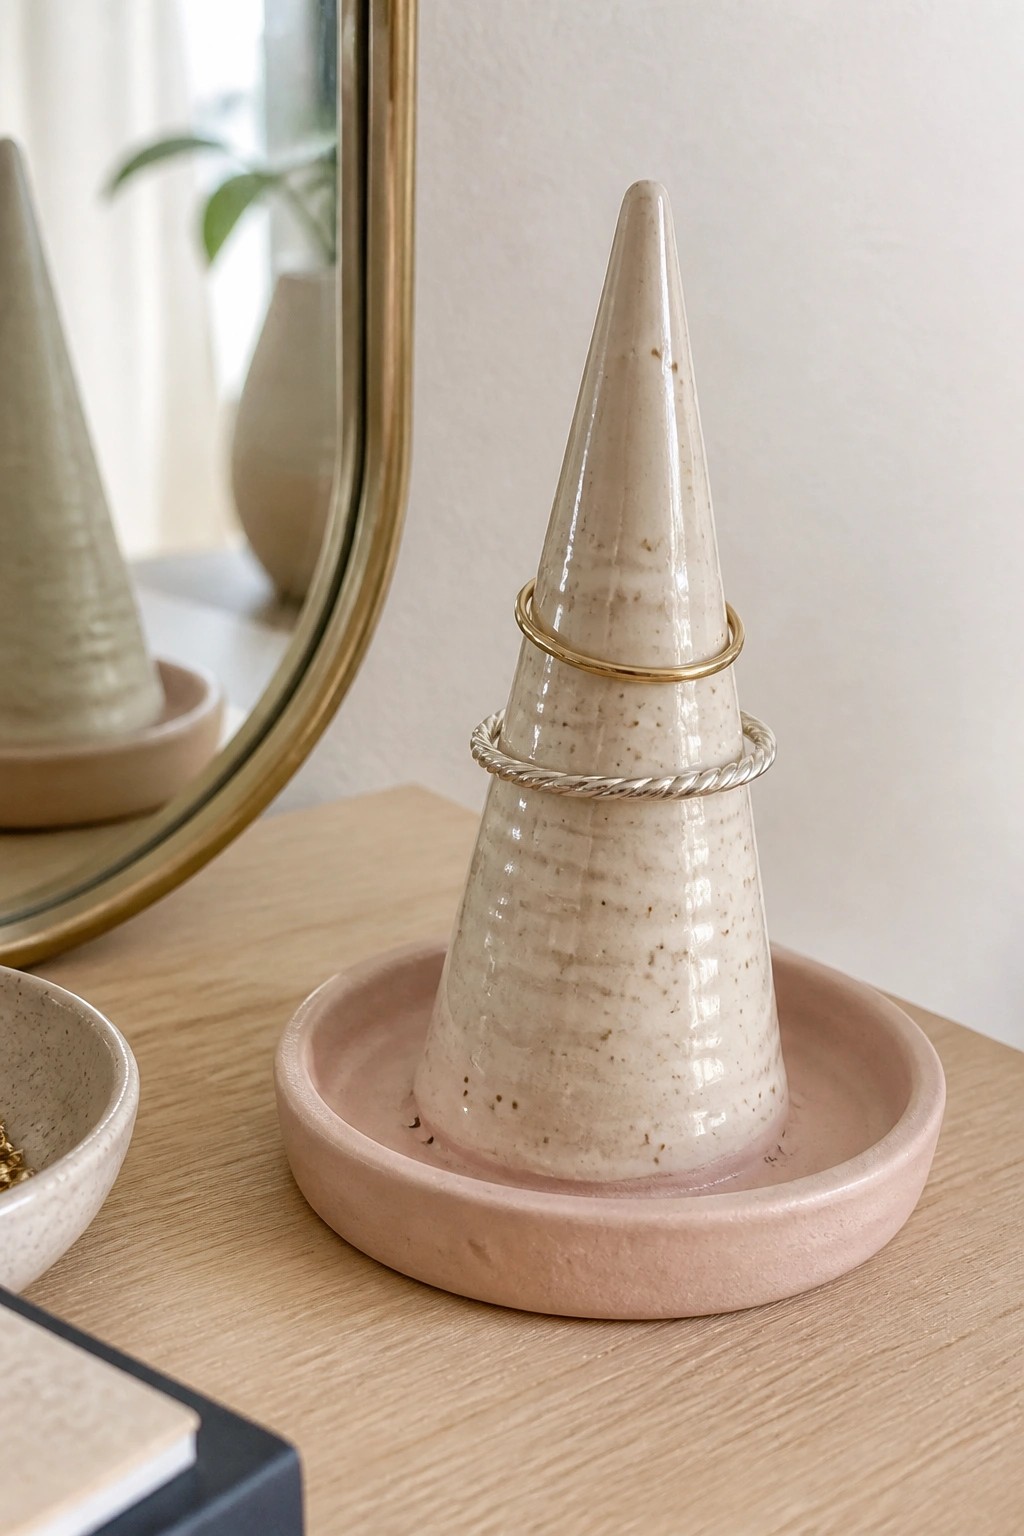
A tall tapered cone mounted on a shallow round tray creates a simple ring holder that keeps pieces organized at different heights. The cone lets rings rest at various levels so they do not stack on top of each other, while the tray underneath catches anything that slides off and offers space for a few extra small items. Speckled glaze on the cone and a soft matte finish on the tray give the set a quiet, consistent look without extra decoration.
What makes this idea useful is that the whole form stays compact enough to fit on a nightstand or vanity without taking much room. You can shorten the cone for a lower profile or widen the tray if you want more flat storage space. The same basic shape works as a necklace stand if you add a small loop at the top or as a holder for hair ties and clips by making the cone shorter and wider.
Cone Ring Holder on a Slab Tray
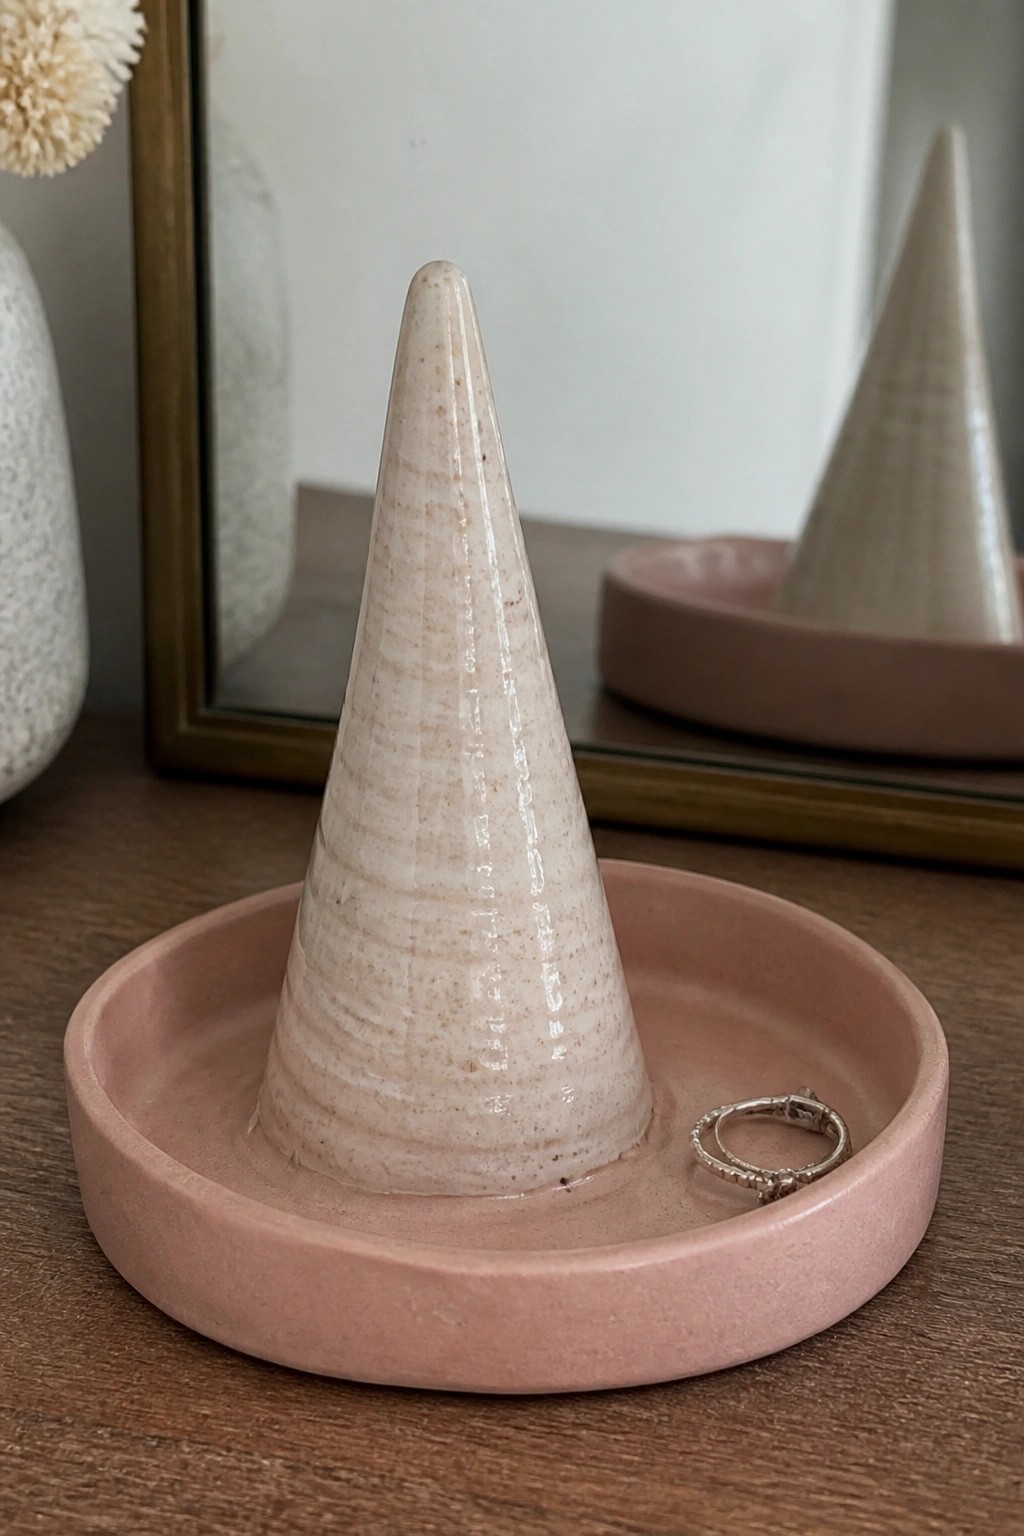
A ring holder built from slabs starts with a flat circle for the base and a simple cone shape attached in the center. The low tray edges keep small items contained while the cone gives rings a place to rest upright. Speckled glaze on the cone and a solid matte finish on the tray create contrast without extra decoration. This two-part form keeps the piece stable on a flat surface.
The small scale works well on a dresser or bathroom counter where space is limited. You can adapt the idea by changing the tray color, adding a stamp texture before assembly, or shortening the cone for fewer rings. For a gift, make a matching pair in different glaze colors. The upright shape keeps rings visible and organized better than a flat dish.
Frequently Asked Questions
What tools and materials do I need to start these slab pottery projects? You will need basic pottery clay such as stoneware or earthenware, a rolling pin or slab roller for creating even sheets, a work surface like canvas or a board, a knife or clay cutter, a scoring tool, slip made from the same clay mixed with water, and simple templates like cardboard shapes. Many of the 24 projects also suggest items like rulers, sponges, and wooden ribs that help refine forms while teaching precise slab handling.
How thick should I roll my clay slabs for beginner projects? Aim for slabs between one quarter and three eighths of an inch thick. This thickness provides enough strength for construction without becoming too heavy or prone to cracking. The projects emphasize rolling evenly and checking thickness with guides such as wooden strips so learners develop consistent technique from the start.
How do I keep slab built pieces from warping or cracking while drying? Dry pieces slowly and evenly by covering them loosely with plastic for the first day or two then gradually exposing them to air. Place them on a flat surface and turn them occasionally. The projects build this skill through simple forms like trays and boxes that let beginners practice controlled drying before moving to more complex shapes.
Do these projects require a kiln or can they be completed without firing? Most projects are designed to be fired in a kiln for durability, yet several early ones can be finished as air dry clay models if you do not have access to firing. The focus stays on handbuilding skills such as joining slabs and creating stable structures so the learning carries over when you later fire pieces at a studio or community center.
What common mistakes should beginners avoid when joining slab pieces? Always score both surfaces thoroughly and apply slip generously before pressing pieces together. Avoid joining dry or leather hard clay and support seams with extra clay coils inside corners. The 24 projects progress from flat constructions to three dimensional forms so learners repeatedly practice these joining steps and see how proper seams prevent separation during drying and firing.

Pottery Path is my cozy corner of the internet where I share clay ideas, pottery inspiration, and simple projects you can recreate at home. I love exploring everything from air dry clay to handbuilt pottery to cute minis that brighten your day. My goal is to make clay crafting feel easy, fun, and welcoming for anyone who wants to try it.
You will find beginner friendly tutorials, creative pottery painting ideas, and lots of warm inspiration for slow and happy crafting. If you enjoy hands on creativity, this space will feel like home.