I started trying slab pottery for kitchen pieces because it seemed like a straightforward way to shape clay with just a few basic tools.
It lets me make things like plates or containers that I can actually use without needing a pottery wheel.
Over the years I’ve found some methods that work well even when I’m short on time or space.
This list includes 23 projects that focus on simple everyday items for the kitchen.
They feel like realistic options if you want to try making a few replacements for what you already have.
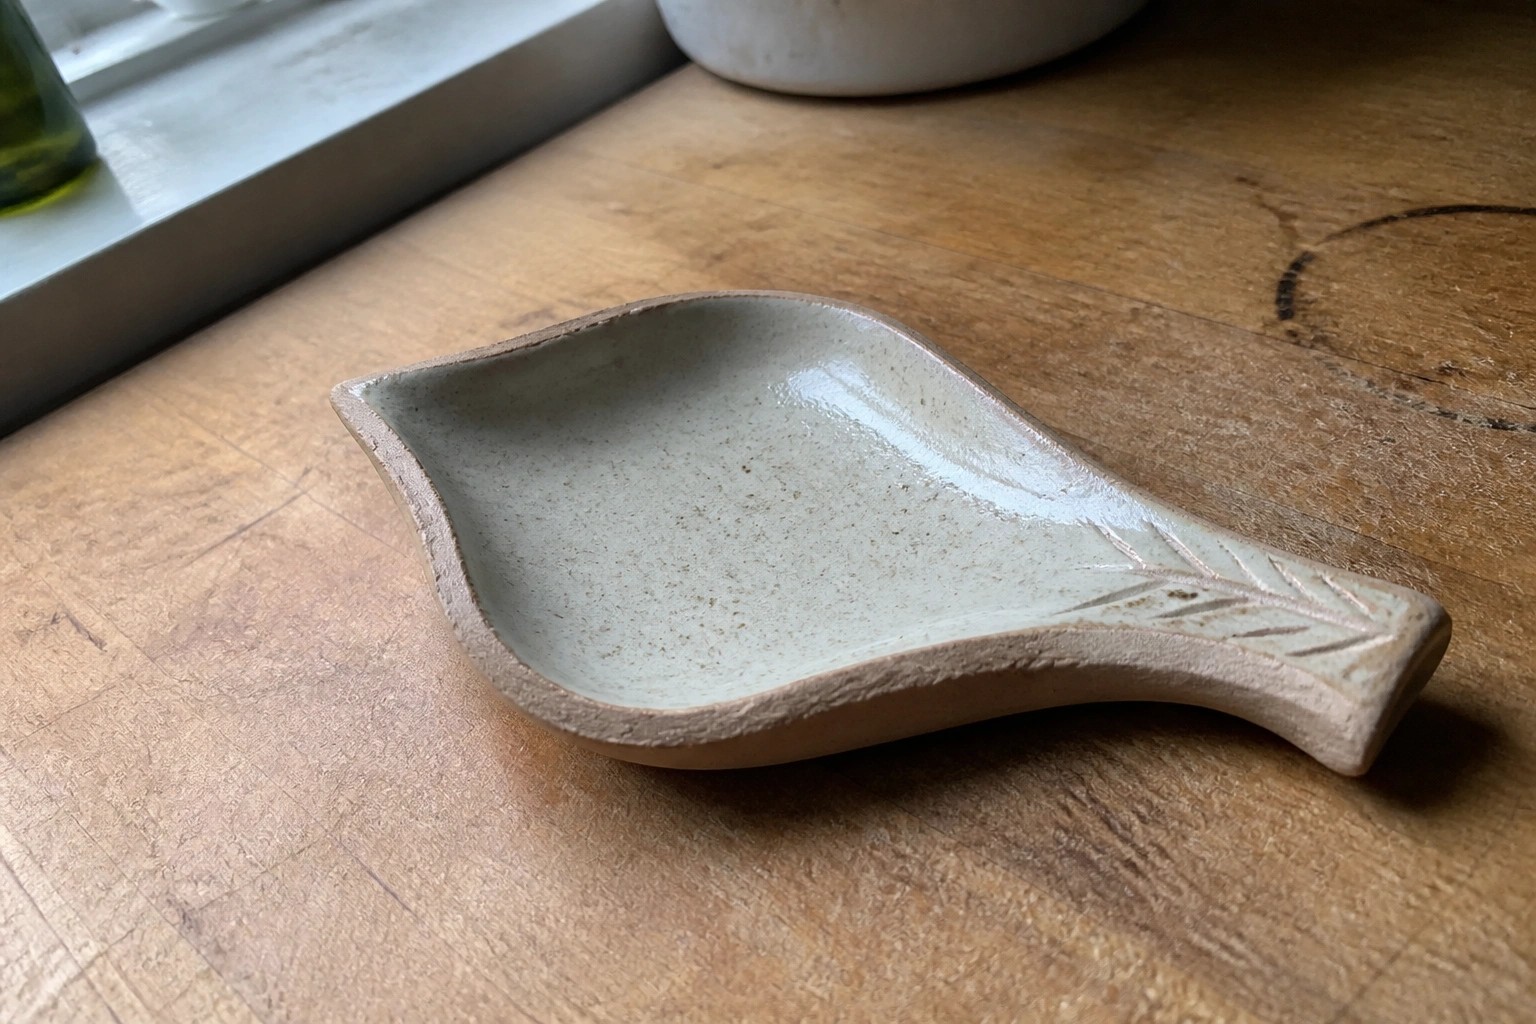
Leaf-Shaped Spoon Rest
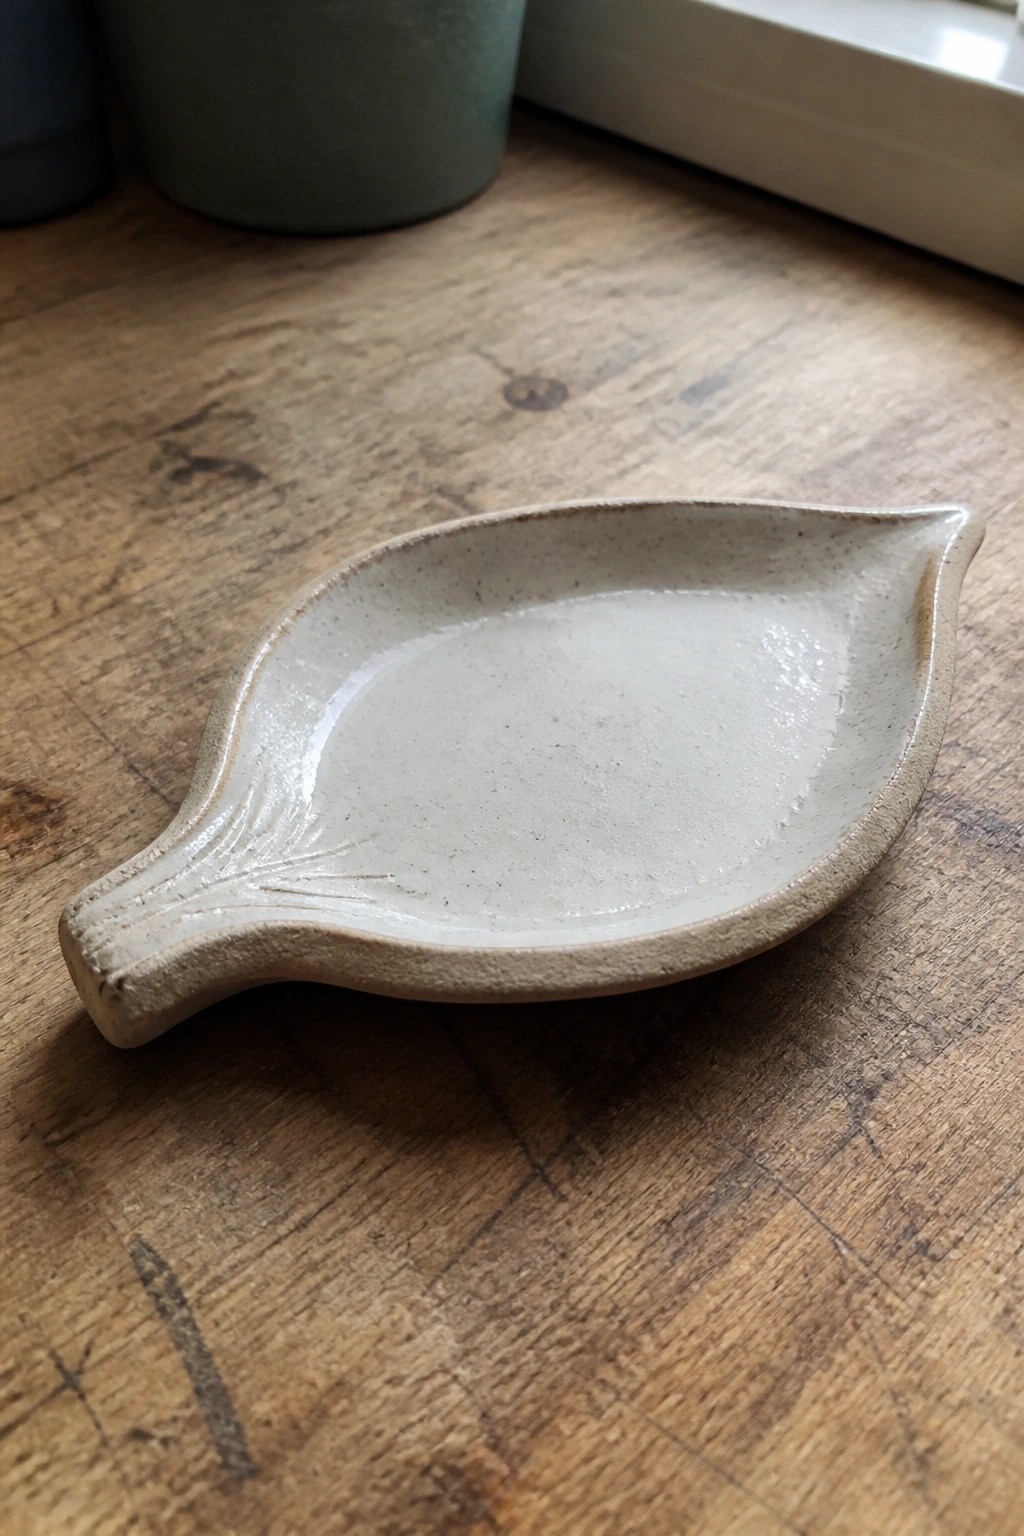
A leaf-shaped dish formed from a rolled slab makes a practical spoon rest or small kitchen tray. The outline follows a simple pointed leaf with one end pinched into a short stem handle, and shallow lines pressed in to show veins. The inside gets a light coat of glaze for easy cleaning while the rest stays unglazed for a natural texture.
What makes this idea useful is how the leaf form sits flat on a counter without taking much space. You can scale it up for a bigger serving dish or swap the vein pattern for a different plant shape like sage or maple. For a gift, something like this works well because it stays useful in the kitchen but still looks handmade. The small scale also means it uses very little clay and fires quickly.
Slab Built Square Mug with Striped Finish
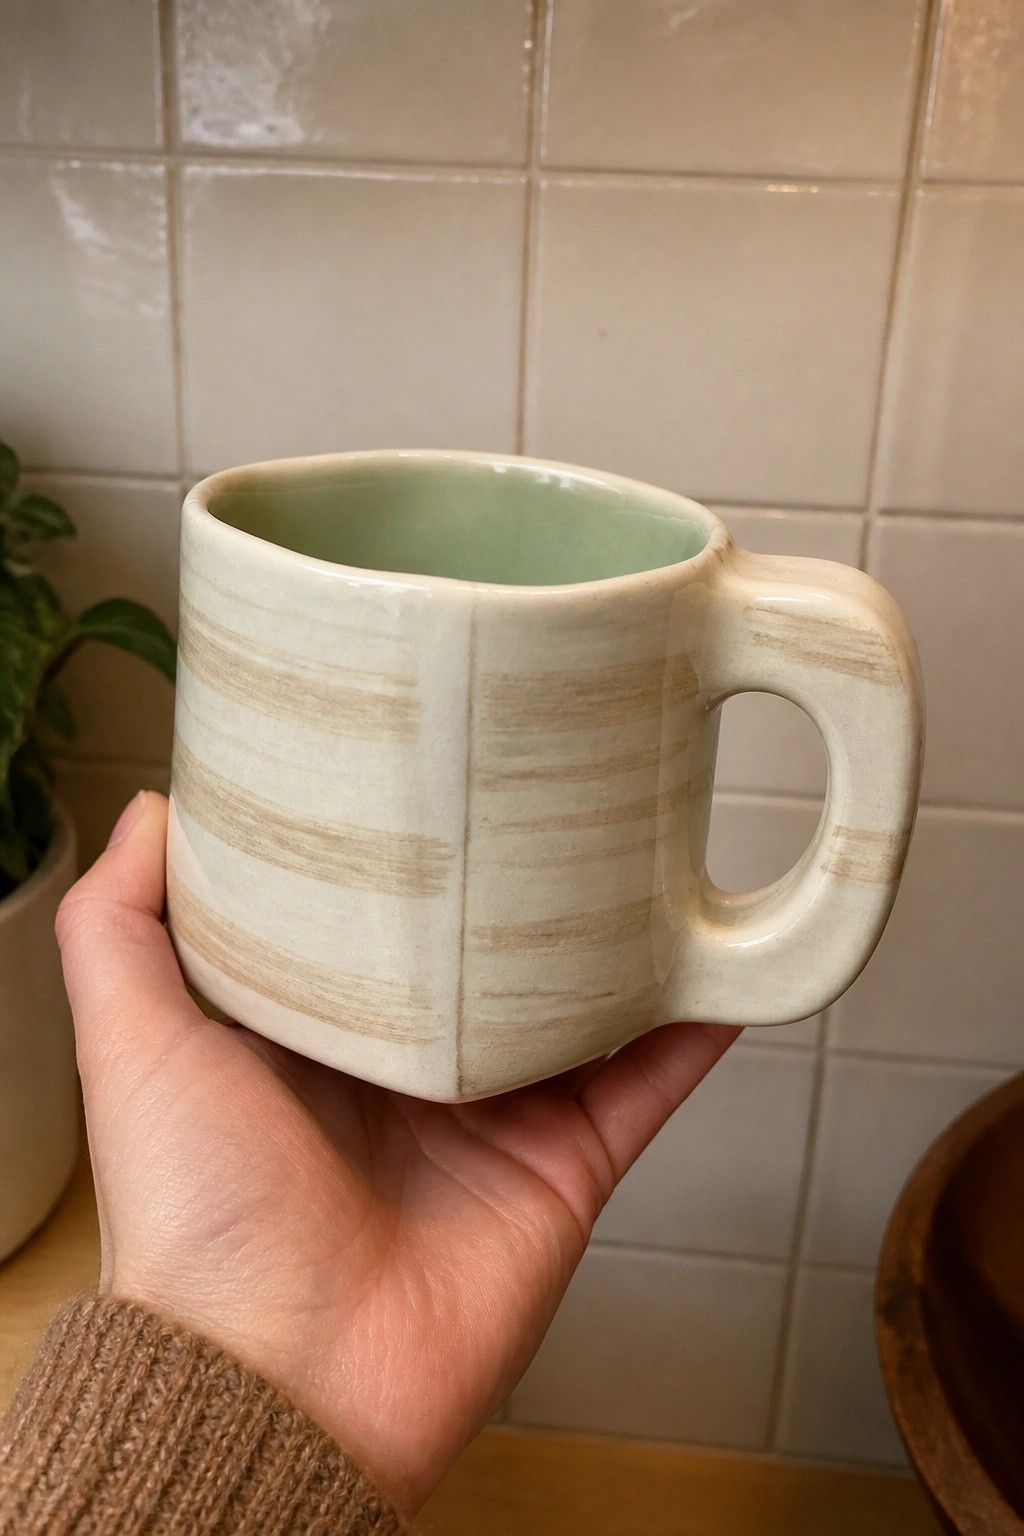
A slab mug starts with flat clay pieces cut to shape and joined at the edges to form straight sides and a boxy profile instead of a curved wheel-thrown body. Horizontal stripes are added by brushing slip or underglaze across the surface before the final glaze layer, creating bands that sit slightly proud of the clay. The interior is coated in a single contrasting glaze while the exterior stays mostly light with the stripes showing through, and a simple loop handle is attached at one corner. This approach works well for anyone making basic kitchen mugs from slabs.
What makes this idea useful is the flat sides that give you clean space to repeat a simple stripe pattern without fighting a curve. You could scale the same template down for smaller cups or widen it for a larger breakfast mug while keeping the same construction steps. In daily use the squared shape sits steady on counters and shelves, and the two-tone glazing keeps the inside practical for drinks. The same slab layout could be adjusted to make a small pitcher or creamer by changing the top edge and adding a spout.
Divided Slab Built Salt Cellar
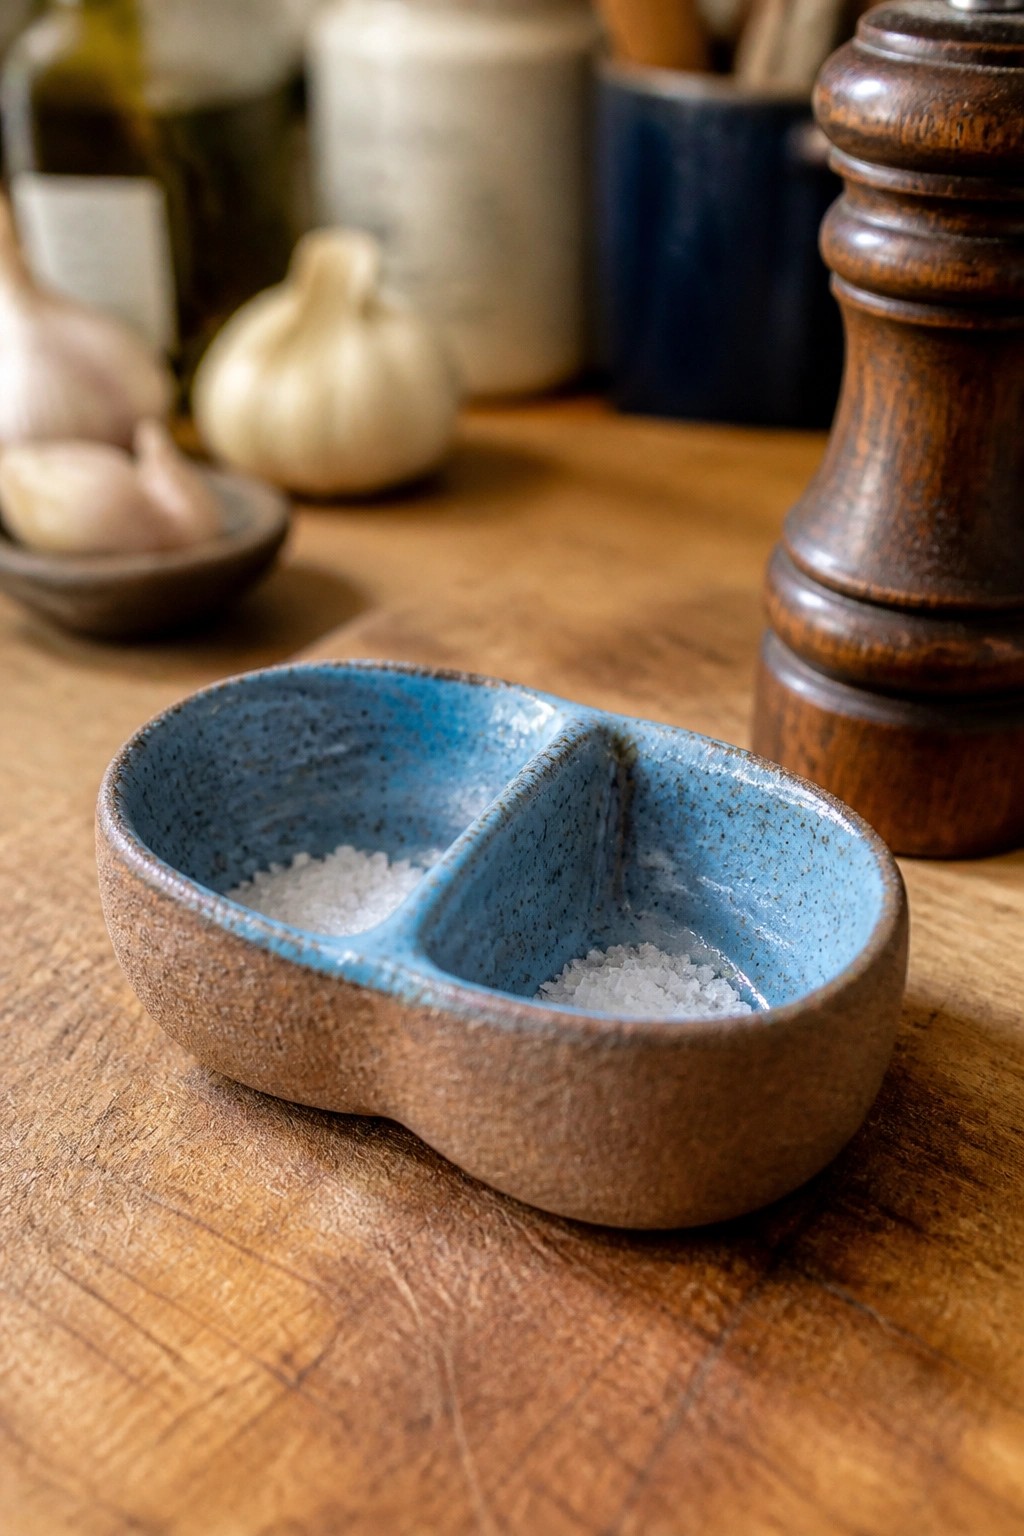
A small divided dish formed from clay slabs makes a practical salt and pepper cellar for everyday kitchen use. The oval shape holds two separate rounded compartments that sit low to the counter, keeping the contents easy to reach with a pinch. The speckled blue glaze covers the interior while the exterior stays in the natural clay color, giving a simple contrast that highlights the handmade form without extra decoration.
What makes this idea useful is the way the divided layout keeps two seasonings together in one compact piece. You can adjust the width of each section when building the slabs to fit larger or smaller amounts. In a kitchen this shape works well next to the stove or on a dining table where space is limited. The same basic form could be lengthened into a three-compartment version for additional spices or herbs.
Citrus Inlay Slab Tray
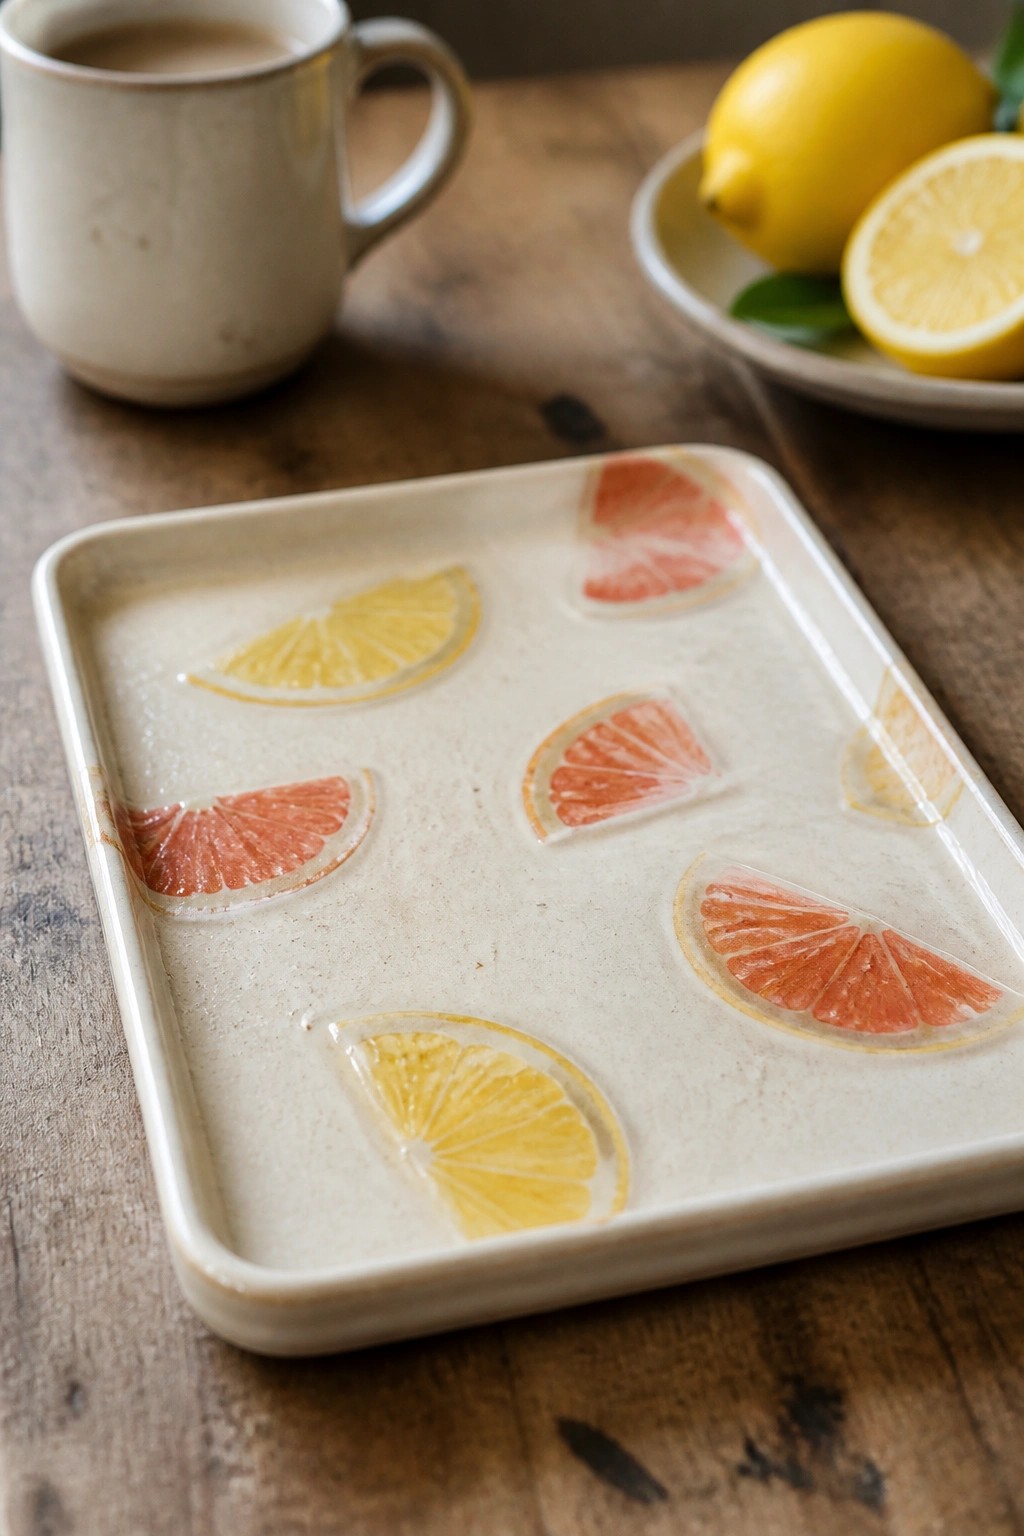
A flat rectangular tray built from a simple slab of clay can hold inlaid slices of lemon and grapefruit to create a useful kitchen piece. The fruit shapes sit slightly raised with their own colored glazes while the base stays in a single matte tone for contrast. This turns a basic tray into a functional item that works for holding mugs, small produce, or kitchen tools.
What makes this idea useful is how the inlaid slices give color and pattern without extra tools or complex carving. You could adapt the same slab method to make smaller versions as spoon rests or larger ones as cheese boards. In a kitchen this shape keeps things practical while the fruit detail makes it easy to spot on a shelf or counter. For a change try using only one type of citrus or arranging the slices in a single row instead of scattered.
Freeform Dip Bowl
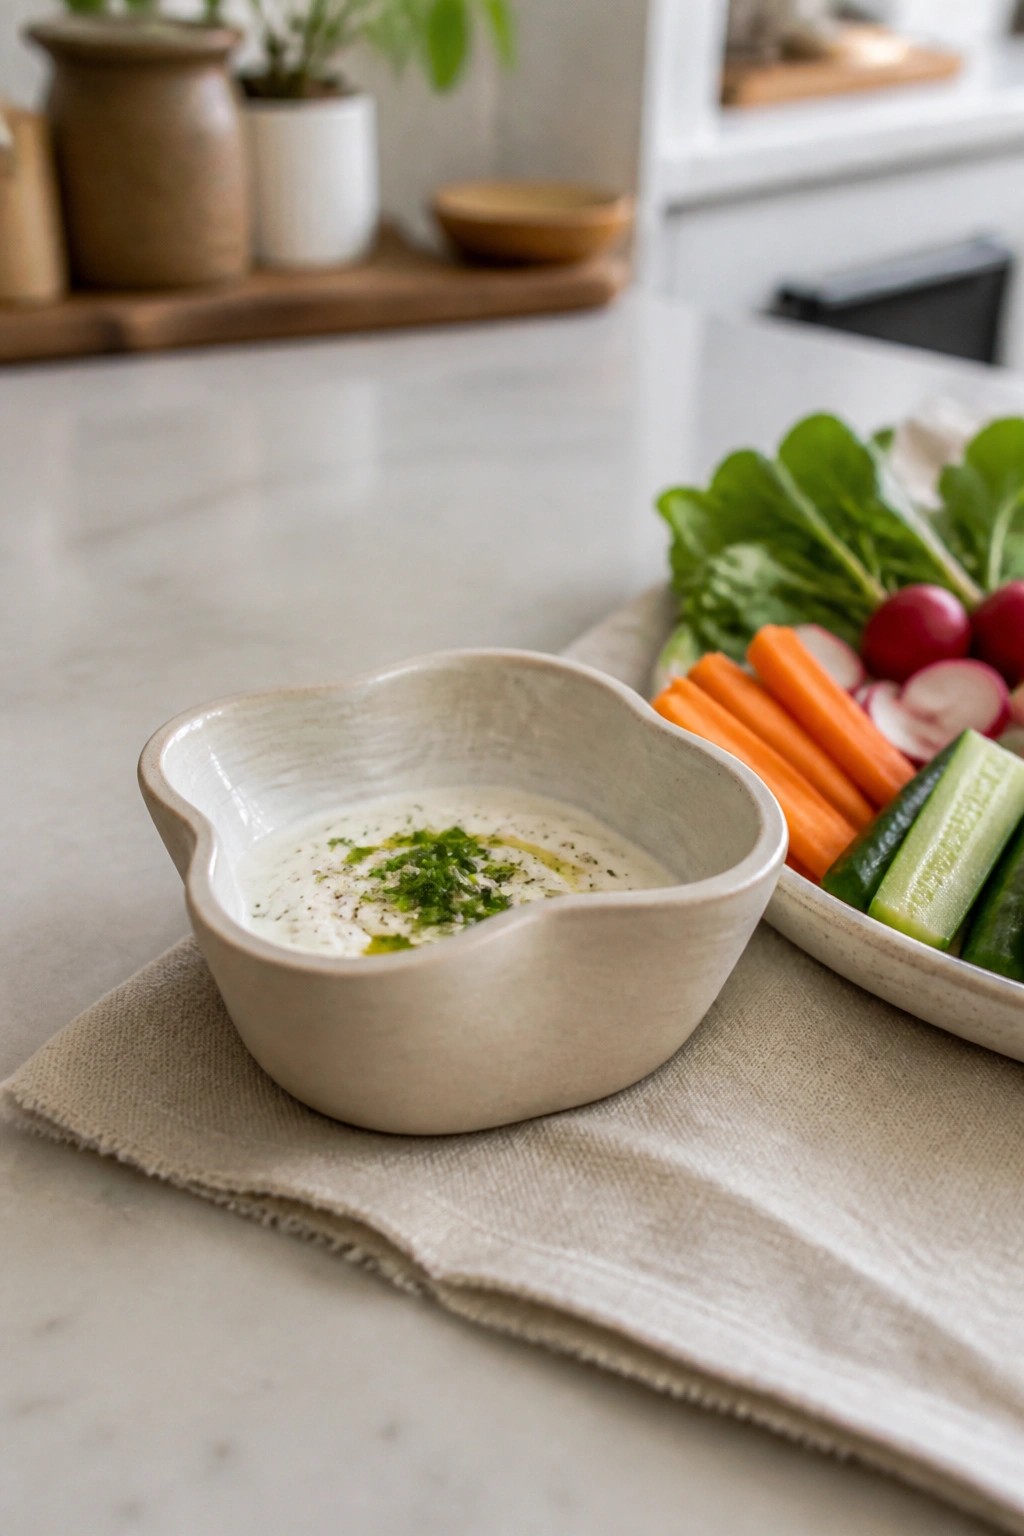
A small slab-built bowl with a wavy, pinched rim makes a practical server for dips or sauces on the counter. The matte neutral glaze lets the irregular shape stand out without competing with food or other dishes. Cutting a simple curved outline from a slab and gently folding up the edges creates this relaxed form that still holds its shape once fired.
What makes this idea useful is how the soft rim gives it an easy, unfussy look next to a vegetable plate or snack board. You can change the curve depth on the next version to make it more oval or add a small handle notch for pouring. In a kitchen this size works for everyday use without taking up much space, and the same slab method scales quickly to a set of two or three matching bowls.
Small Ceramic Creamer for Daily Coffee or Tea

A small ceramic creamer pitcher works well as a simple kitchen piece for pouring milk or cream into drinks. The compact body, short spout, and looped handle create a balanced form that pours steadily without excess dripping. An earthy brown glaze gives the surface a matte finish that hides minor marks from daily use. This type of project fits the category of basic serving items that can be made from slabs and kept modest in size.
What makes this idea useful is how the shape adapts to other kitchen needs, such as a small gravy boat or syrup server. You can change the glaze to a lighter tone or add a simple band of color along the rim to match existing dishes. In a kitchen, this kind of piece stores easily on a shelf or tray next to mugs. For a gift, something like this pairs naturally with a matching bowl or small sugar jar.
Covered Butter Dish from Slabs
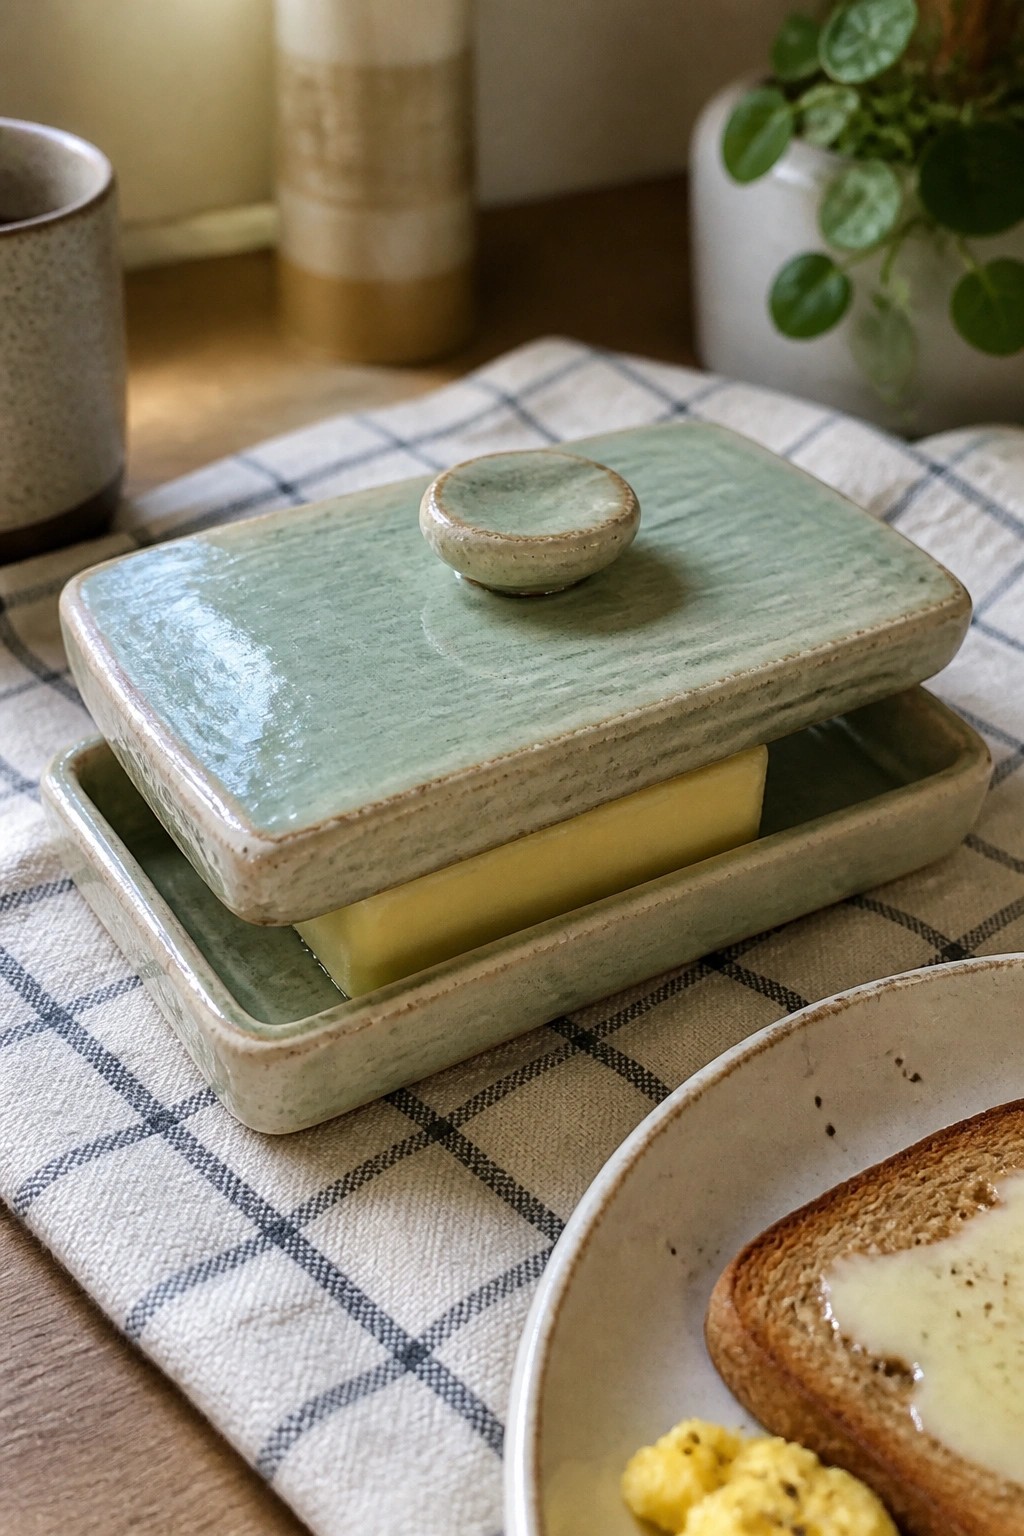
A rectangular butter dish built from slabs includes a shallow tray base and a low lid with a small knob handle. The soft green glaze shows light variations across the surface that emphasize the slab texture without added decoration. This shape holds a standard stick of butter while keeping it covered on the counter.
What makes this idea useful is how the simple slab construction lets you adjust the length and width to fit different butter sizes or even small cheese portions. You could change the knob to a pulled handle or switch to a matte white glaze to match existing dishes. In a kitchen this piece stays practical for daily use and adapts easily into a small serving tray for dips or spreads.
Clay Slab Measuring Spoons
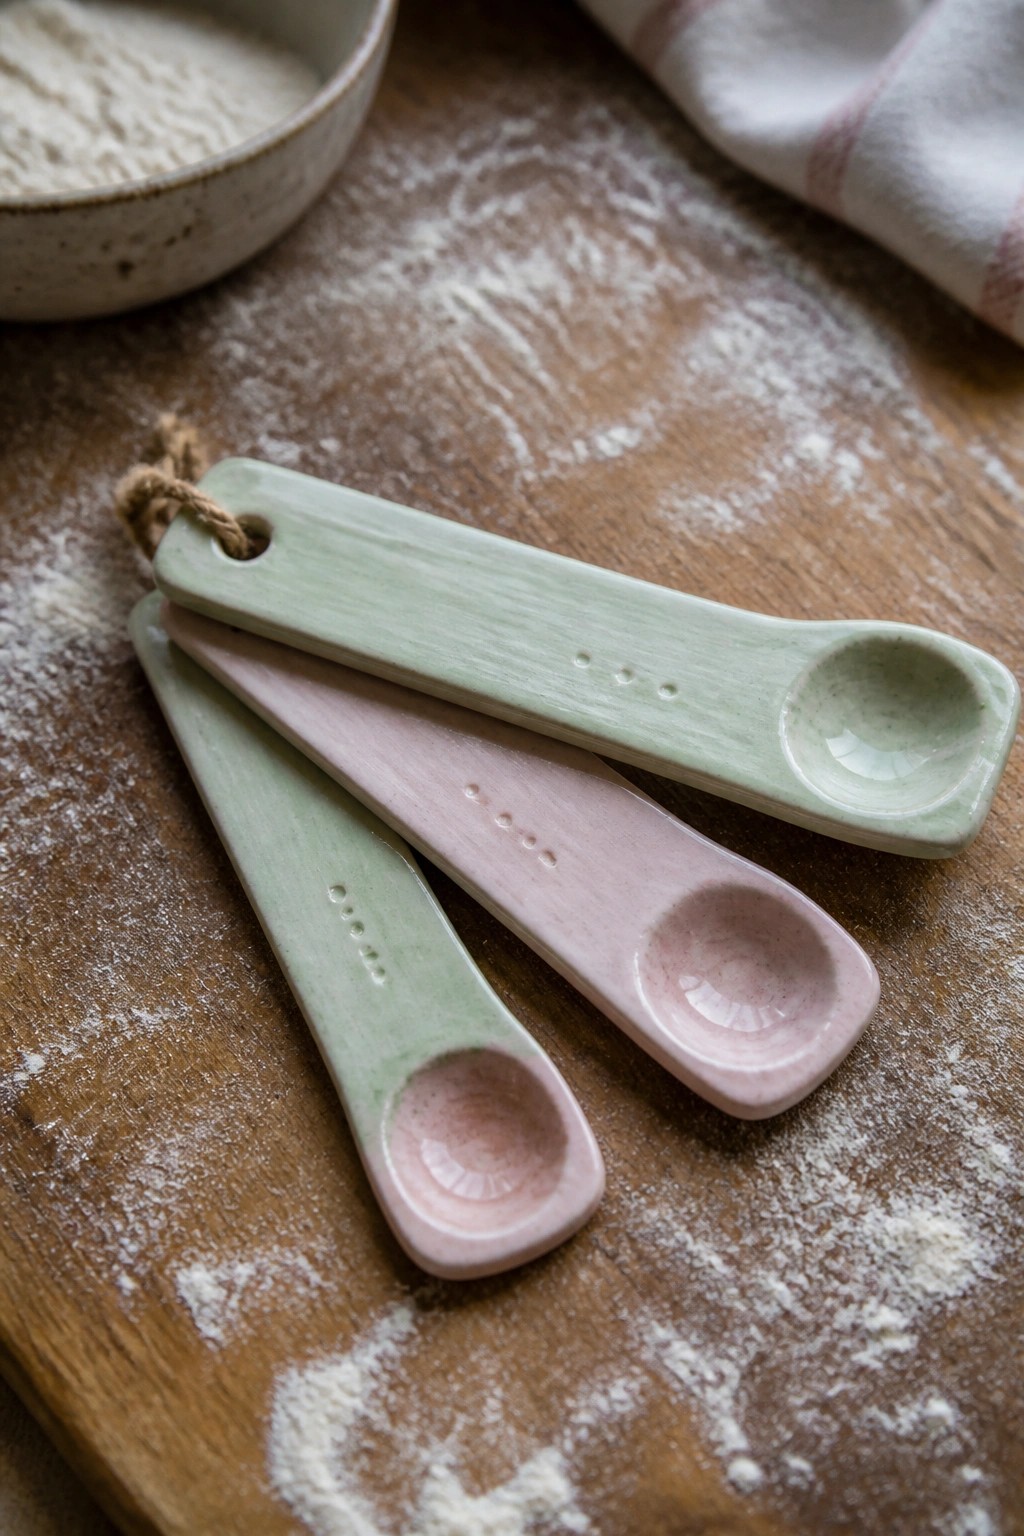
These measuring spoons are formed from flat clay slabs cut into narrow rectangles, then shaped at one end into small rounded bowls. Dots are pressed into the handles to mark different measurements, and the pieces are finished with soft matte glazes in pale green and pink. The straightforward slab construction keeps the handles flat and easy to hold while the simple bowl shape works well for scooping dry ingredients.
What makes this idea useful is how quickly you can produce a full set by cutting several lengths from the same slab. In a kitchen these spoons fit nicely into a jar or drawer and can be sized to match standard measures like teaspoon and tablespoon. The same approach adapts easily to coffee scoops or spice spoons by changing only the bowl width and handle length.
Painted Slab Coasters for Kitchen Tables
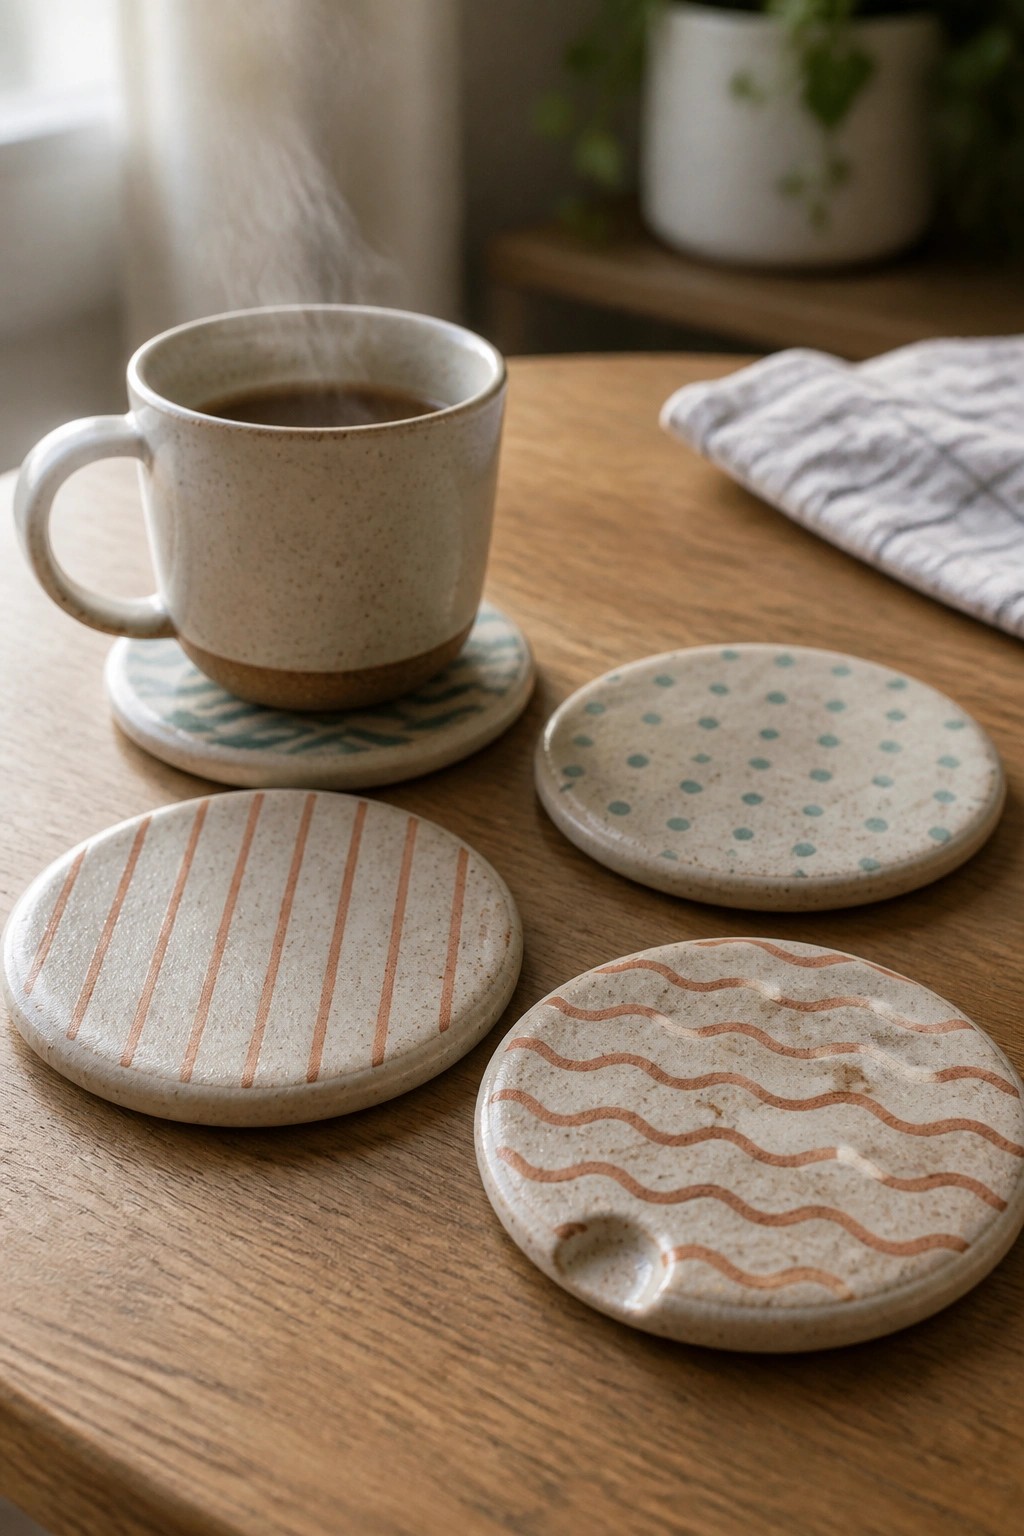
Flat clay slabs cut into circles make quick coasters that keep hot mugs or cold glasses from marking wood surfaces. These examples use simple painted lines, dots, waves, and leaf shapes in muted tones on a speckled clay body, with one design including a small notch for lifting. The round shape and thin profile come directly from rolling out even slabs, cutting with a template, and adding surface decoration before firing.
What makes this idea useful is how the same slab base works for any pattern you already have on hand, whether stripes, dots, or freehand waves. The small scale keeps material use low, so you can produce a full set in one session and still have room to experiment with color combinations. You could scale the same cutout method up slightly for trivets or add a shallow rim to turn them into spoon rests. In a kitchen, the neutral clay and simple motifs blend with most dishware without competing for attention.
Square Slab Utensil Holder with Carrot Motif
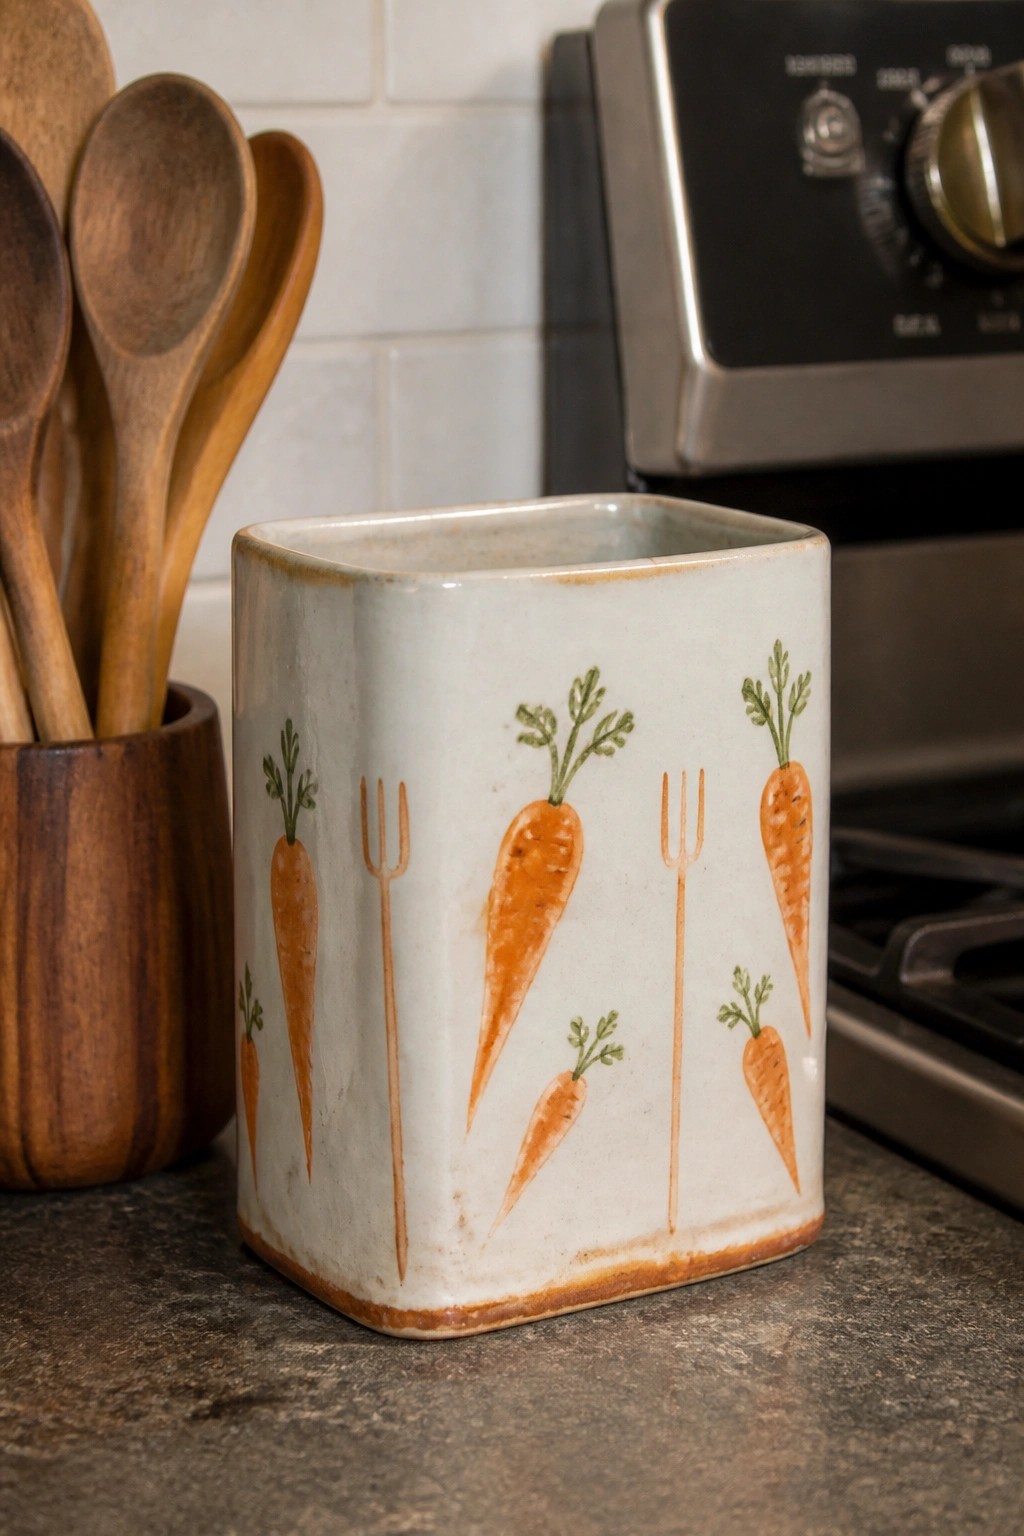
This project uses simple slab construction to create a square ceramic holder for kitchen utensils. The flat sides provide good space for painting carrots in orange with green tops and a few garden forks. A light speckled glaze covers the surface and leaves the edges slightly brown where the clay shows through. The shape stays compact enough to sit on a counter without taking much room.
What makes this idea useful is the flat sides that give clear areas for repeating a painted motif like carrots or other vegetables. You could change the design to herbs or simple lines and still use the same square form. The holder works well next to a stove or sink for spoons and spatulas. The slab method also lets you make a shorter version for smaller tools or a taller one for whisks and tongs.
Slab Built Rectangular Herb Planter
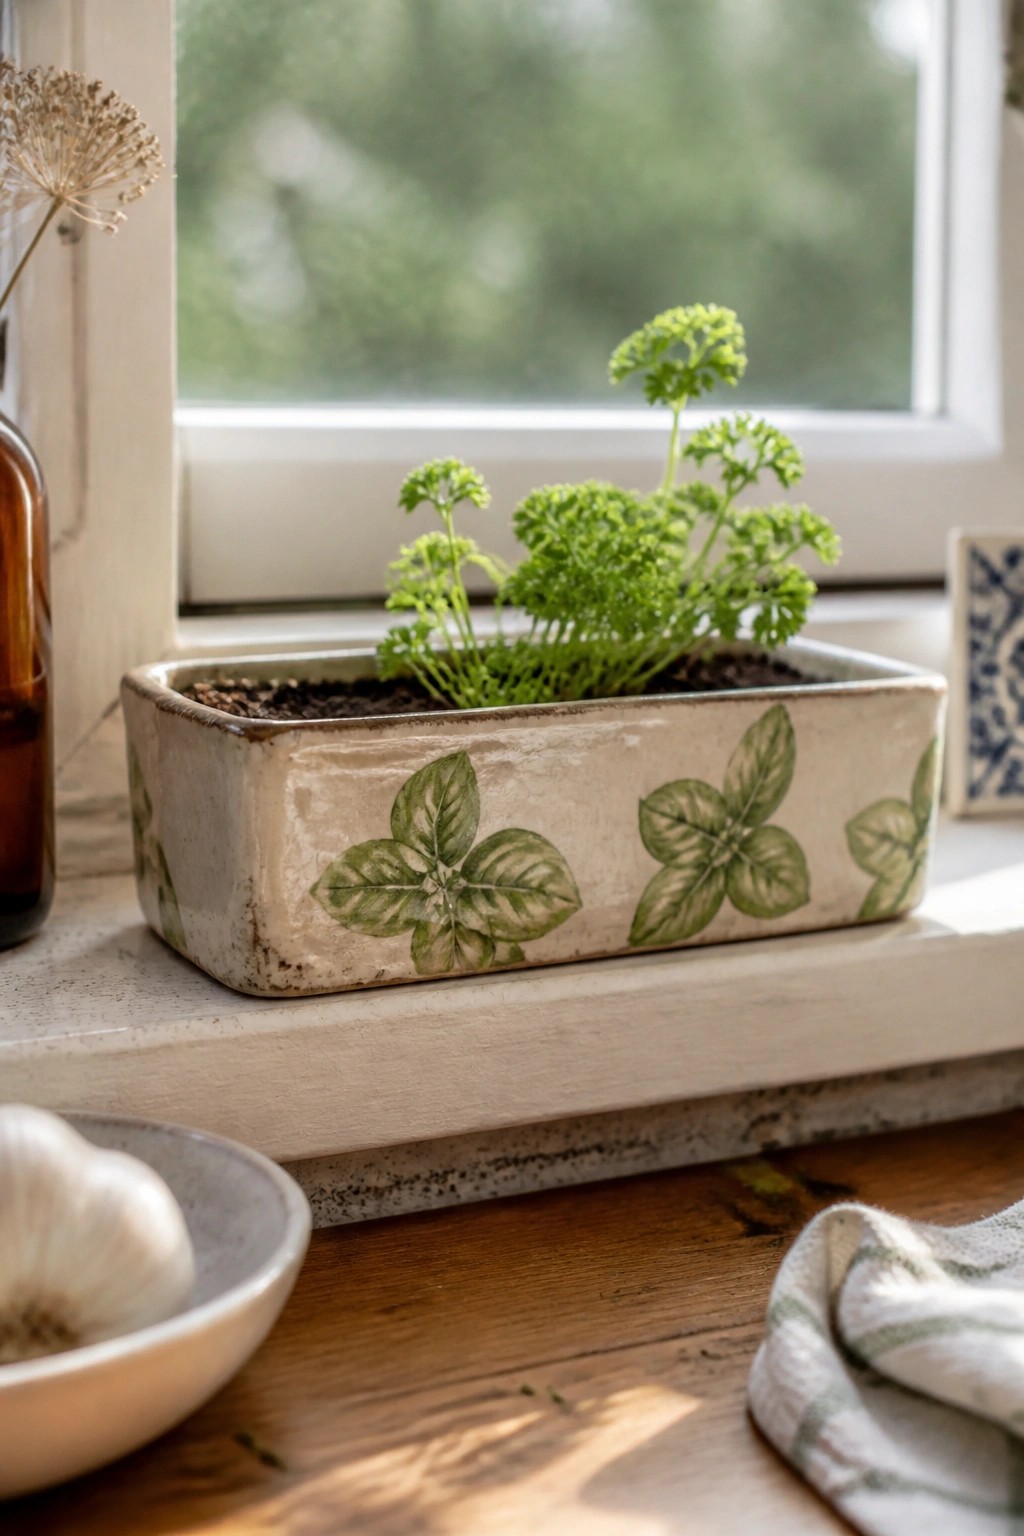
A rectangular slab planter gives a straightforward way to grow small kitchen herbs on a windowsill. The flat sides provide good surface area for repeating painted leaf motifs that reference basil or similar herbs. An off-white glaze keeps the focus on the green leaf designs while the form stays low and stable enough to hold soil and plants without tipping. This turns a basic tray shape into a dedicated spot for fresh parsley or other cooking herbs.
What makes this idea useful is how the narrow rectangle fits tight spaces like windowsills or narrow counters. You can repeat the same leaf motif in different sizes or switch to other herb silhouettes to match what you actually grow. For a gift, something like this works well paired with seed packets. The painted detail helps the piece photograph clearly for kitchen project boards.
Angular Slab Gravy Boat
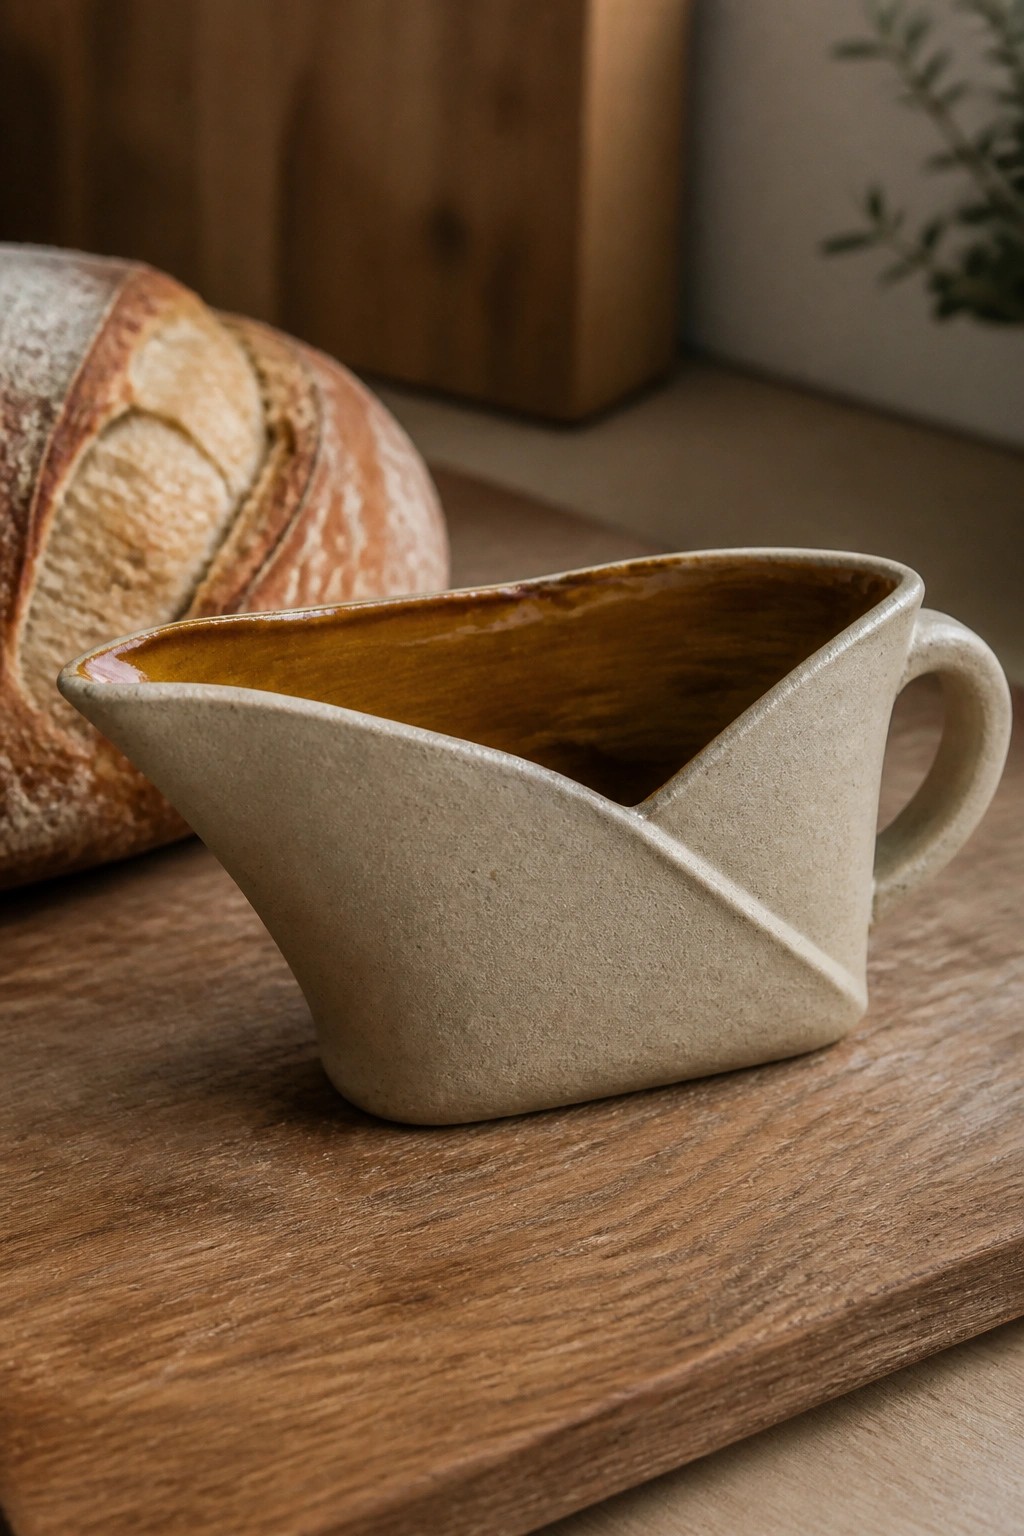
A handbuilt ceramic gravy boat gives you a functional kitchen piece made from flat slabs joined at angles. The design uses a wide front opening that tapers into a pouring lip and adds a simple side handle for control. The matte stoneware body paired with a glossy interior glaze keeps the surface practical for sauces while the sharp edges create visual interest without extra decoration. This approach fits the slab pottery category of tableware that relies on basic construction rather than wheel throwing.
What makes this idea useful is how the folded slab shape naturally forms both the vessel and the spout in one step. You can scale the same pattern up for a larger serving dish or down for a small creamer by changing the starting rectangle sizes. In a kitchen this piece works well for dressings or gravy and adapts easily to other slab projects like butter dishes or small trays. The clean lines also photograph clearly for sharing project ideas online.
Footed Ceramic Egg Cups
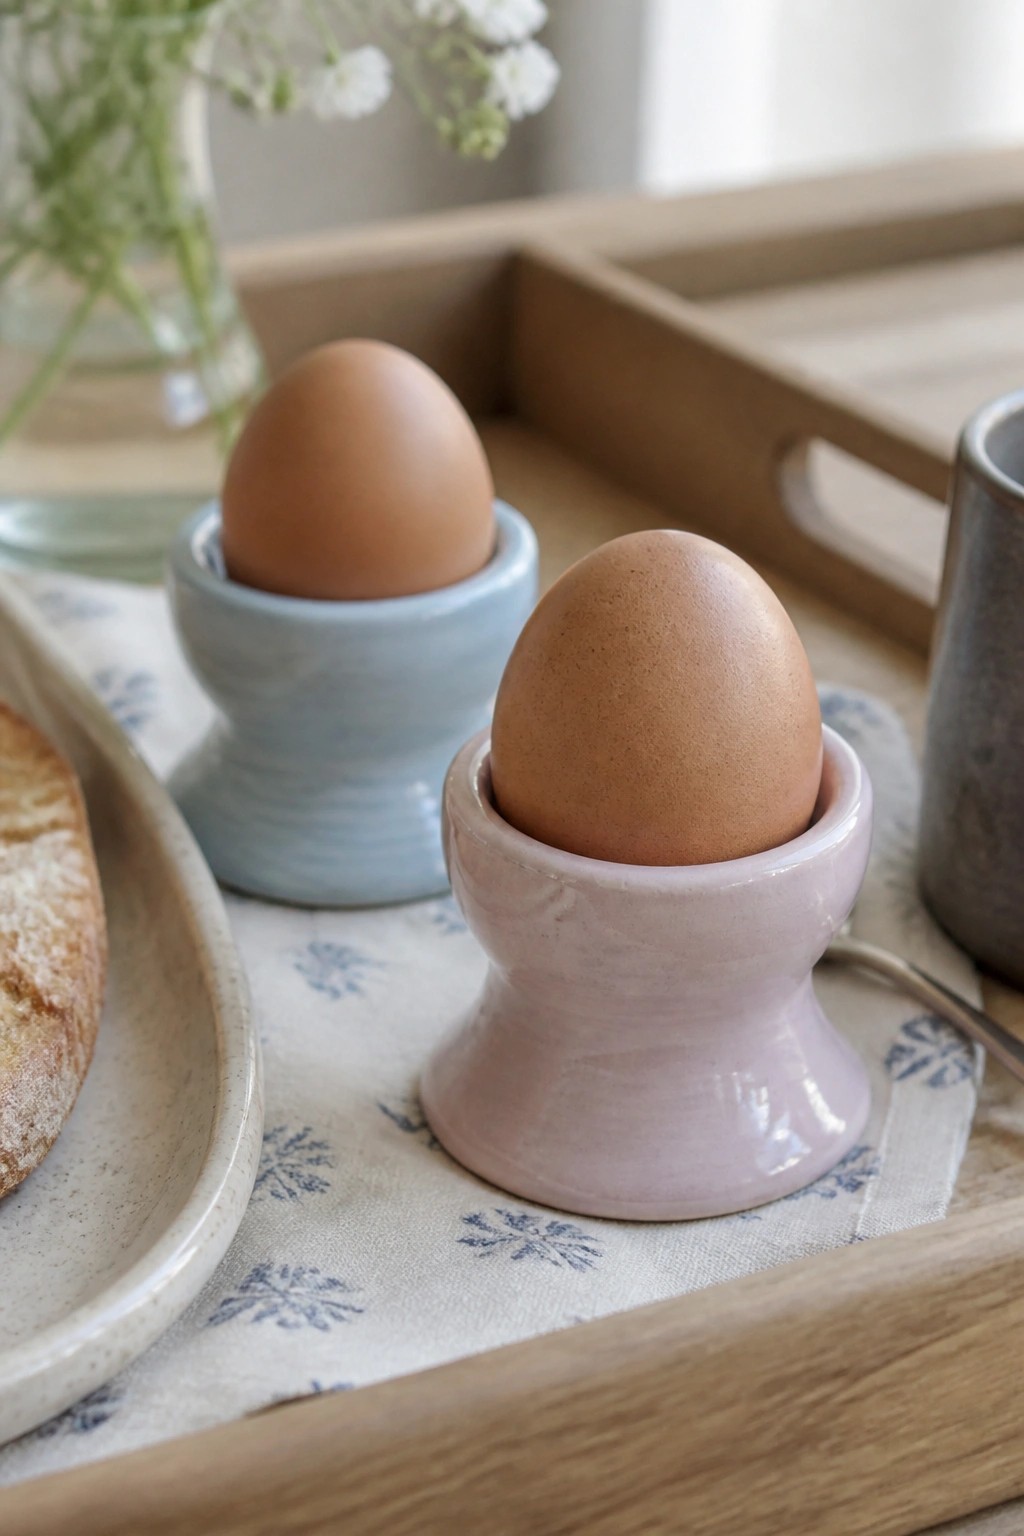
Egg cups are compact ceramic holders with a flared foot and a shallow rimmed top that keeps a boiled egg upright on the table. The form stays simple so the egg sits securely without tipping, and the soft matte glazes in pale blue and lavender keep the pieces neutral enough to mix with everyday dishes. This type of project falls into the kitchen item category and works well as a quick slab build since the shape can be cut from a flat sheet, formed around a small mold, and joined at the base.
What makes this idea useful is how little clay and space it takes while still giving you a finished set for the table. The shape does a lot of the work here, so you can swap the rim height or foot width to fit larger or smaller eggs without changing the whole design. In a kitchen these sit nicely on a tray with toast or butter, and the same basic form can be reworked into small salt cellars or spice pinch pots by widening the opening slightly. A set of four in two alternating glazes photographs cleanly for sharing and uses scraps you probably already have on hand.
Rounded Slab Salt and Pepper Shakers
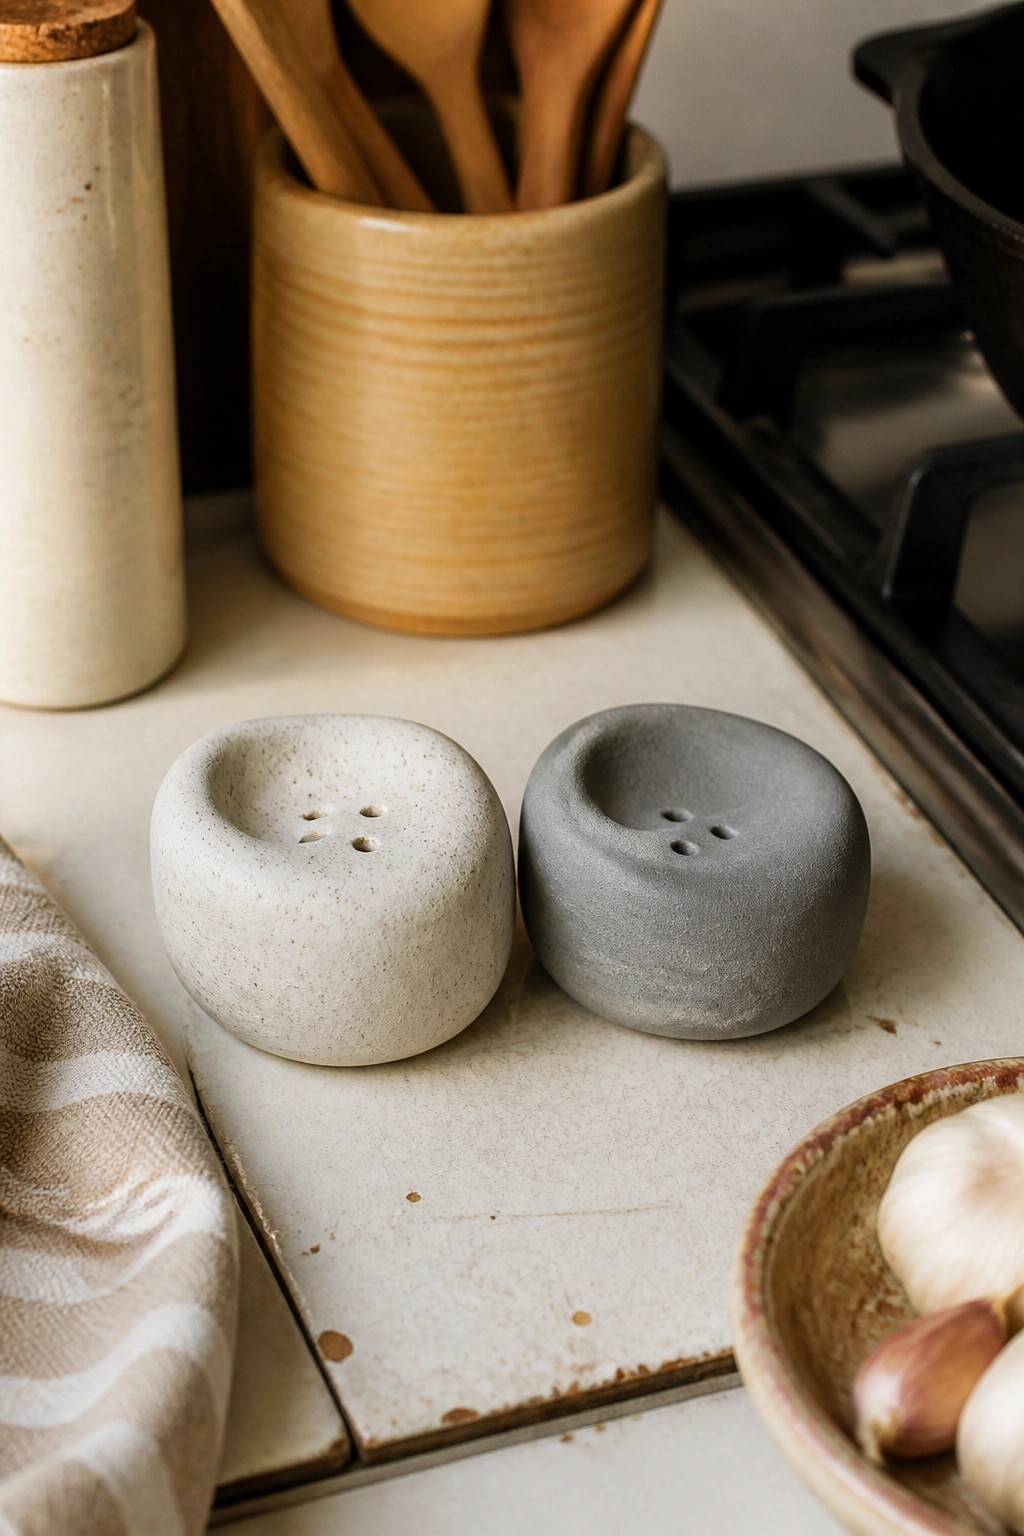
These salt and pepper shakers are formed from clay into low, rounded shapes with a shallow well on top. Four small holes in each well control the flow when shaking. The matte, lightly speckled surface and neutral tones keep the design simple and functional for daily kitchen use.
What makes this idea useful is how the small footprint lets the shakers sit on a counter or table without crowding other items. You can adapt the same base shape for other kitchen needs by adjusting the hole size or adding a lid. The neutral colors pair easily with most dishware and can be changed by switching clay bodies or adding a light wash. In a kitchen, this kind of piece works well as a quick project that produces something actually used every day.
Tea Bag Rest Slab Dish
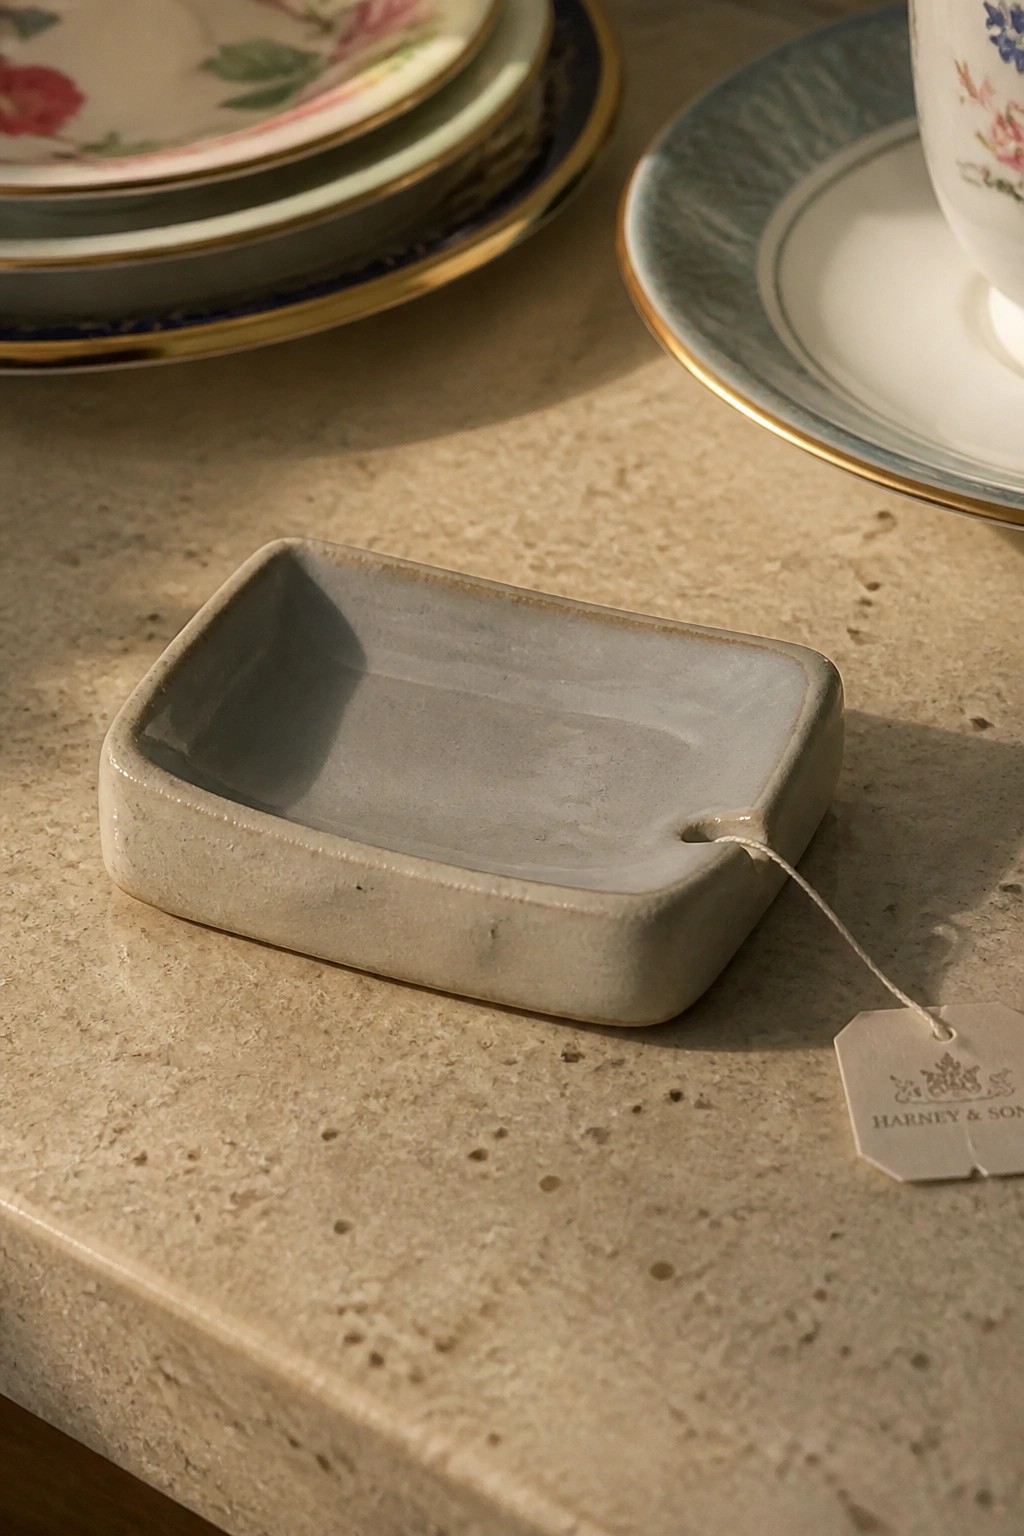
A small rectangular dish formed from a flat slab of clay works well as a tea bag rest. The shallow sides and single notch cut into one rim keep the string and tag from sliding into the liquid. A simple matte or lightly speckled glaze on the interior gives it a clean look that fits with everyday kitchenware. This type of project stays easy because it requires only basic cutting, folding up the edges, and smoothing the corners.
The notch detail makes the piece more useful than a plain square tray since it actually holds the tea bag in place. You can scale the same shape down for spoon rests or up slightly for small butter dishes. Try pressing a subtle texture into the slab before assembling or use the same clay and glaze to make a matching set of four. In a kitchen, these rest neatly beside the teapot and take up little shelf space when stacked.
Bow-Shaped Knife Rests
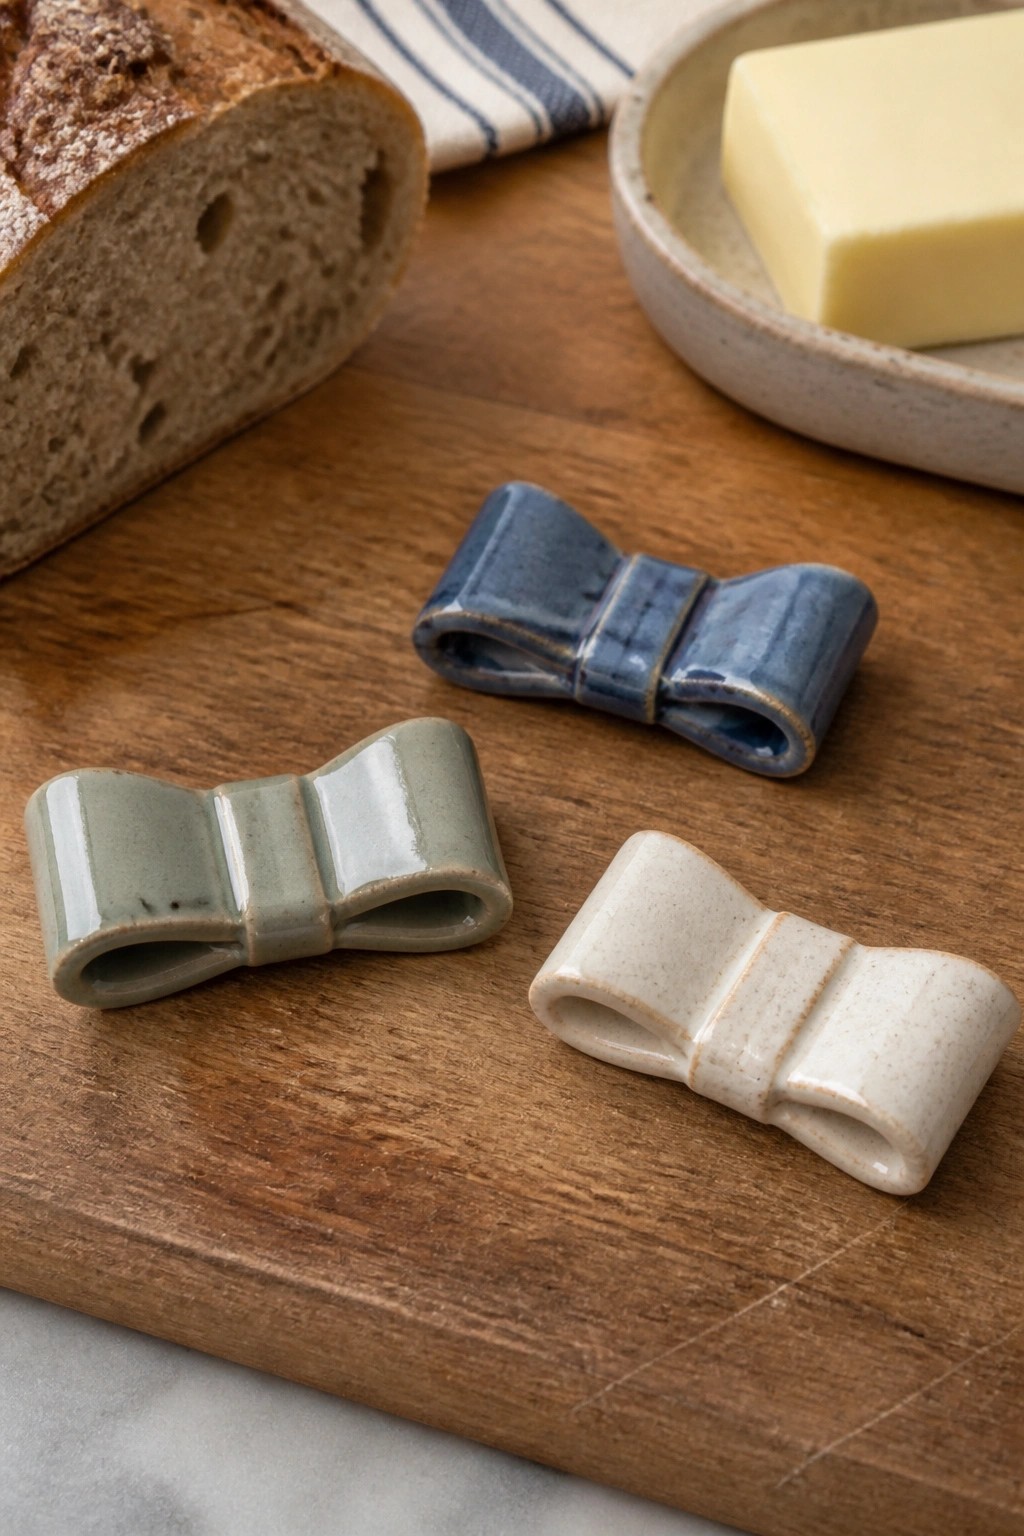
These slab-built ceramic pieces form small bow-shaped knife rests sized for butter knives. Each one uses a folded slab to create the looped bow ends and a central band that adds structure. The design works in a range of matte and glossy glazes, with the curved shape keeping the blade elevated and stable. The compact scale makes them easy to produce in multiples for a matching set.
What makes this idea useful is how the same bow template can be adjusted wider or narrower to suit different knife widths. In a kitchen these rests keep a bread board tidy without needing much storage space. You could rework the shape into a simple loop for chopstick rests or add a small foot underneath for better balance on a tablecloth. The form stands out in photos because the bow detail reads clearly even in a single glaze color.
Rectangular Slab Baking Dish
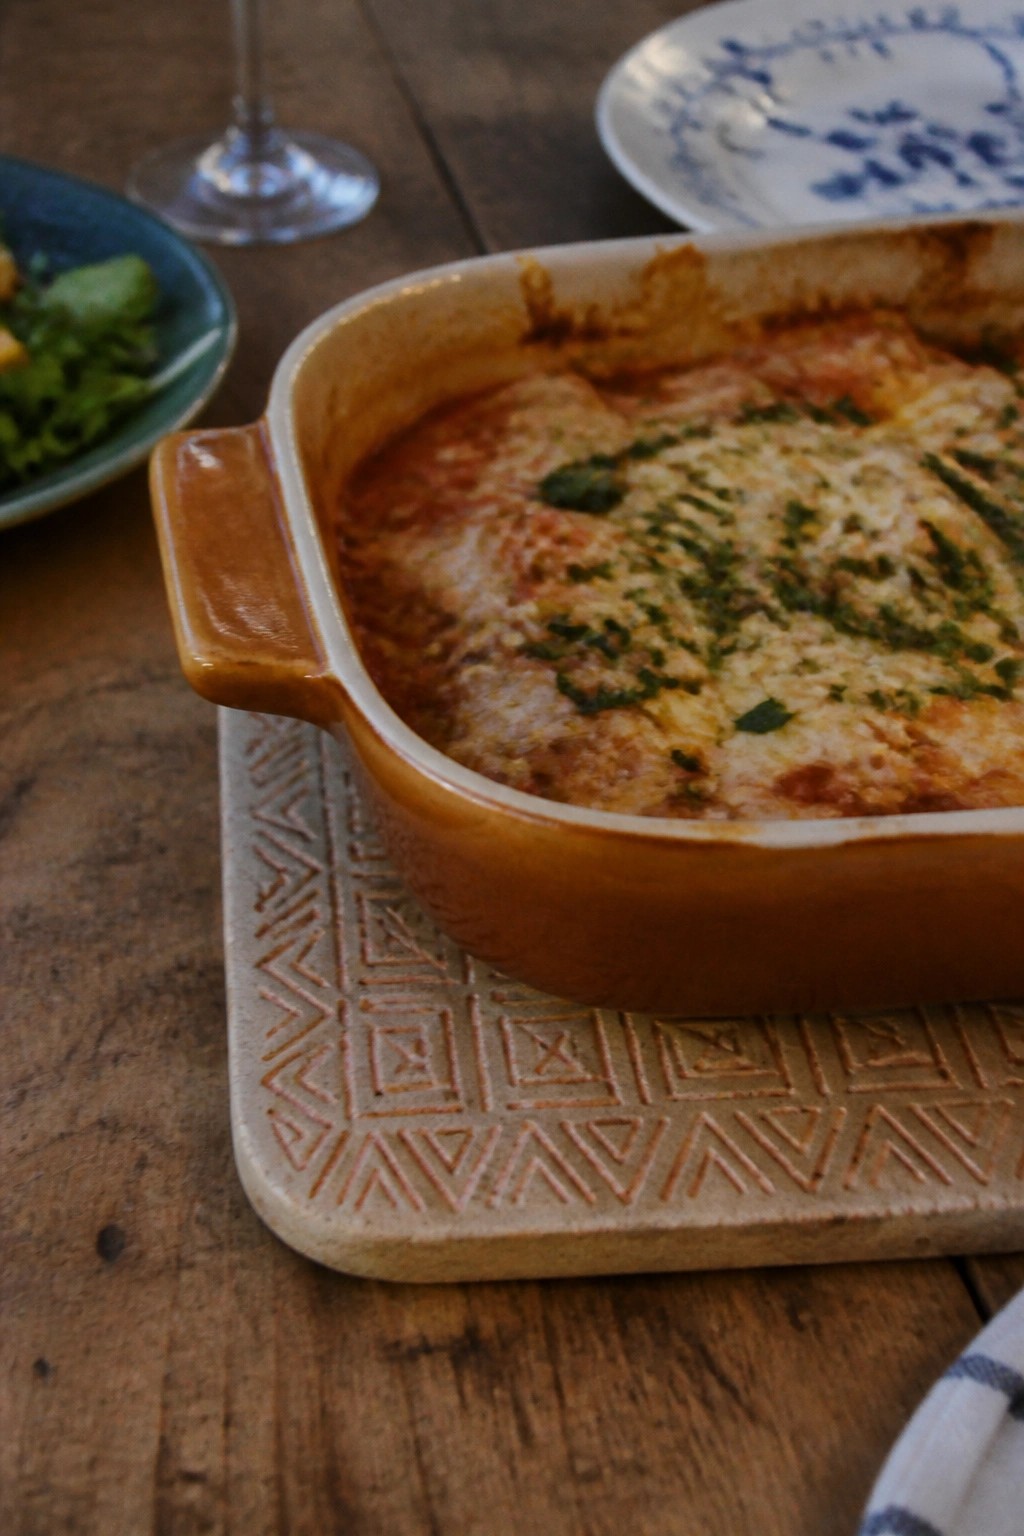
A rectangular baking dish built from slabs gives you straight sides and a flat base that stack evenly in the oven. Simple handles attached to the short ends make lifting easier once the dish is hot. The outside carries an earthy orange-brown glaze while the rim stays white, keeping the look clean for serving straight from the pan.
What makes this idea useful is how the slab construction creates stable walls that resist warping during firing and daily use. You can roll out the same base shape and adjust the height for smaller lasagnas or gratins. In the kitchen this piece works as both cookware and serving dish, so it saves space on extra platters. The same form could be scaled down into individual ramekins or textured with stamps along the exterior before the first firing.
Three Section Glaze Serving Bowl
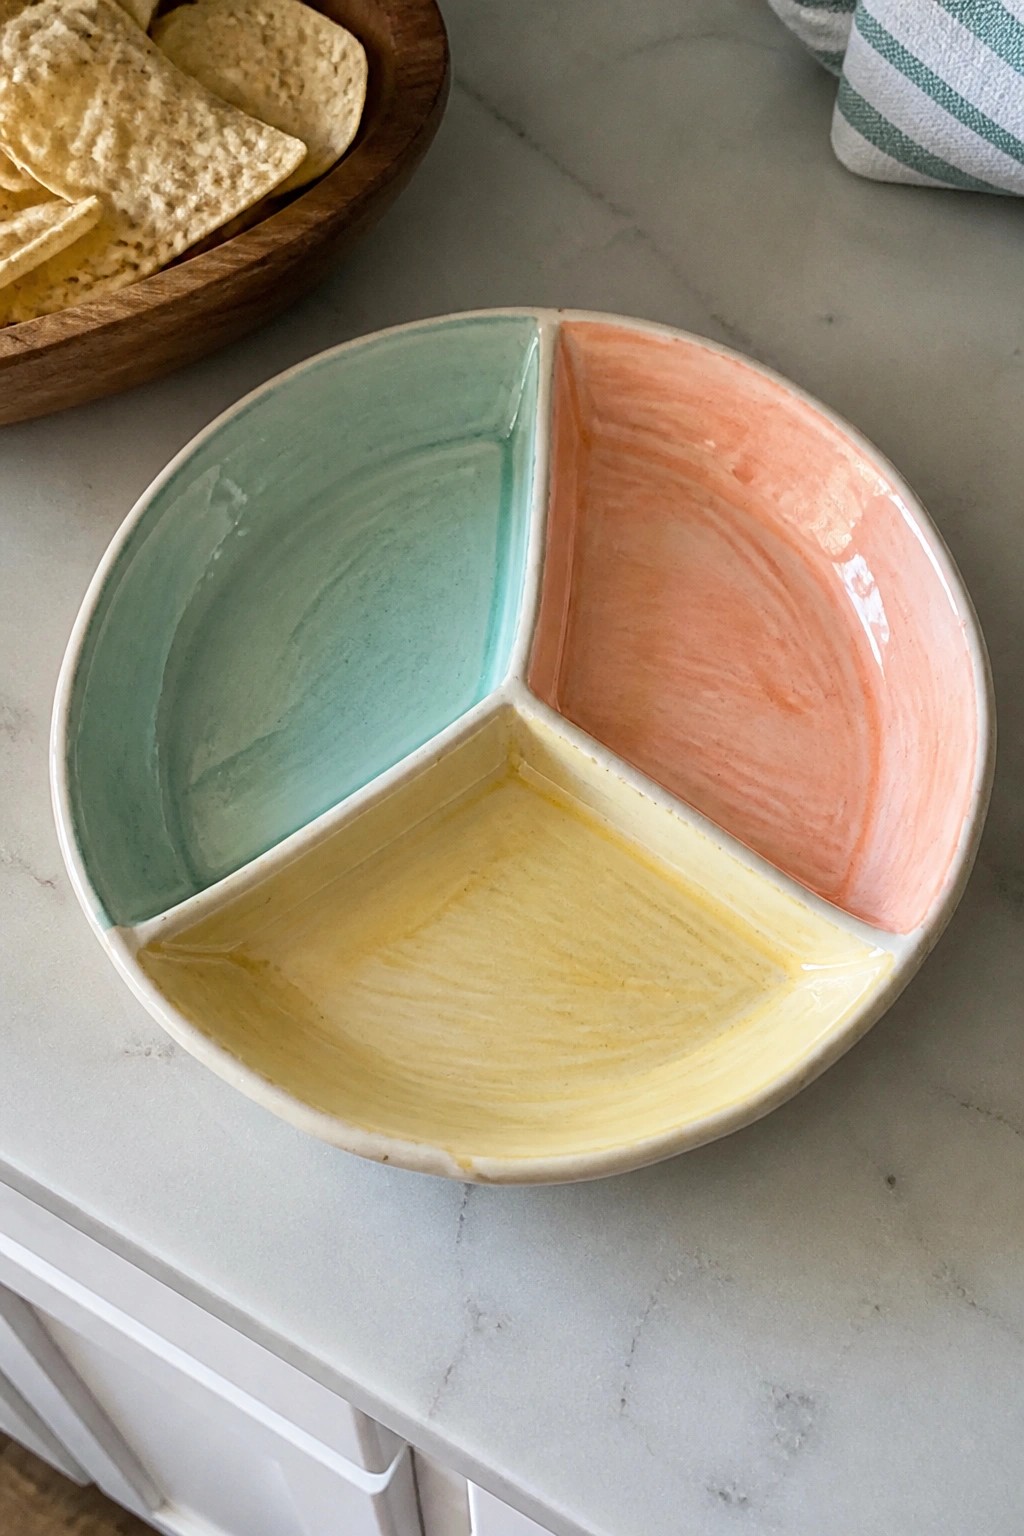
A divided ceramic bowl with three equal sections works well for serving different snacks or dips side by side. Each compartment gets its own glaze color, here in soft mint, peach, and yellow, so the sections stay visually separate without extra carving or stamping. The rounded shape and low walls keep it simple to form from a slab or wheel-thrown base while still holding a useful amount of food in each part. This approach turns a basic plate into a practical kitchen piece that handles chips, vegetables, or small appetizers in one compact dish.
What makes this idea useful is how easily the same divided layout can be scaled up for larger gatherings or scaled down for individual portions. The color blocking lets you swap glazes to match other dishes in your kitchen or try new combinations without changing the form. In a kitchen this kind of bowl keeps counters clear by replacing multiple small dishes, and the same pattern can be adapted into a two-section version for sauces or a shallow tray for crackers. The straightforward construction also makes it a quick project when you want something functional rather than purely decorative.
Honey Pot with Honeycomb Texture and Dipper Notch

A square honey pot built from clay slabs makes a compact kitchen container for storing and serving honey. The sides carry a repeating honeycomb pattern pressed into the surface before firing, while the lid sits flush with a small knob and a cutout that holds the wooden dipper in place. This setup keeps the dipper clean and ready without extra holders.
What makes this idea useful is the way the square form fits neatly on a shelf or table and the texture can be added with a simple stamp or textured roller. You could scale the same slab pattern down for a smaller single-serve version or swap the glaze for a different kitchen color. In daily use the notch for the dipper removes the need for a separate spoon rest.
Scalloped Slab Pie Dishes
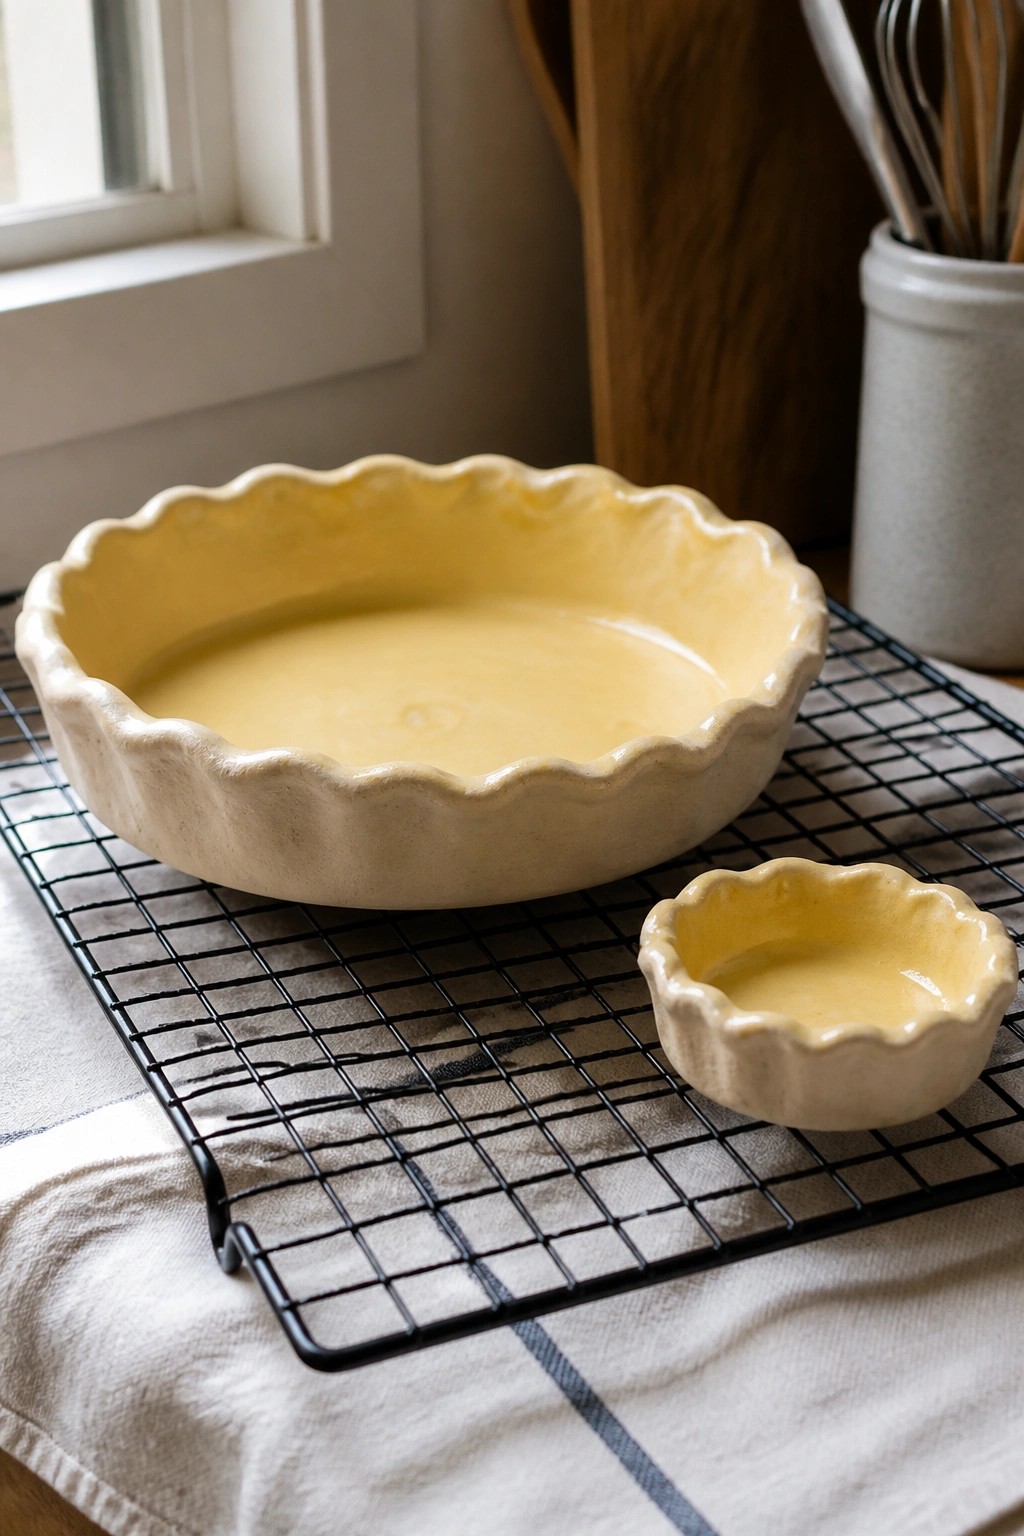
Roll out clay slabs and press them into round forms to create pie dishes with scalloped rims. The larger dish holds a standard pie while the smaller version suits single servings or recipe tests. A pale yellow glaze covers both pieces evenly and gives them a simple kitchen look that works with most table settings. Slab construction keeps the walls thick enough for oven use without needing a wheel.
What makes this idea useful is that the fluted edge comes from basic pinching or a simple tool rather than intricate carving. You can adjust the rim depth or switch to a matte white glaze if you want the focus on the food instead of the color. These dishes move easily from oven to table and stack when not in use. The same slab approach works for making matching rectangular baking trays or smaller ramekins.
Divided Slab Tray for Condiments
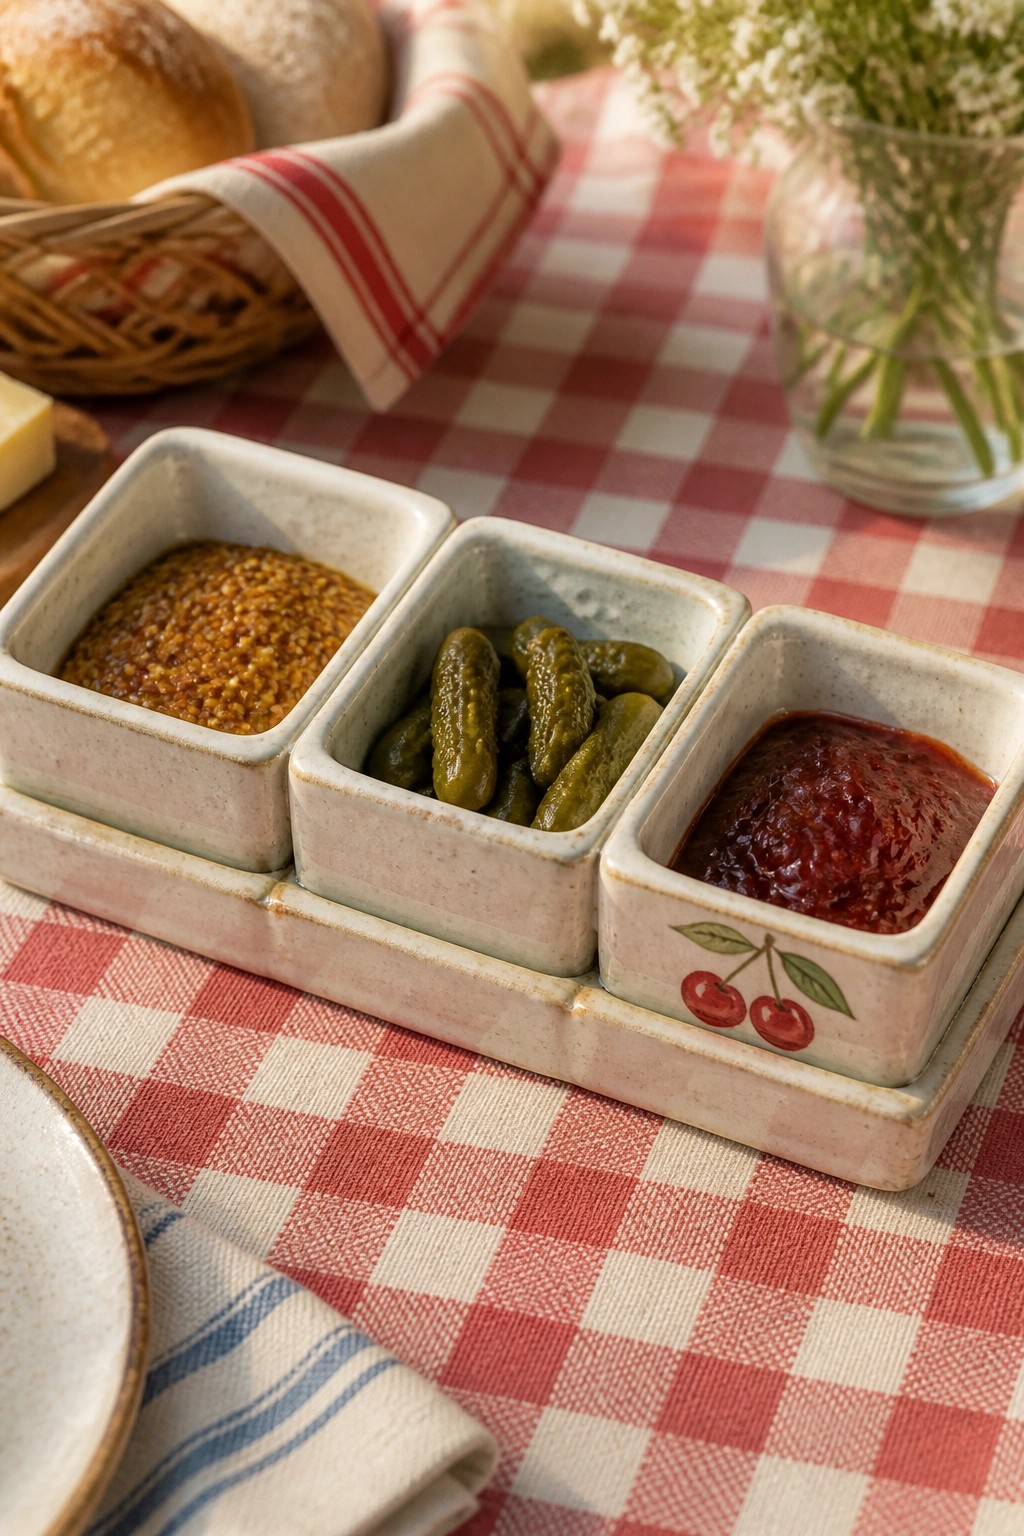
A long rectangular tray built from slabs and divided into three square compartments creates a stable server for mustard, pickles, and sauce. The sections sit side by side on a single base so nothing slides around when carried to the table. One compartment carries a simple cherry stamp under the rim that gives the piece a finished look with minimal extra work. This project stays practical because the shape directly solves the need for organized small servings in one object.
The connected sections keep the tray compact on a counter or picnic table while still holding enough for a meal. You can adjust the number of compartments or swap the fruit stamp for a different simple motif like a leaf or initial. Scaling the whole tray smaller turns it into a spice or nut server, and lengthening it adds room for extra options. The straightforward slab construction makes it quick to repeat if you want matching sets for gifts.
Clay Arched Napkin Holder
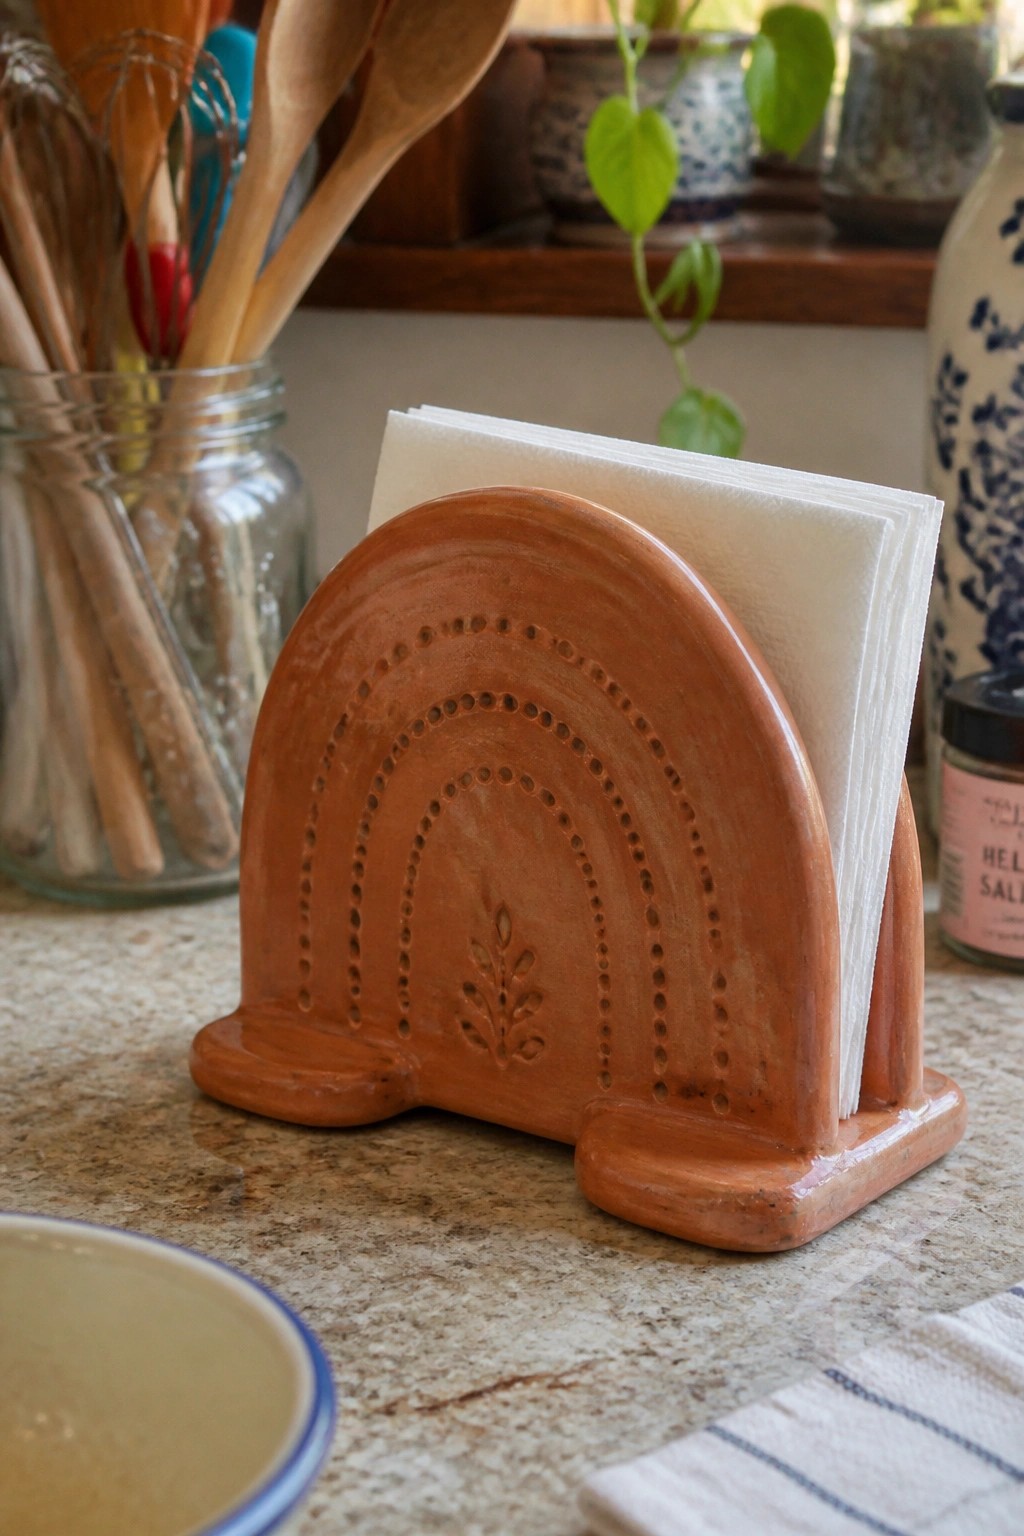
A clay napkin holder built in a simple arch shape keeps a stack of paper napkins standing upright on a counter or table. The wide base feet give it stability while the curved top holds the napkins in place. Dotted lines pressed into the surface create texture, and a small stamped plant motif near the bottom adds a single decorative touch without complicating the form.
What makes this idea useful is how the arch can be adjusted to fit different napkin sizes or thicknesses. You could leave off the dots for a faster build or swap the plant stamp for another simple shape like a circle or line pattern. In a kitchen this kind of piece keeps napkins handy without taking much space, and the same basic form could be reworked into a letter holder or small recipe card stand.
Small Ceramic Dish with Blue Glaze and Speckled Rim

A small handmade ceramic dish like this works as a kitchen piece for holding items such as loose tea, salt, or small snacks. The interior uses a light blue glaze that creates a smooth, contained surface while the outer rim stays unglazed to show the natural speckled clay. The low, wide shape keeps the focus on the simple round form and the contrast between the two surfaces.
What makes this idea useful is how the unglazed rim reduces finishing work while still giving a finished look. You could make the same shape larger for a spoon rest or smaller for a ring holder on a nightstand. The blue and beige pairing adapts easily to other glaze colors inside the same rim style. A version with a deeper center would turn into a small prep bowl without changing the overall approach.
Frequently Asked Questions
What tools and materials do I need to begin slab pottery projects for kitchen pieces?
Start with a basic set of tools including a rolling pin or slab roller, canvas or fabric sheets to prevent sticking, a ruler, cutting wire or knife, and sponges for smoothing. Choose air dry clay or low fire clay if you lack a kiln, along with non toxic glazes that are labeled food safe. Gather everyday items like templates from cardboard for shapes such as plates or mugs to guide your cuts.
How do I make sure my handmade slab pottery is safe for food use and everyday handling?
Select clay and glazes certified as lead free and food safe from reputable suppliers. Apply at least two coats of glaze to the interior surfaces and fire the pieces according to the clay manufacturer’s temperature guidelines. Test finished items by checking for any rough spots that could harbor bacteria and avoid using pieces with cracks. Many projects work well with underglazes sealed under a clear topcoat for added durability.
What steps help prevent warping or cracking during the drying and firing process?
Dry your slabs slowly by covering them with plastic for the first day or two and then gradually exposing them to air over several days. Keep pieces at an even thickness of about a quarter inch and avoid thin edges that dry faster. Support curved forms like bowls with crumpled newspaper or molds during drying and fire at the correct rate to reduce thermal shock. If using air dry clay, rotate pieces periodically to promote uniform moisture loss.
Can I complete these projects without a kiln or pottery wheel?
Yes, many of the 23 projects adapt well to air dry clay or oven bake options available at craft stores. Shape your slabs on a flat surface and let them air harden before decorating with acrylic paints sealed with a waterproof varnish. For more permanence, look into community pottery studios that offer firing services or low cost classes where you can use electric kilns without owning one.
How long does the entire process take from start to finished kitchen piece?
Plan for one to two hours of active work time per project to roll, cut, and assemble the slabs. Allow three to seven days for thorough drying depending on humidity levels and clay type. If firing is involved, add another week for bisque and glaze firings at a studio. Air dry versions can be ready for use in about a week once fully hardened and sealed.

Pottery Path is my cozy corner of the internet where I share clay ideas, pottery inspiration, and simple projects you can recreate at home. I love exploring everything from air dry clay to handbuilt pottery to cute minis that brighten your day. My goal is to make clay crafting feel easy, fun, and welcoming for anyone who wants to try it.
You will find beginner friendly tutorials, creative pottery painting ideas, and lots of warm inspiration for slow and happy crafting. If you enjoy hands on creativity, this space will feel like home.