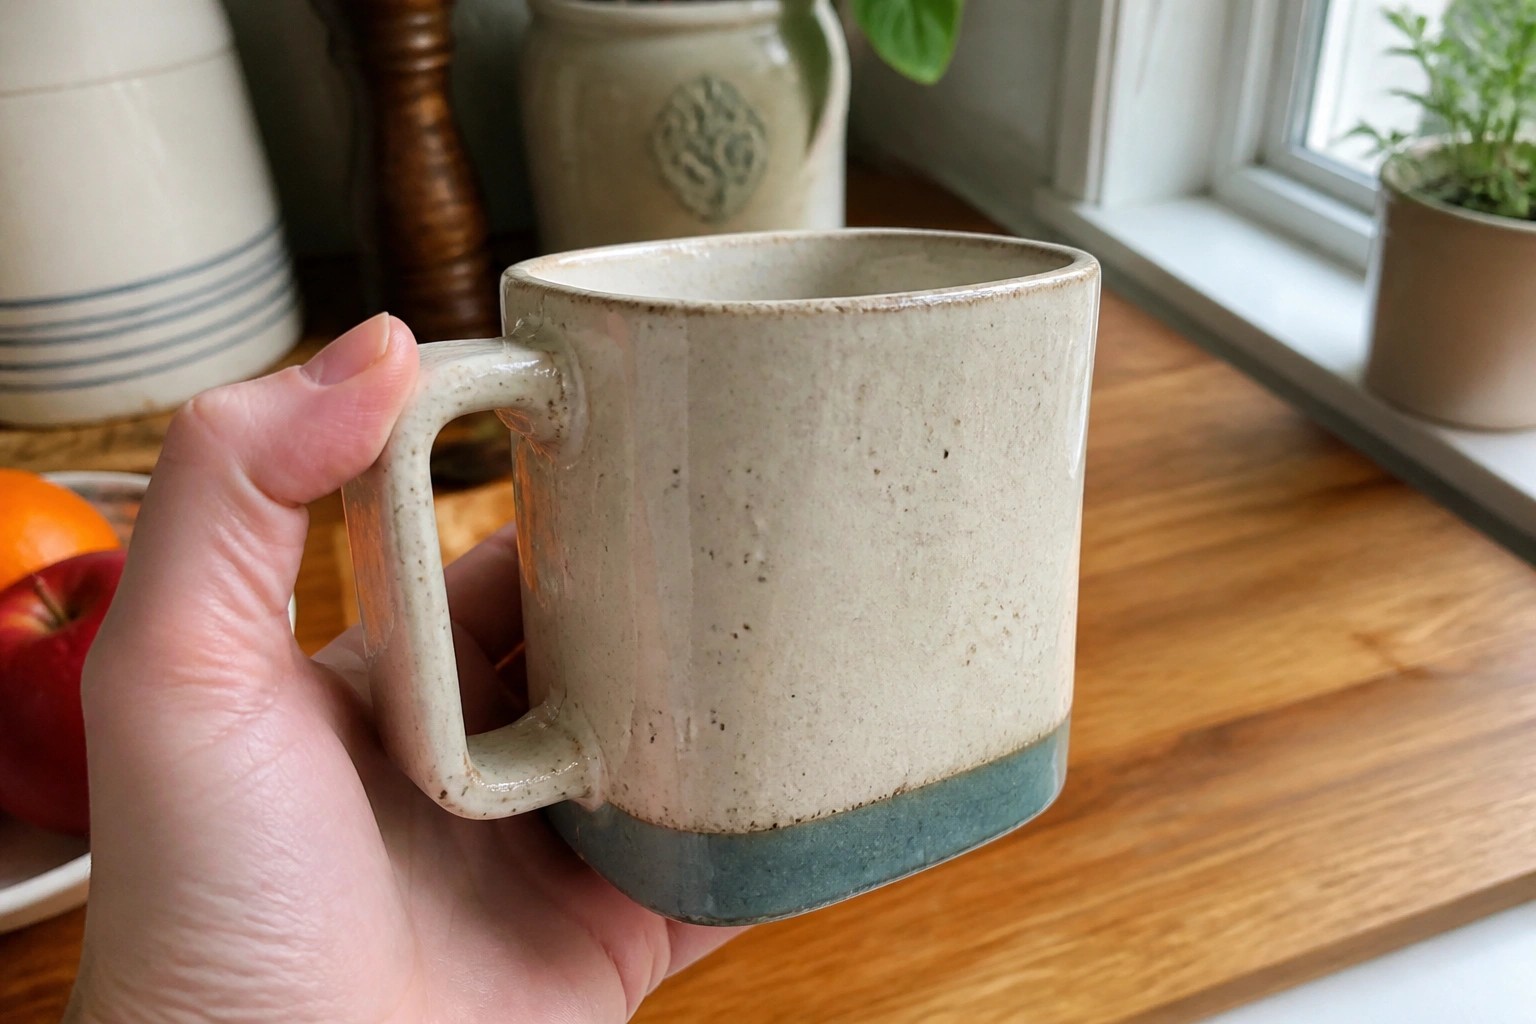
I started with slab pottery because it seemed less intimidating than other methods.
You can make a lot of things with just a rolling pin and some clay.
I collected 22 easy projects that work well for a first session.
They use basic steps like cutting and joining without needing a wheel.
Some turned out useful while others were just simple practice pieces.
Two-Tone Dipped Mug
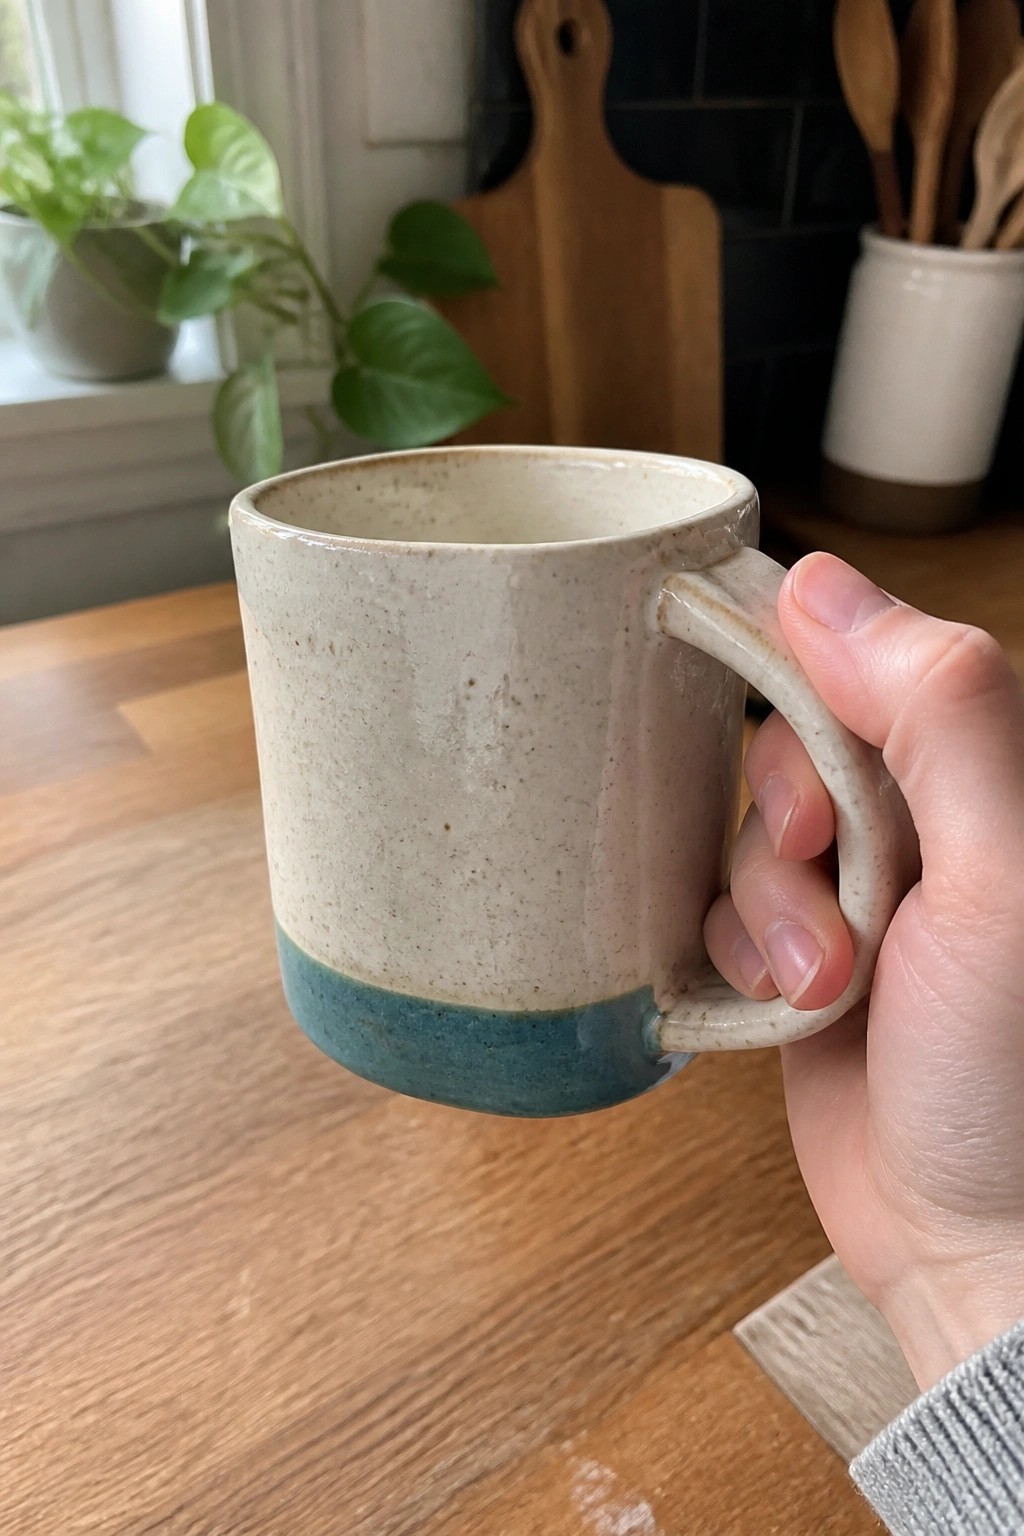
A slab-built mug starts with a simple rectangle of clay rolled to an even thickness and joined into a cylinder. The design uses a clear horizontal glaze split, with a speckled light tone covering most of the body and a solid teal band at the base. This keeps the project focused on basic construction and one clean color transition rather than added carving or handles.
What makes this idea useful is that the dip line can be moved higher or lower on the next version to change the look without altering the build steps. The shape works well for everyday drinking or as a small desk holder, and the same slab cylinder can be shortened into a tumbler or widened into a small planter. Matching sets are easy to repeat by using the same two glazes on different heights.
Scalloped Rim Slab Bowl
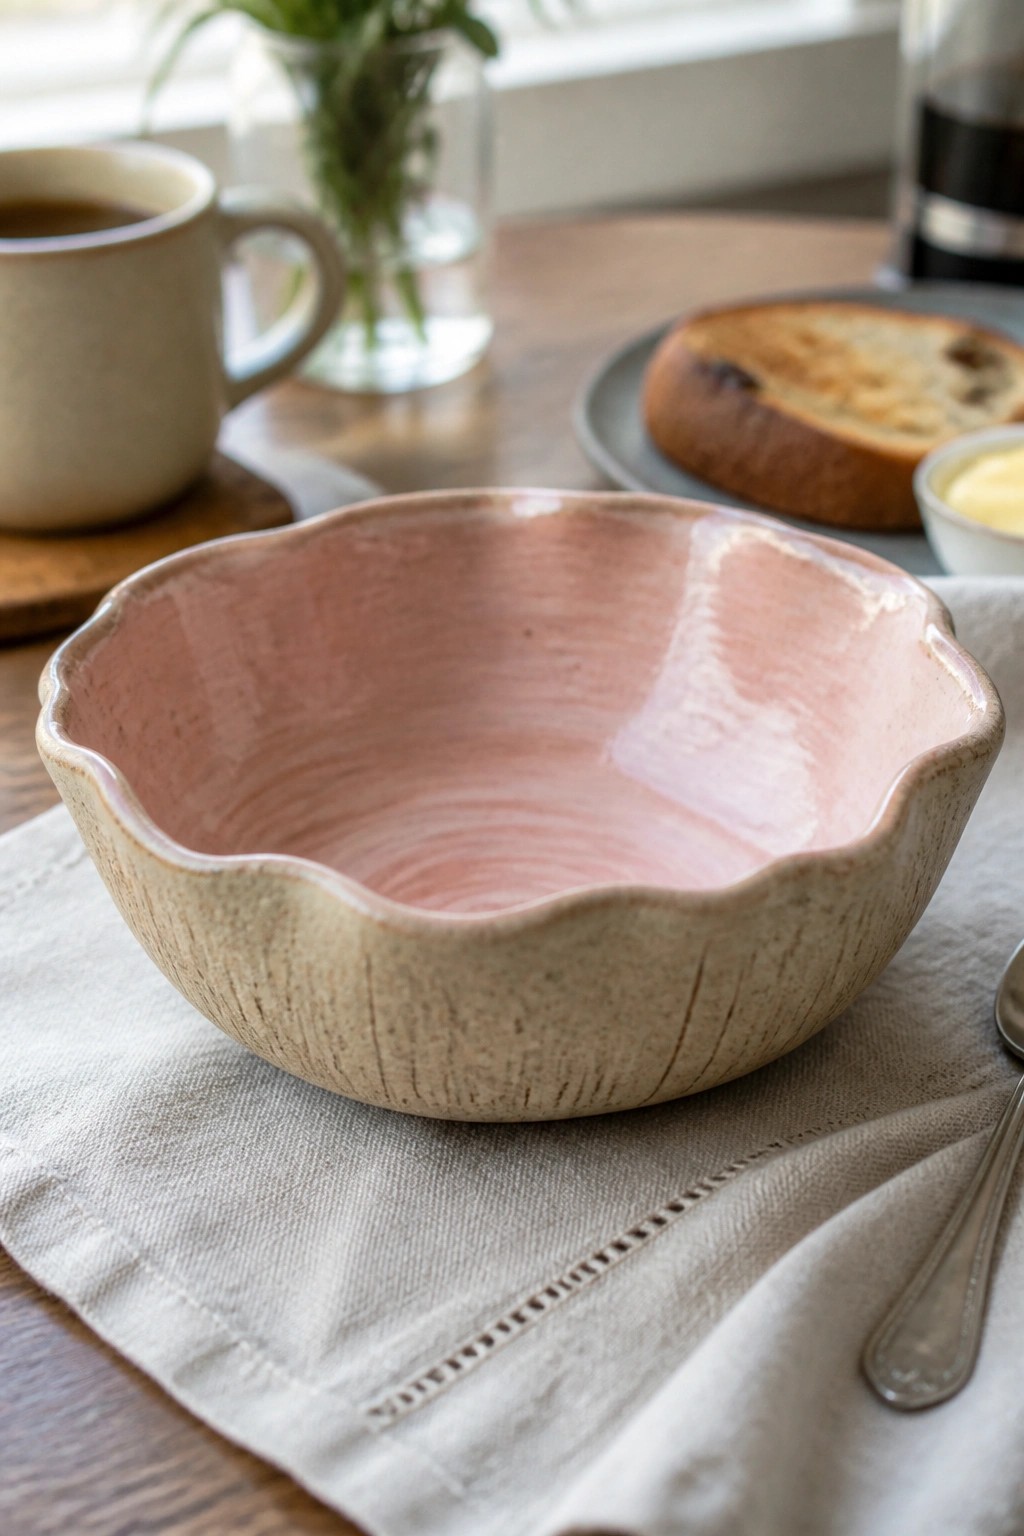
A slab built bowl with a wavy scalloped rim creates an easy way to add organic shape using just basic cutting and pinching. The form stays low and wide, with the interior finished in a soft pink glaze that contrasts against the unglazed textured exterior. This approach keeps the project simple while giving the bowl a finished look that works for everyday use.
The wavy rim comes from shaping the slab edge before assembly, so you can change the curve or depth without new tools. A bowl like this fits well on a breakfast table for yogurt, fruit, or small sides. You could rework the same slab method into a wider tray or shorten the walls for a shallow catchall dish.
Fern Impressed Catch-All Tray
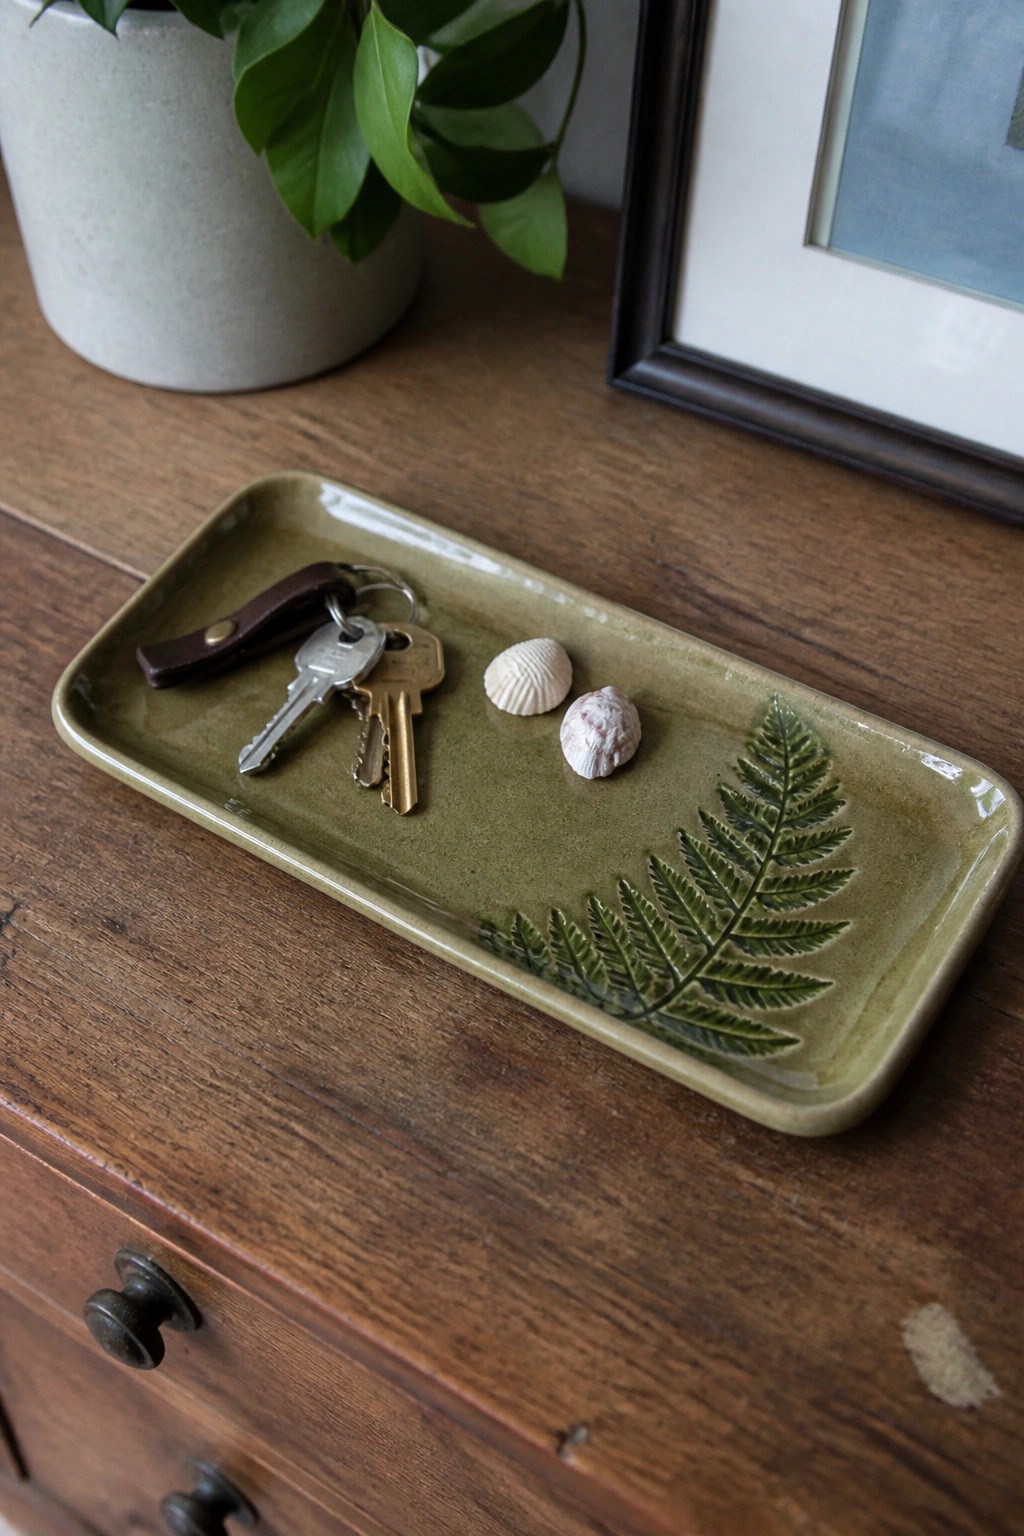
A flat rectangular slab forms the base of this simple tray, with a real fern leaf pressed into the clay to create a raised botanical detail along one edge. The green glaze highlights the leaf texture while keeping the surface smooth and easy to wipe clean. This type of project works as a small storage piece for keys, coins, or jewelry on a dresser or console table. Slab construction keeps the shape straightforward and lets the impressed leaf do most of the visual work.
What makes this idea useful is how quickly the tray can be sized to match a specific spot like a nightstand or entry table. You could press different leaves or even layer a few smaller ones for variety. The same slab method works for a soap dish or a shallow planter saucer if you adjust the depth. A piece like this stands out on Pinterest because the natural imprint gives it a clear, repeatable style without extra painting or carving.
Spoon Rest Tray
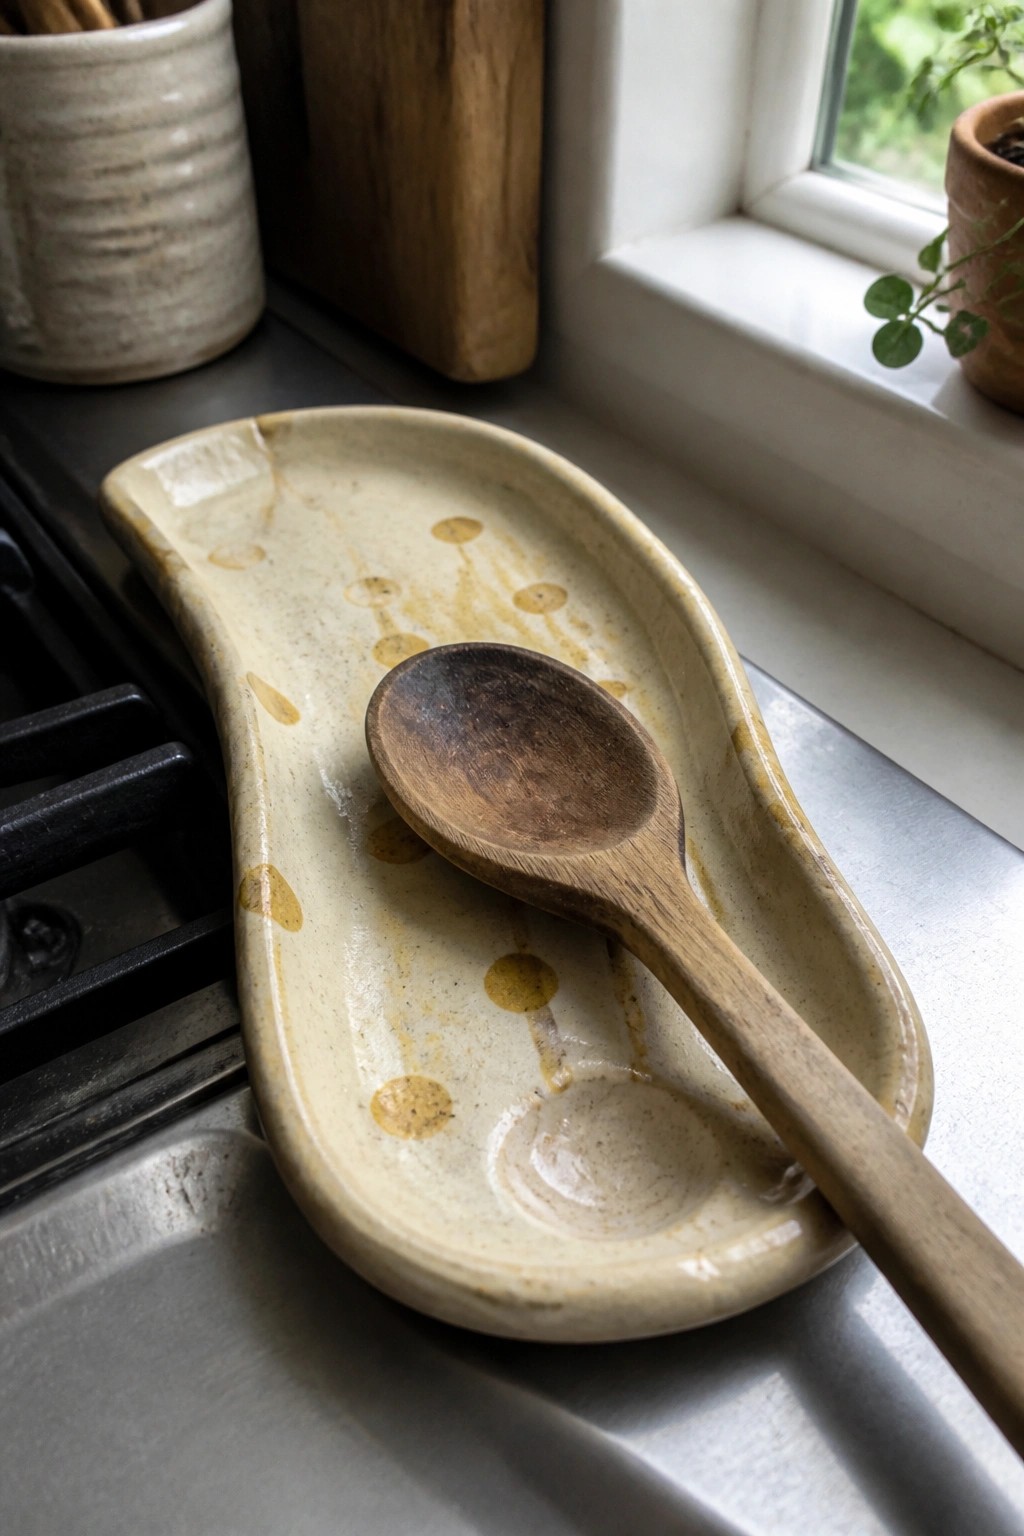
A spoon rest is a long, shallow tray built from a slab of clay that holds cooking utensils while you work at the stove. The elongated shape tapers slightly at one end so the spoon bowl sits securely while the handle extends outward. A light speckled glaze with scattered dots keeps the surface simple and easy to wipe clean.
What makes this idea useful is how quickly you can adjust the length and width to match the spoons or spatulas you use most. A shorter version works for a single utensil while a wider one can catch drips from two tools at once. In a kitchen, this kind of piece keeps counters clean during cooking and can also hold small prep items like garlic or measuring spoons. You could add a shallow groove down the center on your next try to stop the spoon from rolling.
Small Ring Dish with Stamped Flower
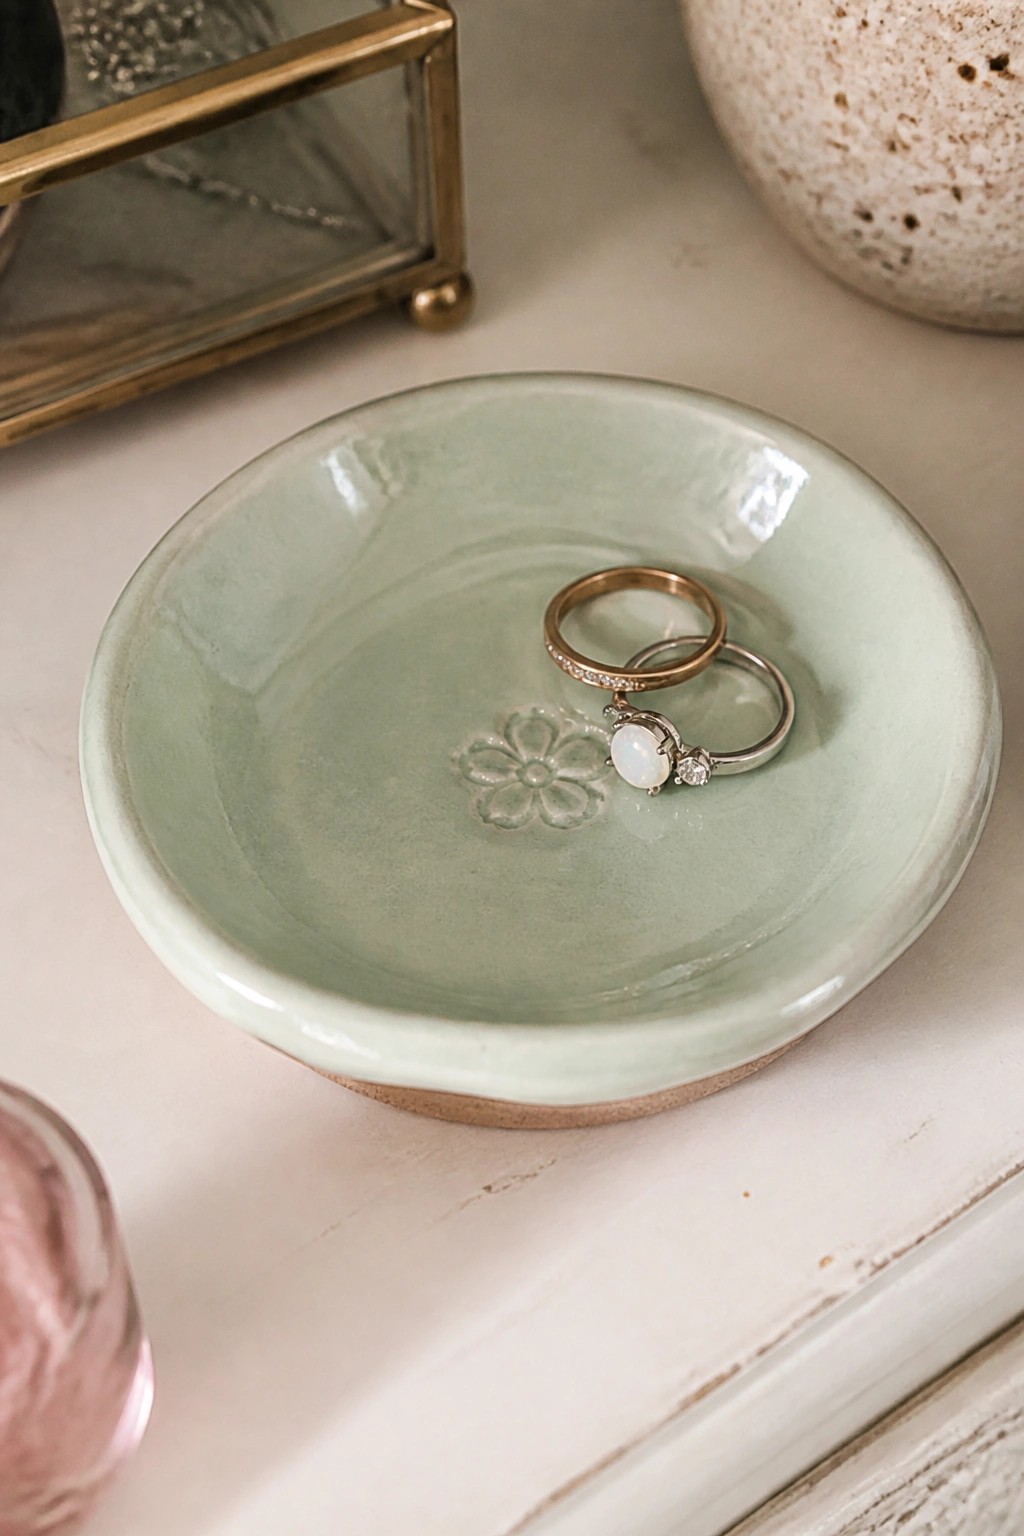
A shallow round dish formed from a rolled slab makes a practical ring holder. The base is pressed with a simple flower stamp before the rim is shaped, then covered in a soft mint glaze that pools slightly in the recessed areas. This approach keeps the form basic while the stamped detail gives the finished piece a clear focal point.
What makes this idea useful is how quickly it turns leftover slab scraps into something functional for a nightstand or dresser. The stamped flower can be swapped for any cutter shape you already have, or skipped entirely for a plain version. The same shallow profile works just as well scaled up into a small soap dish or kept tiny for earrings. The compact size also makes it easy to batch out several at once for gifts.
Square Slab Planter with Feet
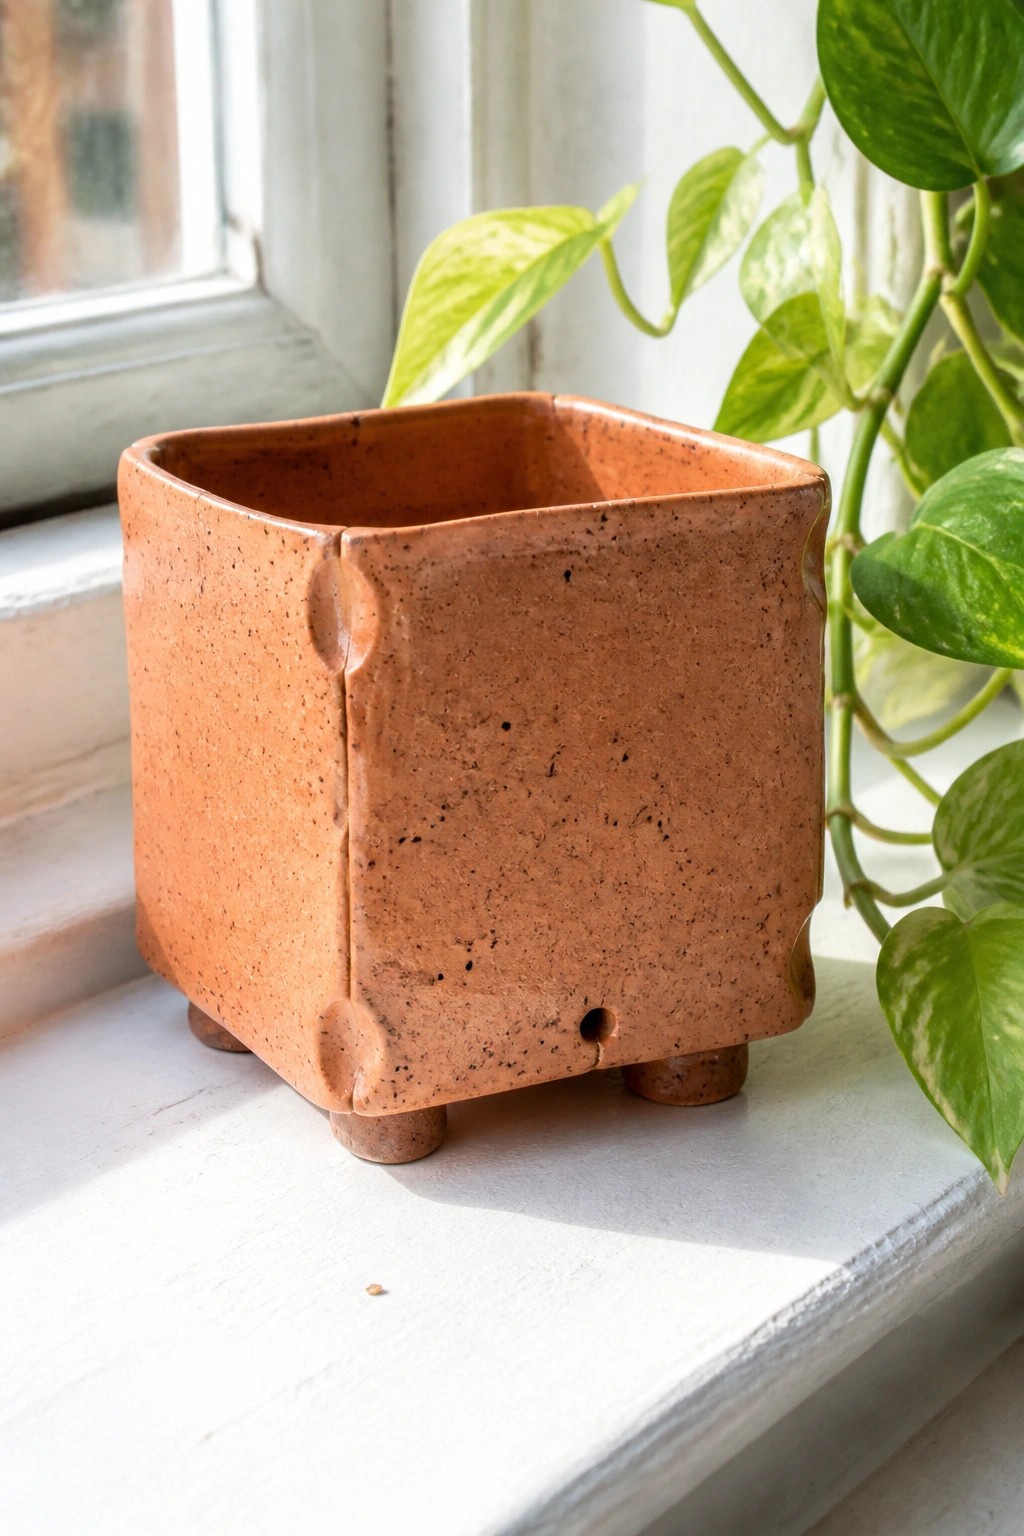
A square planter built from clay slabs gives you clean angles and flat sides that stand out from typical round pots. The form sits on four short feet that raise it slightly, and small holes near the base help with drainage. The speckled terracotta surface keeps the look simple while the joined seams add subtle lines that highlight the slab construction.
What makes this idea useful is how the square shape fits neatly on shelves or windowsills without taking up extra room. You can adjust the height or width easily when rolling out your slabs and add feet from leftover coils. The same approach works for making matching trays or smaller versions to hold succulents. For a gift, this style stands out on Pinterest because the straight lines and lifted base give it a clean, modern look that photographs well.
Embossed Botanical Hanging Tile
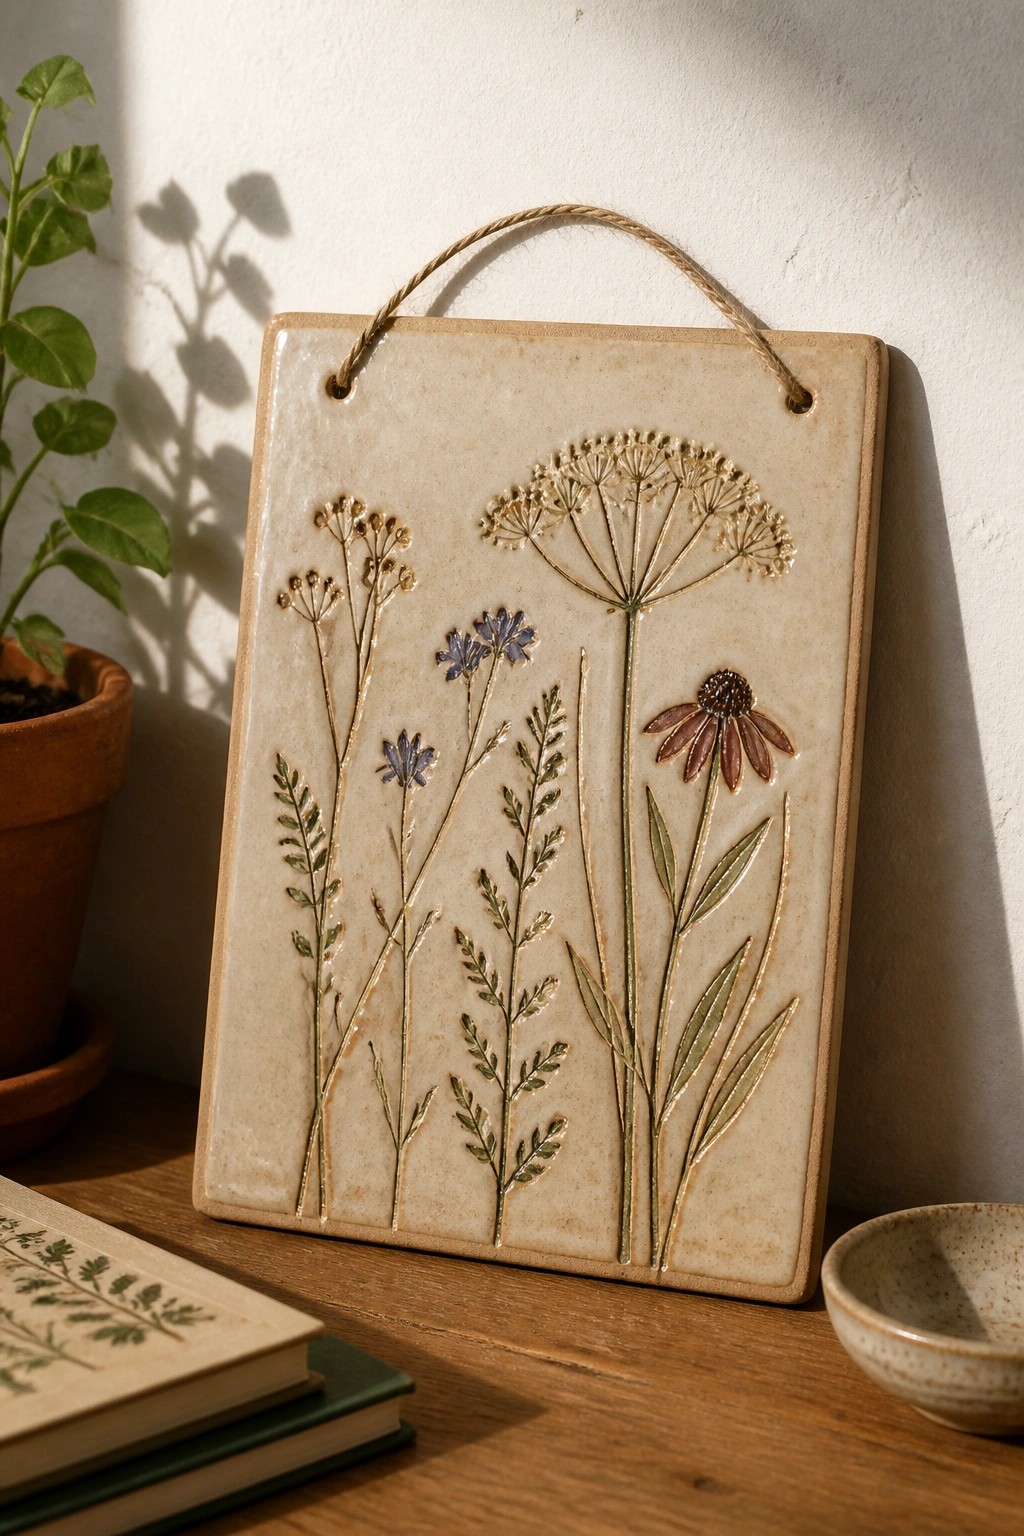
A flat slab of clay rolled to an even thickness and trimmed into a rectangle forms the base for this hanging plaque. Pressing actual plant stems, seed heads, and flower petals directly into the surface leaves crisp raised impressions of wildflowers such as Queen Anne’s lace and small daisies. A pale matte glaze highlights the relief while two drilled holes at the top allow a simple cord to turn the tile into a wall piece. The project stays within basic slab methods and produces a ready-to-hang decor object.
What makes this idea useful is how quickly the same slab can be scaled down for a desk or shelf accent or enlarged for a bigger wall statement. Swapping the pressed plants for whatever is in season keeps the design personal without extra tools. The finished piece works well in a kitchen, hallway, or plant corner where a flat, lightweight item is easier than a pot or vase. A smaller version could also become a trivet or a narrow sign for a workspace.
Slab Built Tea Light Cup
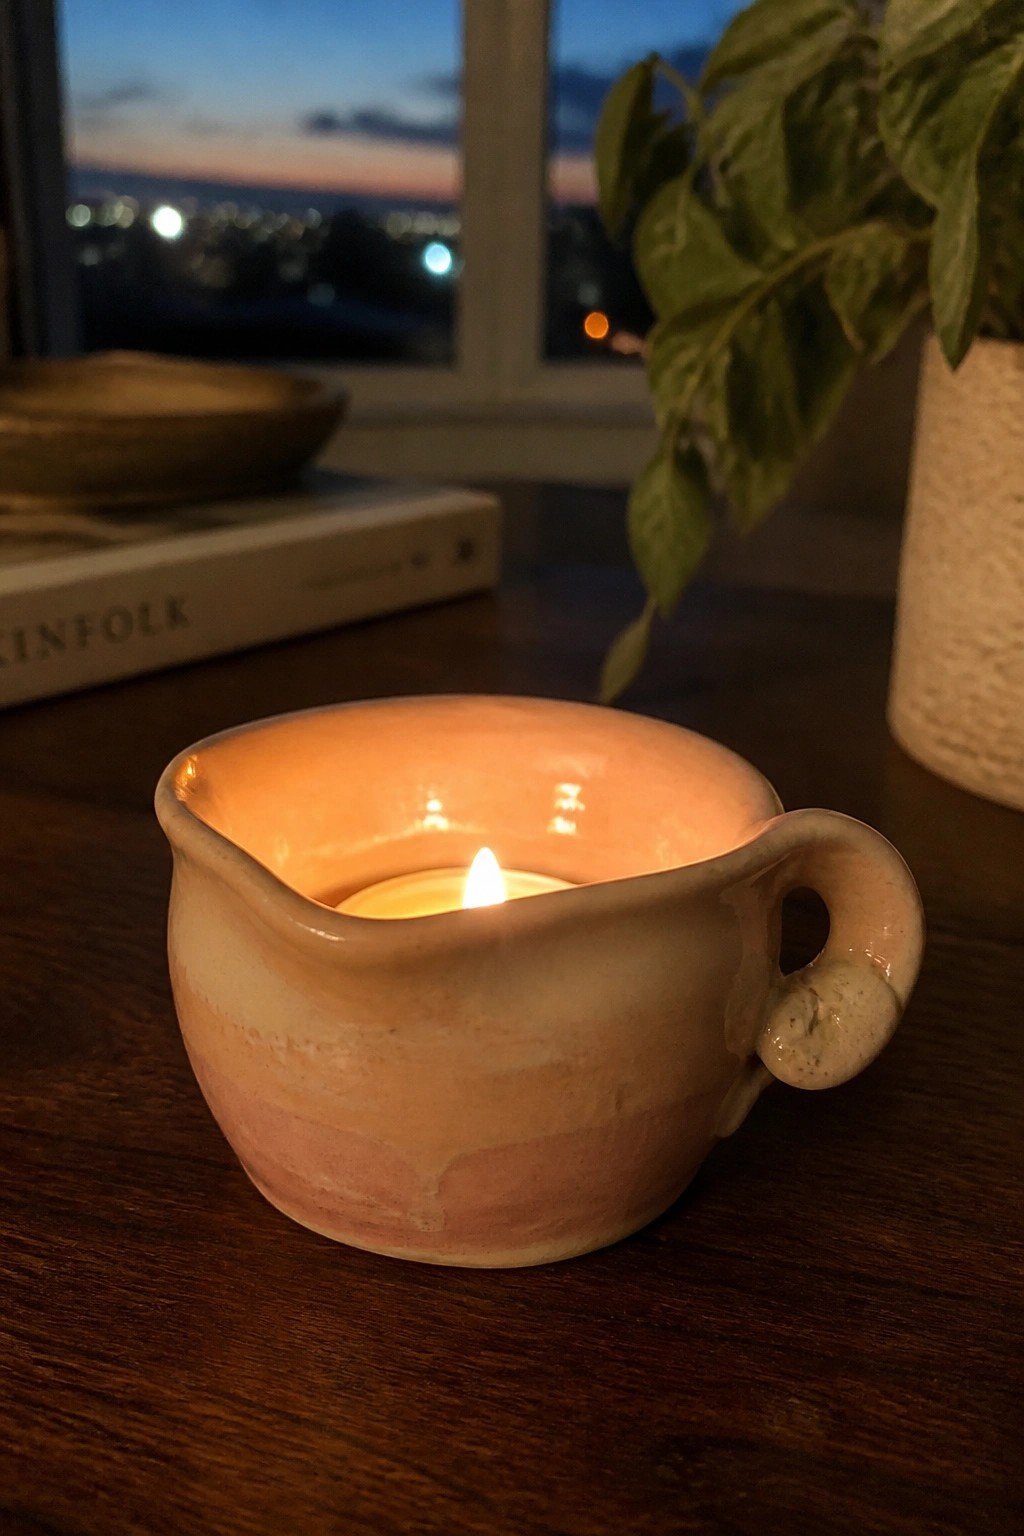
A small slab-built cup makes a straightforward candle holder for a tea light. The basic form uses a few flat pieces joined into a low, slightly irregular bowl with one added handle on the side. Soft layers of peach and pink glaze create gentle stripes across the surface while the pinched rim helps keep melted wax contained.
What makes this idea useful is how the same shape adapts quickly into a small ring dish or tiny planter. The handle gives it an easy grip for moving it around a desk or shelf. You could leave the form plain for faster sessions or add a simple spout to rework it into a miniature creamer later.
Simple Slab Soap Dish
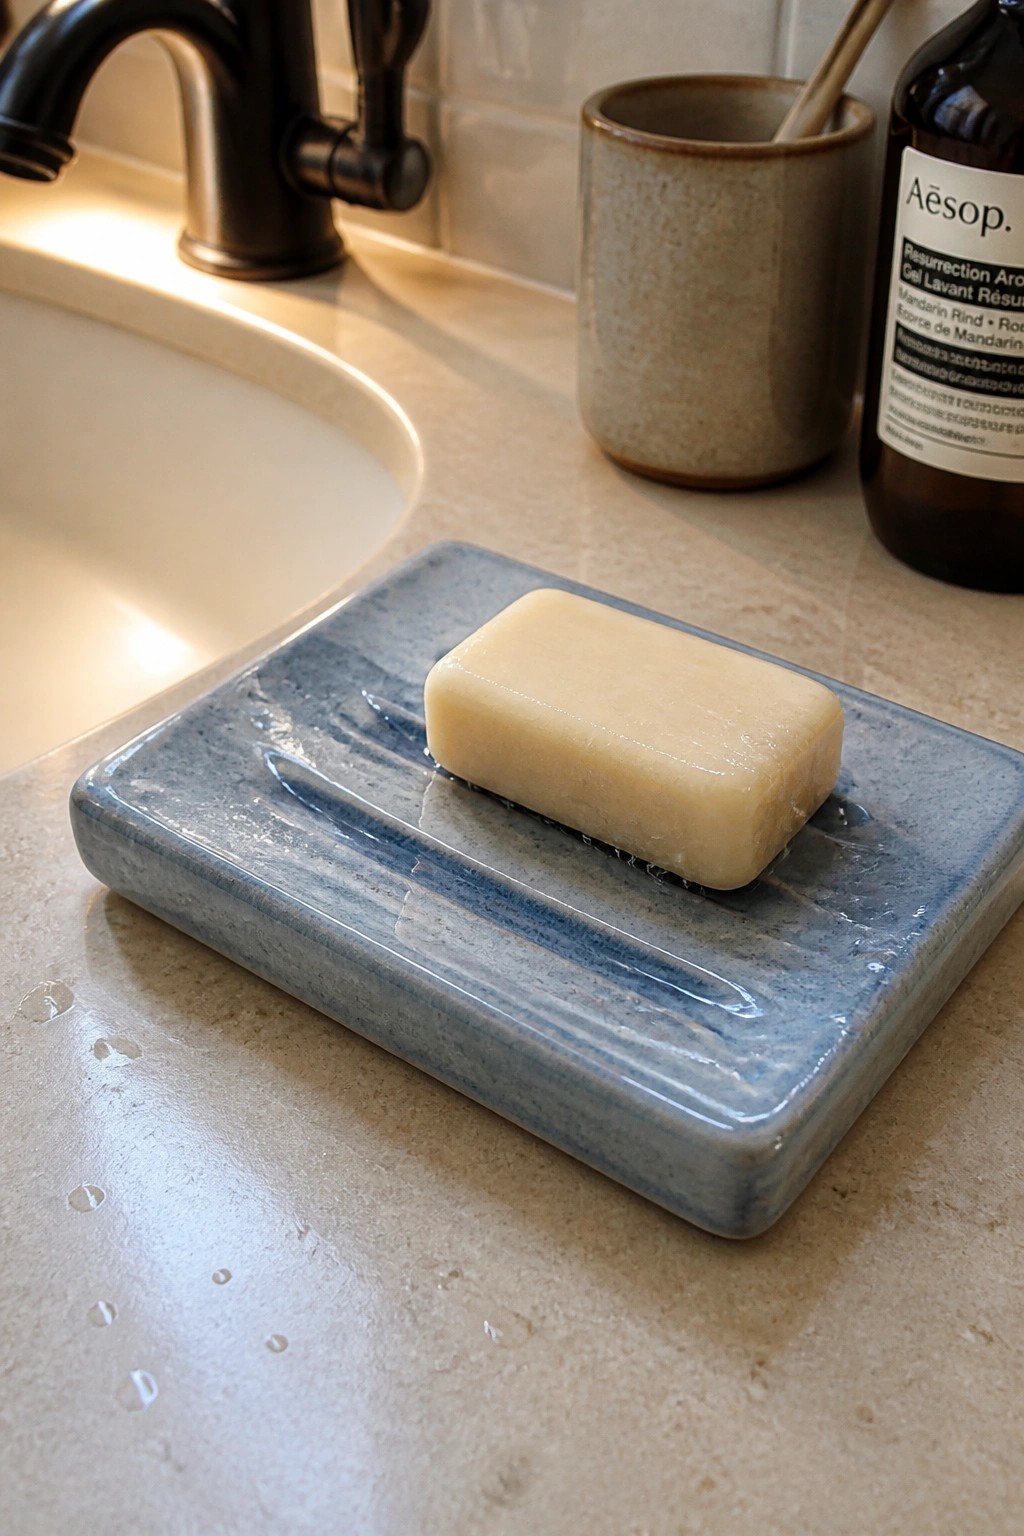
A slab-built soap dish starts with a flat rectangle of clay rolled to an even thickness and trimmed to size. Shallow grooves pressed or cut into the surface let water run off the bar instead of pooling underneath. The blue glaze with its soft streaks gives the piece a finished look while keeping the overall form low and stable on a counter. This bathroom item fits the slab project category because it needs only basic cutting and scoring with no handles or lids.
What makes this idea useful is how fast the shape comes together once the slab is ready. The same rectangle can be lengthened into a tray for two bars or shortened for a smaller sink area. You can leave the grooves plain or add a gentle slope toward one end if you want faster drainage. For a first session this project stays practical because it uses leftover clay and turns into something that gets daily use.
Divided Slab Condiment Dish
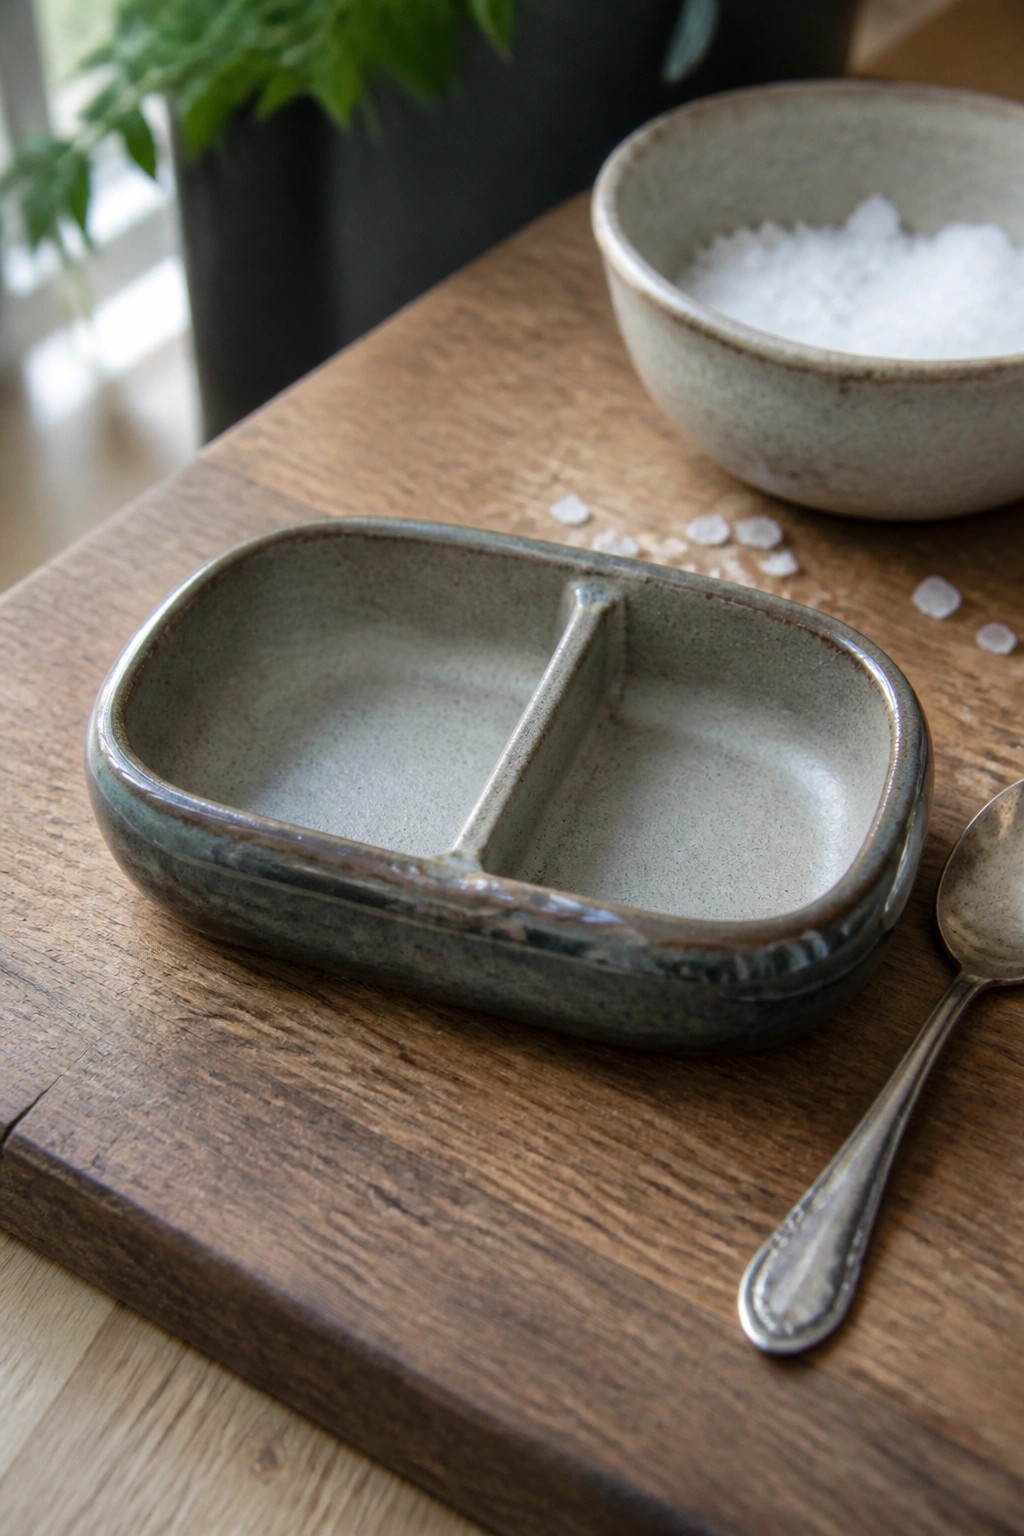
A divided oval dish built from slabs gives you two shallow compartments in one compact form. The low center wall keeps the sections separate without adding bulk, and the rounded edges come from simply pressing the slab into shape before trimming. This style works as a kitchen piece for holding two different salts, spices, or small garnishes side by side.
What makes this idea useful is how easily the same slab layout can be resized or reshaped into a longer tray with three sections. The oval keeps it stable on a table while taking up little space, so it fits well next to a stove or at a dinner setting. You can swap the glaze for a brighter color or leave the surface matte if you want the focus on the form. For a first slab project it stays simple because it only needs one seam and basic trimming.
Three-Compartment Toothbrush Holder
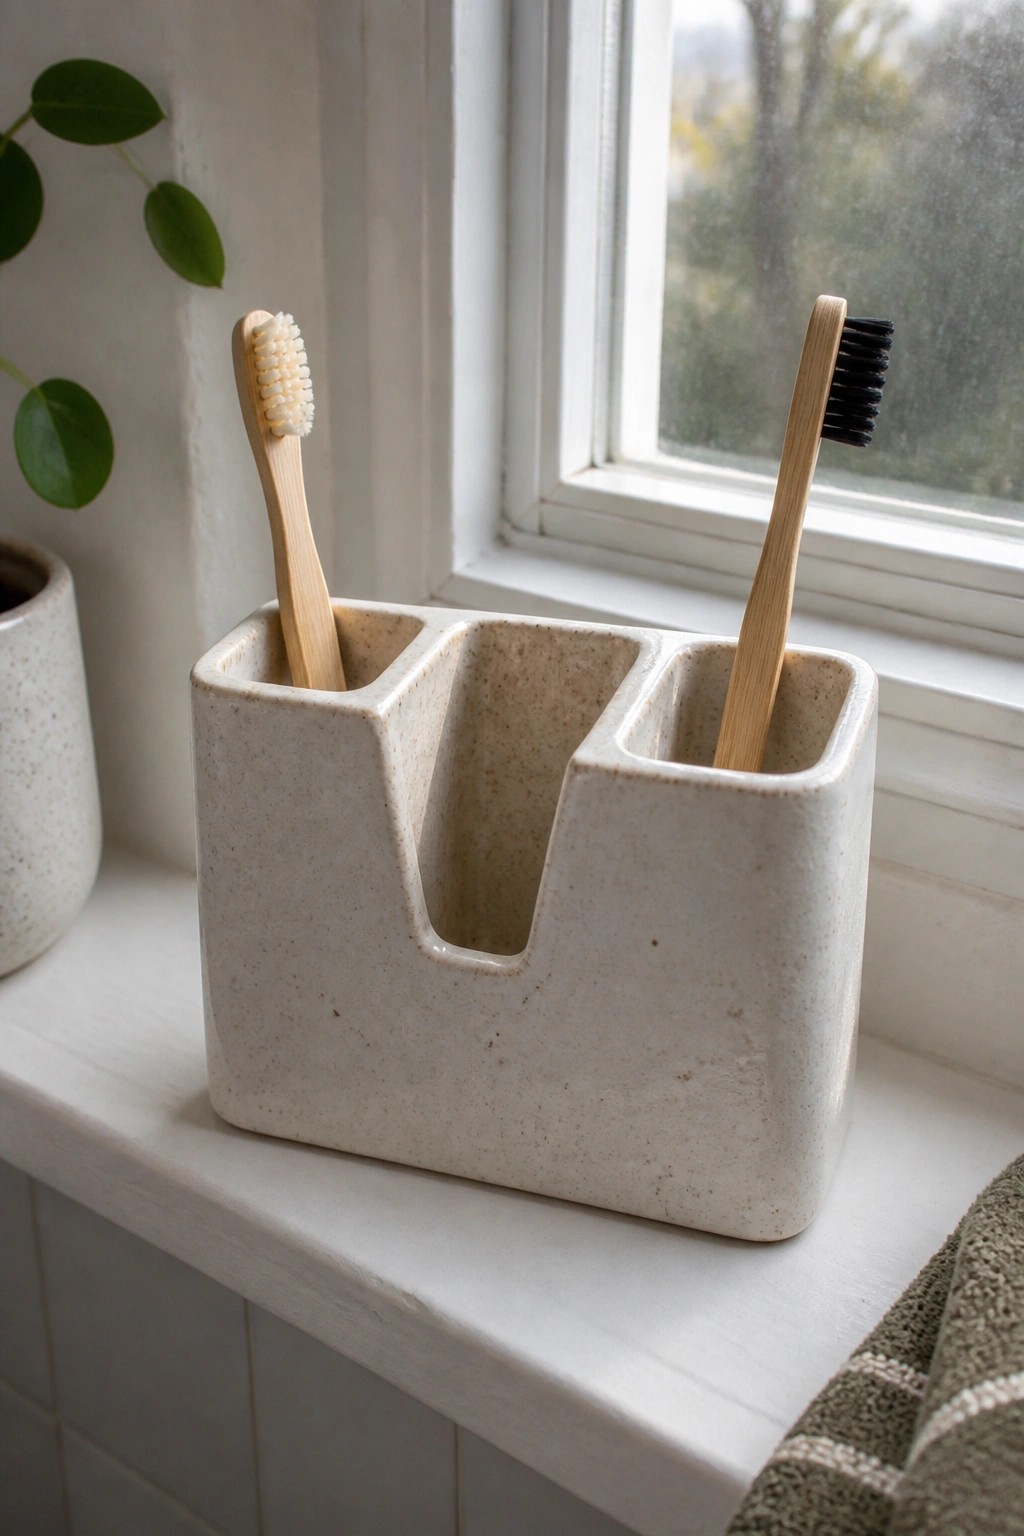
A rectangular ceramic holder built from slabs creates three separate compartments that keep toothbrushes upright and organized. The design uses straight vertical walls and a speckled clay surface that adds subtle texture without extra decoration. This project falls into the bathroom item category and gives a simple way to store daily essentials in one compact piece.
What makes this idea useful is how the divided sections prevent toothbrushes from touching each other. The shape does a lot of the work here by fitting neatly on a narrow windowsill or bathroom ledge. You could easily change the number of slots or widen one compartment to hold a tube of toothpaste instead. In a small bathroom this kind of holder keeps counters clearer than loose cups or jars.
Spotted Ceramic Napkin Holder
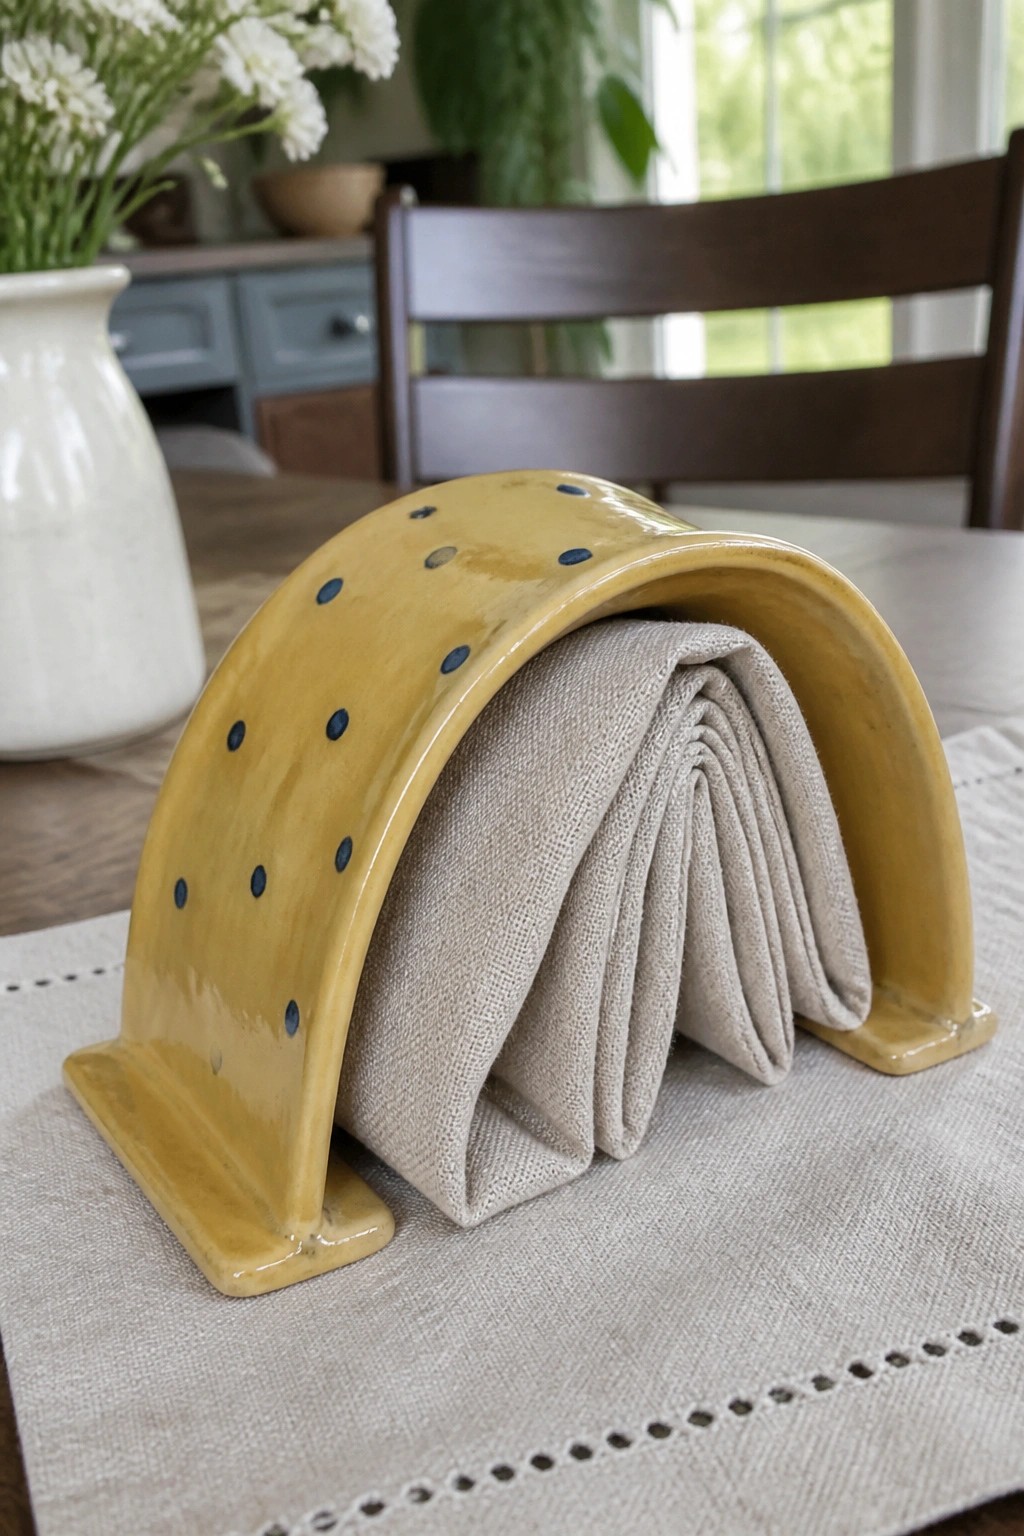
A napkin holder built from a single arched slab keeps a stack of cloth or paper napkins upright and easy to grab. The form uses a gentle curve and flat base feet to stay stable on a table without tipping. A solid glaze color with scattered dots adds contrast while keeping the surface simple to finish. This project falls into the kitchen or tableware category and works as both a functional item and light decor.
The shape does a lot of the work here because the arch creates space for napkins while the feet prevent sliding. Change the dot pattern to stripes or leave the surface plain for a faster build. This kind of piece fits on a dining table, picnic setup, or kitchen counter and makes a quick gift when paired with a set of napkins. You could scale the same arch down for smaller cocktail napkins or widen it slightly for a mail or recipe card holder.
Slab Built Kitchen Utensil Holder
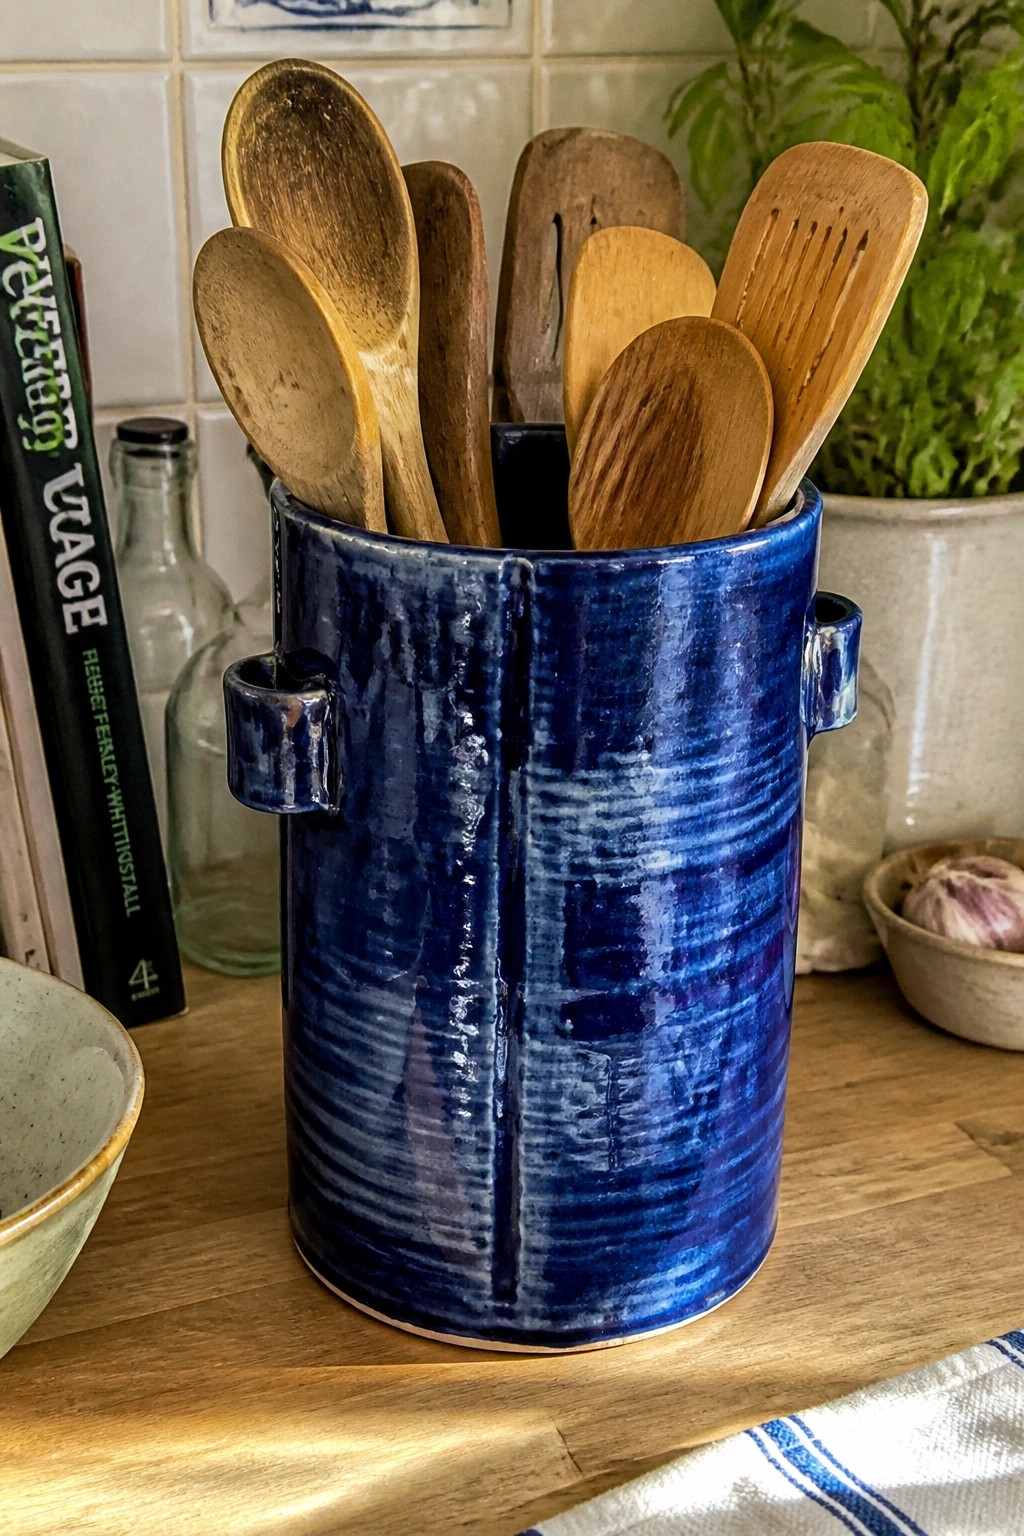
A tall cylindrical holder built from slabs makes a practical container for wooden spoons, spatulas, and other kitchen tools. The form joins into a simple tube with visible seams, then gets finished with a streaky blue glaze that emphasizes the horizontal texture from the rolling process. Small lug handles on the sides give it grip points and break up the plain round shape without adding much extra work. This type of project falls into the kitchen item category and keeps tools upright and easy to grab.
What makes this idea useful is how the height and width can be changed to match the length of your utensils or turned into a shorter version for desk supplies. The side handles let you carry it when full without the contents spilling, and the same cylinder can be adapted into a small planter or a bathroom toothbrush holder by adjusting the scale. In a kitchen this kind of piece stays functional through daily use because the glaze surface wipes clean and the weight keeps it stable on the counter.
Slab Built Hedgehog Figurine
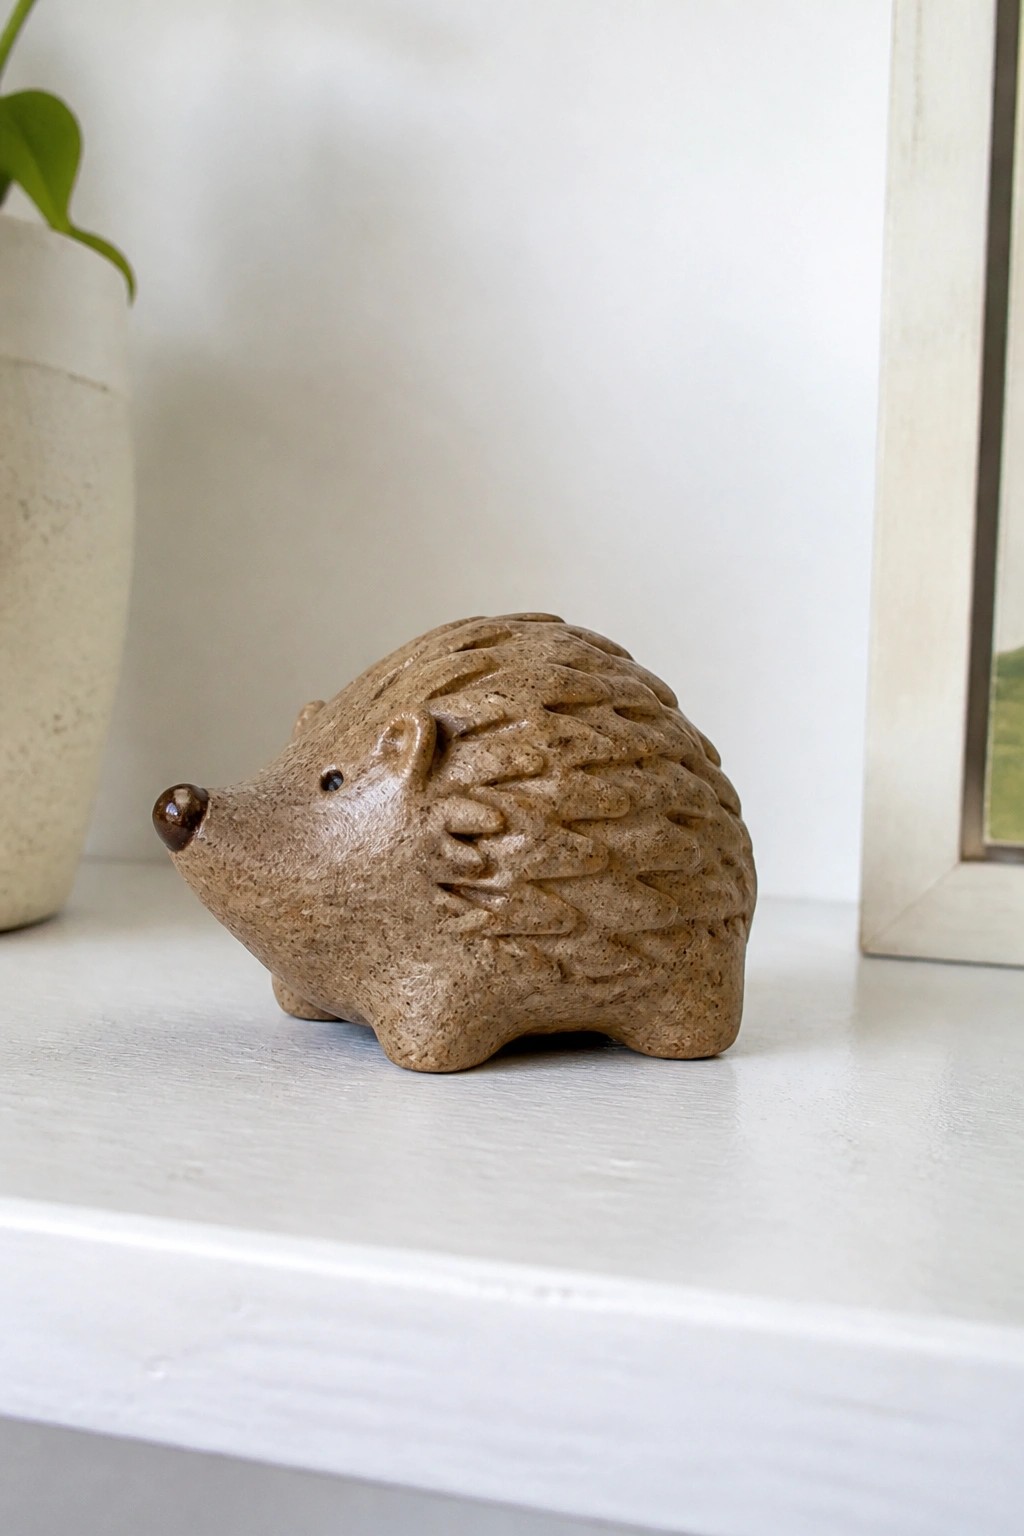
A small hedgehog figurine is a straightforward slab project that starts with rolling out a few basic shapes for the body and head. Press the slabs together and add scored lines across the back to create the look of spines. An earthy brown surface keeps the finish simple while the compact size makes the whole form easy to handle on a first attempt.
What makes this idea useful is how the rounded body shape can be adjusted to create other animals without changing the basic steps. A piece like this works especially well as shelf or desk decor since it stays small and needs no special function. The same approach can be reworked into a turtle or bird by swapping out the head and texture details.
Square Slab Coasters with Embossed Patterns
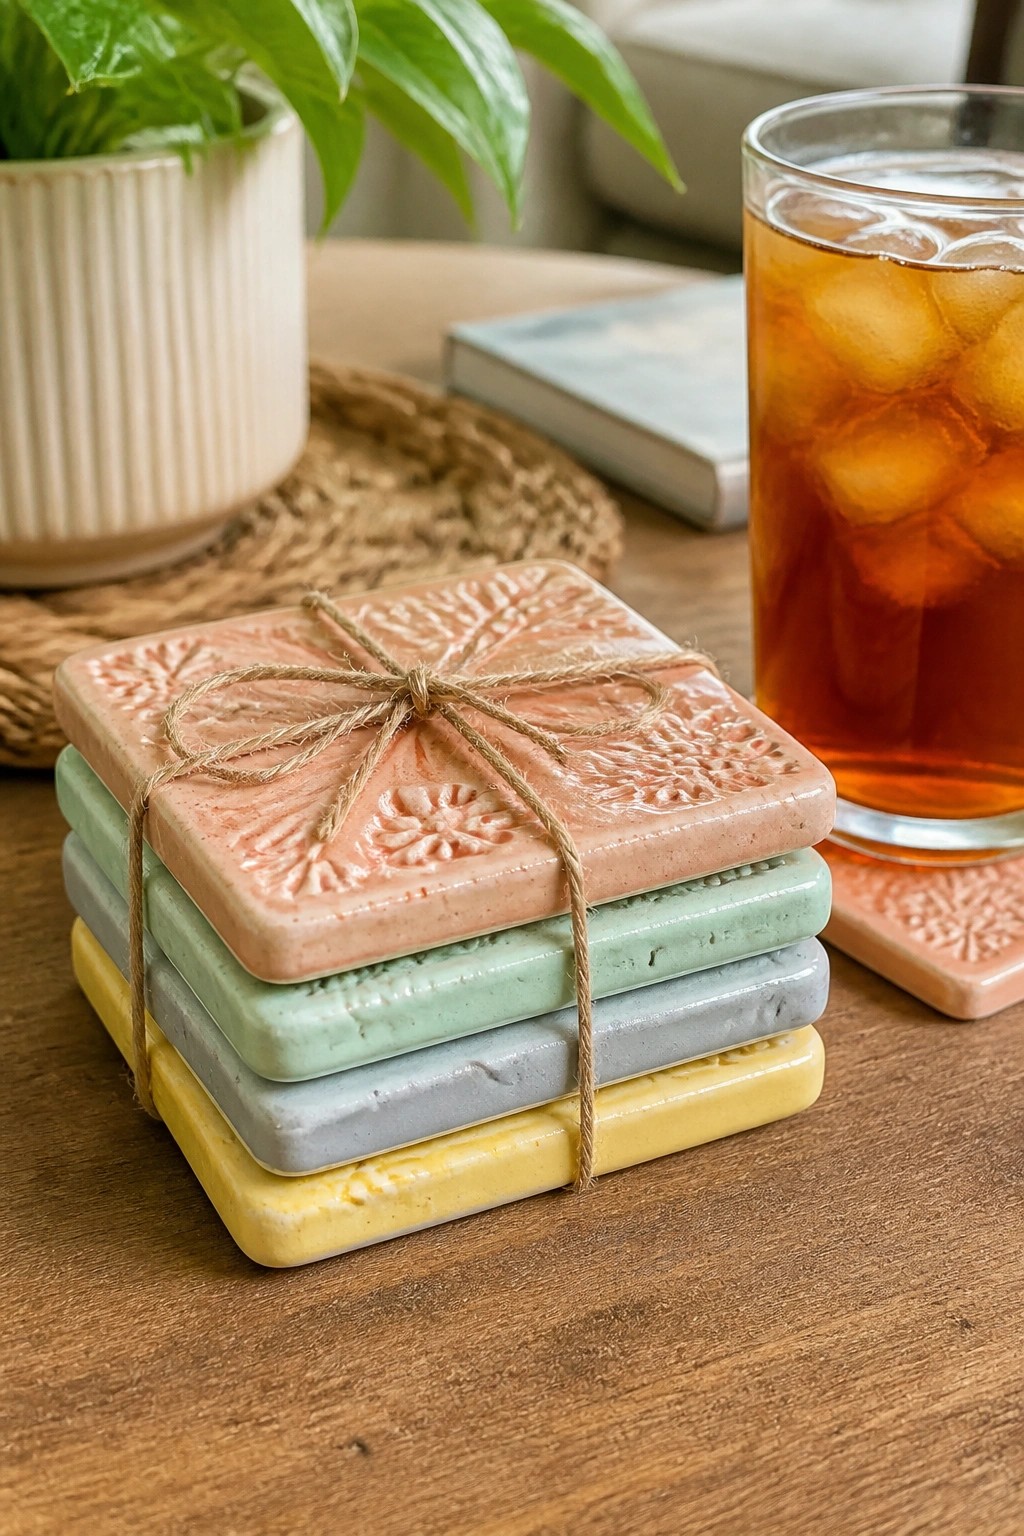
Square coasters cut from clay slabs work well as a first project because they require only basic rolling, cutting, and stamping. The top surfaces are impressed with simple leaf and flower stamps before a light layer of glaze is applied in soft pastel shades. The edges stay slightly rounded from the slab process, which helps them sit flat on a table without sharp corners. Stacking several in different colors creates a ready-to-use set that takes up little space.
What makes this idea useful is how quickly you can produce four or six matching pieces from one slab session. Change the stamp or switch to a single glaze color to match kitchen tiles or a specific mug set. The same square shape can be scaled up slightly into a spoon rest or scaled down for a ring dish. These stand out on Pinterest because the embossed detail shows clearly even in simple photos and the project needs very little equipment.
Leaf-Shaped Serving Platter
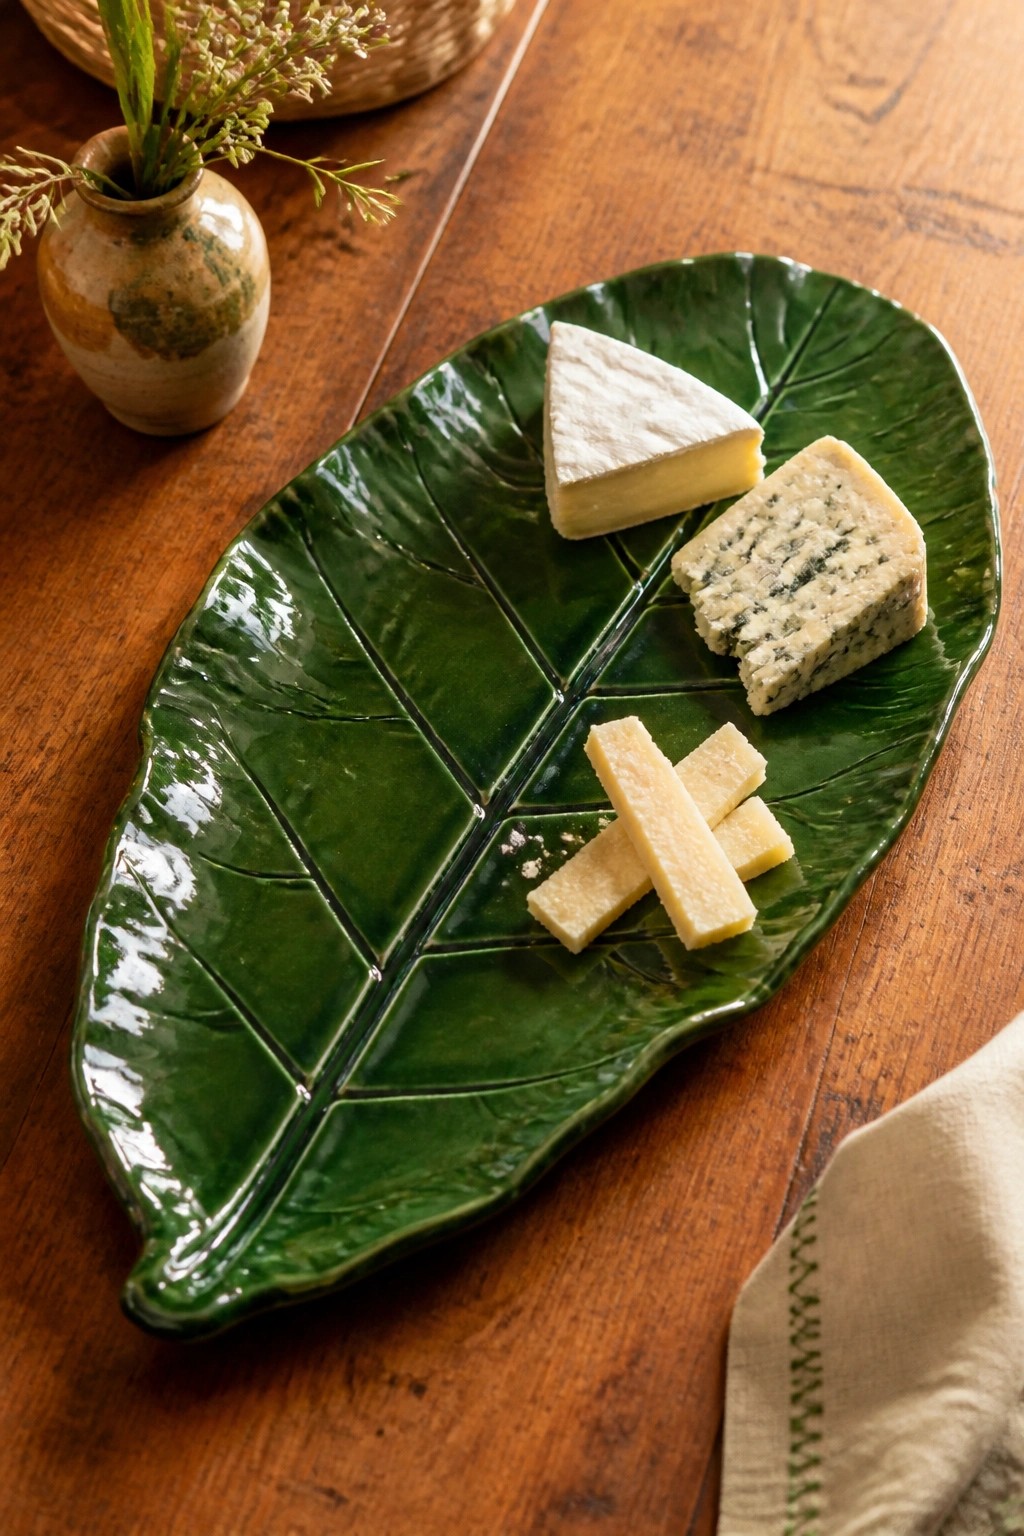
A slab-built leaf platter gives you a flat, functional surface shaped like a broad leaf with raised veins running through it. Cut the basic form from a rolled slab, press or carve the vein lines, then fire it with a glossy green glaze that pools in the recessed areas to emphasize the texture. The result is a kitchen or dining piece that works for serving cheese, snacks, or small appetizers while staying simple enough for early slab projects.
What makes this idea useful is how the leaf outline does most of the design work once the slab is cut. You can resize the same template for a smaller spoon rest or a longer bread board by adjusting the proportions before firing. A single solid glaze keeps the focus on the shape and veins, so the piece stays quick to finish yet still looks intentional on a table. For a different version, swap the green for a matte brown or speckled white glaze and use it as a catch-all tray instead.
Slab-Built Rectangular Kitchen Tray
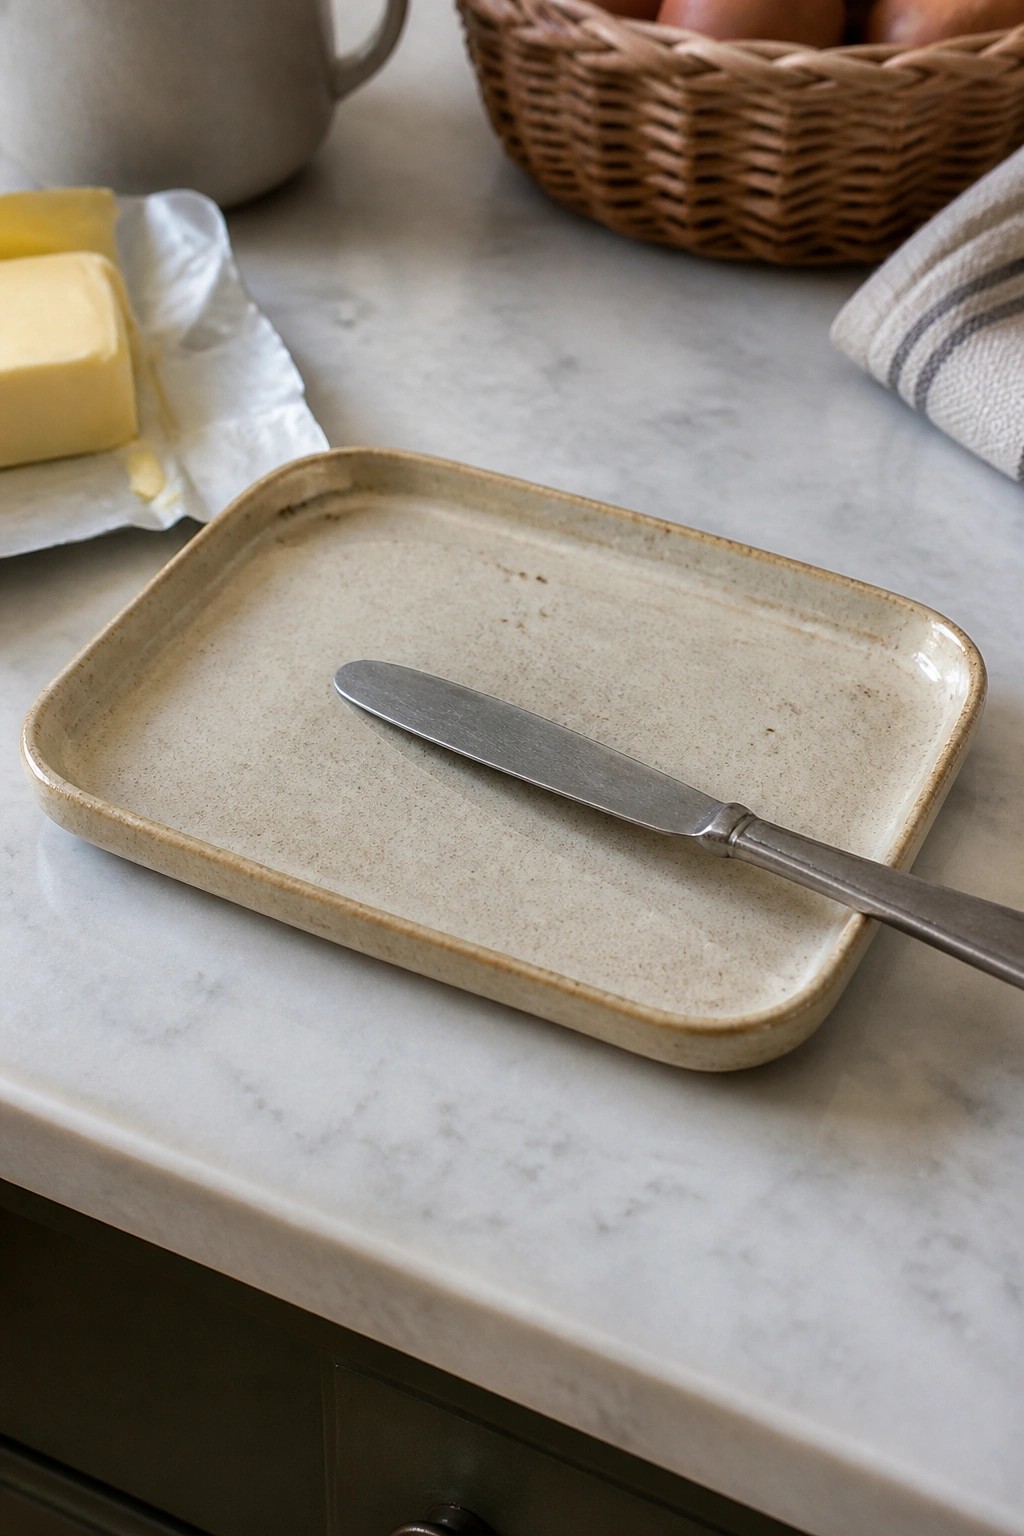
A rectangular slab tray makes a straightforward kitchen piece for holding butter, cheese, or small spreads. Form it by rolling out a flat slab, cutting a clean rectangle, and attaching low side walls along the edges. The speckled neutral glaze keeps the surface practical and easy to wipe clean while letting the simple shape stand out.
What makes this idea useful is how easily you can adjust the size to fit different counter spaces or needs. Make a longer version for a small cheese board or shorten the sides to create a compact dish for soap or keys. In a kitchen, this shape works well next to the stove or on a breakfast table. You could also add a shallow groove down the center if you want to separate two items on the same tray.
Notched Yarn Bowl for Knitting
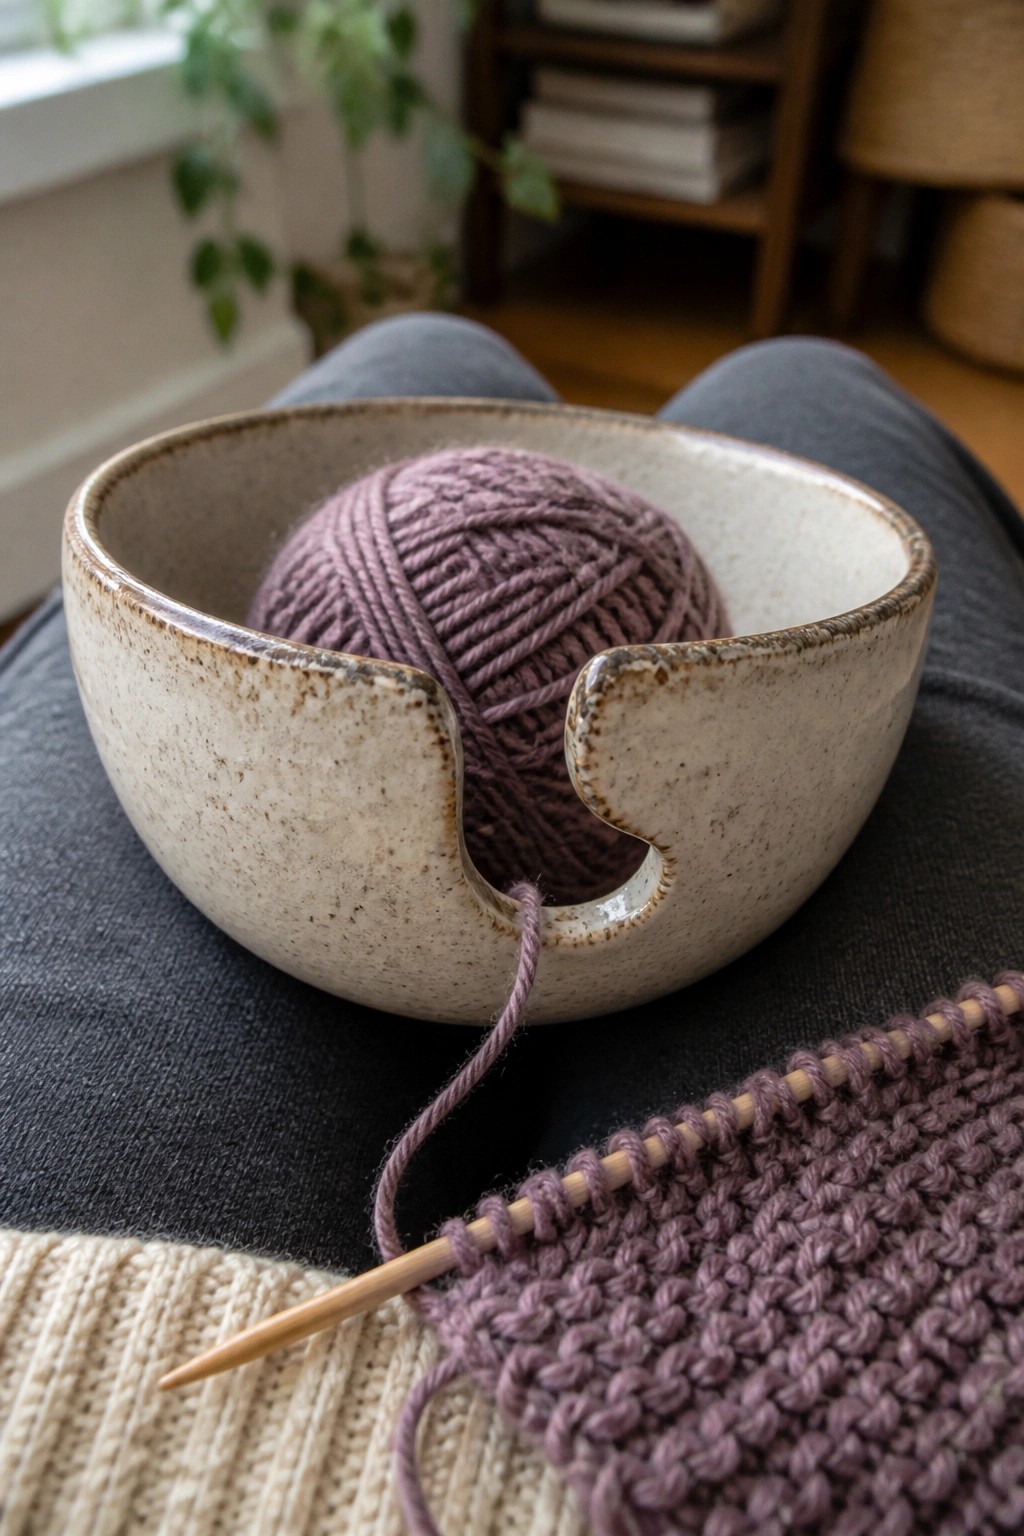
A yarn bowl is a simple ceramic dish made to hold a ball of yarn while you knit or crochet. The main detail is a notch cut into the rim that guides the strand outward and keeps it from rolling away. This example uses a wide, low shape with a matte speckled glaze that highlights the cutout without extra decoration. It works as a practical holder rather than a decorative accent.
What makes this idea useful is how the notch solves a common problem during long knitting sessions. You can scale the bowl larger for bulky yarns or add a second notch if you work with multiple strands. A piece like this works especially well on a lap or side table in a living room or craft corner. For a quick variation, try the same form as a small holder for cords or embroidery floss.
Slab-Built Sponge Holder with Drainage Slots
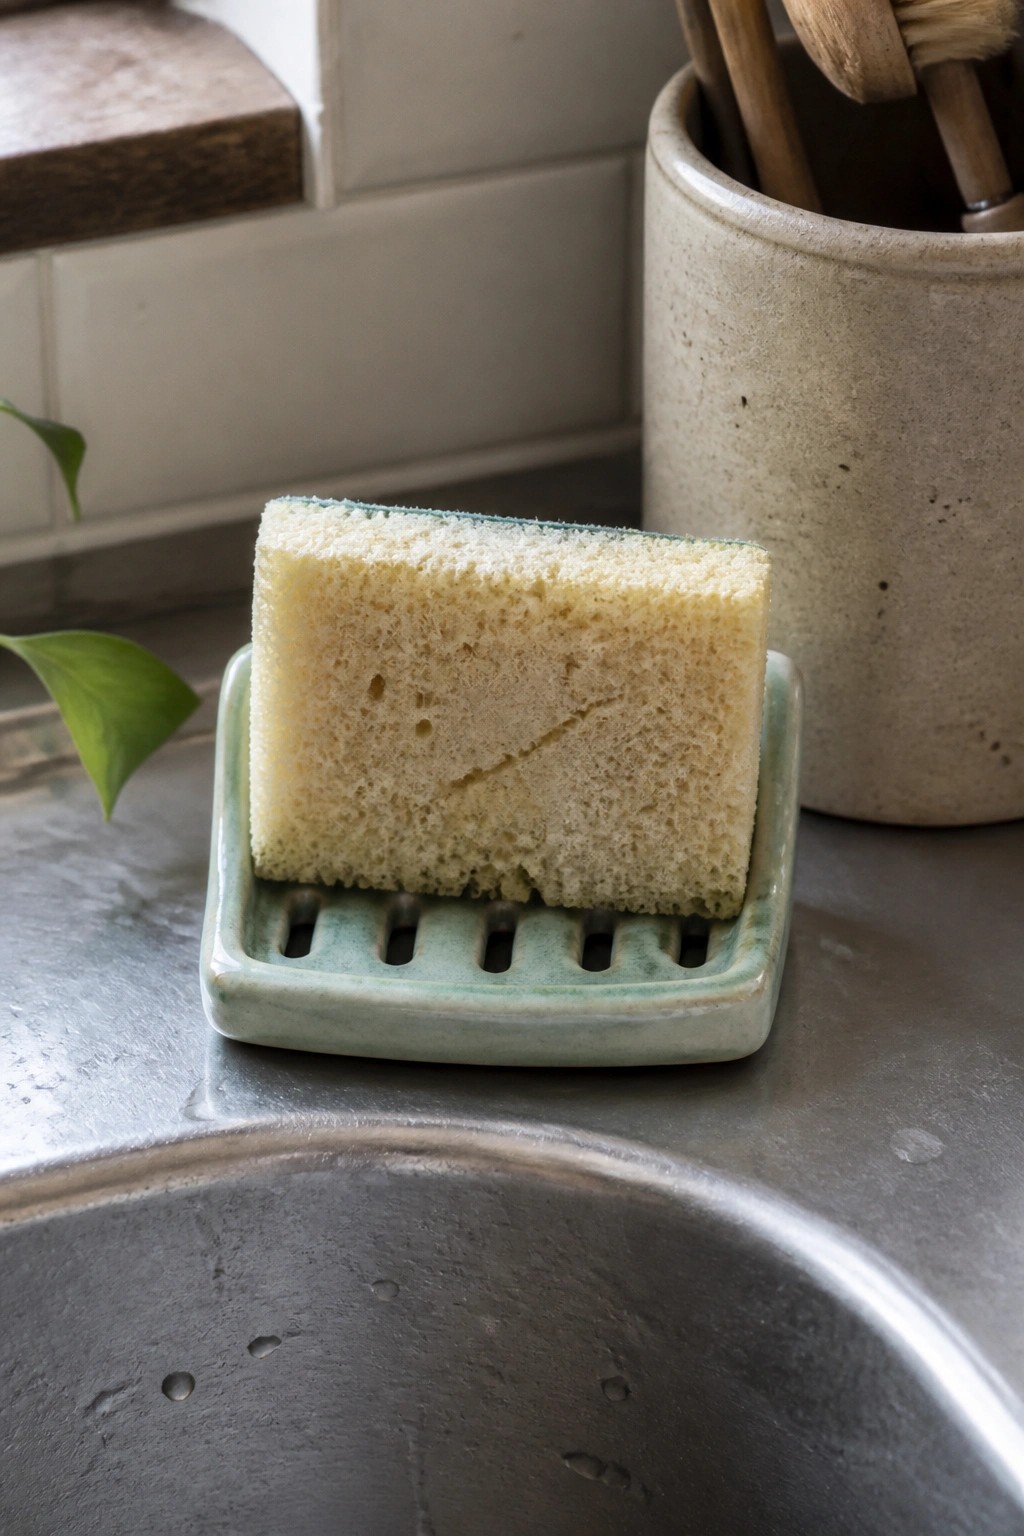
A simple slab project like this creates a low rectangular tray sized to hold a standard kitchen sponge. Parallel slots cut through the base allow water to drain directly into the sink instead of pooling underneath. The soft green glaze covers both the tray and its low rim, giving the piece a finished surface that resists moisture.
What makes this idea useful is how the slotted base solves a common sink problem without adding extra parts. You can change the length or width of the tray to match larger or smaller sponges, or add a shallow lip on one side for easier lifting. The same slab layout works for a soap dish by narrowing the slots or leaving them out entirely. A few of these made in matching glazes store neatly on open shelves and keep counters drier between uses.
Nesting Slab Plates
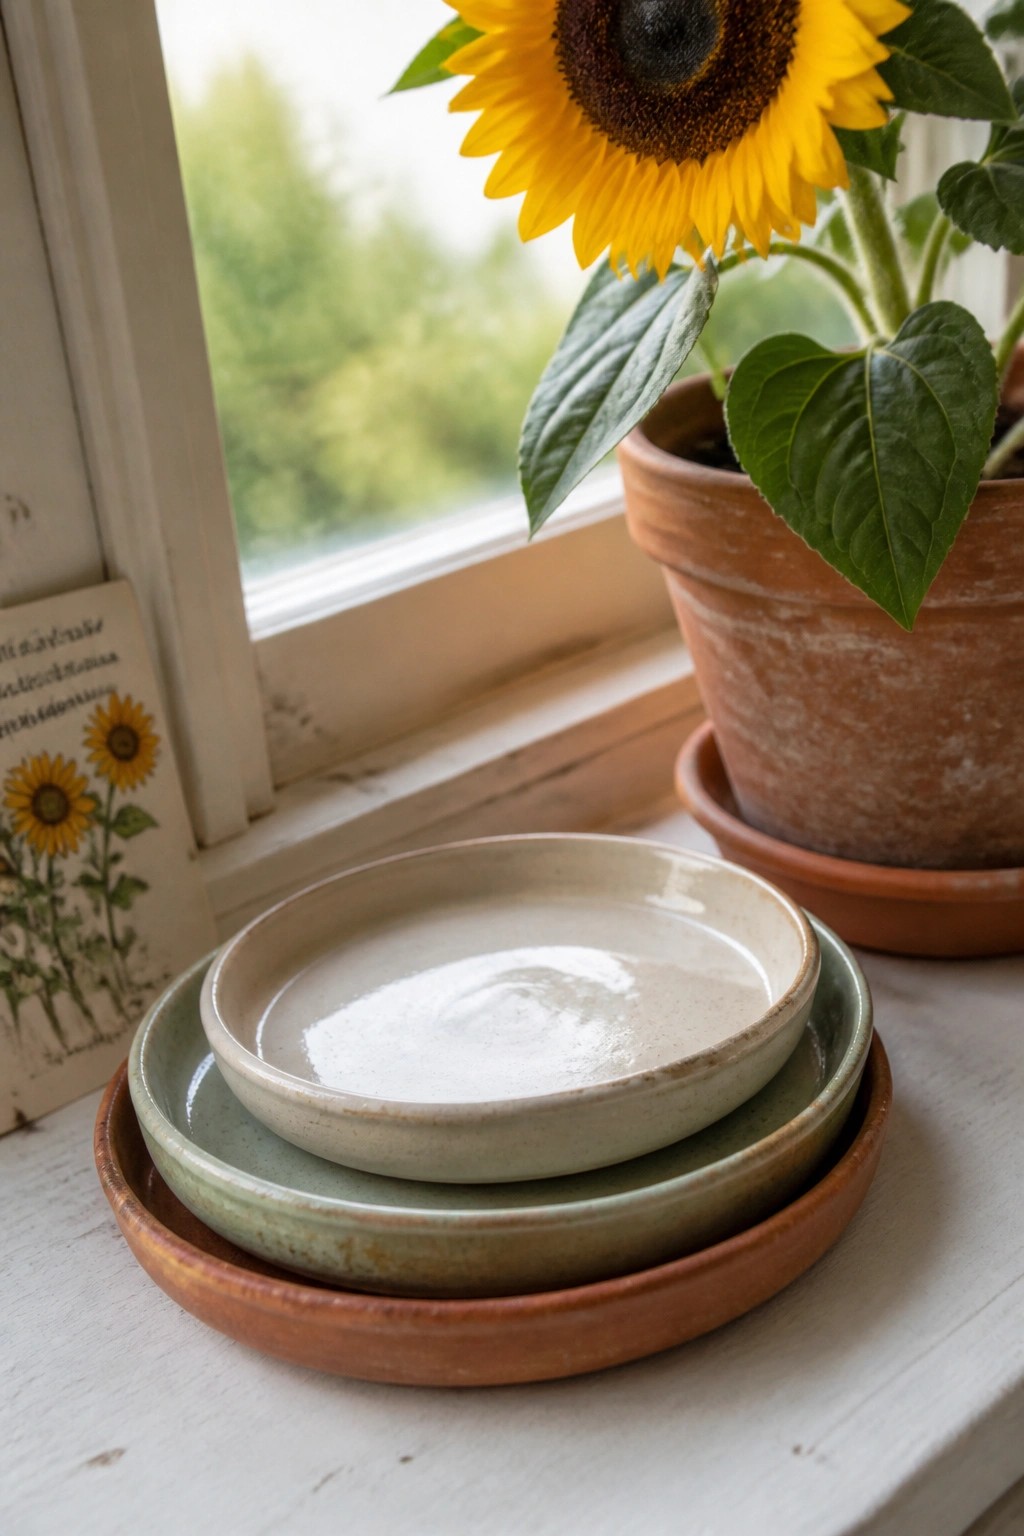
Slab-rolled plates are cut as simple circles from a flat sheet of clay, then gently shaped with a low rim to create shallow dishes. These three graduated sizes stack neatly because each one is sized to sit inside the next, and the matte glazes in terracotta, sage, and cream let the natural clay texture show through without competing patterns. The project stays basic since it only requires rolling even slabs, tracing templates, and adding a foot ring if desired.
What makes this idea useful is that one slab session produces a matching set ready for daily use as side plates or small serving dishes. You can adapt the diameters to match standard plate sizes or shrink them into saucers for plants. The same template method works for making four or six pieces at once, and the neutral glaze choices keep the set versatile for kitchen or table styling.
Wall Pocket Planter
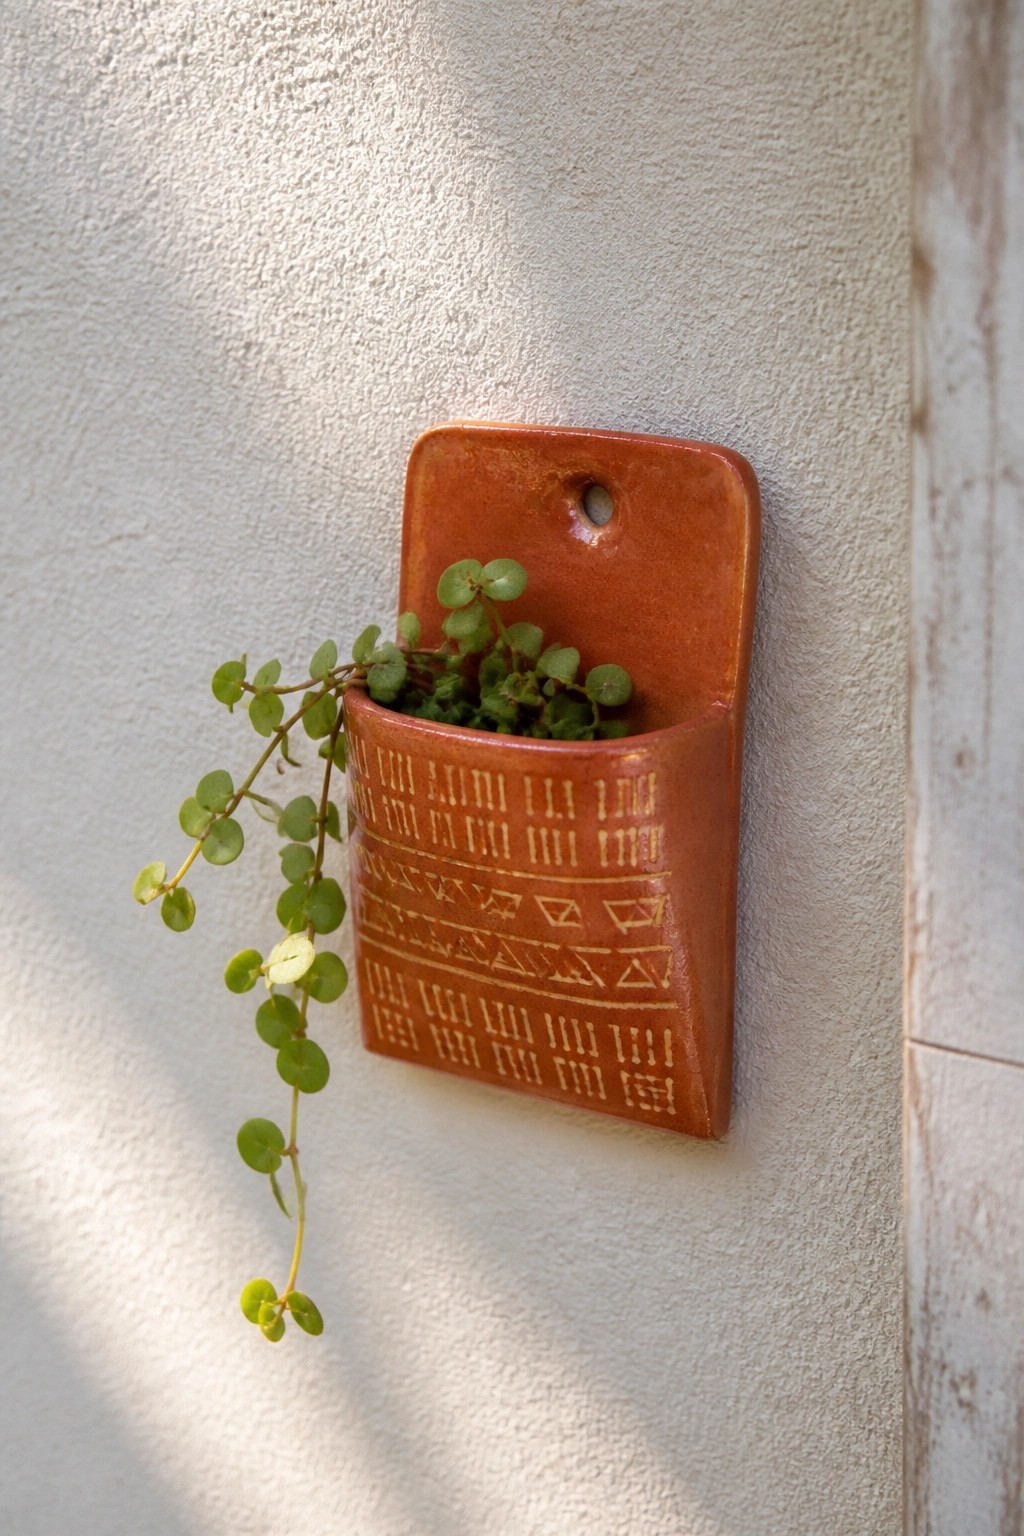
A wall pocket planter built from a single slab of clay creates a flat-backed container that hangs directly on a wall. The reddish glaze covers the surface while incised geometric lines add pattern across the front without extra attachments. This project belongs in the slab pottery planter category and keeps the form simple enough to make in one session.
What makes this idea useful is how the compact pocket shape works well for trailing plants in small outdoor spots or entryways. You could swap the carved patterns for stamps or skip them entirely and still get a clean result. The same slab method could be adapted into a larger version for bigger plants or turned into a set of matching pockets for a row on one wall.
Ceramic Tea Bag Rest
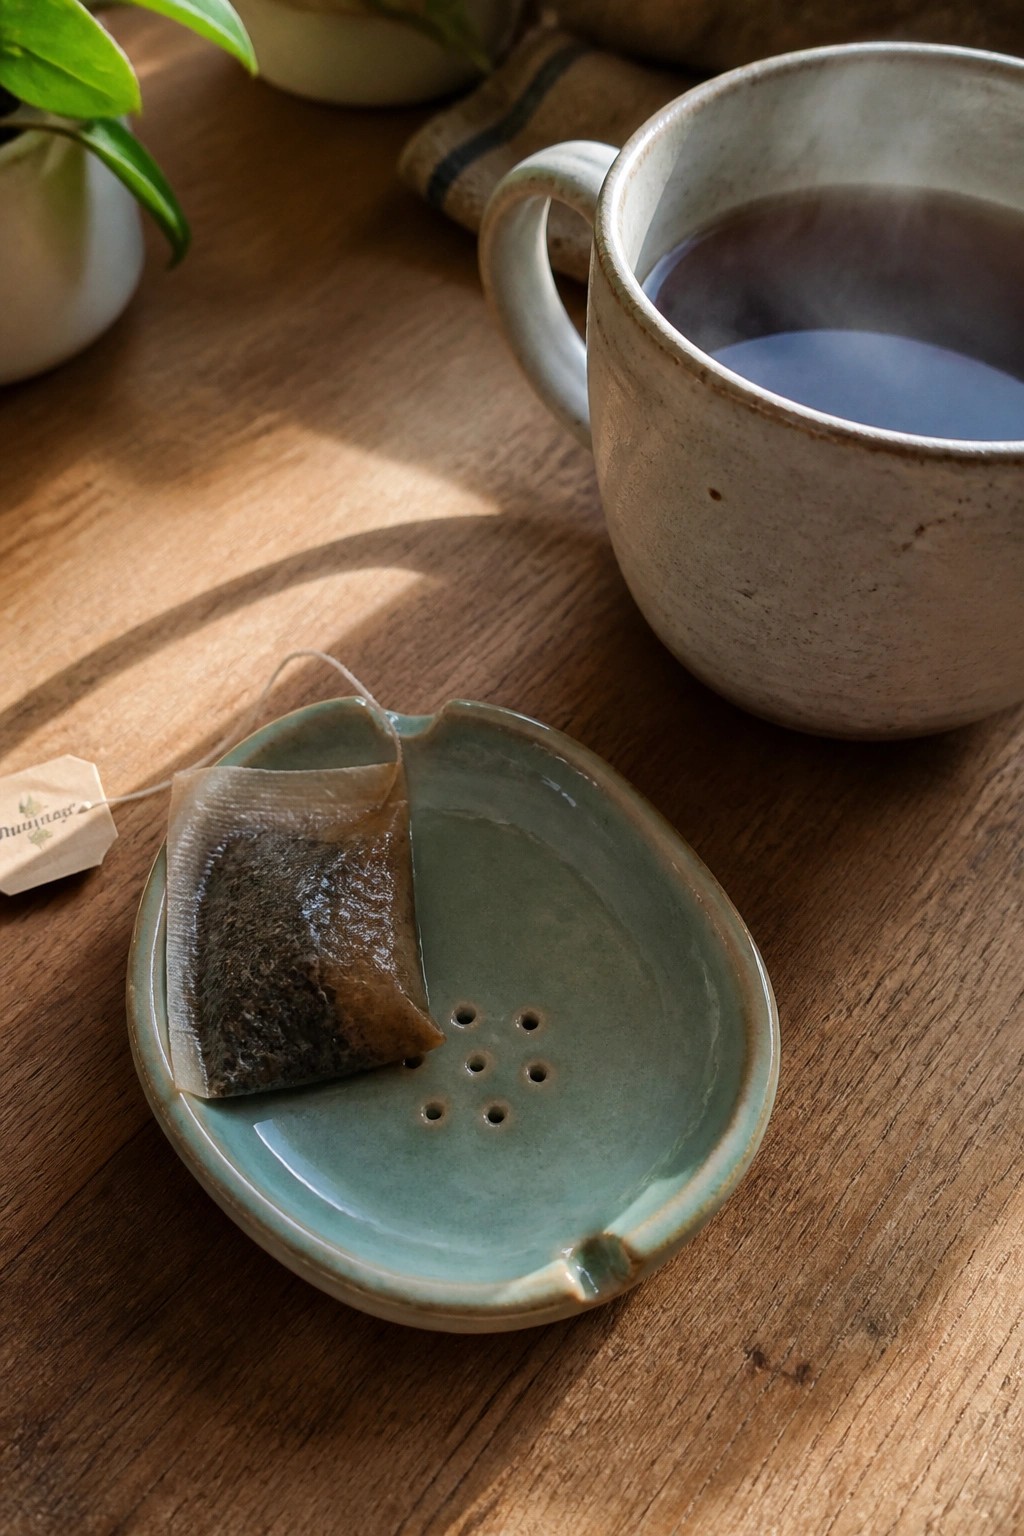
A small oval ceramic dish serves as a tea bag rest for holding a used bag during or after steeping. The design includes a notch along one edge to catch the string and a set of drainage holes in the base to let excess liquid drip through. The soft teal glaze covers the form evenly and gives the piece a clean, practical surface. This fits the category of simple slab-built kitchen accessories.
What makes this idea useful is how it solves the common problem of a soggy tea bag leaking on a table or counter. The compact size works well beside a mug or on a breakfast tray, and the same basic shape could be lengthened into a spoon rest or shortened into a small soap dish. Changing the notch placement or glaze color lets you match it to existing mugs or dinnerware without extra steps. For a first slab session, the form needs only a few cuts and a quick pinch to shape the notch.
Frequently Asked Questions
What basic tools and supplies will I need to get started with slab pottery projects?
You will need a few essentials to begin slab pottery at home or in a studio. Start with a block of clay that is suitable for hand building, such as stoneware or earthenware. Gather a rolling pin or slab roller for flattening the clay evenly, a ruler and craft knife for cutting precise shapes, a sponge for smoothing surfaces, and a work surface like canvas or a wooden board to prevent sticking. Additional helpful items include wooden ribs for shaping, slip for joining pieces, and plastic wrap to keep clay moist during your session.
Which of the 23 projects are the most suitable for someone with no prior experience?
The simplest options focus on basic cutting and minimal assembly. Projects like flat coasters, simple trays, or small wall plaques require only rolling out a slab, cutting shapes with templates, and adding light texture. These avoid complex joins and let you practice core techniques without frustration. Choose projects that use one or two slabs at most and skip anything involving handles or lids for your first attempt.
How can I prevent my clay slabs from cracking during the drying process?
To reduce cracking, roll your slabs to an even thickness of about a quarter inch and allow them to dry slowly under plastic wrap for the first day or two. Turn pieces periodically so both sides dry at the same rate, and avoid placing them in direct sunlight or near heat sources. If edges start to dry faster, mist them lightly with water and cover again. Slow, controlled drying helps the clay shrink uniformly and stay intact until it reaches the leather hard stage.
What are some tips for successfully joining pieces in slab construction?
Score both surfaces where pieces will meet using a tool like a fork or needle tool to create texture. Apply a thin layer of slip, which is clay mixed with water, to the scored areas and press the pieces together firmly. Smooth the seam on the outside with a finger or rib while supporting the inside to maintain shape. For extra strength on thicker joins, add a small coil of clay along the inside seam and blend it in. Work quickly while the clay remains moist to ensure a strong bond.
After completing a project, how should I prepare it for firing in a kiln?
Once your piece is fully dry and feels like chalk, check for any sharp edges or cracks and smooth them gently with sandpaper if needed. Bisque fire first at a low temperature to harden the clay without glazing. After the bisque fire, apply glaze if desired following the manufacturer’s instructions, then load the piece into the kiln for a glaze firing at the appropriate cone temperature for your clay type. Always allow pieces to cool completely inside the kiln before removing them to avoid thermal shock.

Pottery Path is my cozy corner of the internet where I share clay ideas, pottery inspiration, and simple projects you can recreate at home. I love exploring everything from air dry clay to handbuilt pottery to cute minis that brighten your day. My goal is to make clay crafting feel easy, fun, and welcoming for anyone who wants to try it.
You will find beginner friendly tutorials, creative pottery painting ideas, and lots of warm inspiration for slow and happy crafting. If you enjoy hands on creativity, this space will feel like home.