I like using slab construction for pottery because it does not require a pottery wheel or advanced skills.
Most projects start with rolling out a flat piece of clay and then shaping it while it is still soft.
In this article I share 19 simple ideas that follow these steps.
Each one is meant to be straightforward and doable with basic supplies.
I have tested a few of them in my own space and they turned out fine with some practice.
Polka Dot Speckled Mug
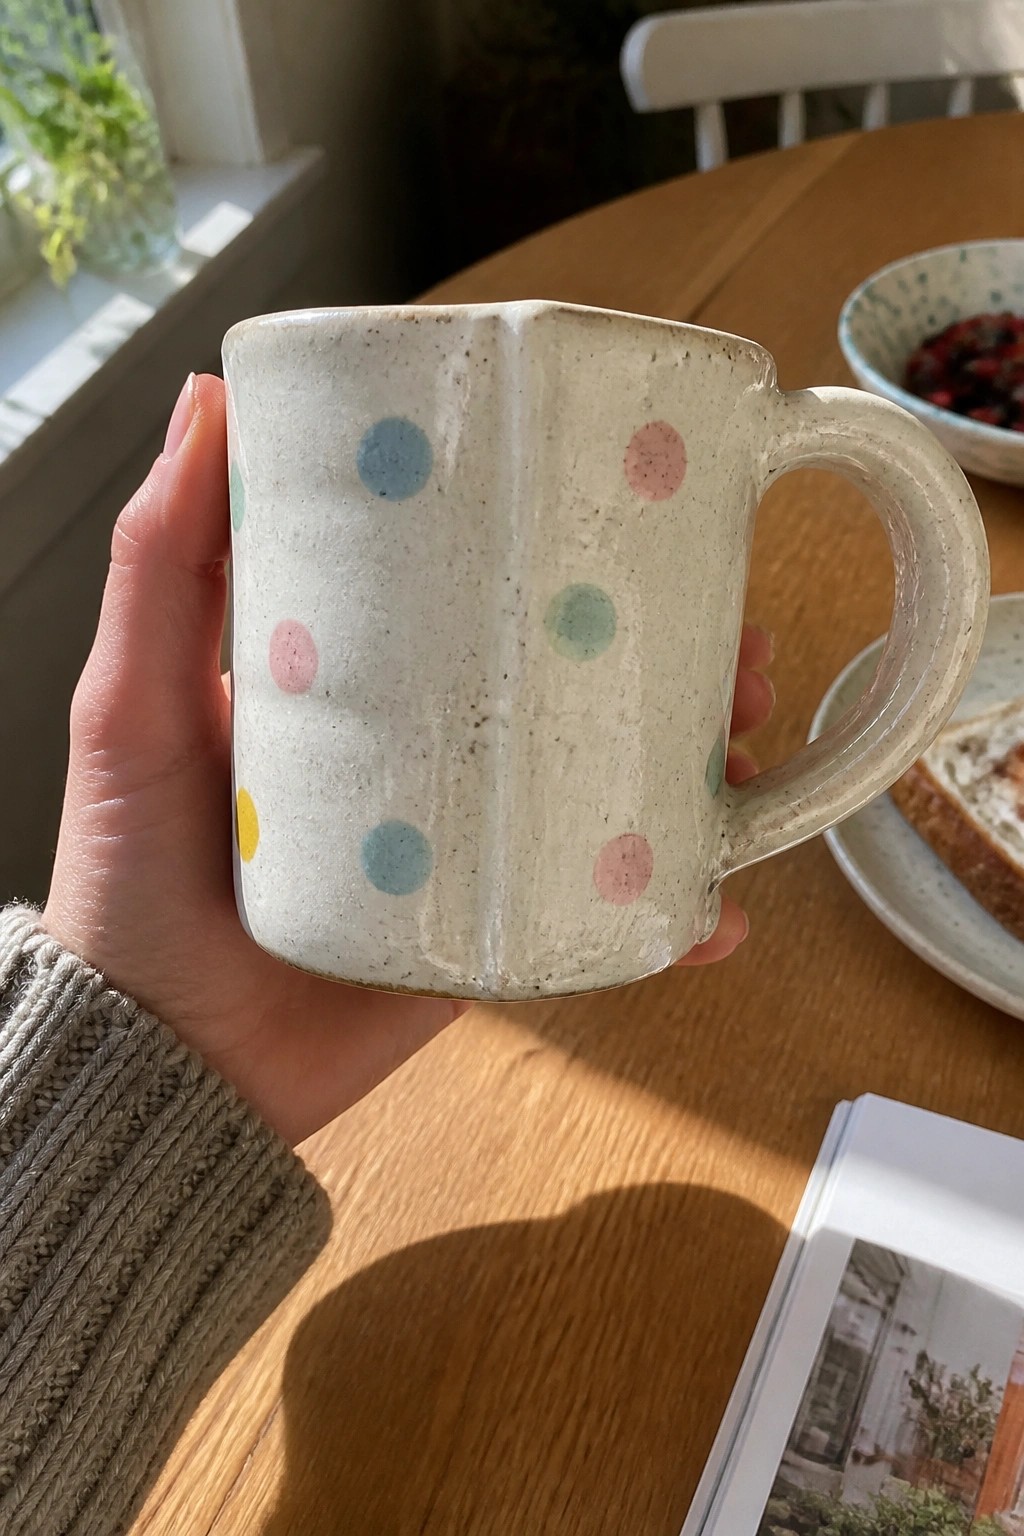
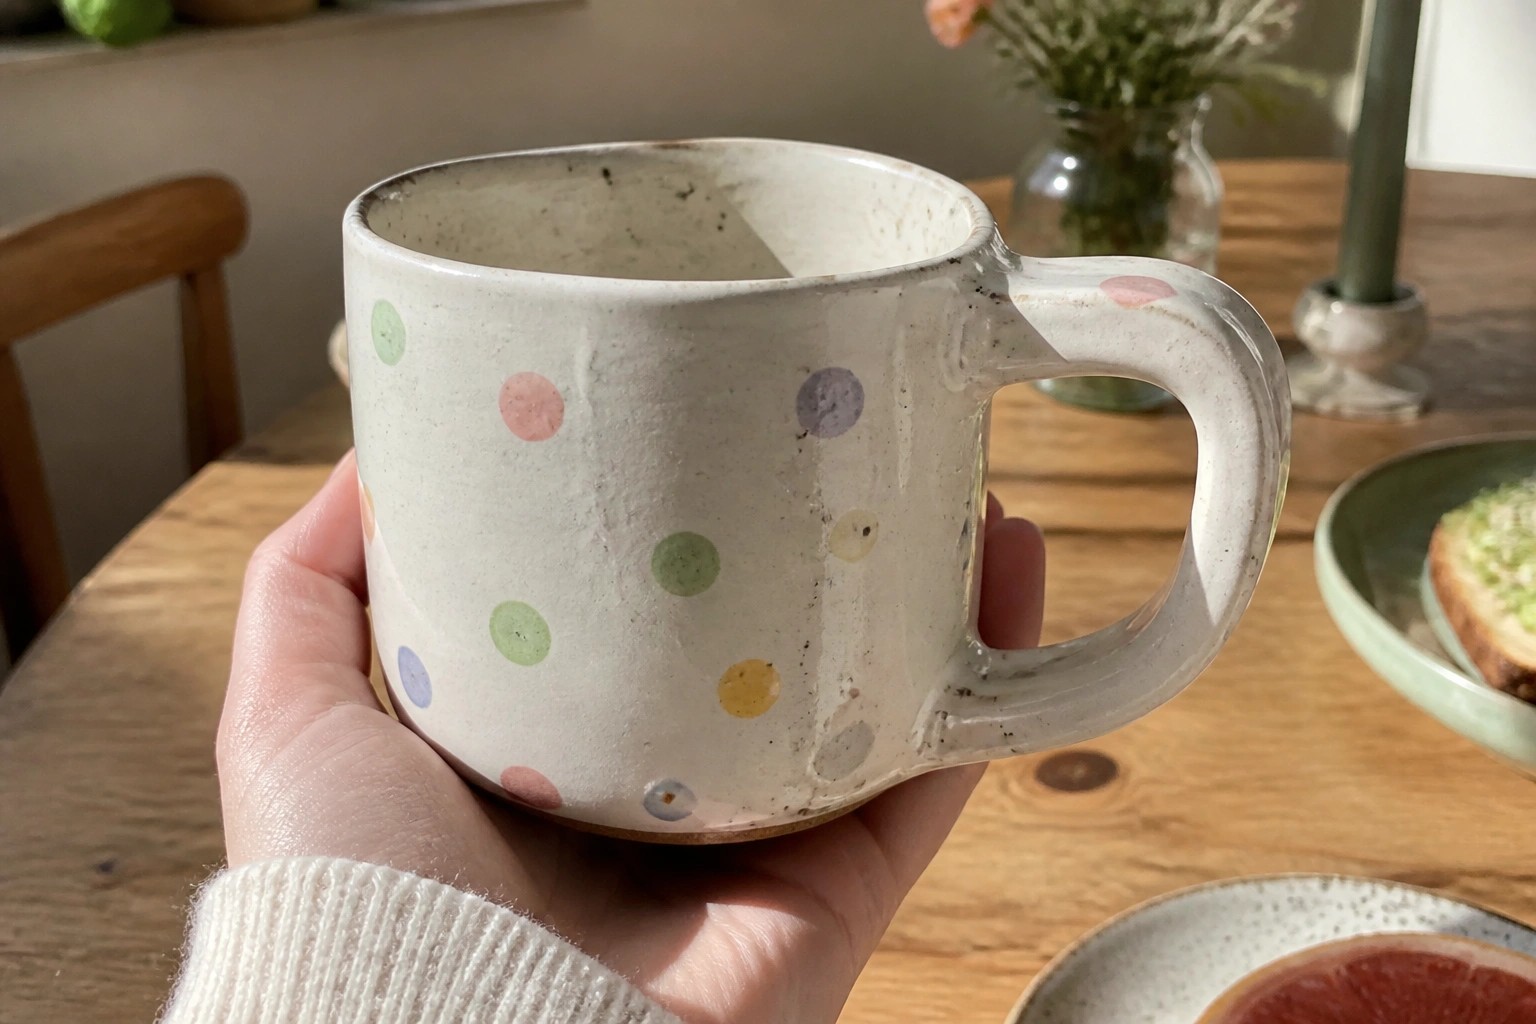
A slab-built mug gets its character from a speckled off-white clay body paired with randomly placed pastel dots in blue, pink, green, and yellow. The dots stay small and spaced out so the handmade texture of the clay still shows through. This keeps the finished piece simple to make while giving it a clear, repeatable pattern that works on any basic cylindrical form.
The shape does most of the work here because a straight-sided mug is quick to cut from a slab and easy to assemble. You can reuse the same dot layout on a shorter tumbler or a small cream pitcher without changing the technique. The speckled surface also forgives small bumps or uneven joins, which makes the project forgiving for first attempts at handles. For a gift set, repeat the dots on matching small bowls using the same glaze combination.
Square Ceramic Trinket Box with Floral Lid
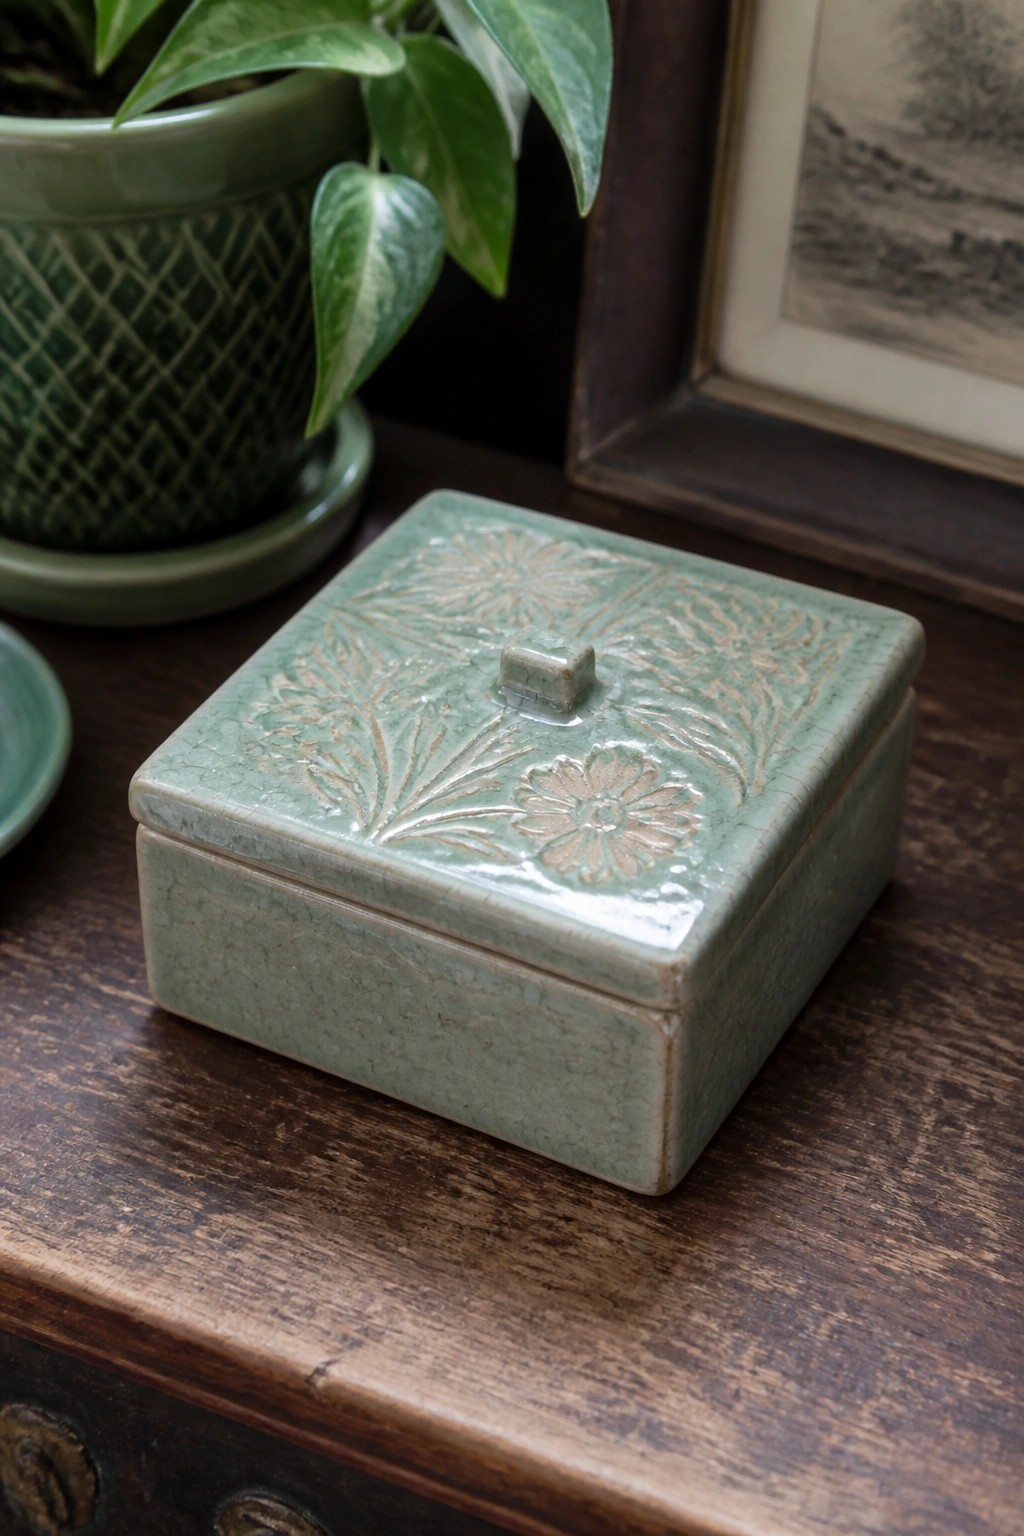
A small square box built from clay slabs makes a simple container for rings, earrings, or small keepsakes. The lid carries raised floral designs that were pressed or carved into the surface before firing, giving the piece texture and visual interest. A soft green crackle glaze covers the entire form and highlights the raised flowers without extra painting.
What makes this idea useful is the straightforward slab construction that lets you change the size or proportions quickly. The same floral relief technique can be swapped for leaves, lines, or other stamps you already have on hand. This box shape works on a nightstand or desk for daily items and photographs well because the raised details show up clearly against the glaze. You could also skip the lid and make an open tray version for bathroom counters or plant saucers.
Lemon Slice Slab Tray
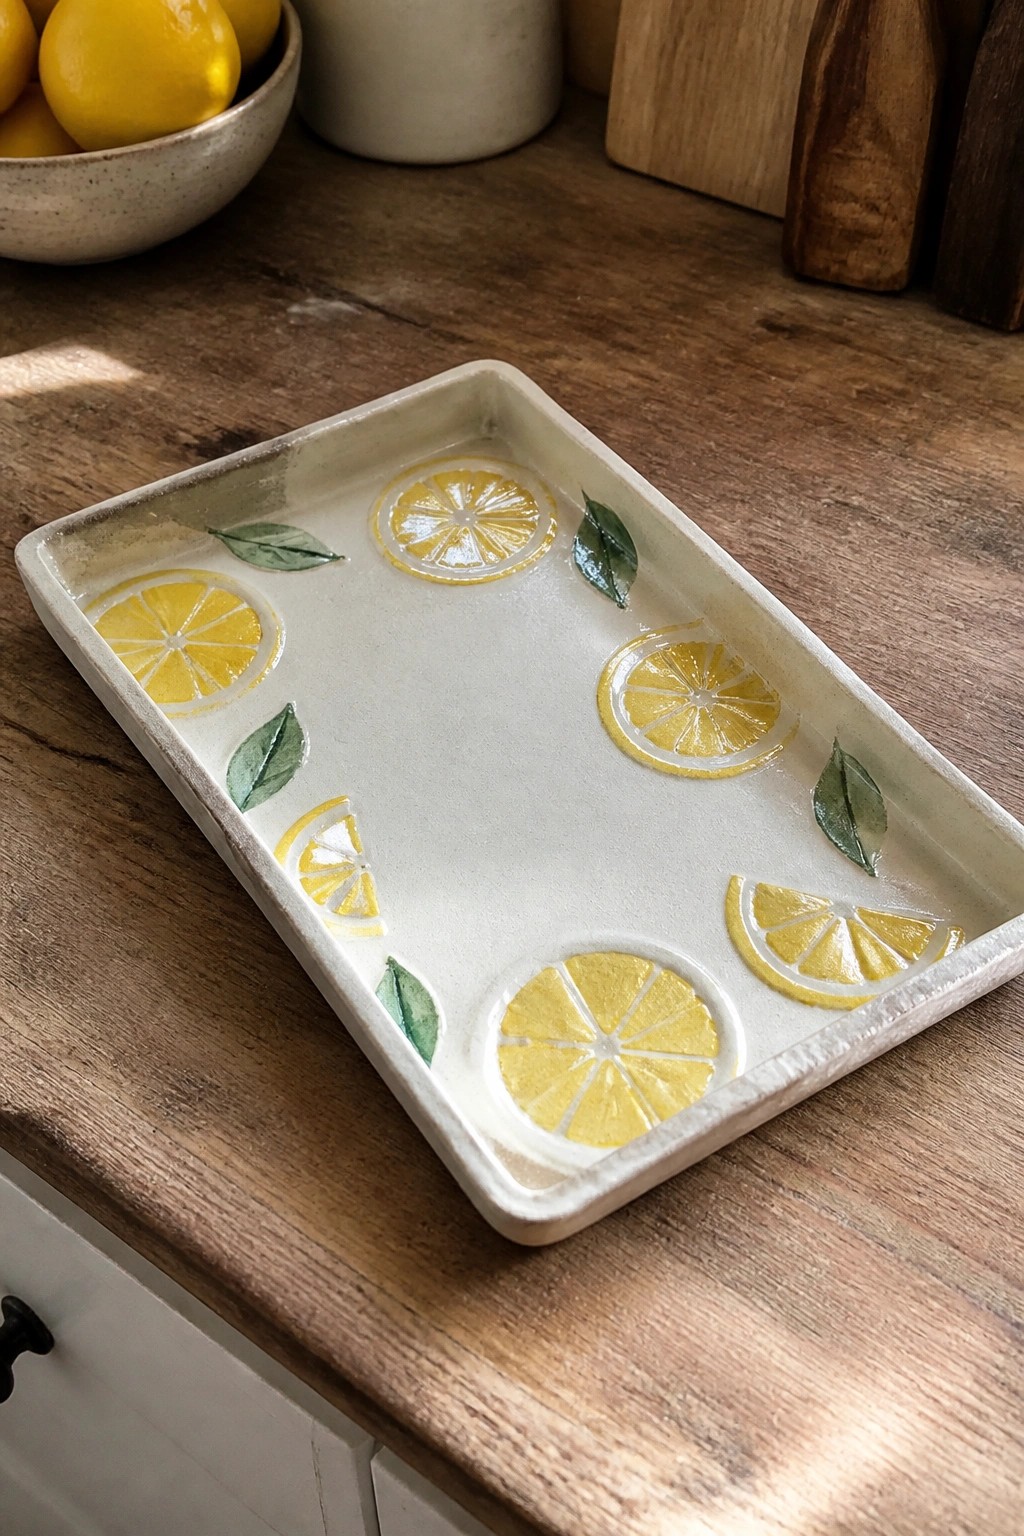
A rectangular slab tray built from a flat clay sheet works well as a kitchen accent or small serving piece. Lemon slices and simple leaf shapes are applied around the edges on a light base, leaving most of the center plain. The citrus motifs give the tray a clear theme while keeping the construction basic and the surface easy to glaze.
What makes this idea useful is how the same lemon layout can be scaled down for coasters or repeated on a larger platter. The shape suits holding soap, jewelry, or kitchen tools, and the painted slices can be swapped for other fruits or simplified to just outlines. In a kitchen this kind of tray stands out on Pinterest because the bright motifs read clearly even in small photos.
Slab Built Spoon Rest with Linear Texture
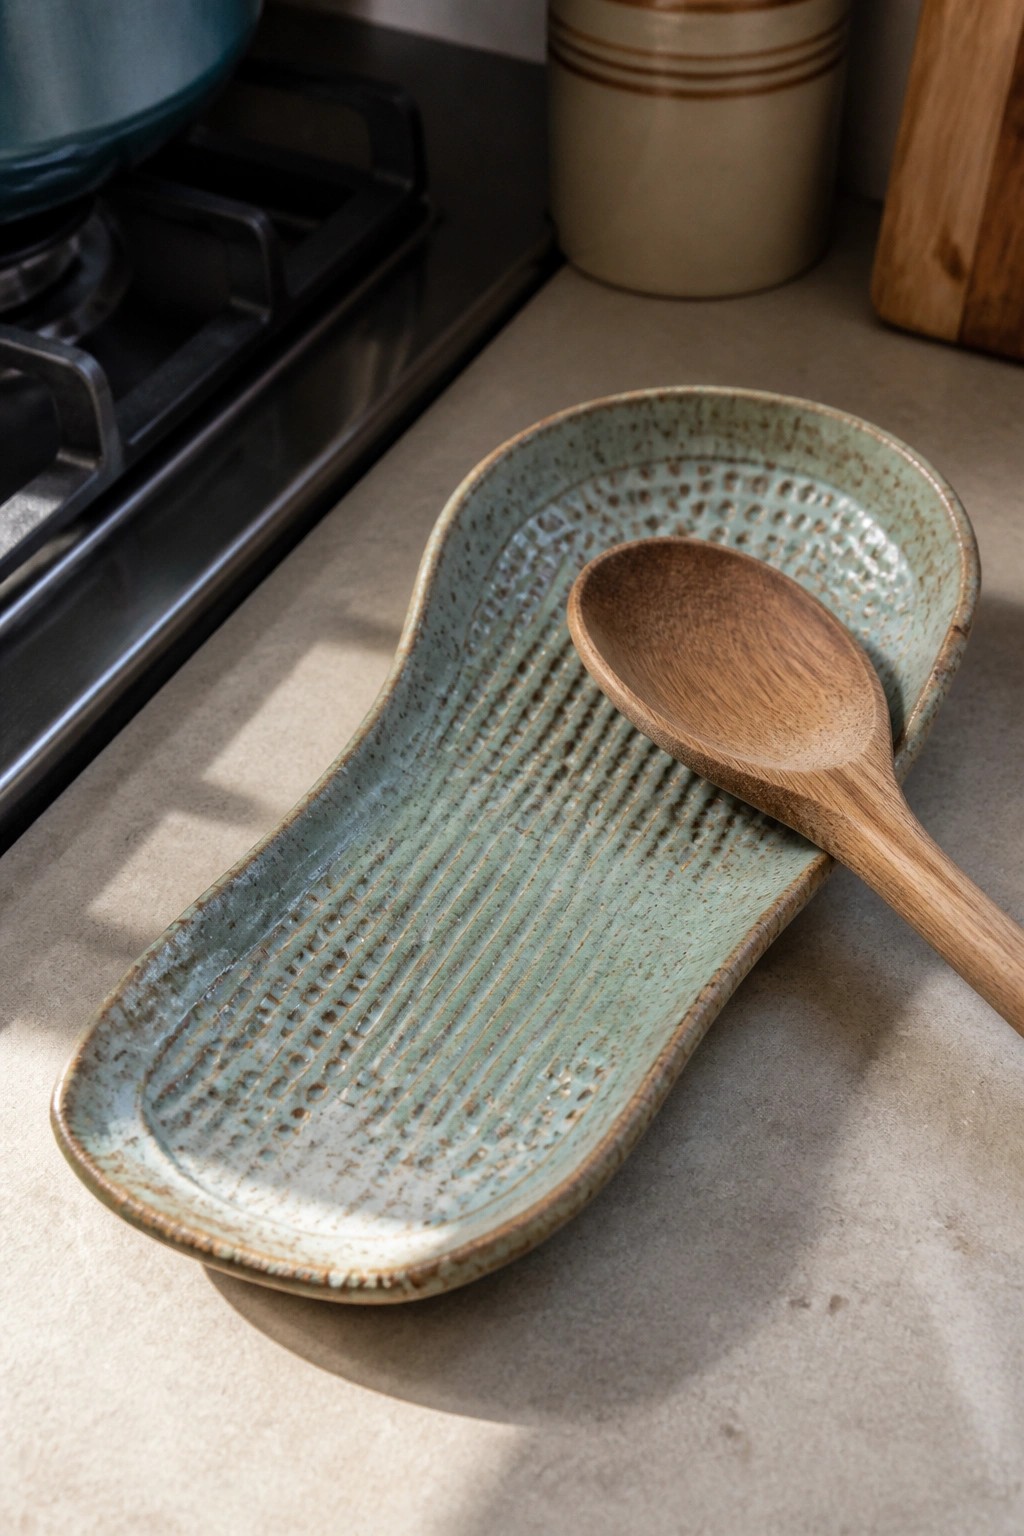
A long, narrow spoon rest built from a single slab of clay gives you a practical kitchen item that holds utensils during cooking. Cut the slab into a gentle curve, add rows of impressed lines or stamps across the surface, then raise the edges just enough to contain drips. The speckled light green glaze settles into the texture and makes the ridges stand out once fired.
What makes this idea useful is how well the shape fits along a stove or countertop without taking much space. You can shorten the same slab pattern to make a smaller version for one spoon or widen it slightly for tongs and spatulas. The impressed lines are simple to repeat with basic tools, so the design photographs clearly for project sharing. Try switching to a matte glaze or adding a small foot on the back if you want it to sit more stably on a smooth surface.
Square Slab Planter with Glazed Interior
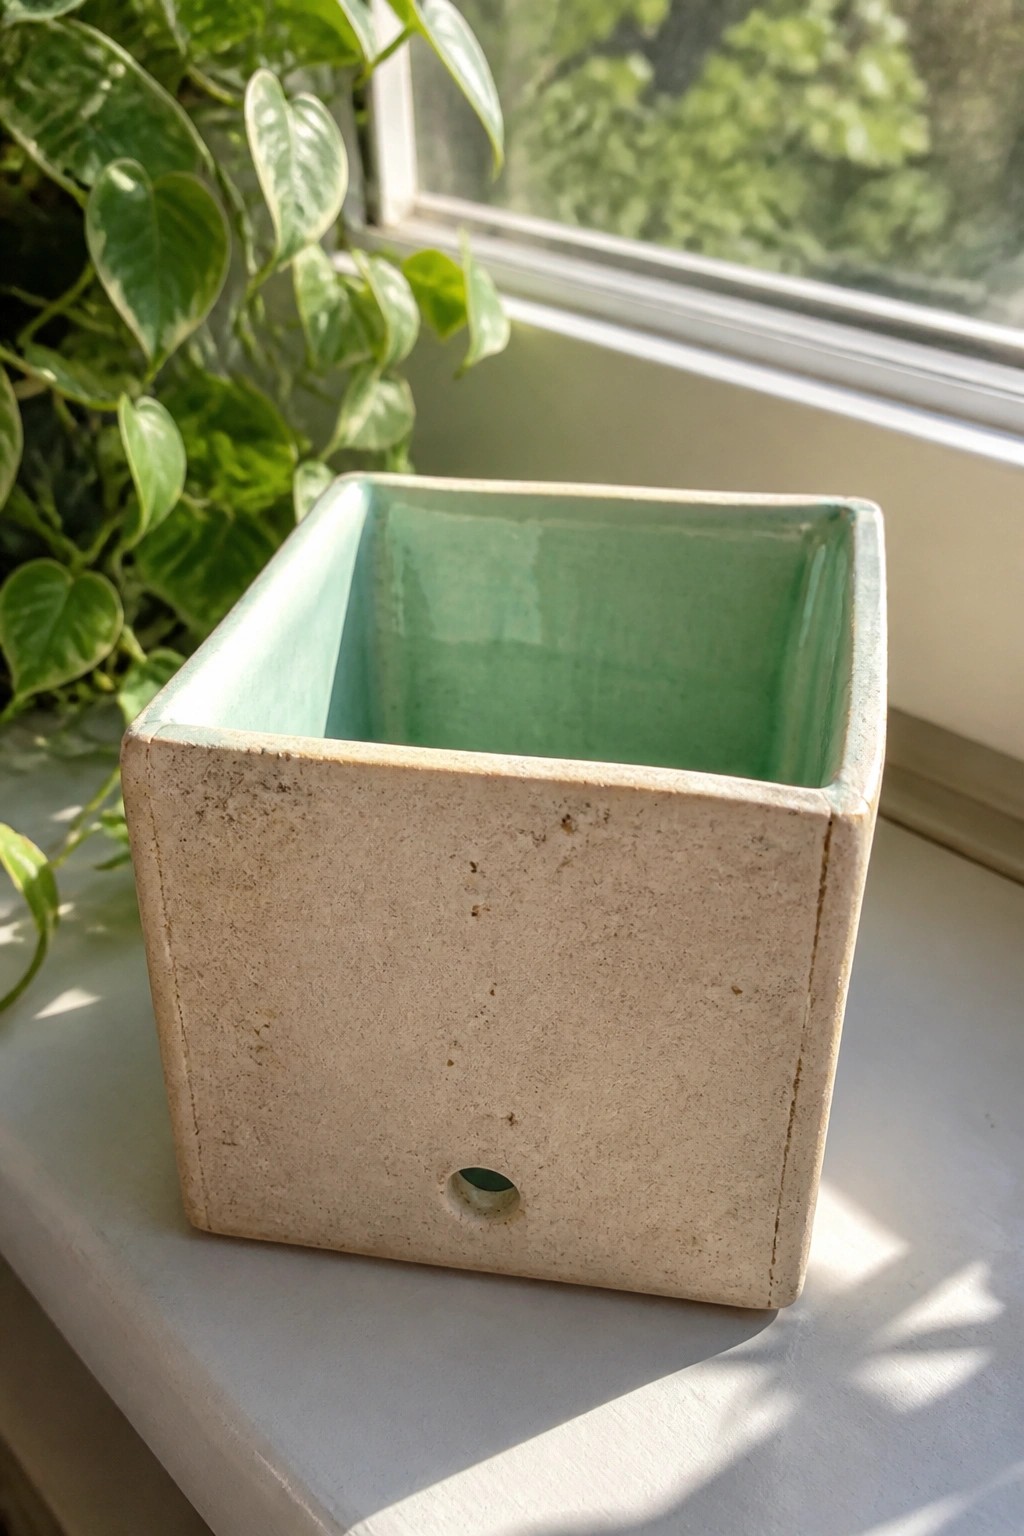
A square planter built from four flat slabs joined at the seams creates a simple box shape that holds small plants on a shelf or windowsill. The exterior keeps the raw clay texture while the interior receives a smooth green glaze that protects the surface from water. A single hole cut in the base before firing allows drainage so the piece functions as a proper planter rather than just a decorative container.
What makes this idea useful is the straightforward slab construction that requires only basic cutting and scoring. You can scale the same box shape up or down or swap the interior glaze color to suit different rooms or plant types. The unglazed exterior also reduces the amount of glazing work while still giving the piece a finished look. This form adapts easily into a small herb holder or a desktop container by adjusting the height and width of the slabs.
Hanging Leaf-Impressed Wall Tiles
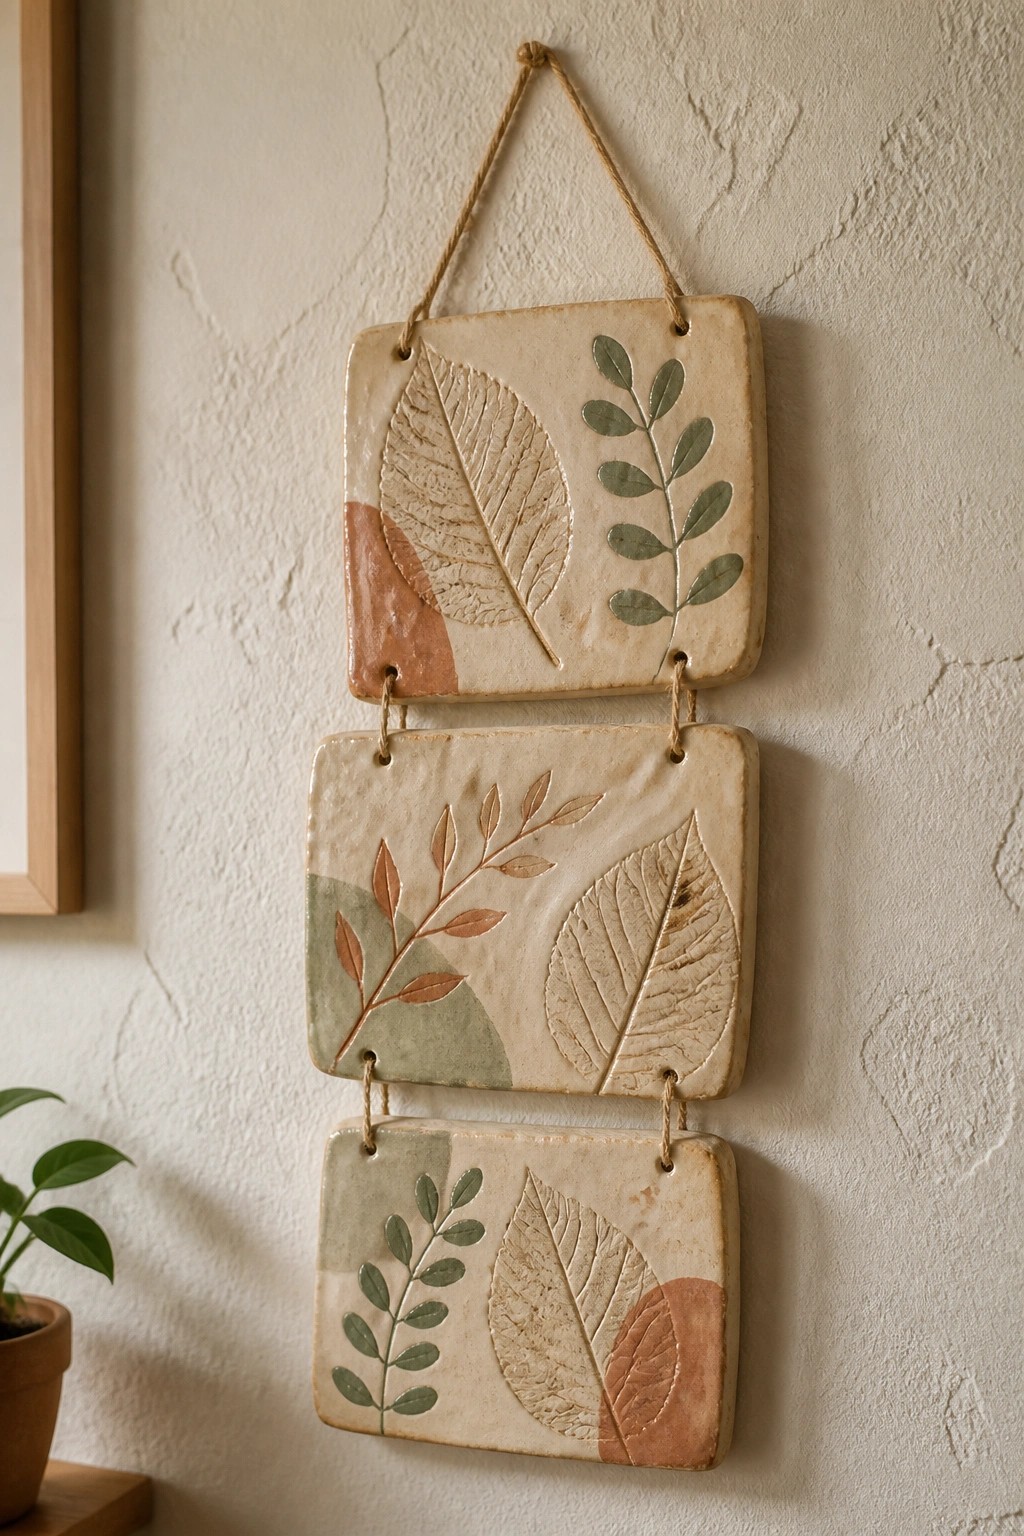
This project uses simple slab construction to make three rectangular tiles that connect with cord into a vertical wall hanging. Each tile carries impressed leaf details plus small blocks of colored slip or underglaze in green and terracotta tones on a light clay base. The design stays effective because the leaves provide clear texture while the color areas break up the surface without crowding it. It works as a lightweight decor object meant for display rather than daily use.
What makes this idea useful is how quickly you can repeat the same slab size and leaf impressions for a matching set or single panel. The drilled holes and cord connection let you adjust spacing or hang the tiles in a different order without extra hardware. You could shrink the same idea down to smaller tiles for a row of hooks or expand it into a larger grid for a bigger wall. In a hallway or above a shelf, the flat shape takes up little depth while still showing the leaf texture clearly.
Slab-Built Tealight Holder
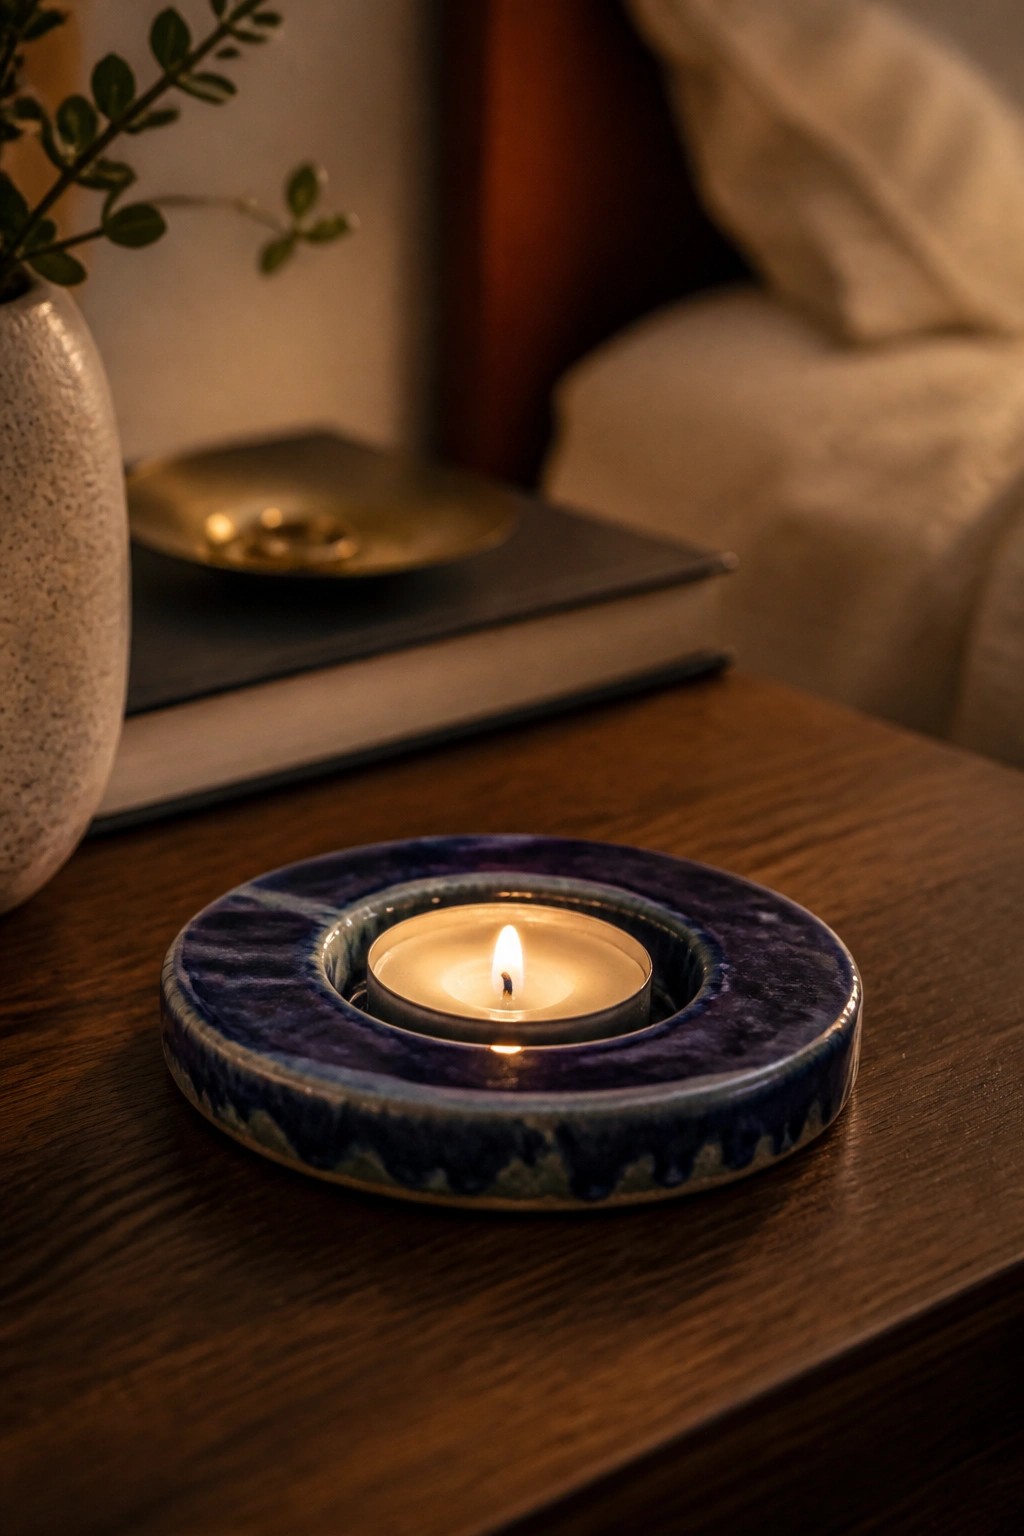
A round tealight holder made from a single slab gives you a simple way to create a stable base with an inner rim that keeps the candle in place. The slab is rolled flat, cut into a ring shape, and the edges are gently curved upward to form the shallow well. The blue glaze application creates variation in tone as it settles into the textured surface during firing.
What makes this idea useful is how the compact ring shape works on a bedside table or desk without taking up much space. You can adapt the same construction by changing the outer diameter or cutting a smaller inner circle to fit different candle sizes. For a gift, this form is quick to repeat in batches and easy to personalize with different glaze colors or a stamped pattern on the rim.
Slab-Built Leaf Ring Dish
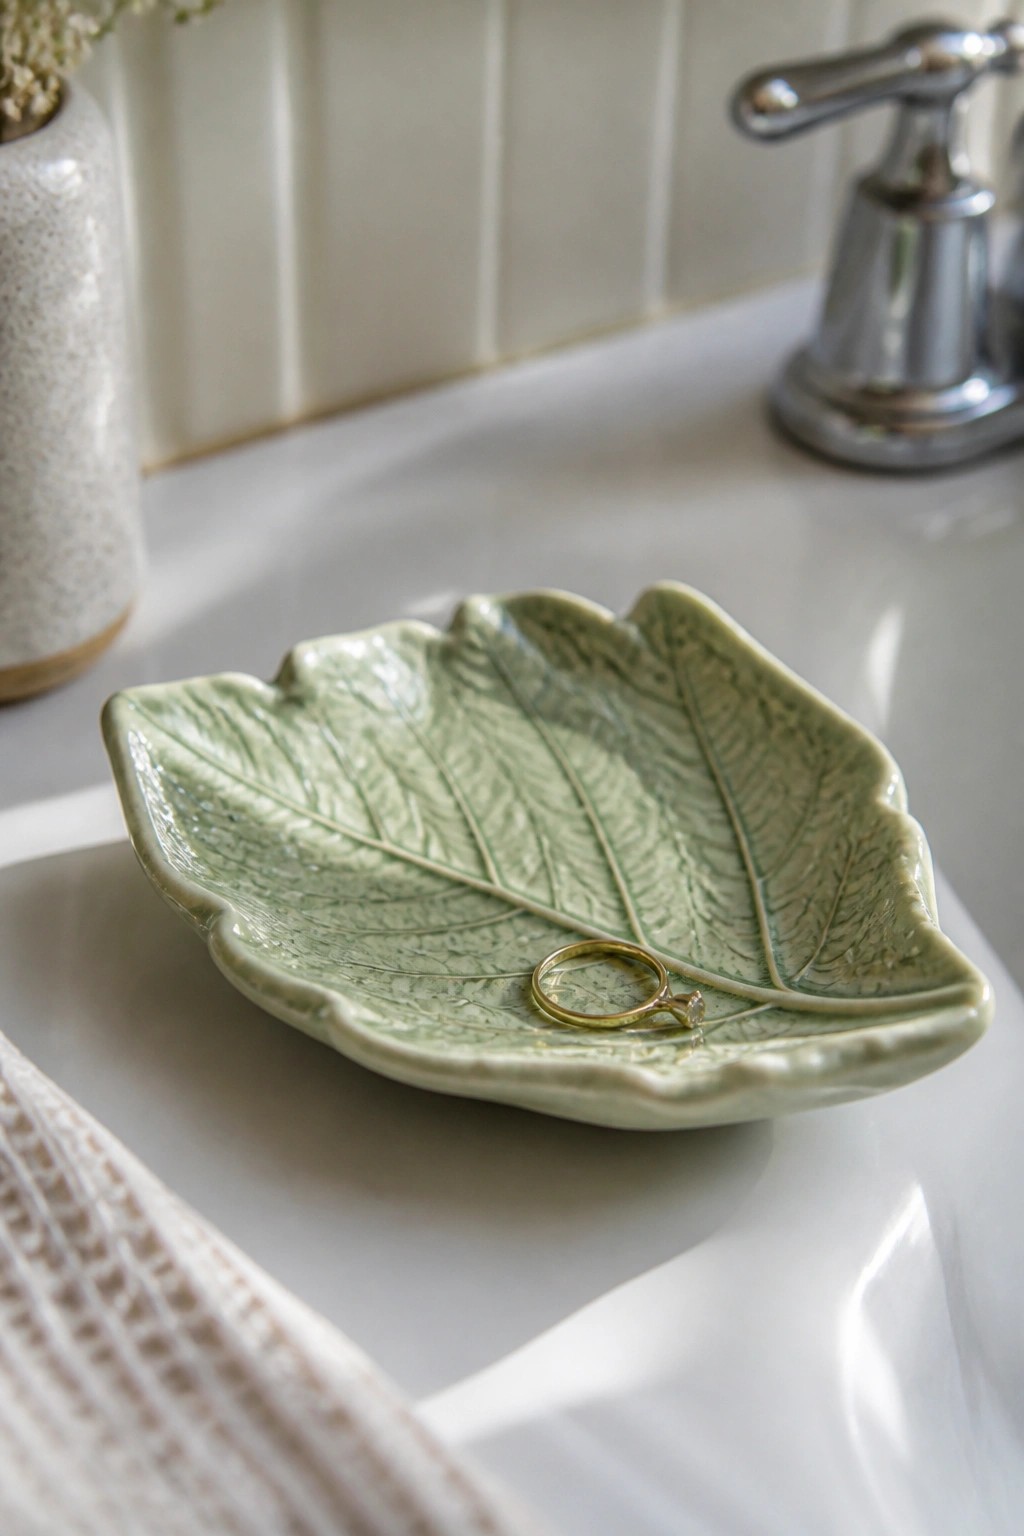
A flat slab of clay cut into a leaf shape and pressed with real leaf veins creates a shallow tray that works as a ring dish. The edges stay slightly raised after forming, and a single green glaze brings out the texture without extra decoration. This approach keeps the project simple while turning a basic slab into something that holds small items on a flat surface.
The small scale fits easily on a bathroom counter or bedside table where rings get taken off daily. You can swap the leaf outline for another natural shape or use a different glaze color to match existing decor. The same slab method also works for making a matching soap dish or small catch-all tray by adjusting the size and depth.
Wavy Rim Slab Bowl
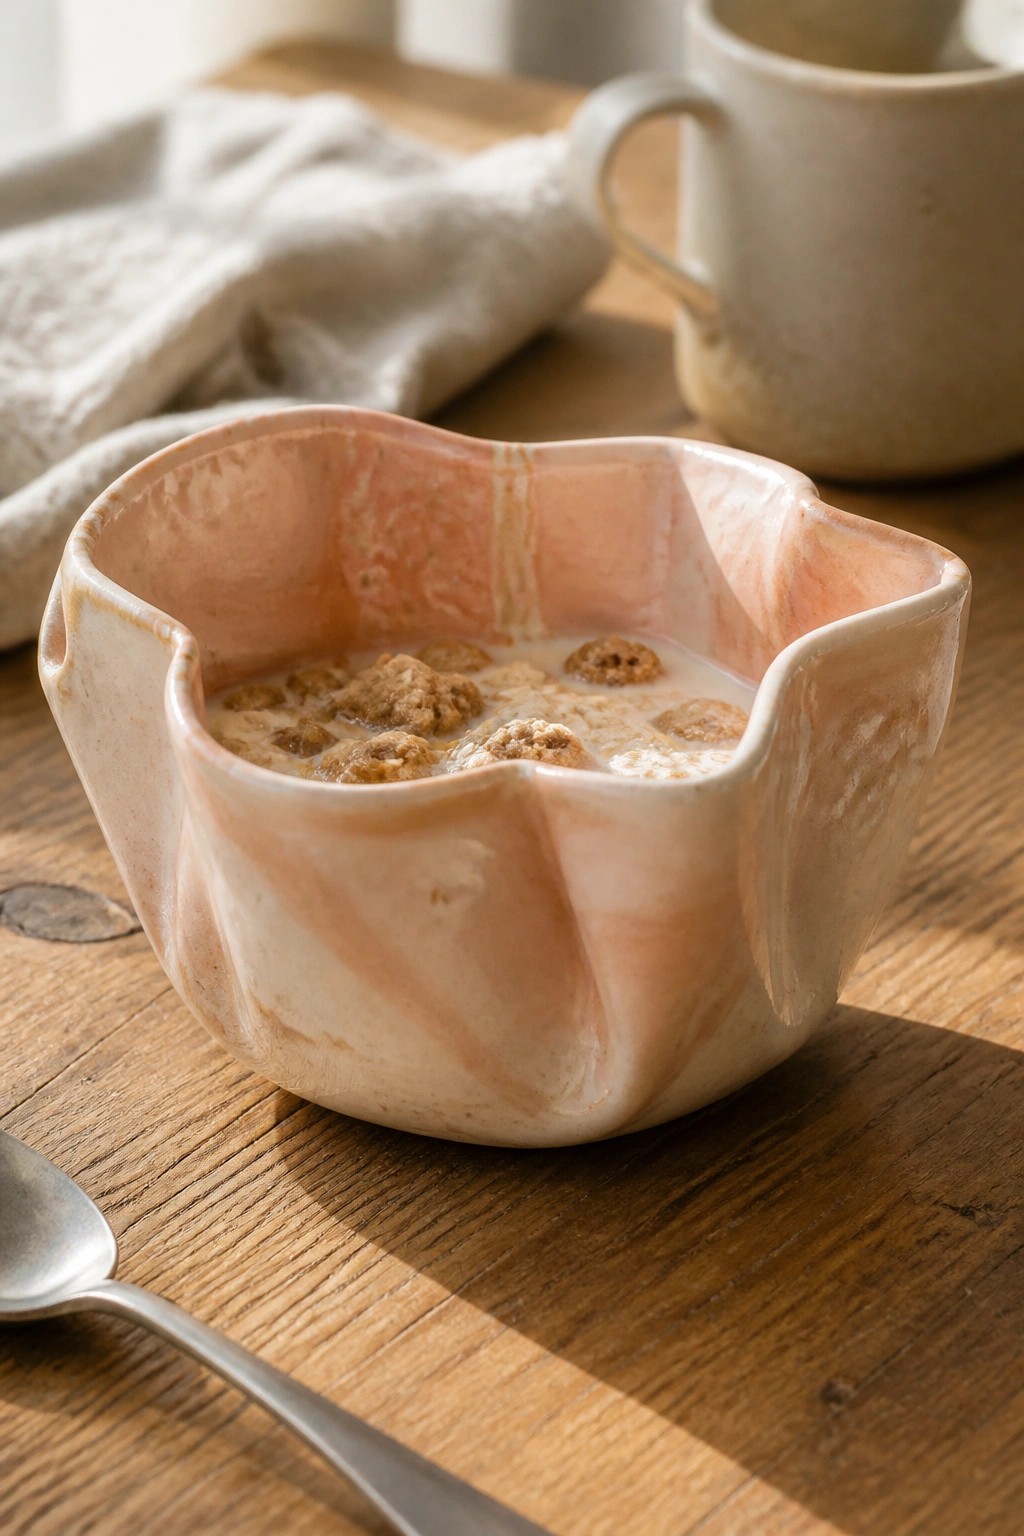
This project uses simple slab construction to form a small, low bowl with a freeform scalloped edge created by cutting and gently folding the clay. The marbled pink and cream glaze gives it a soft, streaked surface that highlights the handmade folds without needing extra decoration. The shape works well as a cereal or dessert bowl because the wide rim makes it easy to fill and the low profile keeps it stable on the table.
What makes this idea useful is how the wavy rim adds visual interest while still keeping the piece functional for daily meals. You can adapt the same slab method by changing the depth or making the scallops deeper for a more dramatic look, or switch the glaze colors to match your kitchen. It also works as a small serving dish for snacks or as a gift that feels personal without requiring advanced skills. The compact size makes it a quick project that still stands out when photographed for Pinterest boards.
Textured Slab Cylinder Utensil Holder
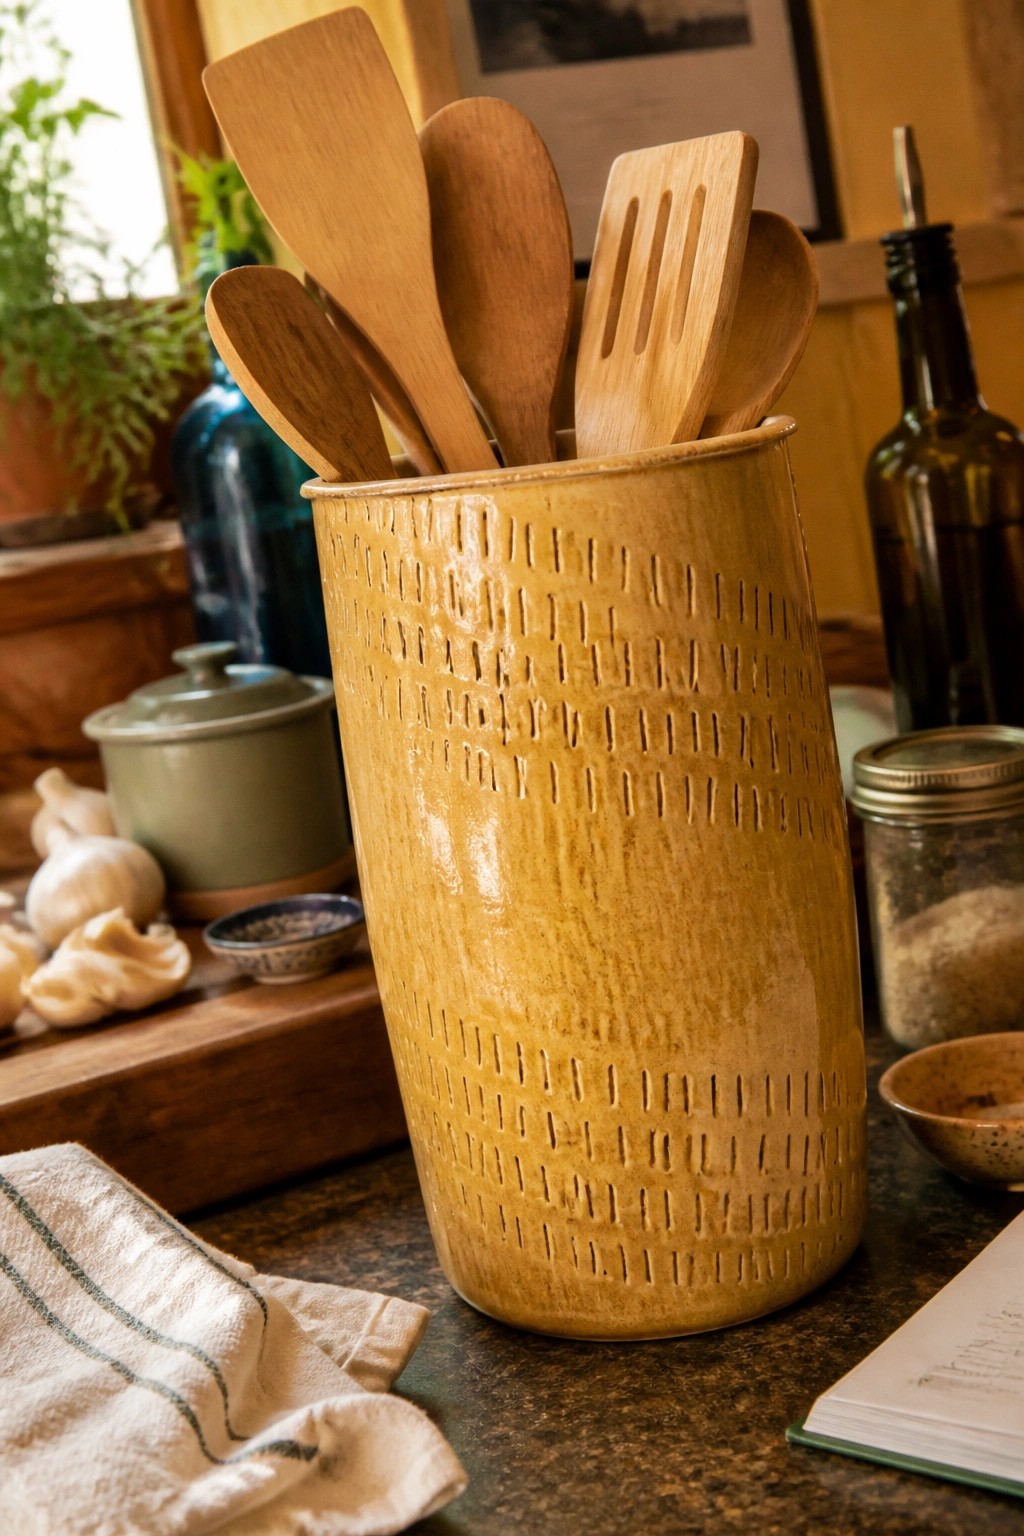
A slab of clay rolled into a tall cylinder forms this straightforward kitchen utensil holder. Vertical lines pressed or carved into the surface create a simple repeating texture that shows up clearly under the warm yellow-brown glaze. The straight walls and open top make it practical for keeping spoons, spatulas, and other tools within reach on a counter.
What makes this idea useful is how the same cylinder shape can be made shorter for a smaller tool set or taller for extra capacity. The impressed lines require only a basic tool or stamp on the flat slab before the seam is joined, so the project stays quick. In a kitchen this kind of holder keeps wooden utensils dry and organized while blending with other stoneware pieces on the counter. The same construction can be adapted into a small vase or a bathroom toothbrush caddy by changing the height and rim finish.
Slab Built Soap Dish with Drainage Grooves
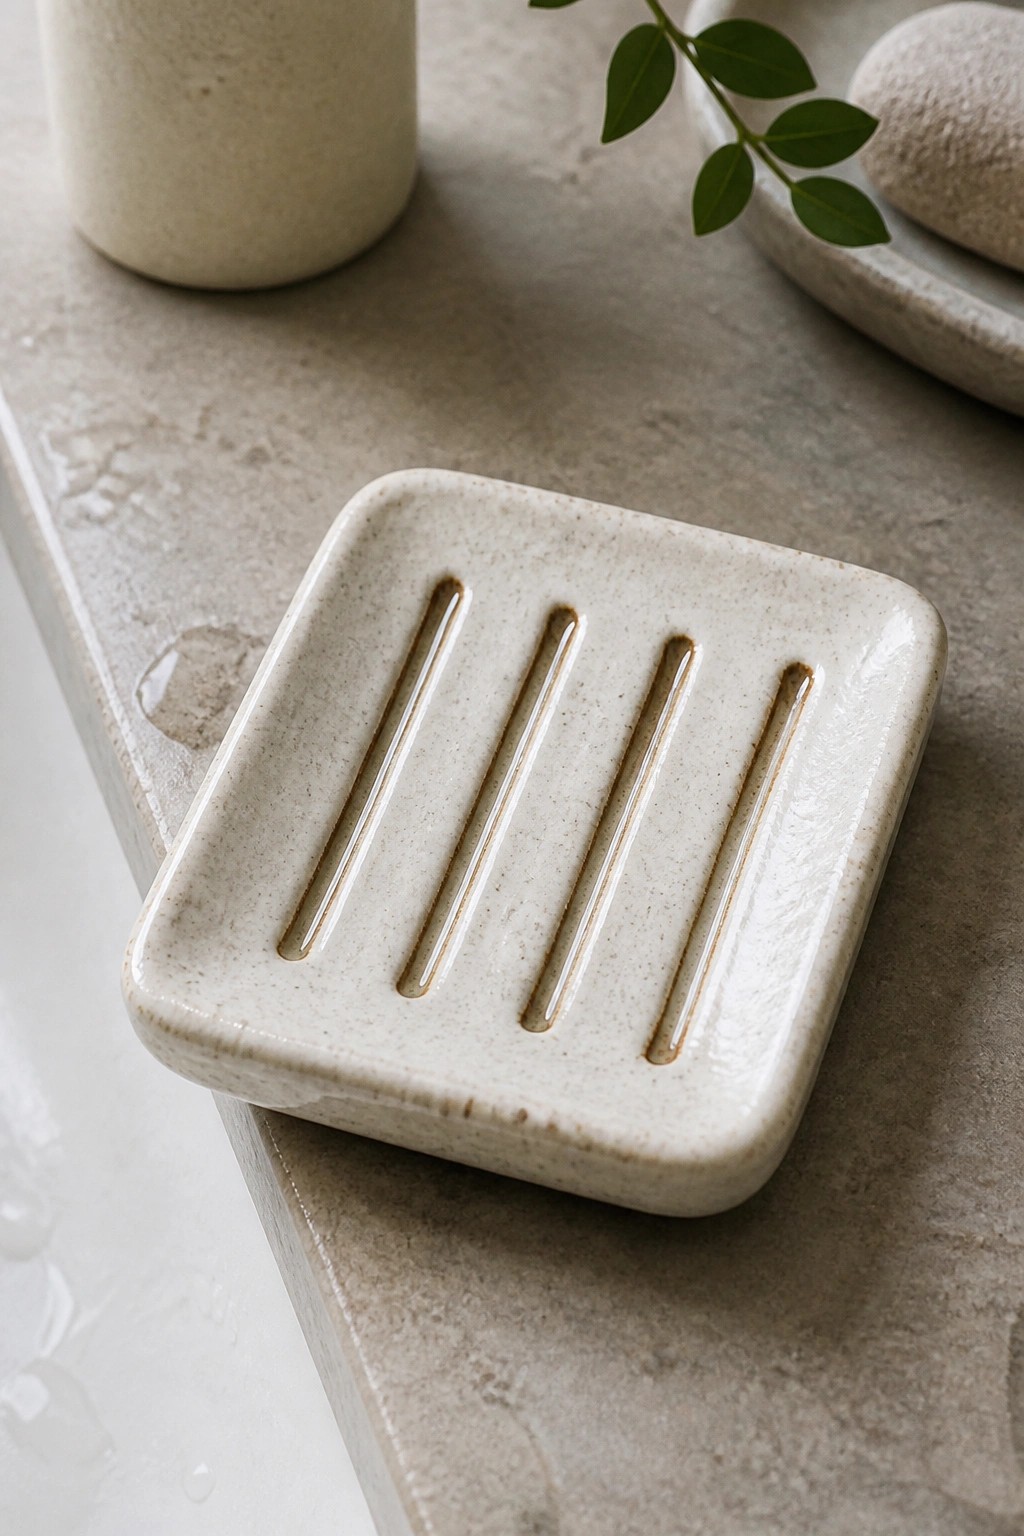
A square soap dish formed from a flat slab of clay uses four parallel grooves cut into the base to let water drain away from the bar. The raised edges keep the soap contained while the speckled off-white glaze gives the surface a subtle texture without being slippery. This project falls into the bathroom item category and stays simple because it requires only one slab, basic cutting, and minimal assembly.
What makes this idea useful is how the groove pattern can be widened or narrowed to fit different bar sizes without changing the overall shape. A piece like this works especially well on a shower ledge or sink edge where standing water is an issue. The small scale makes this easy to adapt into a ring dish or small tray by skipping the grooves and adding a shallow rim instead.
Slab-Built Ceramic Measuring Spoons
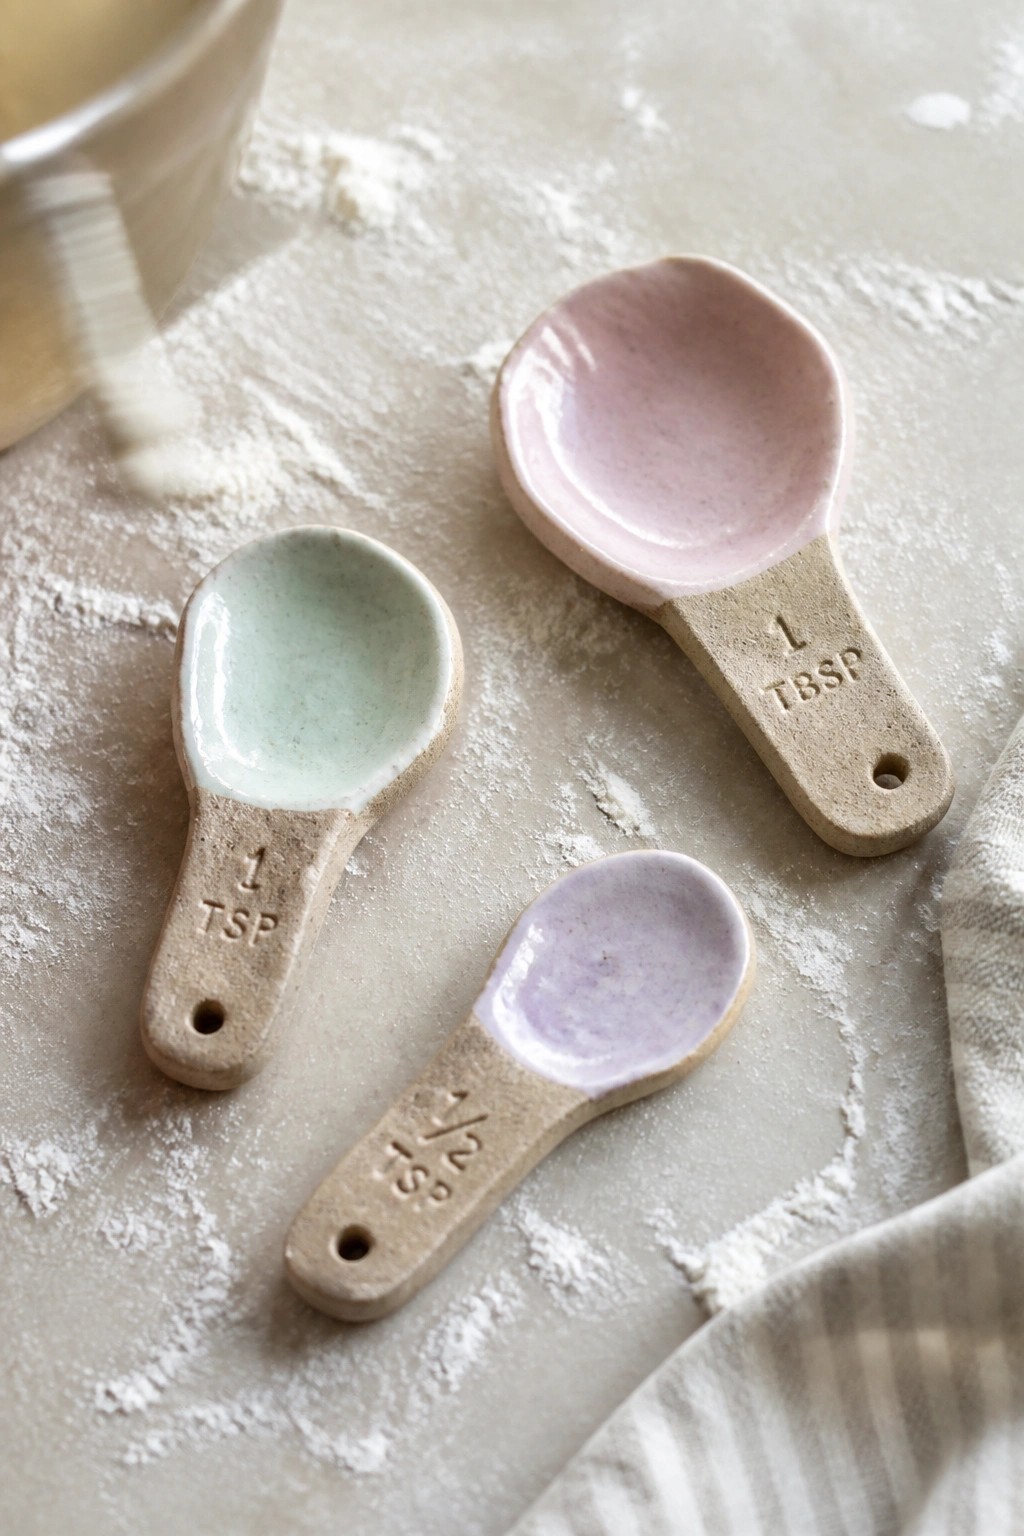
These ceramic measuring spoons use a basic slab construction for the handles and a shallow bowl shape for the scoops. The 1 tsp, 1/2 tsp, and 1 tbsp sizes are stamped directly into the clay before firing, while the bowls receive light pastel glazes that contrast with the natural clay. The flat, simple forms make them easy to produce in multiples and keep them functional for kitchen tasks.
What makes this idea useful is how the same slab approach can be scaled up or down for additional sizes without new templates. They fit well in a kitchen drawer or as a small gift set for bakers. You could swap the glazes for solid colors or leave more of the clay exposed to change the look quickly.
Slab-Built Fox and Whale Planters
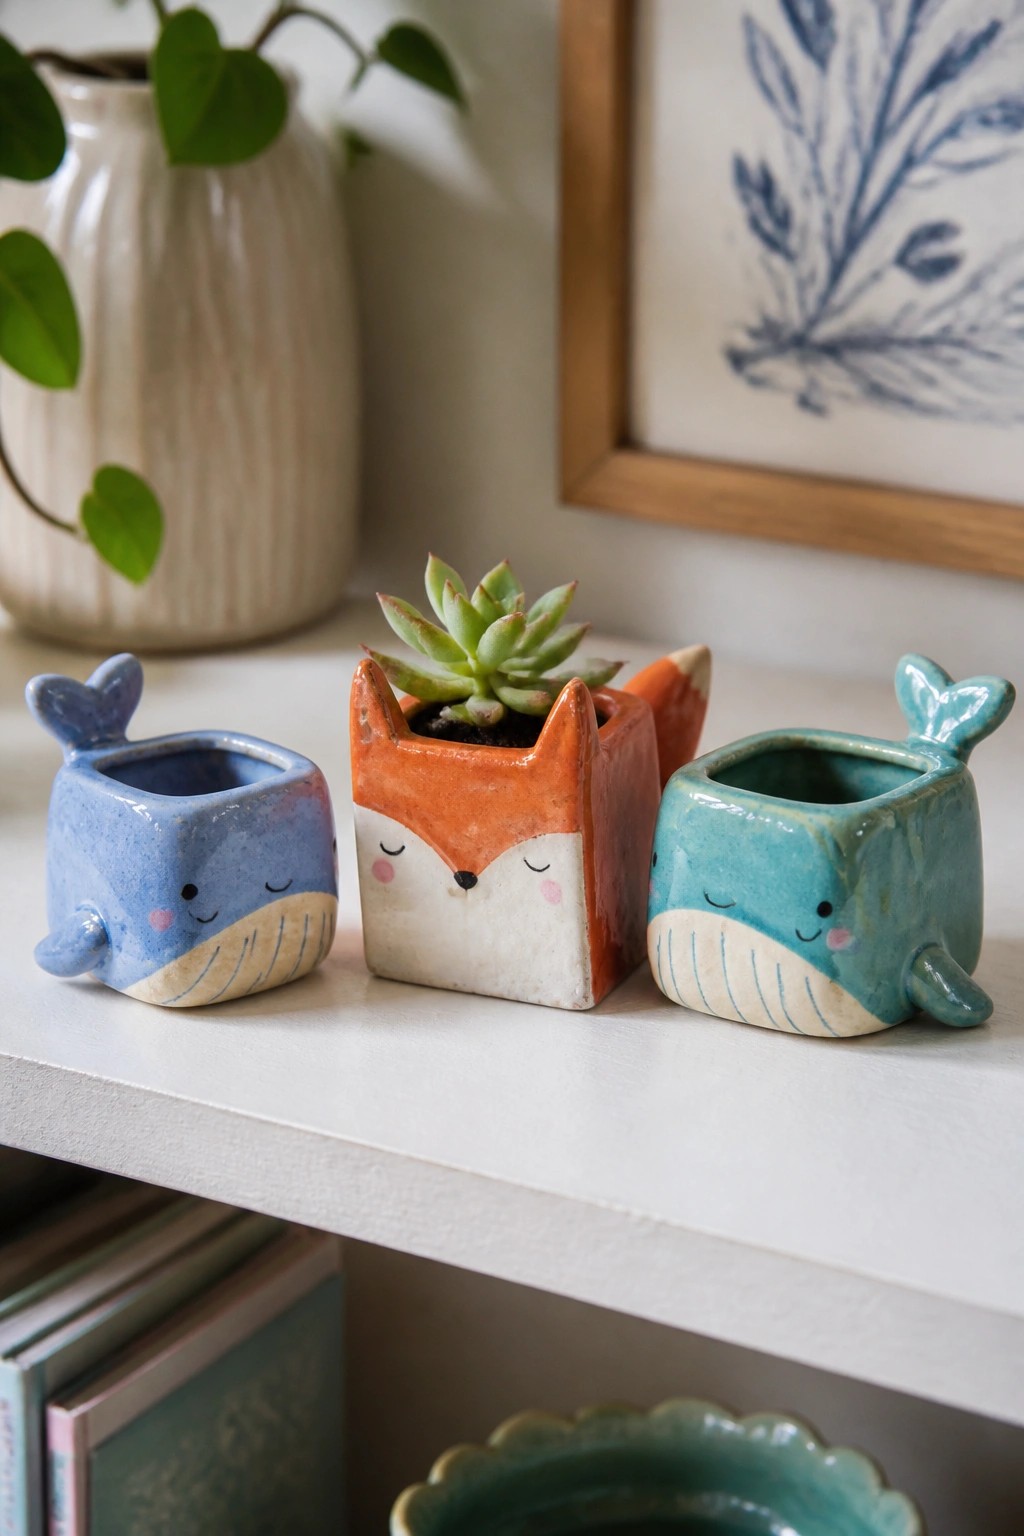
These small square planters are formed from clay slabs joined into box shapes with added tail and fin pieces. The fox version uses an orange glaze on the upper half and white on the lower half, with simple painted eyes, nose, and whiskers. The two whale versions follow the same slab construction but in blue and teal glazes with matching facial details. Each one serves as a compact holder sized for a single succulent or small plant.
The square slab body keeps construction straightforward and uses little clay, so the same base shape can be reworked into other animals by swapping ears or tails. These work well on a shelf, desk, or windowsill where space is limited. You could simplify the painted faces further or change the glaze colors to match different room styles. For a gift or plant display, the compact size and animal form make the idea easy to repeat or vary without needing extra tools.
Slab-Built Napkin Rings with Two-Tone Glaze
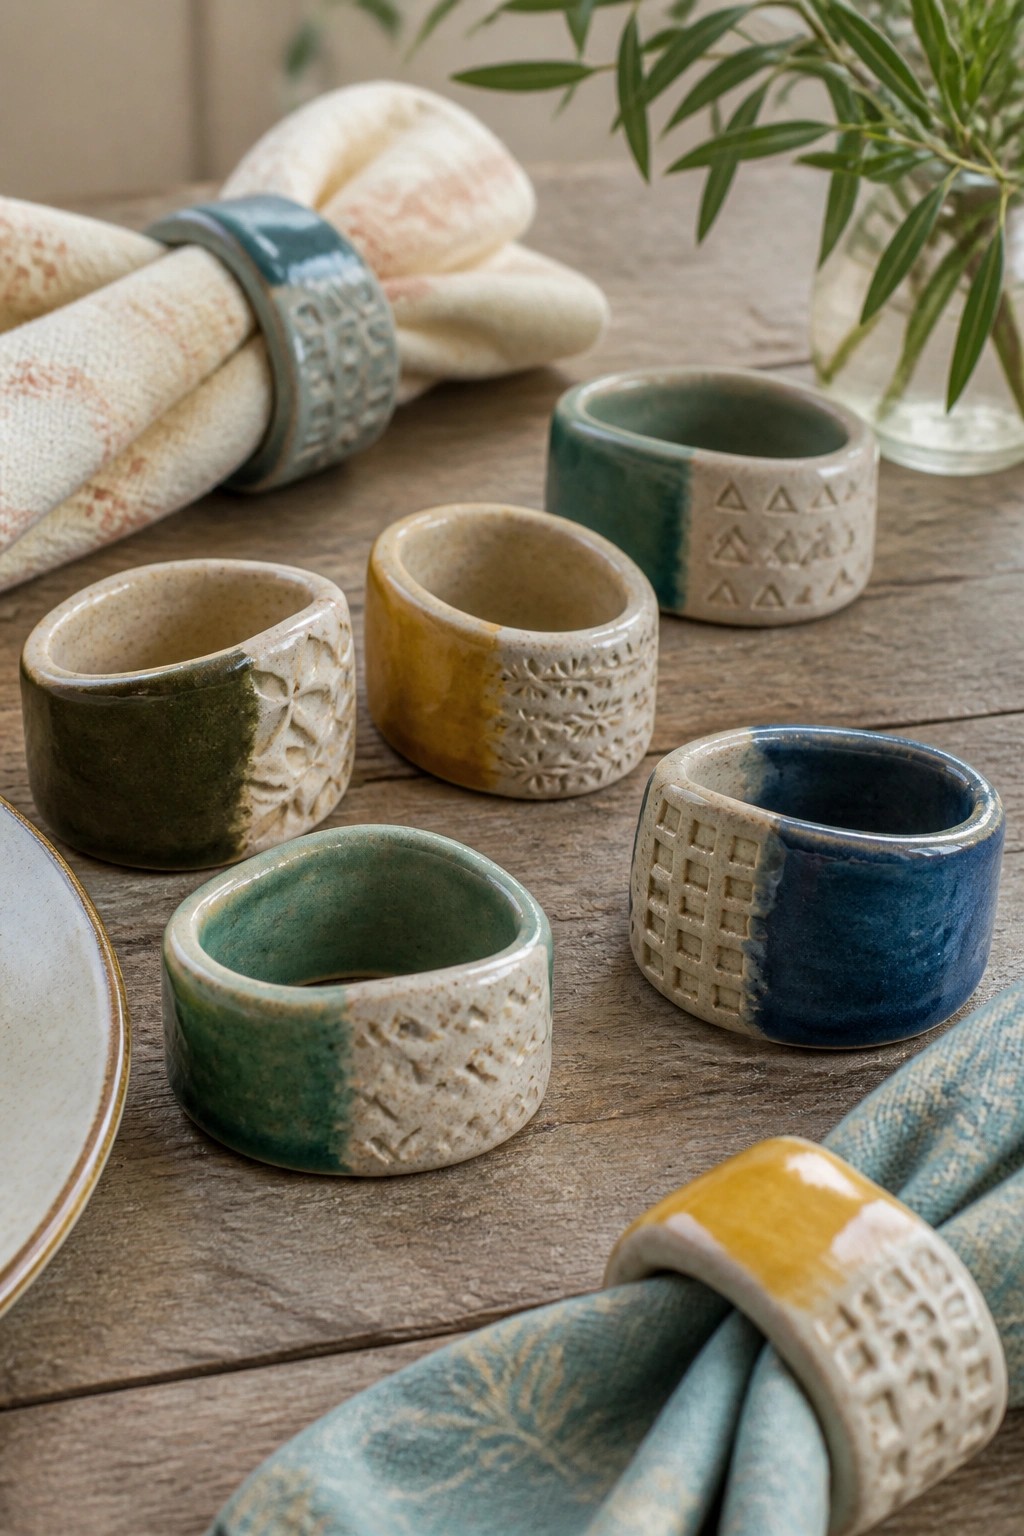
These napkin rings are made by rolling out clay slabs, cutting strips, and joining the ends into cylinders. Each ring shows a simple impressed pattern on one half of the surface while the other half receives a solid glaze color that stops midway around the form. The contrast between the textured section and the smooth glazed area keeps the design from looking plain while the neutral clay body shows through in places. This approach fits the category of small functional tableware that can be produced quickly in multiples.
What makes this idea useful is how little material and space each ring requires, so you can make a full set in one slab session. The same cylinder shape works for different diameters if you want to adapt it for small herb planters or desk pen holders. Changing the stamp pattern or switching which side gets the darker glaze lets you match existing dinnerware without starting over. In a kitchen these rings keep cloth napkins tidy and add a handmade detail that stands out in photos for sharing.
Slab-Built Yarn Bowl with Spiral Feed Slot
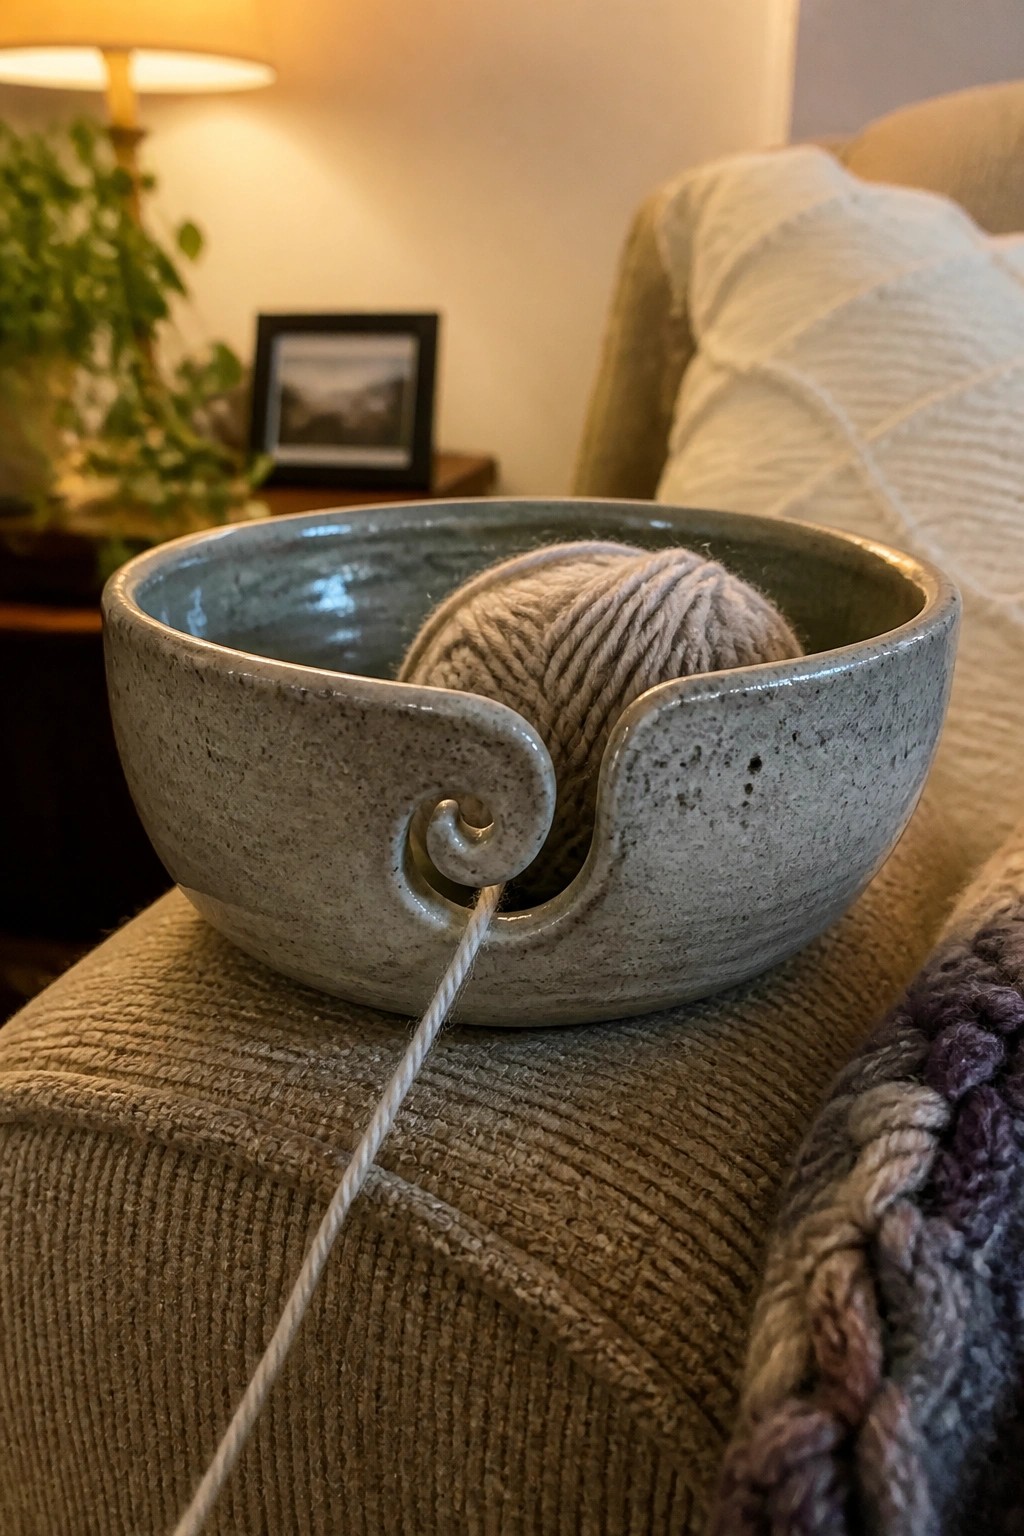
A yarn bowl keeps a ball of yarn in place and lets the strand feed out cleanly during knitting or crocheting. This version starts as a basic slab-formed bowl with a wide rim, then adds a curled clay extension that creates a spiral-shaped opening on one side. The opening guides the yarn without friction, while the matte speckled glaze gives the surface enough texture to hold the yarn ball steady. Slab construction keeps the walls even and the overall shape simple to assemble from flat pieces.
What makes this idea useful is the single cutout that solves a common problem without extra hardware. You can adapt the same spiral detail to smaller bowls for embroidery floss or scale it up for bulkier yarns like chunky wool. In a craft space this shape sits flat on a table and stays put, and the slab method lets you add a matching tray or needle rest using leftover clay. For a gift, swap the glaze for a solid color and keep the spiral narrow so it works with fine threads too.
Slab Built Rectangular Toothbrush Holder
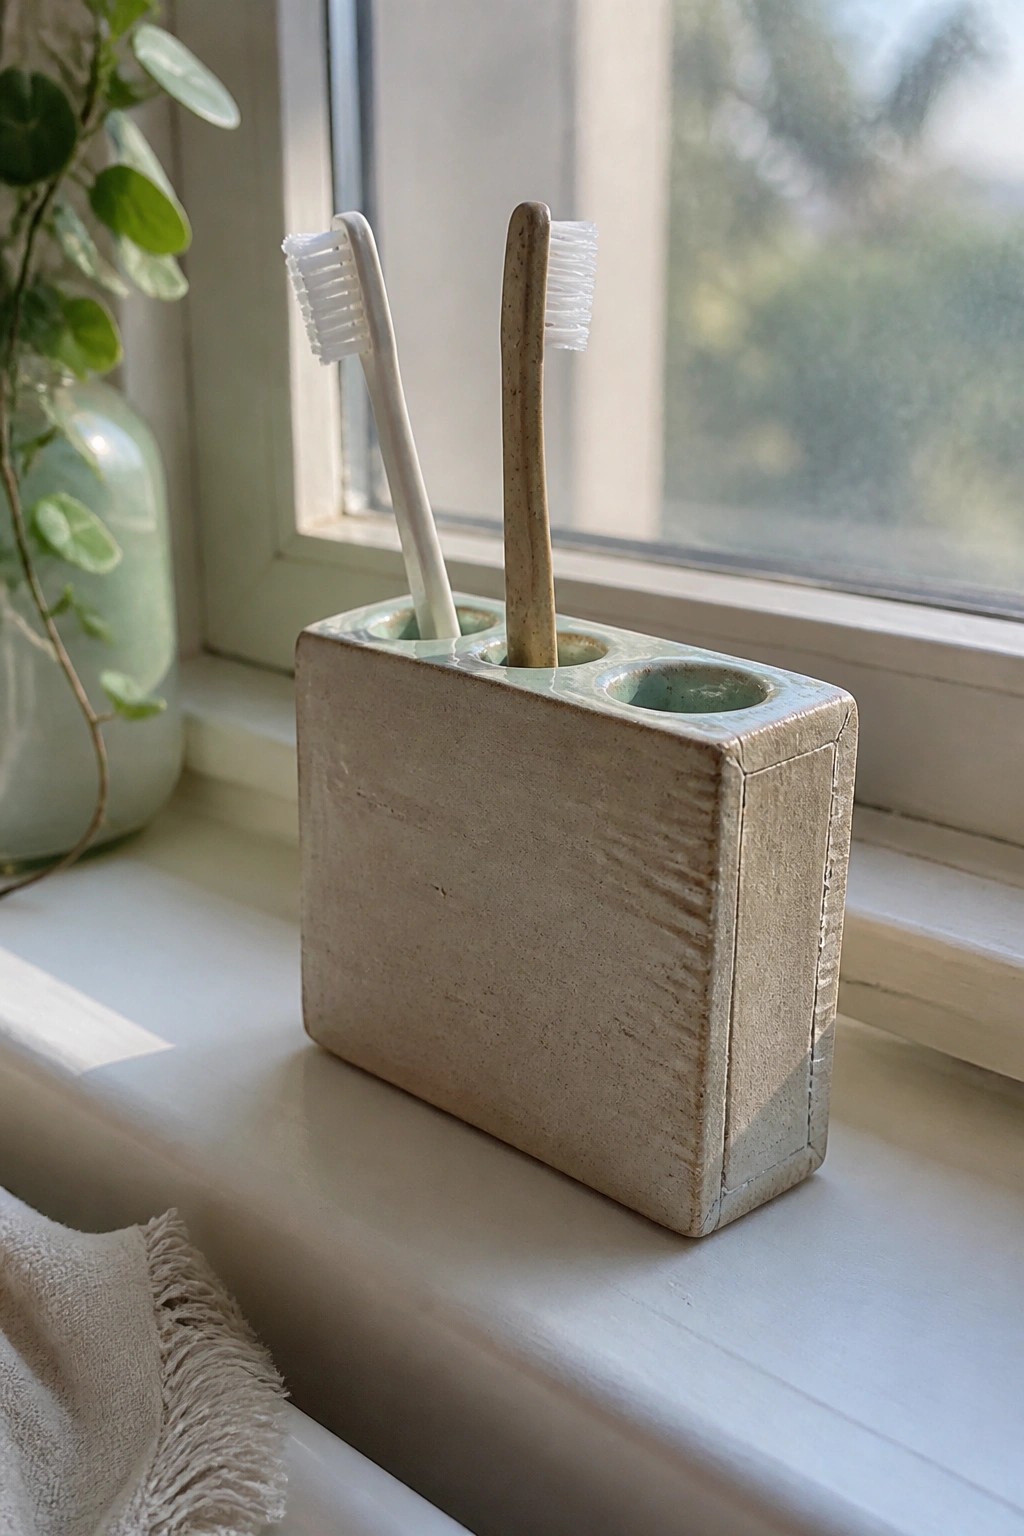
A simple slab construction method produces this rectangular holder with three evenly spaced holes for toothbrushes. The flat sides and solid base come from joining cut slabs into a box shape before the holes are formed through the top surface. A matte glaze with slight color shifts across the exterior keeps the piece neutral while the open holes stay functional for daily use.
What makes this idea useful is the stable block shape that stays put on a bathroom counter or shelf. You can change the number of holes or their spacing to match how many brushes need storage. The same slab layout works for a shorter version that holds razors or small tubes instead. Scaling the rectangle wider also turns the basic form into a tray for cotton swabs or guest soaps.
Stamped Botanical Slab Trivets
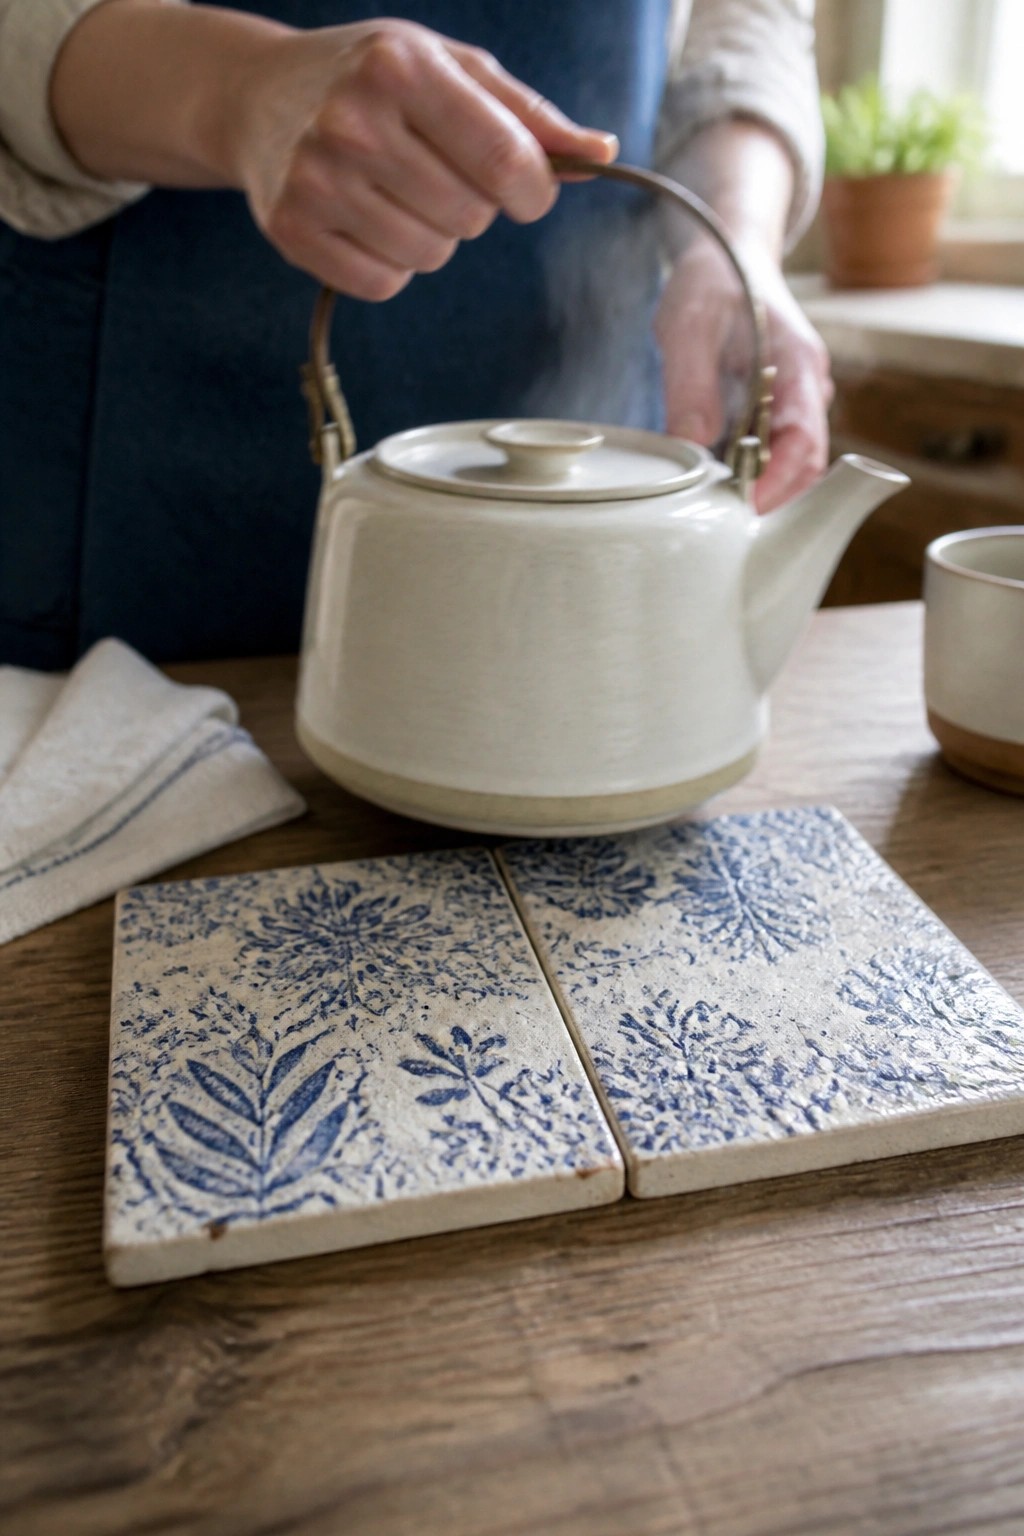
Making flat slab tiles with blue botanical stamps creates simple trivets that protect surfaces from hot pots and kettles. These square pieces are cut to a consistent size, decorated with repeated leaf and flower motifs in blue, and left unglazed on the edges for a raw clay look. The design works because the flat shape and even thickness let the tiles sit stable on a table while the stamped pattern gives them a finished appearance without extra carving or sculpting.
What makes this idea useful is how quickly the same stamp can be used to produce a matching set. In a kitchen they handle everyday heat from teapots or baking dishes without taking up much storage space. You could change the motif to abstract shapes or switch the blue to another underglaze color to fit different dishware. The same slab method also works for smaller versions that double as spoon rests or coaster sets.
Slab Built Sitting Cat Figurine
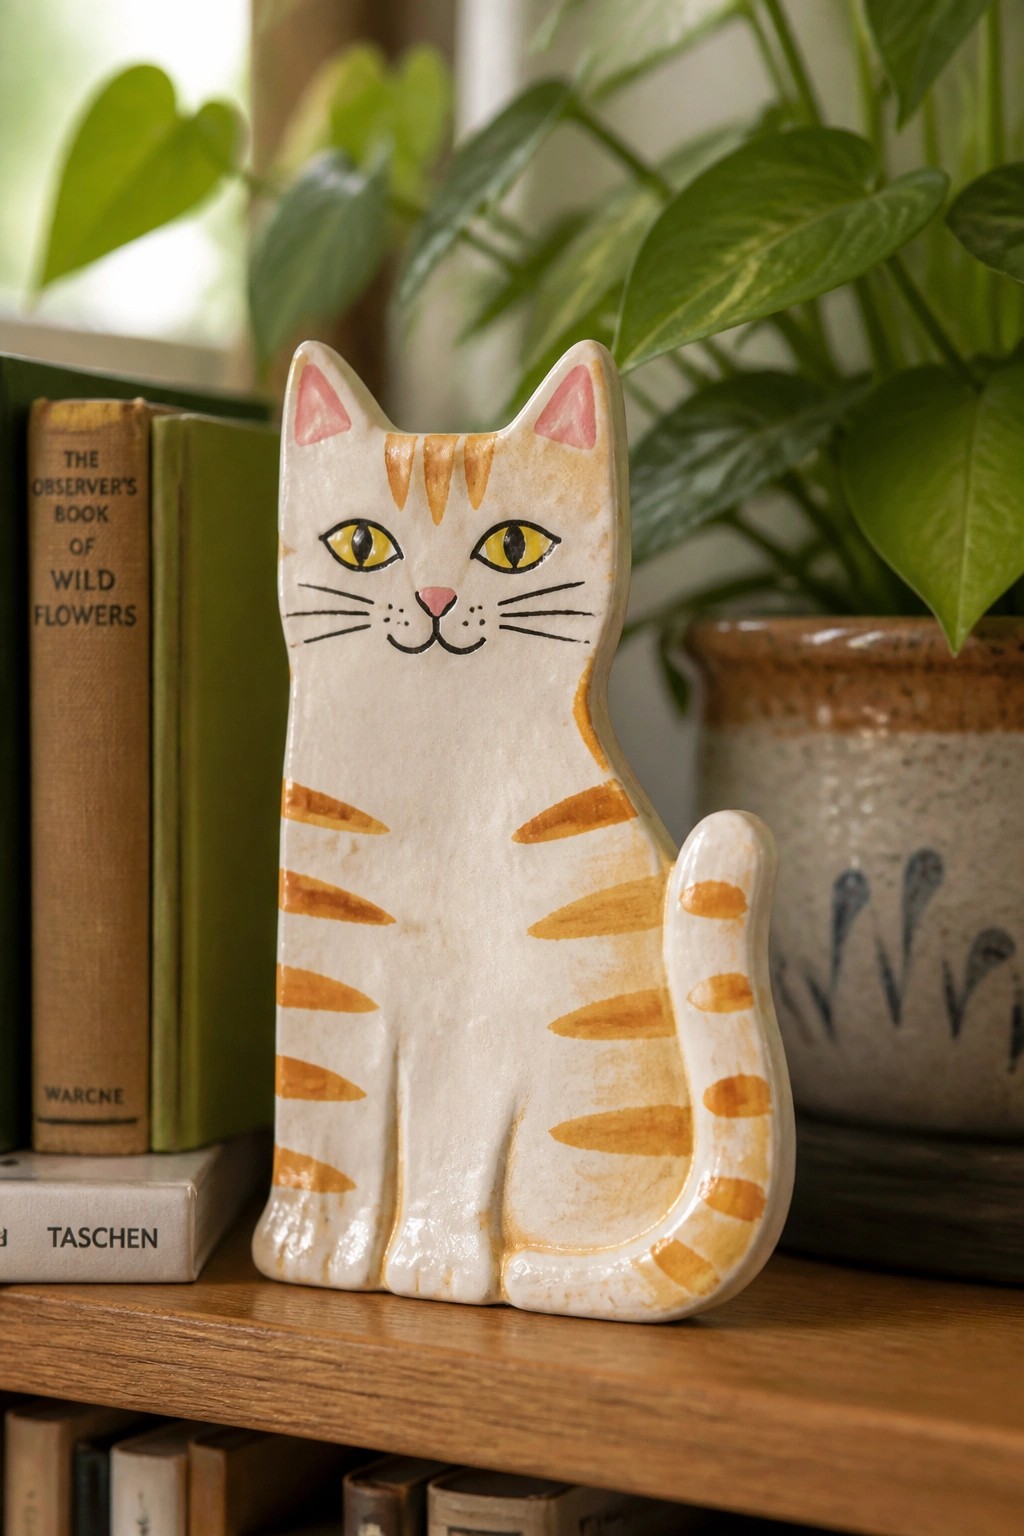
A sitting cat figurine built from clay slabs gives you a flat-backed form that stands easily on a shelf. The white base with brushed orange stripes and simple face details keeps the surface clean while still showing the handmade construction. This approach works as a straightforward decor object because the shape stays compact and the painted markings add interest without needing complex carving.
The shape does a lot of the work here since the flat back and rounded front let you cut the main body from one or two slabs and attach legs and tail quickly. You could swap the stripes for spots or solid color blocks and still keep the same cutout pattern. A piece like this fits on a bookshelf or windowsill without taking much space and makes a quick gift once you have the template. The small scale also means you can try different ear or tail angles on the next version without using much clay.
Simple Divided Dish for Kitchen Seasonings
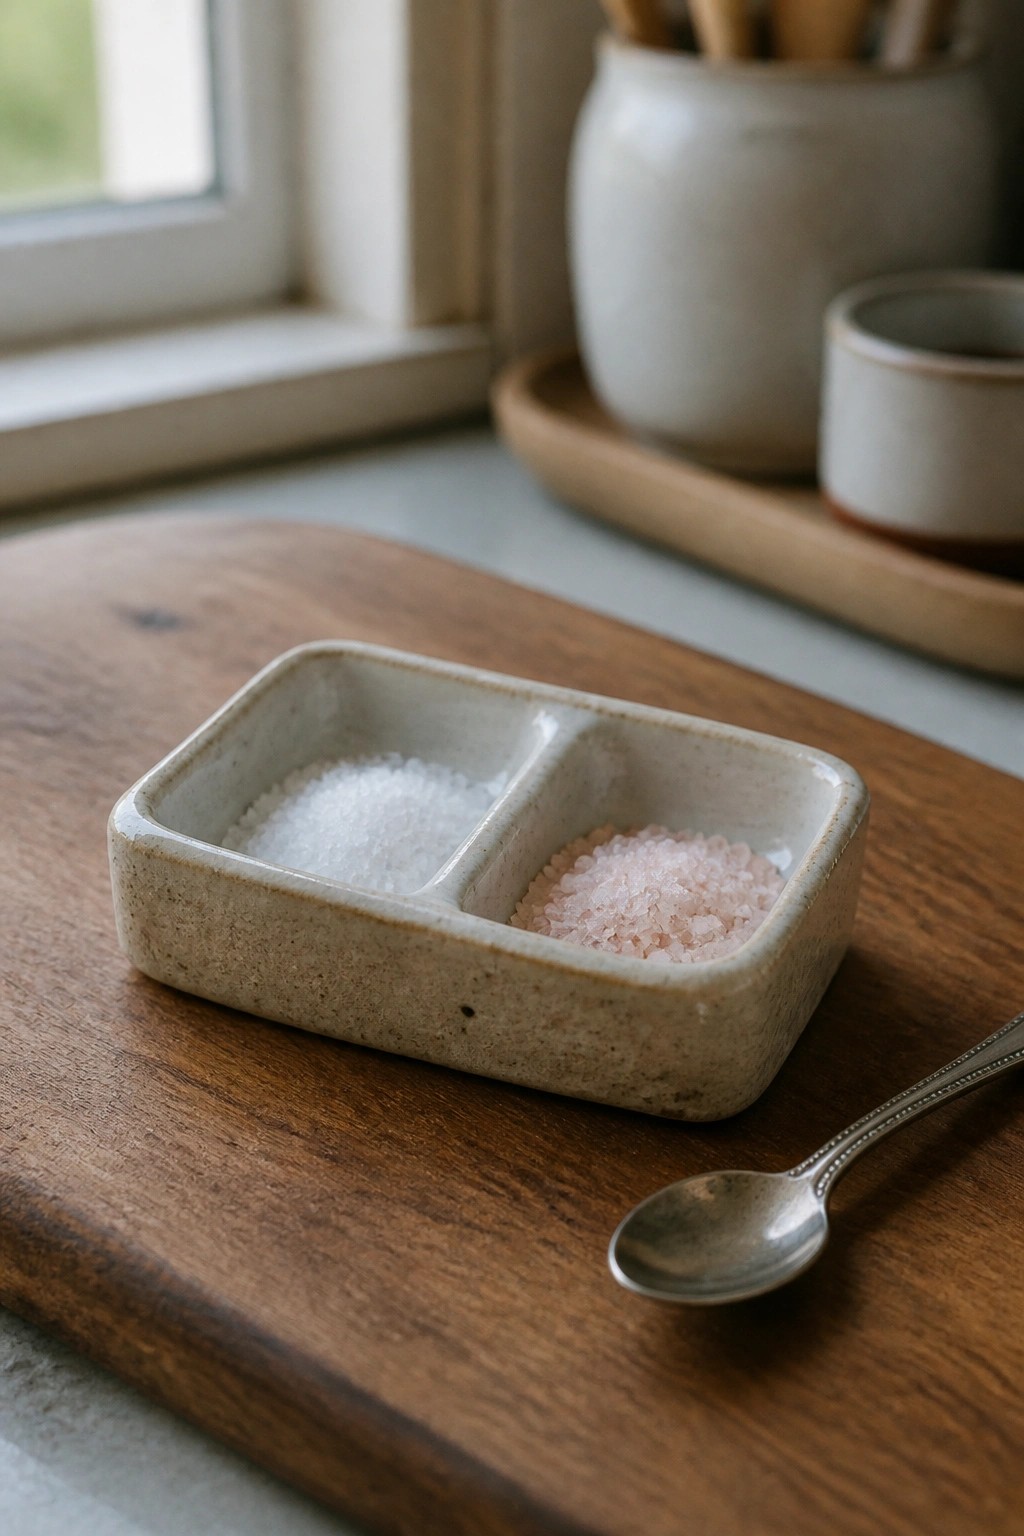
A small rectangular tray with one straight divider makes a practical seasoning dish for the table or counter. Cut two long slabs for the outer sides, shorter slabs for the ends and center wall, then attach them to a flat base using slip. The speckled matte surface keeps the focus on the form while giving the piece a finished look that pairs with other everyday ceramics.
What makes this idea useful is how the divided layout keeps two different salts or spices separate without needing extra containers. The same basic shape can be lengthened into a three-section version for more options or shortened into a single compartment dish if you want something even quicker. In a kitchen this size fits neatly between the stove and prep area, and the straightforward slab construction means you can make several at once to match a set of plates or bowls.
Frequently Asked Questions
What basic supplies and tools should I gather before starting any of the slab pottery projects?
You will need a rolling pin or slab roller for even thickness, a work surface covered with canvas or plastic, basic clay cutting tools such as a wire cutter and scoring tool, and a ruler for measuring. Choose a low fire clay body that is easy to work with for beginners and have plastic bags on hand to control drying speed. These items cover most of the 19 projects without requiring expensive equipment.
How do I prevent slabs from warping or cracking while they dry?
Roll your slabs to a consistent thickness of about one quarter inch and allow them to reach a leather hard stage slowly under loose plastic. Score and slip all joints thoroughly before attaching pieces and avoid placing projects in direct sunlight or near heat sources. Check daily and gently adjust any edges that begin to lift to keep the forms stable through the drying process.
Which clay type works best for simple slab construction and why?
A stoneware or earthenware clay with added grog provides strength and reduces shrinkage during firing. This type holds its shape well when rolled into slabs and joined, making it suitable for boxes, trays, and other flat sided projects listed in the collection. Test a small sample first to confirm it matches your kiln temperature range.
How should I finish and fire the completed projects for everyday use?
Once the pieces reach bone dry stage bisque fire them to cone 04 then apply food safe glazes if desired and complete a glaze firing to cone 6. Sand any rough edges after the bisque stage for a smooth surface. Always follow the clay and glaze manufacturer guidelines for safe results that hold up to regular handling.
What are some common beginner mistakes to avoid when building with slabs?
Do not join pieces that are at different dryness levels since this leads to separation later. Keep seams moist with slip and support larger forms with temporary props during assembly. Measure twice before cutting to reduce waste and work on one project at a time to maintain focus on even pressure and clean edges.

Pottery Path is my cozy corner of the internet where I share clay ideas, pottery inspiration, and simple projects you can recreate at home. I love exploring everything from air dry clay to handbuilt pottery to cute minis that brighten your day. My goal is to make clay crafting feel easy, fun, and welcoming for anyone who wants to try it.
You will find beginner friendly tutorials, creative pottery painting ideas, and lots of warm inspiration for slow and happy crafting. If you enjoy hands on creativity, this space will feel like home.