
I’ve been trying out different ways to finish the surfaces on my pottery pieces over the past few months.
Carving lines and shapes into the clay has been one method that gives a clean look once it’s fired.
Textures made with everyday items like fabric or leaves also add something subtle without much effort.
Glazes behave differently depending on how thick I apply them so I’ve learned to test small batches first.
These are some approaches that have worked well enough for me to keep using.
Carved Leaf Relief on a Ceramic Mug

A handmade ceramic mug can feature a raised leaf design created by carving the clay before glazing. The branching leaf pattern wraps around the body, with the glaze pooling in the recessed areas to make the veins and edges stand out against the mottled green surface. This combines simple surface carving with a single variegated glaze to add texture and interest to a basic drinking vessel.
What makes this idea useful is how the carved motif stays functional on a mug shape that gets daily use in the kitchen or at a desk. You could scale the same leaf branch down for a smaller espresso cup or extend it across a larger soup bowl without changing the technique. The green glaze also mixes easily with other earthy tones if you want to build a small matching set for gifts. A piece like this photographs clearly for sharing because the raised details catch light without extra styling.
Dimpled Exterior Texture with Soft Green Glaze Bowl

A wide ceramic bowl gains strong visual contrast when the exterior is covered in a repeated dimple pattern and the interior is coated with a light green glaze. The dimples are created by pressing a rounded tool into the clay while it is still soft, leaving an even, honeycomb-like surface that remains unglazed or lightly wiped. The interior glaze sits matte and slightly pooled, creating a clear division between the textured outside and the smooth colored inside. This approach works on a simple wheel-thrown or hand-built bowl form and needs no additional carving once the texture is applied.
What makes this idea useful is that the dimple pattern can be made with common household items like a wooden dowel or stamp before the clay dries. The bowl shape suits kitchen use for fruit or bread, or it can sit on a shelf as a decorative piece. You could repeat the same texture on a taller vase or smaller ramekins and swap the green glaze for other matte colors to fit different spaces. The even spacing of the dimples makes the surface hold up well during firing without extra finishing steps.
Pressed Rim Texture with Glaze Pooling
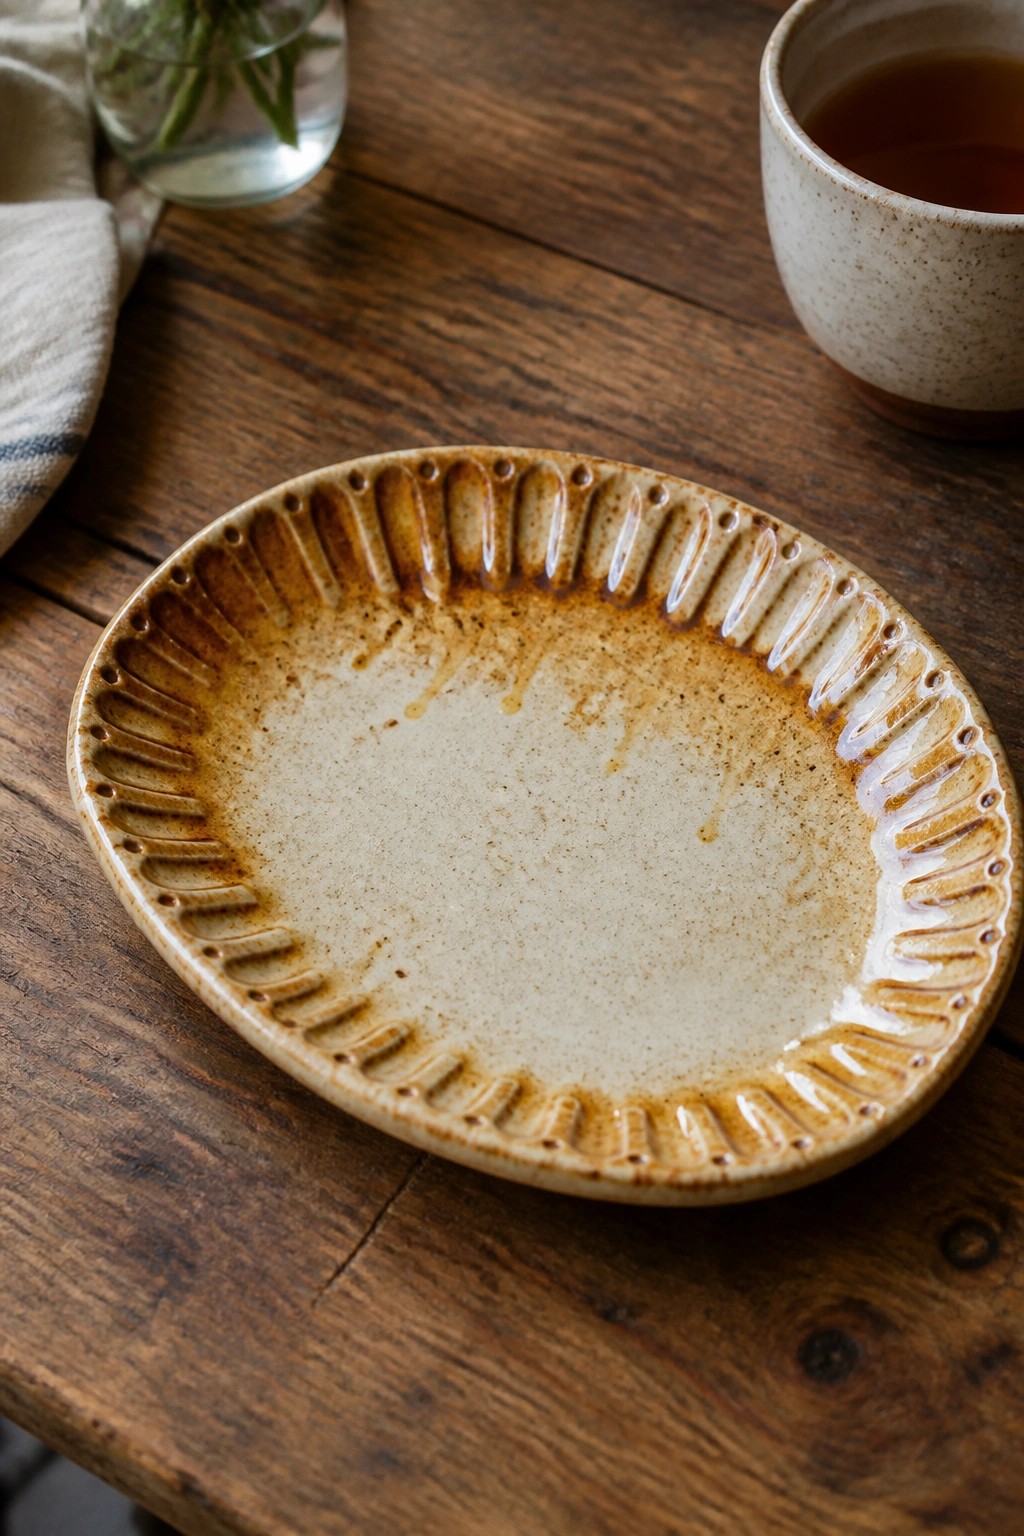
A wide, shallow ceramic plate uses a repeated pressed pattern of vertical ridges and small dots around the rim. The glaze is applied so it pools darker in the recessed lines while leaving lighter tones on the raised areas, which makes the texture stand out without extra color work. This approach combines simple carving or stamping with a single glaze to create contrast on an otherwise plain form.
The shape works well as a serving plate or decorative tray on a table. You can adapt the same rim pattern to bowls or platters by changing the depth and width of the press tool. For a simpler version, repeat the pattern only on part of the rim or use it on a mug instead. This kind of surface stands out in photos because the glaze naturally emphasizes the handmade marks.
Radiating Carved Texture on a Blue Glazed Tray
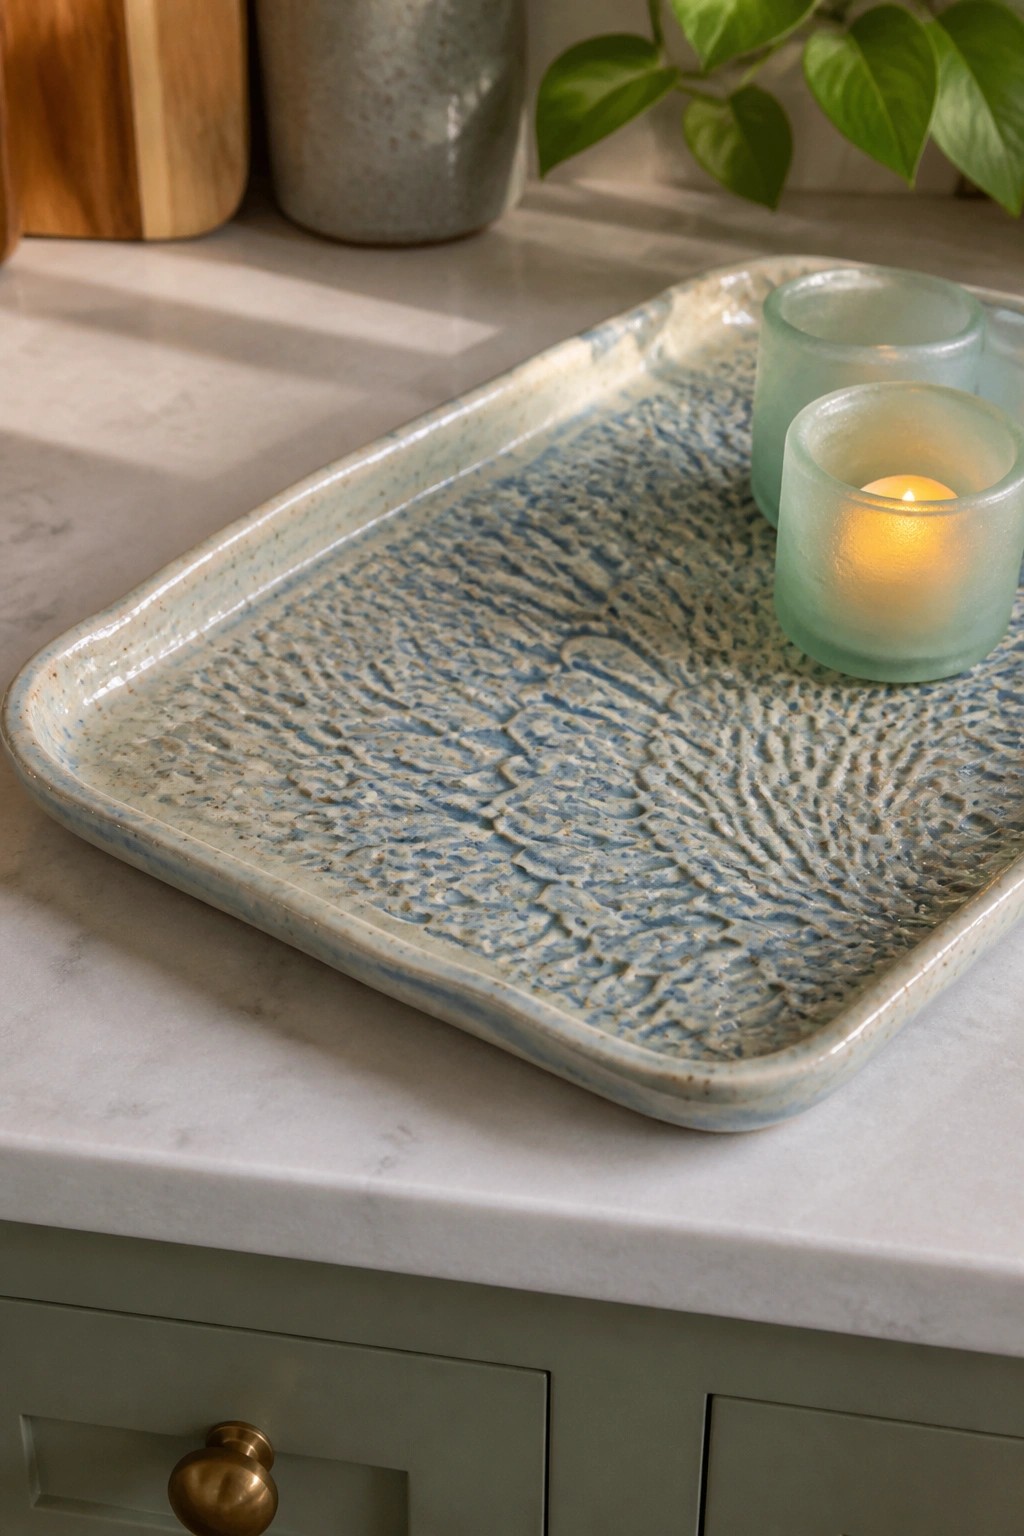
A rectangular ceramic tray becomes more interesting when you carve or impress a radial pattern that spreads from one side toward the edges. The blue glaze pools in the recessed lines while the raised areas stay lighter, creating clear contrast across the surface. Speckles along the rim give the piece a finished border without competing with the main texture. This approach works on any flat form where you want the pattern to guide the eye across the whole object.
What makes this idea useful is how the tray shape turns a texture test into something you can actually use on a counter or table. You could scale the same radial carving down for coasters or a soap dish by keeping the center point and shortening the lines. The blue-over-light base also adapts easily if you swap in other glaze colors that settle into texture the same way. For a gift, a smaller version with just the corner of the pattern would still read as intentional.
Carved Horizontal Bands on a Clay Planter
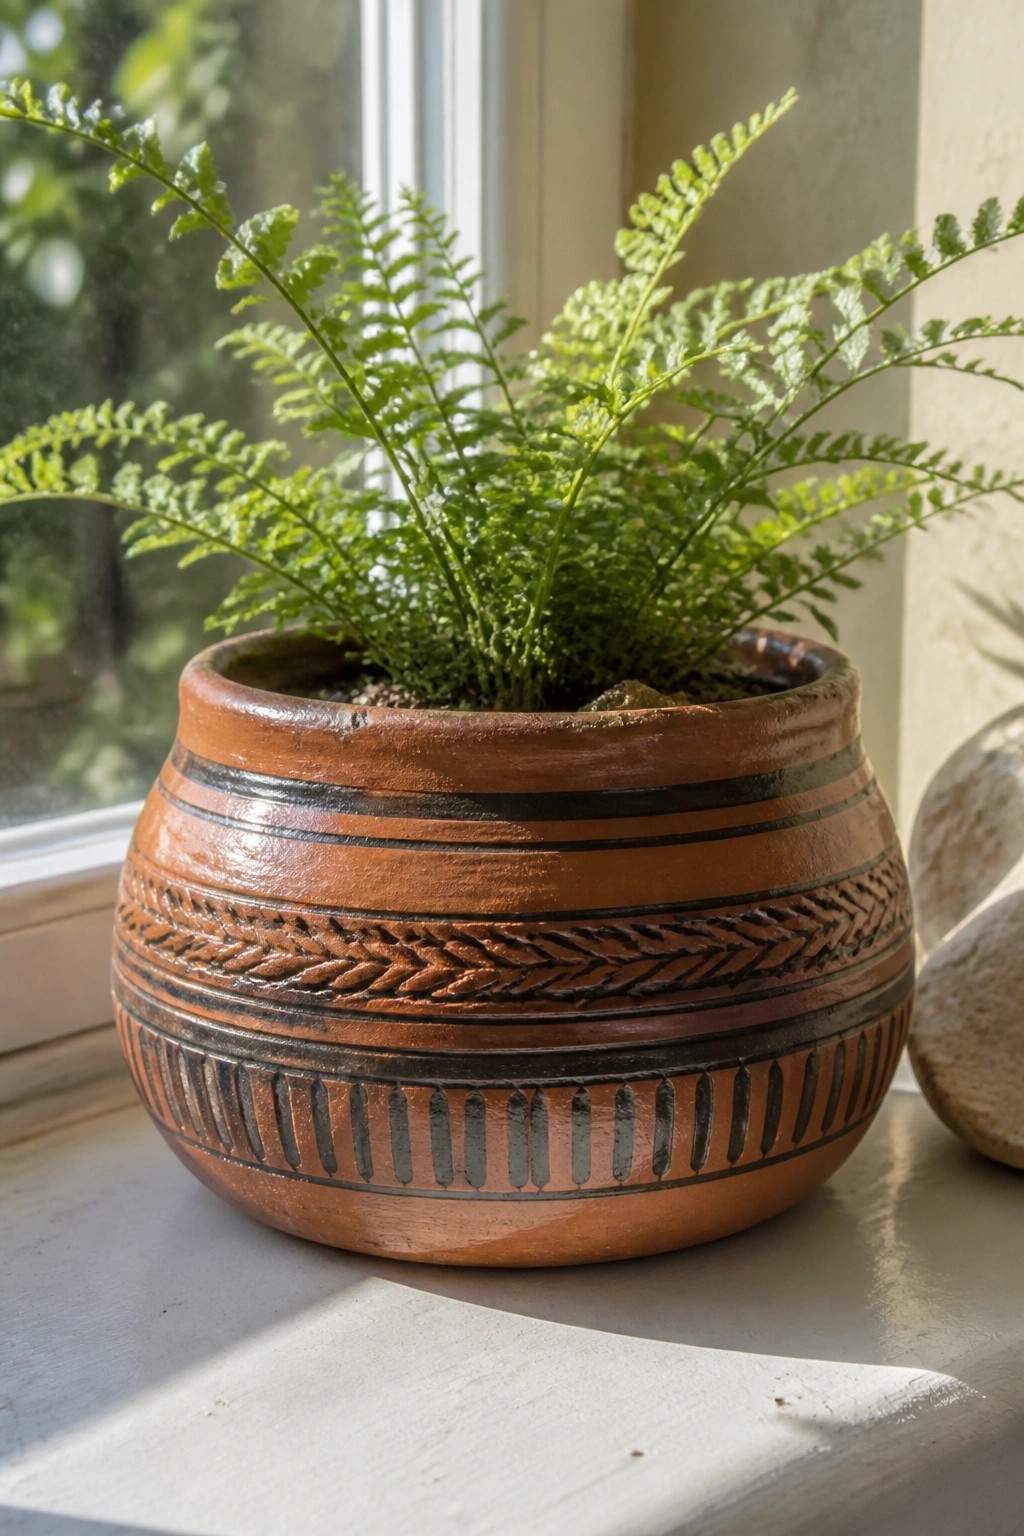
A rounded clay planter uses three distinct carved bands to break up the surface while keeping the natural terracotta color visible. One band shows a repeating herringbone pattern, another uses evenly spaced vertical lines, and plain dark lines separate the sections. The carving stays shallow so the pot still feels sturdy for holding soil and plants. This style works especially well on planters because the patterns remain visible once leaves grow over the rim.
The wide middle section gives room for multiple bands without looking crowded, so the same idea scales down easily to a smaller pot or up to a larger floor planter. You could swap the vertical lines for dots or leave one band smooth to simplify the process. This approach stands out for plant styling because the texture adds detail without competing with the greenery.
Carved Sunflower Center on a Small Glazed Dish

A small ceramic ring dish or trinket bowl gains clear visual interest from a sunflower motif carved directly into the center. The raised petals and dotted middle create recessed areas where the pink glaze pools naturally, giving the surface dimension without added layers. This keeps the overall form simple while the carved detail does the main work of making the piece stand out.
What makes this idea useful is how the small scale lets you practice carving and glazing on a low-material project that still looks finished. The same sunflower stamp or carving tool can be used on soap dishes, spoon rests, or shallow pinch pots with only minor shape changes. In a bathroom or entryway, the compact size fits well for holding rings or small items, and switching the flower to another simple motif like a leaf or star keeps the approach flexible for different spaces.
Impressed Geometric Borders on a Narrow Tray
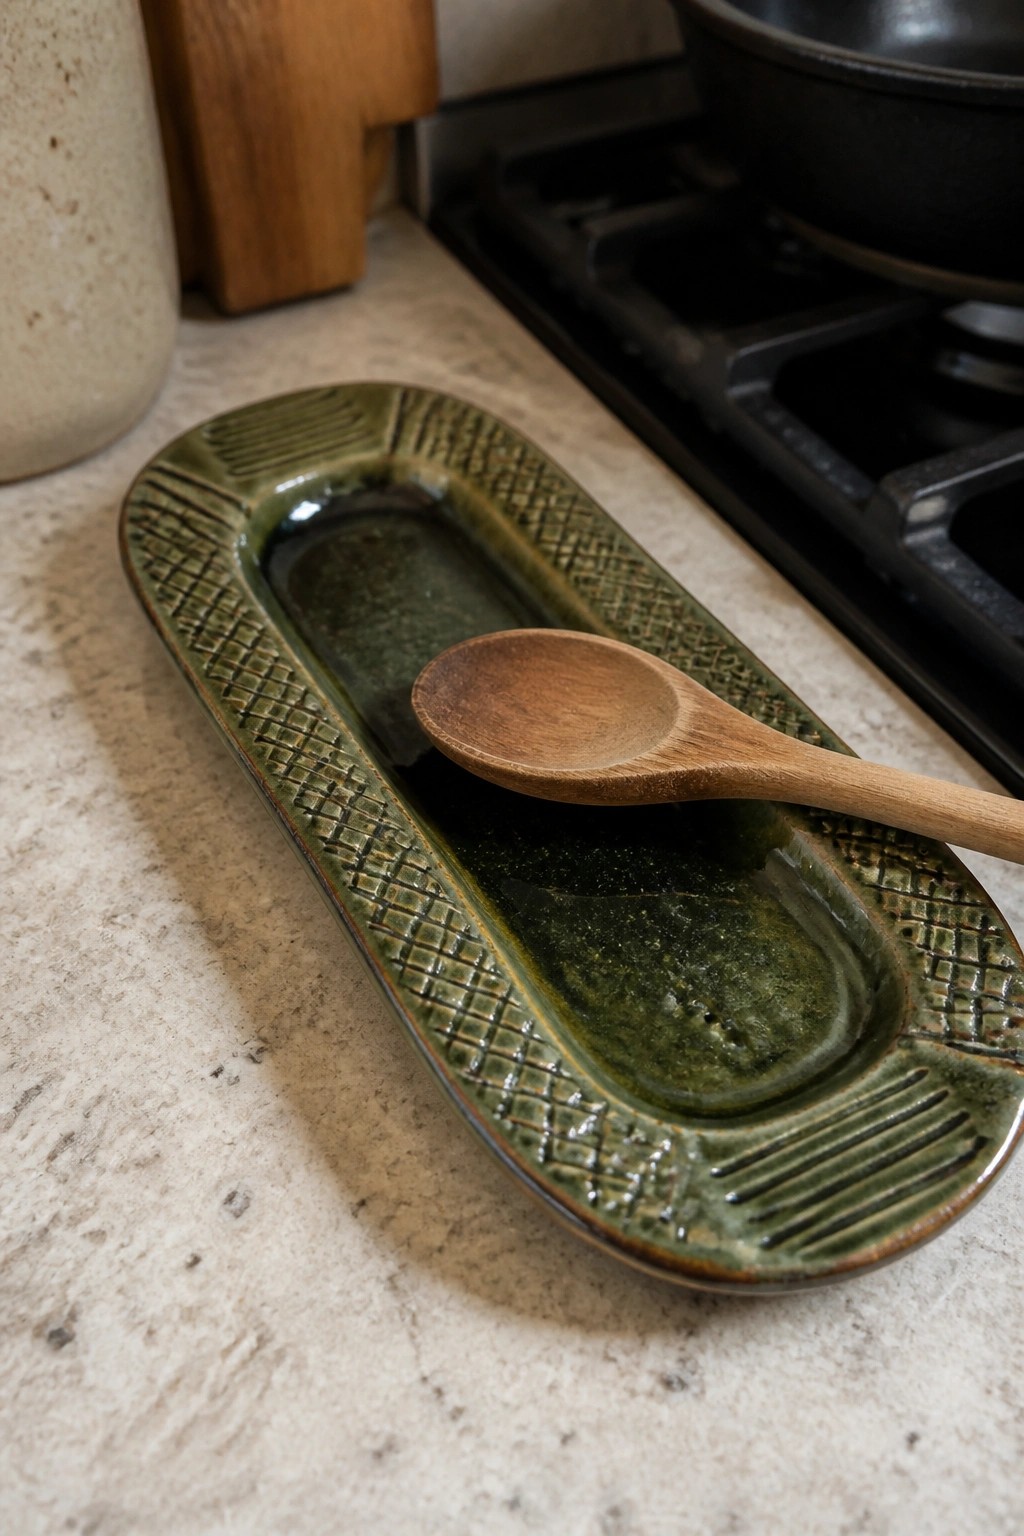
A long rectangular tray becomes more interesting when the borders carry repeated impressed patterns such as grids, cross-hatching, and short parallel lines. The dark green glaze settles into the recessed areas and leaves the raised textures lighter, so the surface design stays visible even after firing. This approach uses basic stamping tools to create contrast on a simple kitchen form without needing complex carving.
What makes this idea useful is how the impressed borders turn an ordinary tray shape into something that holds oil or a spoon during cooking. The same pattern technique works on a smaller soap dish or a rectangular spoon rest, and the narrow proportions keep the piece easy to store. In a kitchen setting the textured edges catch light and glaze differently than a plain surface, which helps the tray stand out in photos for sharing.
Wave Carved Candle Bowl with Warm Interior Glaze

A rounded low bowl makes an effective candle holder when the exterior carries carved wave patterns that catch light and shadow. The dark clay body keeps the focus on the raised and recessed lines of the swirls, while a reflective warm glaze on the inside bounces the flame outward. This combination turns a basic bowl into a small light piece that relies on texture and contrast rather than color.
The compact shape fits easily on a coffee table or shelf without crowding the surface. You could repeat the same wave carving on a matching set of small dishes or scale the pattern down for a taller votive holder. The interior glaze choice also works on any form where you want the light to glow from within, so the idea transfers well to other simple thrown or hand-built shapes.
Vertical Ribbing with Gradient Glaze
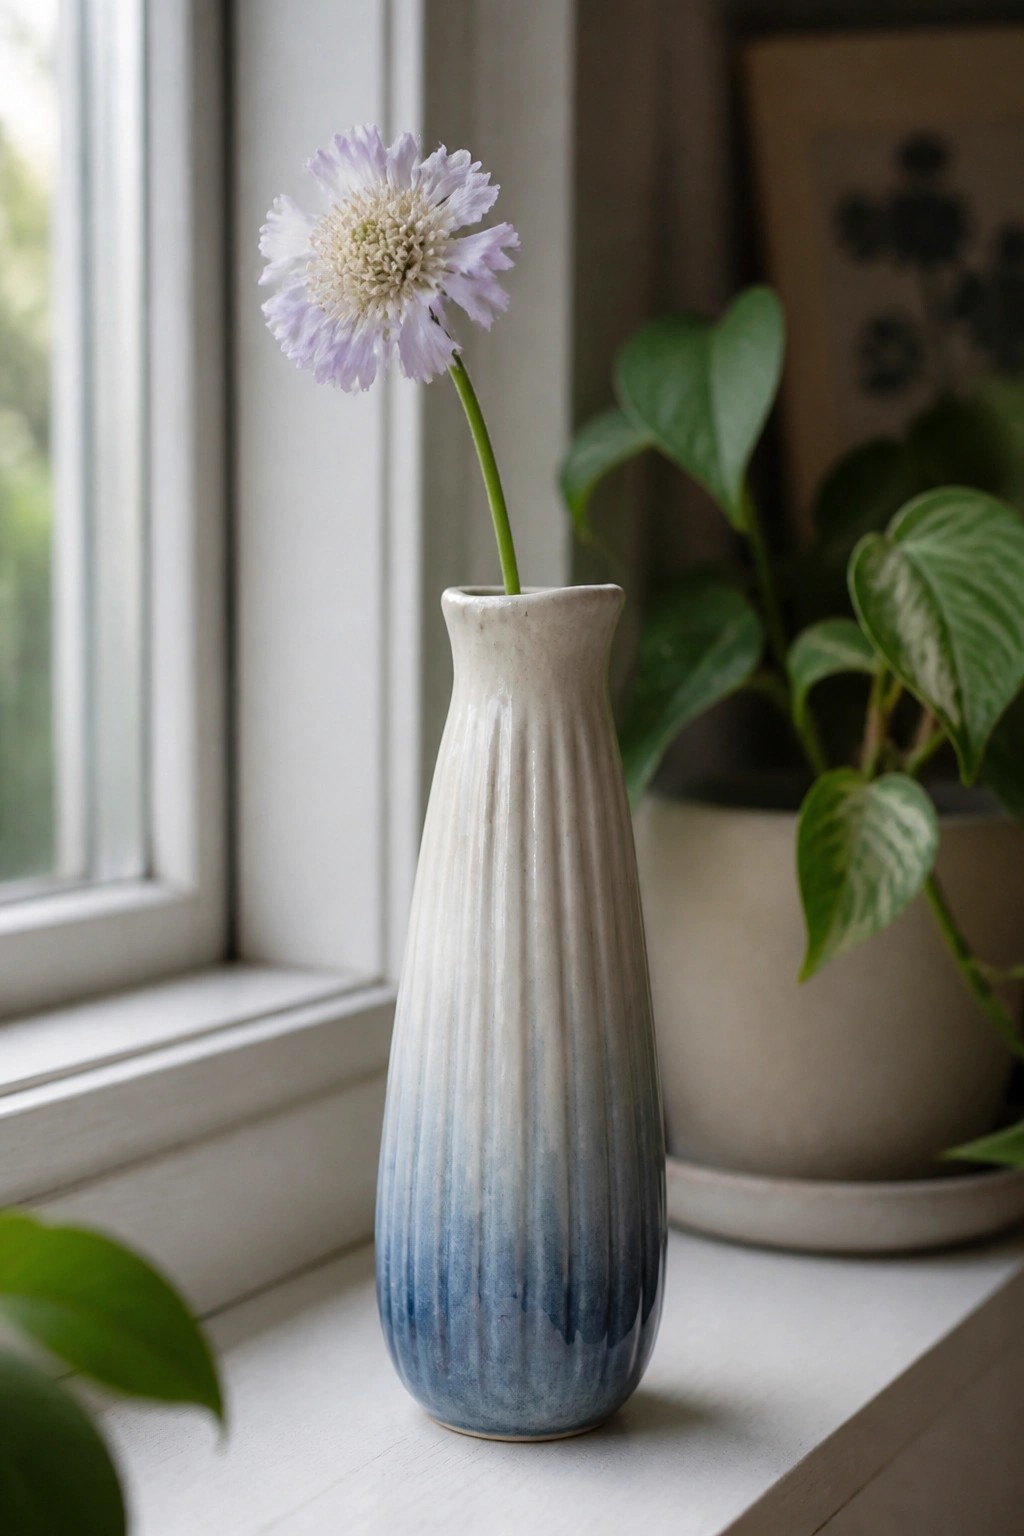
A tall, narrow ceramic vase uses vertical ribs running down the body to guide a blue-to-white ombre glaze. The ribs create subtle lines that catch more glaze in some areas, turning a simple dip or pour into a textured fade. This surface treatment works on any wheel-thrown or hand-built form where you want the glaze to do the visual work without extra carving.
What makes this idea useful is how the ribs and glaze interact on a basic cylinder shape that is easy to throw or hand-build. You can repeat the same rib-and-gradient method on shorter bud vases, pencil holders, or small pitchers by changing only the height and foot detail. The narrow profile fits tight spots like a windowsill or shelf edge, and the same glaze layering can be tested on test tiles before committing to a full piece. For Pinterest, the clean vertical lines and clear color shift photograph well in natural light.
Painted Ceramic Fox Figurine with Striped Tail

A small handbuilt ceramic fox works as a standalone decor piece when finished with layered washes of orange, brown, and gray. The seated pose and banded tail give the shape instant recognition while the painted lines suggest fur without heavy carving. A dark nose and lighter face area help the head stand out against the body. This style suits any small animal figurine where color and simple markings carry the design.
What makes this idea useful is how the same wash technique can be applied to other compact animals like hedgehogs or birds. The size works on shelves, windowsills, or beside plants without crowding the surface. You could drop the stripes to just the tail or switch to one main color for faster production. For gifts, a version with softer edges still reads as intentional and handmade.
Carved Shell and Lattice Textures on a Divided Spice Dish
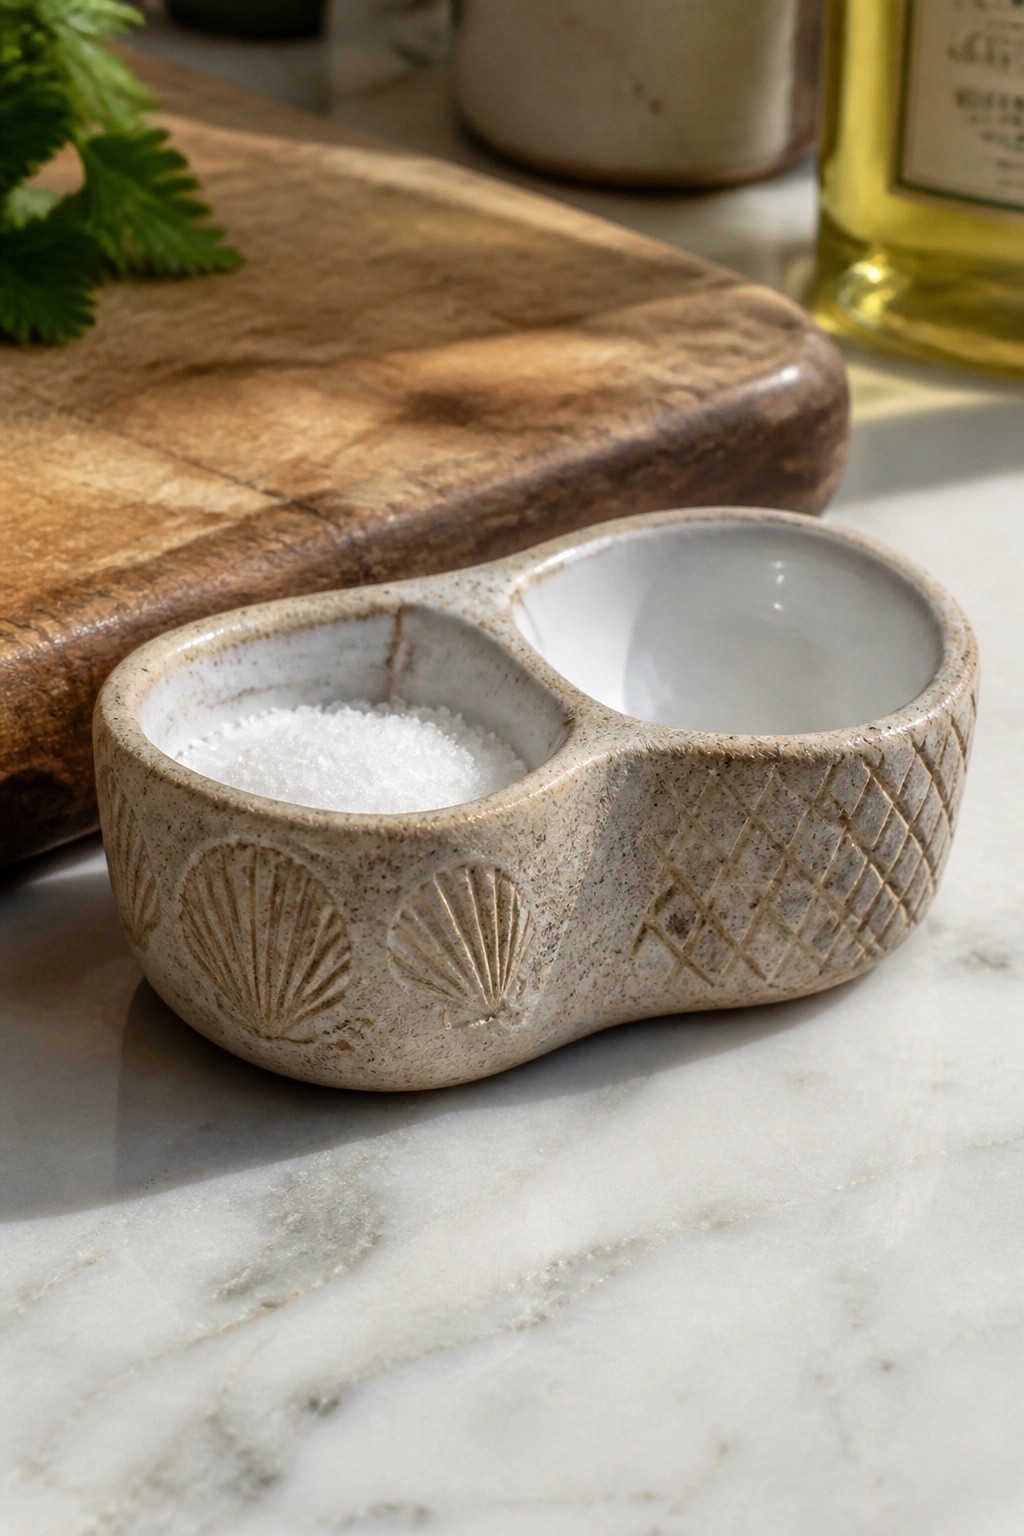
A small two-compartment ceramic dish gives you separate spots for salt, pepper, or other seasonings without taking up much counter space. The maker carved shell shapes into one side of the exterior and a repeating crosshatch pattern into the other, letting the impressed lines create shadow and depth on the speckled clay. A simple white glaze covers only the inside, so the carved details stay visible against the matte surface. This approach fits the kitchen item category and keeps the focus on surface texture rather than added color.
The divided shape makes it practical for everyday cooking because you can reach two seasonings from one small piece. You could replace the shells with other simple stamps like leaves or lines and keep the same layout. The compact size also works as a template for a set of single-compartment pinch pots or a narrow tray. The clear difference between the textured outside and plain interior helps the piece stand out in photos without extra styling.
Leaf Stamped Rim with Crackle Glaze

An oval platter uses a repeated leaf stamp pressed into the clay to create a textured border around the rim. The center area stays smooth and receives a light green crackle glaze that settles into the impressed lines and adds subtle variation across the surface. This combination keeps the design focused on the edge while leaving the main area practical for food or display. The approach fits flatware projects where the texture frames the piece without covering the entire form.
The shape works well as a cheese board or small serving tray on a kitchen counter. You can adapt the same stamp to round plates or rectangular trays to build a simple matching set. Reducing the scale of the leaf pattern would let the idea transfer to smaller pieces like butter dishes or spoon rests. The contrast between the textured rim and the smooth glazed center also helps the piece photograph clearly for sharing.
Carved Tooth Motifs with Drip Glaze on a Toothbrush Holder

A cylindrical ceramic holder makes a practical bathroom item when you press tooth outlines into the clay surface before glazing. The yellow matte glaze covers most of the form while a turquoise glaze applied at the rim creates a dripping edge that stops partway down the sides. Three evenly spaced tooth shapes give the holder a clear theme without covering the entire surface.
This size sits easily on a narrow windowsill or sink ledge and keeps brushes from tipping over. You could repeat the same carving idea on a soap dish or small cup by changing the motif to leaves or waves. The drip glaze effect also works on a taller pencil holder if you want to move the design out of the bathroom.
Carved Botanical Soap Dish with Drainage Ridges

A handmade ceramic tray works well as a soap or sponge holder when one side features a carved leaf or plant motif and the other side includes parallel ridges. The teal glaze settles into the recessed lines to make the design stand out while the ridges keep a sponge lifted so water drains away. This approach pairs surface carving with a practical shape that fits next to a sink.
What makes this idea useful is how the ridges turn a flat tray into something that actually solves a wet-mess problem. You can adapt the same carved motif and glaze pooling to a smaller ring dish or a longer toothbrush tray. The design stays simple enough to try on a slab-built form yet looks finished once the glaze highlights the texture.
Spiral Cutout Yarn Bowl
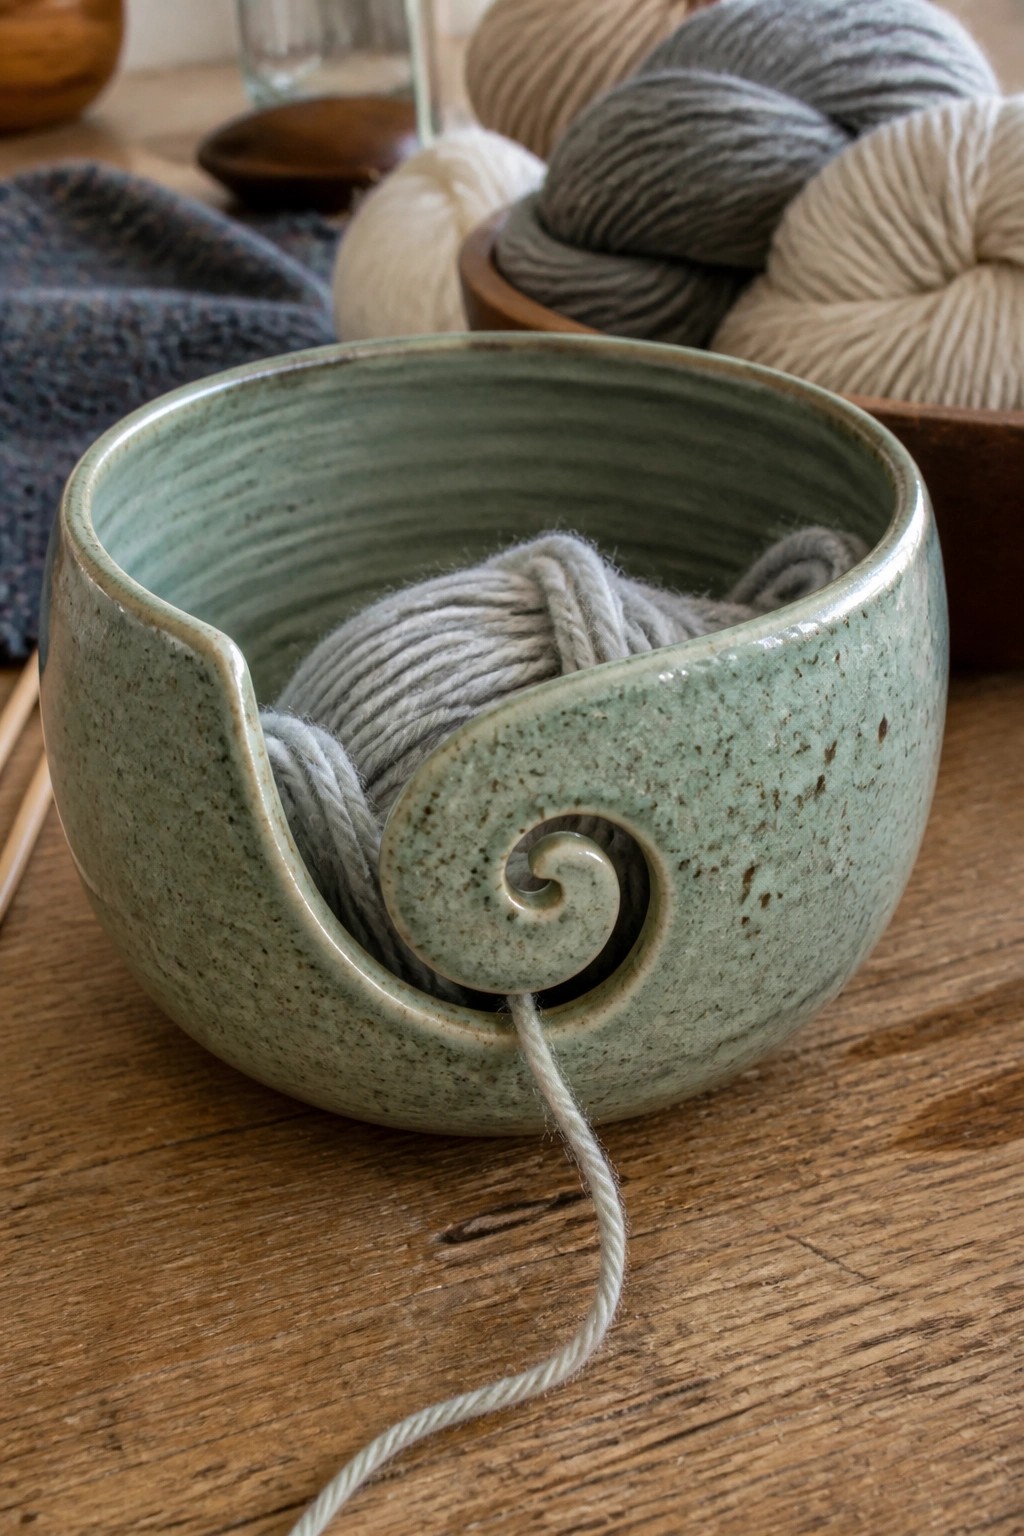
A yarn bowl formed from clay uses a large spiral opening cut through one side to let yarn feed out cleanly. The bowl holds the ball inside while the cutout keeps the strand from tangling or rolling away. A soft green speckled glaze covers the outside, adding subtle texture without interfering with the smooth interior.
What makes this idea useful is the way the cutout combines storage and function in one step for regular knitters or crocheters. You could simplify the spiral into a curved slot on a smaller bowl or repeat the same cut on a lidded version for finer threads. The shape sits well on a table or in a craft space where the yarn needs to stay contained but ready to pull. A single glaze like this one keeps the focus on the form rather than competing details.
Carved Moon Phases on a Dark Tile
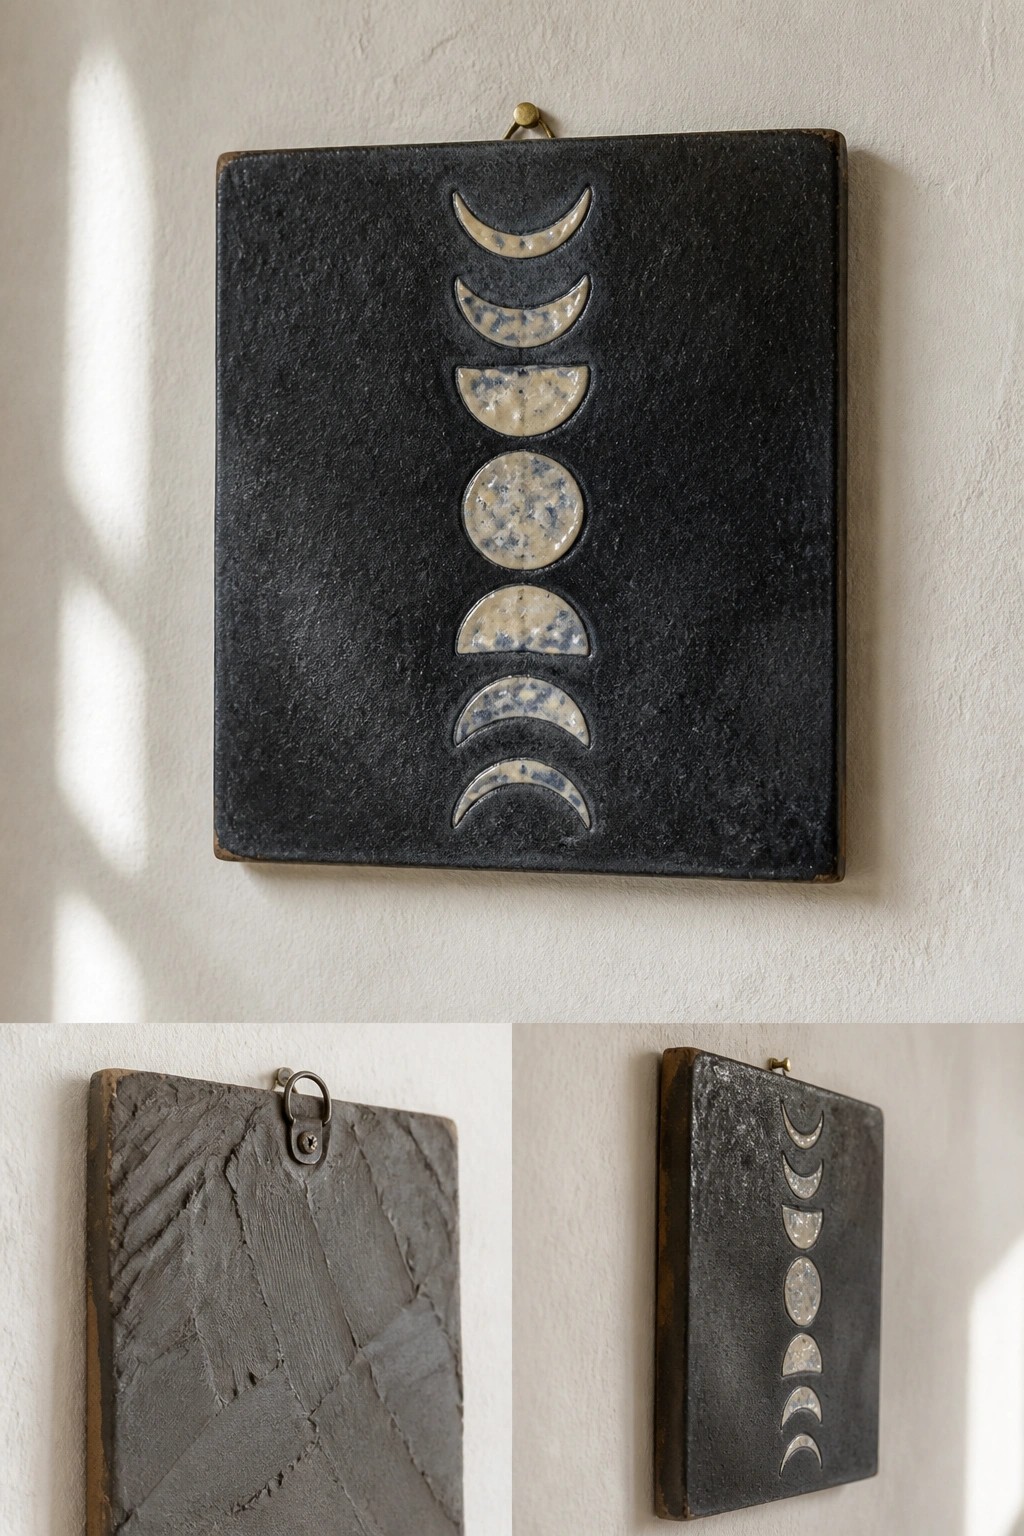
A rectangular ceramic wall tile uses a vertical row of carved or pressed moon phase shapes that run down the center. The background stays dark and matte while the recessed phases receive a lighter speckled glaze that catches the light. This approach relies on simple relief carving combined with selective glazing to create clear contrast without extra color layers. It works as a straightforward decor object that can hang on any wall.
What makes this idea useful is how easily the layout fits narrow spaces like hallways or above a desk. You could shrink the same vertical arrangement onto smaller tiles for a grouped display or swap the moon shapes for stars or simple geometric forms. The dark background also hides minor surface flaws during making, which helps when testing new clay bodies or glazes. For a gift, the finished tile needs only basic hanging hardware and pairs well with neutral interiors.
Dense Stamped Texture on a Teapot

A teapot covered in small, repeated stamped impressions gives the surface a consistent pitted texture that holds glaze in the recesses. The brown glaze pools unevenly across the impressions, creating visual depth while the lid and spout area stay smoother for contrast. A small sculpted accent near the spout breaks up the pattern without competing with it. This surface treatment suits a rounded kitchen form where the texture can run uninterrupted around the body.
The shape does a lot of the work here because the teapot’s curves let the texture read clearly from multiple angles. You could apply the same stamping method to a pitcher or set of mugs to create a coordinated set. For a gift this approach stands out on a table because the texture adds interest even in a single glaze color. The idea also translates easily to a bowl by keeping the stamping tight and letting the glaze do the rest of the work.
Carved Geometric Bands on a Lidded Kitchen Jar
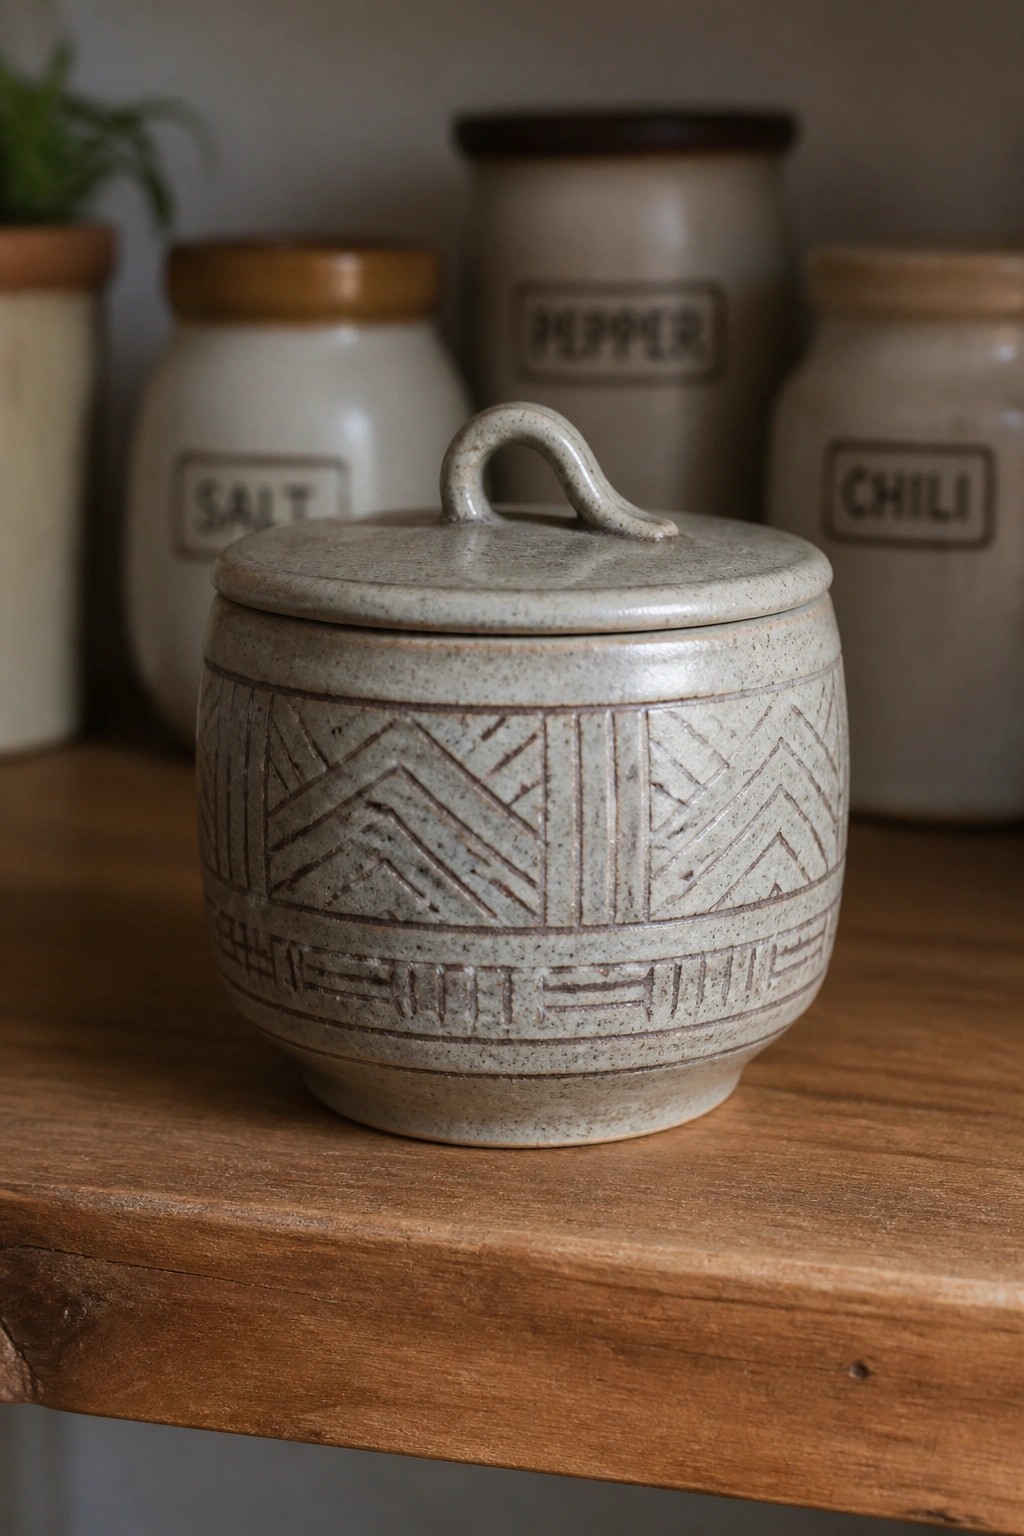
A small round jar with a fitted lid uses carved geometric patterns to add surface detail without relying on color. Bands of chevrons and straight-line motifs are cut into the clay around the body, then covered with a speckled matte glaze that settles into the recessed lines. The result is a simple kitchen container that gains texture and contrast from the carving alone. This approach suits salt, spice, or sugar storage where the lid keeps contents dry and the pattern stays visible on a shelf.
The compact size makes the jar easy to place in a kitchen without taking up much space. You can repeat the same band layout on taller canisters or shorten it for small ramekins by keeping the carved sections narrow. The pattern works on any form that rotates during use because it wraps fully around the piece. Scaling the motif down or spacing the bands farther apart gives quick variations for different storage needs.
Linear Texture on a Covered Butter Dish
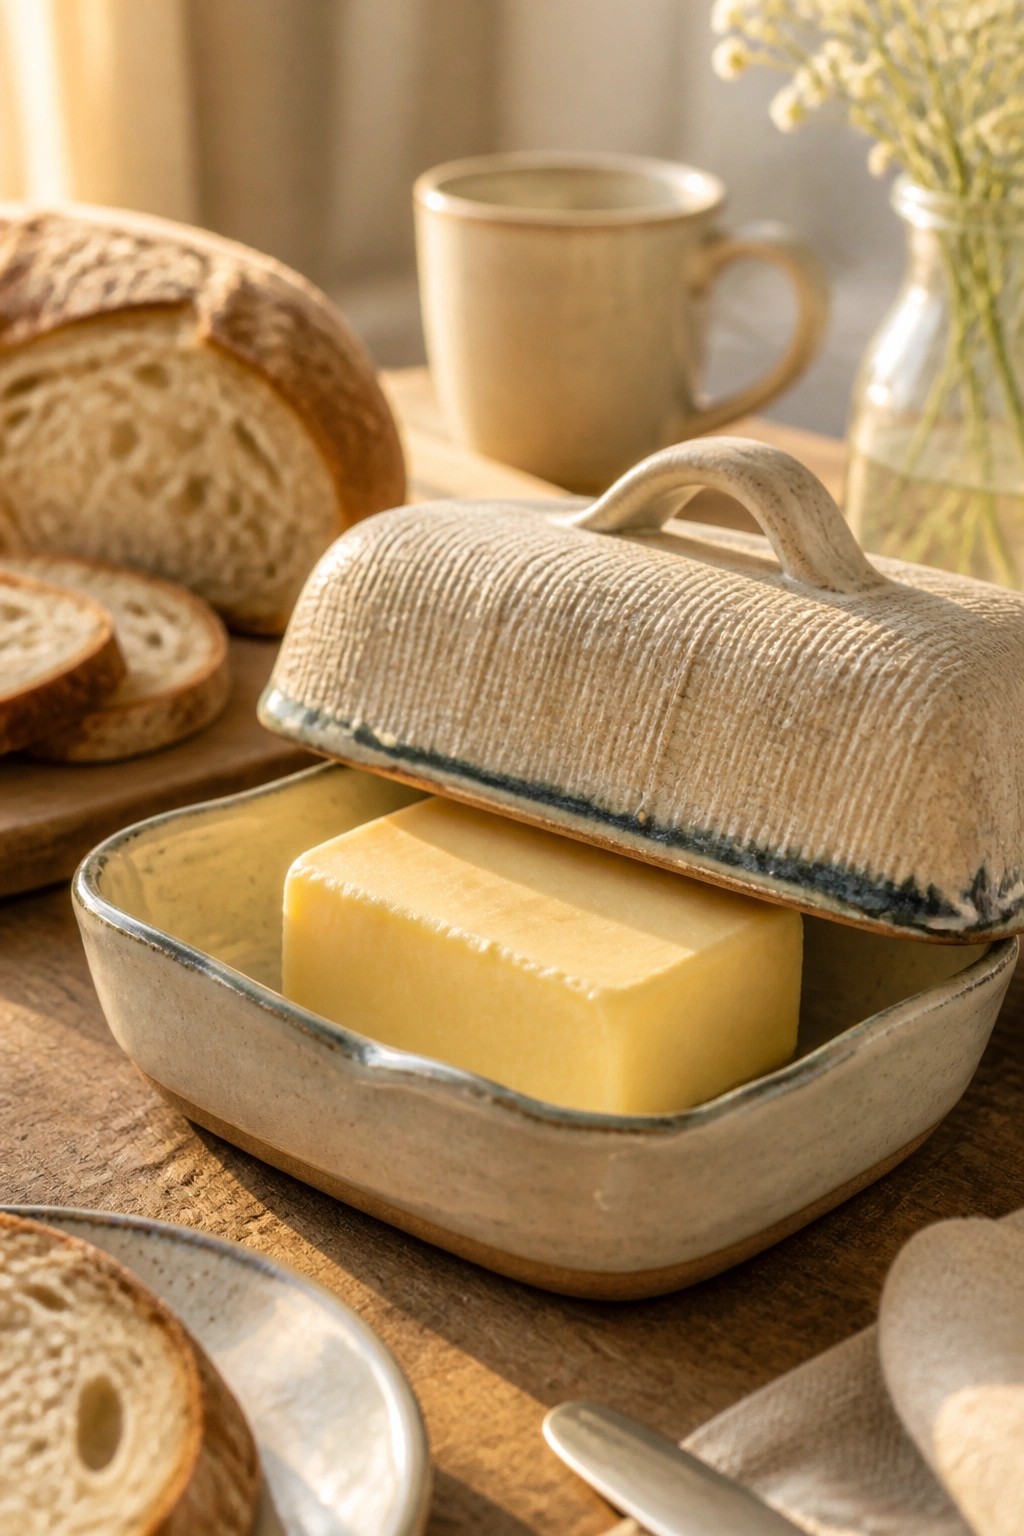
A rectangular stoneware butter dish uses a fitted lid with evenly spaced lines impressed across the top surface to create a simple repeating pattern. The lid includes a low arched handle for easy lifting, while the base stays plain and functional to hold a standard butter block. This design keeps the focus on the lid as the main visual element and works well as a kitchen item that combines storage with surface detail.
What makes this idea useful is that the impressed lines can be made with basic tools like a fork or notched rib and do not require advanced carving skills. In a kitchen, the covered shape protects butter from dust while the texture gives it more presence on a countertop or table. You could scale the same lid treatment down for a small cheese keeper or apply it to the top of a sugar jar for a coordinated set. The straightforward form also makes it simple to repeat in different glaze colors without changing the core idea.
Carved Leaf Incense Holder

A long, narrow clay tray with a hole at one end makes a practical incense holder when you add a repeating leaf pattern pressed or carved into the surface. The raised leaves run the length of the piece and catch a glossy amber glaze that deepens the texture without covering it. This approach keeps the form simple while the surface detail gives the holder enough visual interest to stand alone on a table or shelf.
What makes this idea useful is how the same leaf texture can be shortened into a ring dish or lengthened into a longer tray for multiple sticks. The narrow shape works well in small spaces like a desk or nightstand where a wider dish would feel out of place. You could swap the leaf motif for lines or dots if you want a faster version, or use the same base shape for a soap rest by skipping the hole. The carved surface also photographs cleanly for sharing, which helps the finished piece stand out in a feed.
Thrown Texture on a Small Pouring Bowl

A small wheel-thrown bowl with a notched pour spout on the rim makes a practical kitchen prep piece for oils, dressings, or sauces. The horizontal ridges left by the throwing process create built-in texture that shows through the light speckled glaze. This keeps the surface simple while the functional lip turns the bowl into something you can actually pour from.
What makes this idea useful is how the spout adds everyday function without needing extra tools or carving steps. You could repeat the same thrown ridges on a set of matching prep bowls in different sizes or adapt the shape into a small creamer for the table. The compact form works well for gift sets or for keeping near the stove where quick pours are needed.
Ribbed Texture with Two-Tone Glaze on a Utensil Crock

A thrown ceramic crock uses the horizontal ridges left from the wheel to hold and interact with glaze. The upper half is covered in a blue glaze that runs downward in thin drips, while the lower section uses a mustard yellow that stops short and leaves the ridges exposed. This combination turns the functional holder into a kitchen piece that shows clear glaze movement without added carving or stamps.
The shape does a lot of the work here because the straight cylinder and open top make it easy to load spoons, spatulas, or whisks while the ridges give the glaze something to catch on. You can repeat the same idea with any two glazes that break or run differently, or scale the form down for a smaller desk caddy or bathroom toothbrush holder. The simple drip effect stands out in photos because the color contrast reads clearly even at small sizes on a feed.
Honeycomb Texture with Two-Tone Glaze on a Pitcher
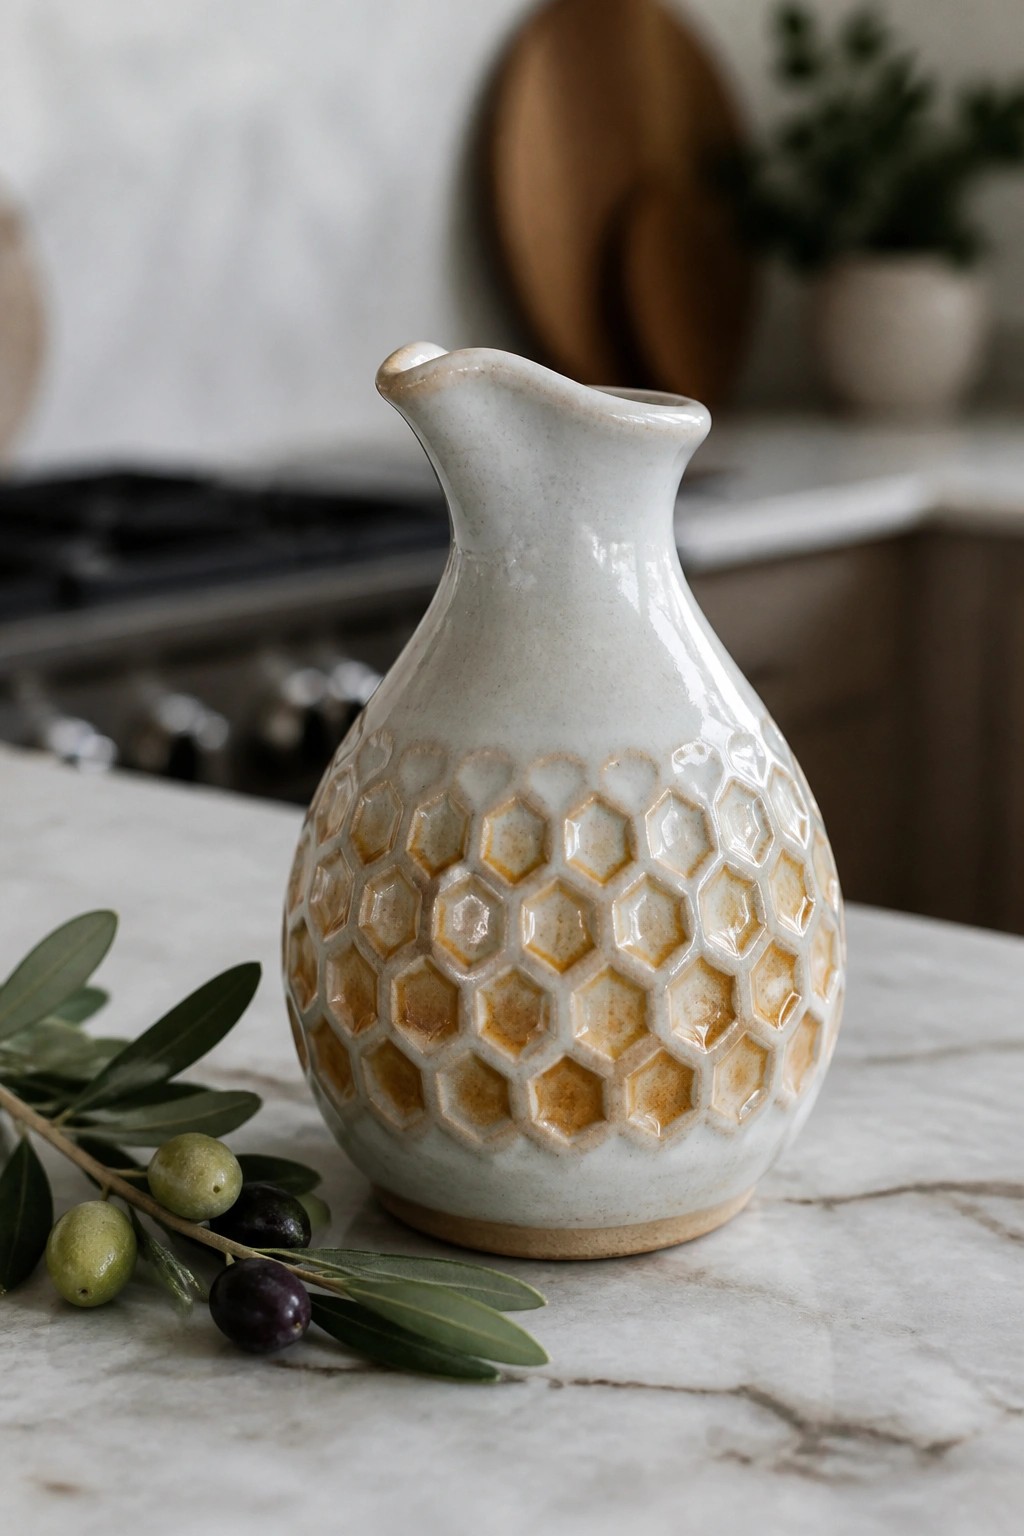
A small ceramic pitcher uses a repeating honeycomb pattern pressed into the lower half of the body. The recessed hexagons catch a warm amber glaze that contrasts with the light speckled surface above, creating clear visual separation between the textured and smooth areas. This surface treatment works on a rounded, tapering form that narrows into a simple spout.
The shape does a lot of the work here by giving the pattern a natural place to stop and letting the plain upper section balance the busy texture. A piece like this works especially well as a small oil or vinegar pitcher on a kitchen counter or as a decorative vessel on open shelving. You could adapt the same honeycomb band to a taller vase or a set of mugs by changing the width of the textured zone or switching the accent glaze color.
Speckled Glaze Finish on a Handformed Sauce Pitcher

A small ceramic pitcher for sauces or gravies carries a mottled glaze that shifts between gray-green and brown where it breaks over the ridges and pools along the interior. The wavy rim and simple pulled handle stay plain so the glaze variation stands out as the main surface detail. This fits the glaze effects category because the color movement and texture come directly from how the glaze interacts with the form during firing.
What makes this idea useful is that the glaze does the decorating work on a piece that still functions at the table. The same mottled application could be repeated on a set of small bowls or a larger serving jug to create matching tableware. In a kitchen setting the compact size keeps it practical for daily use while the organic surface keeps it from looking mass-produced.
Carved Cone Ring Holders with Varied Glaze Finishes

Cone-shaped ring holders give you a simple form that highlights surface texture and glaze variation. Each cone features hand-carved patterns such as diagonal lines, herringbone marks, or stippled dots that catch light differently once glazed. The three examples use distinct glaze effects—one matte green with carved ridges, one speckled purple with a beaded gold accent, and one blue-green with raised texture—to show how the same shape can look completely different based on surface treatment. These small stands work as jewelry display pieces rather than functional vessels.
What makes this idea useful is how the cone shape keeps rings visible and easy to grab without taking up much space on a dresser or nightstand. You can adapt the same base form by changing only the carving depth or switching between matte and glossy glazes to match different room colors. The small scale also makes it practical to produce several at once for gifts or to test new texture tools on a single batch. For a different project, the same carved and glazed approach works on taller candle holders or small bud vases.
Frequently Asked Questions
What tools are best for beginners starting with carving techniques on pottery?
For beginners, start with simple, safe tools like loop tools, wire cutters, or even wooden skewers to create lines and patterns without applying too much pressure that could crack the clay. These allow you to experiment with the carving ideas in the article, such as geometric shapes or organic motifs, while the clay is leather hard. Practice on test tiles first to build control and avoid common errors like uneven depths.
How can everyday household items help create interesting textures on pottery surfaces?
Many textures come from pressing items like lace fabric, leaves, bubble wrap, or the tines of a fork into soft clay. This approach aligns with several ideas in the article for adding depth without specialized equipment. Roll the item gently across the surface or stamp it repeatedly for patterns, then let the clay dry slightly before refining with carving if needed. Always test on scrap pieces to see how the texture holds up during firing.
Which glaze types enhance carved or textured pottery designs the most?
Matte or semi transparent glazes often highlight carved details by pooling in the grooves while leaving raised areas lighter. For textured surfaces, try layering a base glaze with a contrasting color on top, then wiping back the excess to emphasize the effects described in the article. Apply glazes in thin coats and consider test firings at cone 6 or 10 depending on your clay body to achieve the desired depth and color variation.
Can multiple techniques like carving, texture, and glaze be combined on one piece?
Yes, many of the creative ideas involve layering these methods for richer results. Begin with texture pressing on wet clay, follow with carving once it firms up, and finish with selective glazing after bisque firing. This sequence prevents smearing and allows each element to stand out. Keep the overall design balanced by planning the layout on paper first and using masking tape to protect certain areas during glazing.
What firing considerations are important for pottery with complex surface designs?
Ensure even drying to prevent warping in textured or carved pieces, and use a slow bisque firing to burn out any organic materials used for texture. For glazes, avoid over firing which can cause running or bubbling in carved areas. Support pieces properly in the kiln with stilts if needed, and always include witness cones to monitor temperature accurately across different clay and glaze combinations from the article ideas.

Pottery Path is my cozy corner of the internet where I share clay ideas, pottery inspiration, and simple projects you can recreate at home. I love exploring everything from air dry clay to handbuilt pottery to cute minis that brighten your day. My goal is to make clay crafting feel easy, fun, and welcoming for anyone who wants to try it.
You will find beginner friendly tutorials, creative pottery painting ideas, and lots of warm inspiration for slow and happy crafting. If you enjoy hands on creativity, this space will feel like home.