
I started making coil pots a few years ago when I wanted something simple to do with my hands after work.
It turns out that basic patterns like lines or dots can look really nice on them without much effort.
I have put together some designs that beginners can try using just coils and a few simple decorations.
These ideas focus on everyday shapes and patterns that do not need special tools.
I hope they give you a place to begin if you are new to this.
Coil Built Mug with Horizontal Stripes and Heart Accent

A coil mug built from stacked rings creates its own horizontal ridges that become the base for decoration. The light green glaze lets the blue lines sit cleanly along those ridges without extra carving or stamping. A single small heart painted near the base finishes the design without crowding the surface. This keeps the project focused on basic coiling while adding a repeatable pattern that works on any round form.
The small size makes it practical for daily use on a desk or breakfast table where a full mug feels too large. You can swap the heart for a name, date, or row of dots if you want to change the look for different people. The stripes follow the coil lines so uneven stacking still reads as intentional texture once glazed. Try the same layout on a short planter or a lidded jar to reuse the idea without starting from scratch.
Rim Dot Coil Bowl
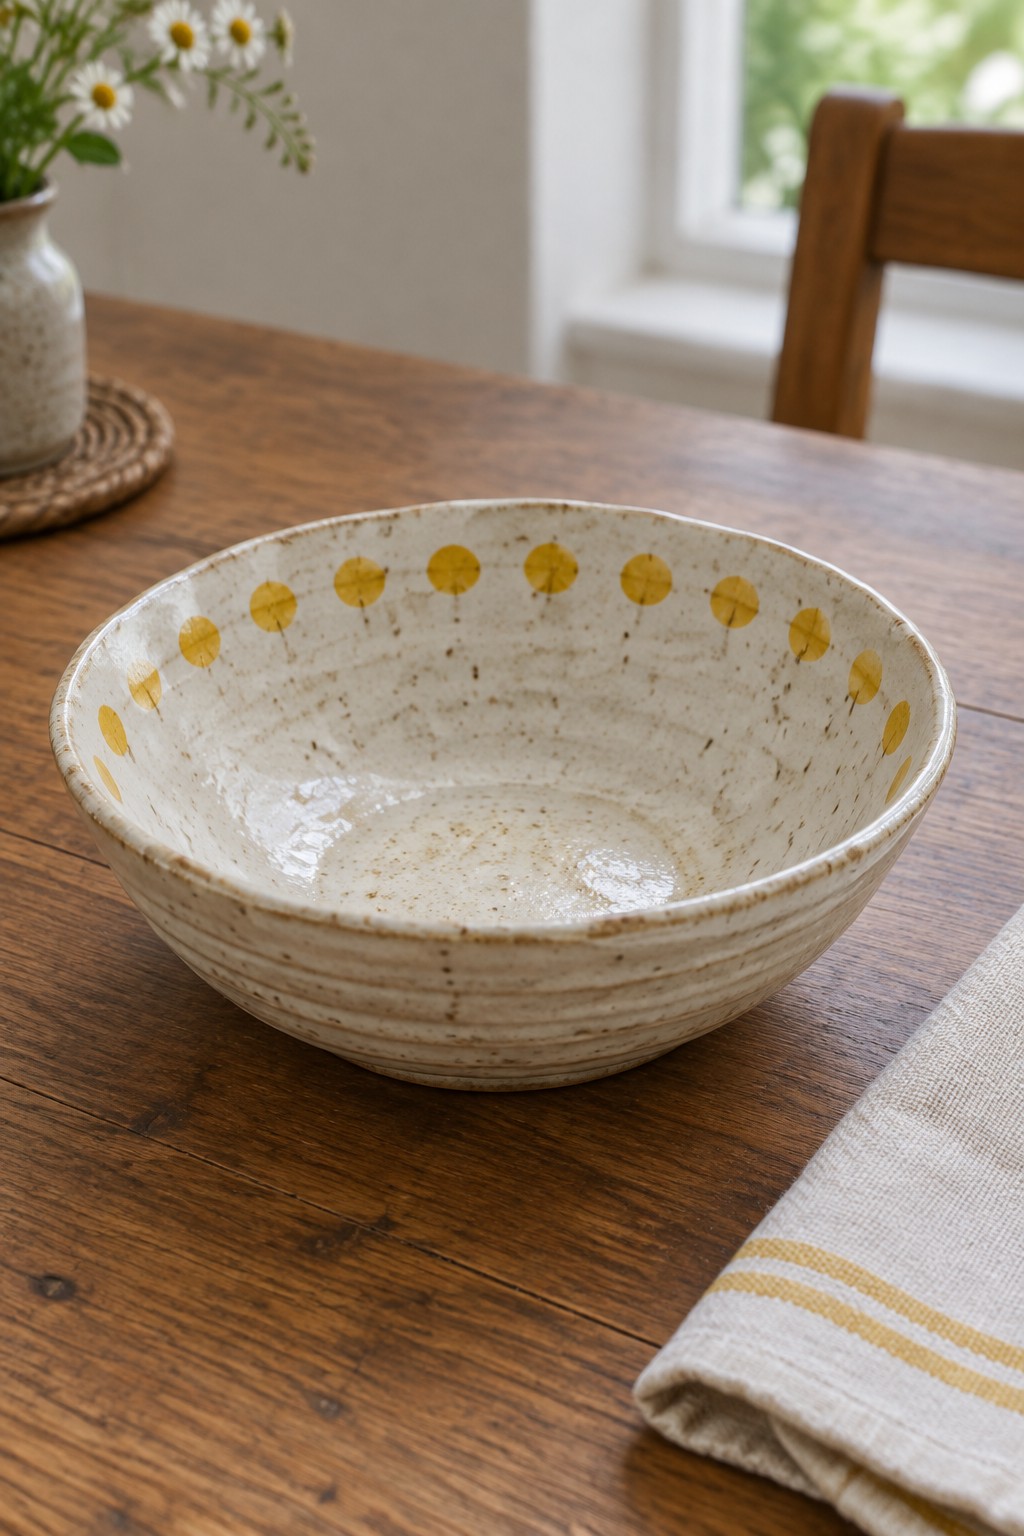
A wide shallow bowl formed from coils shows how a single row of evenly spaced dots can create a finished look without extra steps. The horizontal ridges left by the coils add texture that contrasts with the smooth yellow dots placed just below the rim. Using a neutral speckled glaze keeps the focus on the simple repeating pattern while the dots themselves can be made with underglaze or slip before firing. This approach fits beginner coil projects because the shape stays basic and the decoration uses one repeated motif.
What makes this idea useful is how quickly the dot pattern adapts to different sizes. The same rim treatment works on a smaller pinch pot or a taller cylinder without changing the technique. You can swap the yellow for any color that matches your dishes or repeat the dots in two rows if you want more coverage. For a gift the bowl stays practical for snacks or small plants while the clean pattern keeps it from looking plain.
Spiral Coil Wall Hanging

A round clay disc built from coils arranged in a continuous spiral creates a simple wall hanging. The coils start at the center and wind outward, leaving visible ridges that catch light and add texture to the surface. Two small holes at the top allow cord to pass through for hanging. This turns a basic coiling exercise into a finished decor piece without needing extra tools or complex shaping.
What makes this idea useful is how the flat shape fits narrow wall spots or sits behind plants. You can change the spiral width or add a second color between coils to create contrast. The same layout works for smaller versions that become coasters or a shallow tray if you build up a rim. For Pinterest, the bold spiral pattern photographs cleanly and reads well even at thumbnail size.
Coiled Cat Planter with Painted Stripes

A coiled planter shaped like a curled cat uses stacked clay coils to build both the body and the wrapped tail, leaving an open top that holds a small plant. The head is added as a separate sculpted piece with simple cut ears and paws, then the whole form gets a light base color with painted stripes along the tail and basic face details in a contrasting tone. This keeps the coil texture visible while the stripes create an easy repeating pattern that works well with beginner-level decoration.
The compact curled shape fits neatly on a windowsill or shelf without taking much space, and the open top works for succulents or small herbs. You could change the tail stripes to spots or bands, swap the cat head for a different animal, or shorten the tail to make a simpler version. The combination of visible coils and minimal painted lines makes the design quick to adapt and easy to photograph clearly for reference.
Scalloped Rim Coil Tea Light Holder
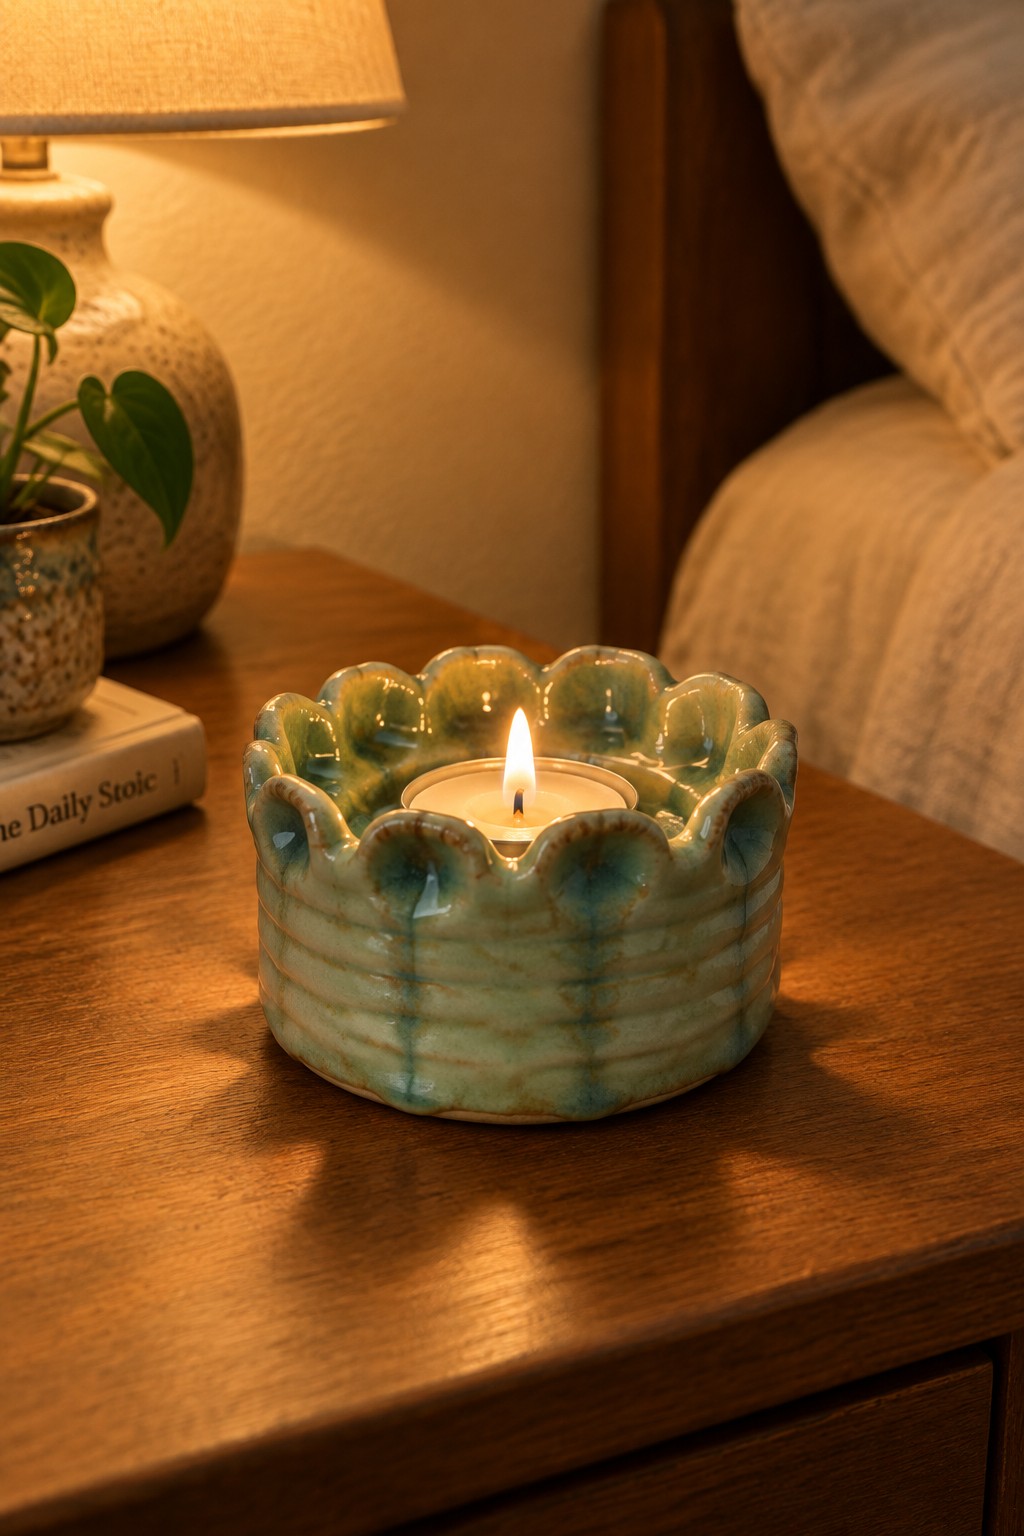
A low cylinder built from stacked coils creates a compact tea light holder that sits easily on a small surface. The maker left the coils visible as horizontal ridges around the outside then pinched the top edge into a repeating scallop pattern. A mottled turquoise glaze settles into the grooves between coils and accentuates the ruffled rim without covering the texture completely. This approach stays in the candle piece category and uses only basic coiling and pinching.
The small size fits bedside tables or bathroom ledges where a single tea light provides soft light. You can keep the same scalloped rim and coil texture but widen the base slightly to turn it into a ring dish or shorten the height for a shallow trinket bowl. The visible coil lines give the finished piece enough surface interest that a simple dip glaze still reads as handmade. The wavy edge also photographs cleanly for sharing because it creates a clear silhouette against most backgrounds.
Curved Coil Spoon Rest with Stamped Grain Patterns
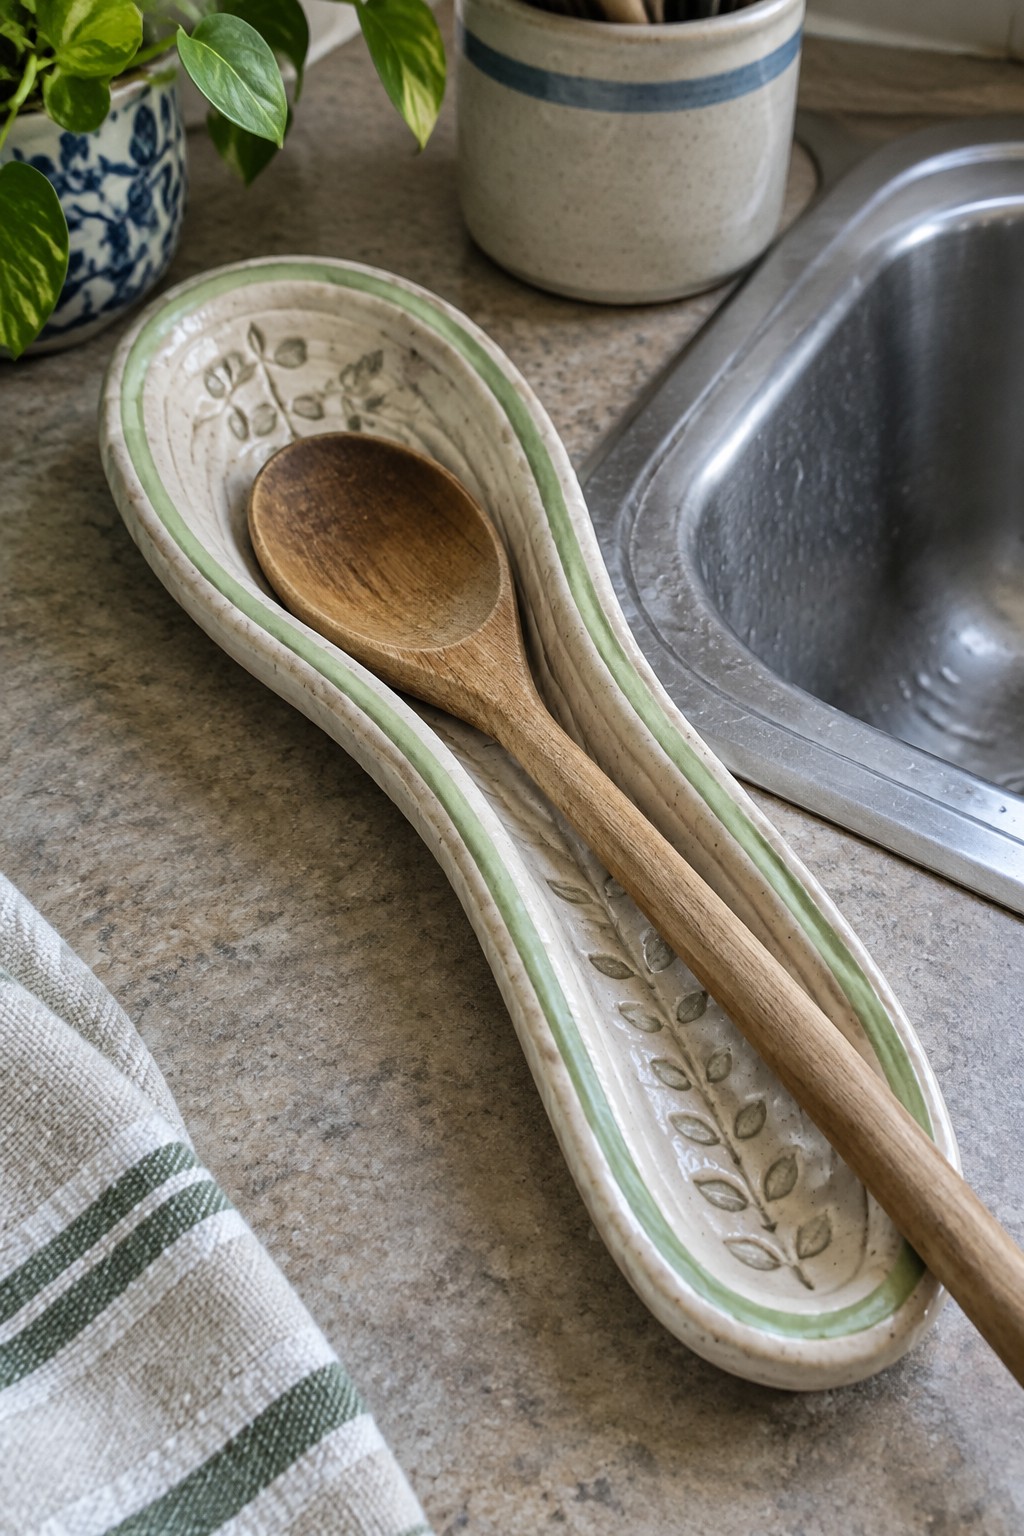
A long spoon rest formed from coils creates a simple kitchen item that holds utensils beside the stove or sink. The builder rolled coils into a narrow, gently curved tray shape and added green clay accents along the outer edges. Stamped leaf or grain motifs run down the center in a repeating row, giving the pale surface a clear decorative pattern without extra tools.
What makes this idea useful is how the elongated form stays compact on a countertop while keeping spoons from touching surfaces. You can shorten the same coil layout into a smaller rest for just one utensil or widen it slightly for tongs and spatulas. The stamped pattern works with any simple pressable shape, so beginners can swap in dots or lines if the grain motif feels too detailed. This style stands out in a set of matching kitchen dishes because the curve and repeated stamp give it a finished look with basic techniques.
Speckled Pink Ring Dish with Gold Dot Rim

A small ring dish built from coils gives beginners a compact project that still shows clear construction lines. The pink speckled glaze covers the form evenly while a single row of gold dots along the rim creates a simple repeating pattern. Subtle coil ridges near the base add light texture that contrasts with the smooth interior. This shape stays shallow enough to function as a jewelry holder without needing lids or handles.
What makes this idea useful is the small scale that lets you finish and fire it quickly. The gold dots can be swapped for any color or replaced with short lines or dashes if you want to test different patterns. A dish like this works well on a dresser or bathroom counter to catch rings and small items. You can easily adapt the same coil base into a slightly larger tray or change the glaze color to match another room.
Rectangular Tray with Repeated Star Motifs

A rectangular tray built with coils shows a dark blue rim and five small stars spaced across the center in matching blue. The light clay body keeps visible coil texture under a clear glaze, giving the surface an even, handmade look. This approach uses a basic repeating motif to add interest while keeping the construction straightforward for beginners.
What makes this idea useful is how the bordered rectangle works for small storage like jewelry, keys, or tea bags. The star pattern can be swapped for other simple shapes such as circles or lines to match different rooms or seasons. A piece this size also translates easily into a longer version for holding pens on a desk or a smaller one for a bathroom soap dish.
Coil-Built Soap Dish with Wavy Rim Pattern

A coil-built soap dish gives you a practical bathroom item that holds a bar of soap above standing water. The oval shape and low walls are simple to form with coils, while the raised ridges inside keep the soap from sitting in moisture. A single wavy line pattern around the outer edge adds a clean decorative touch that works well with most glazes.
What makes this idea useful is how the compact size fits on any sink without taking up space. You can swap the wave pattern for straight lines, dots, or zigzags depending on the tools you have. The same base shape and ridge detail could be adapted into a small sponge holder or a tray for jewelry. The drainage ridges turn a plain tray into something more functional for everyday use.
Coiled Mini Vase with Simple Blue Floral Pattern

A small coil-built vase like this uses stacked rings to create a compact rounded form that tapers slightly at the neck. The main decorative element is a single blue flower with stem and leaves painted along the side, applied over a light crackled surface that shows the horizontal coil lines. This keeps the pattern simple and contained to one area rather than covering the whole piece. The result is a basic vase shape that highlights the painted motif without extra surface details.
What makes this idea useful is how the narrow profile fits easily on a desk or shelf while still holding a single stem or small cutting. The same coil construction and one-sided motif can be repeated with different flower outlines or switched to a leaf pattern if you want variety. You could also make a taller version for a bathroom counter or shorten the shape into a small cup form. The limited color and motif placement keeps the project manageable for trying out underglaze work on a textured surface.
Two-Part Coil Jar for Spices
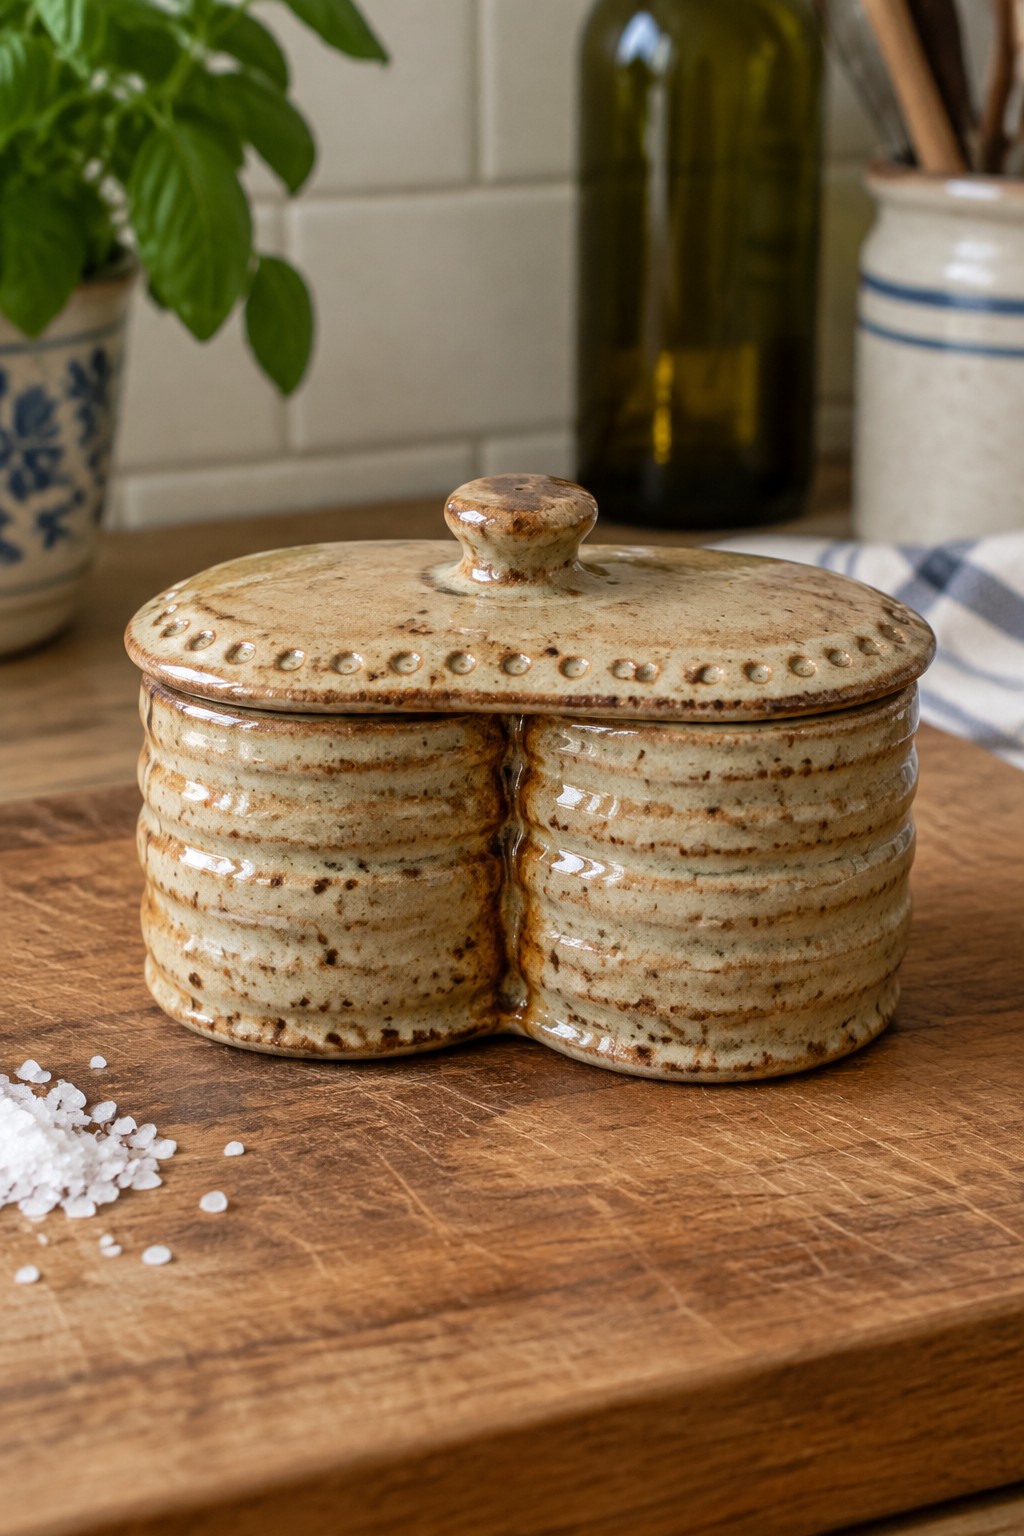
A divided coil-built container creates two separate sections under one lid, making it practical for holding salt and another spice or herb side by side. The coils form even horizontal ridges that add grip and visual rhythm without extra tools. A simple row of pinched dots along the lid edge gives the piece a finished border while keeping the technique beginner-friendly. The speckled glaze stays neutral so the shape and coil texture stay the focus.
What makes this idea useful is how the divided shape solves a common kitchen need without requiring two separate pots. You can swap the dots for stamps or skip them entirely and still have a clean functional piece. Scale the sections smaller and the same form works as a desk organizer for paper clips and rubber bands. The lid keeps contents covered, which helps the jar stay practical on an open counter rather than tucked in a cabinet.
Yarn Bowl with Heart Cutout Feed Hole

A coil built yarn bowl keeps a ball of yarn contained while you work. The heart shaped opening cut into the wall lets the strand pull through smoothly without the ball jumping out. Speckled glaze on the outside and a simple blue rim give the form a finished look that still reads as handmade pottery. This holder turns a basic bowl shape into a dedicated craft tool.
What makes this idea useful is how the cutout solves the rolling yarn problem in one step. You could repeat the same heart window on a smaller dish for embroidery thread or scale the bowl up for blanket weight yarn. In a craft room this piece sits neatly on a lap or table, and the coil construction makes it straightforward to build even if you are new to the wheel. For gifts, the design adapts easily by changing the cutout shape or glaze color to match the recipient’s style.
Coil-Built Toothbrush Holder with Painted Smiley Faces
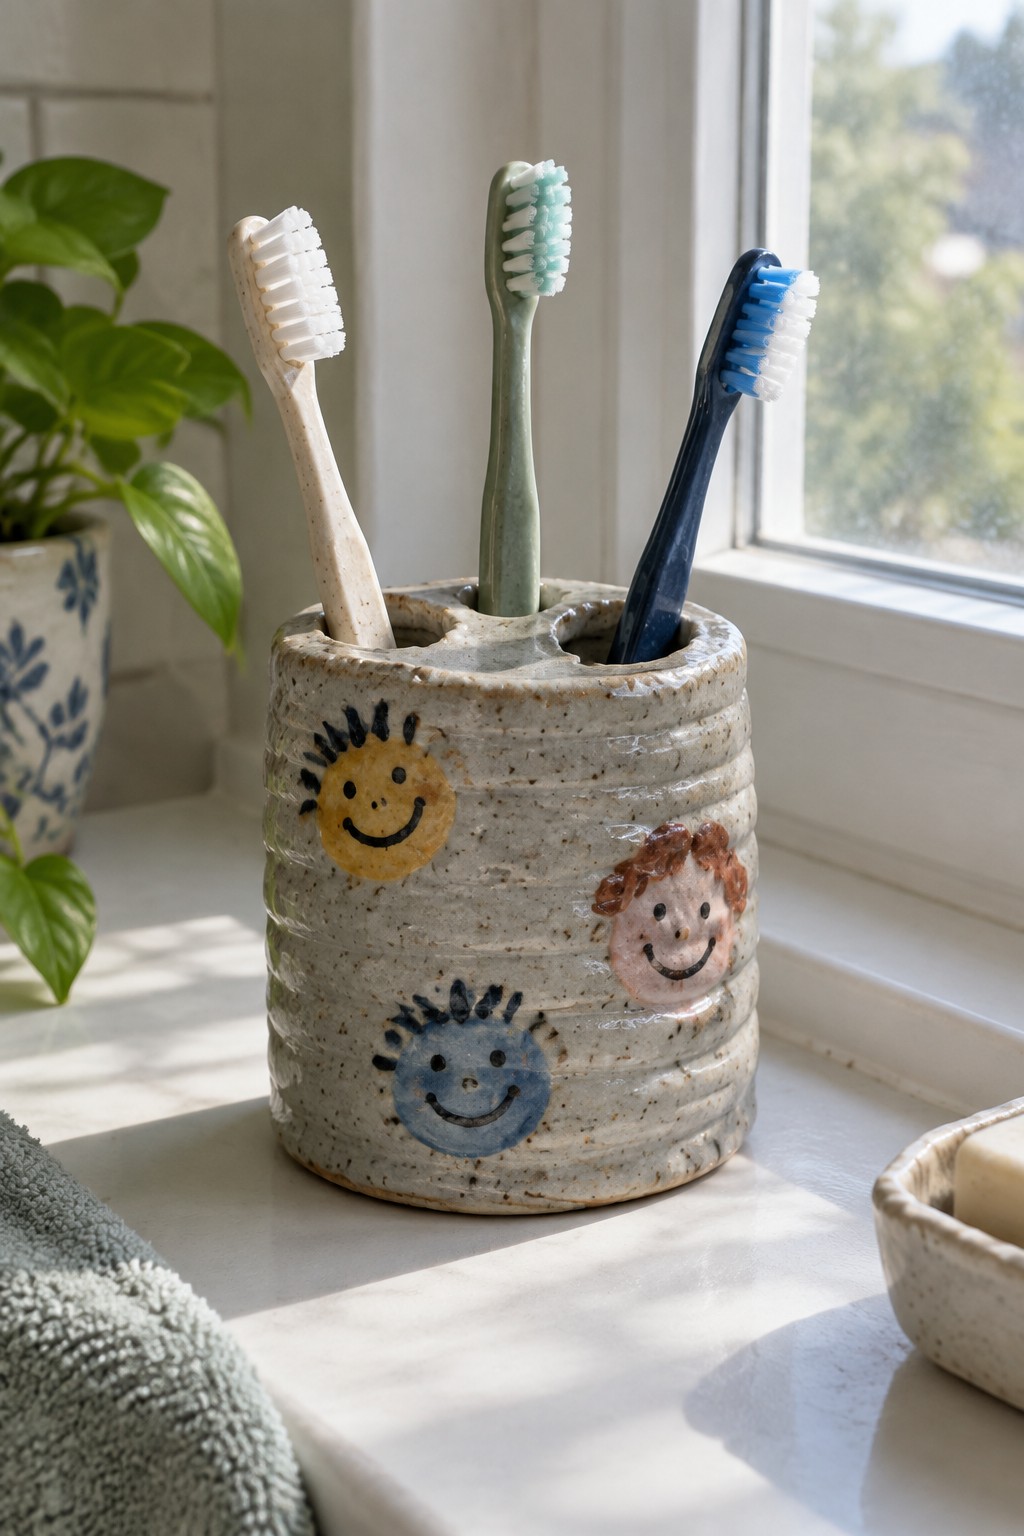
A simple coil-built ceramic toothbrush holder works well as a bathroom organizer when you add basic smiley face patterns. The cylindrical shape holds several brushes through multiple openings at the top, while the speckled clay surface gives the painted faces a clear background. Each face uses the same easy motif of a circle, dot eyes, and a curved smile, but slight changes in color and hair details keep the pattern from looking repetitive.
What makes this idea useful is how the small scale and repeated motif let you practice coil construction without needing complex forms. The holder fits neatly on a sink or windowsill, and the same smiley pattern could be reworked onto a desk pencil cup or a small soap dish using the same underglaze colors. For beginners, the design stays forgiving because the faces only need basic brushwork and the coil walls can stay fairly thick.
Fish-Shaped Ring Dish with Scale Pattern

A fish-shaped ceramic tray works as a small ring dish or catch-all for jewelry and daily items. The form uses a rounded body, tail fin, and head details, with overlapping scales created through stamping or carving before glazing. Turquoise glaze with coral accents highlights the texture across the surface while keeping the piece easy to wipe clean. This design fits the small holder category that combines a simple sculpted shape with a repeating decorative pattern.
The compact size makes it a good first project when practicing coil building for an enclosed form. You can adapt the scale pattern to a leaf tray, oval dish, or shallow bowl using the same stamping method. It fits on a dresser, nightstand, or desk without crowding other items. For a gift, the same idea works in a neutral glaze with a different outline like a simple wave or shell shape.
Hedgehog Figurine Made with Rolled Clay Coils
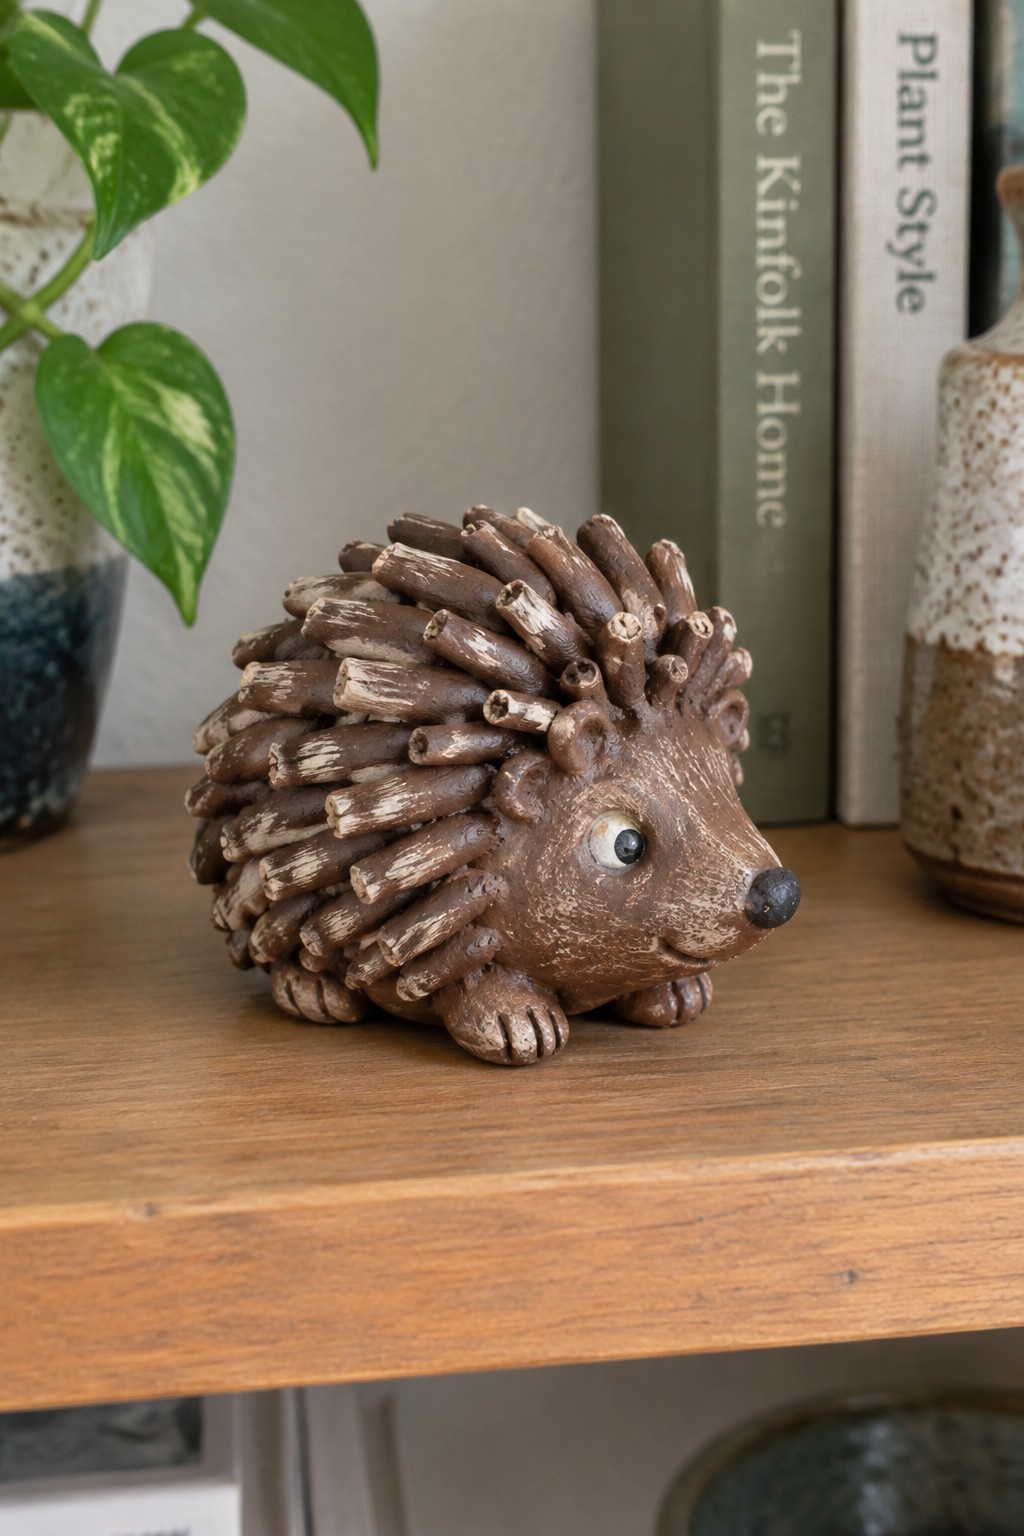
A small hedgehog figurine uses short rolled coils stacked and attached to form the spines along the back and sides. The body is built from a simple rounded slab with added pinched legs and a tapered snout, while the surface shows a matte brown finish with lighter dry brushing to emphasize the coil edges. This approach turns the coil pattern into the main decorative element rather than relying on surface carving or multiple glazes. The result is a compact decor object that highlights texture through basic hand-building steps.
What makes this idea useful is how the coil spines create strong visual interest with minimal tools or added decoration. You could adapt the same stacked coil method to cover a small bowl or candle holder instead of an animal shape. The compact size works well for shelf displays or as a desk accent, and the earthy brown tone blends easily with books or plants. For a beginner project, swapping the hedgehog for a simpler dome form lets you focus practice on coil placement and texture without worrying about facial details.
Striped Hanging Planter Built from Coils

A wall-mounted planter formed from coils gains its pattern from simple horizontal bands of colored slip applied between the coils before firing. The ridges left by the coiling process create natural lines that separate the glaze colors cleanly, so the stripes stay distinct without extra tools or carving. The top includes a built-in loop that lets the finished piece hang from a wall hook, turning the planter into a vertical display rather than a tabletop object.
What makes this idea useful is how the same coil structure works for different plant sizes by adjusting the height and width during building. You can swap the stripe colors to match a room or use leftover glazes, and the hanging shape keeps the design practical even in small spaces like kitchens or bathrooms. For a variation, build the same form without the loop and set it on a shelf, or shrink the scale to hold a single small plant or air plant.
Coiled Incense Tray with Moon Motif
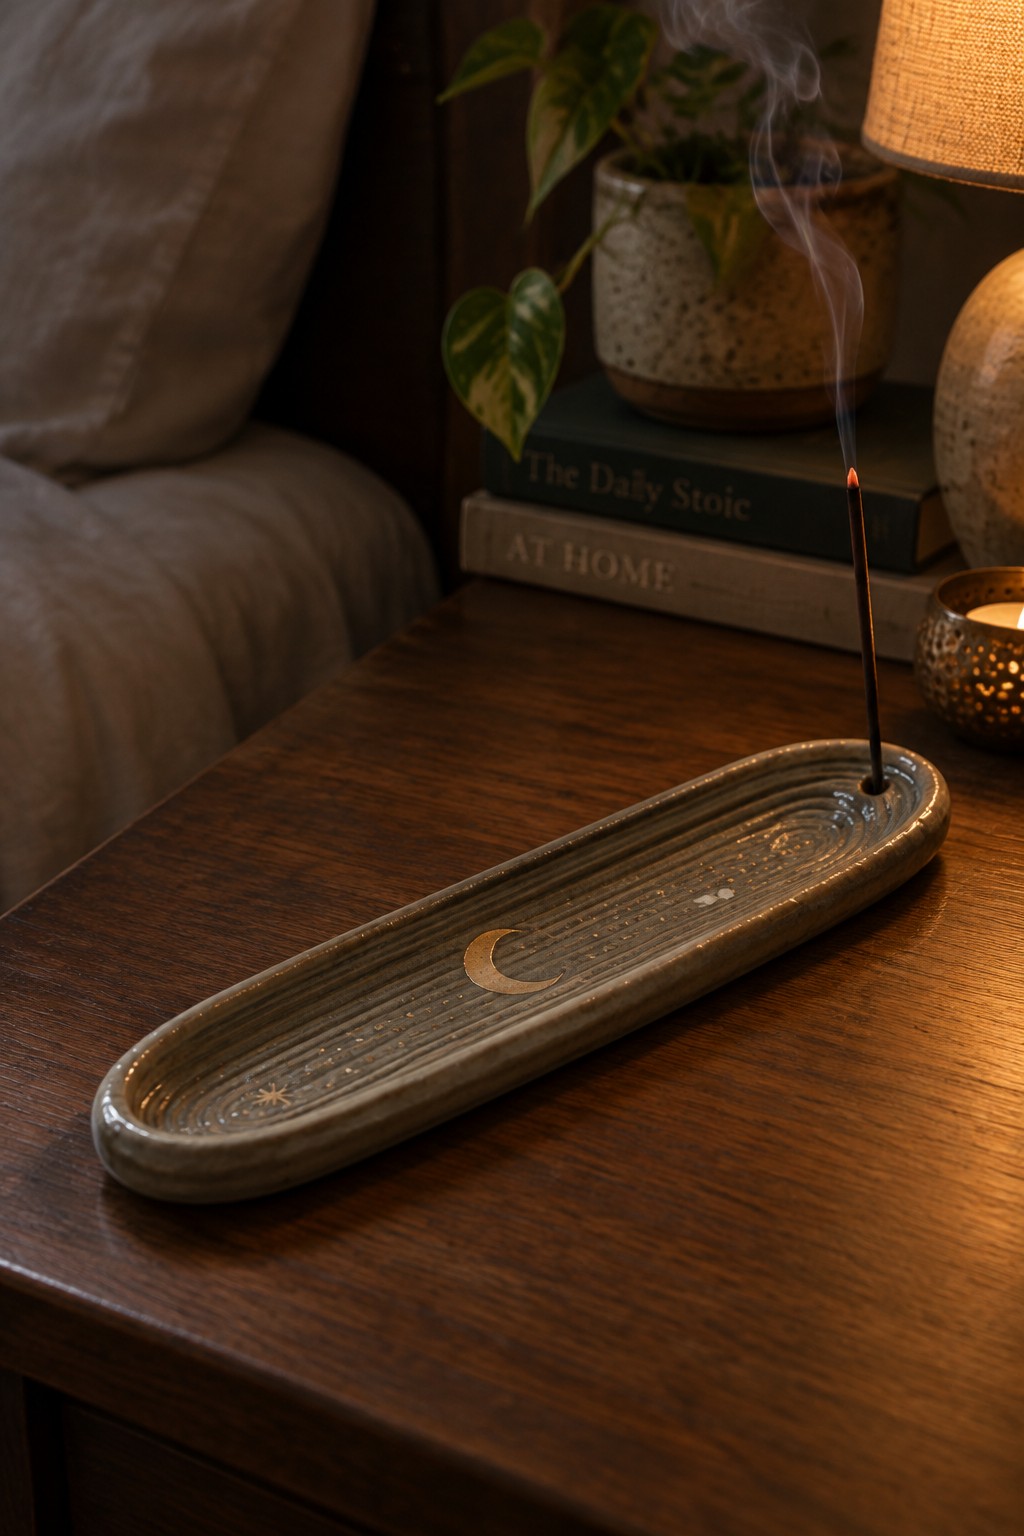
A long narrow tray built from coils makes a simple incense holder. The base has parallel ridges rolled into the clay while still soft, and one end holds a small hole for the stick. A crescent moon and star are added with stamps or slip, then the whole piece is finished in a single muted glaze that settles into the texture. This approach keeps the focus on basic coiling and easy surface patterns rather than complex shaping.
The shape does a lot of the work here because the long rectangle fits neatly on a shelf or bedside table without taking much space. You can swap the moon stamp for other simple motifs like leaves or lines and still use the same coil method. For a different use, shorten the tray and add a second hole to hold two sticks, or widen it slightly to make a small soap rest. The visible ridges and single-color glaze make the piece easy to photograph for Pinterest without extra styling.
Striped Coil Utensil Holder
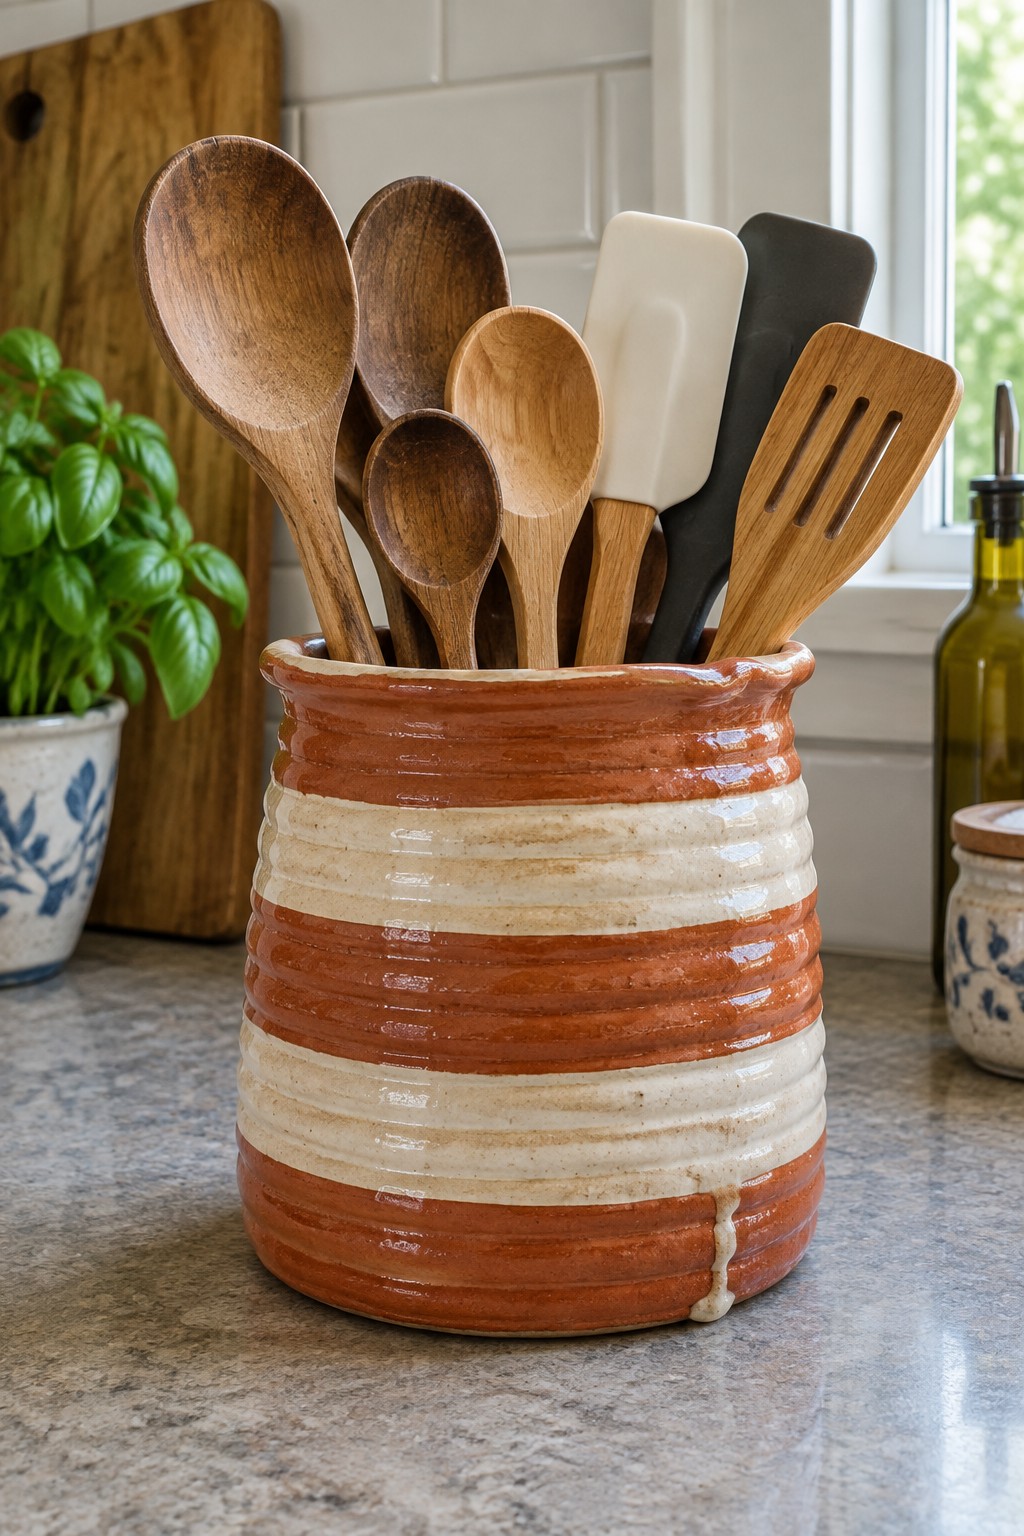
A coil-built utensil holder creates a simple cylindrical form by stacking and smoothing coils of clay into even walls that stand upright on their own. The design uses wide alternating bands of terracotta and cream glaze that follow the natural horizontal ridges from the coils, giving the surface clear visual breaks without extra tools or carving. This approach keeps the focus on the coil lines themselves while the glaze settles into the texture and creates a clean striped effect. The finished piece works as a kitchen item for holding spoons, spatulas, and other tools on the counter.
What makes this idea useful is how the stripe widths can be changed or swapped for solid sections to match different kitchen colors. The same coil method scales easily to a shorter version for a smaller set of tools or a taller one for bigger utensils. In a kitchen this shape keeps items upright and reachable without taking much space, and the pattern stays readable even after glazing. For a beginner project the stripes also hide small uneven spots in the coils better than a single color would.
Coiled Salt Cellar with Side Access Opening

A coil-built salt cellar gives you a practical kitchen holder that keeps salt within easy reach during cooking. The rounded form uses simple horizontal coils for texture, while the large side opening lets you scoop directly without lifting a lid. A mottled green glaze highlights the ridges and keeps the surface easy to wipe clean.
The shape does a lot of the work here because the wide mouth and cutout turn a basic coil pot into something more useful than a standard bowl. You could scale the same idea down for spice cellars or swap the glaze for a matte finish if you want less shine. In a kitchen, this kind of piece works especially well on a countertop near the stove since the opening stays accessible even when your hands are full.
Coiled Egg Cups with Simple Dot Patterns

Egg cups built from stacked coils produce a ridged texture that cradles a single egg while keeping the overall form compact. The decoration relies on repeated dots in one or two glaze colors applied to the raised coils, which gives the surface pattern without needing fine brushwork. This keeps the project focused on basic coil construction and simple surface marks. The finished pieces function as small kitchen holders that fit easily on a tray or table.
What makes this idea useful is that the coil ridges already supply texture, so the dots only need to follow the existing lines. You can change the dot spacing or switch to stripes if you want a faster variation. The same size and shape adapts well to small votive holders or pinch bowls by altering the top opening. These pieces photograph clearly on social media because the coil lines and dots read well even in simple lighting.
Coiled Fruit Planters with Painted Faces

These small planters are built from stacked coils shaped into simple fruit forms like pears, lemons, and apples. The visible horizontal ridges come from the coil construction, which gives the rounded bodies a clear layered texture before smoothing and glazing. Bright solid glazes in green, yellow, and red cover the surfaces, while basic painted eyes, smiles, and cheeks add detail with minimal extra work. The open tops and drainage-friendly size make them ready for succulents or small rooted cuttings.
The compact scale works well for grouping on a windowsill or desk without taking much space. You can change the fruit type or drop the faces completely if you want a cleaner look for different rooms. The same coil method lets you build matching sets quickly or shift to other rounded shapes like vegetables once you have the basic technique down. The ridges provide built-in texture that shows up even with simple glazing, which helps the finished pieces read as handmade rather than plain.
Square Tiles with Simple Impressed Patterns

Small square tiles work well as a beginner project when you press or carve basic motifs like arcs, circles, and radiating lines into the surface before glazing. The designs stay easy to repeat because each pattern uses a few repeated shapes rather than complex drawings. Soft single-color glazes let the raised and recessed areas catch light differently, which makes the patterns stand out without extra decoration. These tiles function as coasters, small trivets, or wall accents once fired.
What makes this idea useful is that the square format gives you a clear space to test one motif at a time. You can scale the same patterns down for ring dishes or up for larger wall pieces. The limited color palette keeps the focus on the texture rather than matching glazes. For a gift, a set of four tiles with two alternating patterns feels finished without requiring much extra work.
Striped Coil-Built Ring Cone

A narrow cone built from coils makes a simple ring holder that tapers from a wide base to a pointed top. Horizontal stripes of glaze in two tones create the banded pattern around the form, letting rings rest at different heights without slipping. The shape keeps the piece stable on a flat surface while the stripes add visual rhythm with minimal extra work.
What makes this idea useful is how the cone doubles as both storage and a small tabletop accent. You can change the stripe width or switch to a single solid band to match different color schemes in a bathroom or bedroom. The same basic form works for necklace display if you leave the top slightly open, or you can shorten it into a wider version for a desk pen holder. A piece this size also stacks easily in a kiln, so making multiples for gifts takes little extra effort.
Coil Pottery Sponge Holder with Drainage Ridges
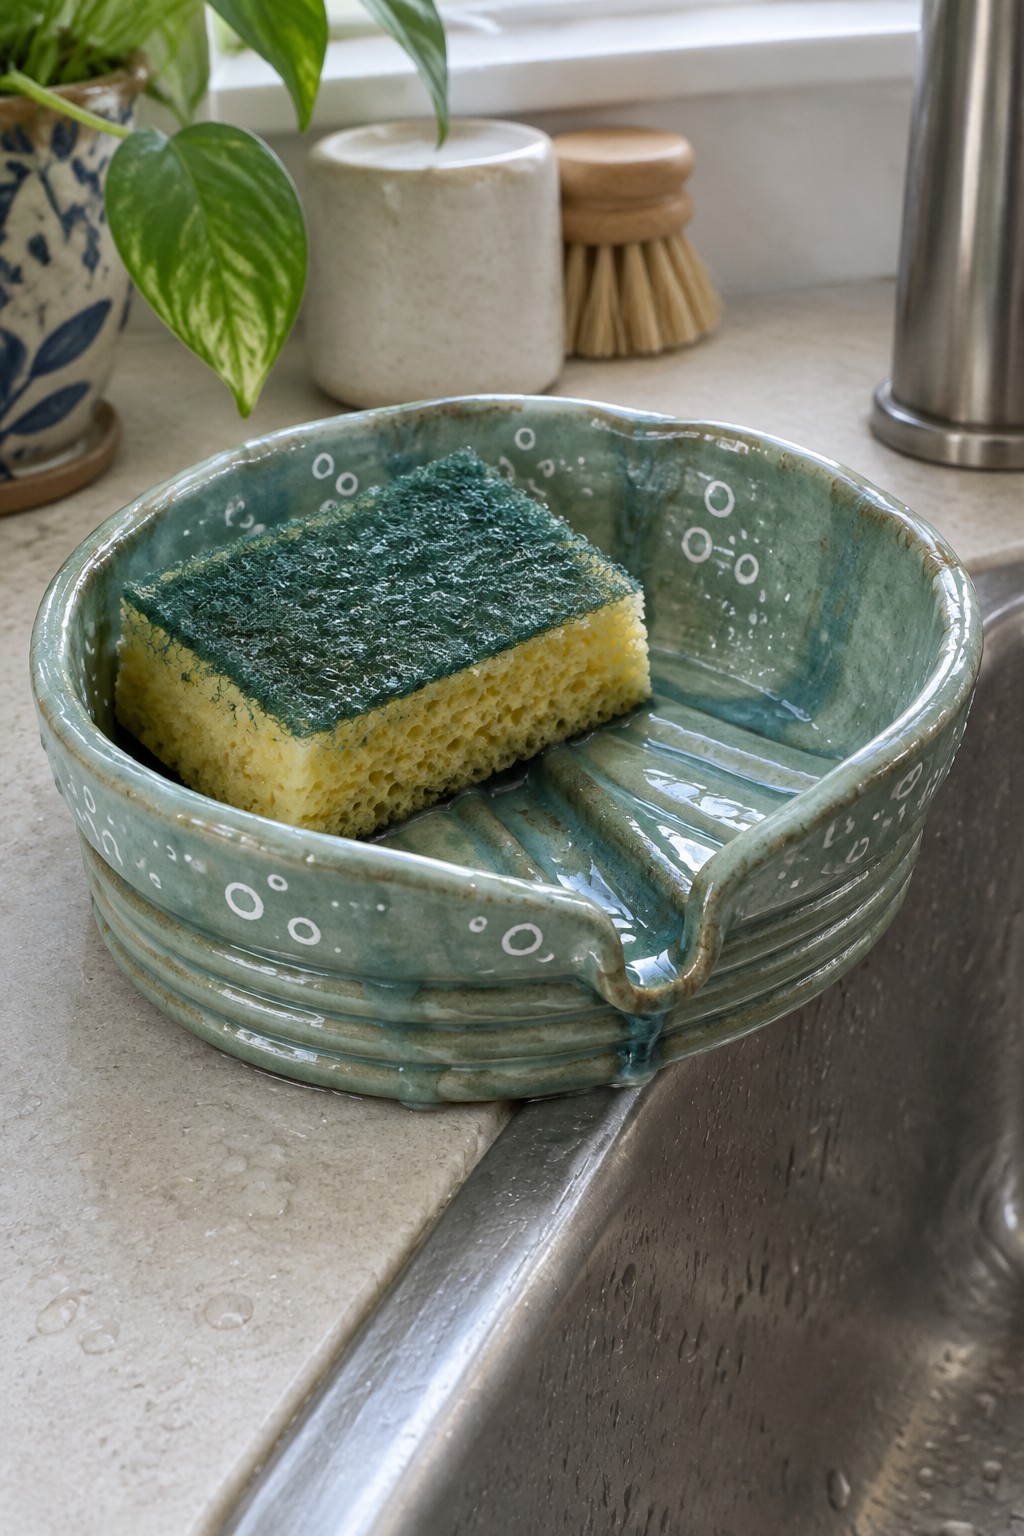
A coil-built sponge holder gives you a practical kitchen item that sits right on the sink edge. The round form uses low walls on one side and a series of ridges on the other to let water drain back into the sink instead of pooling. A simple turquoise glaze with scattered white dots keeps the surface easy to wipe clean while adding light contrast. The shape stays compact so it does not take up counter space.
What makes this idea useful is the built-in lip that hooks over the sink rim and turns a basic dish into a working tool. You can adapt the same coil structure for a soap dish by smoothing out the ridges or change the dot pattern to lines if you want a faster decoration step. In a kitchen this piece keeps the sponge raised and aired out between uses. The small scale also lets you practice even coils and basic glazing before trying bigger projects.
Coiled Candle Holder with Star Cutouts

A coil pottery candle holder built from stacked clay rings creates a tall cylinder that holds a tea light inside. Star shapes cut through the walls let the flame cast matching shadows on the surface below. The visible coil lines add texture while the cutouts turn the holder into a simple light pattern maker. This keeps the project focused on form and openings rather than on added decoration.
What makes this idea useful is how the same coil stack and cutout steps can be repeated for taller or wider versions. The shape works well as a patio accent or shelf piece where the light effect shows up at night. You could swap stars for other simple shapes like moons or triangles using the same cutting method. In a small space, this holder takes up little room but creates a clear pattern without needing glaze or extra tools.
Frequently Asked Questions
1. What materials do I need to begin making coil pottery with simple patterns? Start with air-dry clay or low-fire pottery clay, a basic rolling pin for slabs, a needle tool for scoring, and a sponge for smoothing surfaces. These essentials let you build sturdy coils and add the 25 beginner designs without extra equipment.
2. How can I keep my coils from separating as I build the pots? Score each coil thoroughly with a needle tool and apply slip before pressing the next layer on. Work in small sections and let each layer firm slightly if the clay feels soft. This method supports the simple decorative patterns across all 25 designs.
3. Which simple decorative patterns work best for absolute beginners? Try spirals, wavy lines, dots, and crosshatching first. Press these into the coils with stamps or carve lightly with a wooden tool. They require minimal skill yet create visual interest in the suggested beginner projects.
4. What steps help prevent cracks while drying coil pottery? Dry pieces slowly in a covered plastic bin for several days, turning them occasionally for even moisture loss. Avoid direct heat or drafts. Proper drying keeps the simple patterns intact on your finished coil pots.
5. How do I add color after completing the coil designs? Bisque fire the dried pieces first, then brush on underglazes to highlight patterns before a final glaze firing. Test colors on a small coil sample to match the texture of each design.

Pottery Path is my cozy corner of the internet where I share clay ideas, pottery inspiration, and simple projects you can recreate at home. I love exploring everything from air dry clay to handbuilt pottery to cute minis that brighten your day. My goal is to make clay crafting feel easy, fun, and welcoming for anyone who wants to try it.
You will find beginner friendly tutorials, creative pottery painting ideas, and lots of warm inspiration for slow and happy crafting. If you enjoy hands on creativity, this space will feel like home.