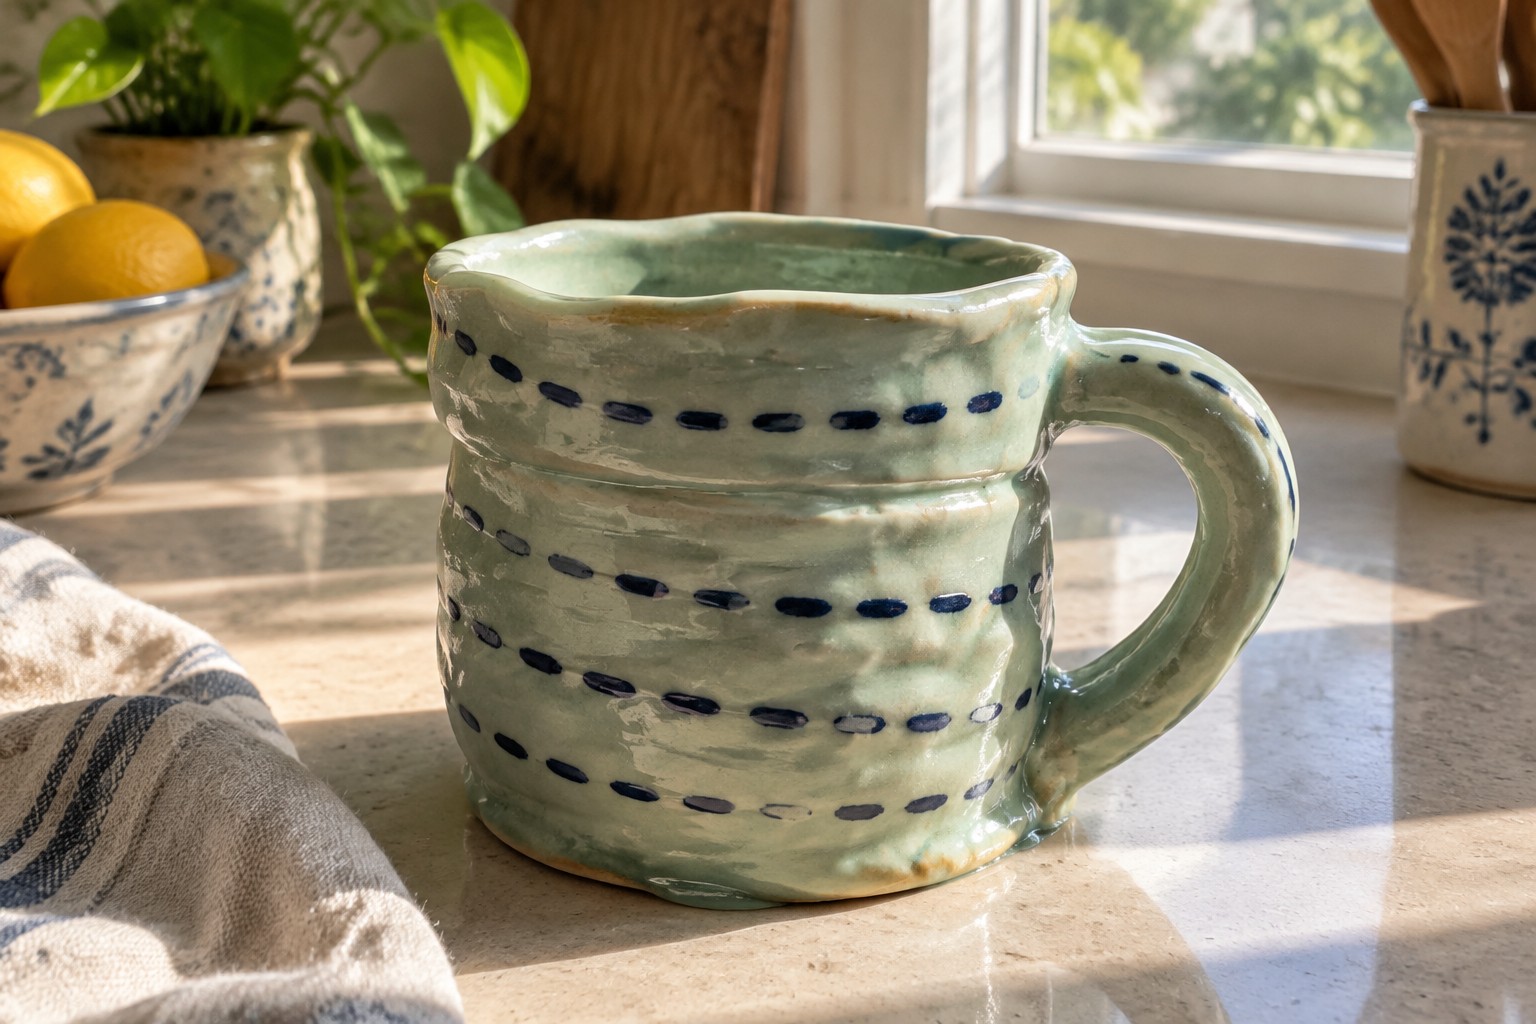
I started trying coil pottery a few years ago because it felt like a simple way to work with clay without a lot of special tools.
It helped me get the hang of building shapes and keeping walls even as I went along.
I put together these projects to show the steps I found useful when I was learning.
Each one focuses on a different form so you can practice the basics without jumping ahead too fast.
They are the ones I still go back to when I want something straightforward to make.
Coiled Mug with Dotted Horizontal Bands
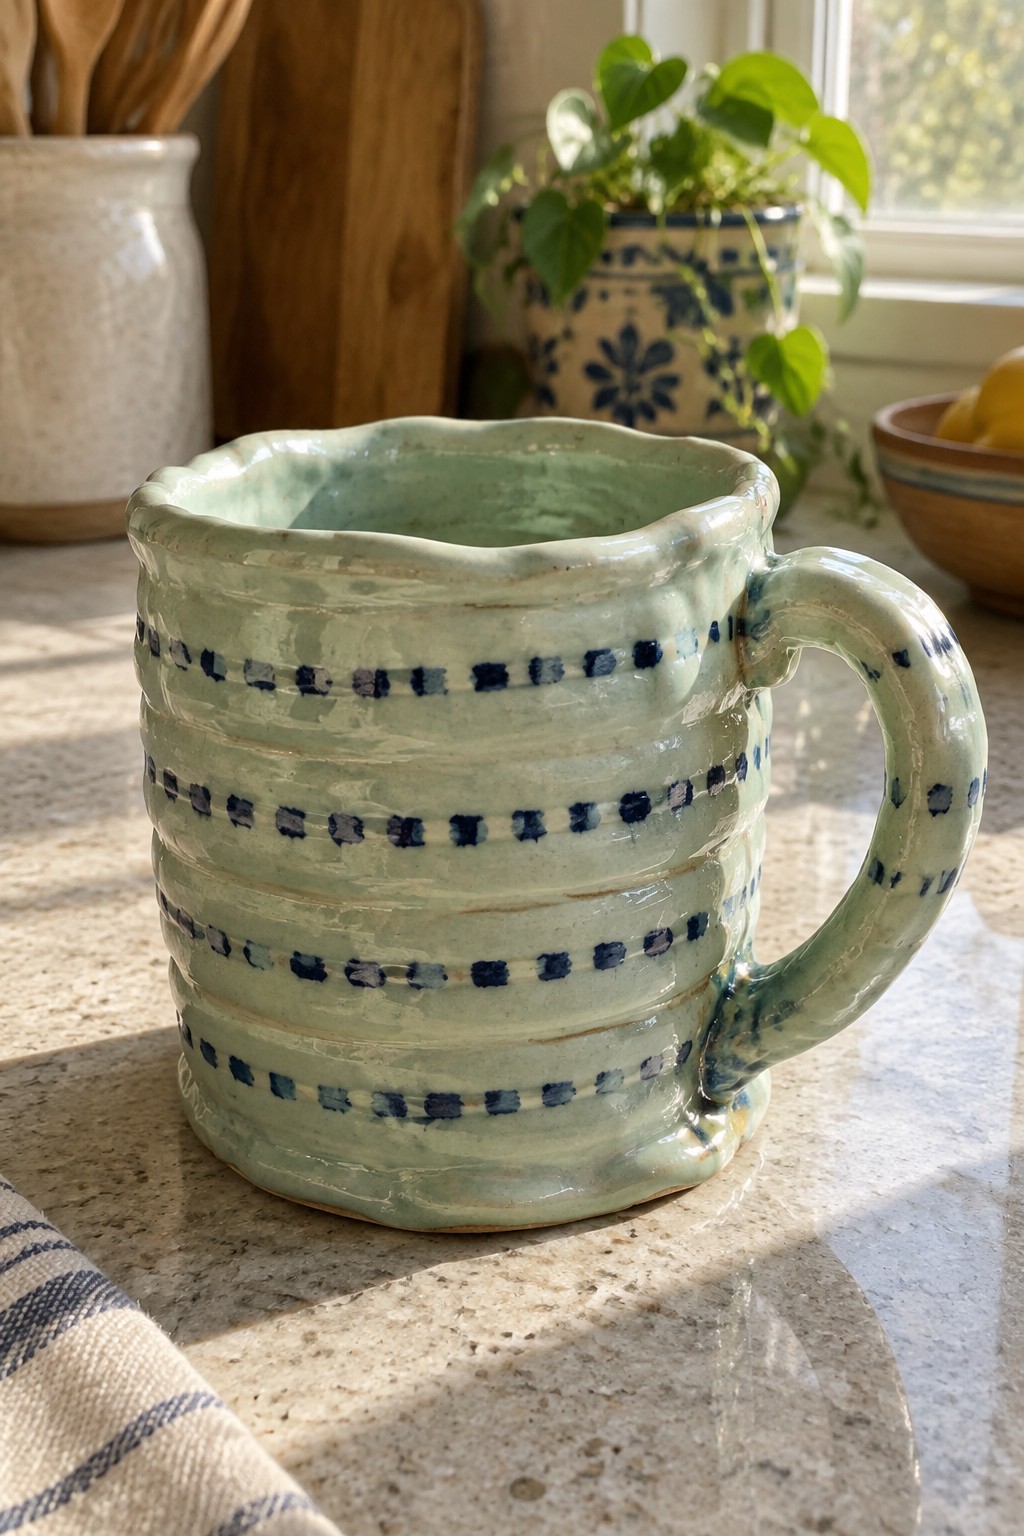
A coil-built mug uses stacked ropes of clay to form the walls, leaving visible horizontal ridges once the piece is smoothed and fired. The light green glaze sits over the textured surface while a row of blue dots runs along each ridge to create a simple banded pattern. The irregular rim and attached handle turn the coiled structure into a usable drinking vessel. This project shows how basic coiling can produce a functional mug without needing a wheel.
The coil ridges make it easy to keep the dotted lines straight and evenly spaced during decorating. You can swap the blue dots for another color or try wider spacing to change the look without altering the build. The same method scales down for smaller espresso cups or up for larger soup bowls. A piece like this works well as a daily kitchen mug because the texture gives it grip and visual interest on an open shelf.
Coiled Nesting Bowls
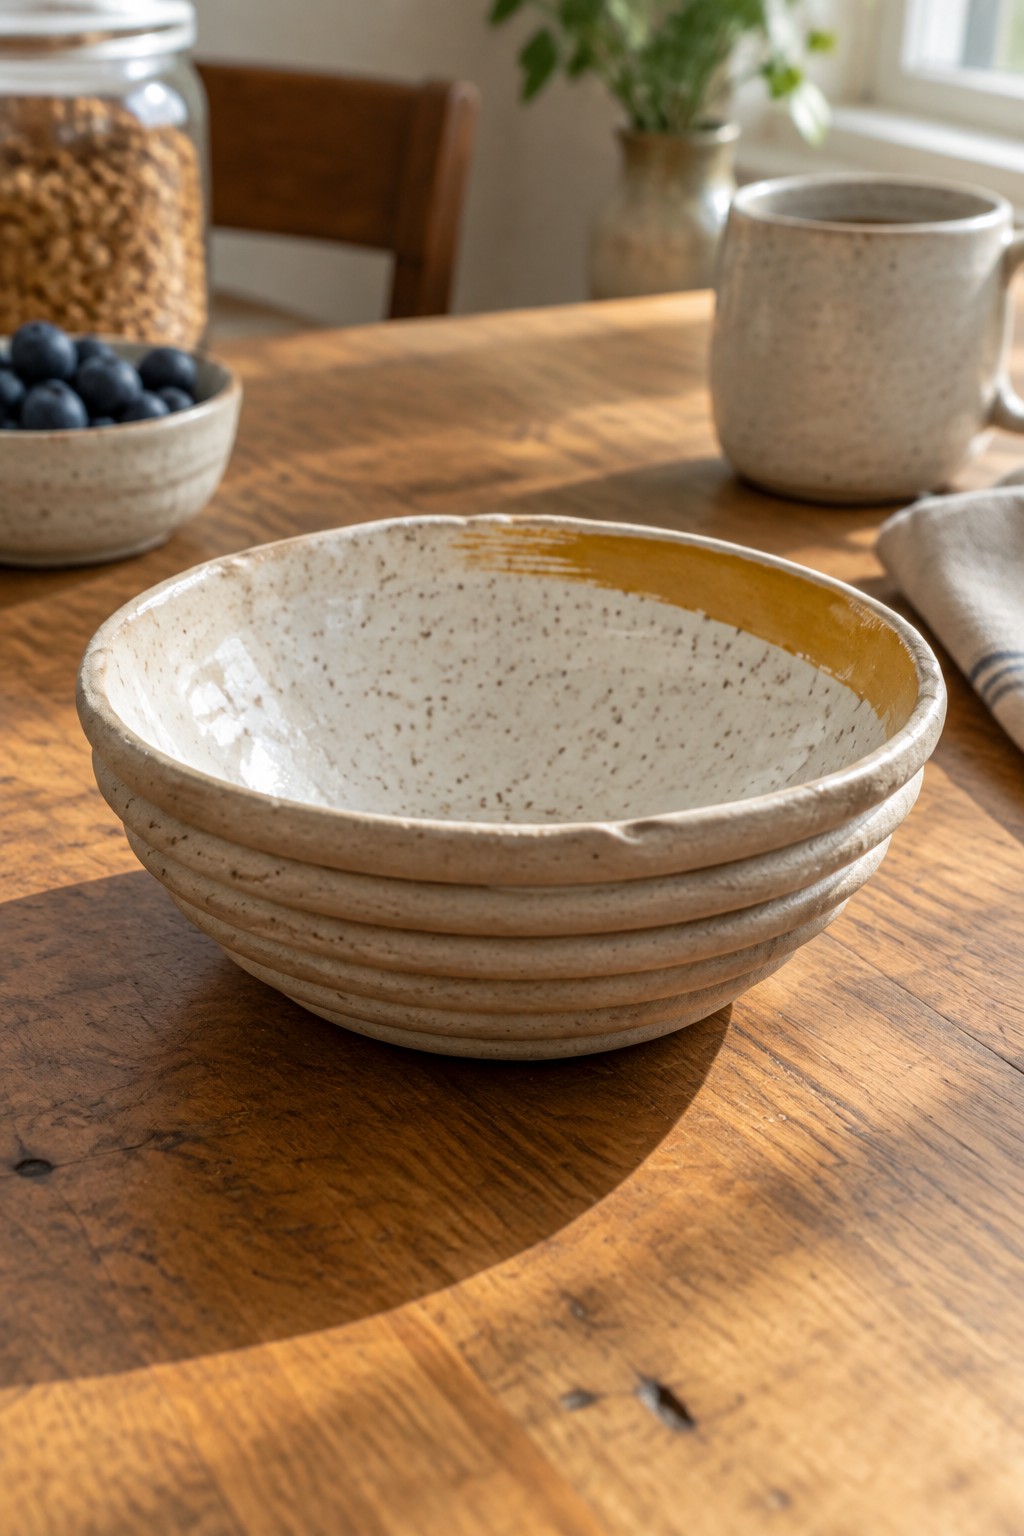
Coil-built nesting bowls are made by rolling out ropes of clay and stacking them into graduated sizes that fit inside one another. The visible horizontal ridges from the coils add texture while the simple speckled glaze and single accent color on the rim keep the set cohesive. This project category works as a basic kitchen item that teaches even wall thickness and rim control without needing advanced tools.
What makes this idea useful is that the nesting shape takes up little cabinet space once finished. You can change the rim color or leave the coils more exposed to shift the look from casual to more refined. The same method works for making just two bowls or scaling up to a larger serving size. In a kitchen this kind of set handles daily use and still looks intentional on open shelves.
Leaf Shaped Trinket Dish

A small leaf shaped dish built from coils makes a practical ring holder or tiny catchall tray. The form follows a simple pointed leaf outline with impressed veins running through the center to catch light and add surface interest. A soft pink glaze with scattered gold flecks covers the inside while leaving the coiled base visible on the exterior. This approach keeps the project small enough to finish in a few sessions while still teaching how coils can support both structure and texture.
What makes this idea useful is how the leaf shape naturally guides the eye to the center where rings or small items sit. You can swap the pink for any solid glaze or press different leaves for texture without changing the overall size. In a bathroom this kind of piece keeps jewelry off the counter while taking up very little space. The same coil base and rim treatment could be repeated to make a longer version for keys or a wider one to hold soap.
Coiled Cat Planter with Spotted Face

A cat-shaped planter built from coils creates a compact holder for small succulents or houseplants. The body shows stacked coils that form horizontal ridges, while the top is pinched and added to create ears, eyes, a nose, and whiskers. Black spots and stripes on a light base give the surface contrast and keep the decoration simple. This approach turns a basic coil pot into a themed planter that sits on a table or shelf.
What makes this idea useful is how the coil ridges already add texture before any color goes on. You can swap the cat face for another animal or drop the spots for stripes or solid glaze without changing the build steps. The small scale means you finish it in a few sessions and it still holds a real plant with drainage. For a gift, pair the same shape with a different face or adjust the spot size to match what the person already owns.
Coil Built Spoon Rest Tray

A long, narrow oval tray made from coils serves as a dedicated spoon rest that keeps utensils off the counter. The shape holds the spoon bowl in the wider section while the handle rests along the length, and the horizontal ridges from the coils create a simple textured surface on the exterior. Green glaze in layered tones gives it a practical kitchen look that pairs with everyday tools without needing extra decoration.
The shape does a lot of the work here by containing drips and preventing the spoon from rolling. You could shorten the same form for a smaller version that fits beside the stove or stretch it slightly to hold two utensils at once. This idea adapts easily into a soap dish or small herb planter by changing the depth and glaze, and the straightforward coil construction makes it a solid project for practicing even walls and basic joining.
Stacked Coil Candle Holder

A small candle holder built from stacked coils of clay forms a compact vessel sized for a standard tea light. The coils remain visible on the exterior to show the construction method while the interior and rim receive a glossy brown glaze that contrasts with the matte textured body. This project keeps the focus on basic coiling and joining without requiring trimming or complex shaping.
What makes this idea useful is how the same coil-stacking approach works for different candle sizes or even small trinket storage. The textured ridges catch light nicely on a shelf or table and can be left unglazed or finished in any color. You could simplify it further by using fewer coils for a shallower dish or widen the base slightly to hold a larger votive. For a gift this shape needs only a simple glaze change to feel finished.
Sunburst Clay Disk Wall Hanging
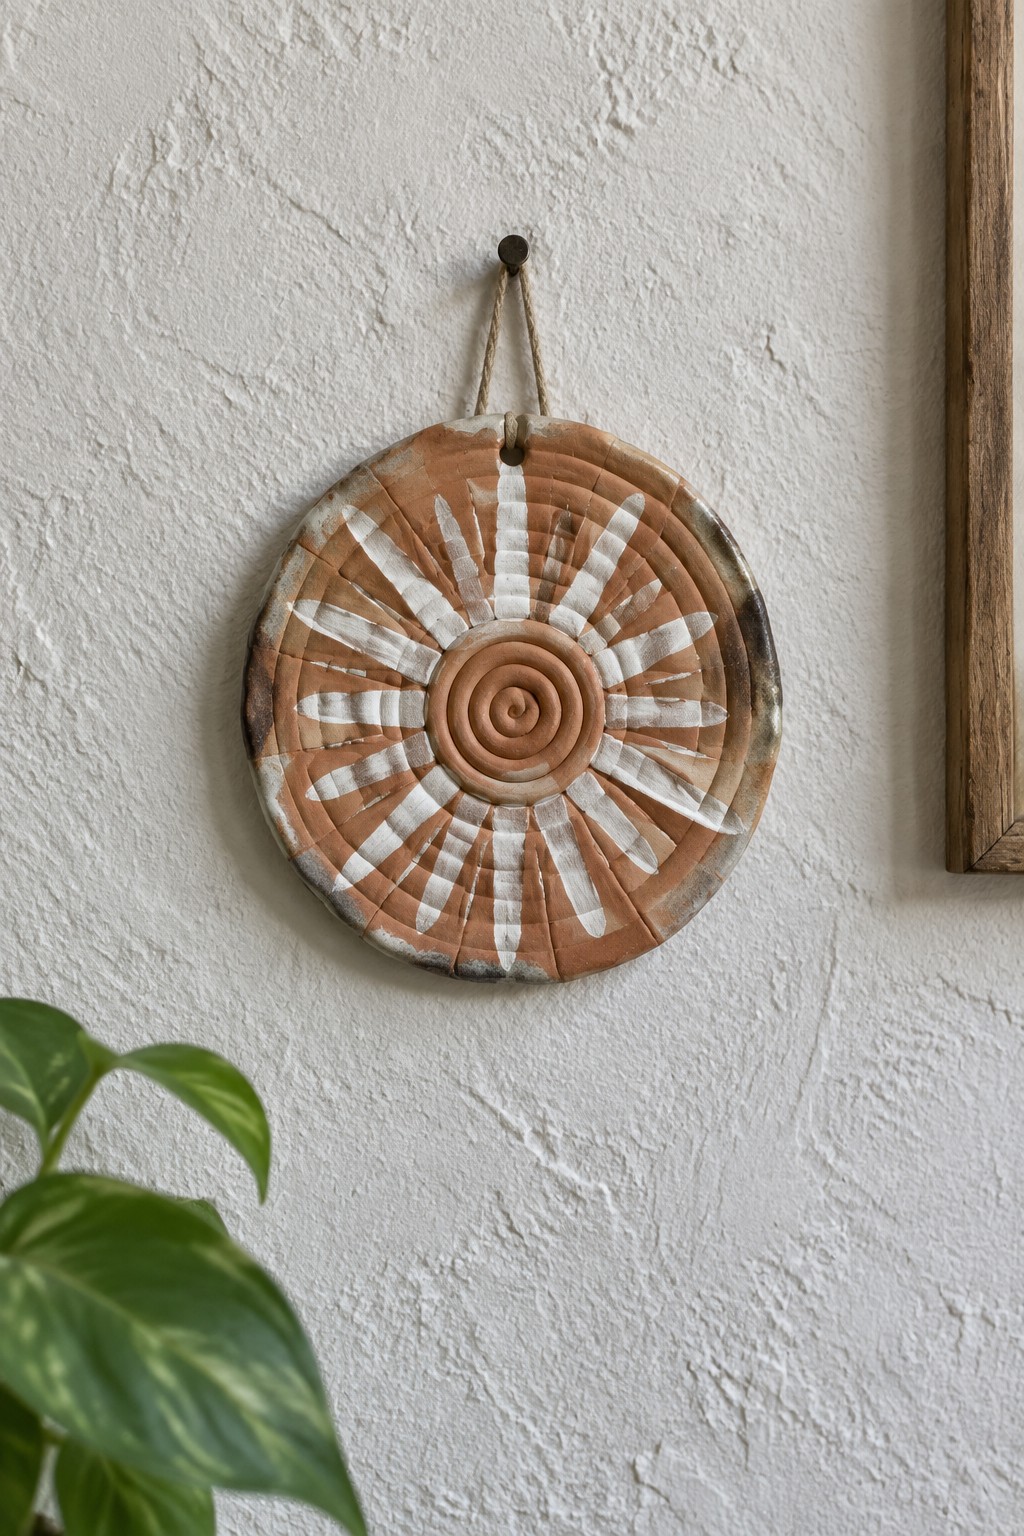
A flat circular clay disk forms the base for this sunburst wall hanging. A central spiral coil sits at the middle while white slip or paint creates radiating lines that fan outward across the terracotta surface. The outer edge is divided into small segments that add structure without complicating the overall round shape. This decor object fits the coil pottery category because the flat form lets beginners practice building even coils and adding simple surface patterns.
The small scale makes this easy to adapt for different spaces or color choices. You could shorten the rays, change the white to another slip color, or skip the segmented edge if you want a faster version. Hang it above a desk, in a hallway, or near a window where the pattern shows up clearly. For gifts, this shape works well because it stays light and needs only a simple hole for hanging.
Ceramic Soap Dish with Drainage Ridges
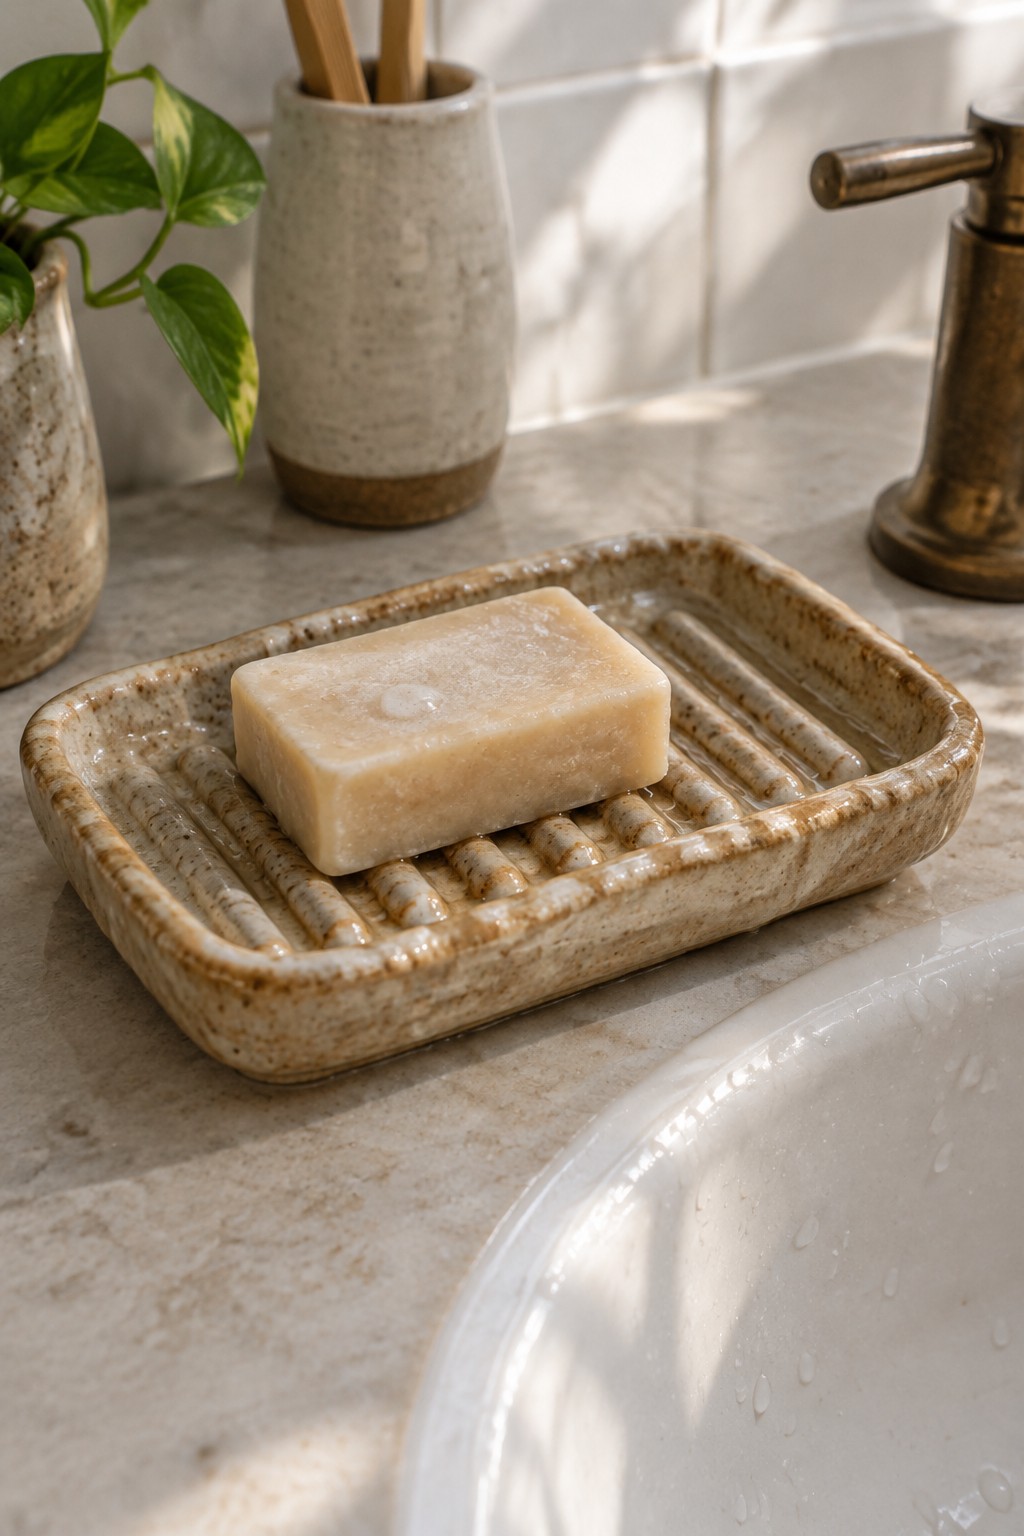
A rectangular ceramic soap dish built with a flat base and evenly spaced raised ridges lets water drain away from the bar instead of pooling underneath. The speckled glaze and slightly irregular edges come from hand-forming the clay, giving the piece a simple, functional shape that sits flat on a counter. This project fits the bathroom item category and uses basic coil or slab construction to create the tray walls and ridges in one piece.
What makes this idea useful is that the ridges solve the common problem of soggy soap without needing extra parts. The compact size works well on a sink edge or shower shelf and can be adapted by shortening the length for a travel version or adding a small lip on one side to catch drips. In a bathroom, this kind of piece keeps counters drier and pairs with any bar soap you already have. The same ridge pattern could be reworked into a small sponge holder or a tray for shaving tools.
Coiled Yarn Bowl with Rim Notch

A yarn bowl built from coils creates a sturdy holder that keeps a ball of yarn contained while you knit or crochet. The coils form both the walls and the visible horizontal ridges that add texture and slight grip inside the bowl. A notch cut into the rim lets the yarn feed out cleanly, and a simple row of white dots along the edge breaks up the purple glaze without extra steps. This project belongs in the holder category and stays beginner-friendly because the coils do most of the shaping work.
What makes this idea useful is how the notch turns a basic bowl into a working tool rather than just decor. You can skip the dots or change their spacing to finish faster, or widen the notch if you use thicker yarns. The same coil build works for a smaller desk catch-all or a larger version that holds multiple skeins. In a craft space the bowl keeps yarn visible and untangled, and the ridged surface shows off the coil technique even with a single glaze color.
Coiled Mini Bowls with Visible Ridges

These small coil-built bowls use stacked ropes of clay to form the walls, leaving the horizontal seams visible after smoothing. The solid yellow and teal glazes cover the surface evenly while still letting the coil texture show through. This approach keeps the project focused on basic coiling technique and simple shaping without added carving or handles.
What makes this idea useful is the small size that works for holding salt, spices, jewelry, or desk supplies. You can change the glaze color or widen the opening slightly to turn the same form into a soap dish or small planter. The compact shape also makes these bowls quick to dry and fire, so you can test different coil thicknesses without committing to a larger piece.
Coiled Oval Tray with Lemon Motif

A coil-built oval tray gives you a flat surface for serving or organizing small kitchen items. The rim is formed by stacking and smoothing coils, which creates a slightly ridged texture that frames the center. Lemon slices and leaves are painted on after glazing, using simple yellow and green tones that stand out against the white base. This project focuses on coil construction first, then adds surface decoration without extra sculpting.
The oval shape works well on a countertop for holding utensils or small produce. You can change the painted fruit to match other seasons or leave the center plain and add color only along the coils. A smaller version of the same form turns easily into a desk tray or soap dish. The painted slices give the piece a clear theme that photographs clearly for sharing.
Coil Built Toothbrush Holder with Painted Smiley Faces

A coil pottery toothbrush holder starts with stacked coils shaped into a short cylinder, then pinched or cut to create multiple openings that keep brushes separated and upright. The light green glaze gives a smooth, wipeable surface while the hand-painted smiley faces in different colors add decoration using basic brushwork. This bathroom item stays compact enough to sit on a counter without taking much space.
What makes this idea useful is that the same coil construction can be adjusted to hold makeup brushes, paintbrushes, or small kitchen tools by changing the number and size of the holes. The smiley face motif can be replaced with simple lines, dots, or initials to fit other color schemes or rooms. For a gift, something like this works well because it stays small, functional, and quick to finish once the coils are built.
Coiled Tall Vase with Horizontal Ridges
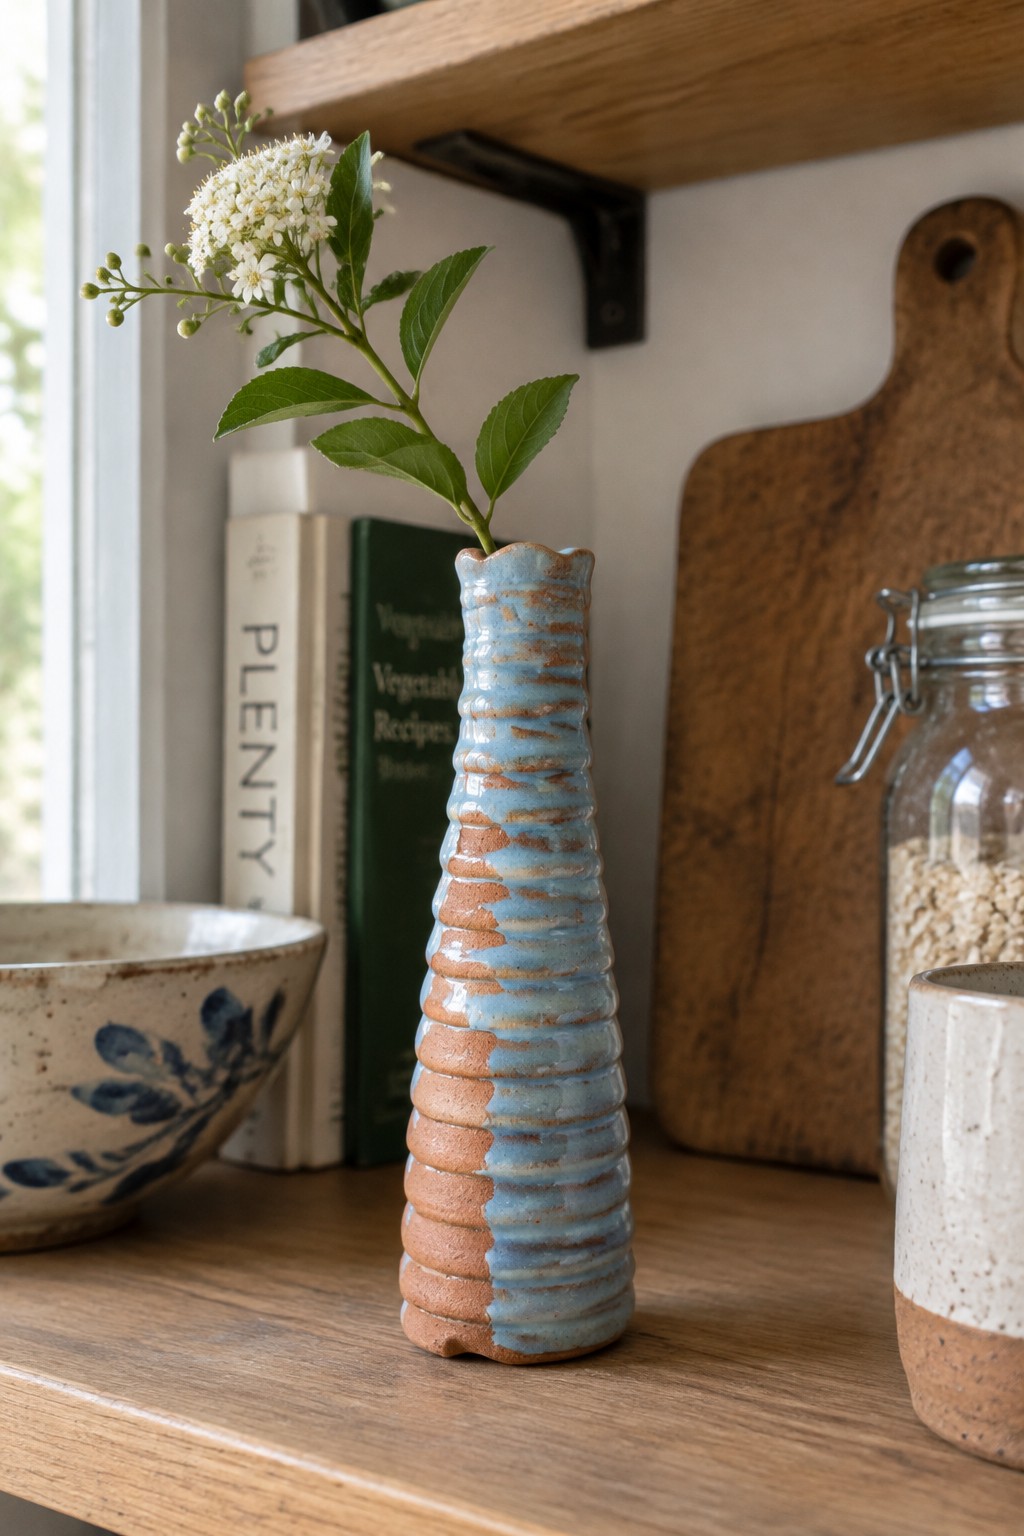
A narrow ceramic vase formed from stacked coils produces even horizontal ridges that run the full height and create a clear striped pattern. The lower section keeps the natural terracotta color while the upper half receives a light blue glaze that stops partway down, leaving a clean two-tone split. This shape works as a bud vase or small stem holder that fits easily on shelves or counters without taking much room.
The slim profile holds a single branch or a few flowers upright and leaves room for other items nearby. You can adjust the height or coil thickness to make a shorter version for a desk or switch the glaze colors to match different rooms. The ridged surface gives the piece enough detail to photograph well for sharing while staying simple to build in stages.
Coiled Ramen Bowl with Wavy Blue Bands

A wide, deep bowl formed from coils creates a sturdy ramen or noodle bowl that holds broth and toppings without tipping. The shape features a thick rim and slightly tapered base that feels balanced in the hands. Horizontal wavy bands of dark blue glaze over a speckled clay body add contrast and movement while keeping the surface simple to execute. This approach highlights coil building as the main technique and lets the glaze pattern finish the look.
What makes this idea useful is how the generous size works for both single servings and family-style noodle dishes. You can adapt the wavy bands by trailing colored slip or using wax resist to keep the lines crisp. The same coil form scales down into smaller cereal bowls or widens into a salad server. In a kitchen, the bold rim pattern helps the piece read as intentional rather than plain.
Mushroom Jewelry Dish Built from Coils

A coiled cylinder forms the base while an added slab or pinched top creates a shallow, freeform dish for rings and small jewelry. The upper section receives a bright coral glaze that pools and drips along the rim, leaving the lower base matte and textured from the coil lines. This combination keeps the project simple yet gives clear contrast between the smooth glazed area and the ridged clay surface. The finished piece functions as a compact holder rather than a deep bowl.
The small scale lets you finish it in one or two sessions and still practice joining coils evenly. You can swap the coral glaze for any color or skip the drip effect by applying glaze only inside the dish. The same base shape works for a tiny plant stand or a candle holder if you widen the top opening slightly. For gifts, the form stays useful without needing extra parts or complex lids.
Coiled Utensil Holder

A coil-built utensil holder creates a tall, stable cylinder that stores spoons, spatulas, and other kitchen tools upright on the counter. The stacked coils form horizontal ridges that give the surface texture and help the piece feel sturdy, while a single band of darker glaze near the top adds contrast without extra steps. This project stays simple because the coils themselves create both the structure and the finished look.
What makes this idea useful is how the open top and height work for any set of wooden tools without needing lids or dividers. You could shorten the same coil build into a smaller spoon crock or widen it slightly for a double compartment version. The glaze band shows an easy way to add color that still reads as handmade, and the coil method would carry over directly to a matching planter or vase.
Marbled Clay Coasters
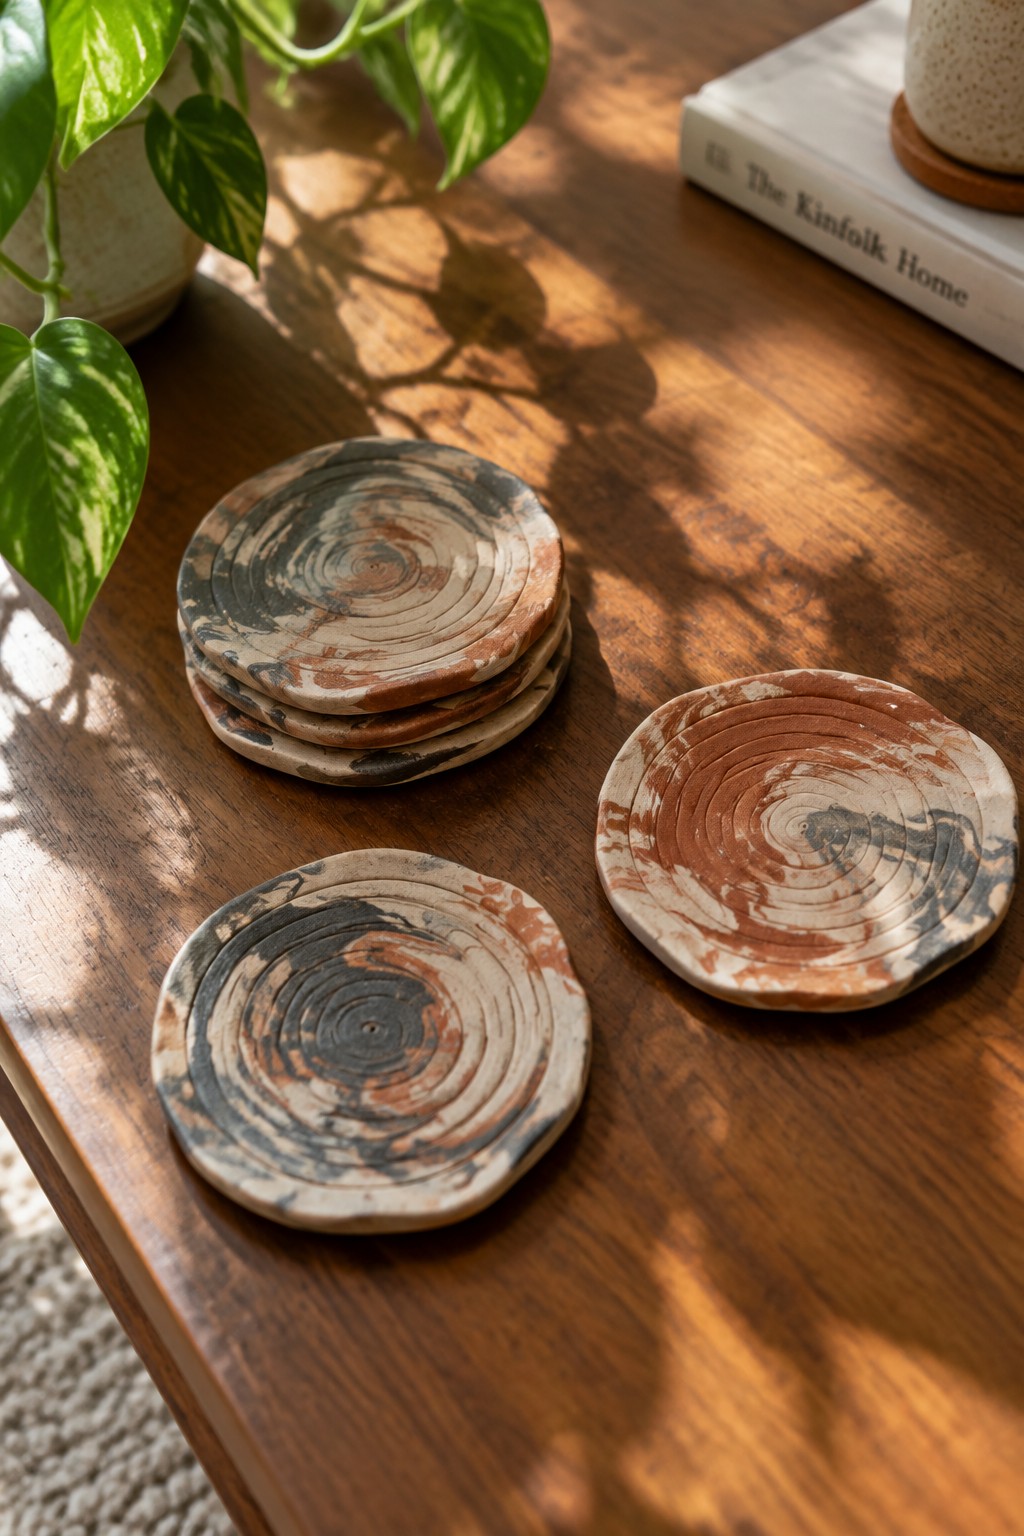
These round ceramic coasters are made by flattening coils of clay into flat discs and finishing them with a marbled swirl pattern. The surface mixes earthy shades of brown, gray, and cream that spiral from the center outward, creating a simple but consistent visual rhythm across each piece. The slightly uneven edges and matte finish keep the coasters looking handmade while still practical for daily use on tables or counters.
The small scale makes these easy to produce in matching sets without needing much workspace or clay. You can swap the color mix for brighter tones or keep the palette neutral so the coasters fit different rooms. They also work well as a first project when learning to control coil thickness and basic surface decoration before moving on to taller forms.
Stacked Coil Animal Figures

Coil pottery works well for small animal figurines when you roll even coils and stack them into rounded body shapes. The hedgehog, whale, and chick examples use graduating coil sizes to build volume, then add simple pinched or attached details for ears, tails, wings, and faces. Painted surfaces in matte colors keep the focus on the form rather than complex glazing. These fit the decor object category and stay small enough to display in groups.
The small scale makes these easy to try without using much clay or workspace. You can swap the animal shapes while keeping the same stacking method, or simplify to just two coils for a quicker version. A set like this works as a desk accent or small gift that does not require functional testing. The painted details help the figures read clearly from a distance, which makes them useful for testing color placement on future projects.
Small Swirled Dip Bowls

Small coil-built bowls work well for this project because the coiling method lets you build a shallow, open form without needing a wheel. The glaze is brushed or poured in a continuous spiral that follows the curve of the bowl, creating a clear pattern that shows off the handmade shape. Different glaze colors on the same form give you a matching set while keeping each piece distinct.
What makes this idea useful is the small scale, which keeps the coiling manageable for beginners and lets you finish several pieces in one session. You can change the depth to turn the same shape into salt bowls, butter dishes, or small plant saucers. A set of three or four in different colors stands out in photos for Pinterest because the spiral pattern reads clearly even in thumbnails.
Textured Ceramic Napkin Rings

Napkin rings formed from clay give a simple way to add handmade detail to a table setting. These versions use stacked rings with a raised dot texture that creates shadow and depth across the surface. Earthy glazes in warm terracotta, golden brown, and soft green keep the pieces grounded and easy to pair with everyday linens or dishes. The compact size makes them a straightforward kitchen or dining project.
What makes this idea useful is how the small scale lets you test new textures or glazes without much material. The dimpled surface holds up well in both matte and slightly glossy finishes, so the rings can match different dinnerware styles. For a gift, something like this works nicely bundled with cloth napkins. You could repeat the same texture on a set of matching coasters or shorten the stack to make lighter single rings.
Spiral Coiled Plate
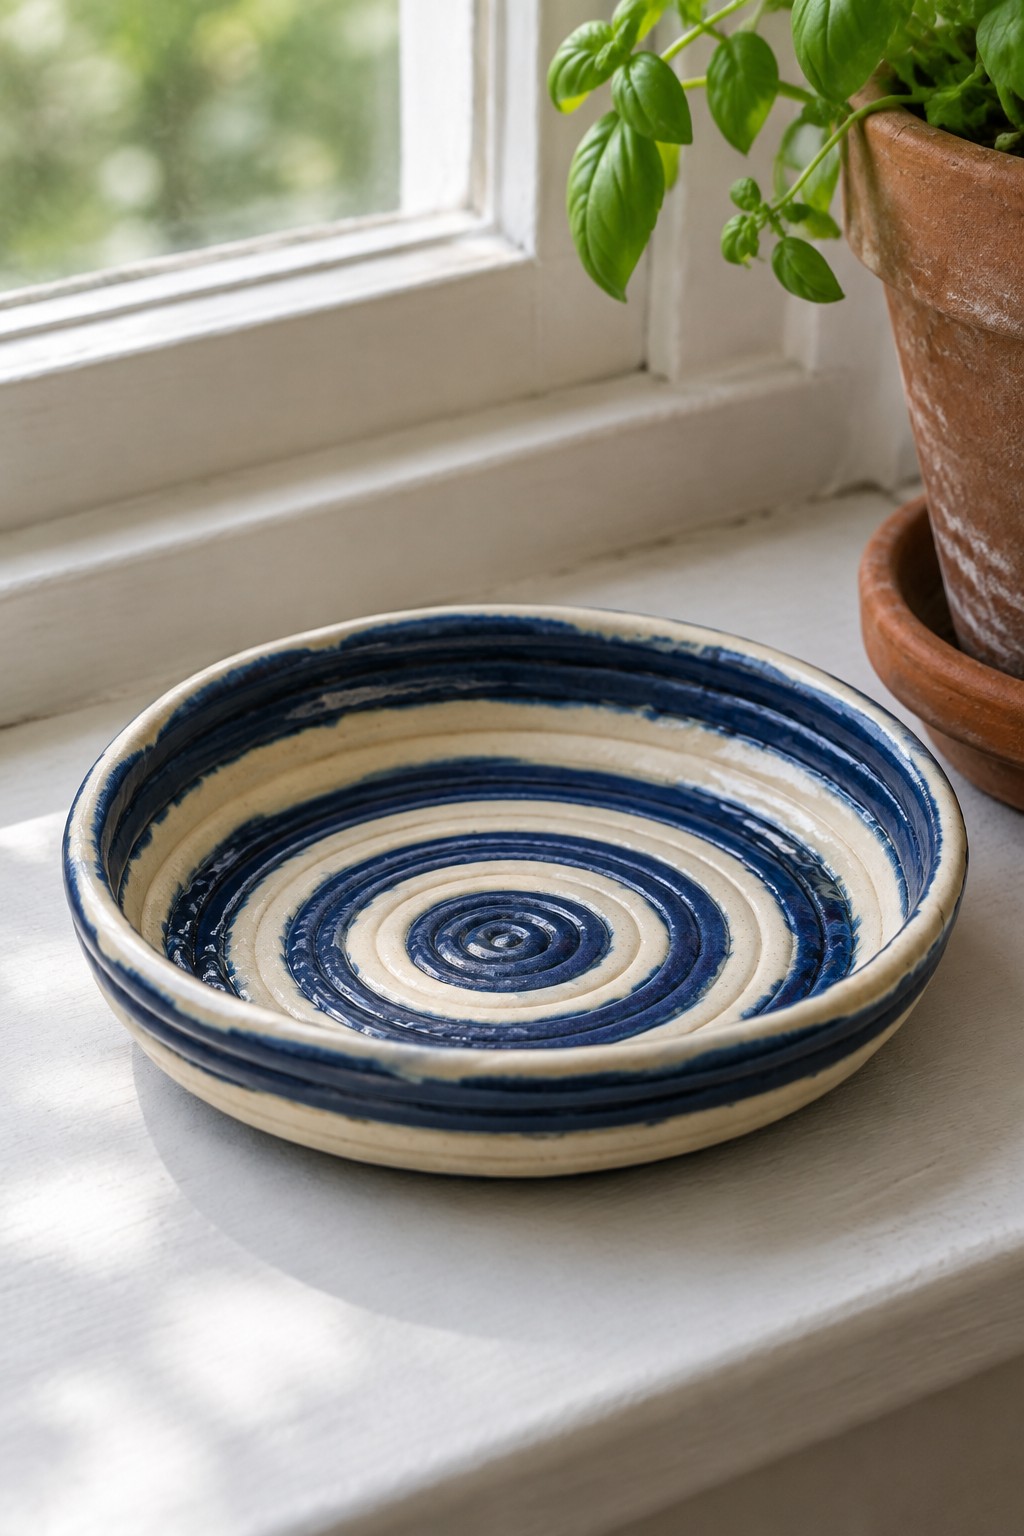
A shallow plate formed from coils gives beginners a straightforward way to build a flat surface with low sides. The coils run in a continuous spiral that switches between blue and cream, creating strong concentric rings across the entire form. This layout keeps the construction simple while the color changes make the spiral pattern stand out clearly. The result is a small dish that works as a tray or plate without extra trimming or handles.
The compact size keeps the project quick to finish and easy to adjust in diameter or depth. You can repeat the same spiral layout in different color pairs or switch to a single glaze to create a calmer surface. A plate like this fits well as a jewelry holder, a small plant saucer, or a catch-all on a desk. Making a second version with tighter coils or a wider rim turns the same basic idea into a different finished piece.
Coiled Ribbed Planters for Kitchen Herbs
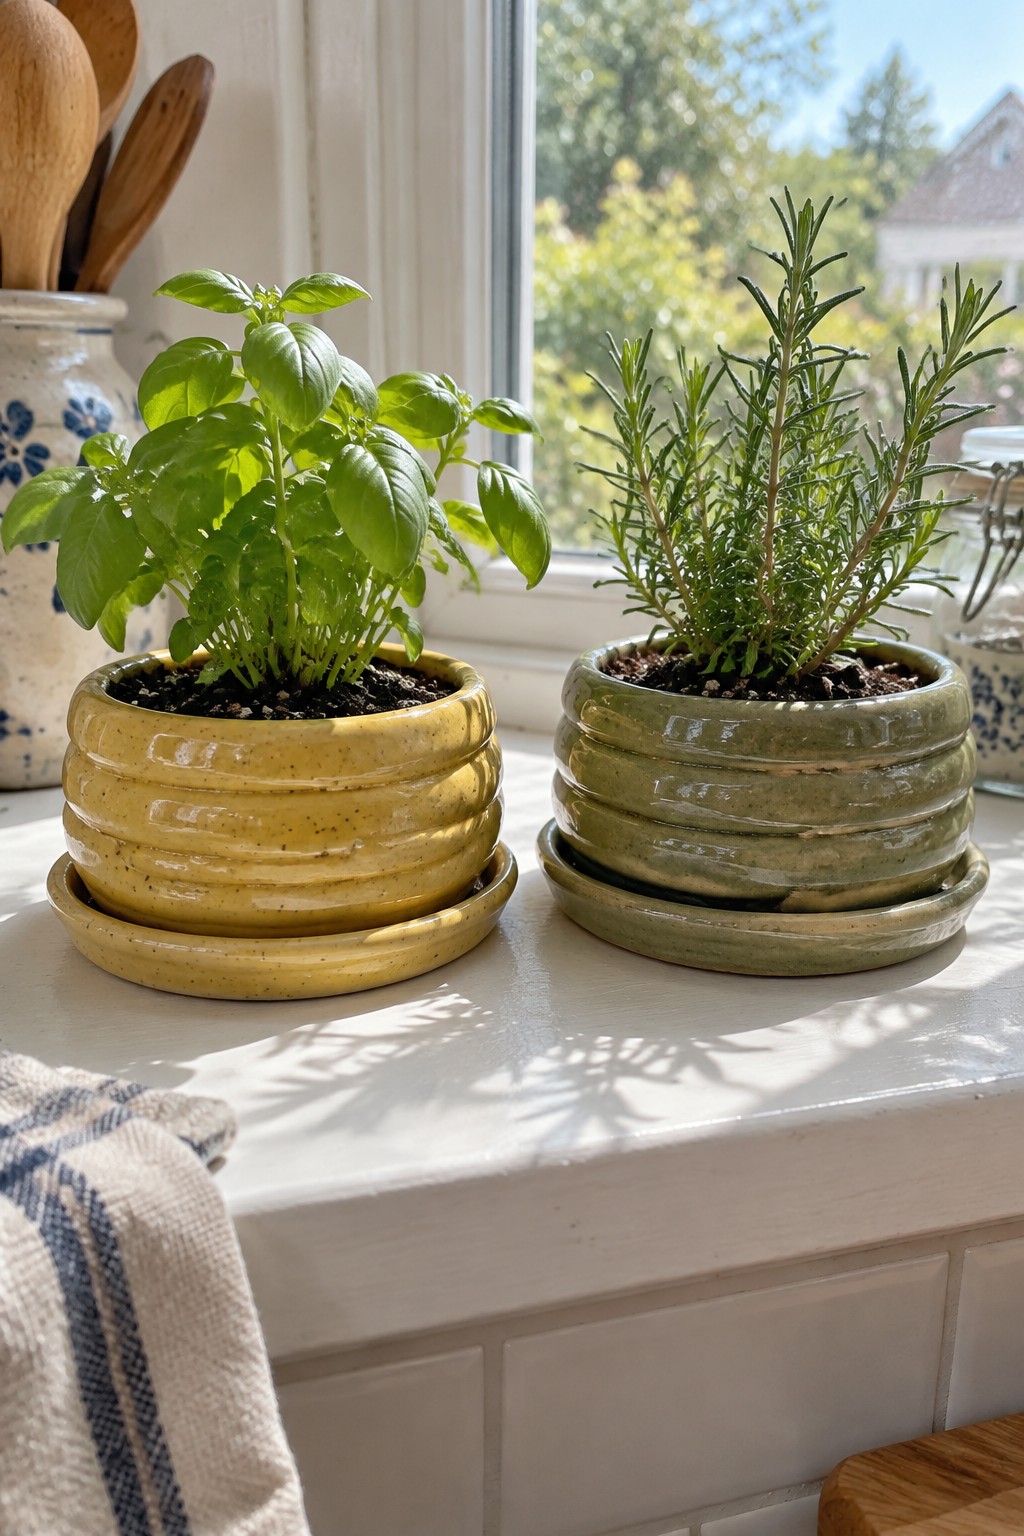
These planters are built from stacked coils that create a simple cylinder with visible horizontal ridges. The solid glaze in yellow or green covers the entire surface and lets the coil texture show through without added decoration. A matching saucer sits underneath to catch water. The shape stays wide enough at the top to hold a small herb plant while the stacked coils give the pot enough height to sit nicely on a windowsill.
What makes this idea useful is that the coil ridges do most of the visual work without needing carving or painting. The same form works for basil, rosemary, or any small kitchen herb and can be made in different diameters to fit various plant sizes. You could simplify it to two or three coils for a shorter pot or add an extra coil at the rim to create a small lip. In a kitchen, this kind of planter keeps herbs close to the sink and gives you a straightforward project that teaches even coil building and basic glazing in one piece.
Frequently Asked Questions
What basic supplies should I gather before starting any of the coil pottery projects?
Gather a few pounds of clay suited to your experience level, a rolling pin or slab roller for flattening bases, a scoring tool or fork for joining coils, a bowl of water for slip, and simple smoothing tools like a sponge or rib. Many of the projects also suggest a turntable for even building and plastic bags to control drying. Start with these items so you can follow the step by step instructions without interruption.
How can I keep my coils from separating or cracking during construction?
Score and slip every joint thoroughly before adding the next coil, then press the coils together firmly from both sides. Work in small sections and cover unused clay with plastic to prevent it from drying out. If a crack appears, gently score the area again, apply fresh slip, and smooth it over with a damp sponge. The projects emphasize building slowly and letting each layer firm up slightly before adding weight on top.
Do I need a kiln to complete these beginner projects?
Many of the projects work well with air dry clay or oven bake clay so you can finish pieces without a kiln. For traditional clay, check local community centers or schools that offer firing services. The step by step guides include drying schedules and surface finishing options that prepare pieces for bisque firing when available, but they also show how to create attractive decorative items that remain unfired.
What is the best way to dry and store unfinished coil pieces between sessions?
Wrap each project loosely in plastic wrap or place it inside a sealed plastic bag with a slightly damp paper towel. This slows drying and reduces cracking risk. Check the piece every day or two and allow it to dry more evenly once the basic shape is complete. The projects recommend drying on a porous surface like a board covered with newspaper to absorb moisture from the bottom.
How do I choose the right first project if I have never worked with coils before?
Begin with the simplest shapes such as a small bowl or cylinder that uses only three or four coils. These early projects focus on scoring, slipping, and smoothing so you master the basics before moving to taller forms or added details like handles. Once you finish one successfully, the later projects build directly on those same techniques with gradual increases in height and complexity.

Pottery Path is my cozy corner of the internet where I share clay ideas, pottery inspiration, and simple projects you can recreate at home. I love exploring everything from air dry clay to handbuilt pottery to cute minis that brighten your day. My goal is to make clay crafting feel easy, fun, and welcoming for anyone who wants to try it.
You will find beginner friendly tutorials, creative pottery painting ideas, and lots of warm inspiration for slow and happy crafting. If you enjoy hands on creativity, this space will feel like home.