
I began trying coil pottery when I first started because the method seemed straightforward.
A few basic shapes helped me improve my handling of the clay without getting discouraged.
This list includes 19 ideas that focus on simple forms to help build skills gradually.
I chose projects that do not require much equipment so they are easy to try at home.
Overall these can give beginners a steady way to gain confidence through practice.
Coiled Ridge Mug
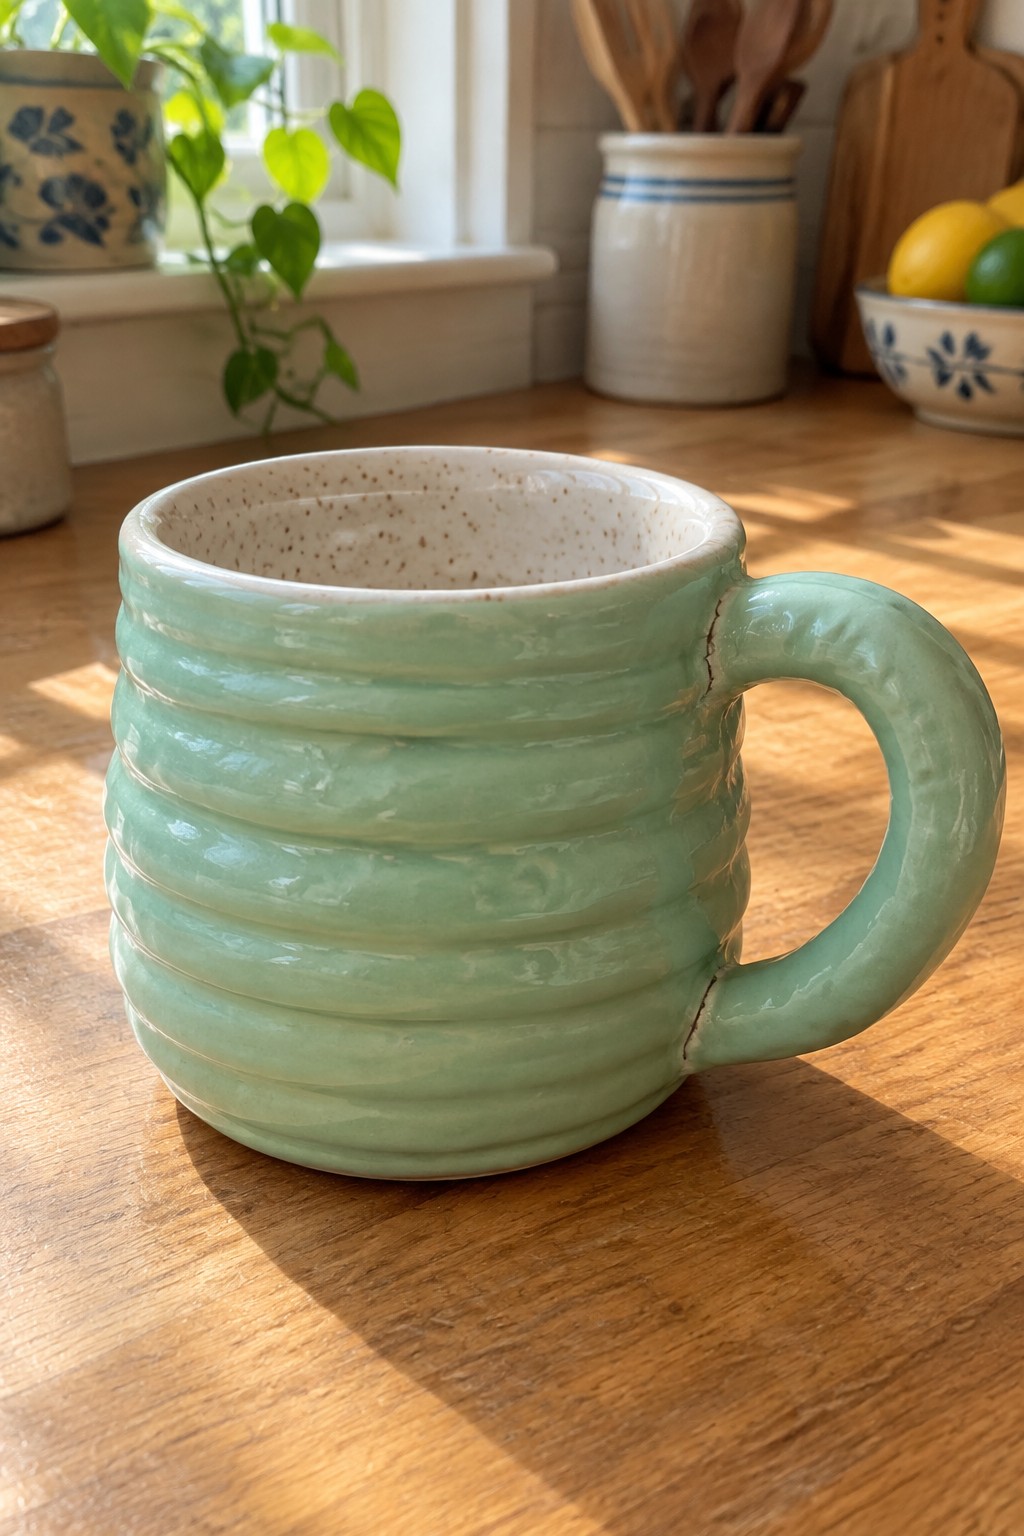
A mug formed by stacking coils creates a series of horizontal ridges that wrap around the body and give it a clear handmade texture. The light green glaze sits in the grooves between coils, making the layers stand out without any extra carving or stamping. The thick pulled handle balances the weight and keeps the focus on the ridged surface. This fits the simple mug category but uses the coil method itself as the main design element.
The shape does a lot of the work here because the ridges add grip and visual interest without needing extra tools or decoration. You could adapt the same coil stacking to make shorter tumblers or wider soup bowls using the same glaze. In a kitchen this kind of mug stands out on open shelves because the texture reads clearly from a distance. For a beginner project the coil ridges also hide minor unevenness in the walls, so the finished piece still looks intentional.
Coiled Clay Cat Planter

A coil-built planter shaped like a cat head works well for small succulents or herbs. The body is formed from stacked coils that leave visible horizontal ridges, while the top edge is pinched into ears and a simple face. Painted details such as black eyes, a nose, whiskers, and pink cheeks are added after the first firing, and a light green glaze covers only the upper section. The lower half is left in plain terracotta, which keeps the process simple and avoids full glazing.
What makes this idea useful is how the coil ridges create texture without extra tools or carving. You could swap the cat face for another animal or skip the paint entirely and just add ears to a basic coiled cylinder. This size fits easily on a windowsill or shelf for one or two plants. The same coil method can be adapted into a taller version for a pencil holder or a shorter one for a ring dish by changing only the top shaping.
Coiled Breakfast Bowl with Visible Ridges

A wide, shallow bowl built from coils creates a simple kitchen piece with clear horizontal ridges that show the construction. The form works well for cereal, yogurt, or snacks since the open shape gives plenty of room for toppings. A single blue glaze highlights the ridges without covering them, keeping the focus on the handmade texture rather than added decoration.
The shape does a lot of the work here because the wide rim and low sides make it stable and easy to eat from. You could rework the same coil method into a deeper version for soup or scale it down for small prep bowls. The visible ridges help the piece stand out in photos, which makes it a useful project to try if you want something that looks finished with just one glaze color.
Leaf Shaped Coil Dish

A leaf shaped dish makes a simple coil project that results in a small functional tray. The builder rolled coils into an irregular oval then pinched and added thin coils on top to create the raised leaf veins. A single green glaze with some darker pooling in the crevices gives the surface variation and makes the veins stand out. This type of piece fits the decor object or small tray category and stays easy to handle during building and drying.
What makes this idea useful is how the leaf outline does most of the design work once the coils are in place. You could stretch the same coil method into a longer version for a soap dish or shorten it into a ring holder by adjusting the outer shape. The small size means it fits on a nightstand or desk without taking much space and the vein texture helps cover small bumps from coil joins. For Pinterest this shape stands out because the form itself carries the interest rather than relying on added color patterns.
Ceramic Spoon Rests with a Simple Dot Line
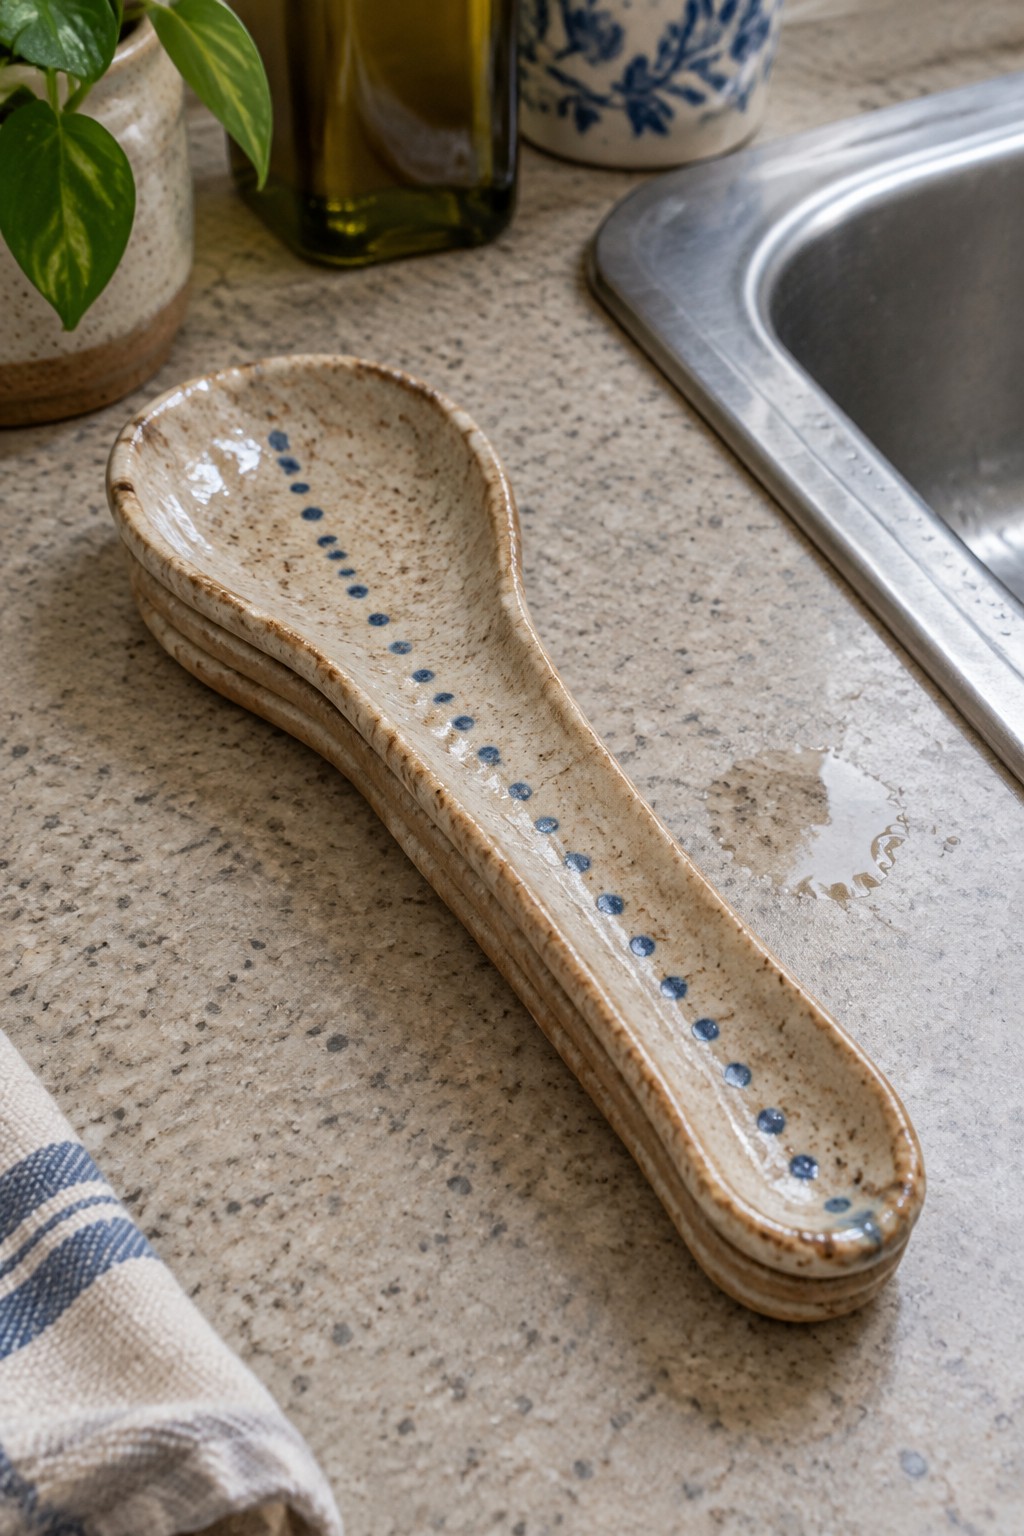
These spoon rests are shaped like long, narrow spoons with a shallow well at the bowl end to catch drips from cooking utensils. The speckled beige glaze gives the surface a natural, slightly textured look while the row of small blue dots running down the center adds just enough color and pattern to keep the design interesting. This project falls into the kitchen item category and works well as a quick batch project since the form is straightforward to repeat.
The shape does a lot of the work here because the long handle and scooped end make the rests stable on a countertop without taking up much space. You can easily adapt the same idea by shortening the handle for a more compact version or switching the dots to a different color that matches your kitchen. In a kitchen, this kind of piece keeps spoons from leaving messes near the stove or prep area and stacks neatly for storage. The dot pattern is also simple enough to personalize with different spacing or to skip entirely if you want a plain version for gifts.
Coiled Flower Tea Light Holder

A coil-built flower candle holder uses repeated petal shapes arranged around a shallow center well that fits a standard tea light. Each petal carries a raised spiral coil that adds surface texture and keeps the form from reading as a flat disk. The overall shape stays compact so it works as a small tabletop piece rather than a large centerpiece. Yellow-green glaze with brown accents on the coils gives the holder a finished look while still showing the handmade coil lines.
The small scale makes this easy to adapt by changing petal width or number to create a daisy, sunflower, or simpler five-petal version. You can swap the glaze for solid matte colors or leave the spirals unglazed for more contrast. In a living room or on a desk this shape doubles as both light source and decor without needing extra space. The same coil technique can be reworked into a ring dish or small trinket tray by flattening the center instead of leaving it open for a candle.
Coiled Bud Vase with Two-Tone Glaze

This project is a small coil-built vase formed from stacked horizontal coils that taper inward toward the rim. The lower half receives a blue glaze while the upper coils remain in the natural clay color, which makes the coil texture stand out and creates a simple color break. It functions as a narrow holder suited for single stems or cuttings rather than large arrangements.
The small scale lets it fit on a narrow windowsill or desk without taking up much space. You can adapt the same coil method by changing the glaze split point or using a single color throughout for a quicker finish. This shape also works as a simple desk pencil holder if you widen the opening slightly during building.
Divided Ceramic Dish for Seasonings

A divided ceramic dish with two connected compartments makes a practical salt and pepper cellar for the kitchen counter or table. The form uses a simple pinched or coiled shape that creates two separate wells while keeping the whole piece compact and easy to pick up. The brown textured exterior and white glazed interiors help the dish stay neutral so the focus stays on the contents. This project falls into the kitchen item category and works at a small scale that suits beginners building confidence with coils.
What makes this idea useful is how the divided layout keeps two seasonings organized without extra dishes or lids. The small overall size makes it easy to adapt by adjusting the depth of each well or adding a handle on one end. In a kitchen this kind of piece fits beside the stove or on a dining table and can be glazed in any color to match other dishes. For a gift the same shape can be reworked into a two-part dip dish or a small tray for oil and vinegar.
Coil-Built Toothbrush Holder

A coil-built toothbrush holder creates a simple cylinder with multiple openings that keep brushes separated and easy to grab. The exterior shows a repeating rounded texture formed by shaping or pressing the coils, then covered in a glossy coral glaze that highlights the surface without needing extra decoration. This approach works well as a bathroom item because the form stays compact while the color adds a clear focal point against typical sink surroundings.
What makes this idea useful is that the same coil structure can be adjusted for two or four holes depending on household size. You could switch to a matte glaze or add a shallow base tray to handle drips if needed. The small footprint lets it sit on a counter or windowsill without crowding other items, and the shape translates easily into a pencil cup or small utensil holder for other rooms.
Coil Built Bird Figurine

A small bird figurine built from coils gives beginners a straightforward way to practice stacking and smoothing while creating a finished shape. Form the body by rolling coils into a compact oval, then attach simple wing slabs on each side and a pinched beak at the front. The horizontal coil lines left visible on the body add texture, and a limited paint scheme with blue on the wings keeps the focus on the form rather than surface detail.
The small scale makes this easy to adapt into other animals by swapping the wings for ears or a tail. Try the same coil method for a desk or shelf accent that takes up little room and needs no special display. Change the wing color or skip paint entirely to match different clay bodies or room styles.
Citrus Slice Ring Dish

A small ceramic dish divided into wedge sections and glazed in layers of orange and yellow creates a citrus slice design that stays contained between raised clay ridges. The ridges prevent the glazes from blending during firing while giving the surface a clear, graphic pattern. This project takes a basic round form and turns it into a compact tray or ring dish that fits easily on a nightstand or kitchen counter.
The small scale makes this easy to adapt by swapping the color palette for lemon yellows or lime greens. A piece like this works especially well as a ring holder, spoon rest, or catch-all for loose change. You can simplify the idea by using fewer segments or rework the same shape into a set of matching coasters. The painted motif helps the dish stand out in photos without requiring complex carving or sculpting.
Coiled Sun Wall Plaque
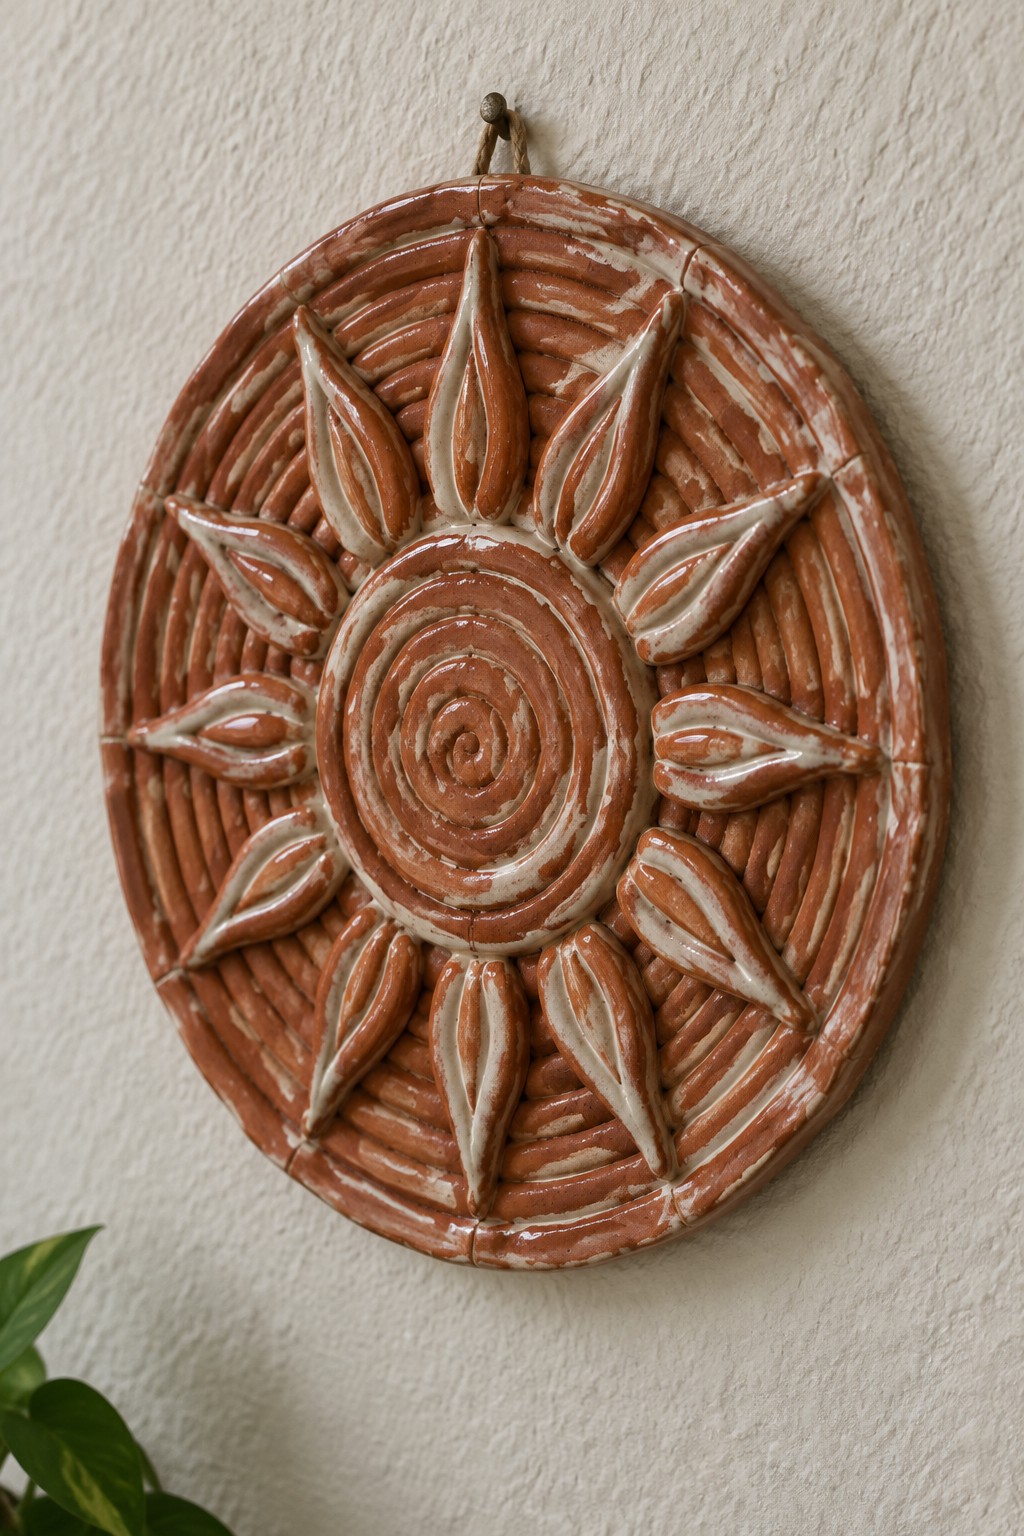
A sun wall plaque built from coils starts with a flat circular base that gets a raised spiral at the center and pointed leaf or ray shapes added around the edge. The terracotta clay body contrasts with the lighter slip brushed over the raised details, which makes the spiral and rays stand out once the piece is fired. This type of decor object stays simple in form but gains interest from the repeating pattern and the way the glaze settles into the grooves between coils.
What makes this idea useful is that the round shape and central spiral give beginners a clear structure to follow without needing complex joins. The plaque works well hung in a kitchen, hallway, or near plants where the warm tone picks up surrounding colors. You can adapt the same layout by changing the rays to straight lines or shortening them for a smaller version that fits on a shelf. For a first coil project the flat base reduces warping risk, and the design still reads clearly even if the coils are a bit uneven.
Boat-Shaped Incense Holder

A long narrow tray built from coils makes a practical incense holder. The raised sides and pointed ends keep ash contained while the coil ridges create built-in texture along the length. A deep green glaze with scattered gold flecks gives the surface shine and subtle variation without extra painting or carving. This project sits in the holder category and stays beginner-friendly because the coils do most of the shaping work.
The shape does a lot of the work here since the length fits a standard stick while the narrow width takes up little space on a bedside table or desk. You could shorten the same form for a ring dish or widen it slightly into a small catch-all tray. The visible coil lines add surface interest that shows through the glaze so the piece still reads as finished even with simple construction. This idea stands out on Pinterest because the boat silhouette is easy to recognize yet quick to adapt into other narrow holders.
Coiled Clay Essential Oil Burner

A coil built essential oil burner starts with stacked clay coils that form both the base and the upper dish in one piece. The lower section leaves an open space sized for a standard tea light, while the top widens into a shallow, scalloped bowl that holds essential oils or wax melts. The green glaze sits unevenly across the coils, letting the handmade ridges remain visible and giving the form a simple, textured surface.
What makes this idea useful is the built-in function that combines candle support with an oil dish without needing extra parts. You can adjust coil thickness or height to fit different tea light sizes or make the top flatter for melts instead of liquids. This shape works especially well on bathroom counters or small shelves where people keep oils and towels. The same stacking method could be reworked into a basic candle holder by leaving off the top dish or into a small planter by widening the base.
Yarn Bowl with a Spiral Yarn Guide

A yarn bowl is a simple clay form with a wide opening and a notched or sculpted side detail that holds a ball of yarn in place while you work. The spiral cutout on the rim lets the strand pull through steadily without rolling across the floor or getting tangled. Horizontal ridges around the outside add grip for handling, and a speckled glaze in warm neutrals keeps the surface practical for everyday use. This project fits the holder category and works especially well when built with coils thick enough to support the carved opening.
What makes this idea useful is how the functional detail turns a basic bowl into a tool that actually solves a problem during knitting or crochet sessions. You could simplify the spiral into a basic U-shaped notch on a smaller pinch-pot version or scale the whole form up for thicker yarns or multiple balls. In a living room or craft corner, the bowl keeps supplies contained without needing extra gadgets. For coil builders, the thick walls give you room to carve or attach the guide after the form firms up.
Coil-Built Planters with Painted Faces

Small coil planters take shape quickly when you roll out coils and stack them into a short cylinder form before smoothing the surface. The ribbed texture left from the coils adds grip and visual interest while the rounded shape holds small plants without tipping. After bisque firing you can paint simple faces with underglaze or add them with acrylics on finished work, keeping the eyes, mouth, and cheeks minimal so the form stays the focus.
What makes this idea useful is how the same cylinder works for multiple plant sizes and the face detail stays easy to change with each new batch. You can skip the drainage hole to turn the shape into a pencil cup or small catch-all, or vary the glaze colors to match different rooms. The small scale also means you can make several in one session and group them together on a shelf or windowsill.
Cloud-Shaped Ring Dish

A small cloud-shaped ring dish makes a straightforward coil project for beginners. Form a flat oval base first, then build up the walls with short coils that curve outward to create the scalloped edge. The blue and white striped glaze with scattered dots gives the surface pattern without requiring carving or extra tools.
What makes this idea useful is how the compact size fits neatly on a nightstand or desk to hold rings and small items. You can swap the glaze colors or straighten the rim coils if the curves prove tricky on your first try. The same shape works just as well as a soap rest or a tiny tray for keys by the door.
Coiled Sponge Holder for Kitchen Sink Use

A coiled ceramic sponge holder built from stacked horizontal coils creates an open cylinder with natural gaps that let water drain straight through. The wavy rim and light speckled glaze keep the form simple while giving it enough texture to stay stable on a wet sink surface. This kitchen item uses the coil method to solve a common problem of soggy sponges without needing lids or extra parts.
The shape does a lot of the work here because the open sides prevent water from collecting at the bottom. You could adapt the same coiling pattern to make a shorter version for a scrub brush or stretch it taller for a small utensil cup. In a kitchen this piece sits right at the edge of the sink so the sponge stays within reach but out of the way. The speckled finish also makes it easy to match with other everyday dishes or pottery you already use.
Small Coil-Built Cream Pitcher

A small cream pitcher built from coils gives you a compact kitchen piece that pours easily and holds just enough for morning coffee or tea. Form the body, add a simple spout, and attach a handle while the clay stays workable. Apply a light base glaze then brush on a band of blue so it drips downward during firing for a relaxed striped effect.
What makes this idea useful is how little clay and time it requires while still producing something you can actually use at the table. Change the glaze colors or band width to match your dishes or try a taller version for syrup. The same shape works as a small vase for single stems or a holder for kitchen tools. Its modest size makes it a quick win that still looks intentional on a shelf or in photos.
Frequently Asked Questions
What type of clay works best for beginners starting with coil pottery projects? Start with a low-fire earthenware clay or an air-dry clay if you lack access to a kiln. These options stay workable for longer periods and allow you to practice coiling without rushing. Keep the clay covered with a damp cloth between sessions to maintain the right consistency for rolling even coils.
How do I prevent cracks from forming where the coils meet? Score the edges of each coil lightly with a tool and apply slip before pressing them together firmly. Build your pot in stages rather than all at once so lower sections can firm up slightly. This approach supports the structure and helps your projects hold together as you gain speed and confidence.
What simple tools do I need beyond my hands to shape these coil ideas successfully? Gather a basic rib tool for smoothing, a needle tool for scoring, and a wooden board for working. A spray bottle with water keeps the clay moist during assembly. These items help refine shapes quickly and turn basic coil stacks into polished forms without extra expense.
How long should I let my finished coil pots dry before any further steps? Allow pieces to dry slowly over several days in a shaded area away from direct heat or drafts. Cover them loosely with plastic at first and uncover gradually. This controlled process reduces warping and gives beginners time to inspect and gently adjust forms before they become too firm.
Which of the 19 ideas should absolute beginners try first to build skills fastest? Focus on simple cylinder shapes or small bowls that use fewer coils and basic stacking. These projects let you practice even rolling and joining repeatedly in short sessions. Once those feel steady move to slightly taller forms or add basic textures to expand your techniques.

Pottery Path is my cozy corner of the internet where I share clay ideas, pottery inspiration, and simple projects you can recreate at home. I love exploring everything from air dry clay to handbuilt pottery to cute minis that brighten your day. My goal is to make clay crafting feel easy, fun, and welcoming for anyone who wants to try it.
You will find beginner friendly tutorials, creative pottery painting ideas, and lots of warm inspiration for slow and happy crafting. If you enjoy hands on creativity, this space will feel like home.