I like using coil techniques for planters since they are simple to learn and work well for beginners.
My plants seem happier in the ones I have made this way so far.
I put together some ideas that rely on easy handbuilding methods without needing fancy tools.
These designs can be adjusted based on what you have on hand.
Most of them take just a few steps to complete.
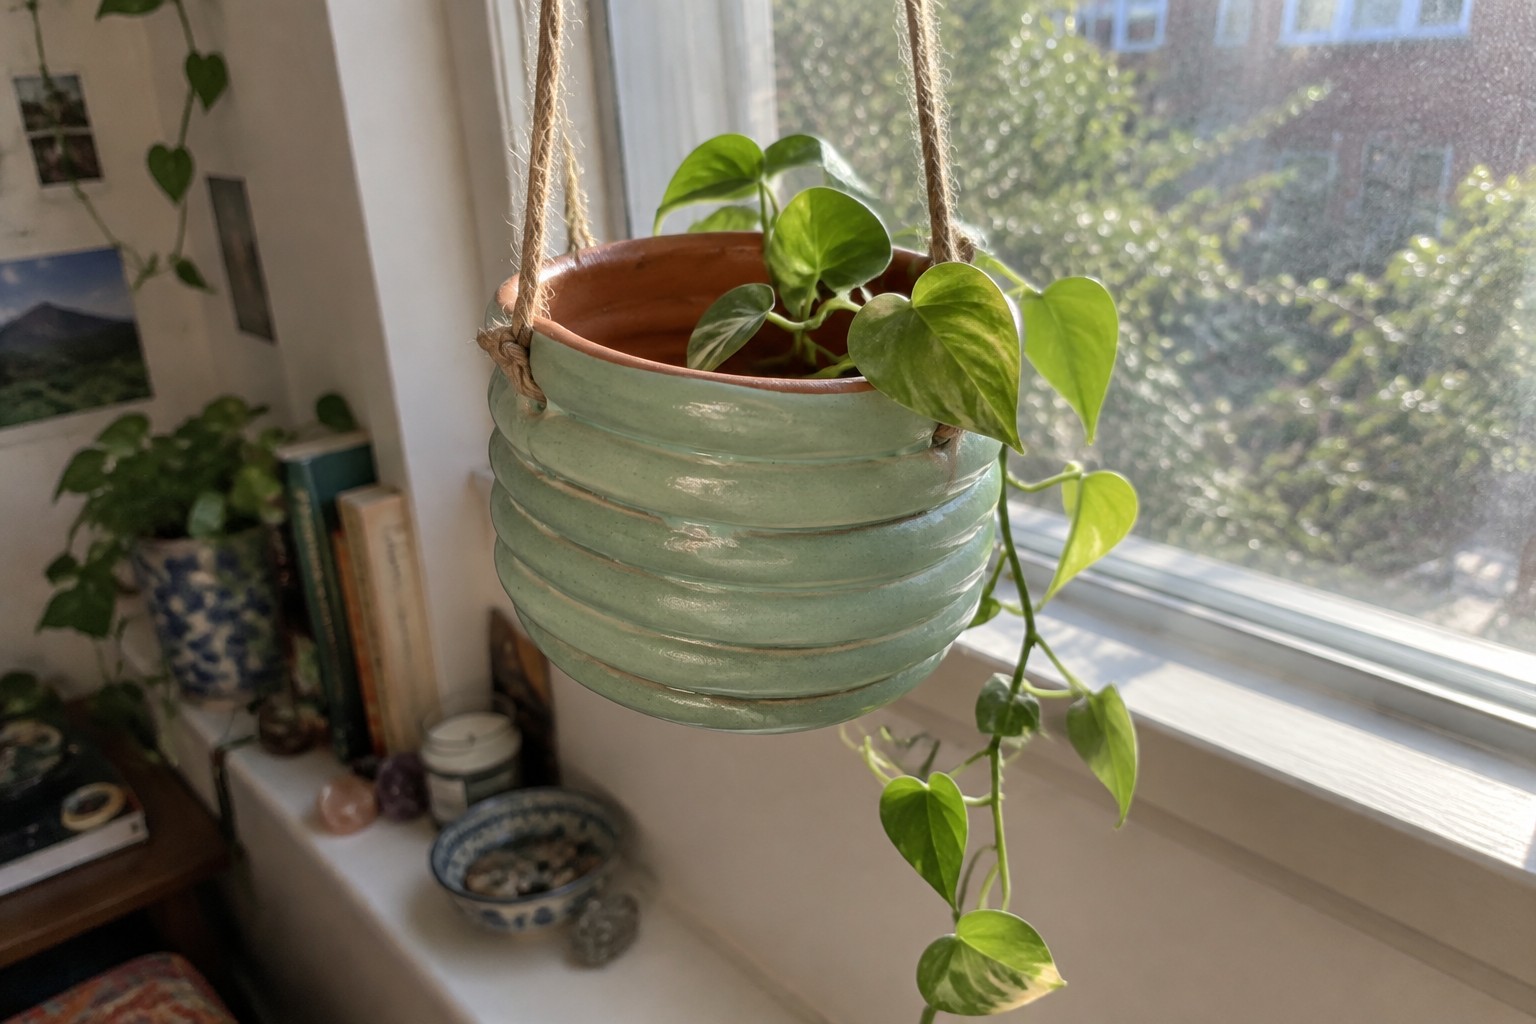
Rope-Hung Coil Planter with Horizontal Ridges

A hanging planter formed by coiling clay into stacked horizontal rings creates a wide, shallow bowl with clear ridges running around the outside. The light sage green glaze covers the coils evenly while leaving the rim and interior a warmer terracotta tone. Three holes near the top rim hold thick natural rope that ties into a simple hanging system. This method uses basic coiling to produce a sturdy suspended planter suited to trailing plants.
What makes this idea useful is how the visible coils add texture and strength without extra tools or attachments. The wide opening and rope setup work well for windows or bright corners where plants need light. You can adapt the same coiling pattern to different diameters or depths depending on the plant size. For a variation, change the glaze color or shorten the ropes to hang the planter lower.
Wall-Mounted Teardrop Planter Built from Coils
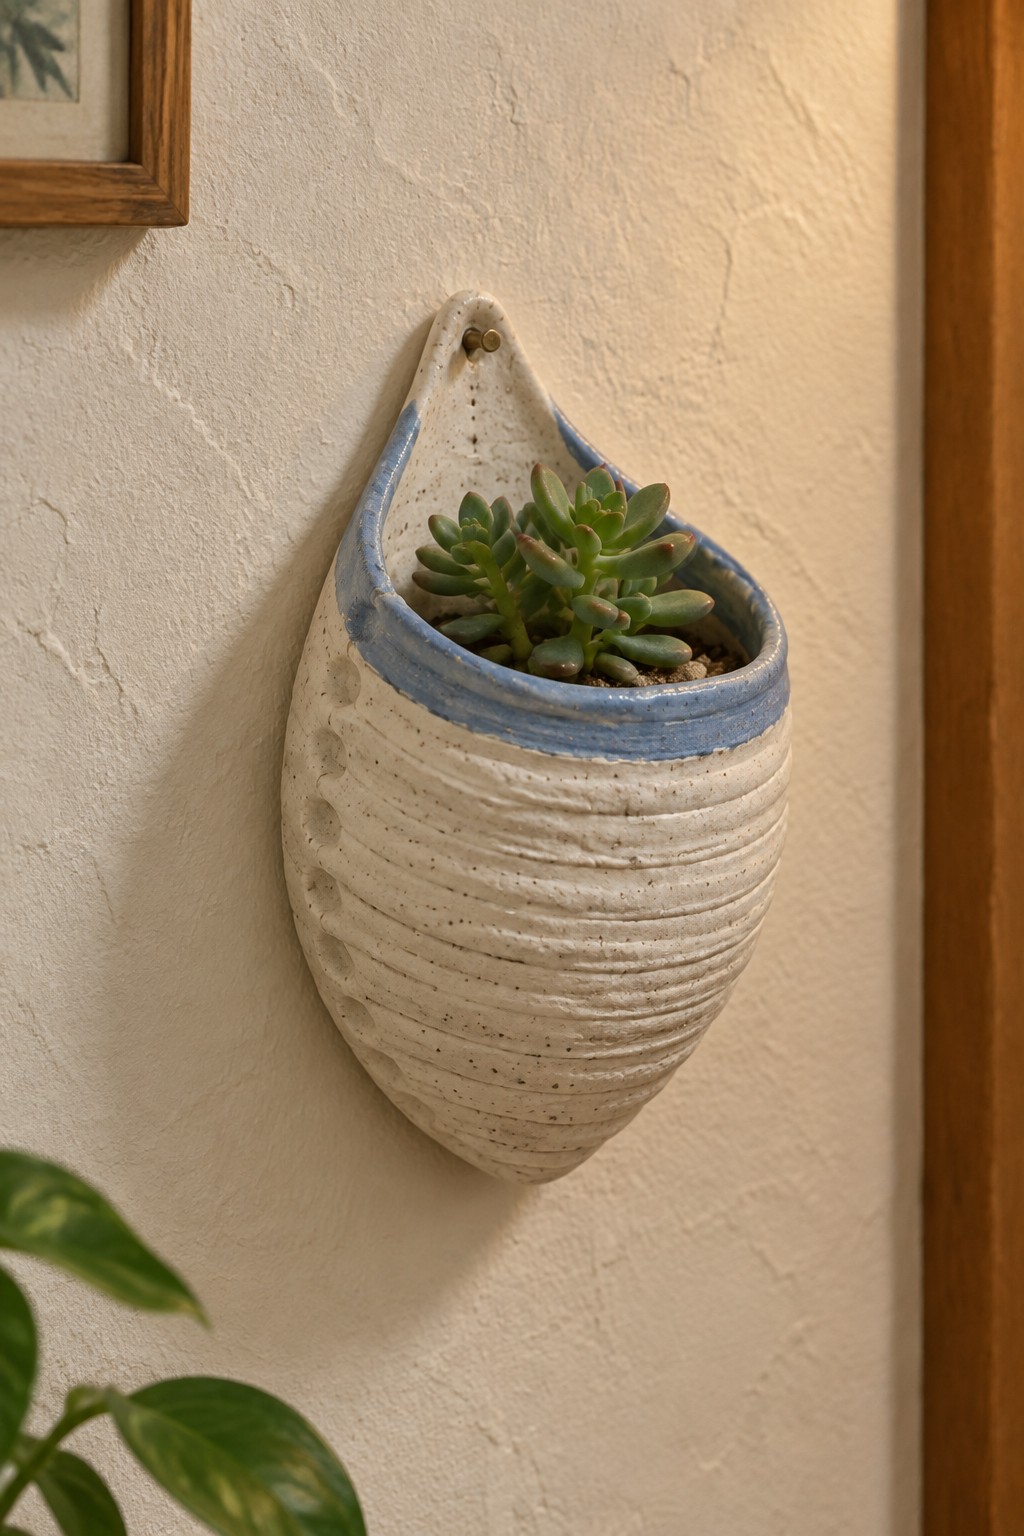
A wall-hanging planter shaped like a teardrop works well when built from stacked coils that create even horizontal ridges across the surface. The form tapers at the bottom while the wide upper section holds soil and a small plant, and a simple hole near the top allows it to hang flat. The blue rim gives a clean color break against the speckled white clay body without adding extra steps.
What makes this idea useful is how the coil texture does most of the visual work once the shape is formed. You could scale the same teardrop down for a row of matching planters or change the rim color to fit different rooms. The narrow base also keeps the piece from sticking out far from the wall, which helps in tight spaces like hallways or above a desk.
Coil-Built Shallow Bowl Planter with Horizontal Ridges

A low, wide bowl formed from stacked coils makes a practical planter for clusters of small succulents and trailing plants. The visible ridges from the coiling method create texture on the exterior while the soft green glaze with warmer undertones keeps the surface simple and plant-friendly. This shape sits flat on a table or shelf and gives roots room to spread sideways instead of downward.
What makes this idea useful is the open form that works for grouping different plant sizes without looking crowded. You could repeat the same ridge pattern on a taller oval version for a windowsill herb planter or shrink the diameter to make matching side dishes. The basic glazing leaves the coil lines as the main detail, which keeps the project quick to finish and easy to photograph for reference.
Striped Coil Planter for Small Cacti

A low, wide coil-built planter with horizontal yellow and white stripes makes a practical home for small cacti or succulents. The even bands of color give the piece a simple graphic quality that keeps attention on the plant rather than the pot itself. This shape works because the wide opening allows good airflow around the base of the cactus while the low profile fits easily on narrow ledges. The glossy glaze finish protects the clay and makes the stripes stand out cleanly against soil and foliage.
What makes this idea useful is how the striped pattern can be changed to any two colors that match a room without altering the coil construction. The compact size works well for grouping several pots together on a windowsill or shelf to create a small display. You could use the same coil method to make a taller version for larger plants or swap the stripes for a single solid color if you want something quicker. For a gift, this shape gives you an easy form that still looks finished once glazed.
Tall Coil Planter With Dripping Blue Glaze

A tall cylindrical planter built from coils works well for upright plants like snake plants or small trees. The lower half stays matte with a ridged texture from the coil construction, while the upper section gets a thick dark blue glaze that runs down in controlled drips. This creates a clear color break and adds visual weight at the top without needing extra decoration. The form stays simple enough to build by hand yet looks finished once the glaze settles.
What makes this idea useful is how the height gives plenty of root room for bigger plants without taking up much floor space. The drip glaze effect draws attention on a balcony or patio ledge, and the same shape scales down easily for smaller pots or wider versions for bushier plants. You could swap the blue for another strong color or leave more of the clay body exposed if you want a softer look. The contrast between the textured base and the glossy top also photographs clearly, which helps when sharing plant displays online.
Hedgehog Planter Built with Textured Spikes

A handbuilt clay planter shaped like a hedgehog gives you a compact holder for small succulents or cacti. The rounded body is formed first, then individual clay pieces are added to create the spiky texture across the back and sides. Painted details on the face keep the focus on the front while the spikes add surface interest without needing glaze coverage everywhere. This approach fits the animal planter category and works especially well when you want a small piece that still reads clearly as handmade pottery.
What makes this idea useful is how the added spikes create texture that stands out in photos for Pinterest without requiring advanced carving skills. You could simplify the same shape by using fewer spikes or rolling coils instead of cutting individual pieces. The small scale makes it easy to try on a shelf or desk where larger planters would not fit. For a gift, pair it with a common succulent and change the face colors to match the recipient’s space.
Face Planter Built from Coils
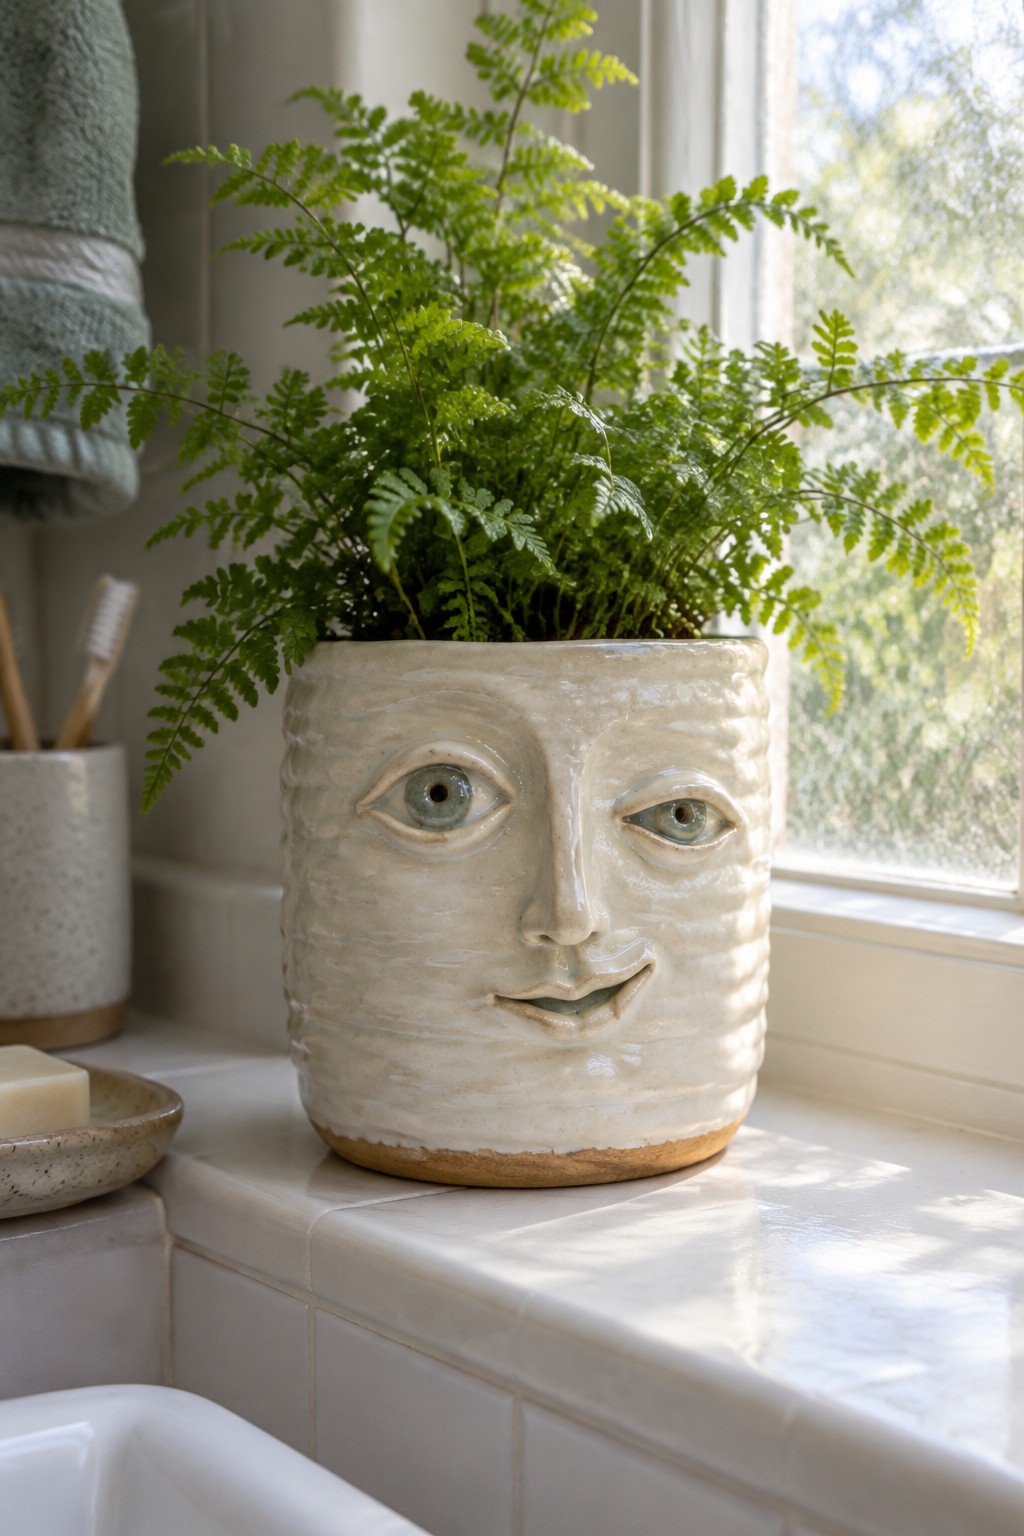
A coil-built planter with a sculpted face turns a simple cylinder into both a plant holder and a focal point. The form is constructed by stacking and smoothing coils, then the front is modeled with basic eye, nose, and mouth shapes before adding light ridges across the surface. An off-white matte glaze keeps the piece neutral while the slight color in the eyes adds a quiet detail. This approach works for any small to medium plant that does not need deep soil.
What makes this idea useful is that the face detail can be changed with just a few extra minutes of modeling time. You could repeat the same cylinder shape for a set of planters with different expressions or scale it down for a desk version. The ridges give texture that hides minor coil seams, so the build stays forgiving. In a bathroom or on a narrow ledge, this shape keeps the plant visible without taking up much space.
Ruffled Rim Coil Planter for Herbs

A handbuilt coil planter with a pinched and folded rim creates a wavy scalloped edge that stands out from basic cylinder shapes. The coils leave behind gentle horizontal ridges that catch the light under a glossy pink glaze, adding subtle texture without extra tools or stamps. This style works especially well for kitchen herbs because the wide opening gives plants room to spread while the sturdy walls support heavier soil and root growth.
The ruffled rim can be adjusted during building to make tighter or looser waves depending on the look you want. Try the same edge treatment on a shorter, wider bowl form for succulents or scale the whole piece down for a matching set of three smaller pots. A soft single-color glaze like this one keeps the focus on the form and lets the plant become the main visual element.
Stacked Coil Planter with Matching Saucer

A planter built from stacked clay coils forms a series of clear horizontal ridges around the body. The pot sits on a shallow matching saucer and carries a matte green glaze that leaves the coil lines visible. This method produces a sturdy container suited to medium houseplants while keeping the construction steps straightforward.
The shape does a lot of the work here because the ridges create surface interest without added tools or stamps. You can adjust coil thickness or total height to fit different plant sizes or shelf depths. Forming the saucer from the same clay batch keeps the set unified and catches excess water cleanly. The textured surface photographs well for sharing, which helps the finished piece stand out in plant styling posts.
Hanging Coil Planter with Visible Texture
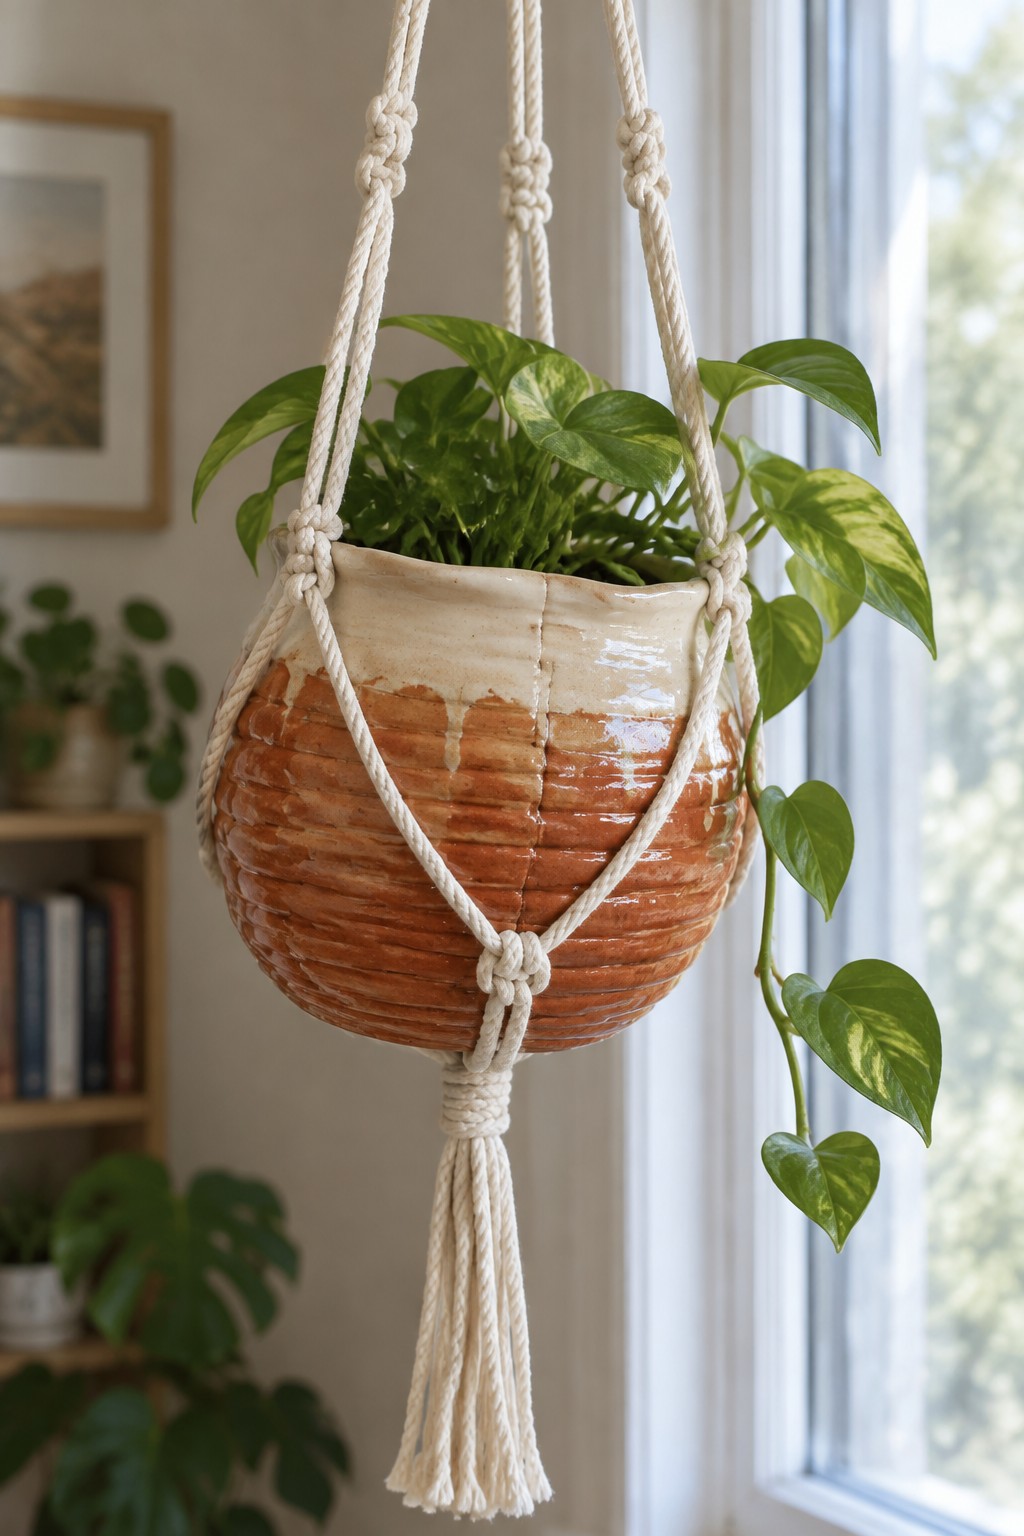
A coil-built ceramic planter works well here because the stacked horizontal coils create both structure and a textured surface that holds the hanging cords in place. The rounded form gives the piece a stable, balanced shape that suits trailing plants, while the two-tone glaze keeps the lower section matte and earthy against a glossy white rim. This approach fits the hanging planter category and uses simple handbuilding to produce a finished piece ready for cords or rope.
The shape does a lot of the work here since the wide middle and tapered base let the macrame sit securely without slipping. You can adapt the same coil method to make a shorter version for a windowsill or switch to a single glaze color if you want less contrast. This idea stands out for plant styling because it combines the pottery with fiber hanging elements in one complete object, and the visible coils give it enough detail to photograph clearly for sharing.
Stacked Coil Planters with Mixed Textures
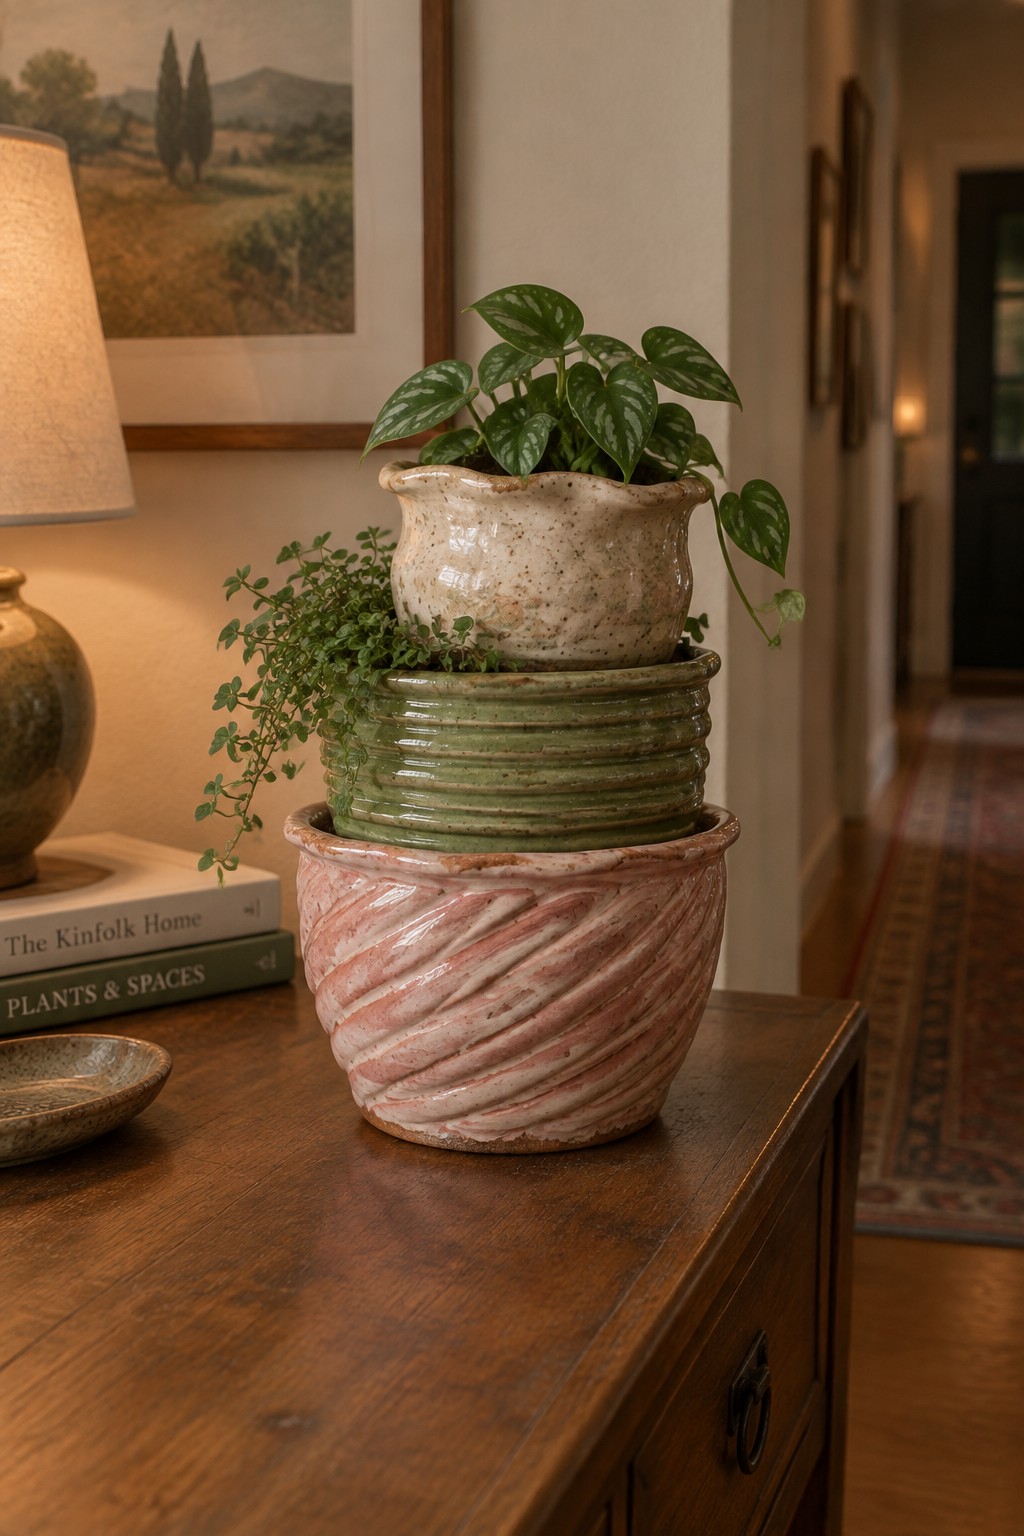
Coil-built pots can be made in separate sections and stacked to form a tiered planter that holds plants at different levels. The bottom section uses a wide spiral texture under a pink glaze, the middle ring shows tight horizontal coils in green, and the top pot has a speckled surface with an uneven rim. This setup turns several smaller handbuilt forms into one vertical display piece that fits the coil technique well.
What makes this idea useful is how it lets you work in smaller batches rather than one large form. The shape does a lot of the work here by creating height and separation for different plants without extra hardware. You could adapt it by changing the glaze colors to match a room or by using only two sections for a simpler version. In a living space, this kind of stack works well on a console or shelf where floor space is limited.
Sculpted Cat Face Wall Planter
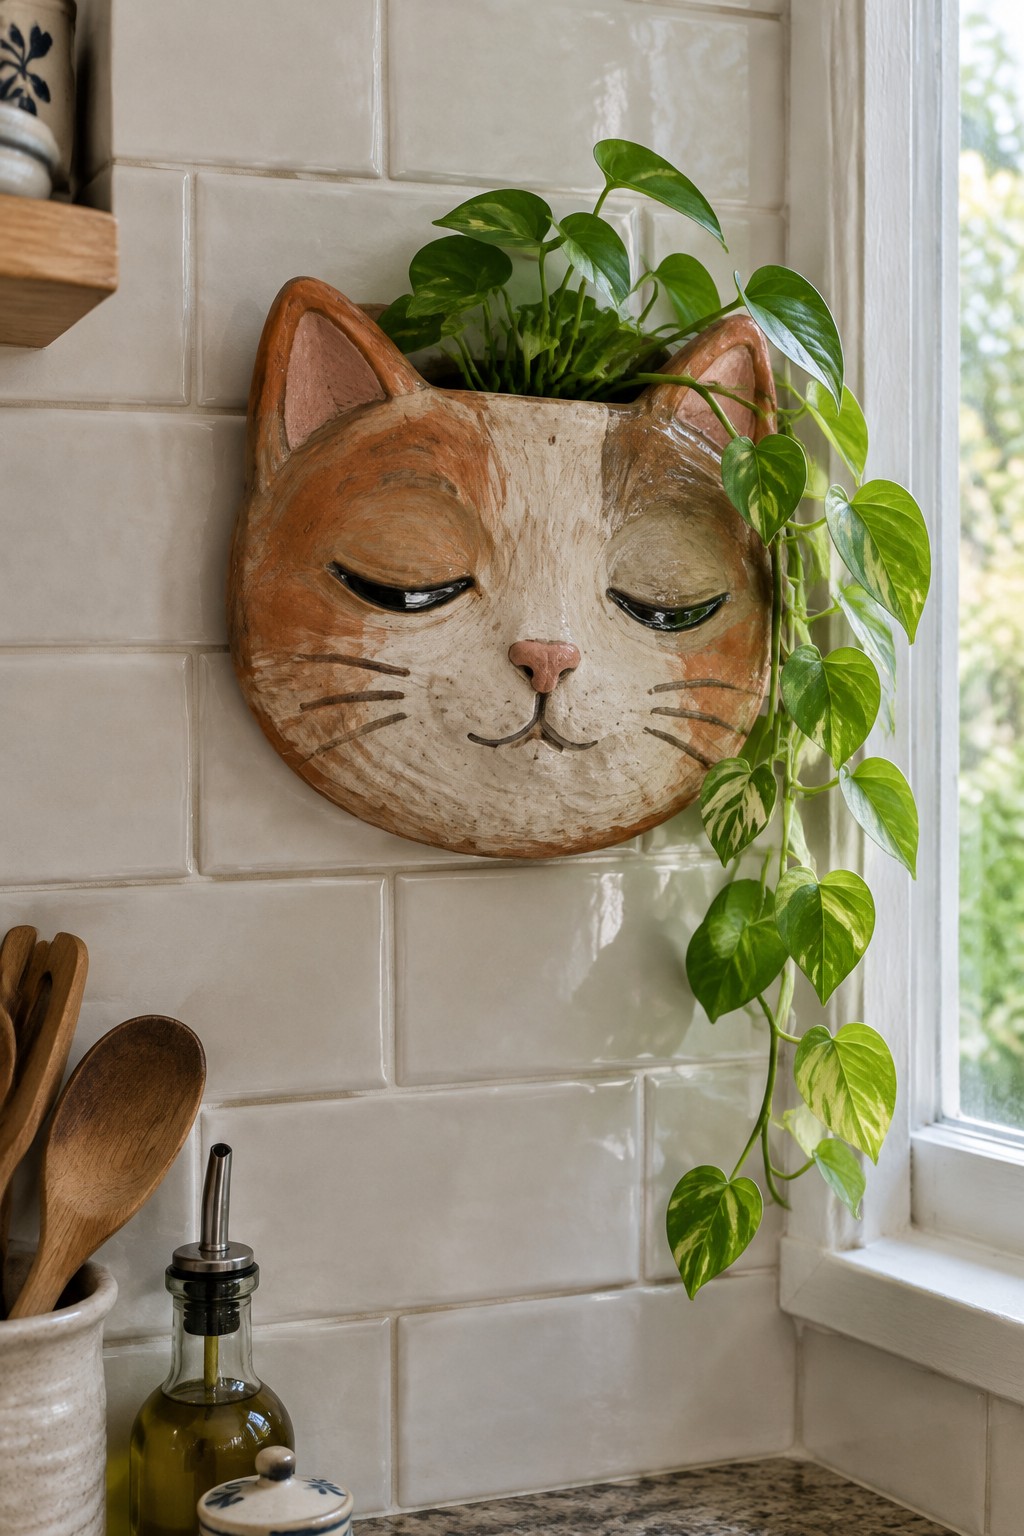
A handbuilt ceramic planter shaped like a cat face offers a simple way to add a wall-mounted plant holder without needing a full pot. The form uses basic sculpting to create ears, closed eyes, and whiskers, while the hollow top holds soil and lets vines trail outward. A two-tone painted finish keeps the surface light and helps the features read clearly from a distance. This turns a standard planter into a compact wall piece that works with trailing houseplants.
What makes this idea useful is the flat back that makes wall mounting straightforward and the curved front that adds shape without extra parts. You could rework the same face into other animals or skip some details to speed up the build. In a kitchen or near a window, the design keeps plants off counters while still showing off the vines. The painted accents also make it easy to match or contrast with existing tile colors.
Ridge-Textured Coil Planter on Small Feet

This coil-built planter uses stacked horizontal coils to form a rounded body with visible ridges that catch light across the surface. The form sits on three short feet finished with a darker blue at the base, while a slightly wavy rim softens the top edge. The blue glaze shifts in tone over the ridges, emphasizing the handbuilt construction. The compact size works well for a tabletop or shelf without taking up much space.
What makes this idea useful is how the ridges add texture while keeping the construction straightforward. The feet raise the pot just enough to protect wood surfaces from moisture. You could build the same shape taller for a floor plant or skip the feet and use it as a simple cachepot on a windowsill. Scaling the diameter down a couple inches turns it into a desk-sized version for smaller plants.
Coil Planter with Pressed Leaf Texture
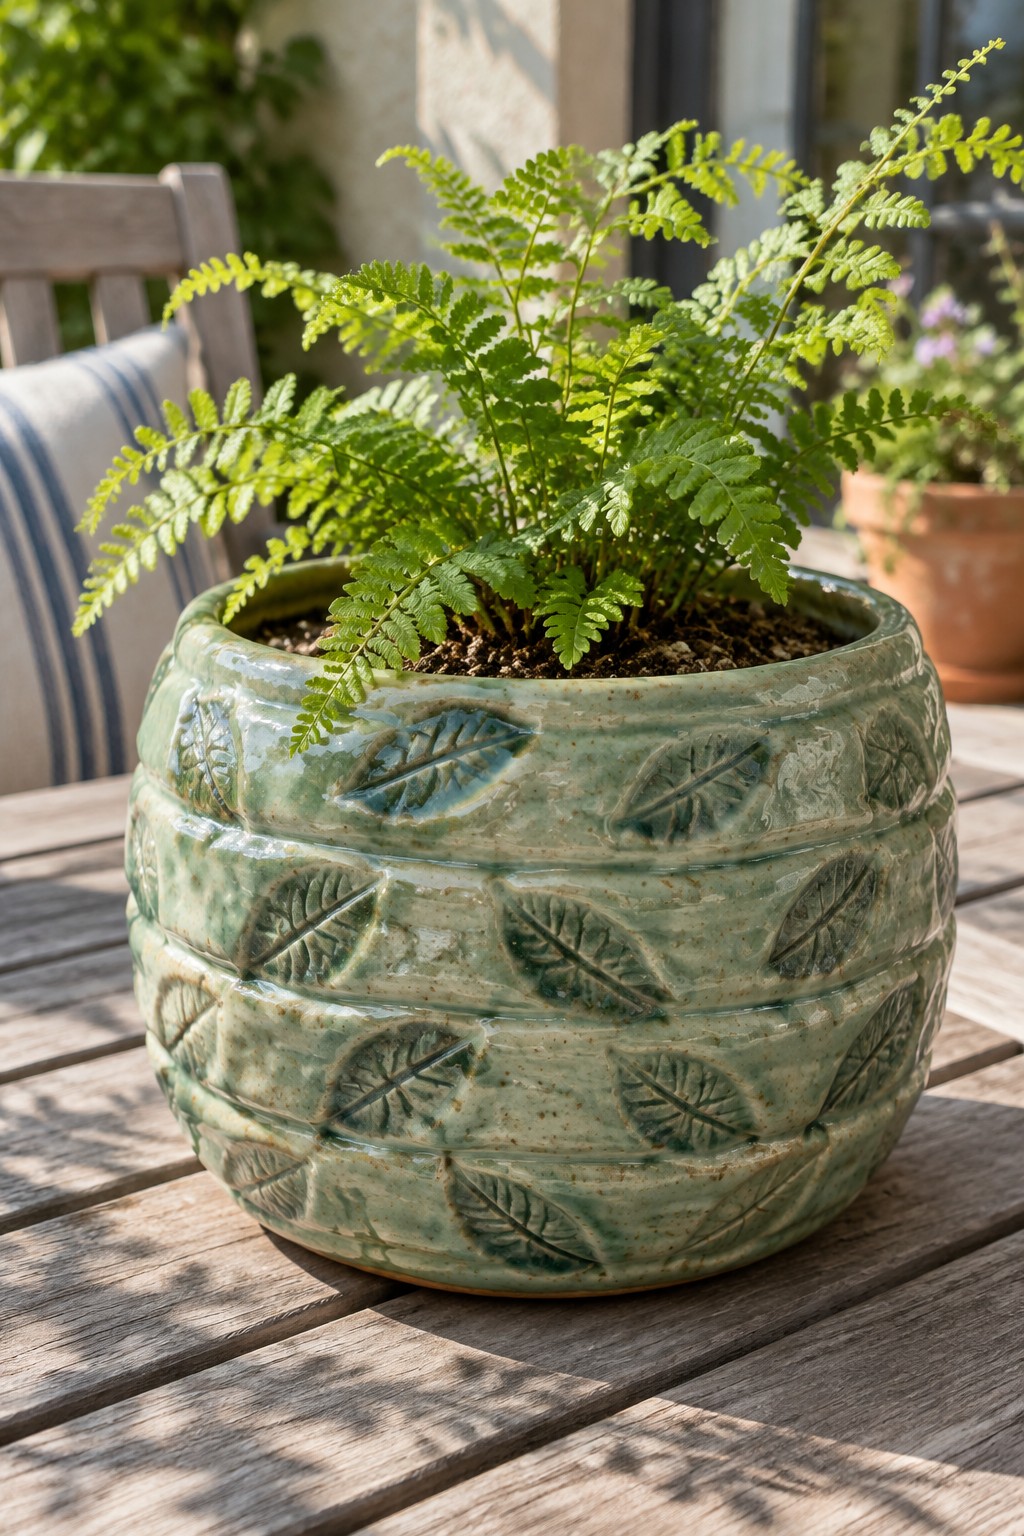
A round planter built from stacked coils creates a sturdy container that suits medium-sized houseplants or patio ferns. The maker pressed real leaves into the clay between each coil to leave clear vein patterns, then applied a mottled green glaze that settles into the recessed areas. This keeps the construction straightforward while turning a basic handbuilding step into the main decorative feature.
What makes this idea useful is that the leaf impressions require no carving skill, just leaves gathered from outside. The rounded profile works on a table or shelf without tipping, and the same coil method can be adjusted for taller or narrower planters by changing coil count and width. You could swap in different leaf shapes or leave some coils plain for a simpler look on the next version.
Coiled Planter with Marbled Swirls

A coil-built planter formed from stacked rings of clay creates a rounded, slightly tapered shape that holds soil and plants securely. The marbled pattern comes from blending terracotta and lighter clay across the coils, producing a flowing surface that highlights the handbuilt construction. This method turns a straightforward handbuilding technique into a finished planter with visible texture and color variation.
The shape does a lot of the work here by giving the planter a stable base that works for medium-sized plants. You could adapt the marbled effect by wedging two different clays together before forming the coils, or change the ring sizes to create a taller or wider version. This style stands out for patio or entryway plant displays because the pattern reads clearly from a distance. For a gift, the same coil approach scales down easily for succulents or small herbs.
Coil-Built Planter with Sculpted Face Detail
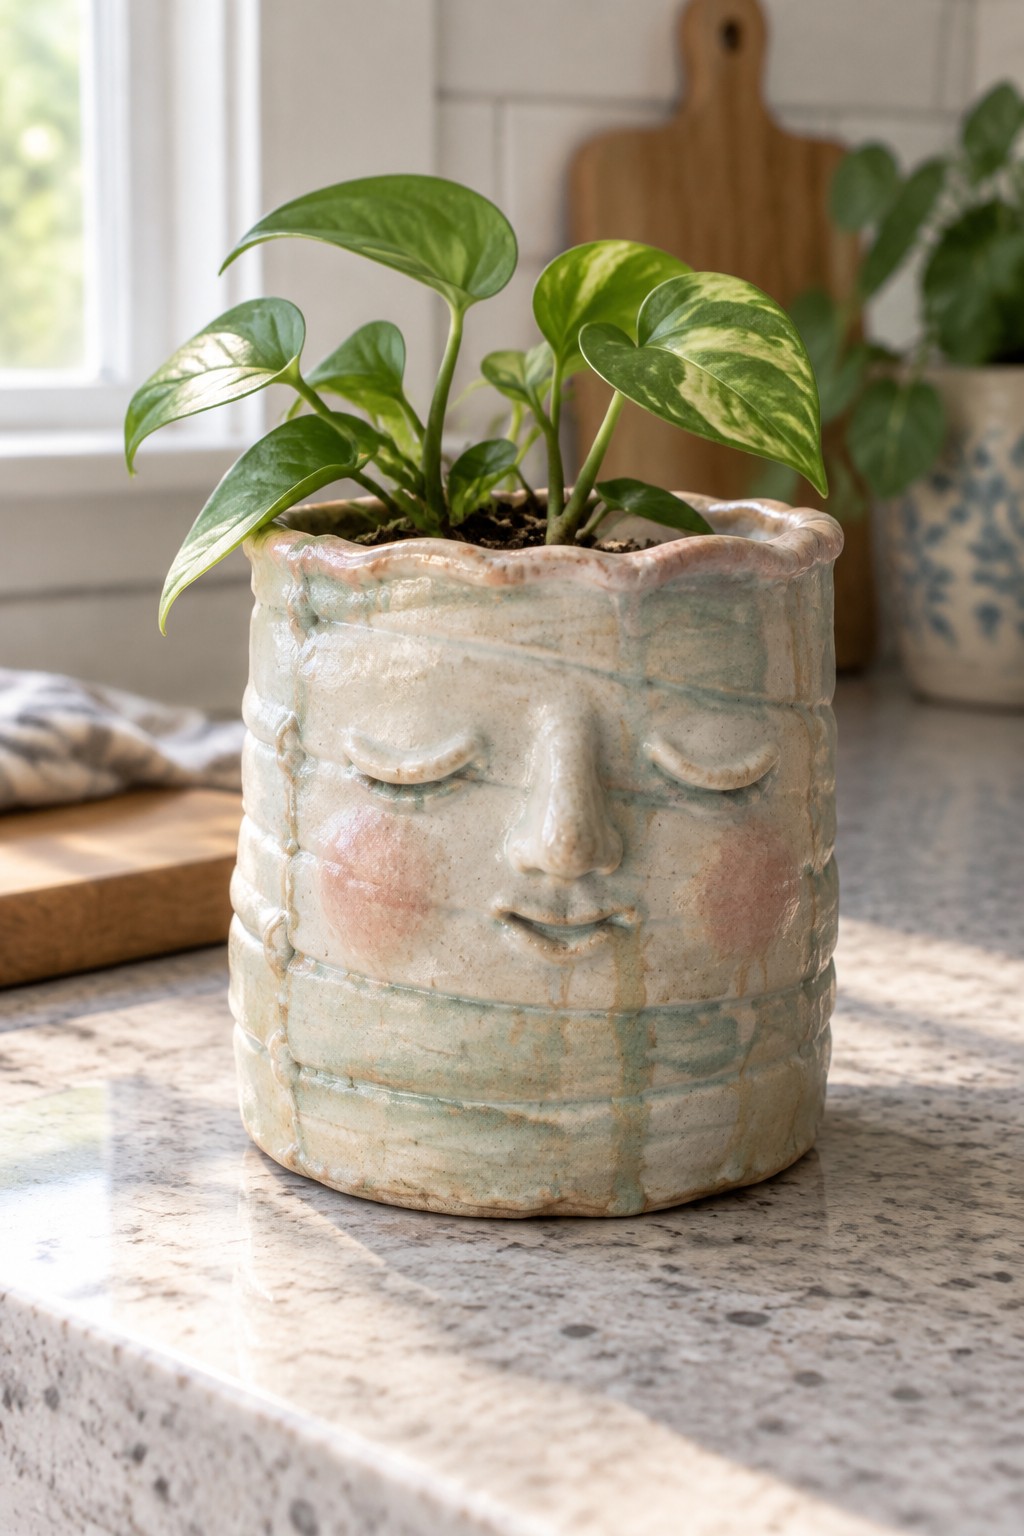
This planter is formed from stacked coils that create both the walls and the horizontal texture lines around a sculpted face. The face includes closed eyes, a nose, and a slight smile, with soft pink blush applied to the cheeks before glazing. The irregular rim and pale speckled glaze keep the focus on the form rather than bright color. It fits the category of a decorative planter that still holds a standard houseplant.
What makes this idea useful is how the face can be scaled up or down depending on the coil thickness you choose. You could keep the coil texture only around the face and smooth the rest of the pot for a faster build. The rounded shape fits easily on a windowsill or shelf without tipping, and the same face technique could be applied to a taller cylinder or a low bowl. For a gift, this style pairs well with a trailing plant that softens the strong facial features.
Scalloped Rim Planter Built from Coils

A low, wide planter formed from coils gives you a stable base that suits clusters of small succulents or trailing plants. The rim is pinched and shaped into repeated scallops that create a wavy edge while the coils are still soft. A single yellow speckled glaze covers the entire form and makes the coil lines and rim detail stand out. This keeps the project simple since the shape and rim do most of the visual work.
What makes this idea useful is that the scalloped rim can be made tighter or wider depending on the plants you plan to use. The same coil method works for a smaller version on a desk or a longer tray shape for a windowsill. Using one solid glaze color lets the rim stay the focus, so you can easily change the glaze or add a second color on the inside only. This shape also photographs clearly for sharing, which helps when you want to show how the rim was formed.
Two-Tone Coil Planter with Notched Rim

A coil-built planter with a rounded shape lets the construction method stay visible through horizontal ridges left from the coils. The lower section uses a contrasting terracotta clay band while the upper body stays light, creating a simple color division that emphasizes the form. Small repeated notches pressed into the rim finish the edge without requiring additional tools or attachments.
What makes this idea useful is how the color break draws attention to the coil lines rather than hiding them. You can scale the same rounded profile for larger or smaller plants by changing coil thickness and height. The terracotta band idea works just as well on a straight-sided cylinder or a low bowl if you want to repeat the technique across a set. The notched rim detail stays quick to add and helps the piece read as complete even when left unglazed.
Coiled Teardrop Hanging Planter
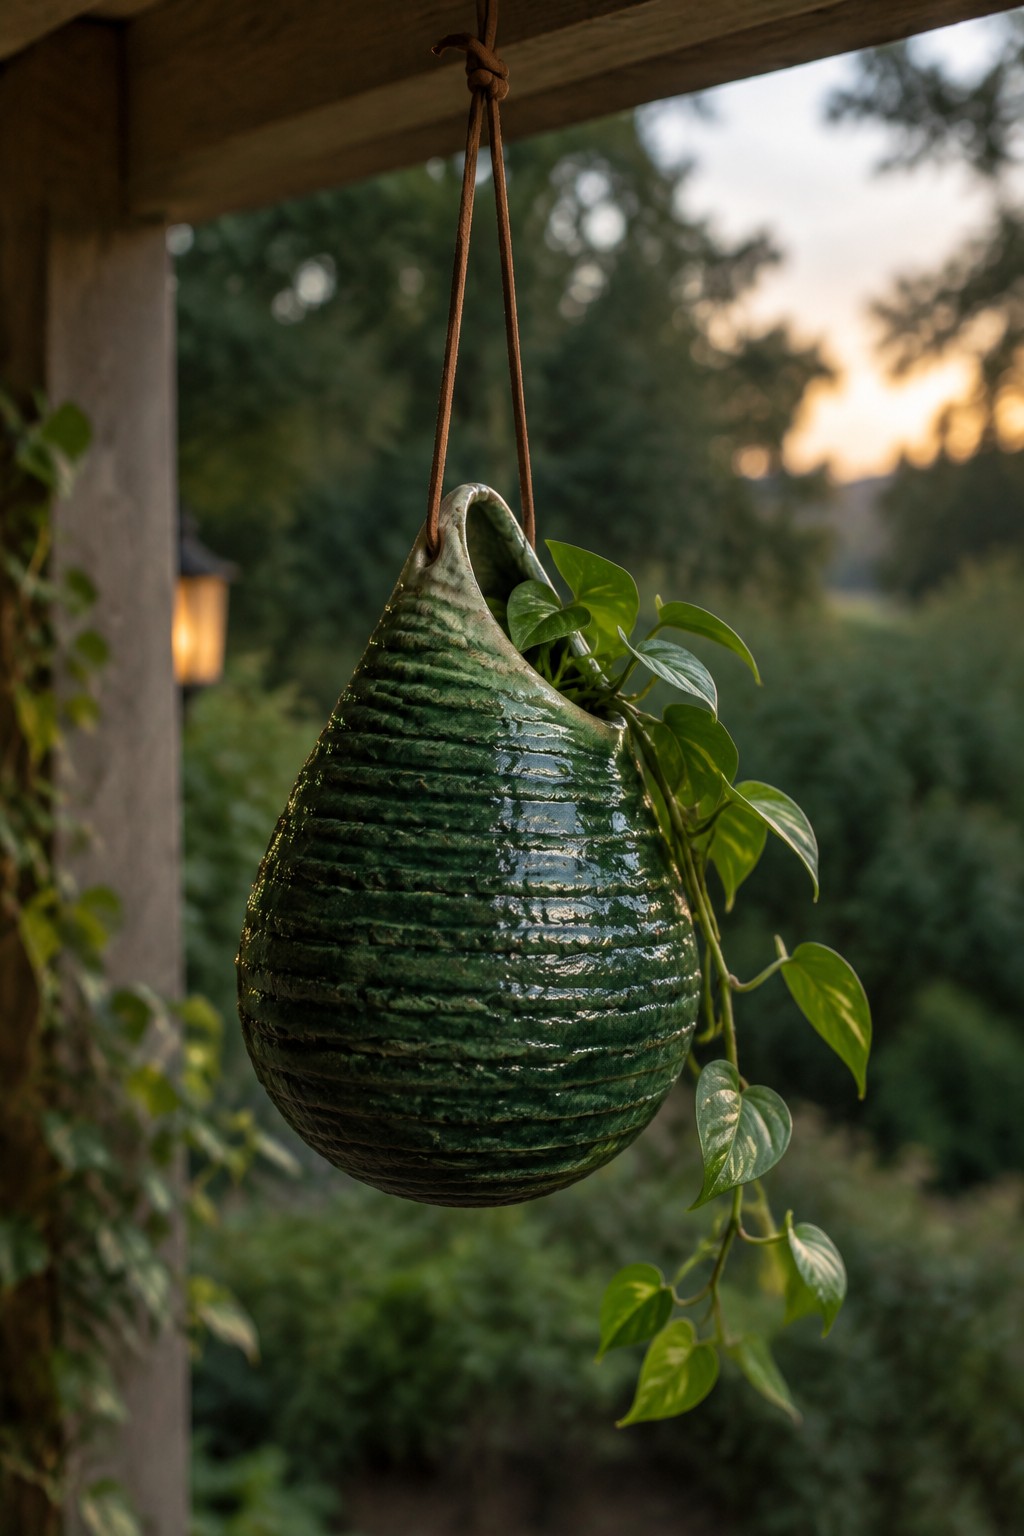
A coiled hanging planter built in a tapered teardrop shape creates a simple vertical form that works well for trailing plants. The horizontal ridges left from the coil construction add texture across the surface, and a glossy green glaze highlights those lines while protecting the piece for outdoor use. The narrow neck at the top makes it easy to thread rope or cord through for hanging without extra hardware. This style fits the coil planter category because the stacked coils form both the walls and the visual pattern at the same time.
The tapered shape keeps the plant as the main focus while the ridges catch light and shadow from different angles. You could adapt the same coil build into a shorter, wider version for a tabletop planter or change the glaze to a matte earth tone for indoor shelves. What makes this idea useful is that the coil ridges give you texture without carving or stamping, so the piece looks finished after glazing alone. In a covered porch or patio, this shape hangs cleanly and leaves room for the plant to grow downward.
Coil Planter with Carved Diamond Bands

A coil-built planter uses stacked coils to form the walls, then the surface is carved with repeating diamond shapes in horizontal bands. The dark clay body keeps the carved lines sharp and visible while the slight texture from the coils adds depth without extra tools. This gives a structured, geometric look that suits a medium-sized plant pot meant for indoor display.
The shape works well on a nightstand or shelf because the height and width stay balanced next to books or lamps. You can change the diamond size or spacing to match different coil thicknesses, or stop the pattern partway up the pot for a simpler version. The same carving idea transfers easily to a taller vase or a low bowl if you want to reuse the technique on another project.
Hanging Ceramic Planters with Swirled Glaze Finishes
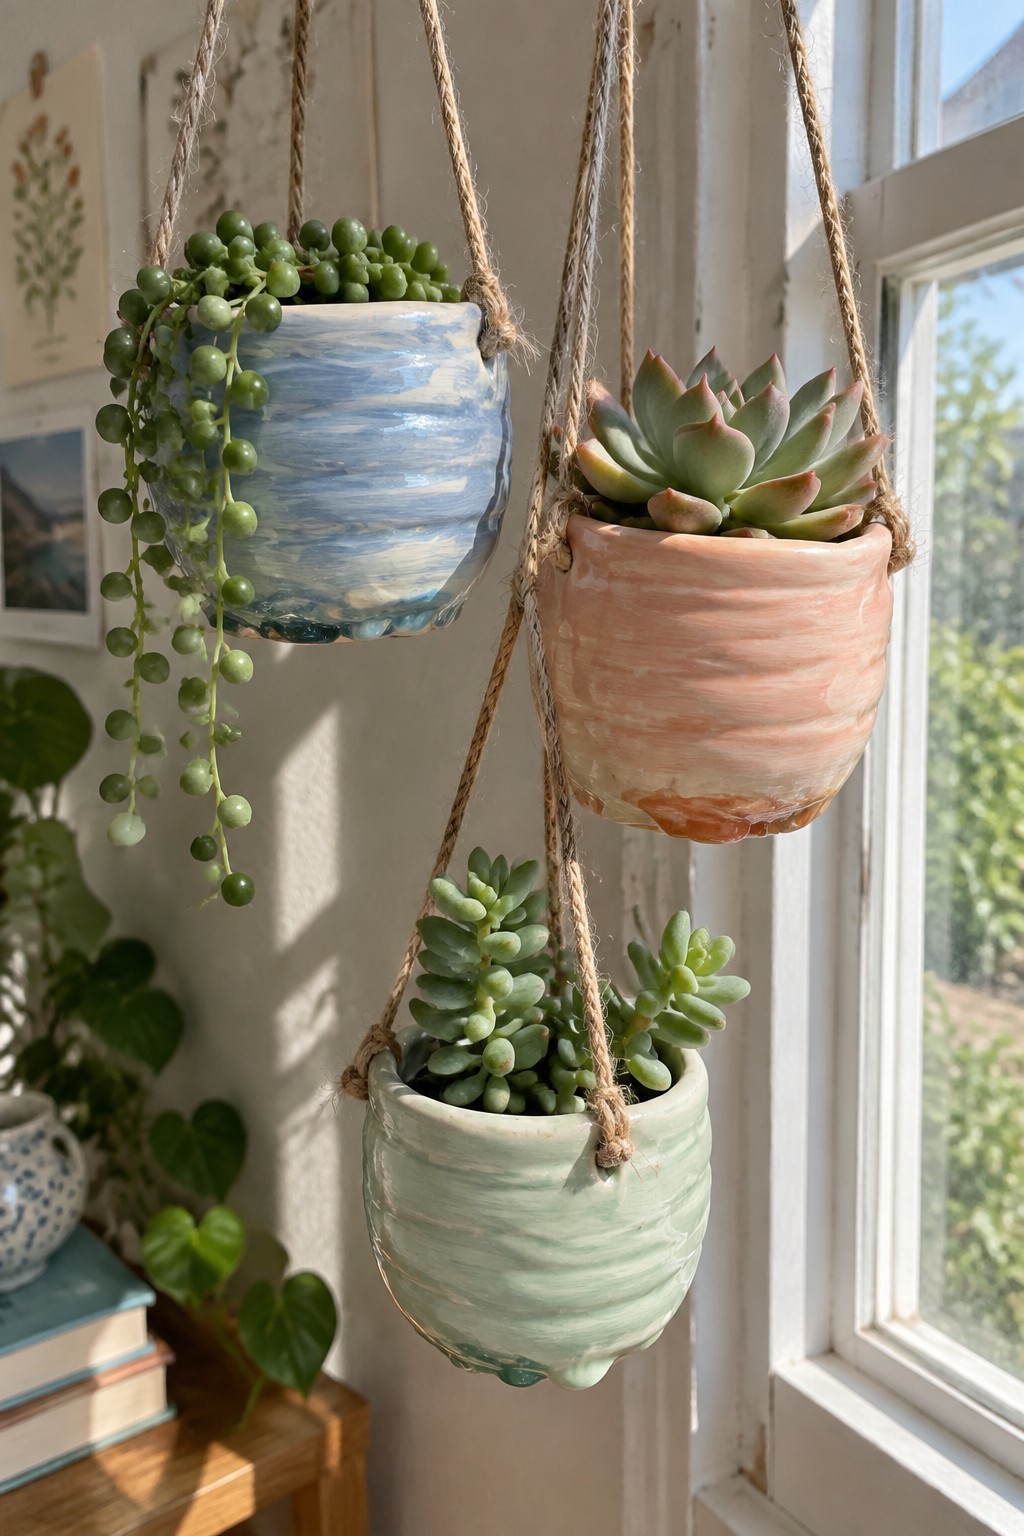
Handbuilt ceramic hanging planters work well for grouping plants at different heights near a window. The rounded, slightly pinched forms give each pot an organic shape that suits both trailing plants and compact succulents. Fluid swirled glazes in blue, coral, and mint add soft color variation across the surface while keeping the focus on the plants. Thick ropes looped through the rims make the pots easy to suspend and rearrange as needed.
What makes this idea useful is how the same rounded form can be made in several sizes to create visual rhythm without extra decoration. The hanging setup fits bright windows or corners where floor space is limited and lets you change the arrangement seasonally. You could rework the idea into a single larger planter or switch to matte glazes for a calmer look. The clean lines and plant contrast make this style easy to photograph for Pinterest.
Frequently Asked Questions
What type of clay works best for these coil planter projects? Air dry clay or low fire stoneware both work well for coil planters since they handle the stacking process without needing advanced equipment. Choose a clay with grog for better strength and less cracking as you build upward. Test small coils first to see how the material responds to your hand pressure.
How do I add drainage to my handmade coil planters? Leave a small opening at the base while shaping the bottom coils or use a tool to poke holes before the clay firms up. This prevents water buildup and root rot for most houseplants. Make sure the holes are spaced evenly and smoothed on the inside to avoid weak spots.
Can beginners really make these planters without prior experience? Yes the coil method is one of the most forgiving handbuilding approaches because it builds gradually and allows easy corrections. Start with simple cylindrical shapes from the 21 ideas and practice rolling even coils on a flat surface. Many of the designs use basic stacking so you can complete a starter piece in one session.
What are some tips for decorating the planters using simple techniques? Press textures like leaves or fabric into the coils while the clay is soft or add small coils as handles and patterns for visual interest. Keep designs minimal to match the easy techniques and avoid overloading thin walls. Once dry you can sand lightly or apply paint suitable for porous surfaces.
How should I dry and finish the planters to make them last? Dry them slowly under a loose cover to reduce cracking risks then sand any rough edges. For outdoor use apply a waterproof sealant after full drying or fire them if you have access to a kiln. Store finished pieces away from direct sun until completely hardened.

Pottery Path is my cozy corner of the internet where I share clay ideas, pottery inspiration, and simple projects you can recreate at home. I love exploring everything from air dry clay to handbuilt pottery to cute minis that brighten your day. My goal is to make clay crafting feel easy, fun, and welcoming for anyone who wants to try it.
You will find beginner friendly tutorials, creative pottery painting ideas, and lots of warm inspiration for slow and happy crafting. If you enjoy hands on creativity, this space will feel like home.