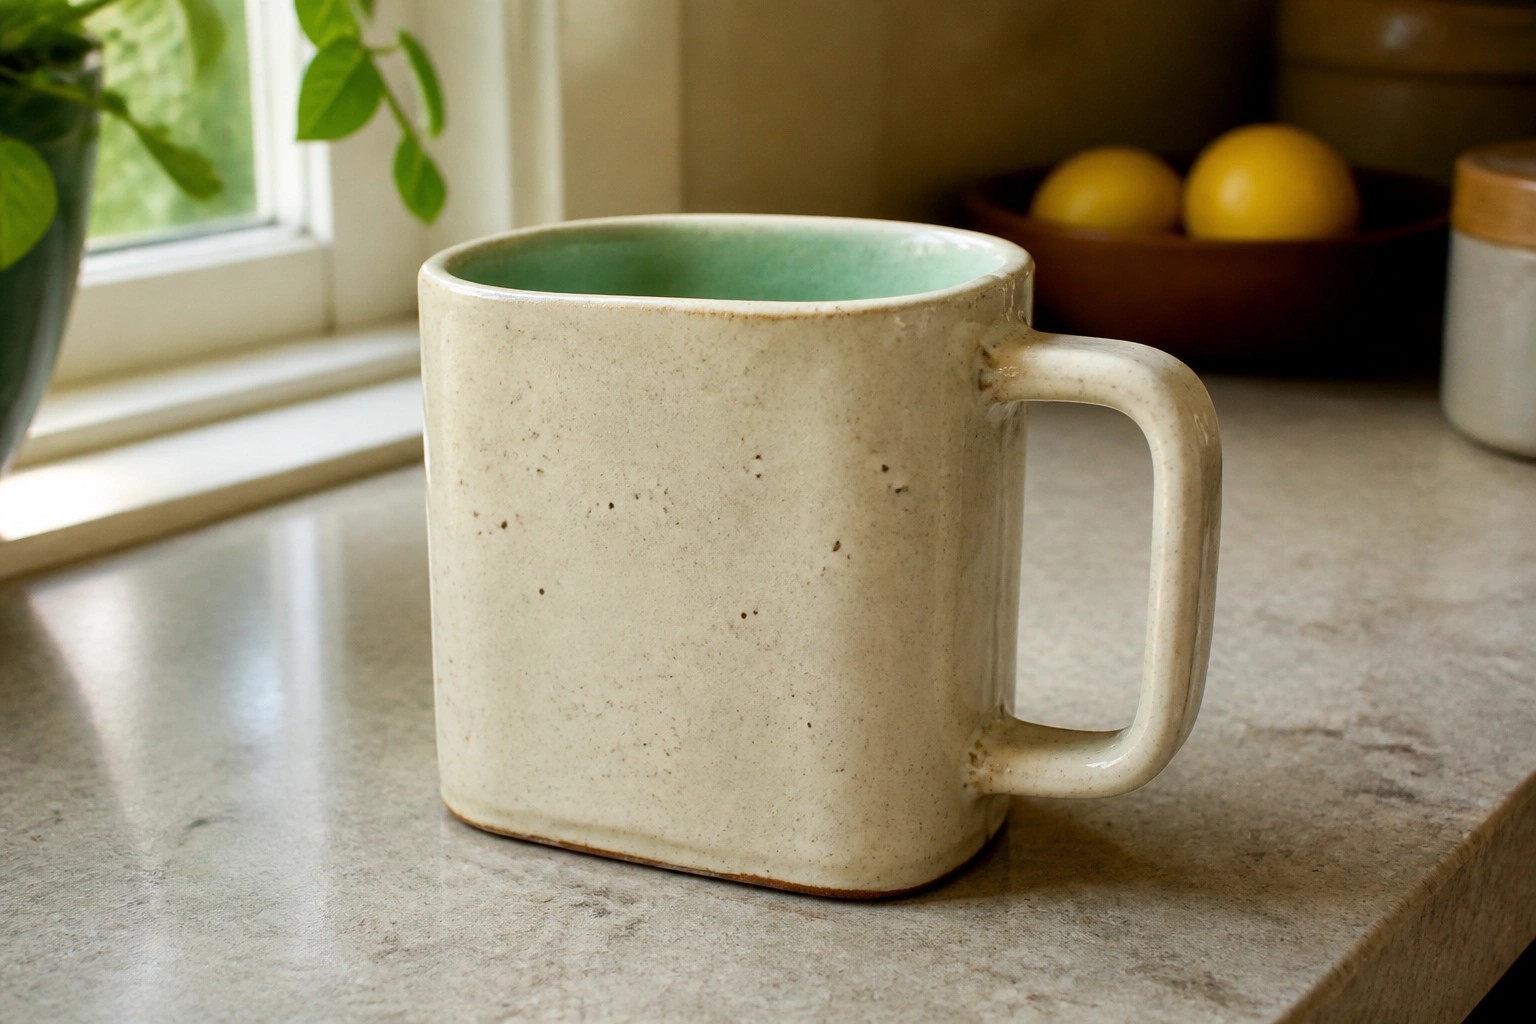
I started using templates for my slab pottery because it helped me get cleaner edges without a lot of extra trimming.
It also made putting pieces together a bit easier since everything lined up more evenly from the start.
Over the last few months I tested out different shapes and sizes to see what actually worked in practice.
Some ideas were simple enough to use on a regular weekday while others needed a little more time on the wheel.
I put together 23 of the ones that felt most reliable for everyday projects.
Slab-Built Mug with Straight Sides and Contrasting Glaze
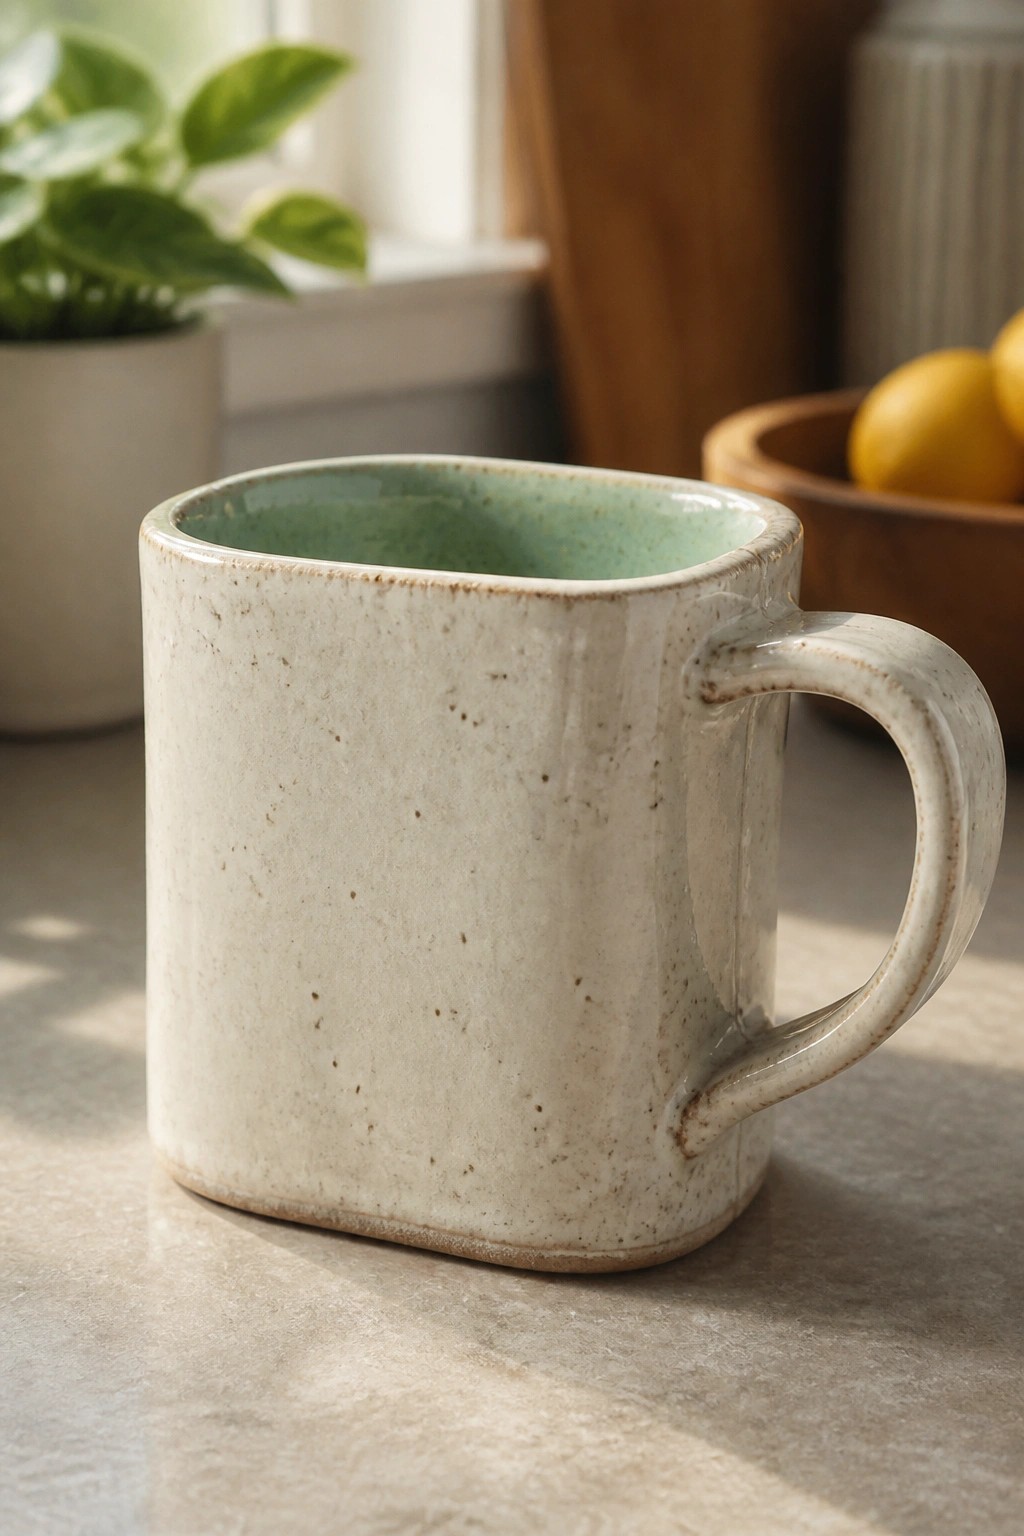
A slab mug built from templates produces clean vertical walls and a flat base that join into a slightly rectangular form with soft edges. The exterior uses a speckled matte glaze while the interior gets a smooth wash of turquoise that shows the depth of the walls. This approach keeps the shape simple enough to cut and assemble quickly yet still produces a functional drinking vessel.
What makes this idea useful is how the straight sides remove the need for wheel throwing or freehand shaping. You can easily change the height or width of the templates to make taller tumblers or shorter espresso cups from the same basic layout. The two-tone glaze choice also helps the piece read as intentional rather than plain, which works well when making a set for gifts or everyday kitchen use.
Slab Built Square Trinket Box with Polka Dots
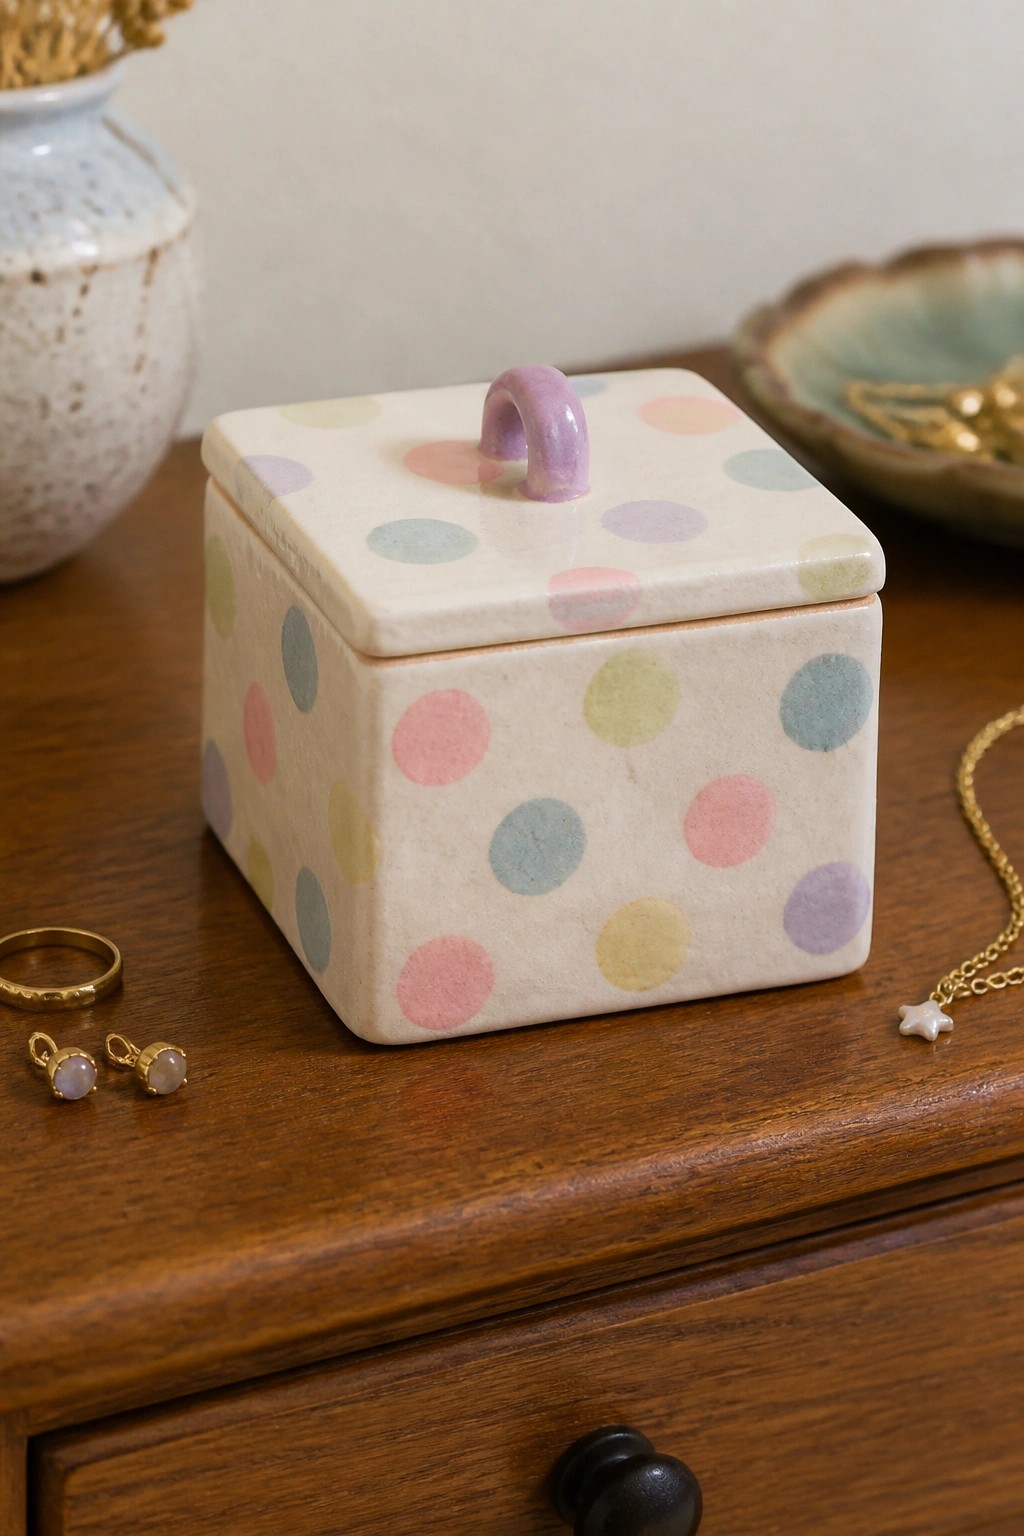
A square box built from clay slabs makes a compact holder for rings, earrings, or small keepsakes. Templates help cut even sides and a flat lid so the seams stay straight during assembly. Pastel dots in pink, blue, green, yellow, and purple cover the surface in a loose grid, while a simple arched handle on the lid adds function without extra bulk. The approach keeps the focus on clean form and quick surface decoration rather than complex carving.
What makes this idea useful is how the square shape fits into drawers or on shelves without wasting space. You can repeat the same templates to make a set of different sizes or change the dot colors to match a specific room. The painted pattern works on a plain background so it stays visible even if the box sits among other items. For a gift, shorten the height slightly and use it as a small catchall on a desk or vanity.
Leaf Relief Circle Cut from a Slab Template
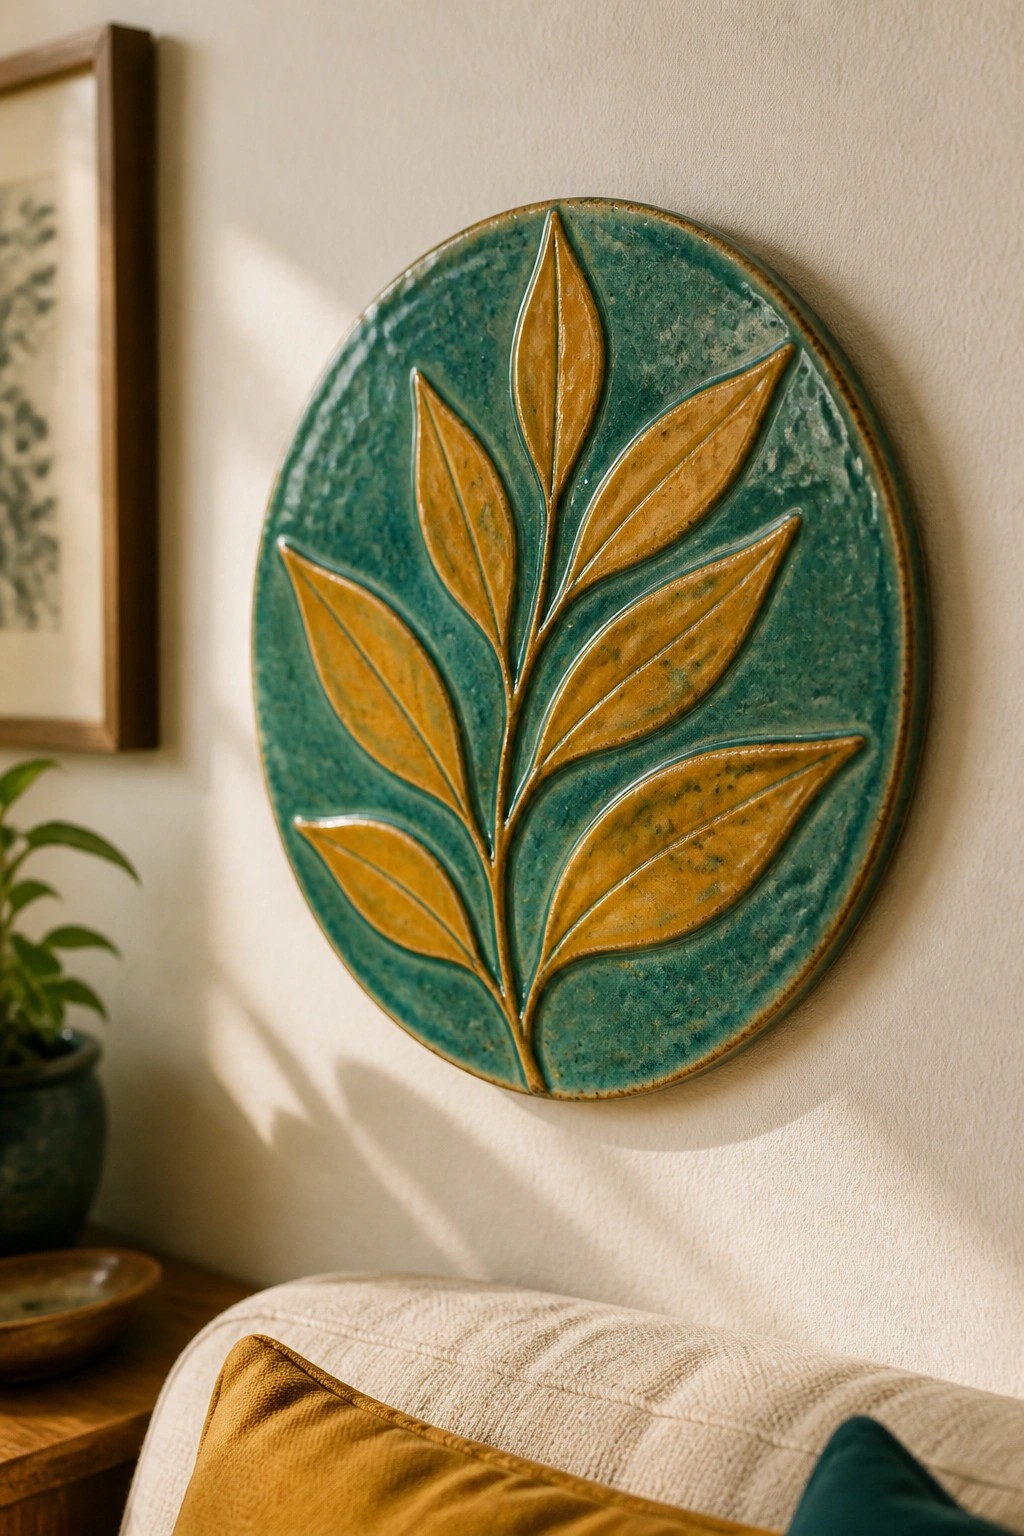
A circular plaque formed from a single slab gives you a flat, stable surface for building a raised leaf design. Cut the main circle with a template, then layer on leaf shapes cut from a thinner slab to create the branch and foliage in relief. The teal glaze on the background sets off the mustard leaves so the pattern reads clearly from a distance.
What makes this idea useful is how the round template keeps the shape consistent even if your handbuilding is a little uneven. You can swap the leaf motif for other simple cutouts like ferns or abstract lines and still use the same base size. Hang one in a hallway or group several together above a sofa for an easy wall arrangement. The same template approach works for smaller versions turned into trivets or larger ones used as trays.
Tomato Motif Rectangular Planter
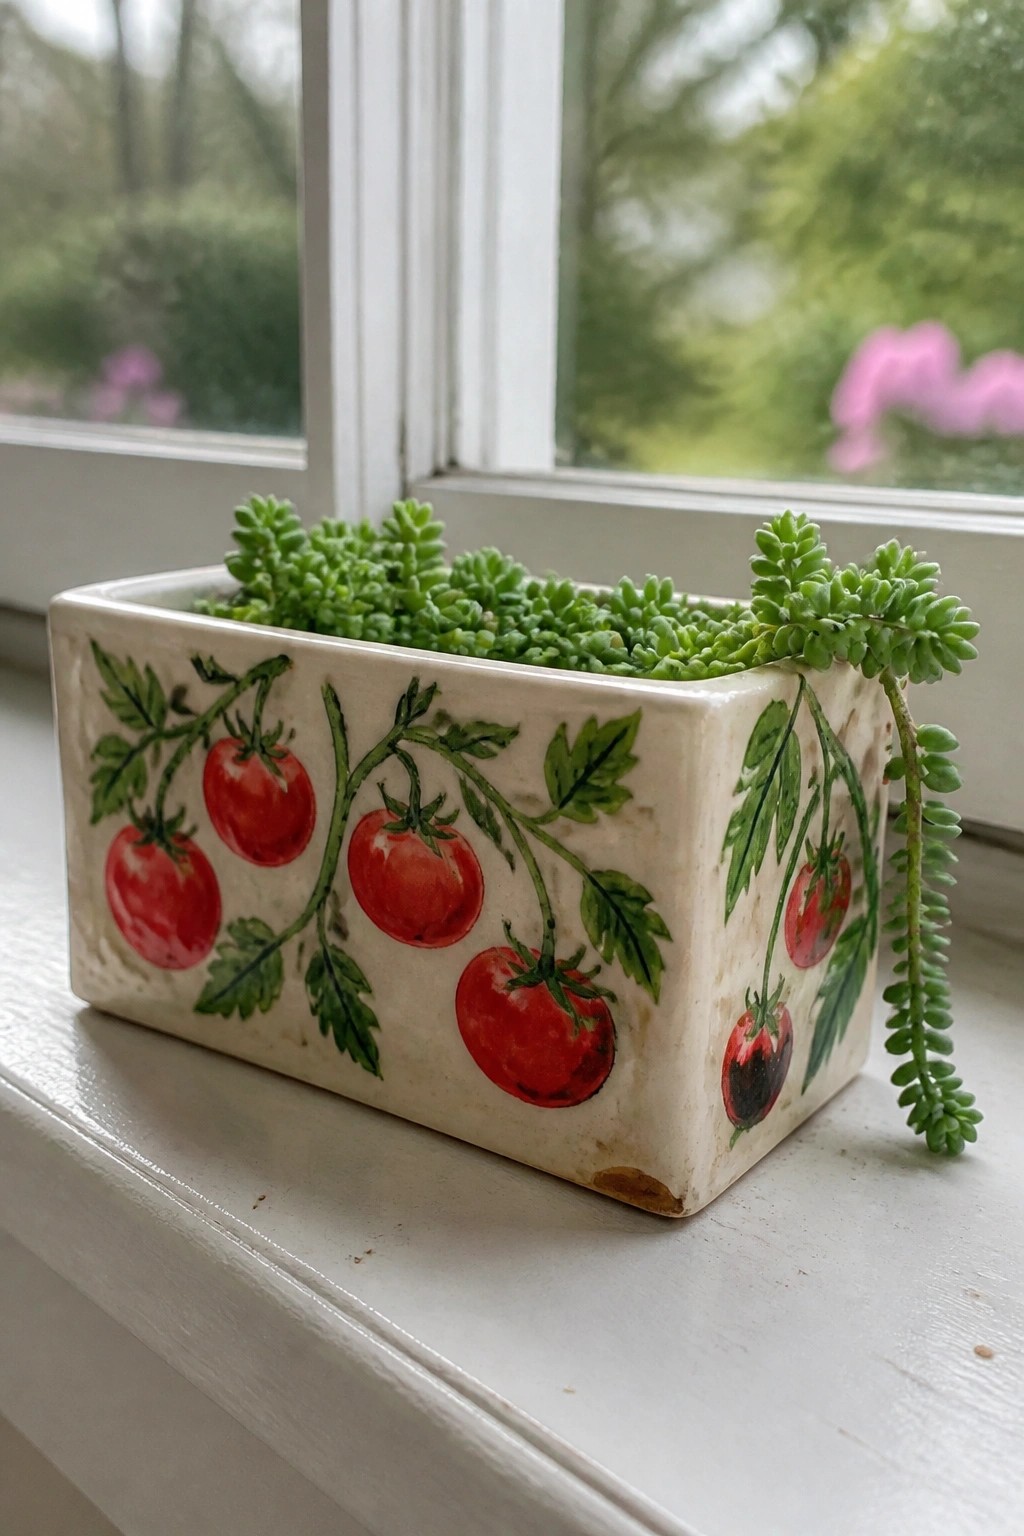
A rectangular slab planter gives you flat sides that are easy to decorate with painted tomato vines and leaves. The design uses simple red tomatoes on green stems to cover the surface without needing extra sculpting or texture. This keeps the project focused on clean slab construction and surface painting rather than complex forms.
What makes this idea useful is how the straight sides let you repeat the same motif on all four faces without distortion. You could change the vegetables to peppers or herbs using the same template and painting style. The shape also works on a narrow ledge or grouped with other small planters, and the template can be shortened into a tray or lengthened into a longer box for different plants.
Teardrop Vase Built from a Single Slab Template
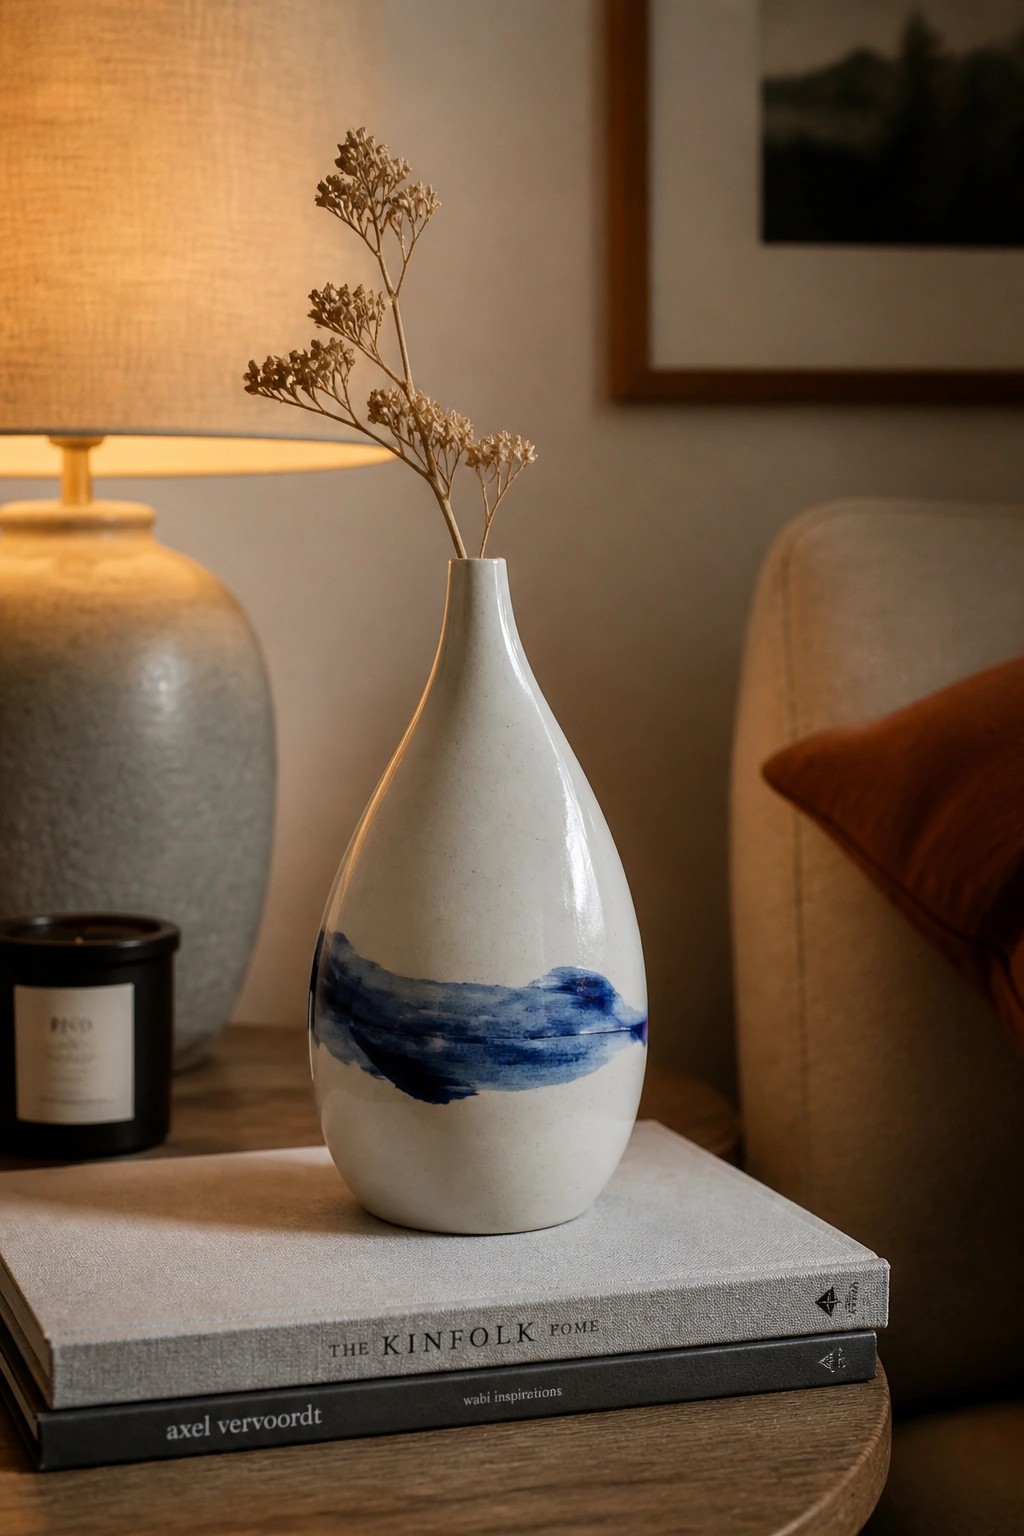
A teardrop-shaped vase cut from a clay slab template gives you a tall, narrow-neck form with a wide rounded base that stands steadily without extra support. The blue band is created by brushing slip or underglaze across the slab in a loose horizontal stroke before the sides are joined, so the color wraps cleanly around the finished piece. This keeps the surface smooth and the construction simple while the painted line adds contrast and breaks up the plain white clay.
What makes this idea useful is that one template produces consistent results if you want to make a set in different heights. The stripe can be widened, narrowed, or repeated in another color to change the look without altering the shape. A piece like this works especially well on a side table or shelf as a dried-flower holder, and the same template can be shortened into a small bud vase or lengthened into a taller version for bigger arrangements.
Leaf-Shaped Slab Spoon Rest
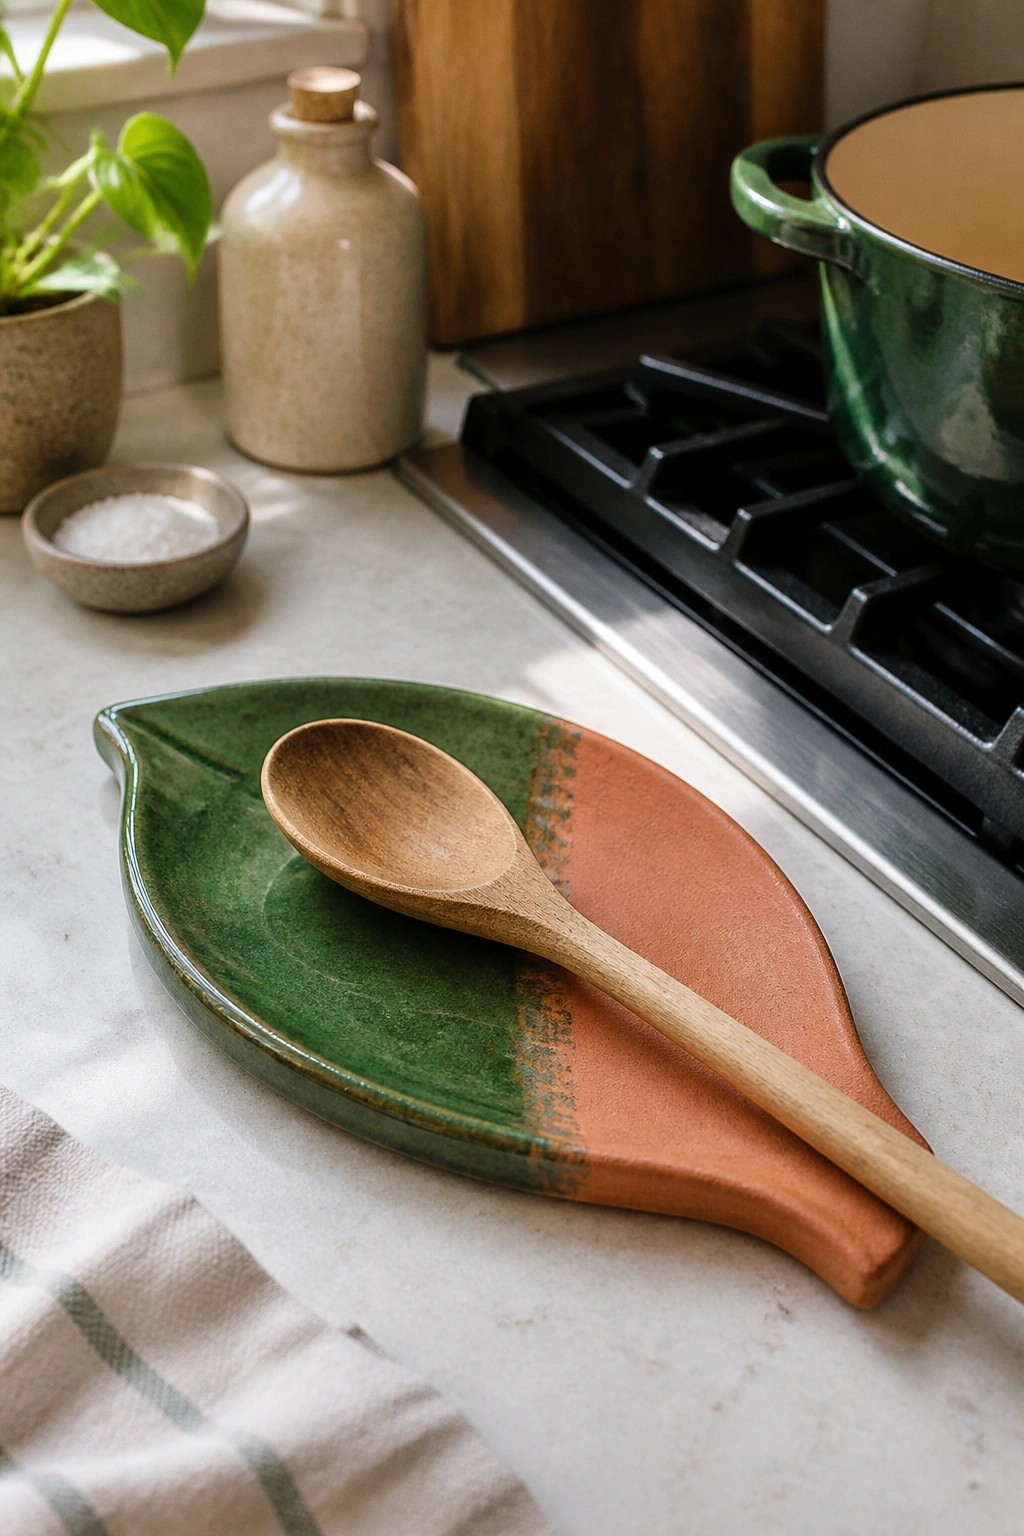
A slab-built leaf tray makes a practical spoon rest by using a simple template to cut the clay into an elongated pointed shape. The surface is split into two glazes, one deep green and one earthy orange, with the division running along the center vein line. This creates a balanced two-tone effect that highlights the leaf form without extra carving or added details. The finished piece sits flat and holds a utensil steady on a countertop.
The shape does a lot of the work here because the narrow end keeps a spoon handle from sliding off while the wider end gives room for the bowl. You can reuse the same leaf template to make smaller versions for tea bags or larger ones for serving utensils. In a kitchen this style of rest stays useful without crowding the workspace and pairs easily with other slab projects like coasters or small trays. For a gift, swap the glaze colors to match the recipient’s kitchen.
Divided Salt Cellar with Matching Spoon
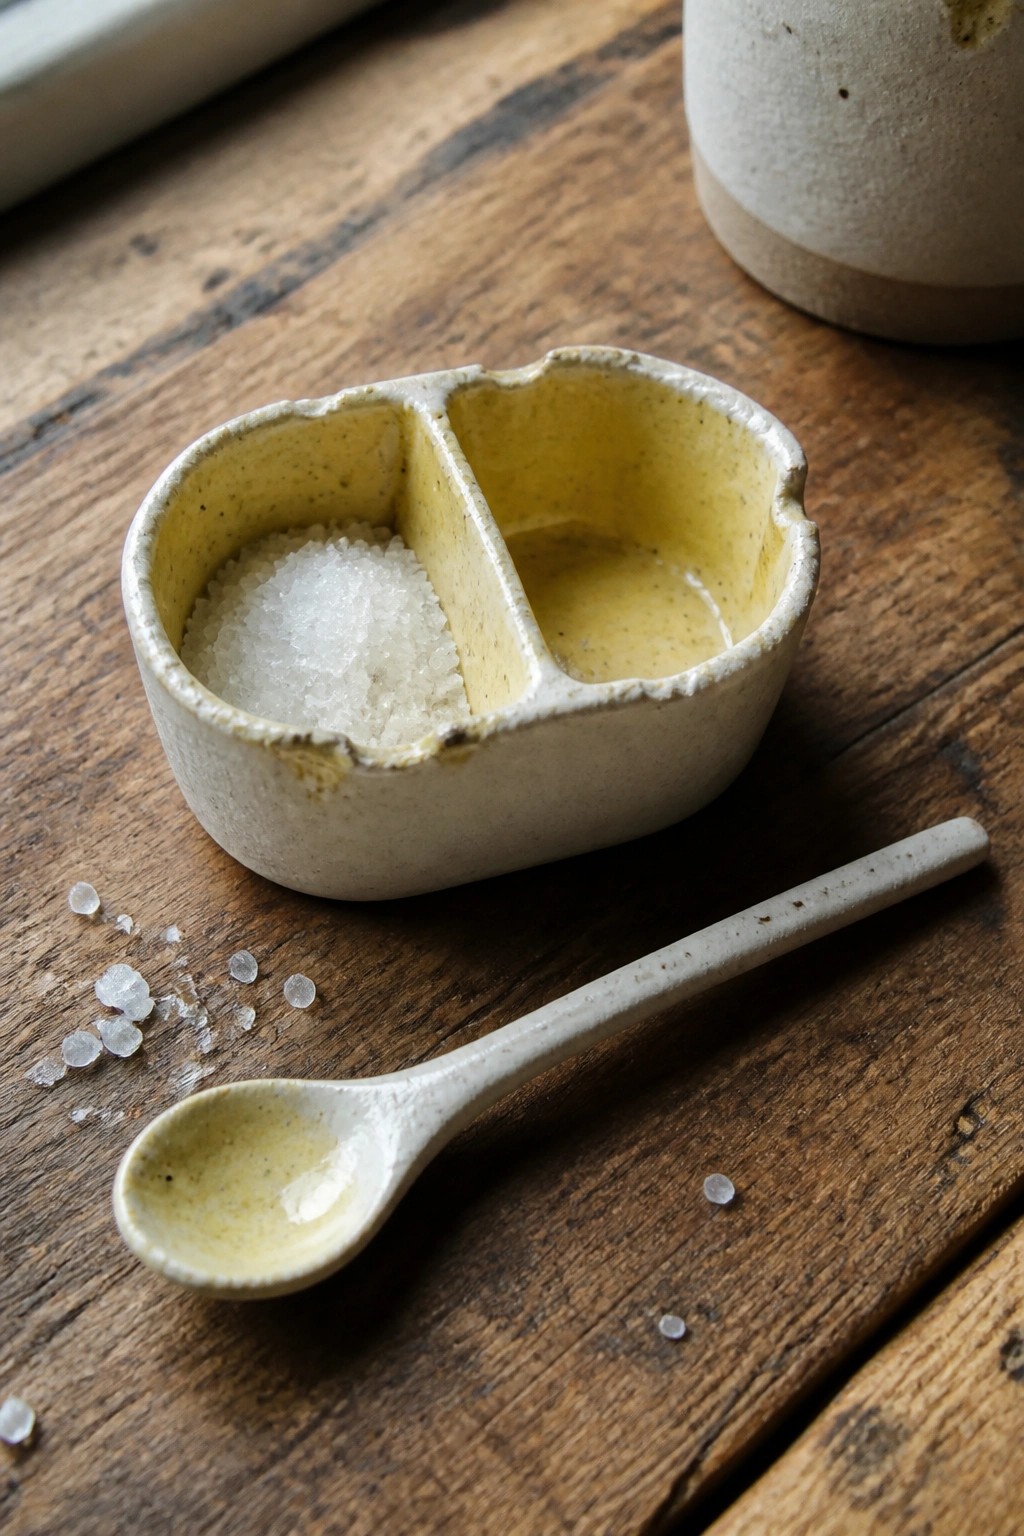
A small two-part dish formed from clay slabs makes a practical salt or spice cellar. One compartment holds coarse salt while the second stays open for another seasoning, and the rounded walls keep everything contained without sharp corners. The matching spoon rests alongside so scooping stays easy and contained to the same set. This layout uses simple template cuts to create clean divisions that still feel relaxed in shape.
What makes this idea useful is how the divided form can be resized for other small kitchen tasks like holding two different dips or spices during cooking. You can swap the spoon for a tiny handle or skip it entirely if you want a quicker tray version. The compact scale fits on a countertop or table without crowding other items, and the same template method works for a jewelry version by shrinking the compartments. For a gift, this kind of piece gives someone a ready-to-use set instead of a single dish.
Star-Shaped Slab Tea Light Holder
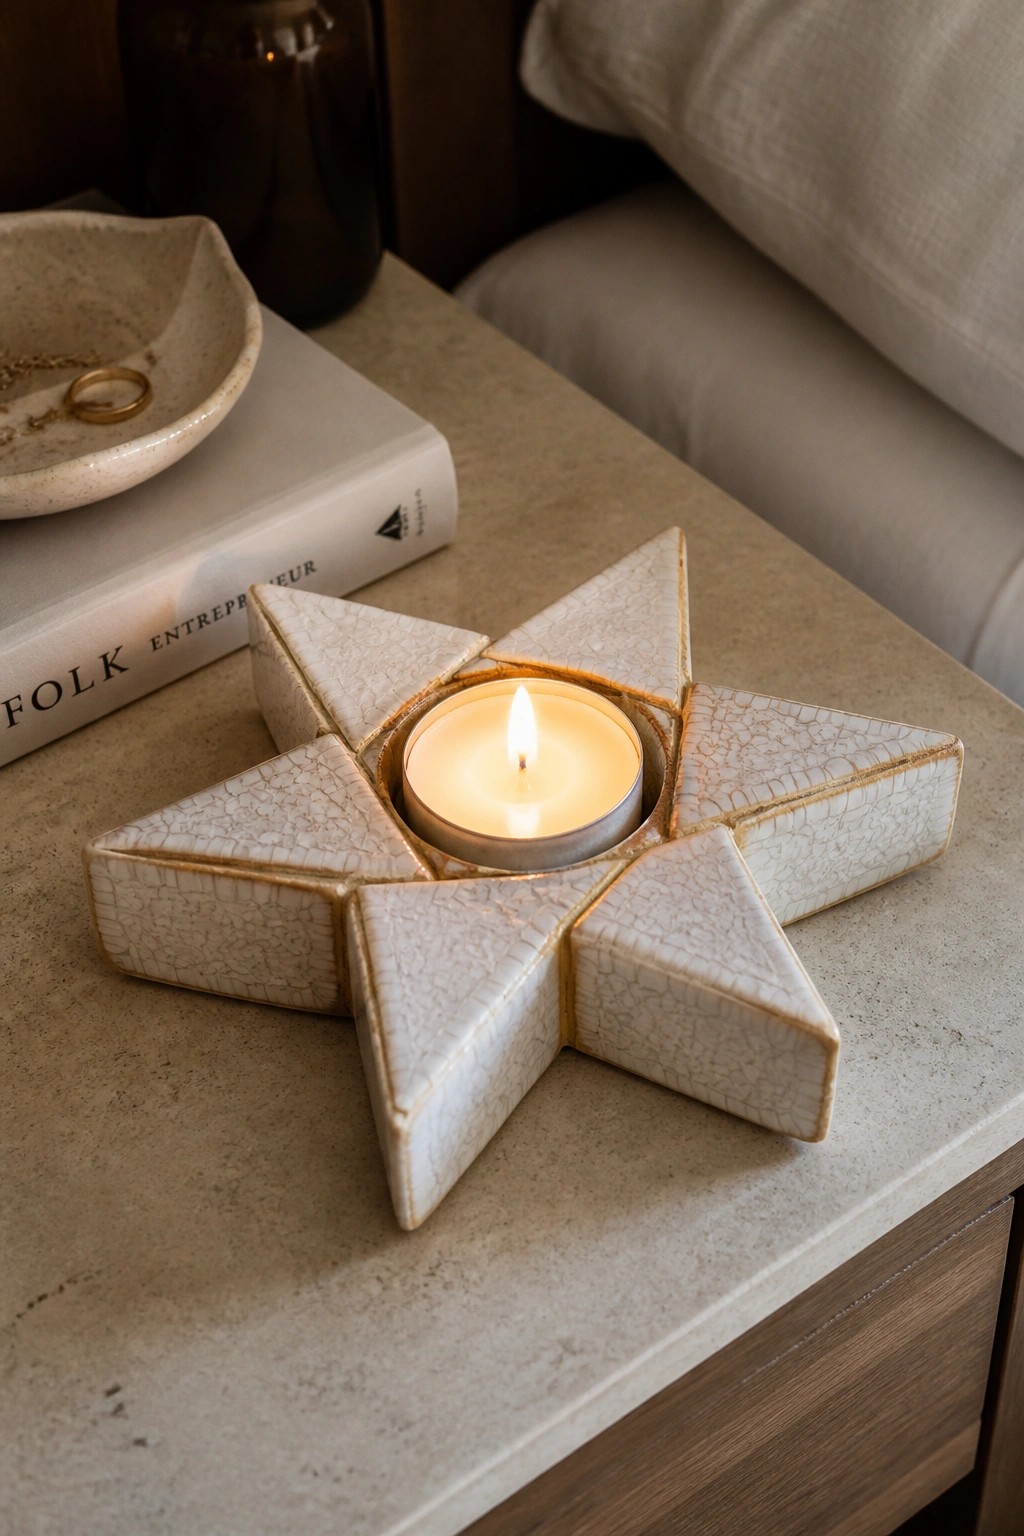
A star-shaped tea light holder made from assembled clay slabs creates a simple geometric form that holds a standard tea light in the center. Triangular slab sections are cut with templates and joined around a circular opening to form the points while keeping the edges sharp and even. The crackle surface on the fired piece adds subtle texture that contrasts with the flat planes of the star.
The shape does a lot of the work here since the points give structure without needing extra sculpting. This would be easy to turn into a smaller ring dish by leaving out the candle recess or scale it up for a larger votive. For a gift, something like this fits well on a nightstand or desk where the compact size keeps it practical.
Rectangular Soap Dish with Drainage Ridges
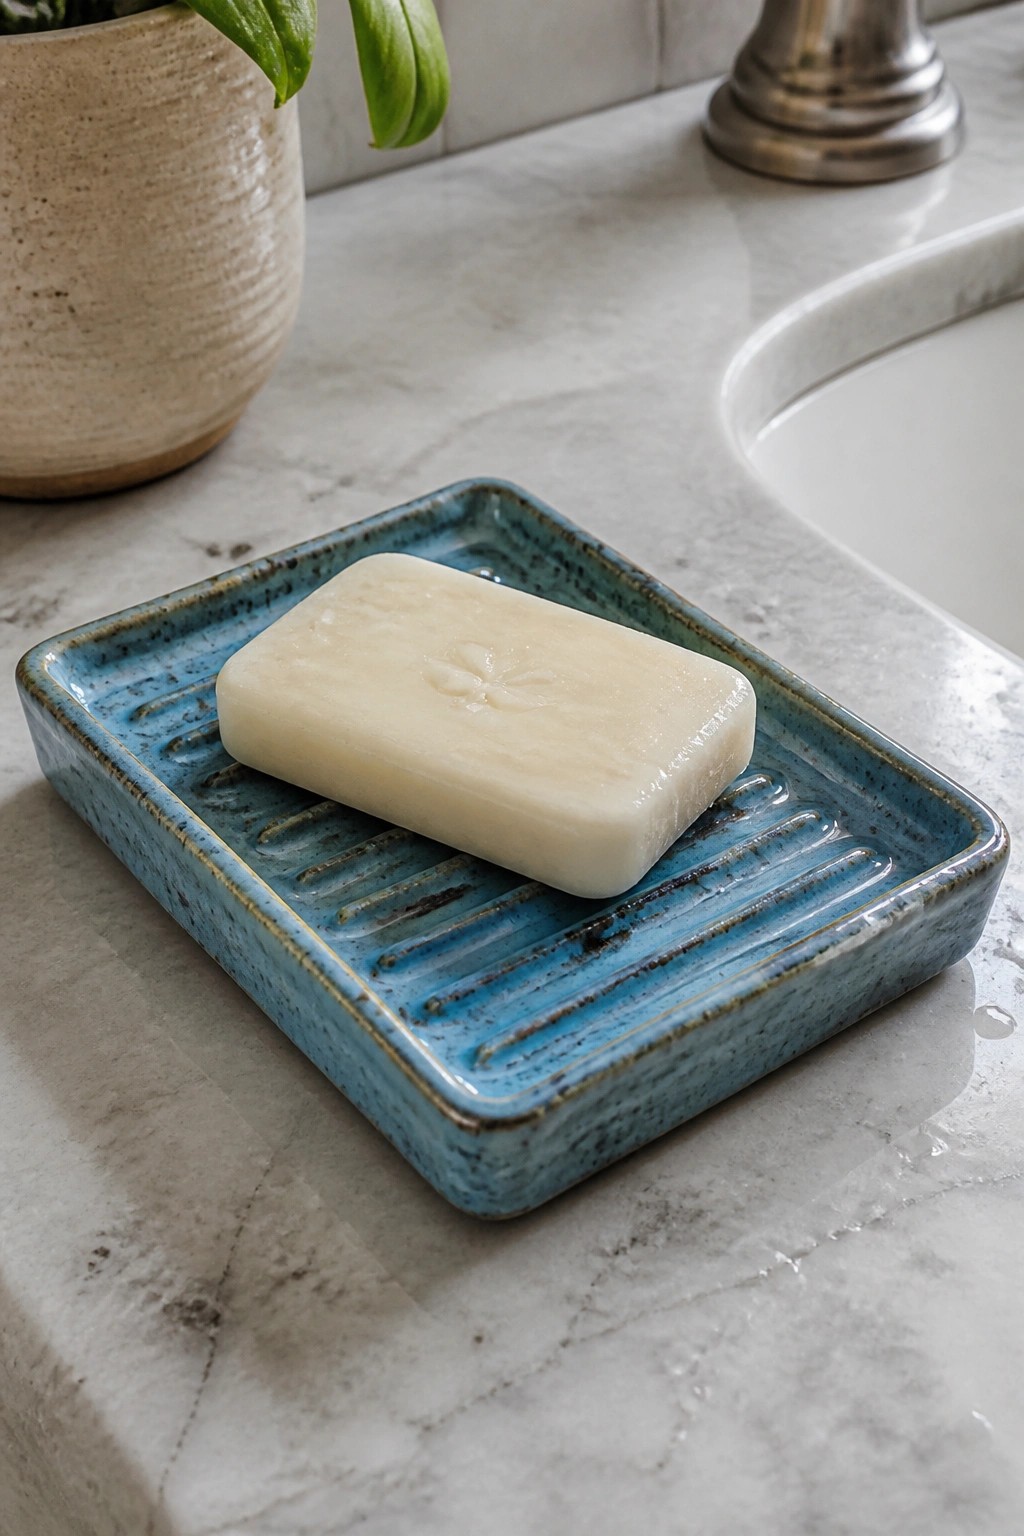
A slab-built soap dish starts with a flat clay rectangle cut to size using a template, then assembled with low walls and a series of thin parallel ridges across the base. The ridges lift the bar slightly so water runs off instead of pooling underneath. A speckled blue glaze covers the entire surface, giving it a solid, water-resistant finish that suits daily bathroom use.
What makes this idea useful is how the template keeps the overall shape clean while the ridges solve a common soap problem without extra steps. You can adapt the same layout for a longer toothbrush tray or shorten it into a small ring dish by changing only the template dimensions. The slab method also lets you swap in different glaze colors to match existing bathroom fixtures. In a small space, this size works well on a sink edge without crowding other items.
Flower Shaped Ring Dish from a Slab Template
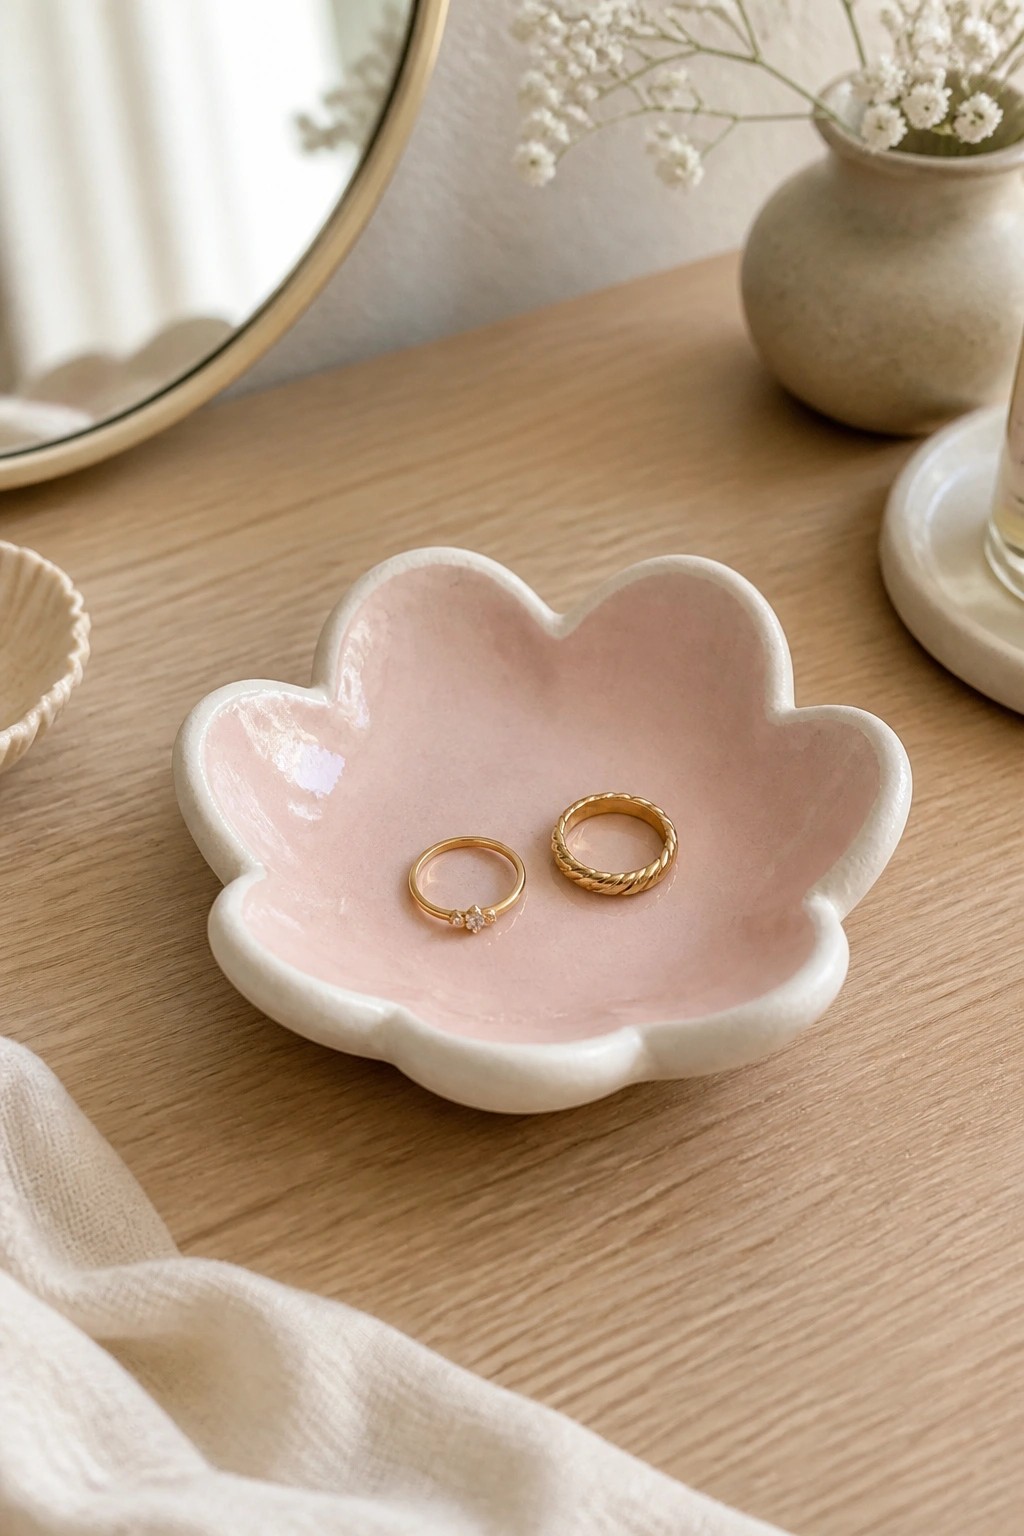
A small flower shaped dish makes a practical ring holder or trinket tray. Use a template to cut a slab into five or six rounded petals, then gently lift and shape the edges while the clay is still soft to create low sides. A two tone glaze application keeps the focus on the outline and gives the interior a smooth, reflective surface that contrasts with the unglazed rim.
What makes this idea useful is how the template produces a clean, repeatable shape that assembles quickly without carving. The compact size works on a dresser, bathroom counter, or desk for everyday jewelry. You can reuse the same template at a slightly larger scale for a soap dish or change the glaze to a single solid color if you want a simpler look for gifts.
Pastel Striped Rim Bowl
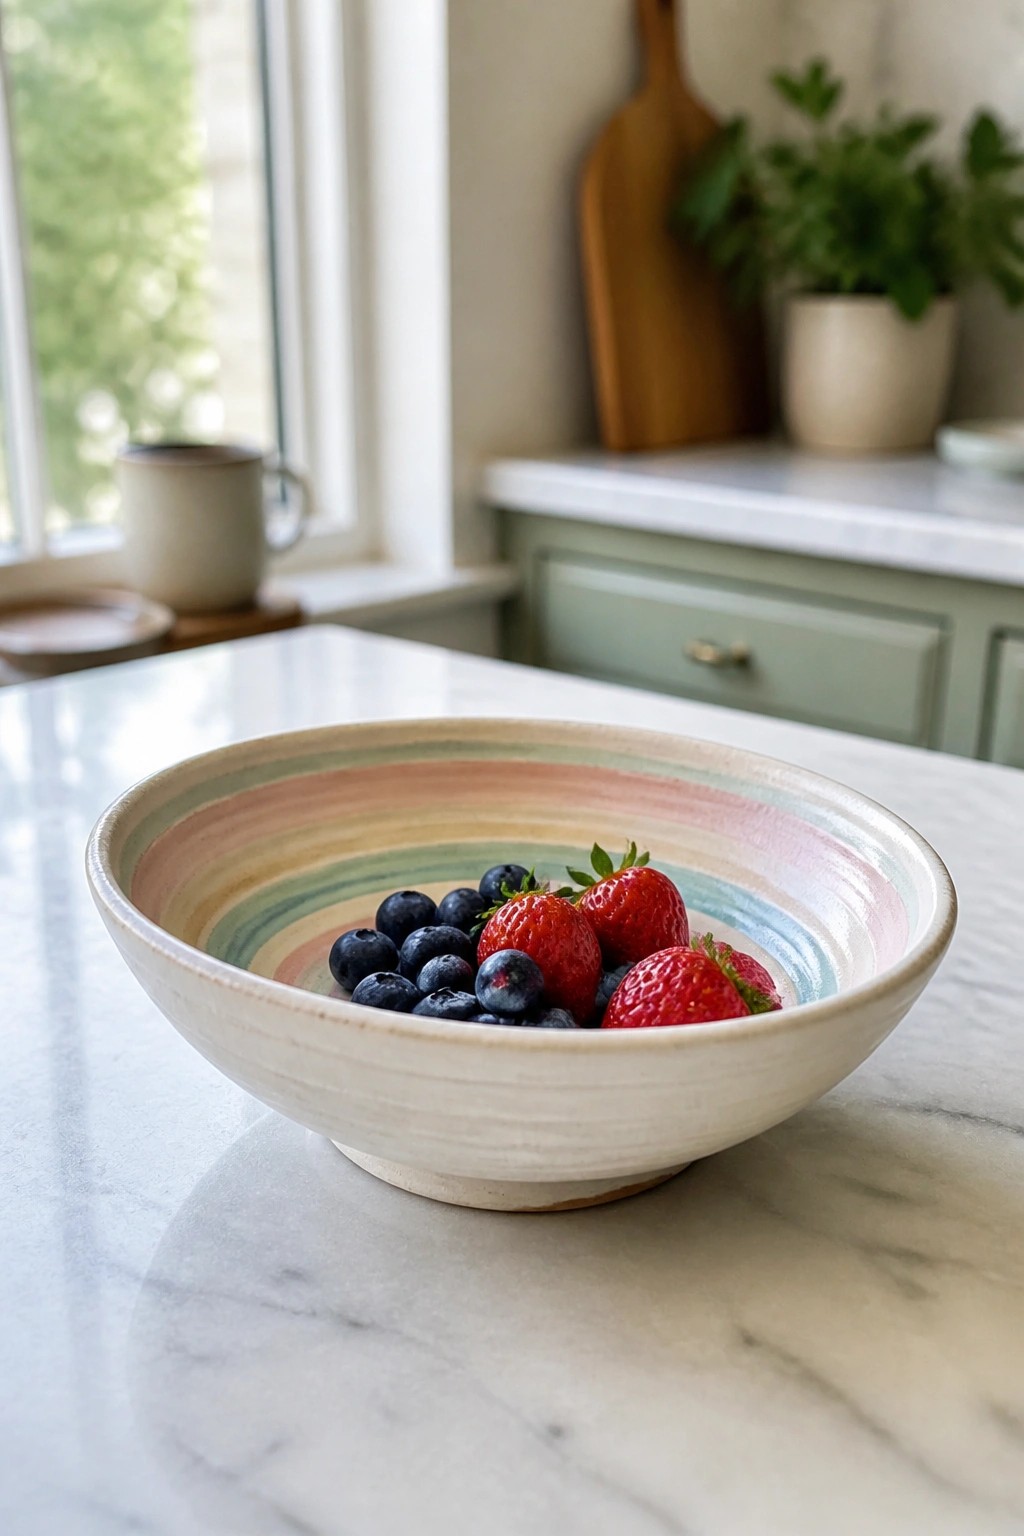
A shallow slab-built bowl with a wide rim offers a large surface for clean horizontal stripes in soft pastel glazes. The stripes run parallel around the interior rim and were applied after the base and rim sections were cut from templates and joined, keeping the lines straight and even. This approach fits the kitchen item category and works especially well for a fruit bowl because the open shape and flat rim give the color bands room to stand out.
The shape does a lot of the work here since the wide rim turns a basic circle template into a functional serving piece without extra sculpting. You could scale the same template set up or down to make a set of smaller dip bowls or a larger salad bowl while keeping the stripe layout. In a kitchen this kind of bowl sits flat on a counter and holds fruit or snacks without tipping. For variety, swap the pastels for two or three stronger colors on the same rim width to change the look while using the exact same cutting and assembly steps.
Slab-Built Tray with Dashed Line Pattern
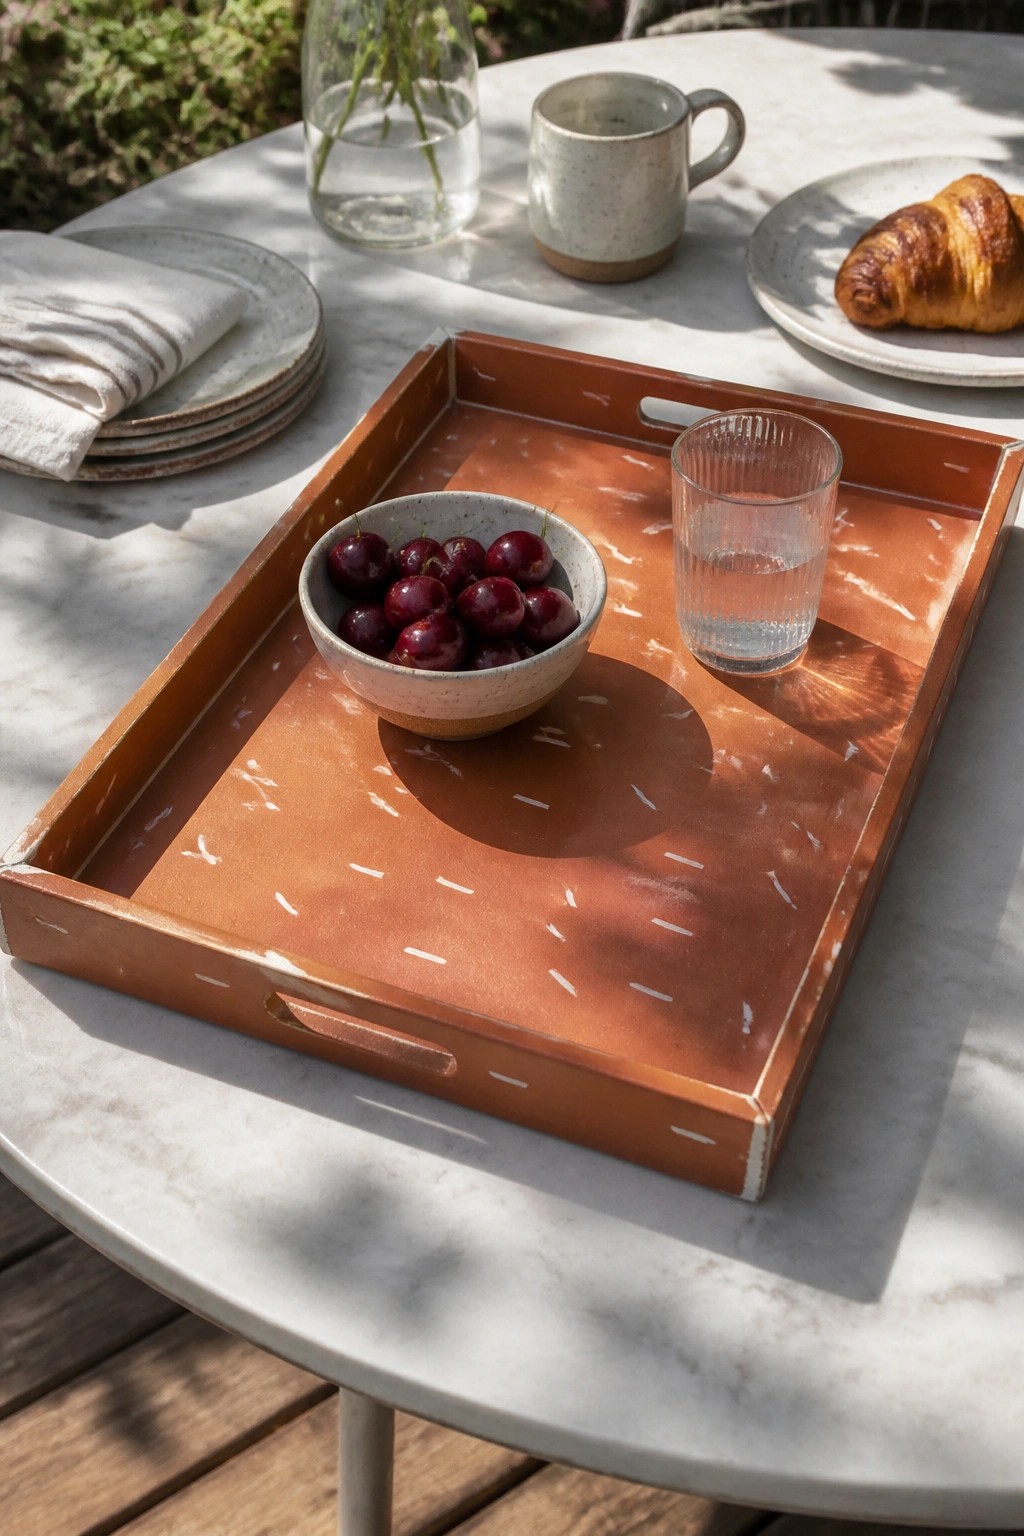
A rectangular slab tray works well as a low-profile serving piece or tabletop organizer. Roll out a base slab and four side pieces using templates for straight edges, then cut simple rectangular handles before joining everything together. The finished surface gets a terracotta-colored slip or glaze followed by short white dashes painted across the center in loose rows. This approach keeps the shape flat and stable while the painted lines add visual interest without needing extra sculpting.
What makes this idea useful is how the template method gives you consistent proportions you can resize for a smaller catch-all or a longer version for bread or fruit. The dashed pattern is easy to adjust in spacing or color to suit different glazes or room styles. A piece like this works especially well in a kitchen or on an outdoor table where you need something durable but not too heavy. You could adapt the same base construction into a wall-mounted shelf or a plant saucer by changing the handle placement.
Color-Blocked Slab Toothbrush Holder
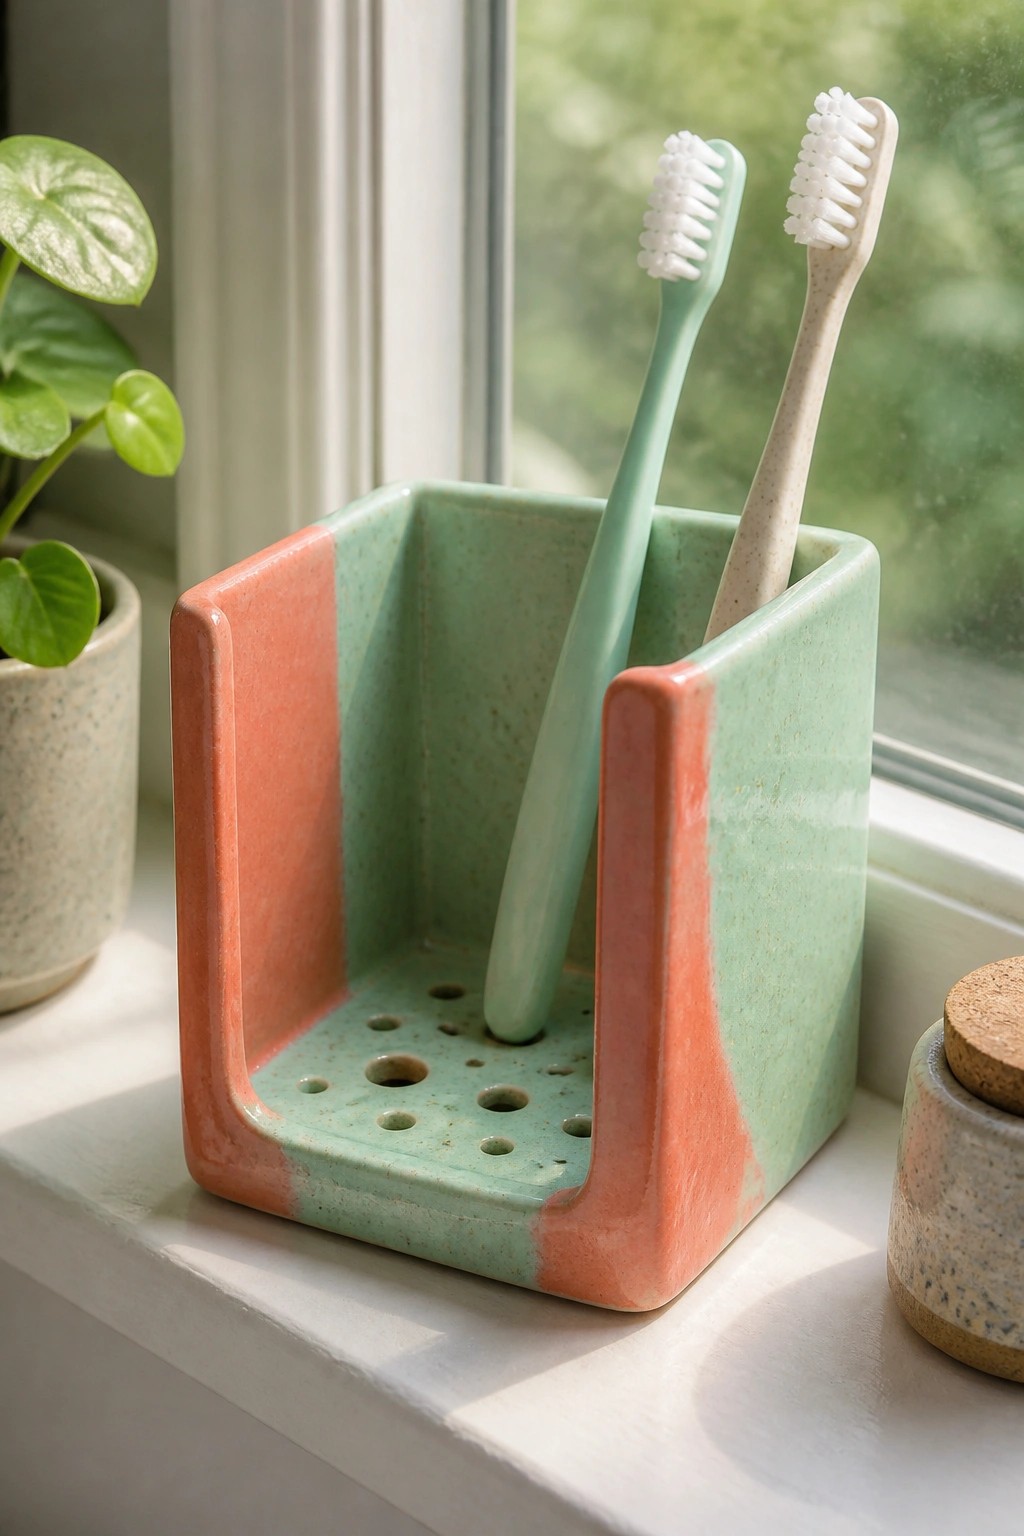
A slab-built ceramic toothbrush holder uses flat clay pieces joined into a square container with one open side. The base includes multiple drainage holes so water from wet brushes can escape. Two contrasting glazes applied in large blocks create a simple color split that highlights the clean geometry without added surface detail. This approach works as a bathroom item because the template method keeps all sides straight and the assembly quick.
What makes this idea useful is how the open-front square shape gives easy access while keeping brushes upright and separated. You could swap the color blocks for a single glaze or add a small slab divider inside to create separate compartments. The same template can be adjusted in height to fit more brushes or shortened into a holder for razors or makeup brushes. For a bathroom, this kind of piece stays practical because the drainage holes prevent standing water.
Yarn Bowl with Spiral Feed Notch
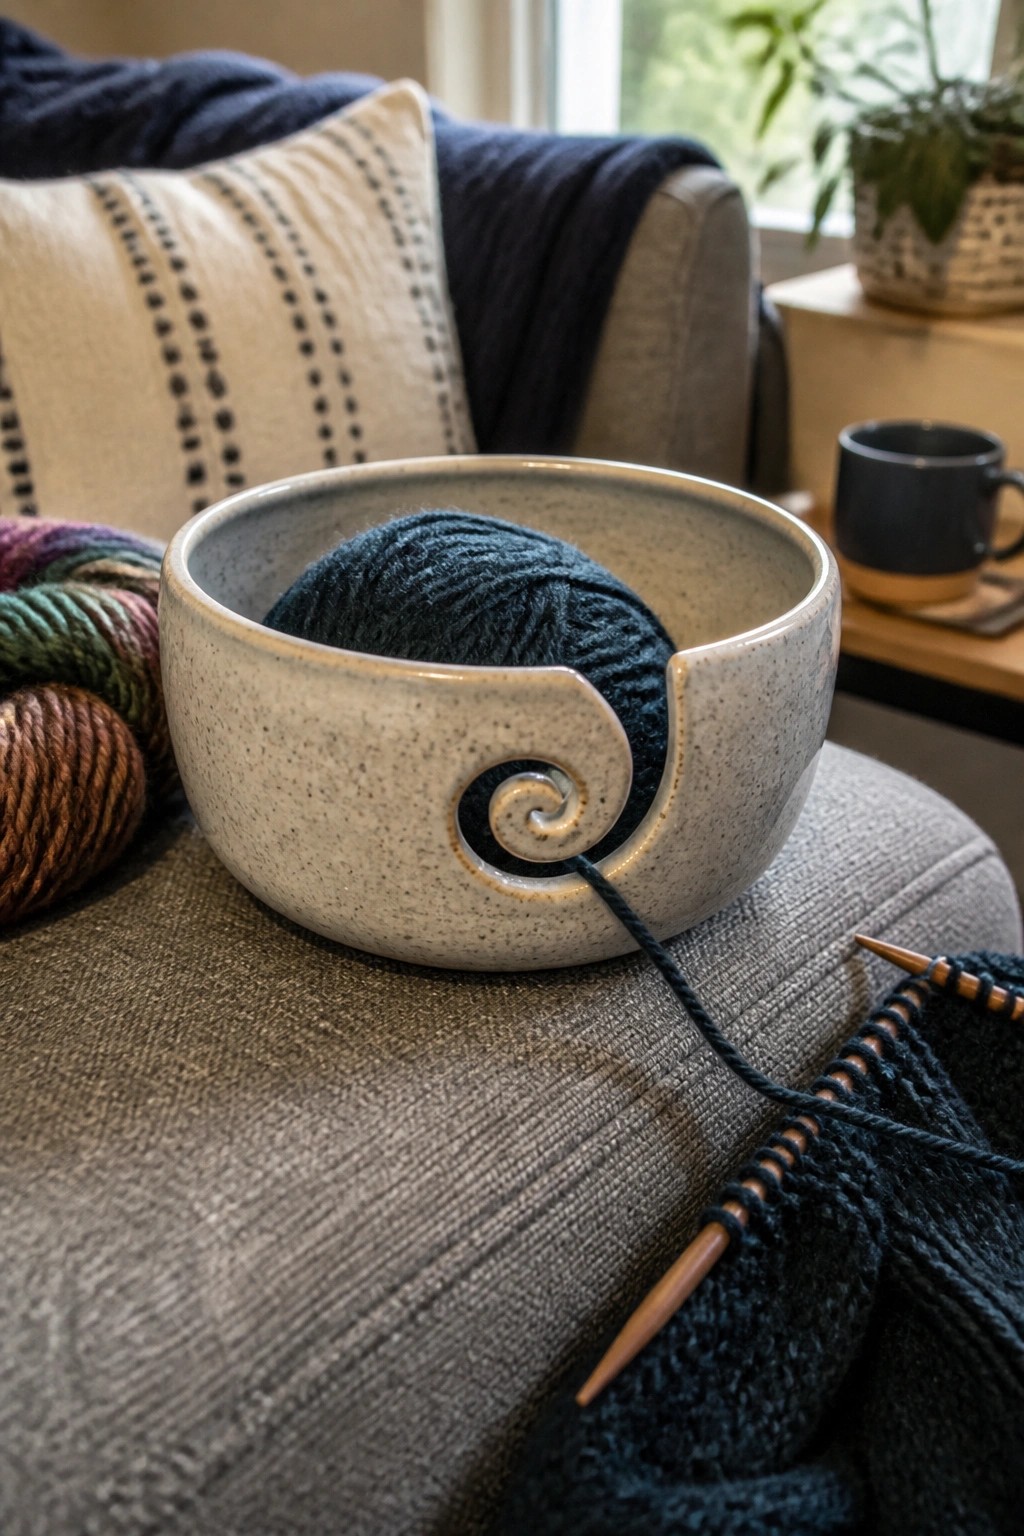
A yarn bowl shaped from clay features a spiraled cutout along one side that lets a strand of yarn feed out smoothly while the rest of the ball stays inside. The rounded walls contain the yarn so it does not roll away during knitting or crocheting. This turns an ordinary bowl form into a dedicated tool that keeps the working strand under light tension without extra attachments.
What makes this idea useful is how the spiral opening solves a basic knitting problem with one clean cut. You can scale the bowl diameter or widen the notch to suit different yarn thicknesses and project sizes. The same template approach works for making a matching set or shifting the shape into a small holder for crochet hooks. In a craft space it keeps supplies contained and visible without taking up much room.
Slab Napkin Holder with Vertical Stripe Accent
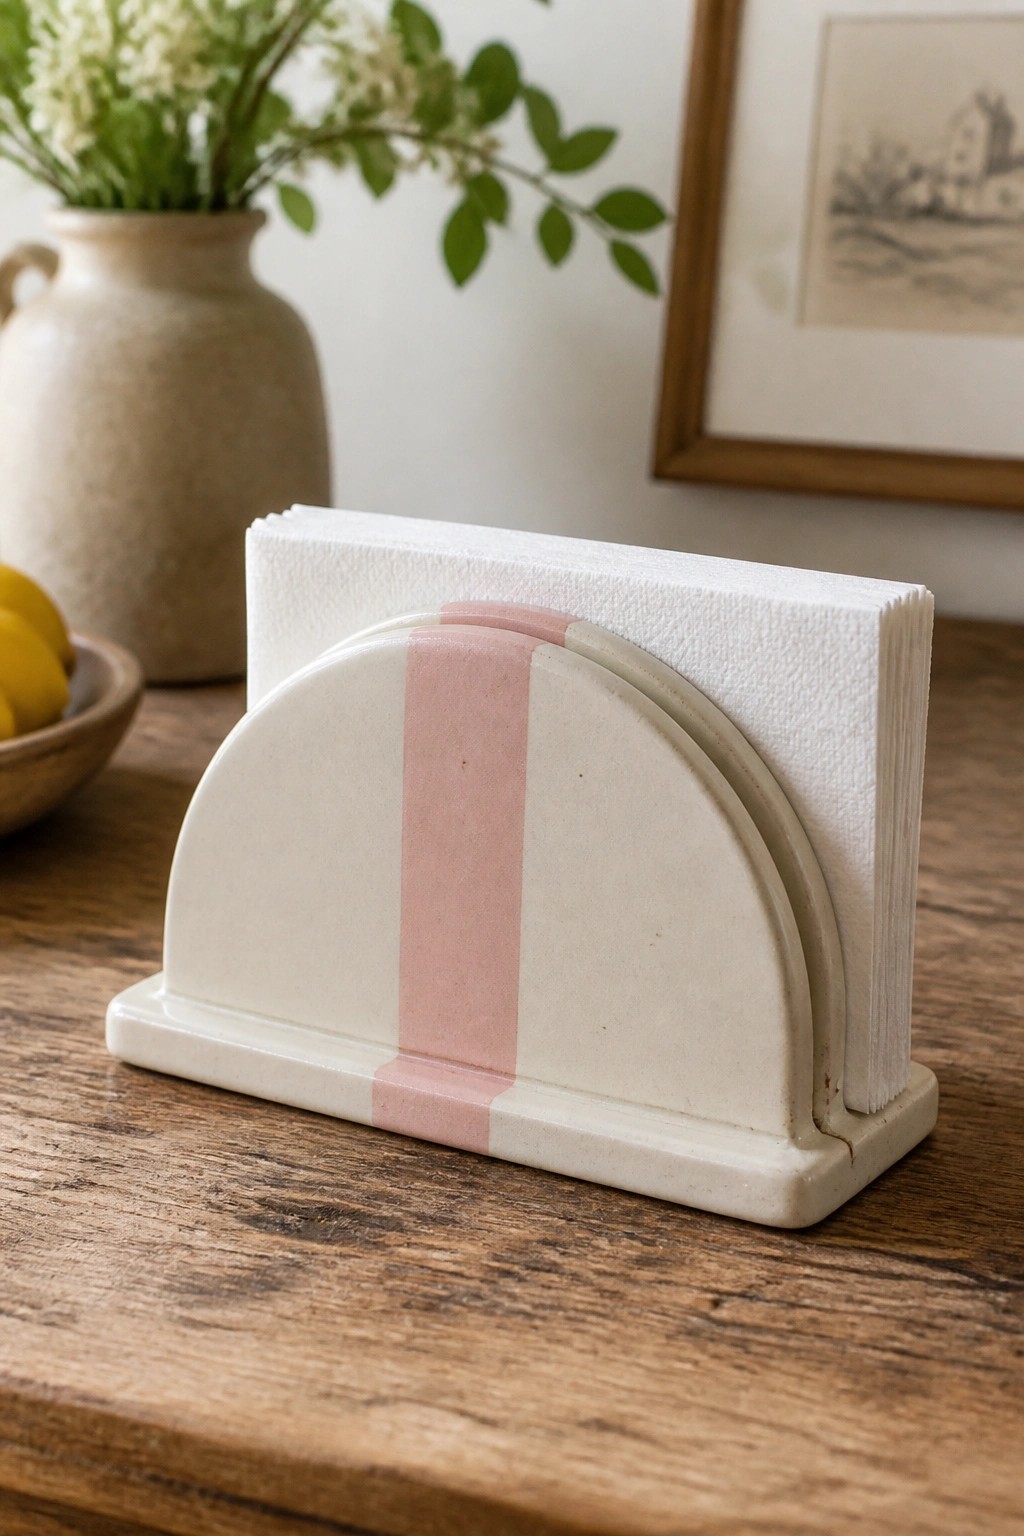
A slab napkin holder formed from two arched pieces joined at the base creates a stable stand for a stack of paper napkins. The clean curve comes from a simple template that keeps the sides even and the opening wide enough for easy access. A single vertical stripe of pink slip or glaze runs down the center and adds contrast without complicating the shape. This kitchen item works because the form stays minimal while the stripe gives it a finished look.
The shape does a lot of the work here by keeping napkins upright on a table or counter. You can change the stripe width or color to match different dishware or skip the stripe for a plain version. The same template could be shortened into a mail holder or lengthened slightly for a small cookbook stand. For a gift this size stays practical and takes little clay or shelf space.
Slab-Built Utensil Holder
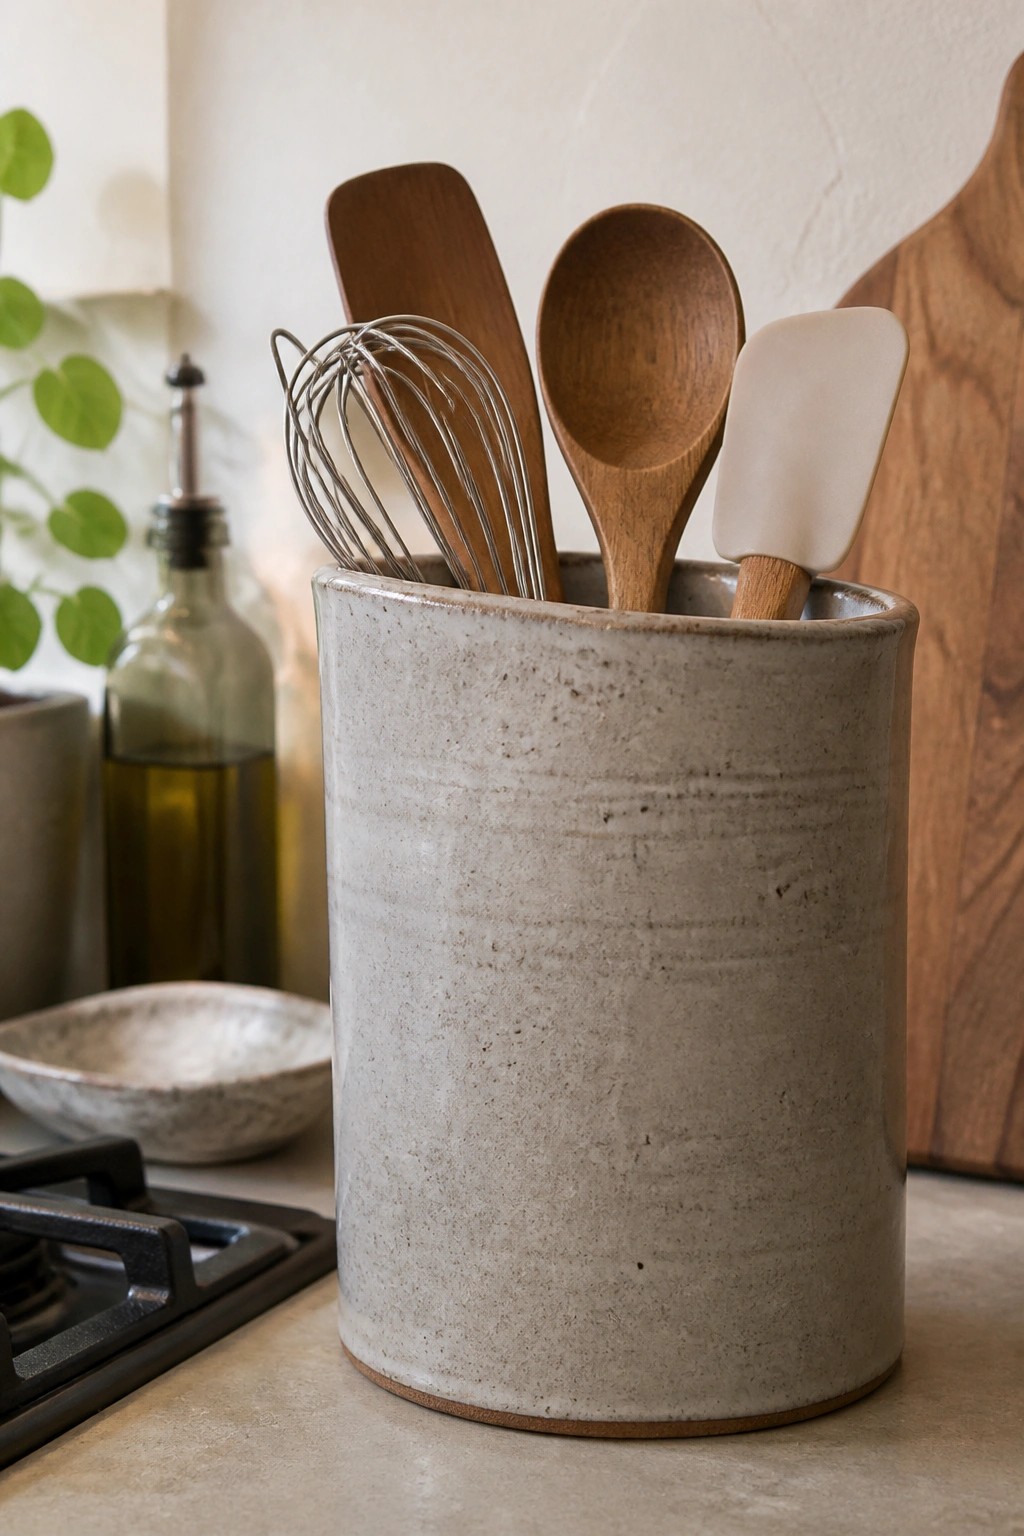
A tall cylinder formed from a single slab of clay makes a practical kitchen utensil holder. The even walls and flat base come from cutting the clay with a template, then joining the seam cleanly so the form stays straight without warping. The lightly speckled surface and simple rim keep the focus on the tools stored inside rather than on decoration.
What makes this idea useful is how the open top and vertical sides let long-handled items stay upright and easy to grab. You can change the template to make a shorter, wider version for spatulas or a narrower one for brushes. The same cylinder shape also works as a small vase or desk organizer if you need it for something other than kitchen tools.
Three Section Slab Planter with Color Blocks
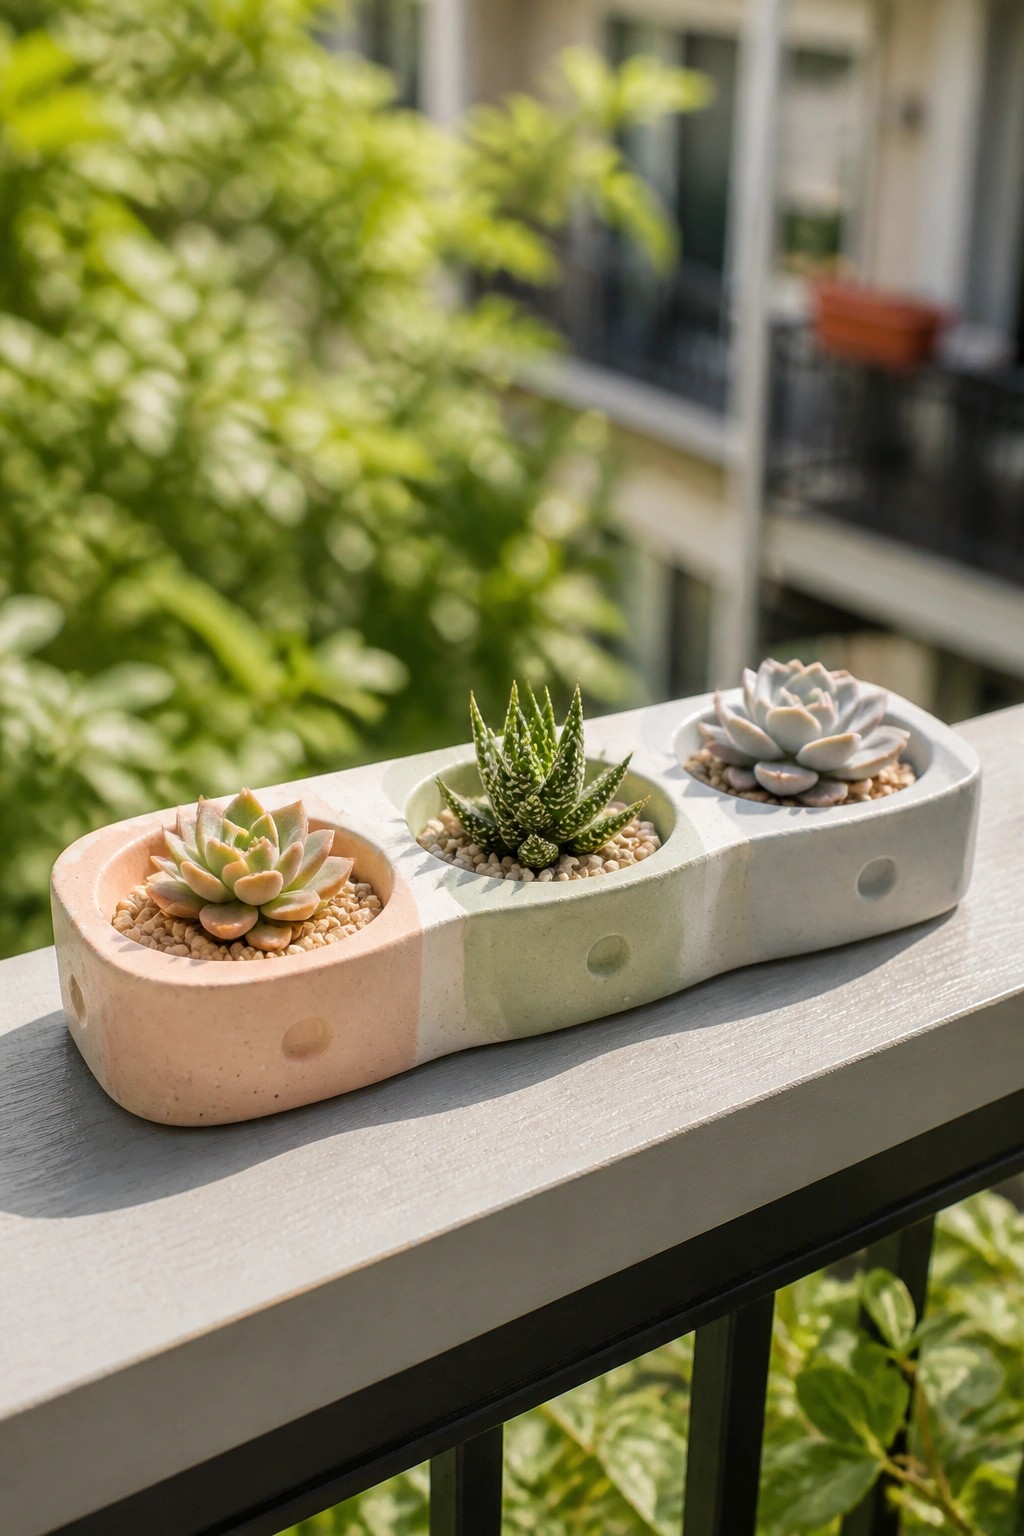
A long rectangular planter built from clay slabs creates three connected planting areas in a single piece. Rounded ends and curved interior walls keep the form simple while the sections stay separate for different plants. Small holes cut into the sides add drainage without breaking the clean lines. The color blocks in soft pink, green, and gray come from applying different slips or underglazes before firing.
What makes this idea useful is how the connected shape lets you display several plants together on a narrow ledge or railing. The same template can be shortened to two sections for a windowsill or stretched longer for a row of herbs. Changing the color placement or adding a matte finish on one section gives quick variety without new templates. This format photographs clearly for plant styling boards because the straight lines and color divisions read well at small sizes.
Slab Built Hedgehog Figurine with Template Spines
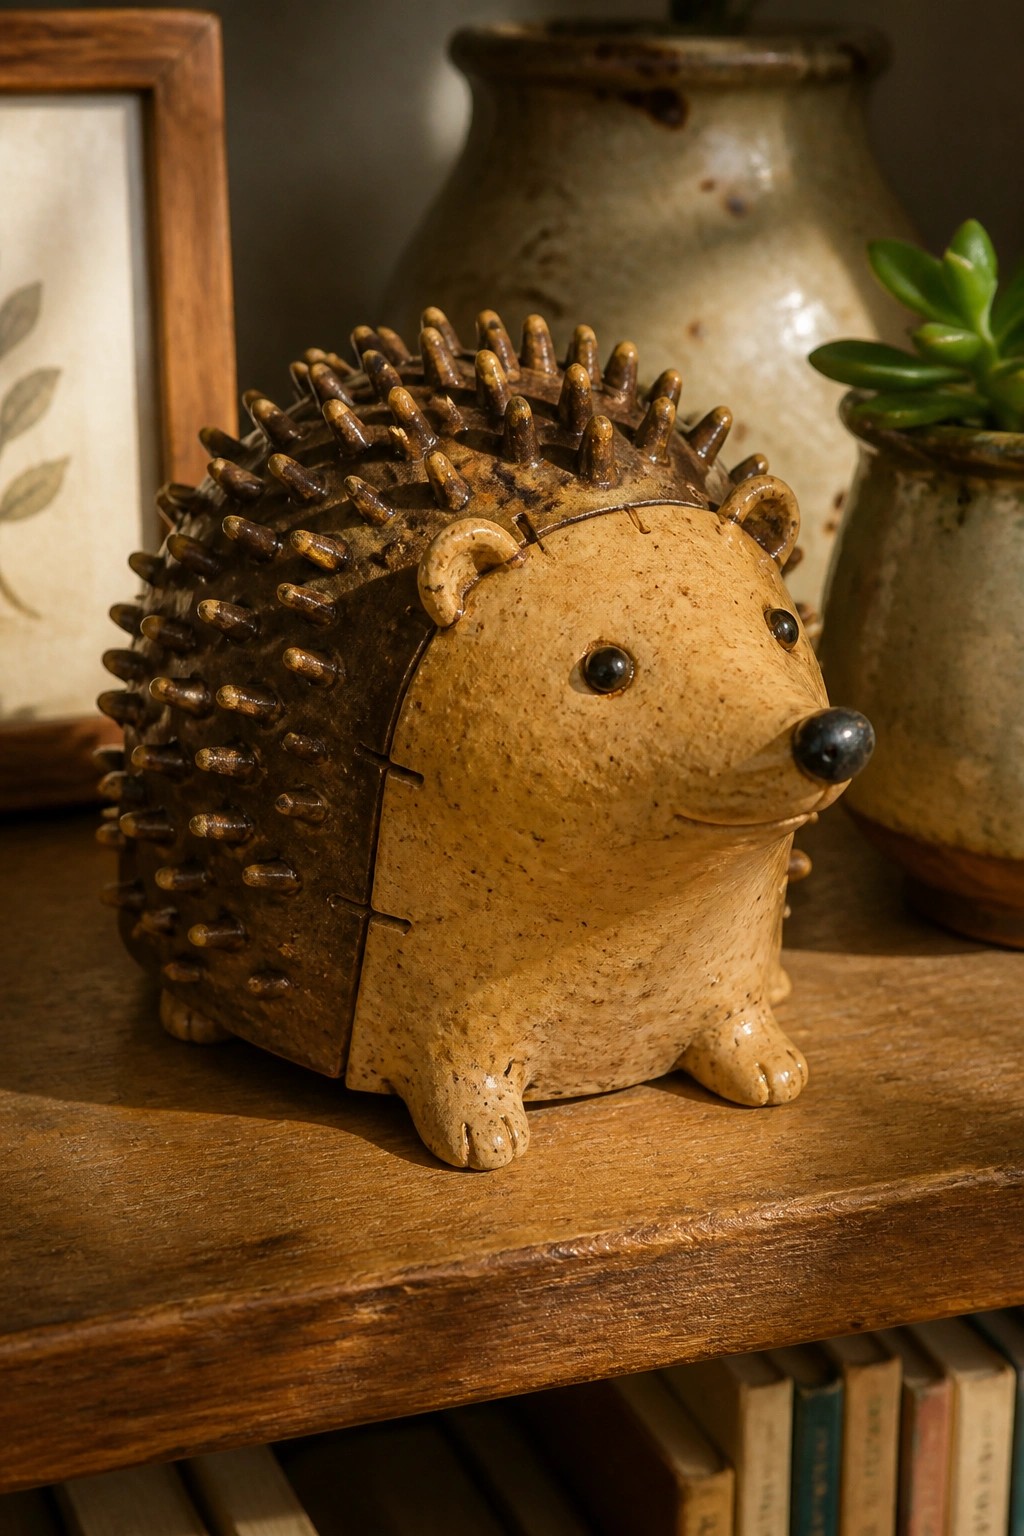
A hedgehog figurine built from clay slabs works well when you cut the main body and head from simple templates for clean edges, then add the back separately. The spines are made from small rolled or cut pieces attached in rows, creating a clear contrast between the smooth face and the textured shell. This approach keeps the assembly straightforward while letting the shape define the animal without extra carving.
What makes this idea useful is how the template method controls the overall size and proportions so the piece stays compact enough for a shelf or desk. You can swap the hedgehog for other animals by changing just the head and leg templates while keeping the same spine technique for texture. The small scale also means it uses less clay and fits easily into a kiln load, and the segmented look from the joins adds visual interest without needing complex glazing.
Geometric Cutout Cube Candle Holder
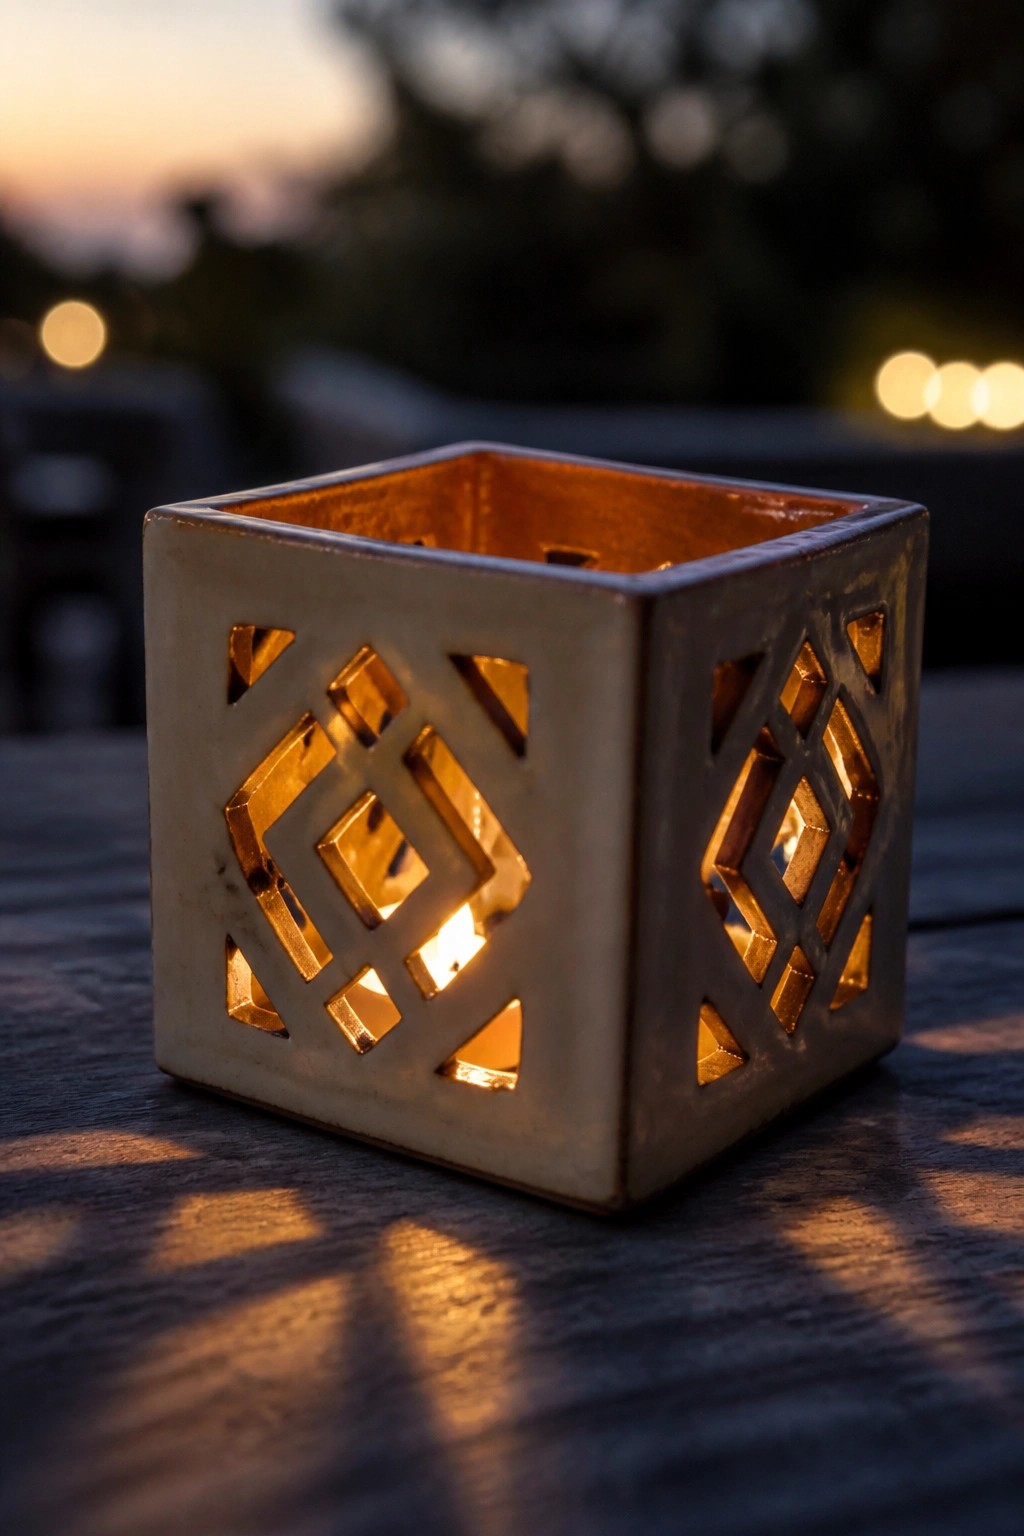
A slab-built cube candle holder starts with flat clay sheets cut to equal squares using templates, then joined at the edges to form the box shape. Geometric openings are cut through the sides in repeating diamond and angular patterns so light from inside casts defined shapes outward. This produces a compact decor piece that functions as both a holder and a light diffuser.
What makes this idea useful is how the template method keeps all sides uniform without freehand measuring. You can adjust the cutout size or spacing to change how much light escapes or swap in simpler shapes for a quicker version. A piece like this fits well on a shelf, side table, or outdoor surface where it provides gentle illumination without taking up much room. The same cube form could be lengthened into a rectangular tray style or shortened for a smaller desk version.
Wall-Hung Planter from a Half-Circle Slab Template
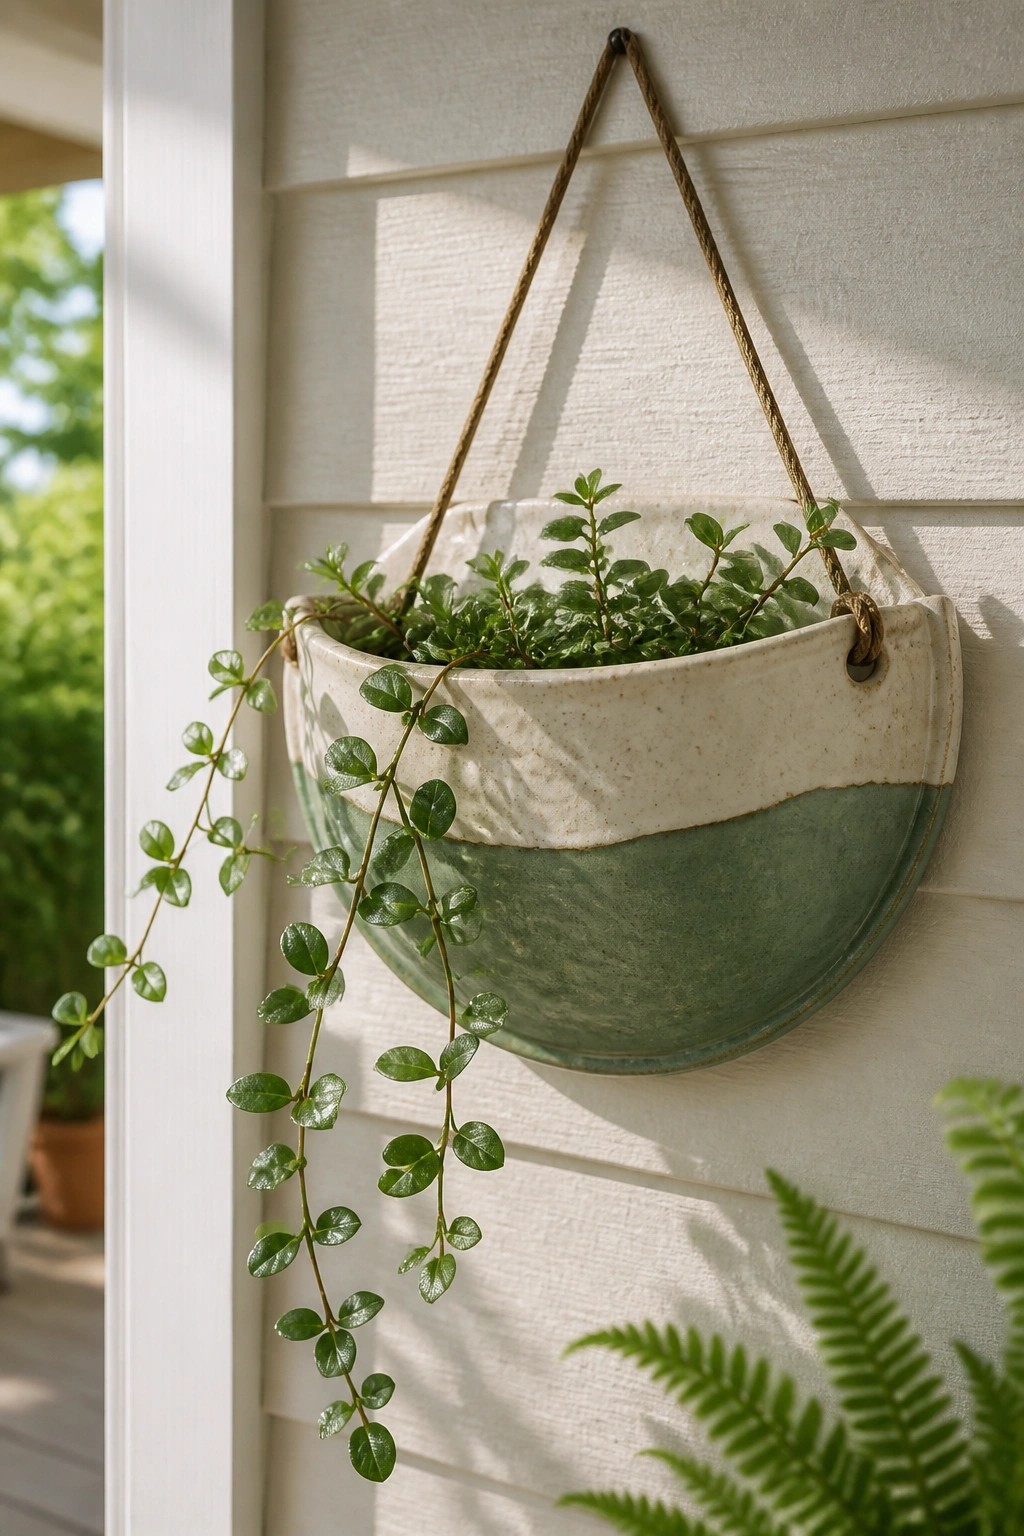
A hanging wall planter cut from a simple half-circle template gives you a flat back that sits flush against siding or drywall while the curved front holds soil and roots. The maker rolled out a slab, used the template to cut the shape, then joined the seam and added small holes near the rim before drying. Two glazes meet in a clean horizontal line, with the lighter one on the upper section and the deeper green below, which keeps the form readable from a distance. Rope threaded through the holes turns the piece into a lightweight hanging planter that needs no brackets.
What makes this idea useful is the flat-back shape that works on any vertical surface where floor space is tight. You can reuse the same template at different sizes to make a matching set or shorten the curve to create a shallower version for succulents. The rope hangers let you swap locations easily, so the planter moves from an indoor wall to a porch without new hardware. Changing the glaze split or adding a third color band gives you quick variations that still read as one cohesive project.
Rectangular Slab-Built Storage Boxes
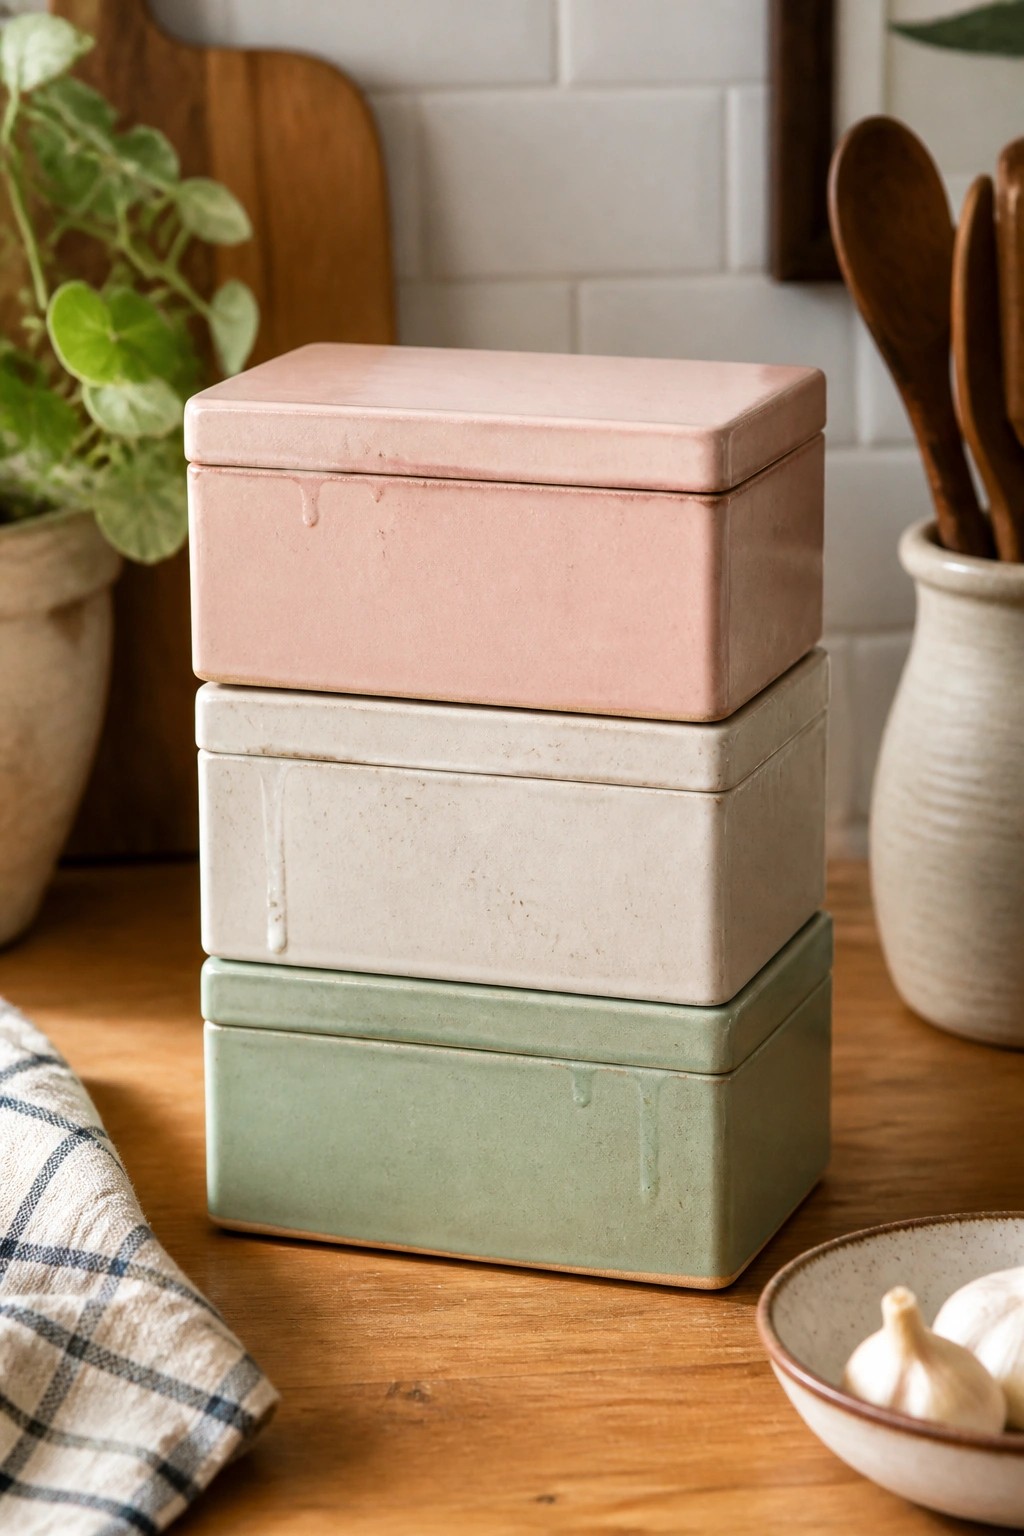
These three rectangular lidded boxes are formed from clay slabs cut to the same template, which keeps the sides straight and the corners sharp. Each box uses a different soft glaze in pink, off-white, and green so the set can be mixed or matched while still looking coordinated. The flat lids sit flush on the rims, turning the boxes into simple containers for small items like tea, spices, or sugar.
What makes this idea useful is the rectangular shape, which stacks neatly and takes up little shelf space compared to round forms. You can scale the same template up or down to make taller canisters or shallower trays, and swapping glaze colors lets you match existing kitchenware without starting from scratch. In a kitchen these boxes keep counters clear while holding everyday staples, and the clean lines make them easy to repeat for a full matching set.
Wall Pocket Planter Made from Slabs
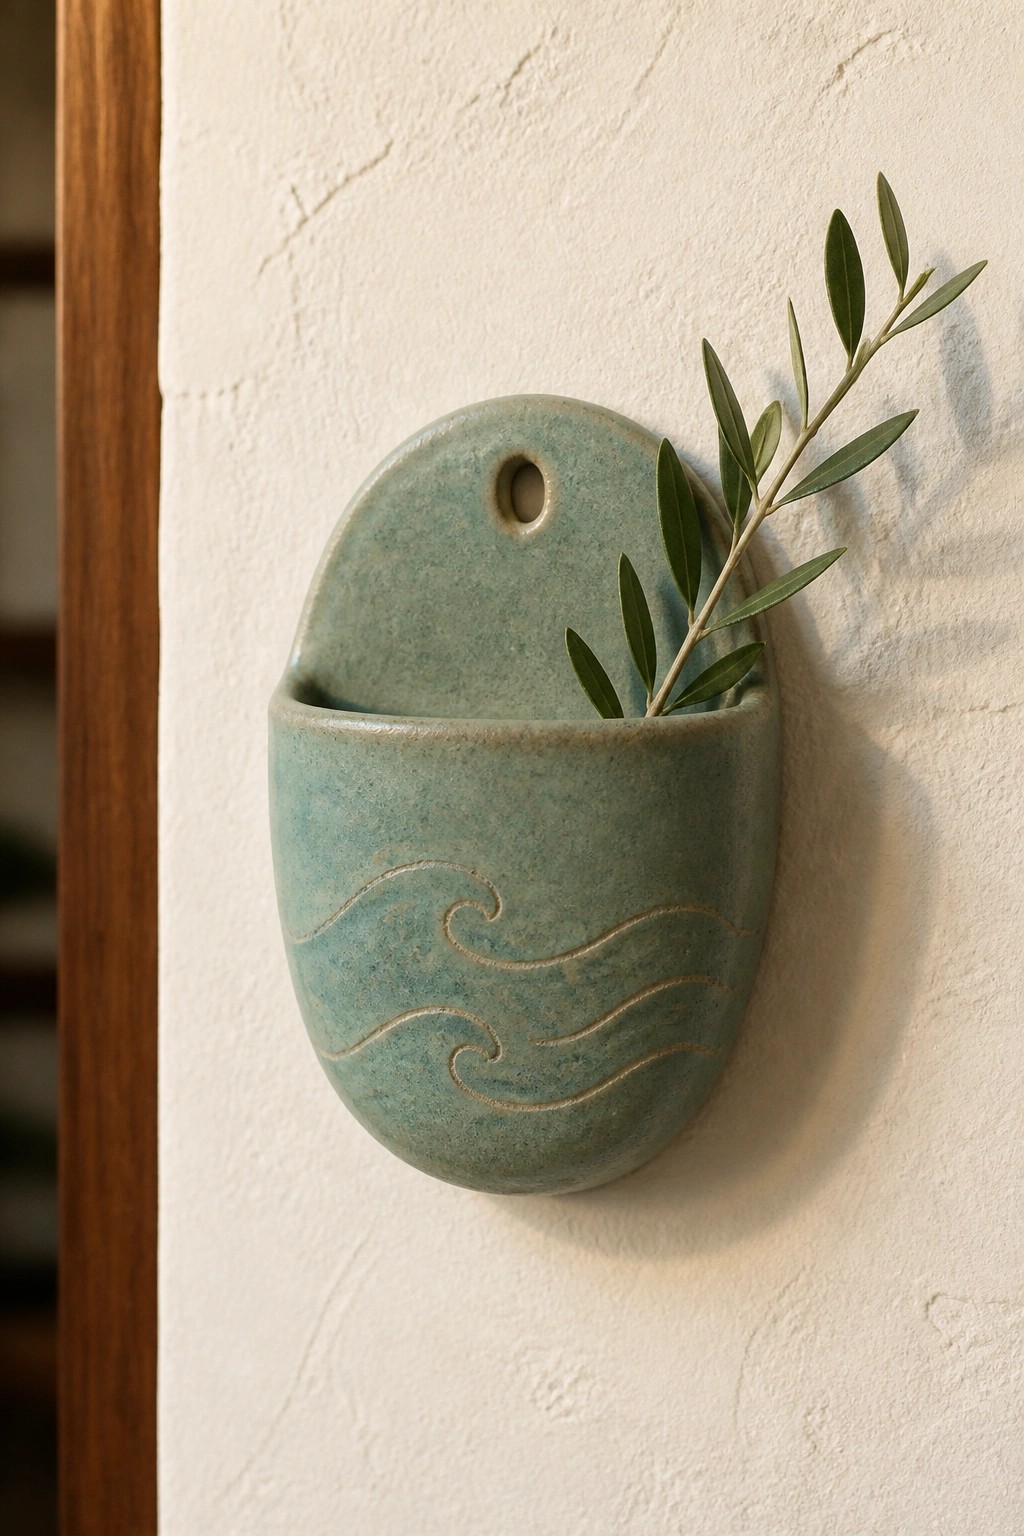
A wall pocket formed from clay slabs creates a shallow, curved container with a flat back and a small overhang at the top. A hole drilled through the upper section lets it hang directly on a nail or hook. The front carries simple carved wave lines that follow the rounded shape without crowding the surface. This style fits the category of small hanging planters or holders that keep plants or stems off counters and shelves.
The compact form works well in bathrooms, entryways, or narrow hallways where floor space is limited. You can keep the wave motif or swap it for straight lines, leaves, or no pattern at all depending on the look you want. The same template can be adjusted slightly wider or taller to hold mail, small kitchen tools, or dried flowers instead of fresh greenery. Making several in one batch gives you matching pieces for a quick gallery arrangement.
Slab-Built Rectangular Tray
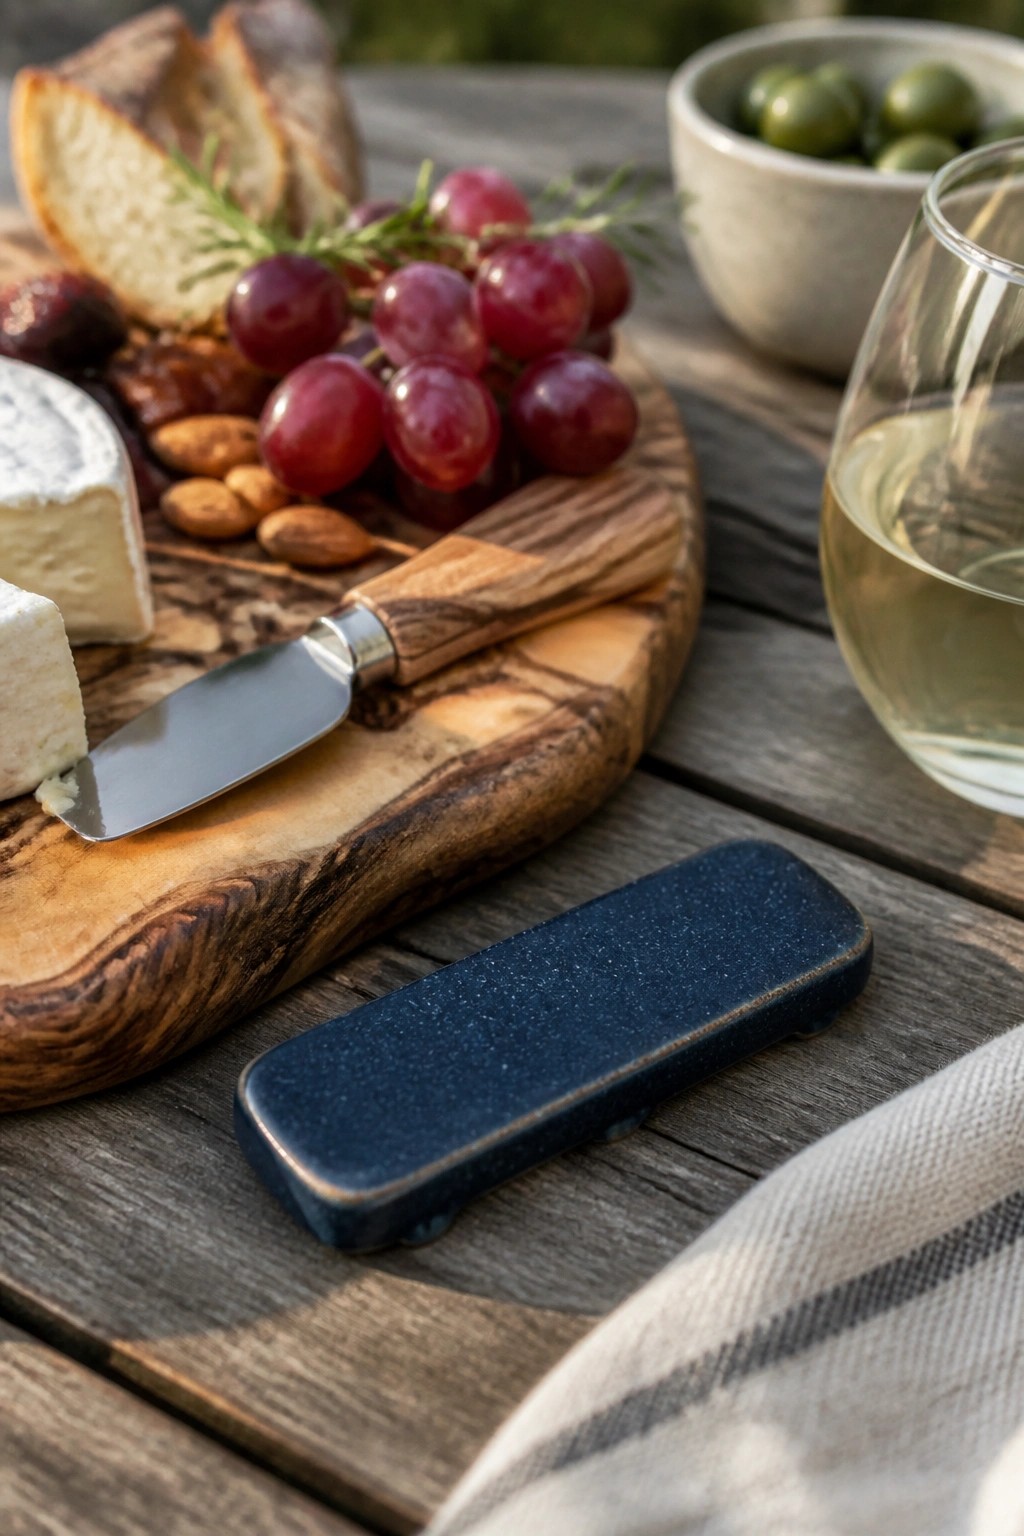
A rectangular tray formed from clay slabs creates a flat, low-profile surface that works as a small serving piece or tabletop organizer. The template method keeps the sides straight and the corners consistent, while a dark speckled glaze adds subtle texture without extra decoration. This approach produces a sturdy kitchen item that sits comfortably next to wooden boards or other tableware.
What makes this idea useful is how the same template can be scaled up for a longer version or narrowed for a knife rest. The speckled finish hides minor surface marks from use, so the tray stays practical on a busy table. In a kitchen, this shape holds small cheeses or olives without taking much space, and the design adapts quickly to a soap dish or desk catch-all by changing the depth slightly.
Frequently Asked Questions
What types of materials make the best templates for slab pottery projects? Cardboard, thin wood sheets, or plastic like acetate work well for templates because they hold shape firmly while allowing easy tracing. Cut them with a craft knife for precision, then sand edges smooth to avoid rough marks on clay. Laminate paper templates with clear packing tape for durability if you plan to reuse them across multiple pieces.
How should clay be prepared to achieve the cleanest cuts with templates? Roll slabs to an even thickness of about a quarter inch using guides like wooden slats on either side of the clay. Let the slab rest until it reaches a leather hard stage before placing the template on top. This firmness prevents dragging or tearing during cutting with a needle tool or sharp knife.
What techniques help with assembling multiple template cut slabs without warping? Score and slip all joining edges thoroughly, then press pieces together gently while supporting them from inside with crumpled newspaper or foam. Work in stages to let sections firm up before adding more parts. Use a small paintbrush to smooth seams and avoid fingerprints that could distort the clean lines from your templates.
How can I adapt the template ideas if my clay type or tools differ from those suggested? Start by testing one simple shape from the list on a small test slab to see how your clay responds to cutting and drying. Adjust template sizes slightly larger if your clay shrinks more during firing, and substitute a pizza cutter for a needle tool if it gives smoother edges on your specific clay body.
What steps prevent templates from sticking or leaving residue on the clay surface? Dust both the clay and template lightly with cornstarch or a clay specific release powder before tracing. Lift the template straight up after cutting rather than sliding it to minimize marks. If residue appears, gently wipe the area with a damp sponge once the piece is leather hard but before full drying.

Pottery Path is my cozy corner of the internet where I share clay ideas, pottery inspiration, and simple projects you can recreate at home. I love exploring everything from air dry clay to handbuilt pottery to cute minis that brighten your day. My goal is to make clay crafting feel easy, fun, and welcoming for anyone who wants to try it.
You will find beginner friendly tutorials, creative pottery painting ideas, and lots of warm inspiration for slow and happy crafting. If you enjoy hands on creativity, this space will feel like home.