Ever wondered why your hand pruner seems to struggle through even the simplest of cuts? Picture this: you’re in the garden, ready to trim your plants, but your pruner just isn’t up to the task. Fret not, because in this article, you’ll discover the secrets to sharpening your hand pruner like a pro.
Importance of Sharp Hand Pruners
When it comes to sharp hand pruners, you’ll find that they offer numerous benefits that can make your gardening tasks much easier. Here’s why they are crucial:
- Efficiency: Sharp blades make cutting through branches like a hot knife through butter.
- Clean Cuts: Sharp pruners ensure clean cuts, which helps plants heal faster without jagged edges.
- Plant Health: Clean cuts reduce the risk of infections, promoting overall plant health and growth.
Sharpening your hand pruners regularly is key to maintaining their effectiveness.
Signs Your Hand Pruner Needs Sharpening
If you’re finding it harder to make clean cuts in your garden, it might be time to sharpen your hand pruner. Here are some signs that indicate your tool needs some sharpening:
- Blunt Cuts: Are you noticing more crushing than slicing when pruning branches?
- Ragged Edges: Do the cut ends of branches look frayed instead of smooth?
- Increased Effort: Are you exerting more force than usual to cut through branches?
Remember, a sharp hand pruner not only makes your gardening tasks easier but also promotes plant health.
Materials Needed for Sharpening
To sharpen your hand pruner effectively, you’ll need a few essential materials. Here’s what you’ll need:
- Sharpening Stone: An essential tool for restoring the sharp edge of your hand pruner blade.
- Lubricating Oil: Helps in smoothing the sharpening process and prevents corrosion on the blade.
- Safety Gloves: To protect your hands while handling the sharp blade and stone.
- Cleaning Cloth: Used to wipe the blade clean before and after sharpening.
- Safety Goggles: For eye protection against any metal particles that may fly off during sharpening.
Remember to gather these materials before you start sharpening your hand pruner.
Recommended Products
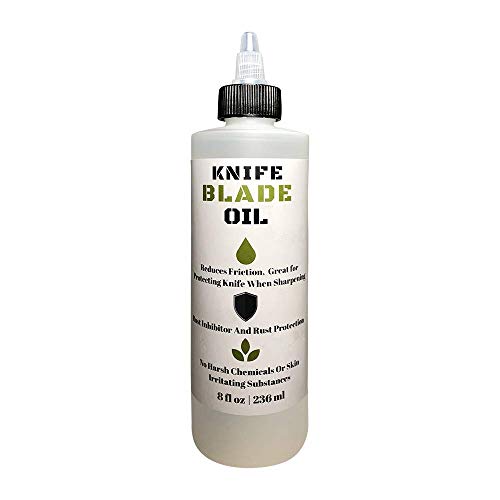
NATURAL & SAFE: Our Knife Blade oil is composed of 100% natural food-safe ingredients to provide worry-free use. While also providing superior protection for kitchen knives, pocket knives, and more

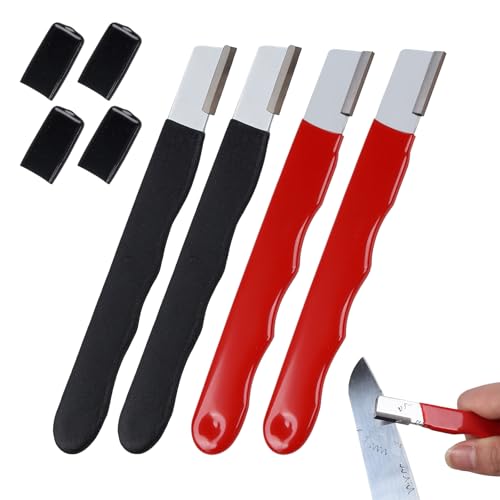
Easy to use and carry: the pocket knife sharpener works well on restoring and honing all sorts of garden tool, knife, scissors, etc.; Portable folding design fits in the pocket or tool bag, convenient to store and carry around

HONING SOLUTION – Smith’s Honing Solution features built-in stone cleaning agents and rust corrosion inhibitors and it can be used on all sharpening stones. This non-petroleum-based honing oil will prevent your sharpening stones from clogging.
Step-by-Step Guide to Sharpening Your Hand Pruner
Sharpening your hand pruner properly is crucial to maintaining its effectiveness. Here’s a simple guide to help you achieve sharp, precise cuts every time:
- Clean the Blades: Before beginning, make sure to clean the blades with a damp cloth to remove any dirt or sap buildup.
- Inspect for Damage: Check the blades for any nicks or dents that may require professional repair.
- Secure the Pruner: Use a vise or clamp to secure the pruner in place, ensuring stability during the sharpening process.
- Sharpen the Blade: Hold a sharpening stone at a 20-degree angle against the blade’s edge and move it along the cutting edge in smooth, consistent strokes. Repeat on the other blade if your pruner is bypass style.
- Test for Sharpness: After sharpening, carefully feel the blade’s edge. It should be smooth and free of any rough spots.
- Oil the Blades: Apply a few drops of lubricating oil to the blades and work the pruner a few times to distribute the oil evenly.
- Safety First: Remember to wear safety gloves and safety goggles throughout the sharpening process to protect your hands and eyes.
- Final Check: Before using the pruner, make sure it’s operating smoothly and the blades are sharp.
| Step | Description |
|---|---|
| Clean the Blades | Remove dirt and sap buildup with a damp cloth. |
| Inspect for Damage | Check for nicks or dents that may need repair. |
| Secure the Pruner | Use a vise or clamp for stability during sharpening. |
| Sharpen the Blade | Hold the sharpening stone at a 20-degree angle and move along the cutting edge. |
| Test for Sharpness | Check blade for smoothness without rough spots. |
| Oil the Blades | Apply lubricating oil and distribute evenly. |
| Safety First | Wear safety gloves and goggles for protection. |
| Final Check | Ensure smooth operation and sharp blades before use. |
Recommended Products

Tungsten Carbide Blade for Fast, Effective Sharpening – Features a durable tungsten carbide sharpening edge that restores a sharp, clean blade in just a few strokes, helping pruners, loppers, shears, and knives cut smoothly with less resistance.

Durable monocrystalline diamonds coated full tang stainless steel. The diamond coating of this product has a very high hardness. It can sharpen all your tools like new ones.

One-Stop Sharpener: The Orange Ninja Multi-Sharpener is your all-in-one solution for maintaining razor-sharp edges on a vast array of tools. Expertly crafted to cater to everything from knives to hunting gear, and garden tools including axes, hatchets, machetes, pruners, hedge shears. With our advanced sharpening system, you can be confident that each tool, whether used indoors or outdoors, will deliver peak performance every time
Testing Your Sharpened Hand Pruner
When sharpening your hand pruner, you must ensure that it’s truly sharp and ready for action. Testing is crucial to verify the effectiveness of the sharpening process. Here’s how to do it:
- Select a Suitable Test Material: Find a material like softwood or a thin branch to test the sharpness.
- Gently Cut the Material: Try a gentle cut using your pruner. A sharp blade should slice through smoothly without much force.
- Inspect the Cut: Check the cut surface; a clean and precise cut indicates sharpness.
- Check for Resistance: If you feel resistance or the cut is jagged, the blade might need further sharpening.
Testing ensures that your pruner is safe and efficient for use. It’s a quick way to verify your sharpening efforts and guarantee a job well done.
Remember, a razor-sharp blade is essential for clean cuts and healthy plants. Use this simple test to ensure your hand pruner is in top condition before you start your next pruning session.
Recommended Products

QUICK & EFFECTIVE SHARPENING ANYWHERE : Our is crafted from high-quality steel, delivering a fine, razor-sharp edge in seconds. It's perfectly designed for quick touch-ups on garden tools like pruners, shears, and knives, ensuring your blades are always ready for a clean cut, whether in the garden or at the campsite
QUICK & EFFECTIVE SHARPENING ANYWHERE : Our is crafted from high-quality steel, delivering a fine, razor-sharp edge in seconds. It's perfectly designed for quick touch-ups on garden tools like pruners, shears, and knives, ensuring your blades are always ready for a clean cut, whether in the garden or at the campsite
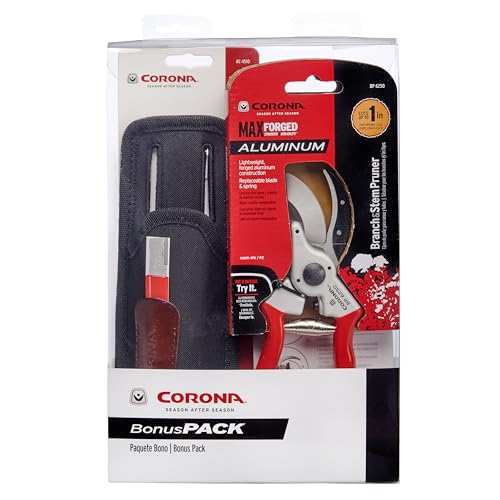
Kit includes BP 6250 Aluminum Bypass Pruner, AC 4510 Universal Tool Pouch and AC 8300 Carbide Sharpening Tool
Conclusion
Ensuring your hand pruner is sharp is key for successful pruning. By testing it on suitable material, checking for smooth cuts, and inspecting the precision, you guarantee a well-sharpened tool. Remember, a sharp blade is essential for clean cuts and plant health. So, before you start pruning, make sure your hand pruner passes the test. Happy pruning!
Frequently Asked Questions
What is the significance of testing a sharpened hand pruner?
Testing your sharpened hand pruner is crucial to ensure its effectiveness. By conducting tests on a suitable material, making a gentle cut, inspecting the cut surface, and noting any resistance or jagged cuts, you can confirm the blade’s sharpness and precision. This testing process is essential to guarantee clean cuts, maintain plant health, and ensure your hand pruner is ready for efficient pruning tasks.
I’ve always been drawn to trees.As a kid, I spent most of my free time outside, climbing, exploring, and trying to figure out the names of the trees around me.That early curiosity eventually led me to study arboriculture and horticulture at Michigan State.Later, I completed a degree in forestry at the University of Michigan.
I’ve been working in tree care and education ever since.These days, I enjoy helping people learn more about the trees in their own backyards.How they grow, how to care for them, and why they matter.You don’t need to be an expert to appreciate trees.A little curiosity goes a long way.