Ever found yourself staring up at your overgrown trees, wishing you could effortlessly trim them back to perfection? Imagine being able to tackle that task with ease, but then you realize the rope on your Corona tree pruner has seen better days. Fret not, dear reader, for we’ve got your back! In this article, we’ll guide you through the simple yet vital process of replacing the rope on your trusty Corona tree pruner.
Assess the Current Rope Situation
When examining your Corona tree pruner’s rope, look for fraying, knots, or signs of wear. A damaged rope can lead to inefficiency or accidents during trimming. Here’s how you can assess the current state of your tree pruner’s rope effectively:
- Inspect the entire length of the rope for any visible signs of wear, tear, or damage.
- Check for knots or tangles that may impede smooth operation.
- Ensure the rope moves freely through the pulley system without any obstructions.
- Test the strength of the rope by gently pulling on it to see if it holds securely.
If you notice any significant wear or weakness, it’s time to replace the rope to maintain the efficiency and safety of your Corona tree pruner.
Gather Necessary Tools and Replacement Rope
To replace the rope on your Corona tree pruner, you’ll need a few essential tools and materials. Here’s what you’ll require:
- New rope: Ensure you have the right type and length of rope that matches the specifications of your Corona tree pruner.
- Scissors or utility knife: You’ll need these for cutting and trimming the new rope to the correct size.
- Screwdriver or wrench: Depending on your pruner model, you may need a screwdriver or wrench to disassemble parts for rope replacement.
- Needle-nose pliers: These will come in handy for securing the rope in place and making any necessary adjustments.
- Owner’s manual: Refer to the manual for specific instructions on disassembling your pruner for rope replacement.
Before you begin the replacement process, ensure you have all these tools ready for a smooth and efficient rope replacement.
Recommended Products
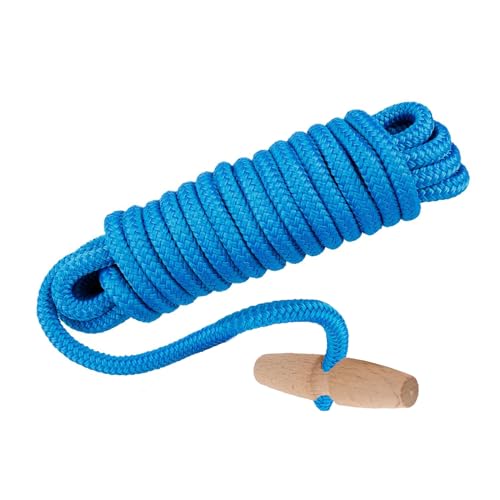
PR-20 Tree Pruner Rope Replacement, for Jameson Fiscar Big Mouth Manual Pole Saw & Tree Pruner,20 feet long with a 5/16 inch diameter(with Wooden Handle)

High-quality PR-20 Tree Pruner rope: Measuring 20 feet long, this product is a sturdy tree pruner rope that is compatible with Jameson Fiskars pruners.

Brand: Corona
Remove the Old Rope
To begin the process of replacing the rope on your Corona tree pruner, you should start by removing the old rope. Follow these steps to ensure a smooth transition:
- Step 1: Locate the securing bolts or screws that hold the rope in place on the pruner.
- Step 2: Using a screwdriver or wrench, unscrew the bolts or screws to release the old rope.
- Step 3: Once the bolts or screws are removed, carefully pull out the old rope from the pruner’s system.
- Step 4: Make sure to inspect the pulley system and other components for any signs of damage or wear while the old rope is removed.
Remember, safety should always be a top priority when working on any tool or equipment. Wear appropriate gear and handle all parts with caution to prevent accidents or injuries during the process.
Essential Tools for Rope Replacement
Before delving into the replacement process, ensure you have all the necessary tools ready. Here’s a list of what you’ll need:
| Tool/Material |
|---|
| New rope |
| Scissors or utility knife |
| Screwdriver or wrench |
| Needle-nose pliers |
| Owner’s manual |
Having these tools at hand will streamline the process and help you complete the rope replacement efficiently.
Install the New Rope
- Feed the new rope through the hole in the pruner’s handle.
- Tie a secure knot at the end of the new rope to prevent it from slipping back through the hole.
- Thread the other end of the rope through the pulley system according to the pruner’s manual.
- Adjust the tension of the rope by pulling it taut but not overly tight.
- Test the pruner to ensure smooth operation before using it on branches.
| Important Note |
|---|
| Always refer to the owner’s manual for specific instructions on threading the new rope. |
Recommended Products

Pole saw rope: PR-20 This poly pruning rope measures 20 feet long with a 5/16-inch diameter, tree pruner replacement rope, Compatible with Jameson Fiskars pruner

Compatible with the Corona 4200-5 tree pruner and rope-driven saws, this 4200-5 pruner spring fits models TP 4212, TP 4214, and TP 4216 for reliable performance.

Compatible with Corona 3800-5 compound action tree pruner—this 3800-5 pruner spring is suitable for models TP 3811, TP 3841, and TP 3714, serving as a direct replacement spring for compound action pruners with rope drive.
Test the Pruner
Now that you’ve replaced the rope on your Corona tree pruner, it’s crucial to test it to ensure it functions correctly. Here’s how you can do it:
- Step 1: Hold the pruner securely in your hand.
- Step 2: Give the rope a gentle pull to engage the cutting mechanism.
- Step 3: Release the rope and check if the blade retracts smoothly.
- Step 4: Repeat the process a few times to confirm consistent operation.
Remember, testing the pruner after replacing the rope ensures that it’s functioning safely and effectively.
Conclusion
You now have the knowledge to confidently replace the rope on your Corona tree pruner. By following the outlined steps and tips, you can ensure that your pruner operates smoothly and effectively. Remember to refer to the owner’s manual for any specific instructions and always test the pruner after replacing the rope to guarantee its safe and consistent performance. With these insights, you can maintain your tree pruner in top condition and continue to enjoy hassle-free pruning experiences.
Frequently Asked Questions
Q: How do I feed the rope through the handle of a Corona tree pruner?
A: Simply insert one end of the rope into the handle opening and push it through until it comes out the other side securely.
Q: What knot should I use to secure the rope in the Corona tree pruner handle?
A: A reliable and strong knot to use is the double overhand knot to ensure the rope stays in place.
Q: How do I thread the rope through the pulley system of the Corona tree pruner?
A: Thread the rope through each pulley in the system following the path outlined in the owner’s manual for smooth operation.
Q: How can I adjust the tension of the new rope in the Corona tree pruner?
A: Adjust the tension by pulling the excess rope through the handle and tightening it to the desired level before securing the end.
Q: What is the best way to test the Corona tree pruner after installing a new rope?
A: Test by gently pulling the rope to engage the cutting mechanism, checking for smooth blade retraction, and ensuring consistent functionality for safe operation.
I’ve always been drawn to trees.As a kid, I spent most of my free time outside, climbing, exploring, and trying to figure out the names of the trees around me.That early curiosity eventually led me to study arboriculture and horticulture at Michigan State.Later, I completed a degree in forestry at the University of Michigan.
I’ve been working in tree care and education ever since.These days, I enjoy helping people learn more about the trees in their own backyards.How they grow, how to care for them, and why they matter.You don’t need to be an expert to appreciate trees.A little curiosity goes a long way.