Ever found yourself struggling to figure out the right way to put the blade on your Fiskars pole pruner? It can be a real head-scratcher, can’t it? You’re not alone in this dilemma. Many gardeners face the same challenge when it comes to maintaining their tools. But fret not, because we’ve got your back!
Gather Your Tools
When assembling your Fiskars pole pruner properly, having the right tools within reach is crucial. Before you start, ensure you have the following items handy:
- Fiskars pole pruner blade
- Wrench or screwdriver
- Work gloves
- Safety goggles
To avoid any unnecessary interruptions during the process, gather all these tools in one place. This preparation will make attaching the blade to your Fiskars pole pruner a smooth and efficient task.
Recommended Products

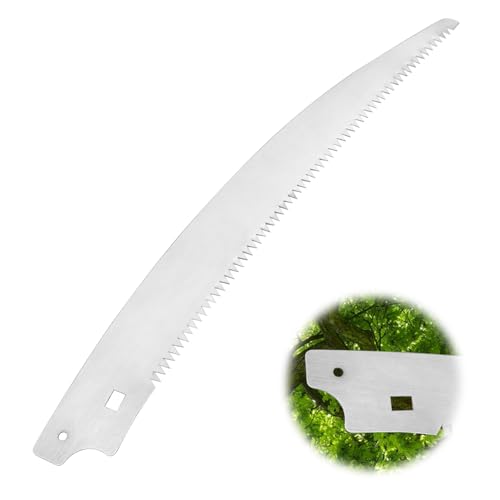
COMPATIBLE WITH MULTIPLE FISKARS MODELS: Fits Fiskars pruning saw models 9388, 9389, 9390, 9391, 8391, 7889, 7831, 6391 and tree pruner models 9300, 9261, TP45, 9301, 9236

[POLE SAW PRUNER BLADE] Length of the pole saw replacement blade is 15 inches, it is a replacement pruning saw blade designed for fiskars extendable tree pruner parts. The sharp serrated teeth can easily trim branches up to 1.25” or so and help extend the life of pole saw replacement blade.

The Corona Clipper razor tooth 13-Inch replacement tree pruner saw blade for Corona models TP 6870, TP 6850, TP 6830, TP 6780, TP 6570 and AC9000
Remove the Old Blade
To begin the process of putting a blade on your Fiskars pole pruner, start by removing the old blade. Follow these simple steps:
- Step 1: Locate the screws holding the old blade in place on the pole pruner.
- Step 2: Use a screwdriver or wrench to carefully loosen and remove the screws.
- Step 3: Gently detach the old blade from the pole pruner, being cautious not to damage any other components.
- Step 4: Inspect the blade and surrounding area for any signs of wear, damage, or debris that may need attention before attaching the new blade.
Remember, proper removal of the old blade is crucial for a successful blade replacement process.
Prepare the New Blade
To successfully attach the new blade to your Fiskars pole pruner, follow these steps:
- Check the Blade: Before attaching the new blade, ensure it is compatible with your specific Fiskars model. Inspect the blade for any defects or damage that could affect its performance.
- Prepare the Pruner: Ensure the pole pruner is switched off and securely locked to prevent any accidents during the blade attachment process.
- Gather Tools: Have all the necessary tools and equipment ready, such as a screwdriver or any specific tool required for your pruner model.
- Securely Attach the Blade: Follow the manufacturer’s instructions to properly position the new blade and screw it into place securely.
- Double-Check: After attaching the new blade, give it a gentle tug to ensure it is firmly in place before operating the pole pruner.
| Important Guidelines |
|---|
| Blade Compatibility Check: Ensure the new blade is compatible with your Fiskars pole pruner model. |
| Secure Attachment: Properly secure the new blade by following the manufacturer’s instructions. |
Remember, the proper attachment of the new blade is essential for the safe and efficient operation of your Fiskars pole pruner.
Recommended Products
[POLE SAW PRUNER BLADE] Length of the pole saw replacement blade is 15 inches, it is a replacement pruner saw blade for fiskars. The sharp serrated teeth can easily trim branches up to 1.25” or so and help extend the life of 9390 tree pruner blade.

HIGH-PERFORMANCE REPLACEMENT SAW BLADE: Designed to replace and restore cutting efficiency for Fiskars Lightweight Extendable Tree Pruner and Chain-Drive Extendable Tree Pruner models.

【COMPATIBLE WITH】Saw blade is designed for compatible with Fiskars Pruning Saw models 9388, 9389, 9390, 9391, 8391, 7889, 7831 and 6391. Also fits pruner models 9300, 9261 and TP45; Fits Fiskars Tree Pruner models #9301, #9300, #9261, and #9236.
Attach the New Blade
- Secure the Pruner: Ensure the pruner is safely secured before you begin.
- Align the Blade: Fit the new blade onto the mounting bracket, aligning the holes.
- Insert Screws: Insert and tighten the screws into place, following the manufacturer’s instructions.
- Double-Check: Ensure the blade is securely attached before operating the pole pruner.
Testing the Blade
- Before testing the blade, carefully inspect it for any damages or defects.
- Securely tighten all screws and bolts to prevent any movement during use.
- Check the alignment of the blade to guarantee smooth and efficient cutting.
- Test the blade on small branches or foliage to assess its sharpness and cutting ability.
| Blade Testing Tips |
|---|
| Inspect blade for damage |
| Securely tighten screws and bolts |
| Check alignment for smooth cutting |
| Test blade on small branches |
Conclusion
You’ve now learned the essential steps for putting a blade on your Fiskars pole pruner. By following the tips shared in this article, you can ensure that your pole pruner operates safely and effectively. Remember to inspect the blade, tighten all screws, check the alignment, and test the blade on small branches. These simple yet crucial actions will help you maintain a sharp and efficient cutting tool for your pruning needs. Keep these guidelines in mind each time you replace the blade on your Fiskars pole pruner to make the process smooth and hassle-free. Happy pruning!
Frequently Asked Questions
1. Why is it important to test the new blade on a Fiskars pole pruner?
Testing the new blade on a Fiskars pole pruner ensures safe and efficient operation. It allows for inspecting damages, securing screws, checking alignment, and assessing cutting ability on small branches.
2. What steps should be taken before testing the new blade?
Before testing, ensure to inspect the blade for damages, securely tighten all screws and bolts, check alignment, and test the blade on small branches to evaluate sharpness and cutting performance.
I’ve always been drawn to trees.As a kid, I spent most of my free time outside, climbing, exploring, and trying to figure out the names of the trees around me.That early curiosity eventually led me to study arboriculture and horticulture at Michigan State.Later, I completed a degree in forestry at the University of Michigan.
I’ve been working in tree care and education ever since.These days, I enjoy helping people learn more about the trees in their own backyards.How they grow, how to care for them, and why they matter.You don’t need to be an expert to appreciate trees.A little curiosity goes a long way.