Ever found yourself staring at your Fiskars pole pruner, wondering how to restring it without turning it into a tangled mess? You’re not alone. It’s a common puzzle many gardeners face. But fret not, because in this article, I’ll guide you through the process step by step.
Imagine effortlessly gliding through branches, trimming with precision, and feeling like a pruning pro. That’s the power of mastering the art of restringing your Fiskars pole pruner. With a few simple tips and tricks, you’ll be back to pruning with ease in no time.
Get ready to say goodbye to frustration and hello to a smoothly operating pole pruner. Let’s dive in and unravel the mystery of restringing your Fiskars tool.
Step 1: Gather the Necessary Tools
Starting on the right foot is crucial. Ensuring you have all the tools on hand will make the restringing process go smoothly. Here’s what you’ll need:
- New replacement rope
- Small screwdriver
- Wire cutters or scissors
- Flathead screwdriver
- Needle-nose pliers
- Clean work area
Not having the right tools can make the task daunting. Being prepared sets you up for success.
Recommended Products

High-quality PR-20 Tree Pruner rope: Measuring 20 feet long, this product is a sturdy tree pruner rope that is compatible with Jameson Fiskars pruners.
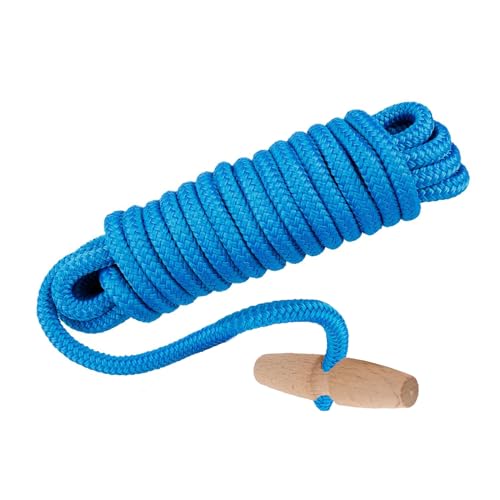
PR-20 Tree Pruner Rope Replacement, for Jameson Fiscar Big Mouth Manual Pole Saw & Tree Pruner,20 feet long with a 5/16 inch diameter(with Wooden Handle)
【Easy installation】Made with a flexible and tough material,this easily thread the rope end over pulleys and tie securely to the eyebolt on the Adapter. Route the rope over the upper pulley, under the lower pulley on the adapter and secure the end to the upper pulley, making it ideal for use with pole pruning saws.
Step 2: Determine the Correct String Length
To begin, measure the length of the old rope you just removed. Ensure it’s pulled tight for an accurate measurement.
Then, add a few extra inches to compensate for any knots or fraying on the old rope. This extra length will ensure you have enough for the restringing process.
Remember, having the right length of string is crucial for a successful restringing.
Step 3: Remove the Old String
To begin the process of restringing your Fiskars pole pruner, you’ll first need to remove the old string. This step is crucial to ensure a smooth and successful restringing process. Here’s how you can do it:
- Locate the Knot: Start by finding the knot that secures the old string to the pruner head. It’s usually located near the cutting blade.
- Carefully Untie the Knot: Using your fingers or a small tool like needle-nose pliers, carefully untie the knot that holds the old string in place. Make sure to do this gently to avoid damaging any components.
- Pull Out the Old String: Once you’ve untied the knot, slowly pull the old string out of the pruner head. Take care not to yank it out abruptly to prevent any tangling or potential damage.
- Inspect for Residual String: After removing the old string, inspect the pruner head to ensure there are no leftover pieces of string or debris that could interfere with the restringing process.
By following these steps carefully, you’ll be one step closer to successfully restringing your Fiskars pole pruner and getting it back in optimal working condition.
Step 4: Thread the New String
After removing the old string from your Fiskars pole pruner, it’s time to thread the new string and get your tool ready for action. Here’s how you can do it:
- Feed the New String: Begin by feeding the new string through the hole at the bottom of the cutting blade. Make sure it goes all the way through.
- Pull the String: Gently pull the string until the ends are even. Ensure there are no tangles or knots along the way.
- Secure the String: Tie a tight knot at the end of the string to prevent it from slipping back through the hole.
- Check the Tension: Test the tension by giving the string a light tug. It should be securely in place and ready for use.
Congratulations! You’ve successfully threaded the new string on your Fiskars pole pruner. It’s time to put it to work and enjoy the benefits of a properly restrung tool.
Recommended Products
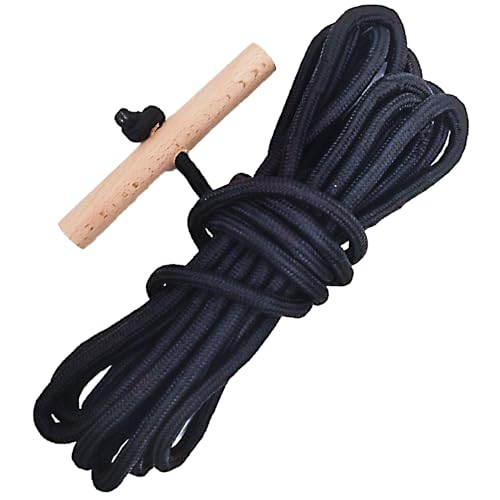
Ultra-Strong & Durable: This premium 3/8" nylon braided pruner cord is engineered to withstand heavy-duty use, resisting abrasion, rot, and UV damage. Its superior strength and durability make it the ideal replacement cord for pole saws, tree pruners, and other high-demand applications.

Telescopic tree pruner with SK5 carbon steel blade which stays sharper for longer
【Practical Tree Pruner Rope】This tree pruner cord replacement for Jameson Fiskars Big Mouth Manual Pole Saw and Tree Pruner is a versatile must-have tool that ensures smooth operation when pruning trees.
Step 5: Secure the String in Place
To ensure proper functionality, you must secure the string tightly in place. Here’s how you do it:
- Tie a tight knot at the end of the string to keep it from coming loose.
- Make sure the knot is secure and won’t slip when under tension.
- Once the knot is in place, check for any slippage by lightly tugging on the string.
Remember, a secure knot is essential for smooth pruning.
Recommended Products

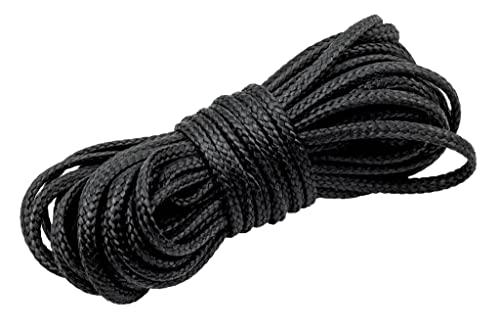
Designed for Z104 pole pruner spring replacement, compatible with Marvin PH4 pruner head and other common pole pruner models, offering a reliable spring replacement

Pole saw rope: PR-20 This poly pruning rope measures 20 feet long with a 5/16-inch diameter, tree pruner replacement rope, Compatible with Jameson Fiskars pruner

Smooth Cutting: The pruning head can snip branches up to 3cm/1.2 inches thick. The 34cm/13.5 inches long saw blade is made from 1.2mm thick high-carbon SK5 steel and sharpened on 3 sides for smooth cuts. With a sharp saw blade and hedge clipper, easy to cut shrubs, bushes, grass, and branches, Save time and energy.
Conclusion
And there you have it – your Fiskars pole pruner is now restringed and ready for action. By following these simple steps to thread the new string securely and ensuring a tight knot, you’ve set yourself up for smooth and effective pruning sessions. Remember, a well-strung pole pruner is key to achieving clean cuts and maintaining your garden with ease. So, grab your newly restringed tool and get ready to tackle those overgrown branches like a pro!
Frequently Asked Questions
How do I secure the new string on my Fiskars pole pruner?
To secure the new string on your Fiskars pole pruner, tie a tight knot at the end of the string. Ensure the knot is secure and won’t slip under tension. Test for slippage by gently pulling on the string. A secure knot is vital for smooth pruning.
What are the key steps for restringing a Fiskars pole pruner?
The key steps for restringing a Fiskars pole pruner involve threading the new string and securely tying a knot at the end. Make sure the knot is tight and won’t slip under tension. Check for any slippage by lightly tugging on the string to ensure a secure attachment.
Why is it essential to tie a tight knot when restringing a pole pruner?
Tying a tight knot when restringing a pole pruner is crucial to prevent the string from coming loose during pruning. A secure knot ensures smooth functionality and effective use of the tool. Checking for slippage by gently pulling on the string helps verify the knot’s security and reliability.
I’ve always been drawn to trees.As a kid, I spent most of my free time outside, climbing, exploring, and trying to figure out the names of the trees around me.That early curiosity eventually led me to study arboriculture and horticulture at Michigan State.Later, I completed a degree in forestry at the University of Michigan.
I’ve been working in tree care and education ever since.These days, I enjoy helping people learn more about the trees in their own backyards.How they grow, how to care for them, and why they matter.You don’t need to be an expert to appreciate trees.A little curiosity goes a long way.