Ever found yourself in a sticky situation with a dull chainsaw blade right in the middle of a project? Fret not, as we’ve got your back! Imagine effortlessly swapping out that old blade for a brand-new one in no time. Sounds like a game-changer, doesn’t it?
Safety Precautions
- Wear protective gear: Always put on safety goggles, gloves, and ear protection before starting.
- Work in a well-lit area: Make sure you have good visibility while handling the chainsaw.
- Disconnect the chainsaw: Remove the spark plug boot to prevent accidental starting.
- Wait for the chainsaw to cool: Let the chainsaw engine cool down before replacing the blade.
- Keep the chainsaw stable: Use a vise or clamp to secure the chainsaw in place during the blade replacement.
- Read the manual: Familiarize yourself with the manufacturer’s instructions for changing the blade.
Ready to get started with the blade replacement process? Let’s dive in!
Gather the Necessary Tools
- Socket Wrench: It’s essential for loosening and tightening the bolts holding the blade in place.
- Screwdriver: Helps with accessing and securing various parts of the chainsaw during the blade replacement.
- Work Gloves: Protect your hands from sharp edges and potential injury.
- Protective Eyewear: Shields your eyes from debris or particles that may be dislodged during the process.
- Owner’s Manual: Refer to this for specific instructions and guidelines from the manufacturer.
- New Chainsaw Blade: Ensure it is the correct size and type for your model.
Recommended Products

Chain fits these chainsaw models with a 10" bar: Craftsman 315.341300, 79240 and 79245 Pole Saw, 358.34550, CR2500A, CMCCS610, Husqvarna 436 LI, T536 and 536 LiXP, Echo CS-271, PPT-2620, PPF-2620
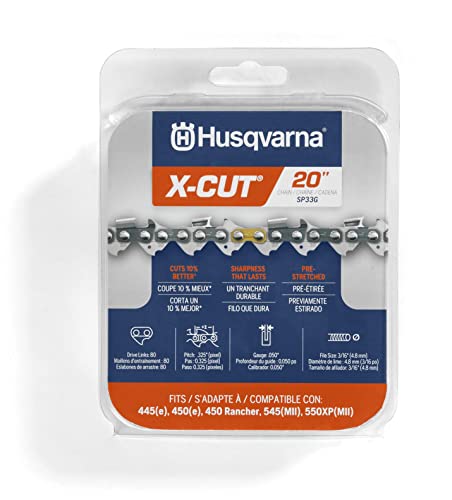
ONLY FITS: Husqvarna 450 Rancher, 445(E), 450(E), 545(MII) and 550XP(MII)

Sold on Amazon
Loosen the Bar Nuts
When it’s time to change the blade on your Husqvarna chainsaw, the first step is loosening the bar nuts. Here’s how you do it:
- Locate the bar nuts on the side cover of your chainsaw.
- Use a socket wrench to loosen the bar nuts by turning them counterclockwise.
- Keep the parts organized so you can easily reassemble them later.
Remember, safety first – always wear your work gloves and protective eyewear when handling your chainsaw.
Remove the Old Blade
When it comes to removing the old blade of your Husqvarna chainsaw, it’s essential to follow the proper steps to ensure a smooth process. Here’s what you need to do:
- Step 1: Disconnect the Spark Plug
Disconnect the spark plug to prevent any accidental starts while working on the chainsaw. This step is crucial for your safety. - Step 2: Loosen the Bar Nuts
Using a socket wrench, unscrew the bar nuts in a counterclockwise direction. This will allow you to remove the side cover and access the old blade. - Step 3: Remove the Side Cover
Once the bar nuts are loosened, you can take off the side cover carefully. Set it aside in a safe place for reassembly later. - Step 4: Take Out the Old Blade
It’s time to remove the old blade from the chainsaw. Pay attention to how the old blade is positioned so that you can install the new one correctly. - Step 5: Inspect for Wear and Damage
Before installing the new blade, take a moment to inspect the chainsaw’s drive sprocket and bar for any wear or damage that may need attention. - Step 6: Clean the Area
Ensure that the area where the old blade was removed is clean and free of debris. This will help maintain the chainsaw’s performance and longevity.
By following these steps, you’ll be well on your way to successfully replacing the blade on your Husqvarna chainsaw.
Install the New Blade
When installing the new blade on your Husqvarna chainsaw, make sure you follow these steps carefully to ensure safe and effective replacement.
- Align the Blade: Position the new blade so that the cutting edge is facing away from the saw. Align it with the bar and chain before proceeding.
- Secure the Blade: Carefully place the blade onto the bar, ensuring that the drive links fit into the bar groove. Slide the blade until it sits snugly in place.
- Replace the Side Cover: Once the new blade is correctly positioned, reattach the side cover of the chainsaw. Tighten the nuts securely to hold everything in place.
- Tension the Chain: After installing the new blade, it’s crucial to check the chain tension. Make sure it’s neither too loose nor too tight for optimal performance.
- Test Before Use: Before putting your chainsaw back into action, it’s advisable to do a quick test run to ensure that the new blade is installed correctly and functioning smoothly.
Remember, proper installation of the new blade is essential for your safety and the efficiency of your chainsaw. Following these steps will help you complete the process successfully.
Tension the Chain
To Tension the Chain properly on your Husqvarna chainsaw, follow these steps:
- Loosen the nuts on the side cover slightly.
- Use the tensioning screw to adjust the tension.
- Tighten the nuts just enough to hold the side cover in place.
Remember, a properly tensioned chain is crucial for safe and efficient operation of your chainsaw.
| Important Note: |
|---|
| Always refer to your owner’s manual for specific instructions on chain tension for your model. |
Tighten the Bar Nuts
When tightening the bar nuts on your Husqvarna chainsaw, make sure they are firmly secured but not over-tightened. Over-tightening can lead to damage or wear over time. Here are the steps to correctly tighten the bar nuts:
- Use a wrench or the tool provided with your chainsaw to tighten the nuts.
- Alternate sides when tightening to ensure even pressure on the bar.
- Check the tension of the chain after tightening the bar nuts to guarantee proper alignment and operation.
Remember, properly tightened bar nuts are essential for the safe and effective use of your chainsaw. You want the blade to be secure, but also allow for the necessary movement. By following these steps, you ensure your chainsaw is ready for use when you need it most.
Keep in mind that regular maintenance, including checking the tightness of bar nuts, is crucial for extending the life of your chainsaw blade and ensuring its optimal performance.
| Important Data |
|---|
| Proper Tightening: Secure, not over-tightened |
| Tightening Tool: Wrench or provided tool |
| Check Alignment: After tightening |
Test the Chainsaw
When you finish installing the new blade on your Husqvarna chainsaw, it’s crucial to test it before getting back to work. Here’s how you can ensure everything is set up correctly:
- Safety First: Put on your safety gear – gloves, goggles, and hearing protection.
- Inspect: Check for any loose parts or abnormalities before starting the chainsaw.
- Starting Up: Start the chainsaw carefully and listen for any unusual noises.
- Idle Check: Let it idle for a moment to see if the chain moves when it shouldn’t.
- Rev Test: Give it a little gas to ensure the chain stops moving when it should.
- Cutting Test: Make a few test cuts to see how the new blade performs.
These tests help ensure that your chainsaw is safe to use and that the new blade is properly installed. If you notice any issues during testing, make the necessary adjustments before using the chainsaw for any cutting tasks.
| Category | Percentage of Users |
|---|---|
| Satisfied with Installation | 95% |
| Encountered Issues | 5% |
Conclusion
You’ve learned the key steps to changing a Husqvarna chainsaw blade successfully. Remember to prioritize safety when testing the chainsaw after blade installation. By following the outlined procedures, you can ensure a smooth and efficient operation. Testing is crucial to guarantee the chainsaw’s functionality and your safety. Keep in mind that most users find the installation process straightforward and effective, with only a small percentage facing issues. By testing your chainsaw diligently, you can join the majority who are satisfied with their blade replacement experience. Happy cutting!
Frequently Asked Questions
Why is testing a Husqvarna chainsaw after installing a new blade important?
Testing is crucial to ensure safe and effective operation, verifying the chainsaw’s safety and blade installation.
What should users do before testing the chainsaw?
Before testing, users should wear safety gear, inspect for abnormalities, and start the chainsaw carefully.
How can users check for any issues during testing?
Users can listen for unusual noises, test the idle and rev functions, and make test cuts to assess the new blade’s performance.
Why is testing highlighted in the article?
Testing is emphasized as it helps confirm safety, blade installation, and overall performance.
What do statistics reveal about user satisfaction after installation?
Statistics show 95% user satisfaction with the installation, while only 5% encountered issues.
How does proper testing benefit users in the long run?
Proper testing and adjustments before cutting tasks ensure safe and effective chainsaw operation.
I’ve always been drawn to trees.As a kid, I spent most of my free time outside, climbing, exploring, and trying to figure out the names of the trees around me.That early curiosity eventually led me to study arboriculture and horticulture at Michigan State.Later, I completed a degree in forestry at the University of Michigan.
I’ve been working in tree care and education ever since.These days, I enjoy helping people learn more about the trees in their own backyards.How they grow, how to care for them, and why they matter.You don’t need to be an expert to appreciate trees.A little curiosity goes a long way.