Ever struggled with a dull hand-held pruner that just won’t make the cut? You’re not alone. Picture this: you’re in the midst of tending to your garden, and your pruner seems to be working against you rather than with you. Fret not, as we’ve got your back! In this article, we’ll unravel the mystery of sharpening a hand-held pruner, helping you get back to effortlessly trimming those unruly branches.
Understanding the Anatomy of a Hand-held Pruner
When sharpening a hand-held pruner, it’s essential to understand its anatomy. Here are the key parts you should know about:
- Blade: The sharp, cutting part of the pruner, responsible for trimming branches.
- Spring: Located between the handles, it helps the pruner to open after each cut.
- Screw: Allows for adjusting the tension of the blades for smoother cuts.
- Handle: Where you grip the pruner, providing leverage for cutting.
Before sharpening your pruner, familiarize yourself with these components to ensure efficient and effective sharpening.
Signs That Your Pruner Needs Sharpening
When it comes to keeping your hand-held pruner in top shape, recognizing the signs that it needs sharpening is crucial for maintaining its effectiveness. Here are some indications that your pruner is due for a sharpening session:
- Difficulties Cutting: If you find it increasingly challenging to make clean cuts through branches or stems, it could be a sign that the blade is dull.
- Crushing Instead of Cutting: When your pruner starts to crush plant material rather than making precise cuts, the blade likely needs sharpening.
- Torn or Ragged Edges: Inspect the cut edges on plants after using the pruner. Ragged or torn edges indicate a dull blade.
- Sap Build-Up: A sticky residue of sap on the blade can impede cutting performance and signal that it’s time for sharpening.
- Increased Effort: If you’re exerting more force than usual to make cuts, the blade might be in need of sharpening.
Observing these tell-tale signs will help you determine when it’s time to hone the blade of your hand-held pruner for optimal cutting performance.
Tools and Materials Required for Sharpening
To sharpen a hand-held pruner effectively, you’ll need the right tools and materials on hand. Here’s what you require:
- Sharpening Stone: Look for a high-quality sharpening stone that is suitable for sharpening blades.
- Gloves: Protect your hands with a sturdy pair of gloves to avoid any accidents during the sharpening process.
- Safety Glasses: Keep your eyes shielded with safety glasses to prevent any debris from harming your eyes.
- Brush: A small brush will come in handy for cleaning the pruner before and after sharpening.
- Oil: Have some lubricating oil ready to apply to the blade after sharpening for smooth operation.
- Cloth: Keep a clean cloth nearby to wipe down the pruner and remove any excess oil.
- Sharpening Guide (optional): A sharpening guide can help maintain the correct angle while sharpening.
When you have these tools and materials prepared, you’ll be all set to sharpen your hand-held pruner effectively.
Step-by-Step Guide to Sharpening Your Hand-held Pruner
So, you’re ready to sharpen your hand-held pruner! Here’s a simple guide to help you get it done efficiently:
-
Step 1: Safety First
- Put on your safety gloves and glasses to protect your hands and eyes.
-
Step 2: Clean Your Pruner
- Use a brush to remove any dirt or debris from the blades.
-
Step 3: Get Your Sharpening Stone Ready
- Ensure your sharpening stone is clean and lubricated before you start.
-
Step 4: Find the Correct Angle
- If you have a sharpening guide, use it to maintain the correct angle.
-
Step 5: Begin Sharpening
- Starting from the base of the blade, sharpen in smooth, even strokes towards the tip.
-
Step 6: Check Your Progress
- Regularly check the sharpness of the blade by testing it on a piece of paper.
- Once you’re satisfied with the sharpness, wipe down the blade with a cloth and apply a light coat of oil for maintenance.
Recommended Products
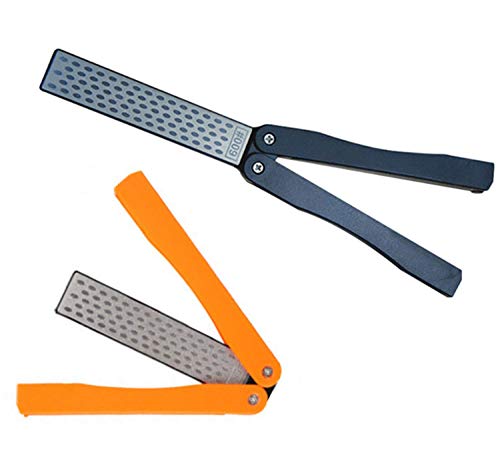
The garden tool sharpener is made of diamond whetstone for durable use, lightweight ABS handle for comfort; Honeycomb surface can sharpen garden implements faster than conventional stones

Easy to use and carry: the pocket knife sharpener works well on restoring and honing all sorts of garden tool, knife, scissors, etc.; Portable folding design fits in the pocket or tool bag, convenient to store and carry around
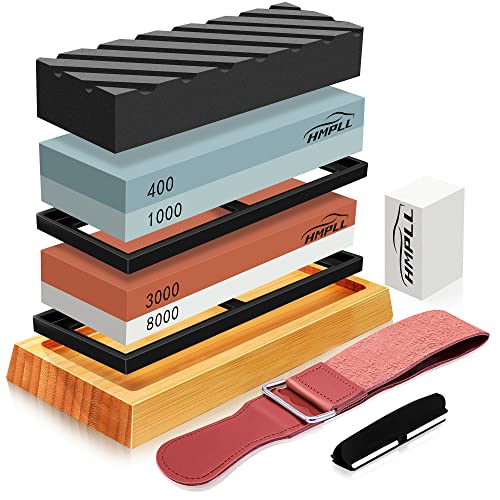
Professional Whetstone: 2 whetstones have difference grit which are 400/1000 and 3000/8000. The grit is accurate. 4 sides grit are satisfy with any knife blade needs. 400/1000 grit is typically used to repair knives with chipped edges and sharpen dull knives. 3000/8000 grit used to refine the edge and provide extra fine finish/polish on your blades.
Tips for Maintaining Sharpness and Longevity
To ensure your hand-held pruner stays sharp and lasts a long time, here are some essential tips to follow:
- Clean after Every Use: Resin, sap, and dirt can build up on the blade, leading to dullness. Wiping the pruner down after each use helps prevent this buildup.
- Regular Inspections: Check your pruner for any nicks or damage. Address these issues promptly to avoid further damage.
- Sharpen When Needed: Using a sharpening stone, **** and a sharpening guide, sharpen the blade when you notice it’s getting dull.
- Proper Storage: Store your pruner in a dry and clean place. A protective sheath or container can help prevent damage.
- Lubrication: Apply a light film of oil to the blade after sharpening to prevent rust and ensure smooth cutting.
By following these simple yet crucial tips, you can keep your hand-held pruner sharp and in top condition for all your gardening needs.
Conclusion
Now that you’ve learned the importance of recognizing when your hand-held pruner needs sharpening and have mastered the steps for sharpening it, you’re well-equipped to keep your tool in prime condition for all your gardening tasks. Remember to regularly inspect for damage, clean after each use, and store it properly in a dry place. By following these simple tips, you can ensure that your hand-held pruner remains sharp and ready whenever you need it. Happy gardening!
Frequently Asked Questions
Why is it important to sharpen a hand-held pruner?
Sharpening a hand-held pruner ensures clean cuts, prevents damage to plants, and reduces strain on your hands.
What tools do I need to sharpen a hand-held pruner?
You will need a sharpening stone or file, safety gloves, and lubricating oil for maintenance.
How do I sharpen a hand-held pruner?
Follow these steps: clean the pruner, locate the bevel edge, sharpen with a stone or file at a 20-degree angle, and lubricate after sharpening.
How often should I sharpen my hand-held pruner?
Sharpen the pruner when you notice dull cuts or jagged edges, typically a few times per gardening season.
How can I maintain the sharpness of my hand-held pruner?
Regularly inspect for damage, clean after each use, store in a dry place, and apply oil post-sharpening to prevent rust.
I’ve always been drawn to trees.As a kid, I spent most of my free time outside, climbing, exploring, and trying to figure out the names of the trees around me.That early curiosity eventually led me to study arboriculture and horticulture at Michigan State.Later, I completed a degree in forestry at the University of Michigan.
I’ve been working in tree care and education ever since.These days, I enjoy helping people learn more about the trees in their own backyards.How they grow, how to care for them, and why they matter.You don’t need to be an expert to appreciate trees.A little curiosity goes a long way.