I started working with clay a couple years ago and found that slab methods work well without a pottery wheel.
They let me make simple pieces using basic supplies I already have at home.
I’ve tried out different projects over time and narrowed down the ones that feel practical.
These include things for the kitchen and garden that hold up in real use.
I wanted to share what has worked for me in case it helps others get started.
Slab-Built Jewelry Catchall Tray
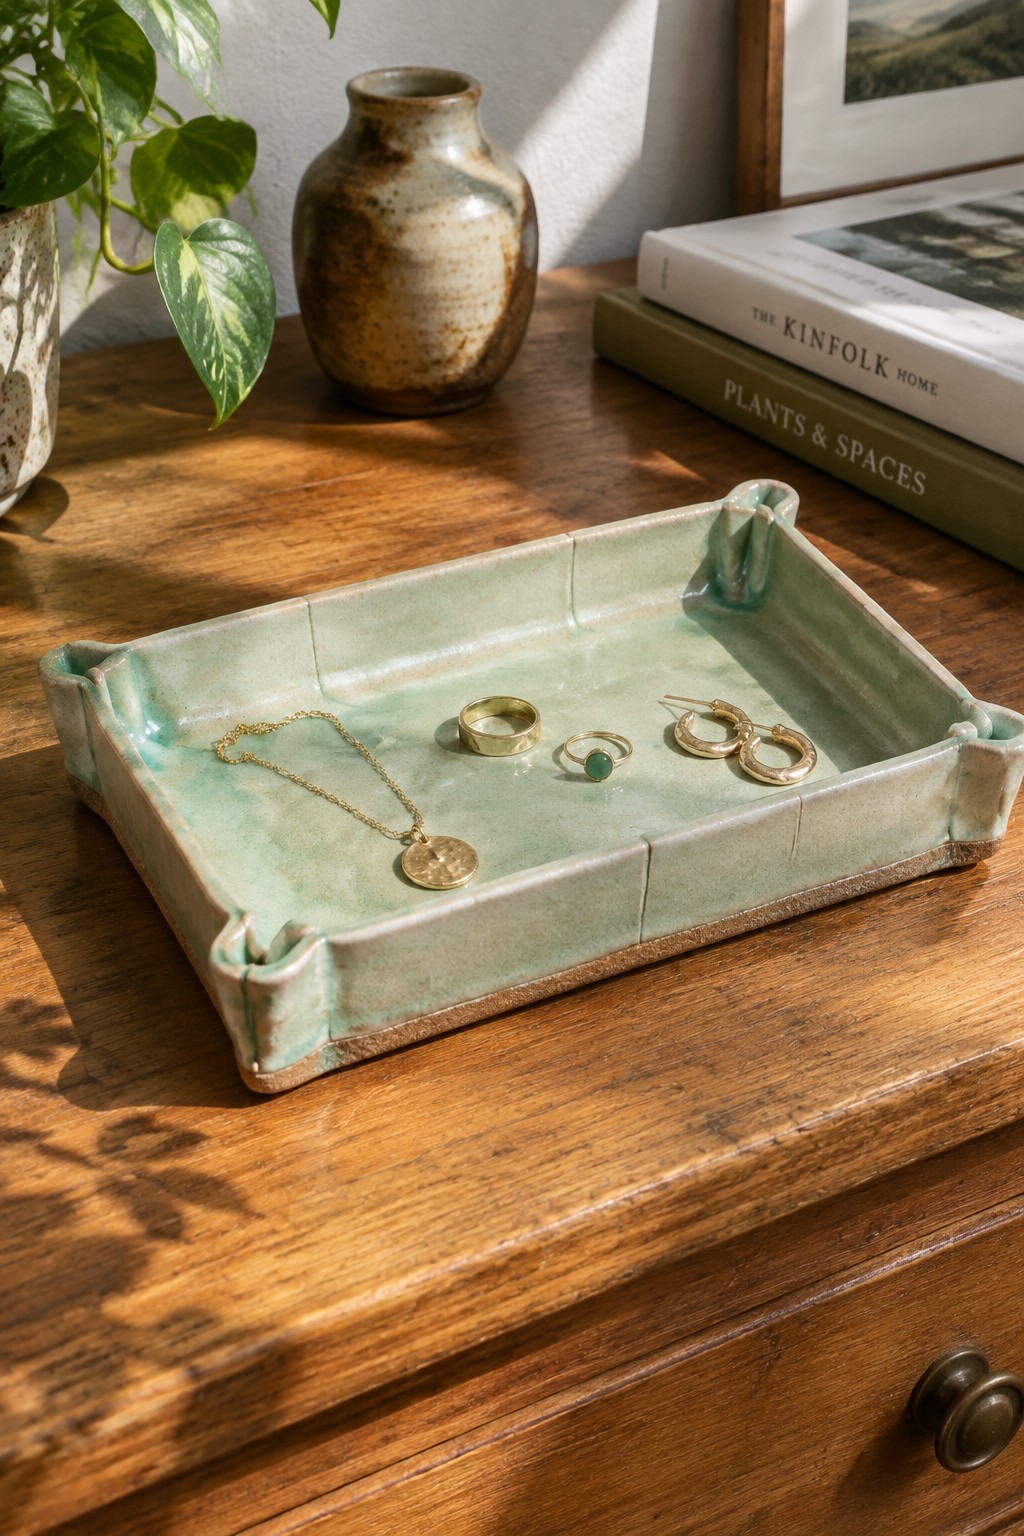
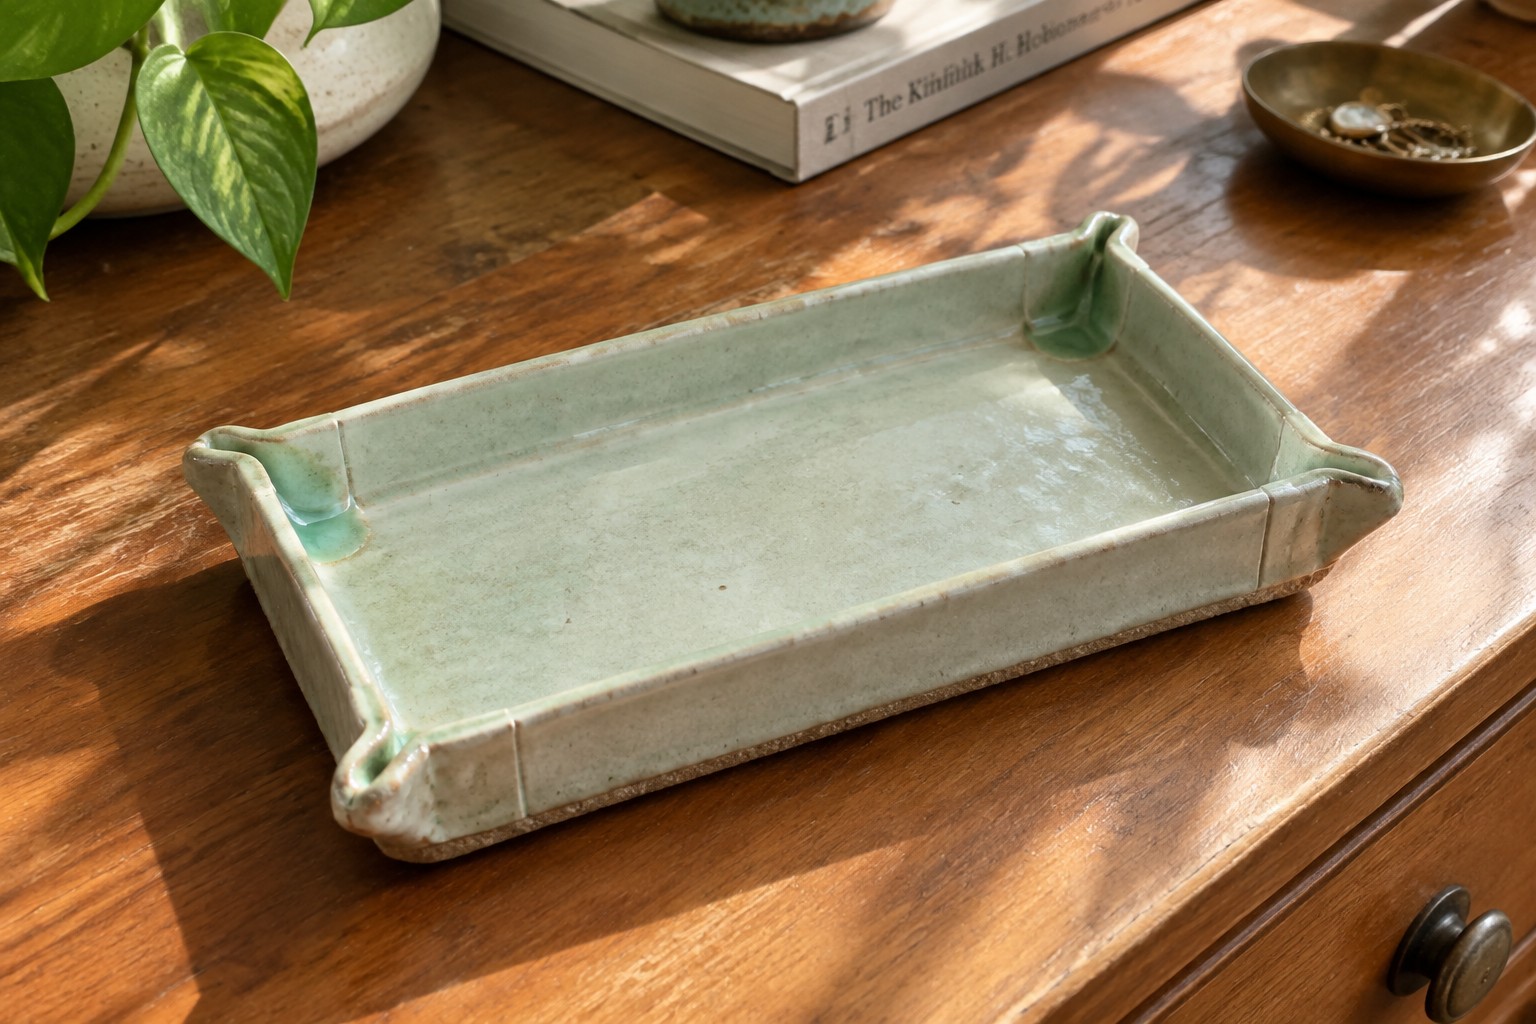
A flat slab of clay rolled to an even thickness can be cut into a rectangle and the edges folded up to form a shallow tray. Pinching or creasing the corners keeps the sides upright while giving the piece a relaxed, handmade outline. The light green glaze pools slightly in the creases and along the rim, creating subtle variation that highlights the form without overpowering it.
This tray shape fits easily on a dresser or bedside table for daily jewelry. You can scale the rectangle larger or smaller depending on how many items you want it to hold, or switch the glaze to match other pieces in the room. The same slab technique works for making matching soap dishes or small desk trays if you want a simple set.
Slab Built Mug with Drip Glaze

A slab built mug starts with flat pieces of clay joined into a simple cylinder or faceted form, then shaped by hand before adding a pulled or rolled handle. This version uses a bright yellow glaze that runs unevenly down the sides, leaving the lower edge and base in raw clay for contrast. The textured surface from the slab work shows through the glaze in places, giving the piece an intentionally unfinished look. The irregular shape and visible seams make it clear this was made without a wheel.
What makes this idea useful is how the slab construction lets you build a mug to any width or height using just a rolling pin and basic templates. You can swap the yellow glaze for other colors or skip the drips entirely for a smoother finish that still highlights the handbuilt lines. The same method works for making sets of four or six by cutting matching slabs at once. For a gift, this shape fits well in a kitchen or on a desk because the sturdy handle and open form make it practical for daily use.
Leaf-Shaped Slab Tray
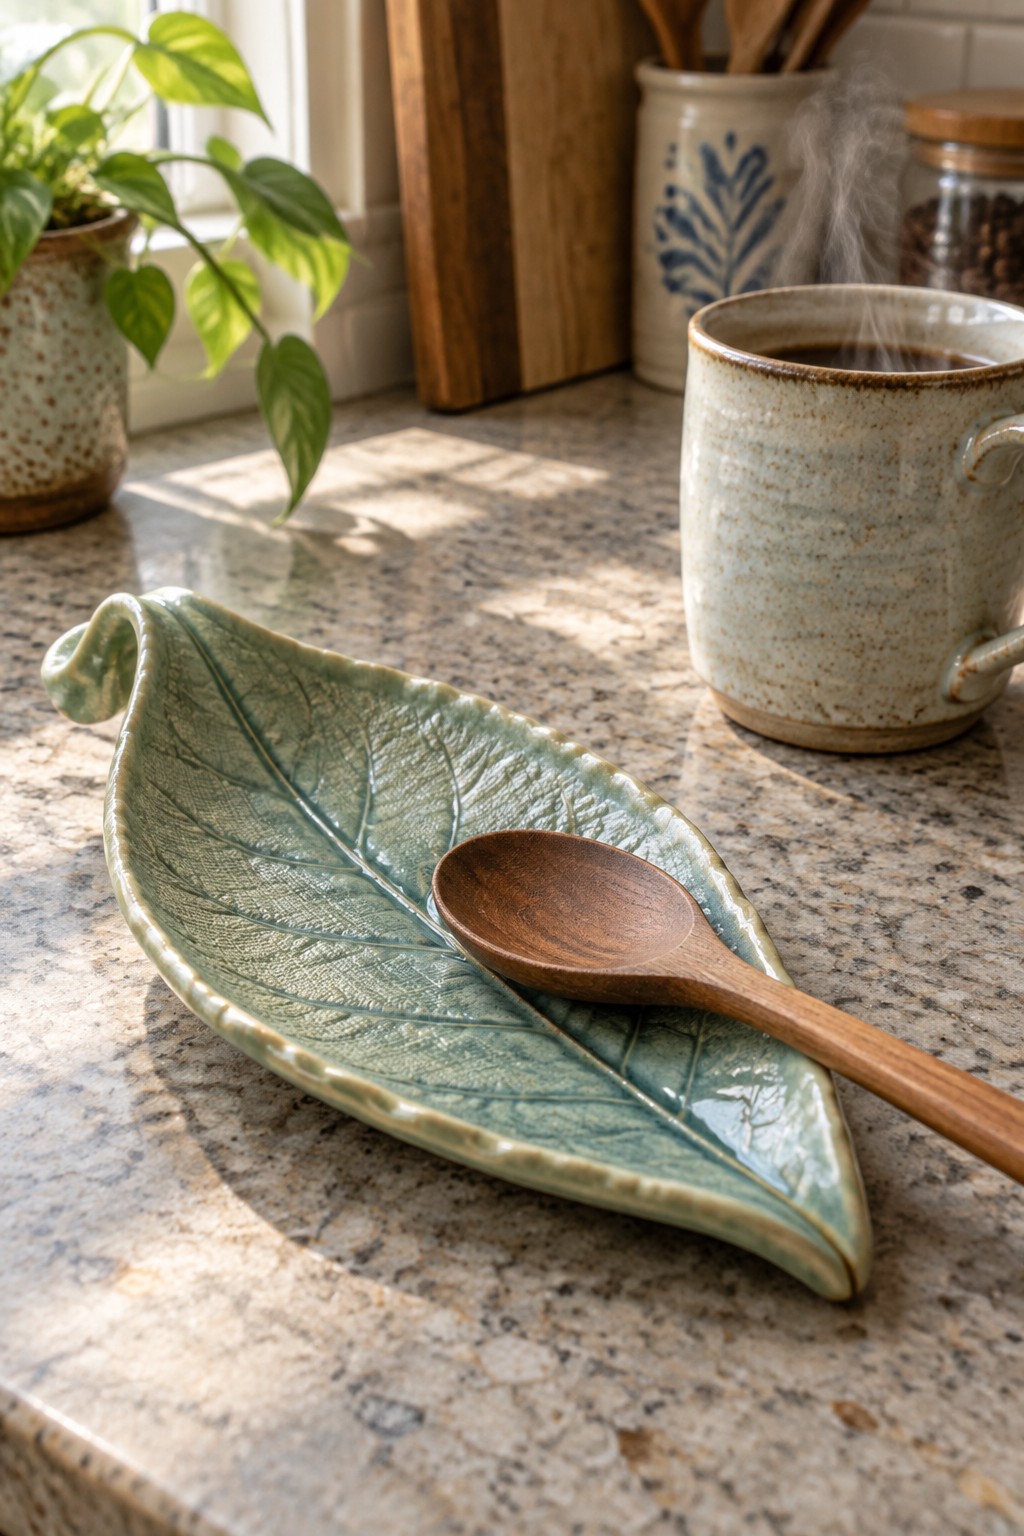
A leaf-shaped tray built from a rolled slab gives you a flat, functional surface with natural edges that curve up slightly at one end. Press a real leaf into the clay to transfer the vein pattern, then trim and form the slab into the leaf outline before adding a food-safe glaze in a single color. The result is a small kitchen piece that works as a spoon rest or holder for utensils. This approach stays simple since it relies on slab construction and an imprint rather than wheel throwing or complex assembly.
What makes this idea useful is that the leaf form already creates a finished shape and surface detail without extra carving. You can change the scale to make a longer version for serving or shrink it into a smaller dish for keys or jewelry. The textured veins catch light and glaze differently, which helps the piece stand out in photos for project sharing. For a kitchen, this tray keeps spoons off the counter near the stove or coffee station, and the same slab method works for other simple forms like a shallow soap dish.
Square Slab Planter with Drainage Hole

A square planter formed from clay slabs creates a simple, stable container for small houseplants. The sides are built flat with horizontal scoring for texture, then finished in terracotta clay with a light white wash rubbed into the surface. A single drainage hole centered in the base prevents water from pooling. This approach belongs in the planter category of slab projects because the construction stays basic while still producing a usable, functional object.
What makes this idea useful is how the square shape sits flat on a shelf or windowsill without tipping. You can scale the same slab layout to make a taller version for larger plants or shorten it into a shallow tray for succulents. Changing the wash color or leaving the clay plain lets you match different room styles without extra tools. For a gift, two or three matching sizes stacked together take up little storage space and give the recipient options for different plants.
Sun Face Hanging Plaque

A flat rectangular slab of clay serves as the base for this wall plaque. The design centers on a carved sun with simple facial features and straight rays extending outward, all impressed directly into the surface before firing. A single hole drilled near the top edge lets the piece hang from twine or cord. The crackle glaze covers the entire form and highlights the carved lines without adding extra color layers.
What makes this idea useful is how quickly the slab can be rolled and cut to whatever size fits your space. The carved sun motif adapts easily to other themes like moons or stars using the same impression technique. In a kitchen or hallway, a piece like this takes up no counter space and still reads as handmade pottery rather than mass-produced decor. You could shorten the rays or simplify the face if you want a faster version for gifts or a set of matching tiles.
Oval Serving Platter with Gradient Glaze

A slab-built oval platter makes a practical serving piece for fruit, bread, or appetizers. The scalloped rim gives the edge definition while the glaze shifts from a warm coral-red on one side to a soft cream on the other. This creates movement across the surface without added decoration or carving.
The shape does a lot of the work here because the long oval fits neatly on a table or countertop. You could roll out the same slab, trim a wavy edge, and swap the glaze colors to match your dishes or season. In a kitchen this kind of piece handles daily use while still looking intentional on a shelf when not in use.
Rectangular Soap Dish with Drainage Ridges
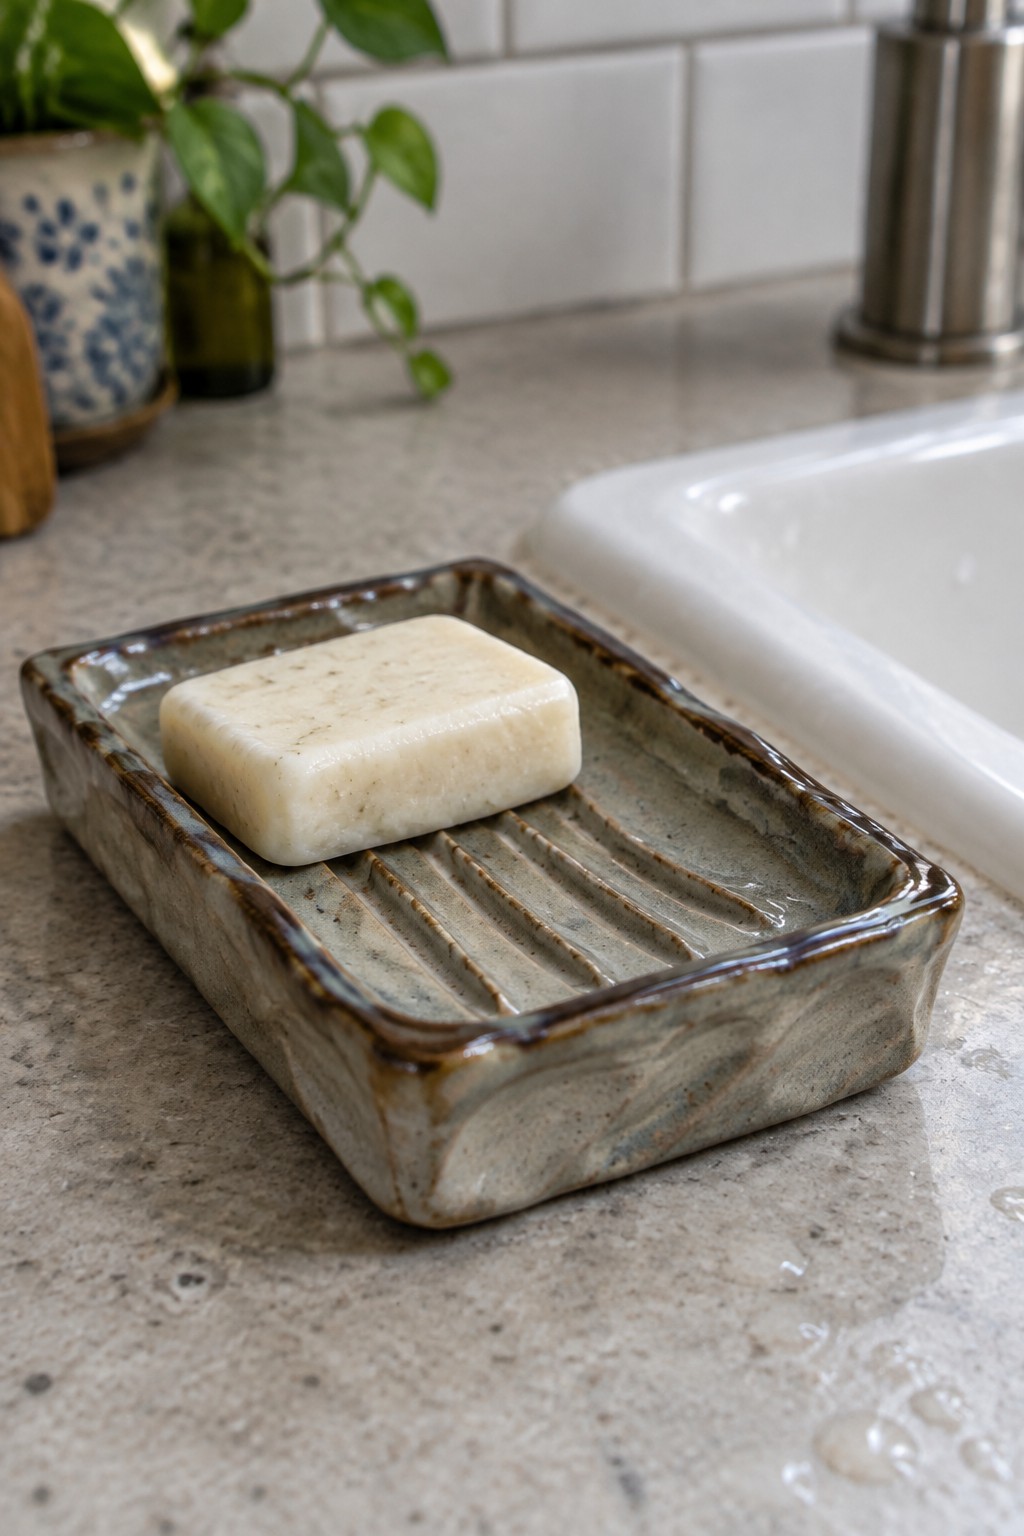
A rectangular soap dish formed from slabs gives you a simple bathroom tray that keeps bar soap from sitting in water. The base stays flat while a series of parallel ridges along the bottom lift the soap and let water run off into the sink. The muted gray glaze with brown rim edges keeps the piece from looking too bright against typical countertop colors. This project stays in the slab category since it needs only flat sheets of clay cut to size and joined at the corners.
What makes this idea useful is how the ridge spacing and overall length can be changed to match the soap you actually use. A shorter tray works for a powder room while a longer one fits better beside a larger sink. The same slab layout can be adapted into a small sponge holder or a narrow tray for jewelry by skipping the ridges. In a bathroom this shape stays practical because it sits flat, drains well, and takes up little counter space.
Divided Ceramic Salt Cellar

A two-compartment salt cellar built from slabs gives you separate sections for different salts or seasonings in one compact piece. The low center wall keeps the contents from mixing while the overall rectangular form stays low and stable on a counter. Simple contrasting glazes in blue and pink make each side easy to tell apart without extra labels.
What makes this idea useful is how it turns a basic kitchen need into a single tidy object instead of multiple small bowls. The shape adapts easily if you want one compartment larger or change the glaze colors to fit your dishes. For a gift, the same divided layout works for holding two different spices or even small snacks.
Checkered Slab Utensil Holder

A square slab-built holder works as a kitchen item for storing wooden spoons, spatulas, and other tools upright on the counter. The checkered surface comes from alternating light and dark glaze squares applied after the slabs are joined, giving the piece a simple pattern that reads clearly from a distance. This shape stays stable, holds multiple tools without tipping, and takes up little counter space compared to round containers.
What makes this idea useful is how the flat sides let you lay out the checkered pattern evenly before firing. You could change the glaze colors to match your kitchen or shrink the size to hold only a few spoons. In a kitchen, this kind of piece keeps tools within reach while hiding their handles inside, and the same slab method could be reworked into a shorter version for desk pens or bathroom items.
Slab-Built Triple Candle Holder
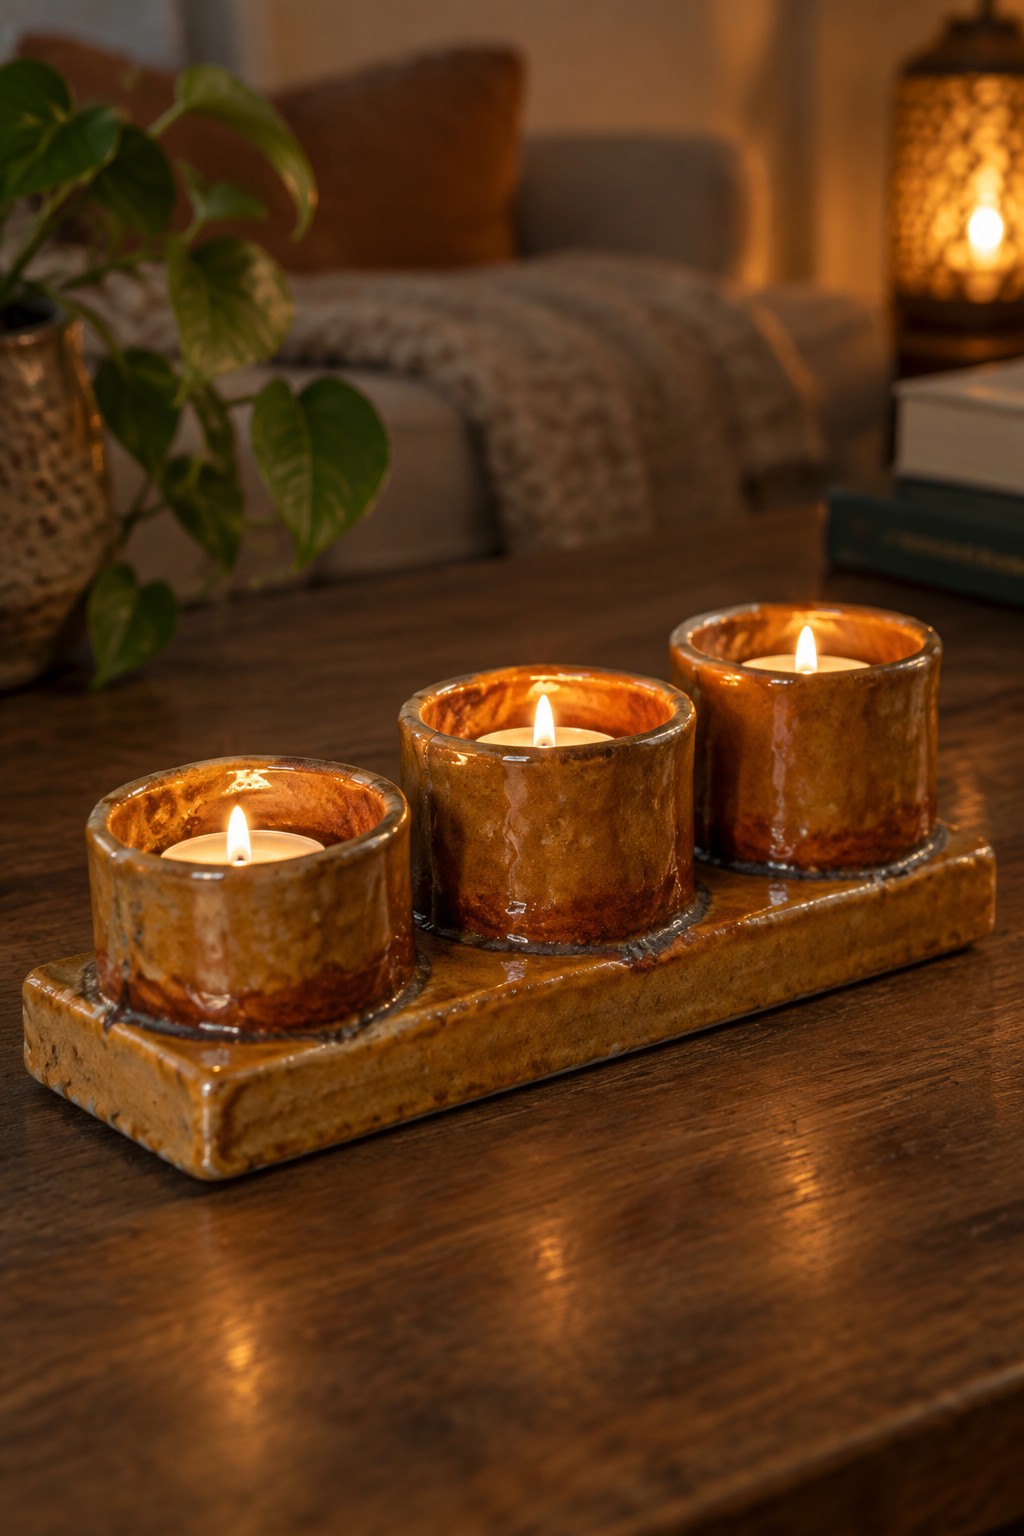
A triple candle holder made from slabs starts with a flat rectangular base and three short cylinders formed from the same rolled clay. Each cup sits upright with its own rim, and a single warm amber glaze covers the whole piece, settling into the seams where the cups meet the base. The connected design keeps the three holders stable as one unit while still letting each candle burn on its own.
What makes this idea useful is how the shared base turns three small pieces into one easy-to-move object. You can roll a longer slab to add a fourth cup or shorten it for just two, and the same cylinder shape works for tiny plant pots or ring dishes if you skip the candles. On a dining table or shelf this holder takes up little space but gives a clear focal point, and the slab method keeps the project simple enough to finish in one or two sessions without a wheel.
Covered Butter Dish

A rectangular butter dish built from slabs gives you a simple covered container that keeps butter ready on the counter. The base tray holds a stick of butter while the domed lid with an integrated handle keeps it clean and protected. The blue-gray glaze with its natural speckling and slight variation across the surface keeps the form looking handmade without extra decoration. This project falls into the kitchen item category and stays practical for daily use.
What makes this idea useful is how the tray base catches any drips while the lid design works without added knobs or hardware. You could change the proportions to fit European butter blocks or make a smaller version for single servings. The same slab method works for a matching small cheese dome or a rectangular tray for snacks. In a kitchen this piece sits out in view and gets used often, which makes it a strong candidate for a quick weekend project that actually earns its space.
Leaf-Shaped Slab Dish for Rings or Keys

A small slab-built dish with a freeform leaf outline makes a practical catch-all for rings, earrings, or loose change. Roll out a flat piece of clay, cut an irregular shape with gentle curves, then gently press the center to create a shallow well. The pink glaze inside highlights the uneven surface while the outside stays mostly matte, keeping the focus on the handmade form rather than perfect symmetry.
The small scale makes this easy to adapt for a nightstand, desk, or entry table where it keeps small items from getting lost. You can change the proportions to make a longer version for a bathroom counter or simplify the edges into a basic oval if freeform cutting feels tricky. For a gift, the same slab approach works for soap dishes or small spoon rests by adjusting the depth and glaze. The natural outline gives it enough visual interest to photograph well for sharing.
Polka Dot Slab Built Toothbrush Holder

A simple cylinder made from a rolled slab of clay makes an effective toothbrush holder for the bathroom. The form is joined along one seam and left with a slightly textured surface that shows the clay body. Colored dots are applied in a loose pattern around the outside before firing, and a few small drainage holes are cut near the base. This keeps the piece functional while giving it a clear handmade quality.
What makes this idea useful is how little equipment it needs beyond a basic slab and some underglaze or slip colors. The same cylinder shape can be adapted for a pencil cup, small plant holder, or kitchen utensil caddy by changing the height or dot colors. The drainage holes are easy to add with a simple tool and make the holder more practical for wet environments. In a small bathroom, the compact size fits on a ledge without taking up much space.
Yarn Bowl with a Built-in Guide Notch
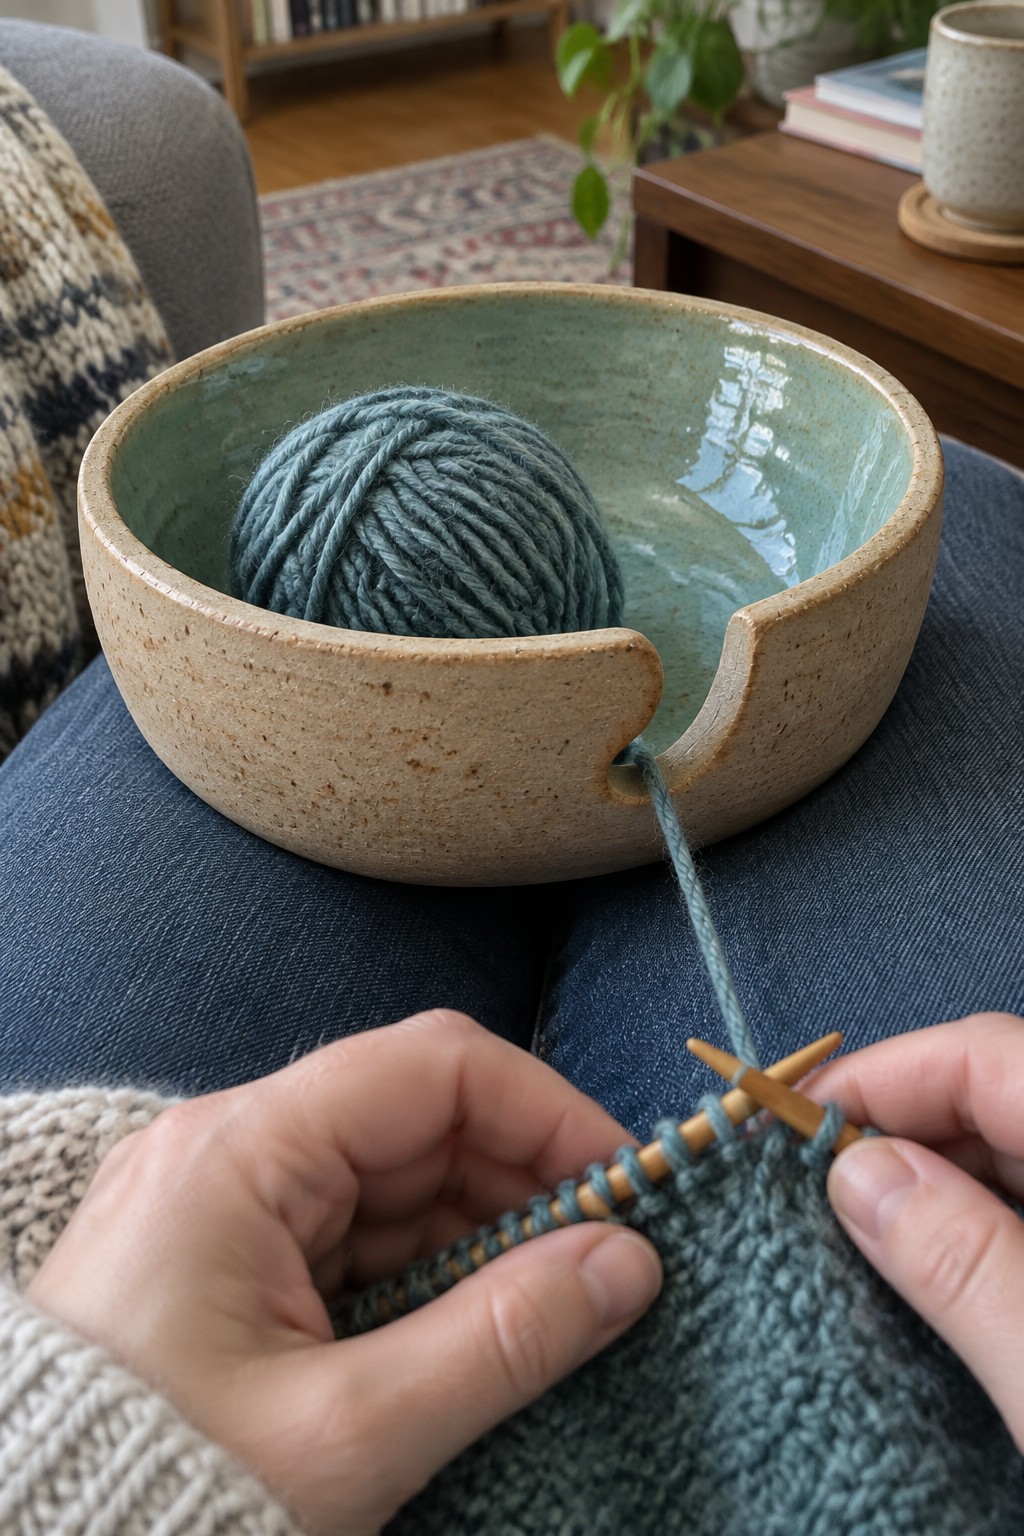
A yarn bowl is a simple holder designed to keep a ball of yarn in place while you knit or crochet. This example is a slab-built bowl with a rounded form and a notched opening cut into the rim. The notch lets the yarn feed out steadily without the ball tumbling around. The speckled clay body paired with a smooth glazed interior keeps the focus on function while giving the piece a straightforward handmade finish.
What makes this idea useful is how the notch turns a basic bowl into a dedicated tool for fiber work. The same slab method works for different sizes, so you can scale it down for thread or up for bulky yarns. It sits comfortably on a lap or table and keeps yarn tidy in small spaces like a craft corner or living room. You could easily adapt the shape into a similar holder for cords or ribbons by adjusting the notch width.
Slab-Built Napkin Holder with Impressed Daisies
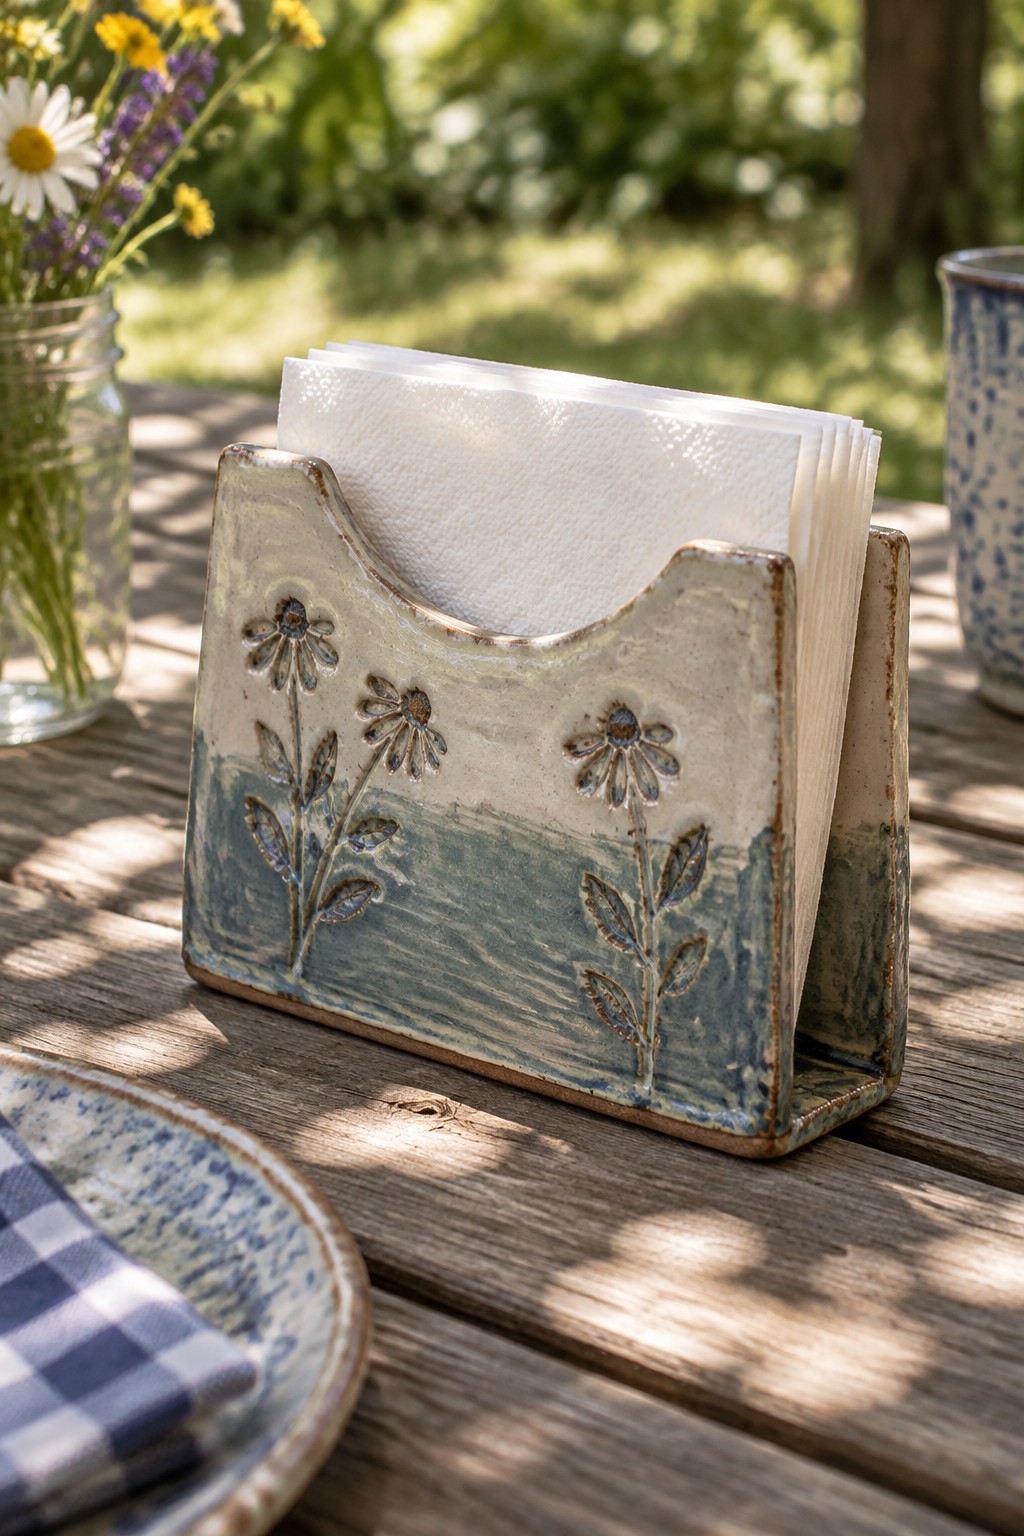
A napkin holder built from clay slabs creates a simple upright container that keeps paper napkins upright and easy to grab. Flat slabs form the front, back, and sides, with the front panel carrying impressed daisy shapes and stems that catch light and add surface detail. A split glaze treatment, darker blue-green at the base fading to lighter tones above, makes the raised flowers stand out while keeping the overall piece understated. This method produces a practical kitchen or table item that requires only basic joining and no wheel work.
The rectangular form stays stable on a table without extra weight, and the impressed flowers can be swapped for other stamps or leaves depending on what you have on hand. You can change the width to fit dinner napkins or shrink it for smaller cocktail sizes, and the same slab layout works for a letter holder or desk organizer by raising the back panel. The earthy glaze colors fit both indoor dining and outdoor meals, so the piece gets used regularly instead of stored away.
Slab-Built Sponge Holder with Drainage Ridges

A rectangular ceramic sponge holder built from slabs gives you a practical kitchen item that keeps a sponge raised above standing water. The base features several parallel slots cut through the clay before firing, which lets excess moisture drain straight into the sink. Low walls around the edges contain drips while the simple rectangular form stays compact enough to sit in a corner without taking up much space. The matte green glaze provides a durable, water-resistant finish that holds up to daily use.
What makes this idea useful is how the slab construction lets you adjust the overall size or slot spacing to match your sink dimensions or preferred sponge. You could shorten the tray into a compact soap dish or lengthen it to hold two sponges side by side. In a kitchen this shape keeps the sponge drier between uses and reduces mildew buildup. The same grate pattern works just as well in a bathroom for a bar of soap or a small scrub brush.
Slab-Built Egg Cups

Egg cups made from slabs give you a quick way to form small, stable holders that keep boiled eggs upright without tipping. Cut a simple rectangle, wrap it into a loose cylinder, and pinch or fold the top edge to create an irregular rim that still supports the egg. Thick walls and a solid base keep the piece from feeling fragile, while different glaze colors let you build a set that looks intentional rather than perfectly matched. This approach stays firmly in the kitchen item category and works for daily use rather than display only.
What makes this idea useful is how little clay and time each cup requires, so you can easily make four or six in one session. The compact size fits on a breakfast table or in a small cupboard, and the same cylinder shape can be shortened into a salt cellar or lengthened into a small vase. You could swap the freeform rim for a cleaner cut edge if you want a more uniform look across the set. A group of these in varied glazes photographs well for Pinterest because the scale stays relatable and the colors pop against food.
Leaf-Impressed Square Coasters
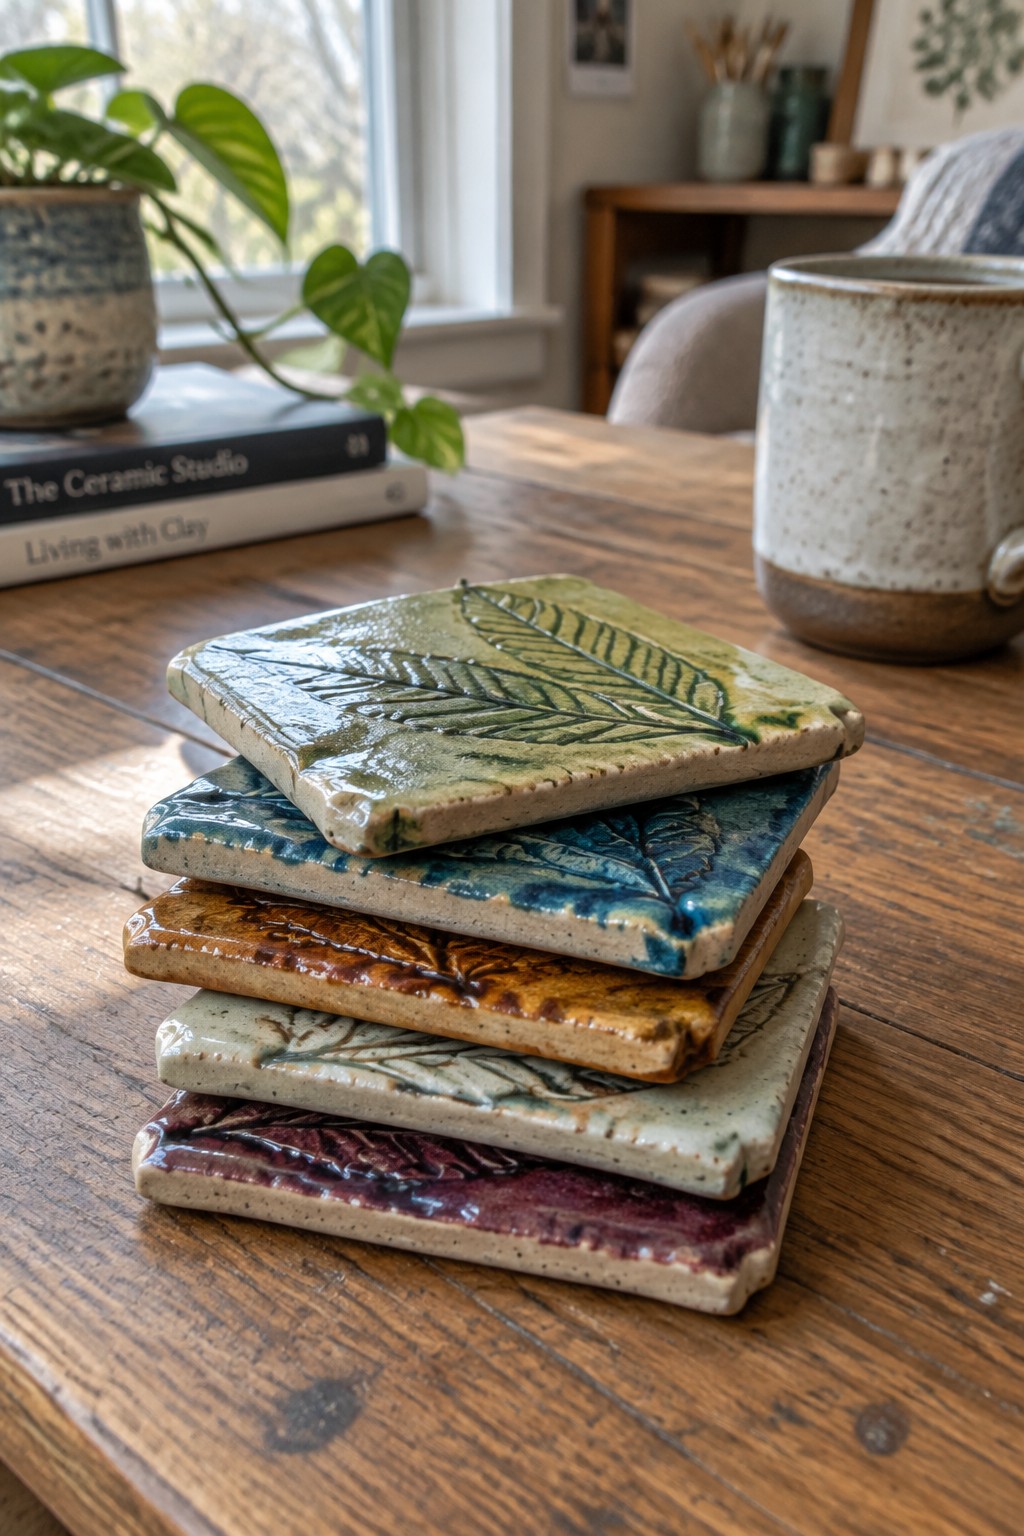
Square slab coasters are made by rolling out flat clay sheets and pressing leaves directly into the surface to capture vein details. The square format keeps edges clean and easy to cut without templates, while the impressed texture holds glaze in the recessed areas for contrast. Glazing each piece in a different color, such as green, blue, brown, or purple, turns the same leaf pattern into a coordinated set.
The small scale makes this easy to adapt into a matching set of six or eight without much extra clay. You could change the shape to rectangles for larger trivets or use the same leaf impression on a single long tray. For a gift, a mixed-glaze stack works well because the texture shows through the shiny surface and the pieces stack neatly for storage.
Frequently Asked Questions
What tools and materials are essential for starting slab pottery projects at home?
You will need a rolling pin or slab roller for flattening clay, a cutting tool like a wire or knife for shaping, a sponge for smoothing, and basic supplies such as clay, a work surface covered in canvas or plastic, and access to a kiln for firing. Many of the 19 ideas can be completed with household items like rulers for straight edges and texture tools from around the home such as leaves or fabric.
How do I prevent my slab-built pieces from warping during drying?
To avoid warping, dry your pieces slowly and evenly by covering them loosely with plastic for the first few days and turning them periodically. Keep the clay at a consistent thickness of about a quarter inch or less for most projects, and avoid placing finished items in direct sunlight or near heat sources. Adding a foot ring or base support during construction helps maintain shape as the clay shrinks.
What techniques work best for joining slabs together securely?
Score the edges of each slab with a tool to create rough surfaces, then apply slip made from the same clay mixed with water before pressing the pieces firmly together. Smooth the seams inside and out with a sponge or rib tool to remove air pockets. For added strength on items like boxes or trays, reinforce joints from the inside with small coils of clay.
Which of the 19 ideas are most suitable for beginners with no prior experience?
Simple flat projects like coasters, trivets, or wall plaques require minimal joining and are forgiving for new potters. These allow practice with rolling even slabs and adding textures before moving to three-dimensional forms such as planters or soap dishes that involve more assembly.
How should I finish and fire slab pottery to make it functional and durable?
After the pieces are bone dry, bisque fire them in a kiln, then apply food-safe glazes if the items will hold liquids or food. Test glazes on sample tiles first since slab pieces can absorb glaze differently than wheel-thrown work. Always follow your kiln’s firing schedule to prevent cracking during the final high-fire stage.

Pottery Path is my cozy corner of the internet where I share clay ideas, pottery inspiration, and simple projects you can recreate at home. I love exploring everything from air dry clay to handbuilt pottery to cute minis that brighten your day. My goal is to make clay crafting feel easy, fun, and welcoming for anyone who wants to try it.
You will find beginner friendly tutorials, creative pottery painting ideas, and lots of warm inspiration for slow and happy crafting. If you enjoy hands on creativity, this space will feel like home.