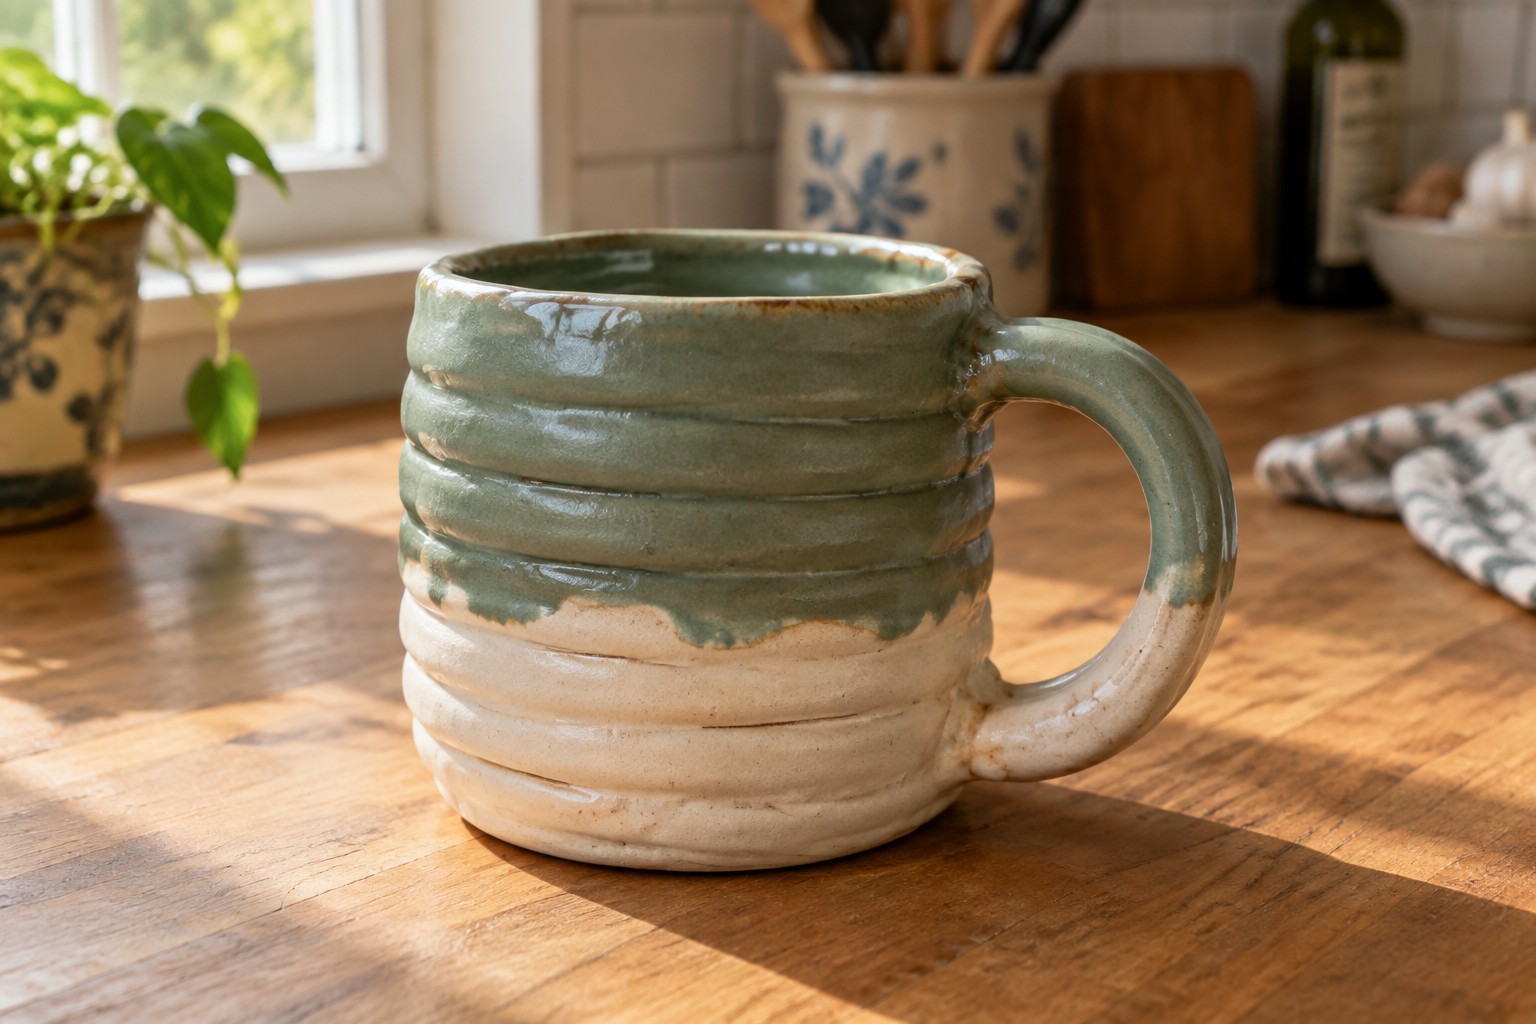
I’ve been trying out coil building in my own studio and it works well for making pieces without needing a pottery wheel.
It feels straightforward once you get the hang of rolling and stacking the clay evenly.
I gathered up 22 project ideas that stay simple and focus on this technique for anyone starting out.
Some of them are things I’ve made myself while others came from watching friends experiment with similar forms.
They might give you a few options to try at your own pace.
Coil-Built Two-Tone Mug
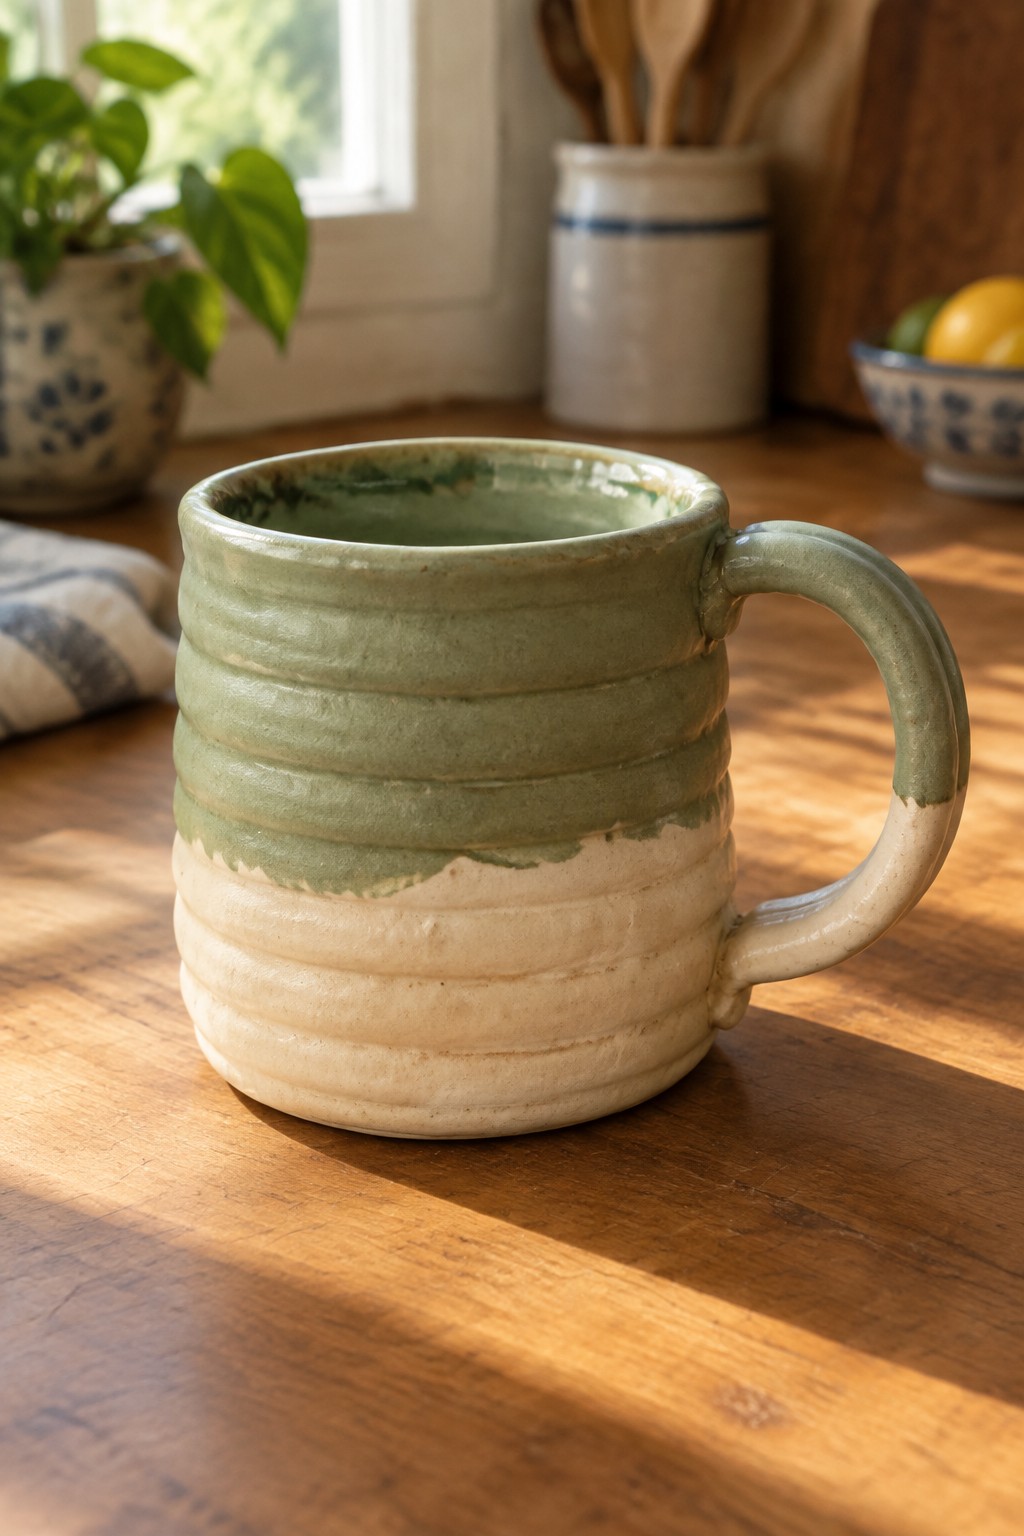
A coil-built mug stacks clay coils to form both the walls and a series of horizontal ridges that remain visible after firing. The upper half receives a green glaze while the lower section stays in the lighter clay body, creating a simple color break without additional decoration. This keeps the construction method obvious and produces a sturdy, functional cup for daily use.
The ridges supply texture that improves grip and shows the building process clearly. You can repeat the same coil heights and half-dip glazing on a shorter tumbler or a wider soup bowl for a matching set. The straightforward shape works well on open shelving where the color split and ridges stay visible.
Coiled Ridge Planter for Succulents
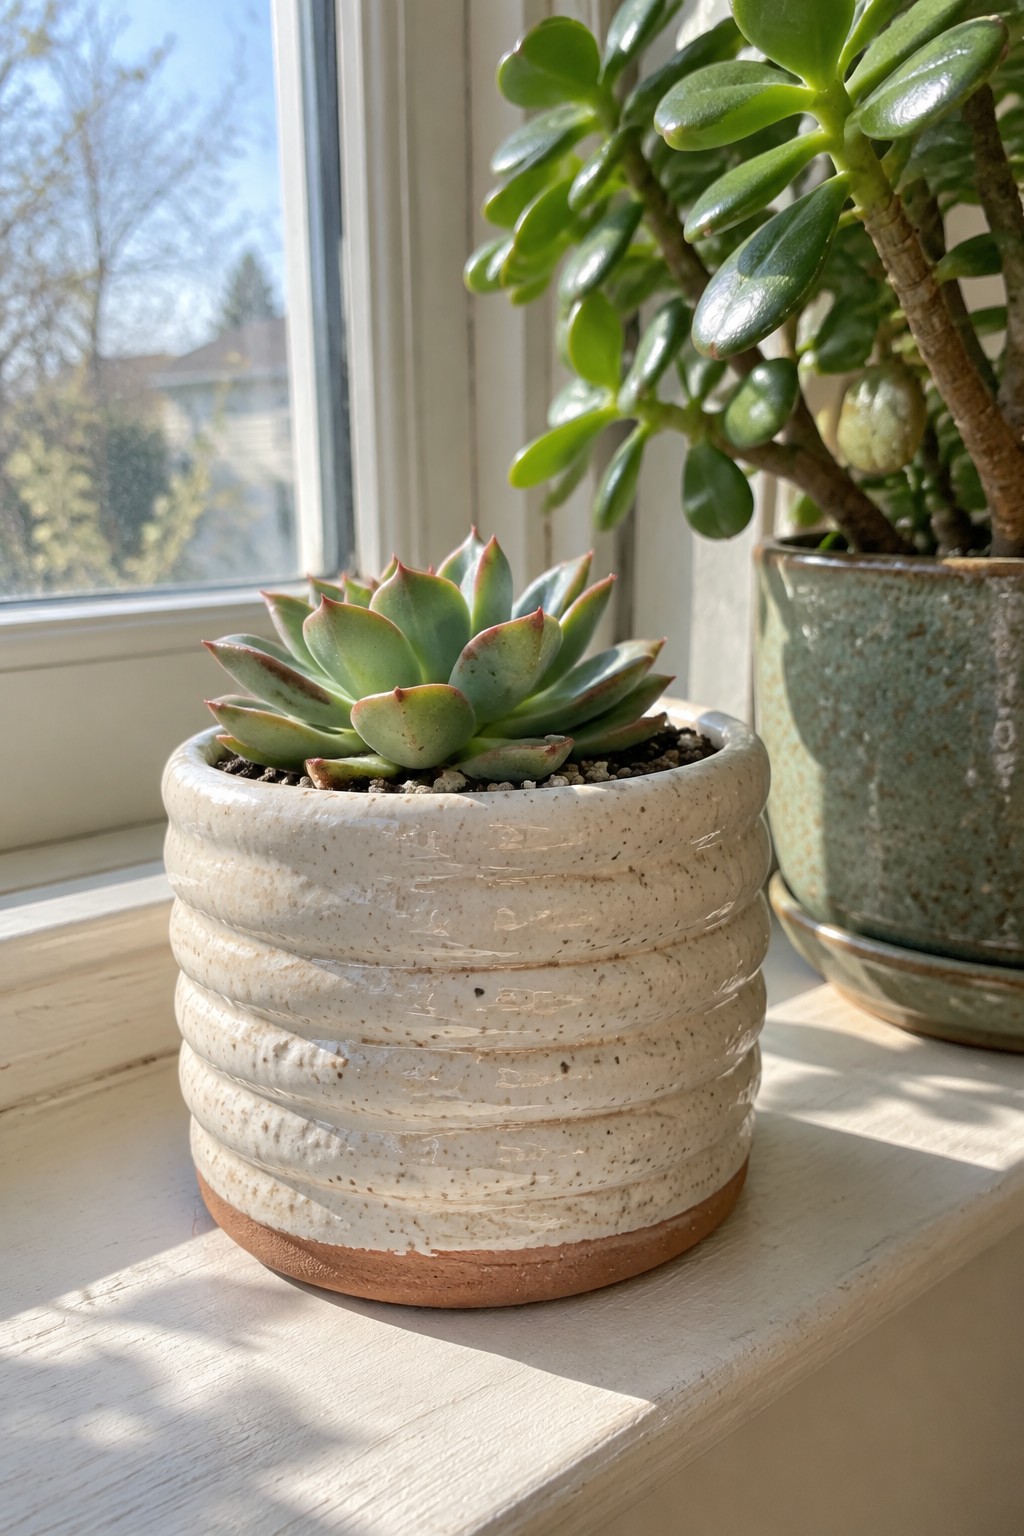
A small coil-built planter gives succulents a compact home where the stacked coils form clear horizontal ridges across the surface. The cylindrical shape stays straightforward while the visible coil lines create texture that reads as intentional rather than plain. A light speckled glaze covers most of the form and stops short of the lower section, leaving the clay color exposed at the base so the ridges remain the main visual feature.
What makes this idea useful is how the coil ridges do the decorative work without added carving or stamps. You can keep the same diameter and simply add or remove coils to change height for different plants or turn the form into a slightly wider bowl for a group of smaller succulents. The neutral glaze keeps the pot from competing with the plant, so it works on a windowsill or shelf where space is limited. For another version, switch to a matte glaze in a single color to make the coil texture stand out even more.
Coil-Built Breakfast Bowl
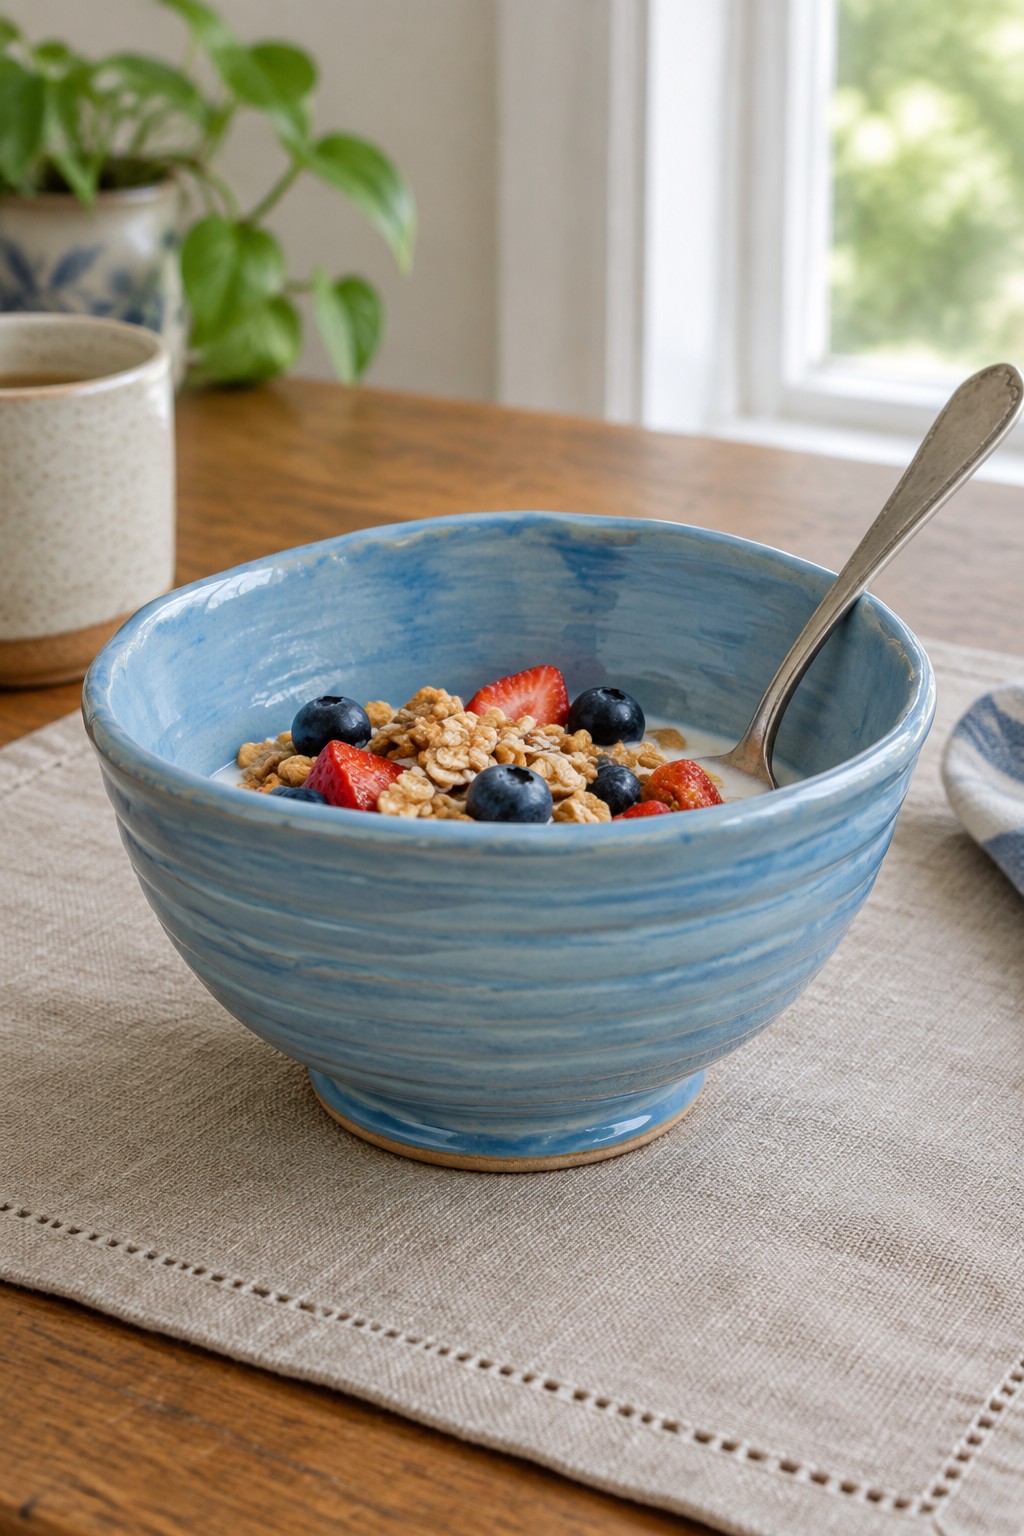
A wide, shallow bowl formed from coils makes a practical piece for serving yogurt, granola, or fruit at breakfast. The horizontal ridges left from the coils show through the blue glaze, creating a simple striped texture across the surface without extra carving or stamping. This shape stays low and stable, so it works well on a table or tray and holds a good portion without feeling oversized.
The shape does a lot of the work here because the open rim lets you mix and eat directly from the bowl without crowding the contents. You could build the same form in a smaller size for individual portions or leave the rim slightly thicker for extra durability during daily use. In a kitchen, this kind of piece moves easily from the cabinet to the table and back, and the coil texture gives it enough detail to stand out in photos for sharing ideas online.
Two-Tone Coil Built Serving Tray
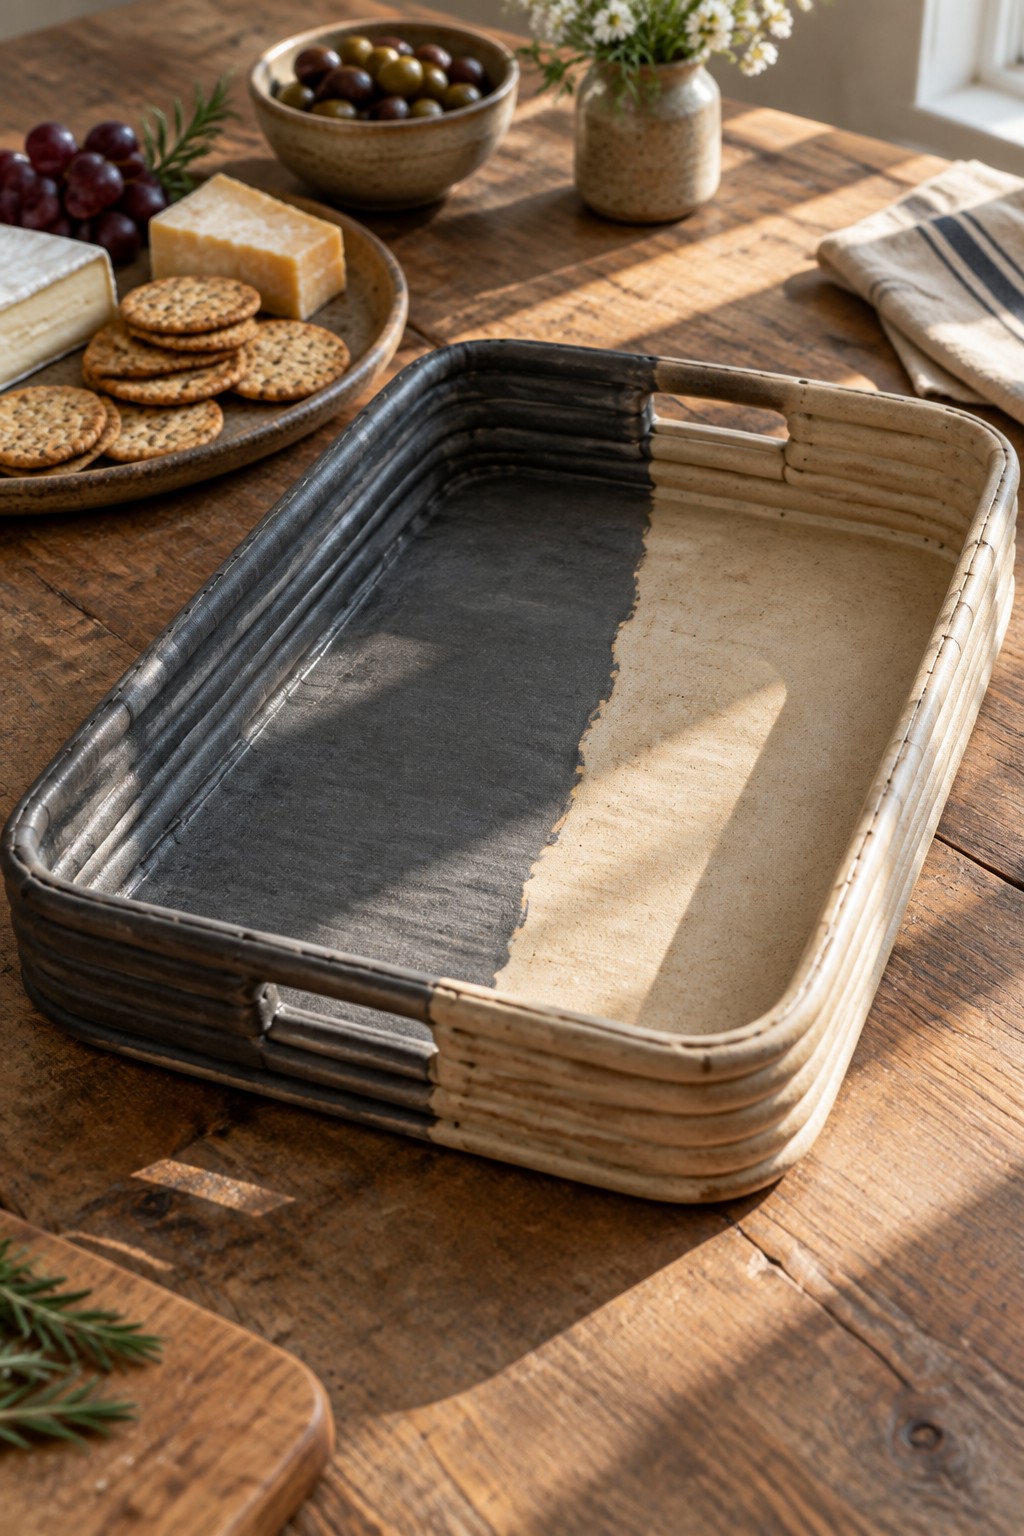
A rectangular serving tray built from coils uses a simple split finish with one half in dark charcoal and the other left in a lighter clay tone. Horizontal ridges along the exterior walls show the coil construction clearly while integrated handles on the short ends keep the form practical for carrying. The flat base and straight sides stay easy to form, and the color division adds contrast without extra carving or attachments. This keeps the project focused on coil building skills while producing a usable kitchen piece.
What makes this idea useful is how the split glaze works on trays of any length without needing patterns or stamps. You could flip the division to run the other direction or try a three-section color layout for variation. In a kitchen this shape handles cheese boards or snacks and the neutral tones match most tableware. For another project the same coil walls and handle style could be shortened into a smaller catch-all tray or lengthened into a plant saucer.
Concentric Ring Wall Hanging
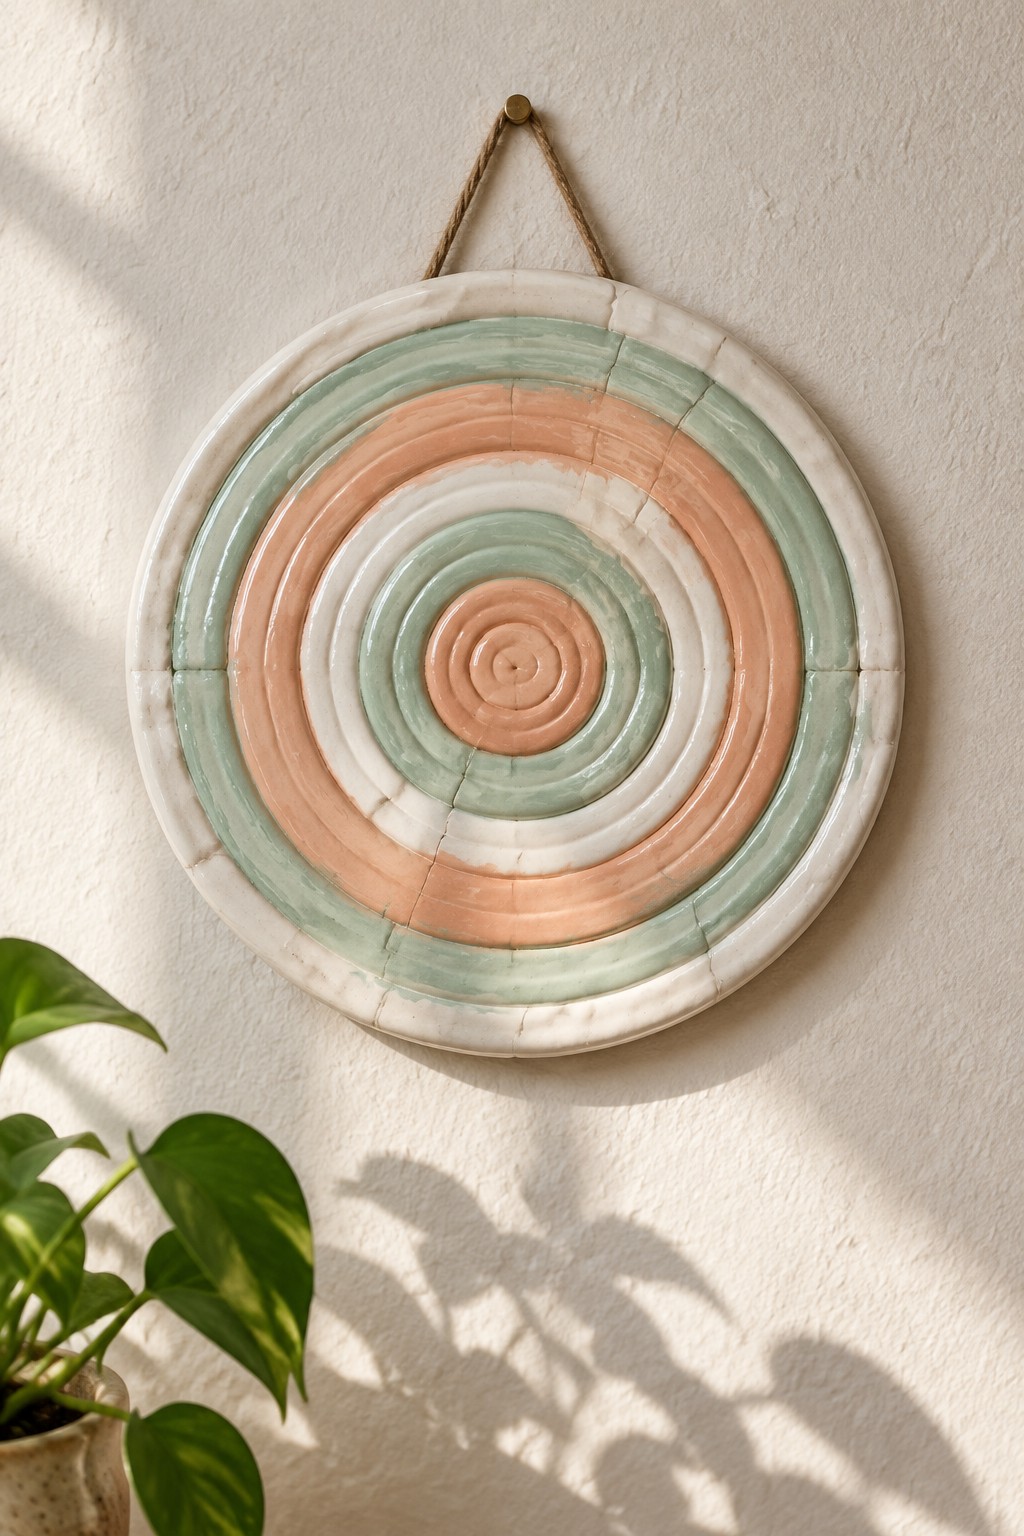
A coil-built wall hanging uses stacked rings of clay to form a flat circular plaque with a clear bullseye layout. Alternating bands of white, mint green, and peach glaze create the concentric pattern while the outer edge stays unglazed white for contrast. The simple ring construction keeps the focus on the color layers and lets the piece hang flat against the wall as decor.
What makes this idea useful is how the ring structure lets you change colors or scale without new templates. You can make a smaller version for a bathroom or turn the same rings into a trivet by leaving the center open. The painted bands also stand out on Pinterest because the graphic layout reads clearly even in a thumbnail. For a first coil project, this shape gives you practice joining rings while still producing a finished piece you can hang right away.
Stacked Coil Candle Holder
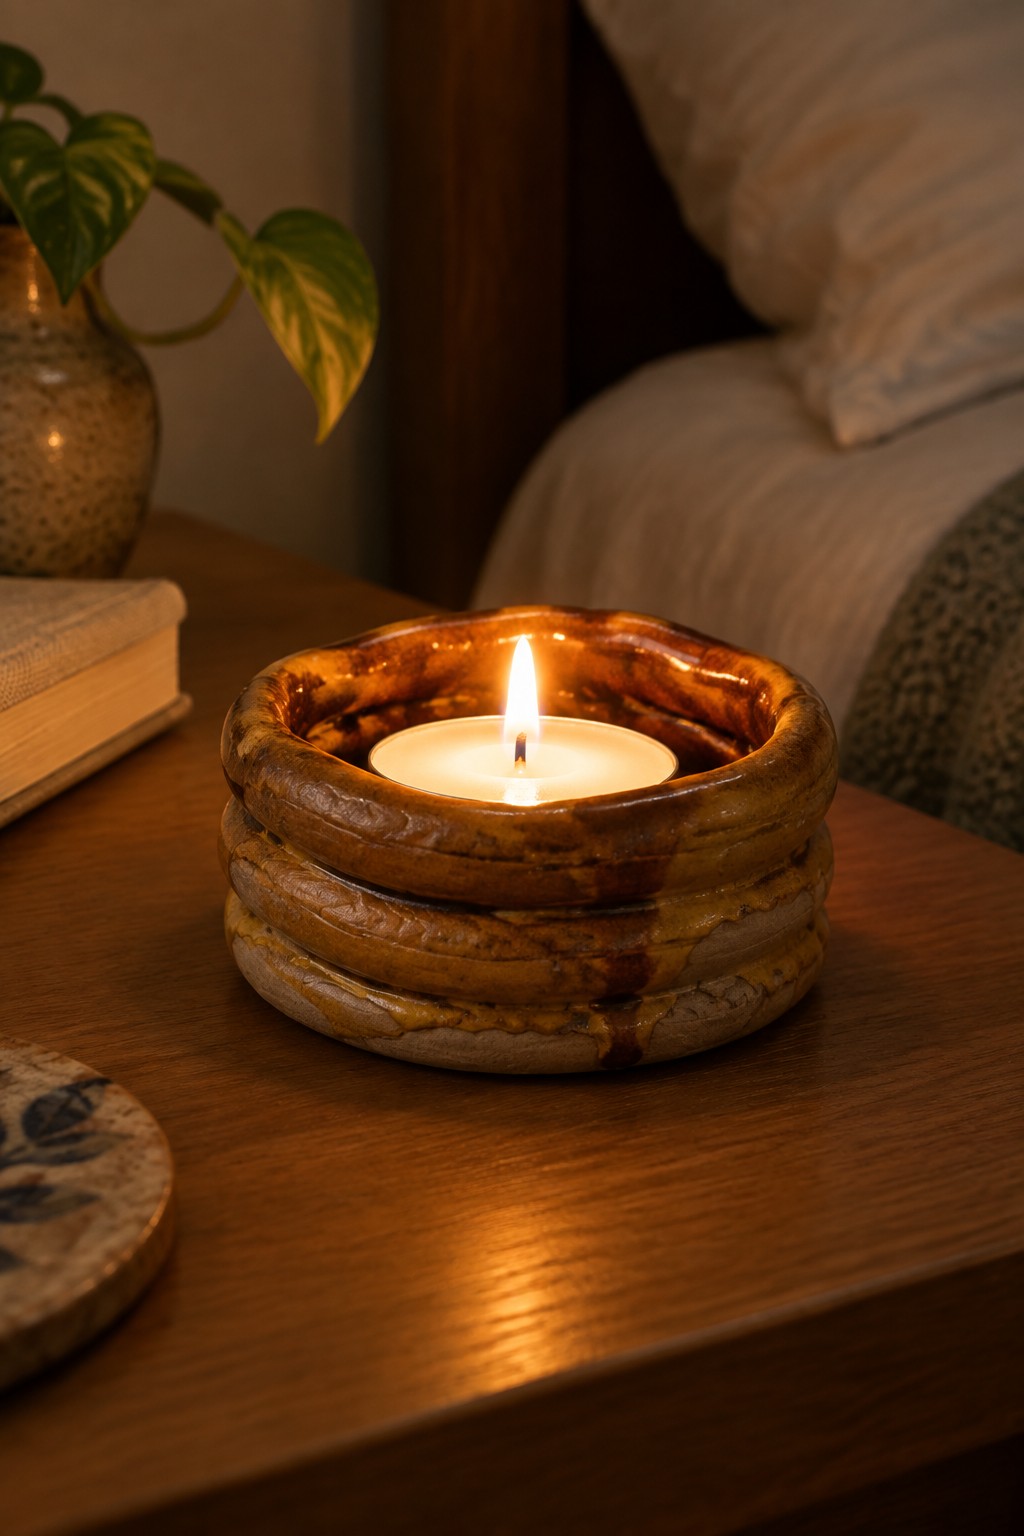
A candle holder built from stacked coils forms a low, rounded bowl that holds a standard votive or tea light. The maker leaves the coils thick and slightly irregular, then applies a warm brown glaze that pools in the seams and highlights the layered construction. This keeps the project focused on simple coil joining while producing a finished piece that functions as tabletop decor.
The stacked ring shape works especially well because each coil can be placed, adjusted, or removed before the piece dries. You could make a taller version with extra layers for a pillar candle or switch to a matte glaze to show the coil lines more clearly. The compact size also means it finishes quickly and stores easily, making it practical for trying different glaze combinations or giving away as a small gift.
Coil-Built Spoon Rest with Blue Dot Rim

A coil-built spoon rest takes the form of an elongated, shallow tray with a wider bowl area at one end and a tapered handle section that supports the full length of a wooden spoon. Interior ridges help keep the spoon from sliding while the raised edges contain any drips. The white glaze with evenly spaced blue dots along the rim adds a simple repeat pattern that reads clearly from a distance. This kitchen item works well for coil building because the long shape stacks easily from coils and holds its form without needing a wheel.
The shape does a lot of the work here since the extended length keeps both the spoon head and handle off the counter in one stable piece. You can change the dot color to match your dishes or swap the pattern for lines if you want less repetition. This would be easy to turn into a shorter version for a honey dipper or a wider one for tongs. In a kitchen, this kind of piece stays useful during daily cooking and scales well for batch making as gifts.
Flower Petal Ring Dish
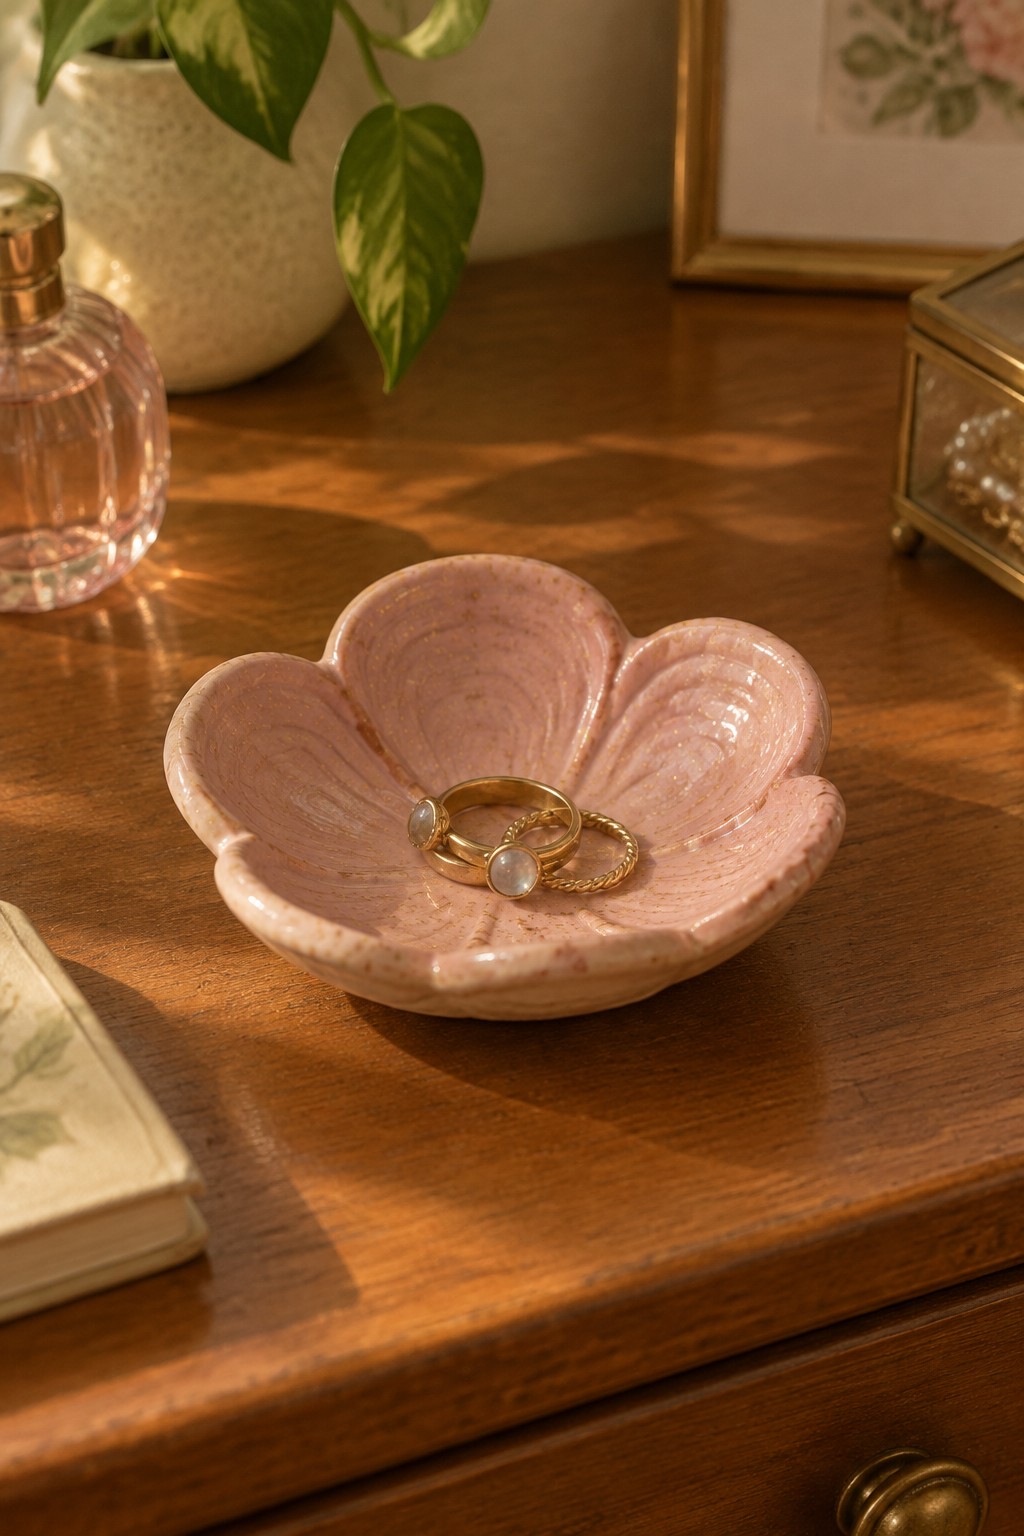
A coil-built ring dish shaped like a flower creates a compact holder for small jewelry pieces. The form uses curved coils to build five overlapping petals that rise slightly around a flat center. A soft pink glaze with fine speckles covers the surface and emphasizes the ridges left from the coils.
What makes this idea useful is how the shallow depth keeps rings visible and easy to grab. You can rework the same petal layout into a soap rest or a small catch-all tray by widening the center. The compact size also makes it quick to batch out in different glaze colors for gifts or market sales.
Coil Built Divided Salt Dish
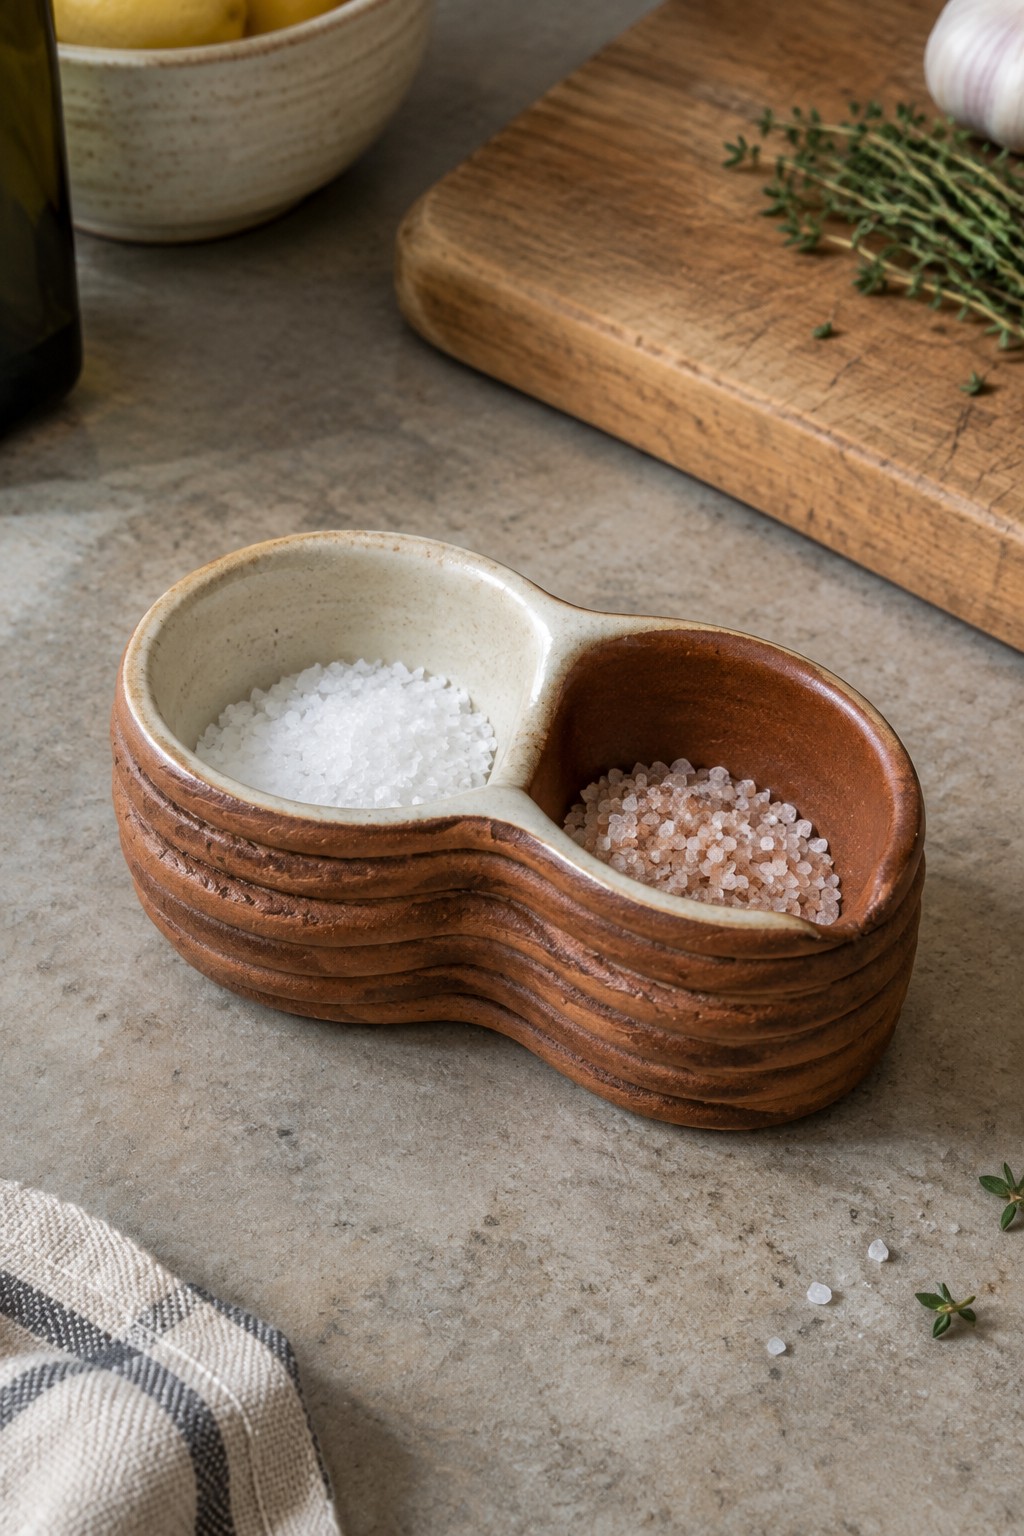
A divided ceramic dish built from coils creates two connected wells for holding different salts or seasonings side by side. The horizontal coils form a wavy exterior that gives the piece structure while keeping the interior smooth for easy scooping. One compartment uses a light glaze and the other stays unglazed, which helps separate the contents visually without extra markings. This shape works as a simple kitchen item that sits on a counter or table during meal prep.
The shape does a lot of the work here by combining two functions into one compact form that takes up little space. You could adapt the same coil method to make longer trays or add a third section for spices. In a kitchen this kind of piece keeps frequently used salts handy without needing separate containers. The visible coils make the construction straightforward for beginners while still looking intentional once finished.
Coil-Built Hedgehog Figurine
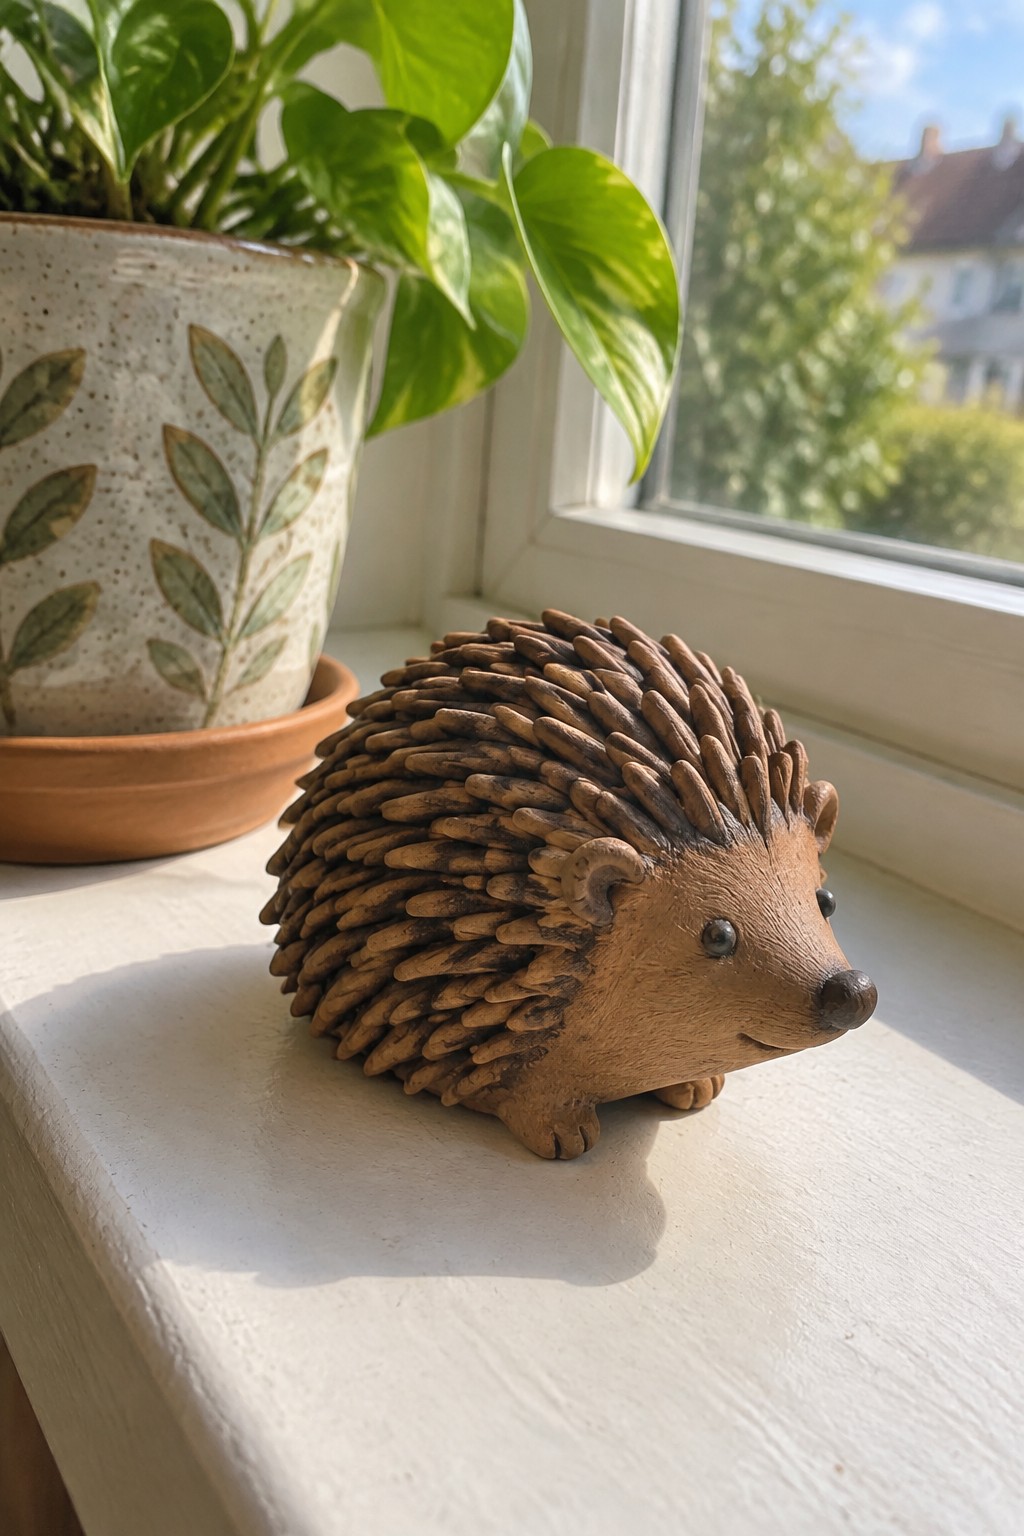
A small hedgehog figurine built from clay makes an easy entry point into coil construction for beginners. The rounded body is formed first with thicker coils, then covered with dozens of thin rolled pieces that stand upright to create the spines. The brown clay body and minimal face details keep the attention on the surface texture rather than added decoration. This approach fits the decor object category and works at a scale that stays manageable on a standard workspace.
What makes this idea useful is that the same coil technique can be adapted to other small animals by swapping the head shape and ear placement. The compact size lets you finish the piece in a few sessions and place it on a desk, shelf, or plant stand without taking up much room. You could simplify the spines into shorter coils for a faster version or scale the whole form up slightly to make a paperweight. For a gift, this kind of figurine pairs well with a small plant since it already sits comfortably beside pots.
Stacked Coil Toothbrush Holder with Multiple Openings
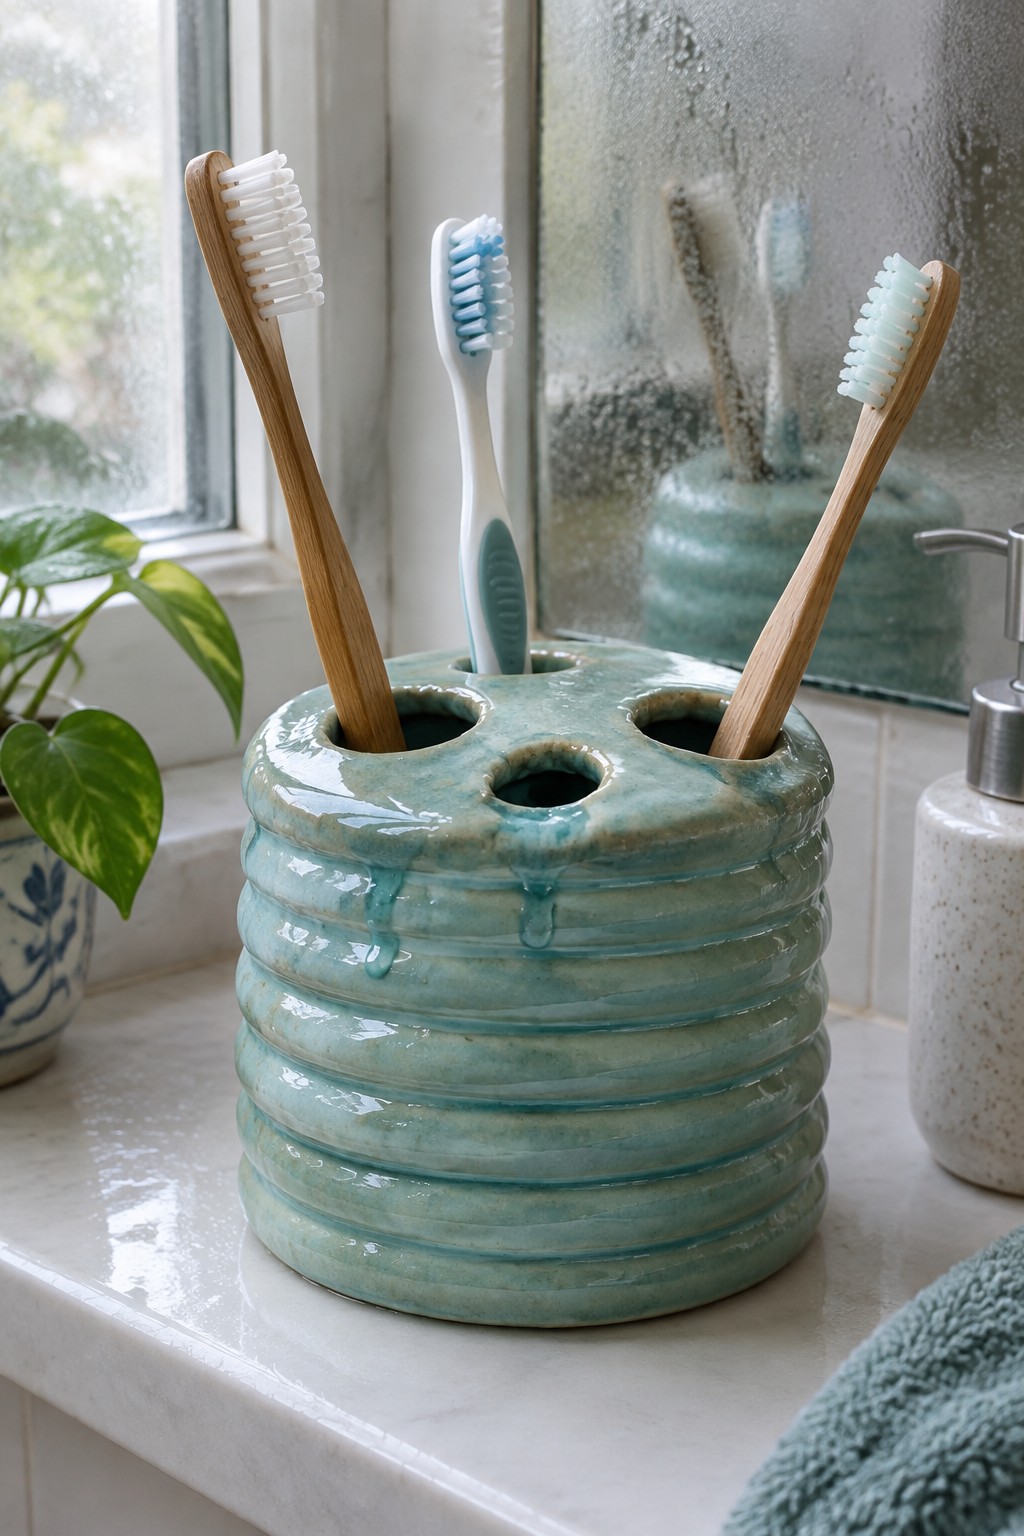
A multi-hole toothbrush holder formed from stacked coils produces a cylindrical shape with several vertical openings sized for standard brushes. The visible horizontal ridges create built-in texture across the surface while a turquoise glaze with light drips adds color depth without extra decoration. This approach keeps the form simple and functional as a bathroom item that holds four or more toothbrushes upright and separated.
The coil ridges do most of the visual work so you can focus on even walls and consistent hole spacing during building. You could easily reduce it to a two-hole version for smaller counters or adjust the diameter to fit electric toothbrush bases. A piece like this works well for everyday bathroom use and translates directly to other small storage needs such as makeup brushes or desk pens.
Coil Built Yarn Bowl with Spiral Opening

A yarn bowl built from coils creates a stable, rounded form that keeps a full skein in place during knitting or crochet. The rim features a spiral cutout that guides the yarn strand outward smoothly, preventing it from catching or rolling away. The visible coil lines give the surface a subtle wavy texture that shows through the glaze, while the contrast between the light base and darker rim edge keeps the shape easy to read.
What makes this idea useful is how the cutout turns a basic bowl into a working tool rather than just storage. The same coil method can be simplified by cutting a straight notch instead of a full spiral if you want fewer steps. This size sits comfortably on a side table or lap while you work, and the shape adapts easily into a small holder for cords or loose craft supplies. On Pinterest it performs well because the functional opening makes the purpose instantly clear in photos.
Coiled Sponge Holder for the Sink
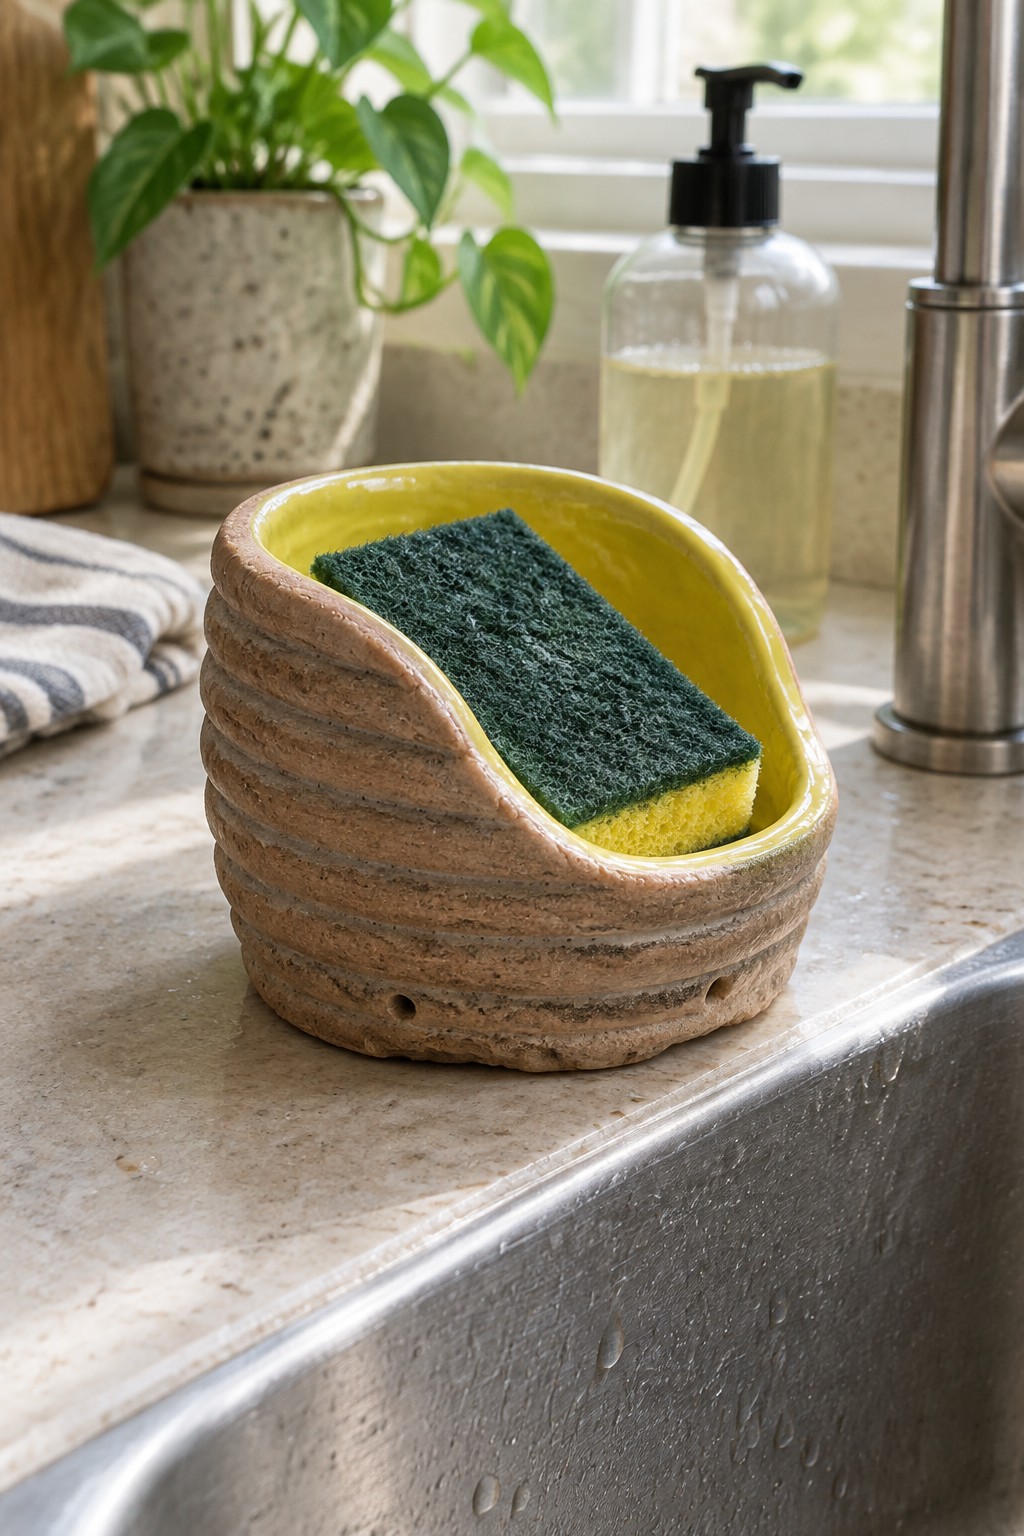
A coil-built sponge holder gives you a simple kitchen item that keeps a sponge off the counter while letting water drain. The stacked coils form a low, wide shape with visible ridges on the outside and a smooth yellow glazed interior that contrasts with the matte brown exterior. Small holes near the base help with drainage, and the open form makes it easy to grab the sponge during dishes.
The shape does a lot of the work here because the wide mouth and low sides sit flat beside a faucet without crowding the workspace. You could scale the same coil method down for a soap dish or widen it slightly for scrub pads. In a kitchen this kind of piece photographs cleanly on Pinterest when the coils stay exposed and the glaze stays limited to one bright interior color.
Coiled Soap Dish
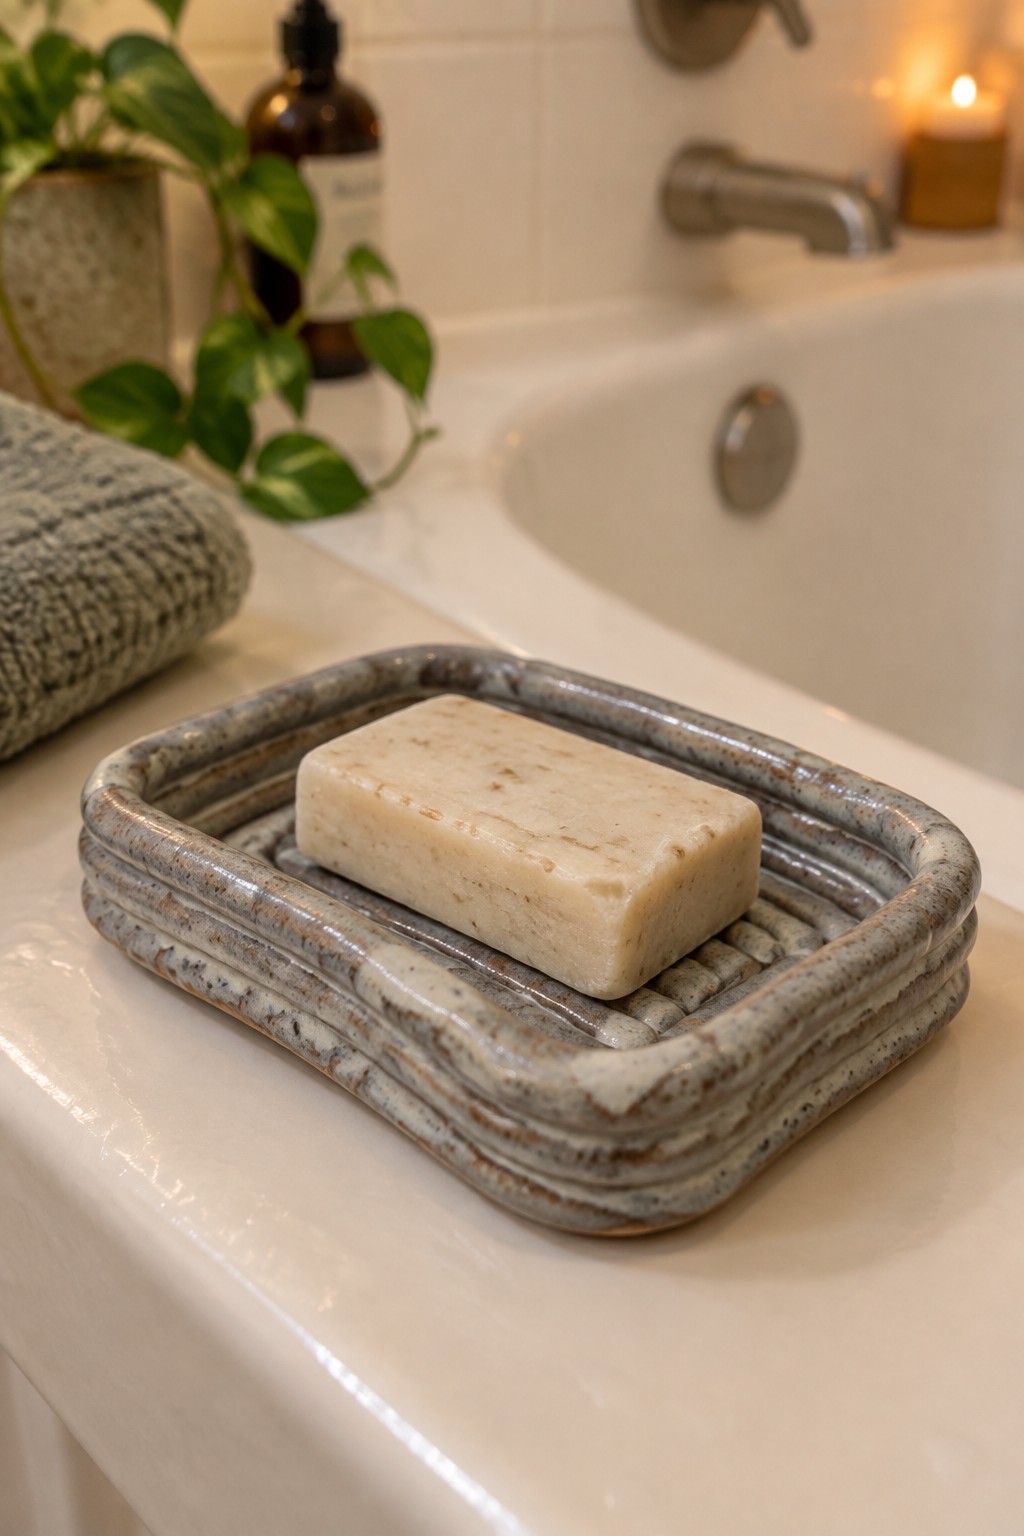
A coil-built soap dish creates a simple bathroom tray that holds a standard bar of soap. Stacked coils form the low sides and base while a speckled glaze in gray and brown tones gives the surface a mottled, stone look. The rectangular shape keeps the soap centered and the raised rim stops it from sliding. This project fits the bathroom item category and uses basic coil construction to add both function and texture.
What makes this idea useful is how the same coil rim can be made taller for a jewelry tray or wider for a sponge holder. The small size works well on any countertop without taking up space. You could change the glaze to match your tile or add a center groove to help the soap drain faster. For a gift, the shape is easy to repeat in different lengths while keeping the coil detail that makes it stand out from plain trays.
Coil Built Creamer with Horizontal Ridges
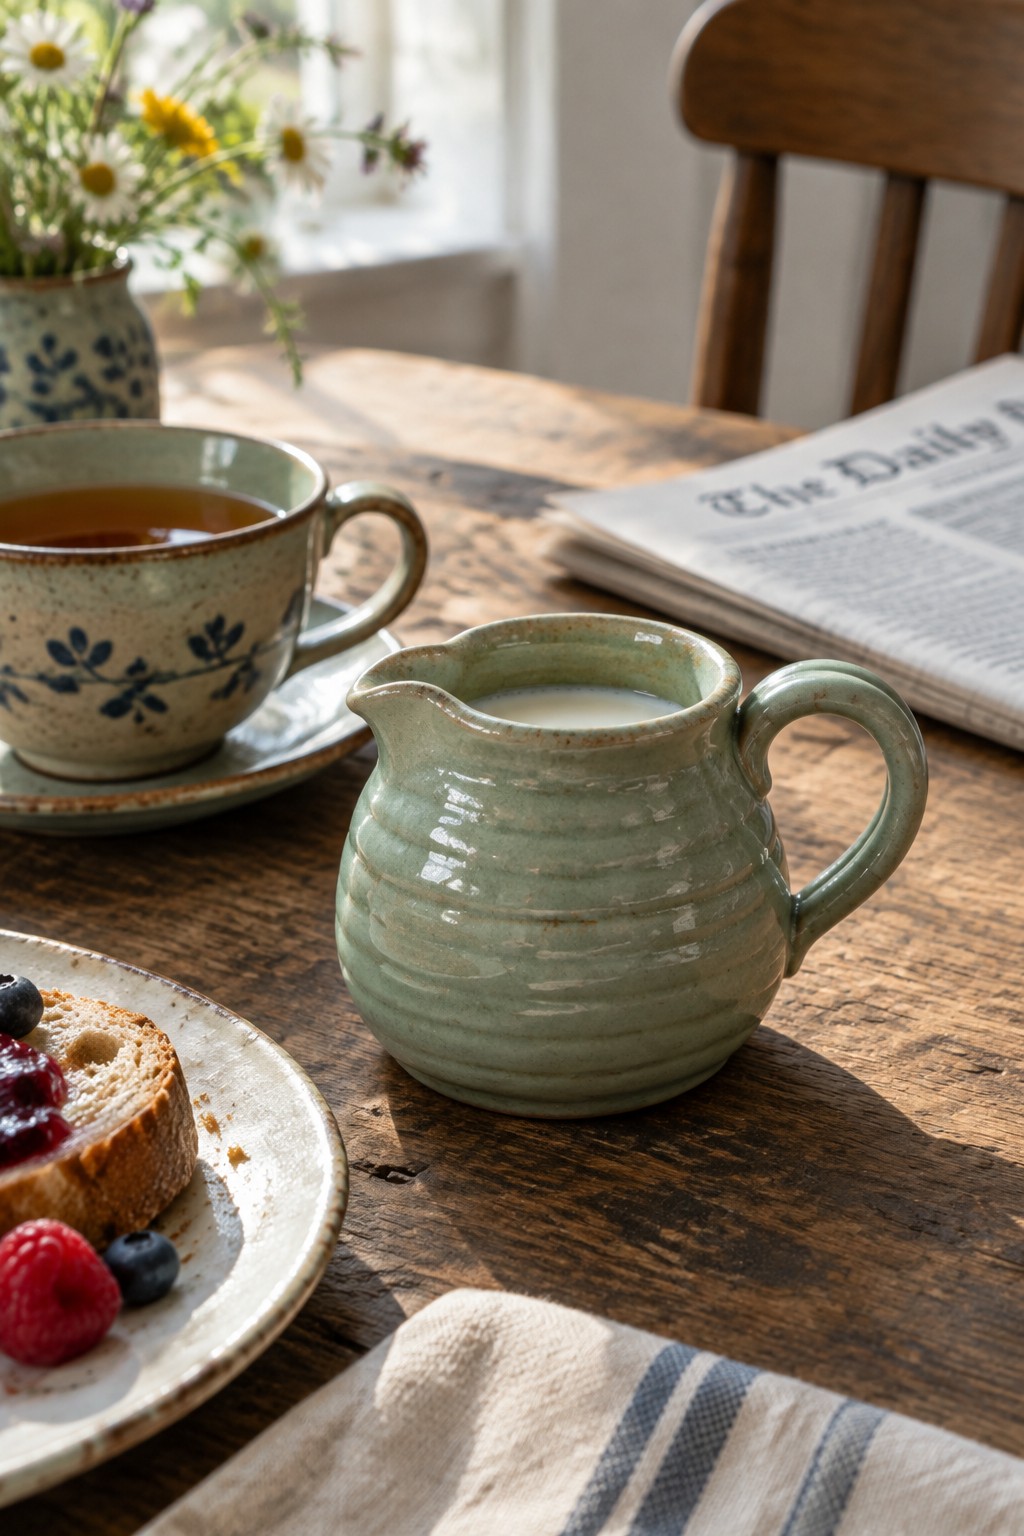
A small pitcher formed from coils makes a practical creamer or milk jug for the table. The visible horizontal ridges come directly from the coil construction and give the piece its texture. A soft green glaze covers the form evenly and highlights the ridges without covering them. The spout and handle are added after the main body is built, keeping the focus on the coil work.
What makes this idea useful is how the ridges do the decorative work while the construction stays simple. You can change the glaze color or keep the same shape and make a taller version for syrup or a shorter one for cream. The size works well next to a teapot or coffee setup without taking up much space. For another project the same coil method can be used to build a matching sugar bowl or small jug with a lid.
Coil Built Two Tone Utensil Holder

A coil built utensil holder creates a tall, stable cylinder that keeps wooden spoons, spatulas, and ladles upright and easy to grab on a kitchen counter. The vertical split between dark gray and brown glaze runs down the middle and emphasizes the horizontal ridges left from the coils. This kitchen item works because the wide opening and sturdy walls can handle a full set of tools without tipping.
The shape does a lot of the work here since a basic cylinder is straightforward to build with coils and scales easily to different heights. You could adapt it by switching the glaze colors, narrowing the base for a slimmer profile, or adding a small notch on the rim for hanging a small brush. In a kitchen this holder keeps tools organized while matching other stoneware pieces. For Pinterest the bold color divide makes the project easy to spot in a feed of coil built forms.
Coil-Built Incense Tray with Raised Holder

A shallow oval tray paired with a short upright holder at one end creates a simple incense burner. The tray catches falling ash while the stacked coil section grips the stick upright. An earthy terracotta glaze with dark speckles keeps the surface matte and textured so it reads as handmade pottery rather than a generic tray. The elongated shape gives the piece a clear front-to-back direction that works on a flat surface without extra feet or stands.
The small footprint makes this easy to set on a bedside table or desk where space is limited. You can shorten the tray for a more compact version or widen it slightly to hold two sticks at once. Switching to a matte black or soft gray glaze changes the look without altering the coil construction. The same base shape also adapts quickly into a small catch-all for matches or a narrow plant saucer.
Coiled Tapered Vase with Visible Ridges

A coil-built vase like this starts with stacked ropes of clay that form a tall, narrow shape tapering toward the base. The horizontal ridges left by the coils create built-in texture that catches glaze and gives the surface depth. This method suits a simple vase meant for holding a few stems or wildflowers without needing extra carving or attachments.
The shape does a lot of the work here since the narrow profile fits easily on a windowsill or shelf. You could rework the same coil technique into a shorter cylinder for a toothbrush holder or widen the base slightly for a small plant pot. The green glaze pools in the grooves and keeps the piece from looking flat, which helps it photograph well for project shares. A beginner can practice even walls and control height without adding handles or lids.
Coil-Built Mini Ring Bowls
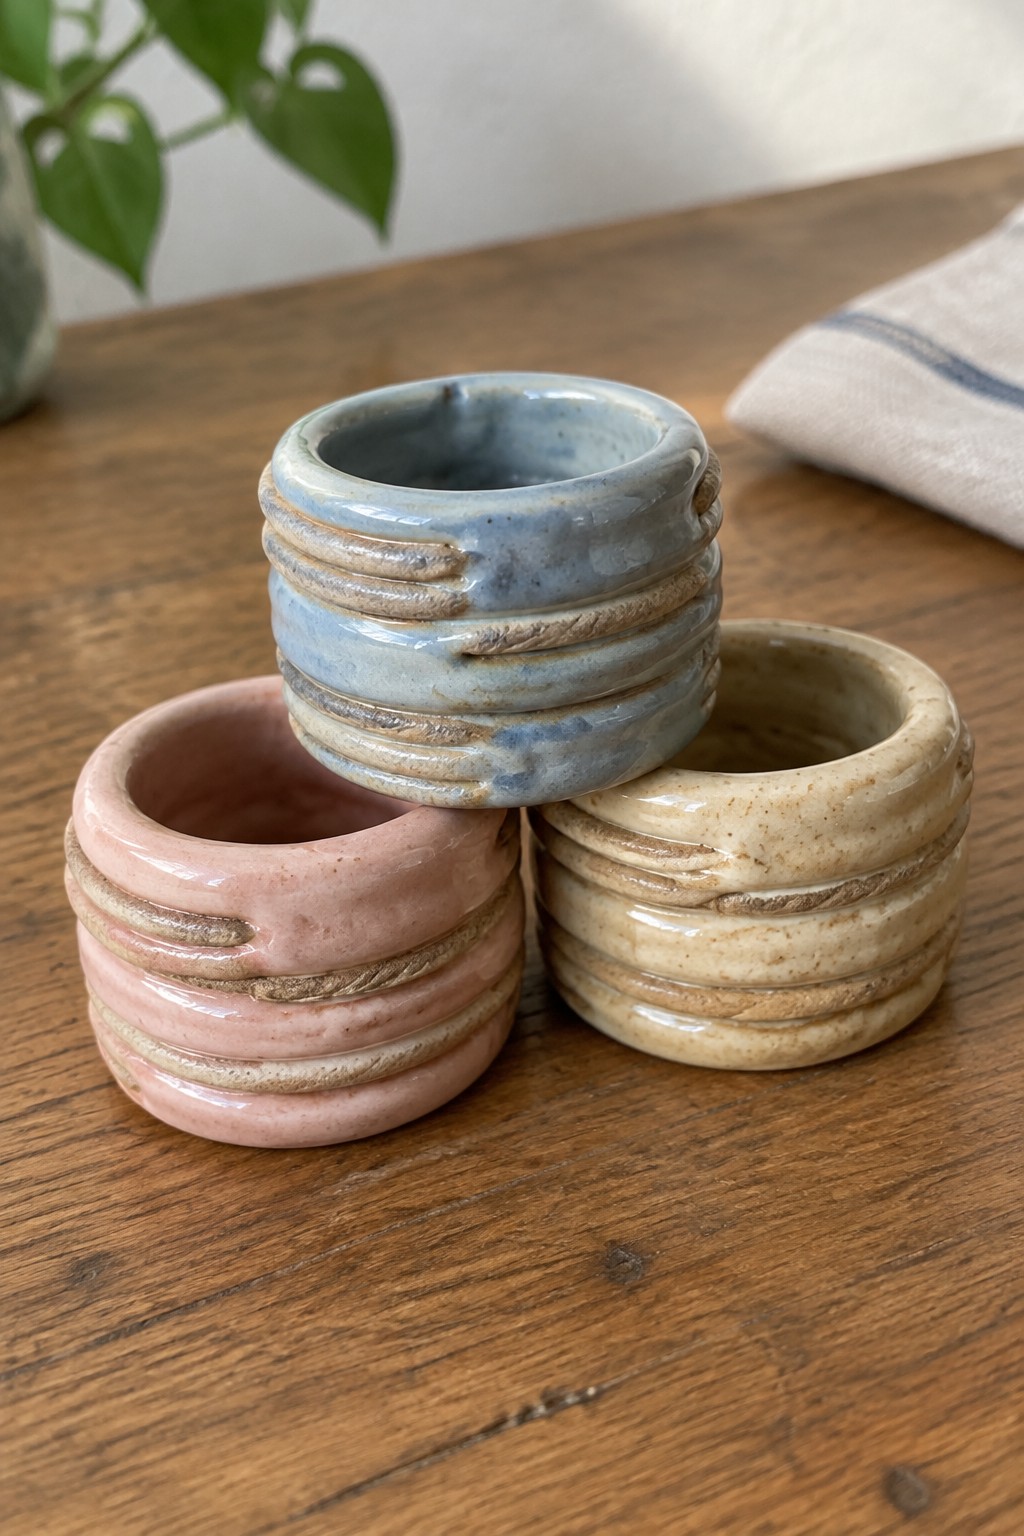
Small cylindrical bowls made by stacking coils produce a series of horizontal ridges that give the forms structure and clear texture. The three bowls shown use soft pastel glazes in pink, blue, and beige, with the coils left slightly raised under the finish. This keeps the construction method visible while creating a compact shape suited to holding rings, small desk items, or tiny plants.
The small scale means you can finish several in one session and fire them together without taking up much kiln space. Changing the glaze colors or coil thickness lets you adapt the same build for different rooms or turn the bowls into a coordinated set. A group of three like this works well as a quick gift because the ridges add detail without extra carving or handles.
Leaf-Shaped Coil Built Tray
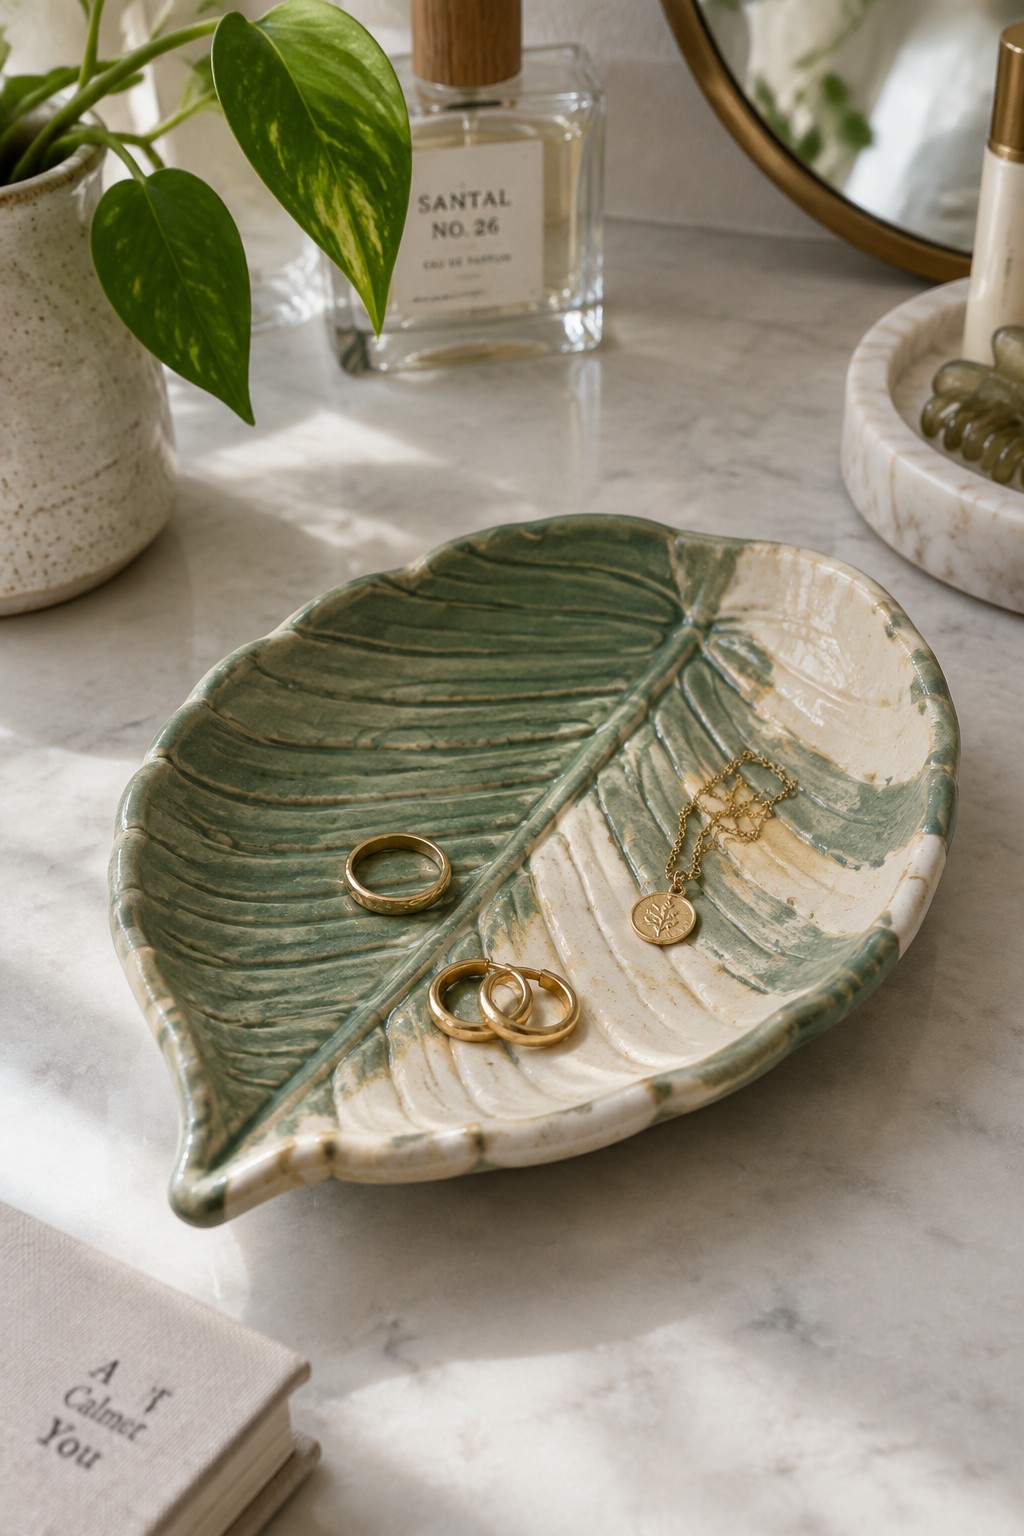
A coil-built leaf tray creates a shallow, wide dish with an irregular rim that follows the outline of a large leaf. The surface carries impressed lines that run from the center stem outward, giving the form both texture and a clear visual direction. A two-tone glaze application splits the piece into green and cream sections, which highlights the vein pattern without needing additional decoration. This shape works well as a ring dish or small catch-all because the low sides and broad surface keep items visible and contained.
The shape does a lot of the work here because the natural taper already forms a usable rim once the coils are smoothed. You can scale the same template down for an earring holder or stretch it longer to hold keys by adjusting the starting coil length. On a dresser or bathroom counter the textured surface helps hide small scuffs from metal jewelry while the flat profile stays stable on shelves. The leaf approach also translates easily to other simple forms like a wave or oval if you want to practice coil building without starting from a blank slab.
Coil Built Egg Cups with Tiered Bases
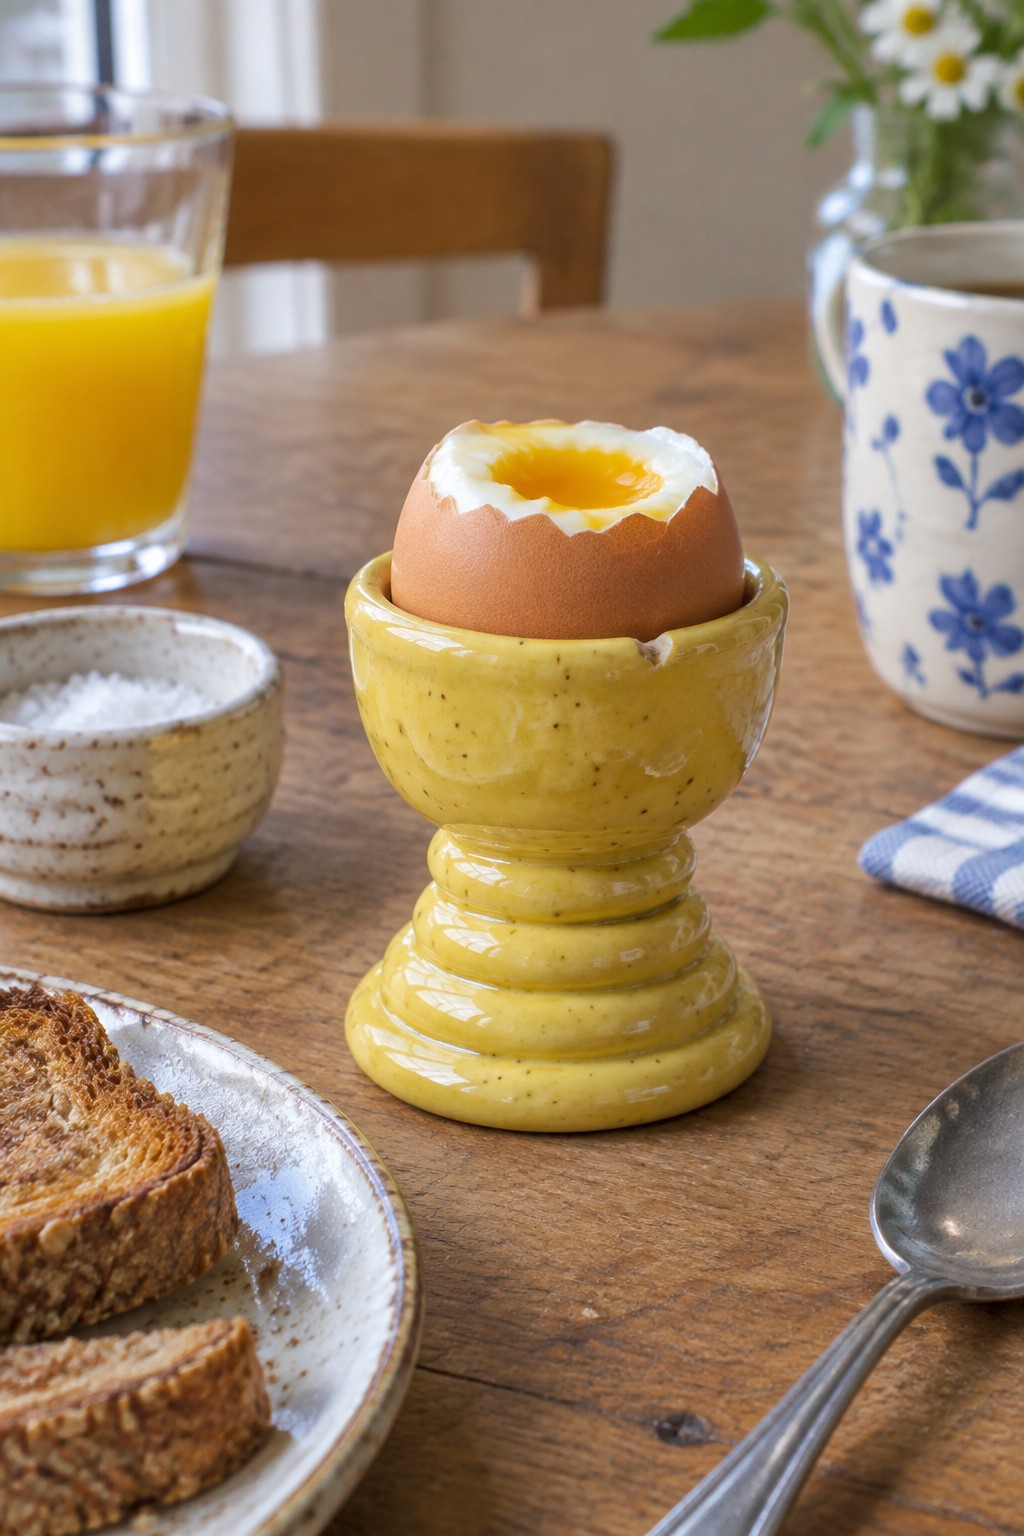
A coil-built egg cup makes a practical kitchen item that holds one soft-boiled egg at the table. The form uses a wide, slightly flared rim to keep shell pieces contained and a series of stacked rings for the base that create both height and stability. A mustard-yellow speckled glaze covers the entire piece, giving it a simple, food-safe surface that works with everyday dishes.
What makes this idea useful is how the stacked base can be adjusted in height or number of coils to change the look without new tools. In a kitchen this shape keeps a single egg upright and easy to tap open while taking up little space on the table. You could adapt the same coil method into a small cream pitcher or a bud vase by narrowing the top opening and keeping the same base pattern.
Coil-Built Candle Holder with Cutout Openings

A coil-built candle holder gives you a simple way to make a small lantern using stacked coils of clay. Form the cylinder by layering thick coils, then cut small round openings through the walls before the clay firms up. The dark clay body lets light from a tea light pass through the holes and create a soft glow without any glaze. This project stays focused on basic coil construction and straightforward cutouts rather than added parts or detailed carving.
What makes this idea useful is how the same stacking method can be changed for different heights or hole arrangements. You could build a wider version to hold a larger candle or make several smaller ones to group together. The cutouts also let you try other shapes like ovals or rectangles if you want a different look. A piece like this works especially well on a patio table or shelf where the light shows through after dark.
Frequently Asked Questions
What basic supplies beyond clay are recommended for starting these coil projects?
Gather a rolling pin or slab roller for flattening clay, a scoring tool or fork for joining coils, a sponge for smoothing, and basic wire cutters for trimming. Keep a spray bottle handy to maintain moisture in the clay during building. These items help beginners achieve clean joins and consistent shapes across the 22 projects without needing advanced equipment.
How thick should coils be when beginning these modern ceramic builds?
Start with coils about the thickness of your pinky finger, around half an inch in diameter, and adjust based on the project size. Thinner coils work well for delicate modern forms like vases or sculptures, while thicker ones provide stability for larger bowls. Roll them evenly on a non-stick surface and score each layer before adding the next to prevent weak spots.
What techniques help create seamless surfaces on coil-built pieces?
Blend coils by pressing them together firmly with your fingers, then use a rib tool or damp sponge to smooth the interior and exterior walls in stages. Work in small sections and let layers firm up slightly before adding more height. This approach gives the clean, contemporary look featured in the projects while reducing visible lines after firing.
How long does it typically take for coil projects to dry before bisque firing?
Allow pieces to dry slowly over one to two weeks in a controlled environment away from direct heat or drafts. Check for even drying by ensuring no cool spots remain when touched. Slow drying minimizes cracking in coil structures, especially for taller or more complex beginner designs, and prepares them safely for the kiln.
Can these coil building ideas be adapted for air-dry clay instead of traditional firing?
Yes, many of the projects translate well to air-dry clay for non-functional decorative items. Build in thinner layers and smooth thoroughly to avoid seams, then let dry completely over several days before painting or sealing. Note that air-dry versions lack the durability of fired ceramics but offer a low-barrier entry for testing modern shapes at home.

Pottery Path is my cozy corner of the internet where I share clay ideas, pottery inspiration, and simple projects you can recreate at home. I love exploring everything from air dry clay to handbuilt pottery to cute minis that brighten your day. My goal is to make clay crafting feel easy, fun, and welcoming for anyone who wants to try it.
You will find beginner friendly tutorials, creative pottery painting ideas, and lots of warm inspiration for slow and happy crafting. If you enjoy hands on creativity, this space will feel like home.