I started trying slab methods because they seemed straightforward compared to other pottery techniques.
With just a rolling pin and some templates I could shape clay into useful items without much fuss.
This article shares twenty easy projects that beginners can try using basic handbuilding approaches.
I have tested most of them myself and they turned out fine with a bit of practice.
They focus on everyday objects that do not demand perfect symmetry or extra equipment.
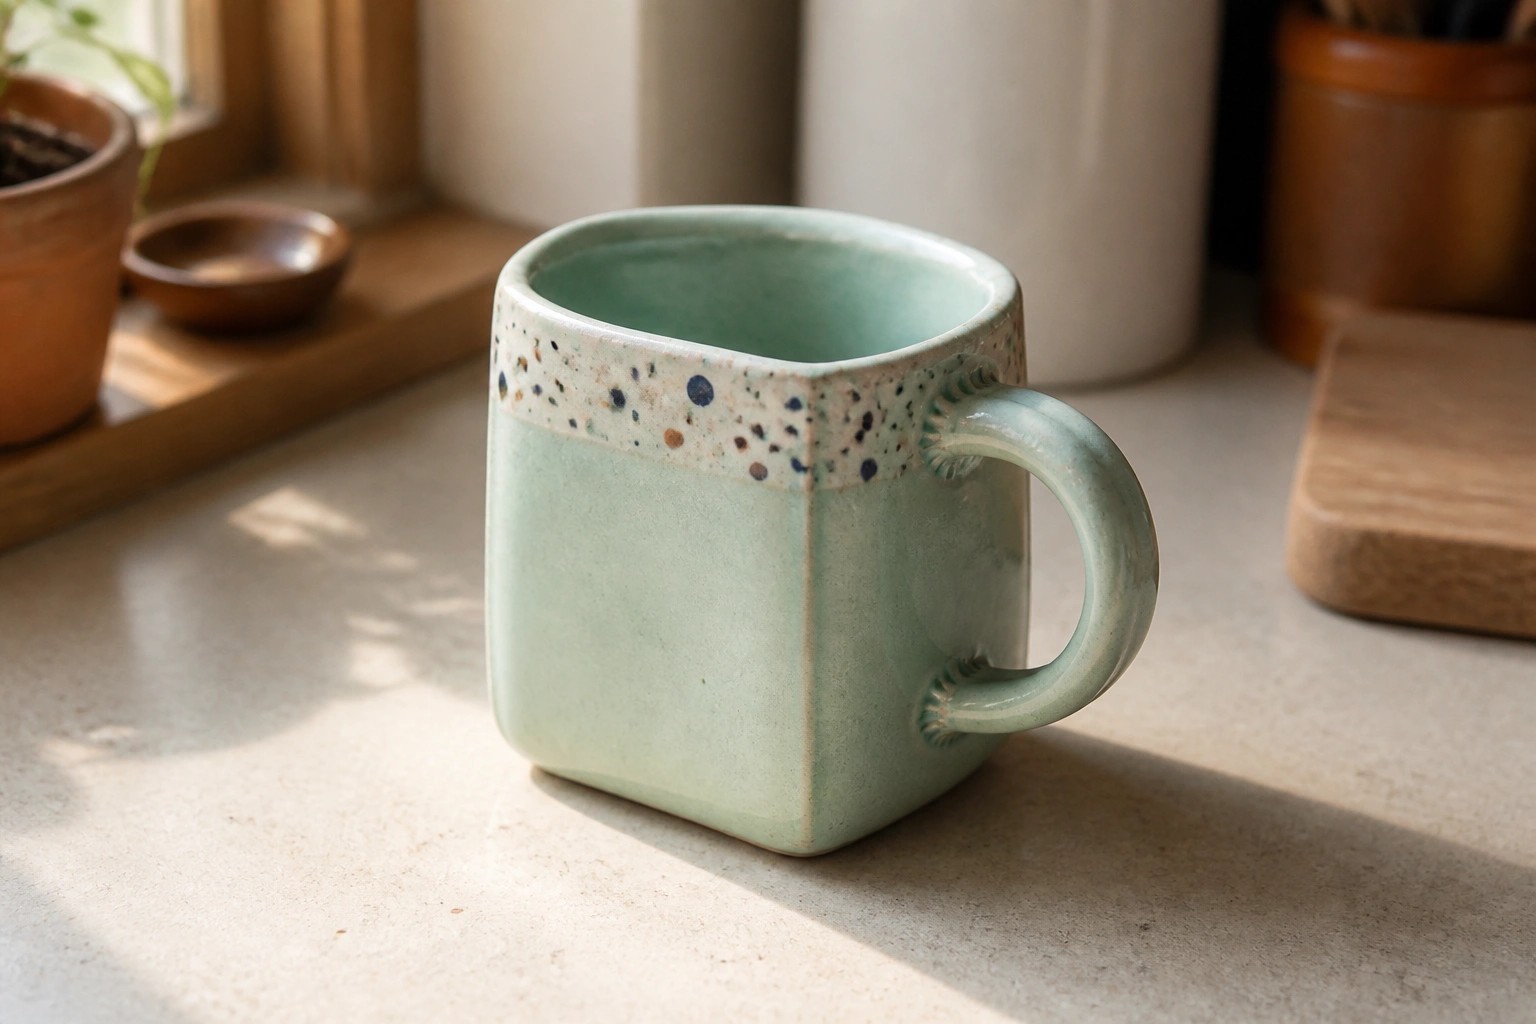
Square Slab Mug with Speckled Finish

A slab-built mug with flat sides and a squared profile gives beginners a straightforward project for practicing even slab rolling, scoring, and joining. The soft mint glaze with brown speckles creates contrast and hides minor surface marks, so the piece still looks finished even when the seams show a little. This type of mug fits the kitchen item category and stays functional for daily use while keeping the handmade slab look.
What makes this idea useful is that the straight sides let you adjust the height or width quickly by trimming the slabs before assembly. The speckled glaze can be copied with a simple oxide wash over a base color, which works well on textured slab surfaces. This shape scales easily into a small creamer or desk cup, and the angular form photographs clearly for sharing project ideas online.
Speckled Rim Slab Bowl
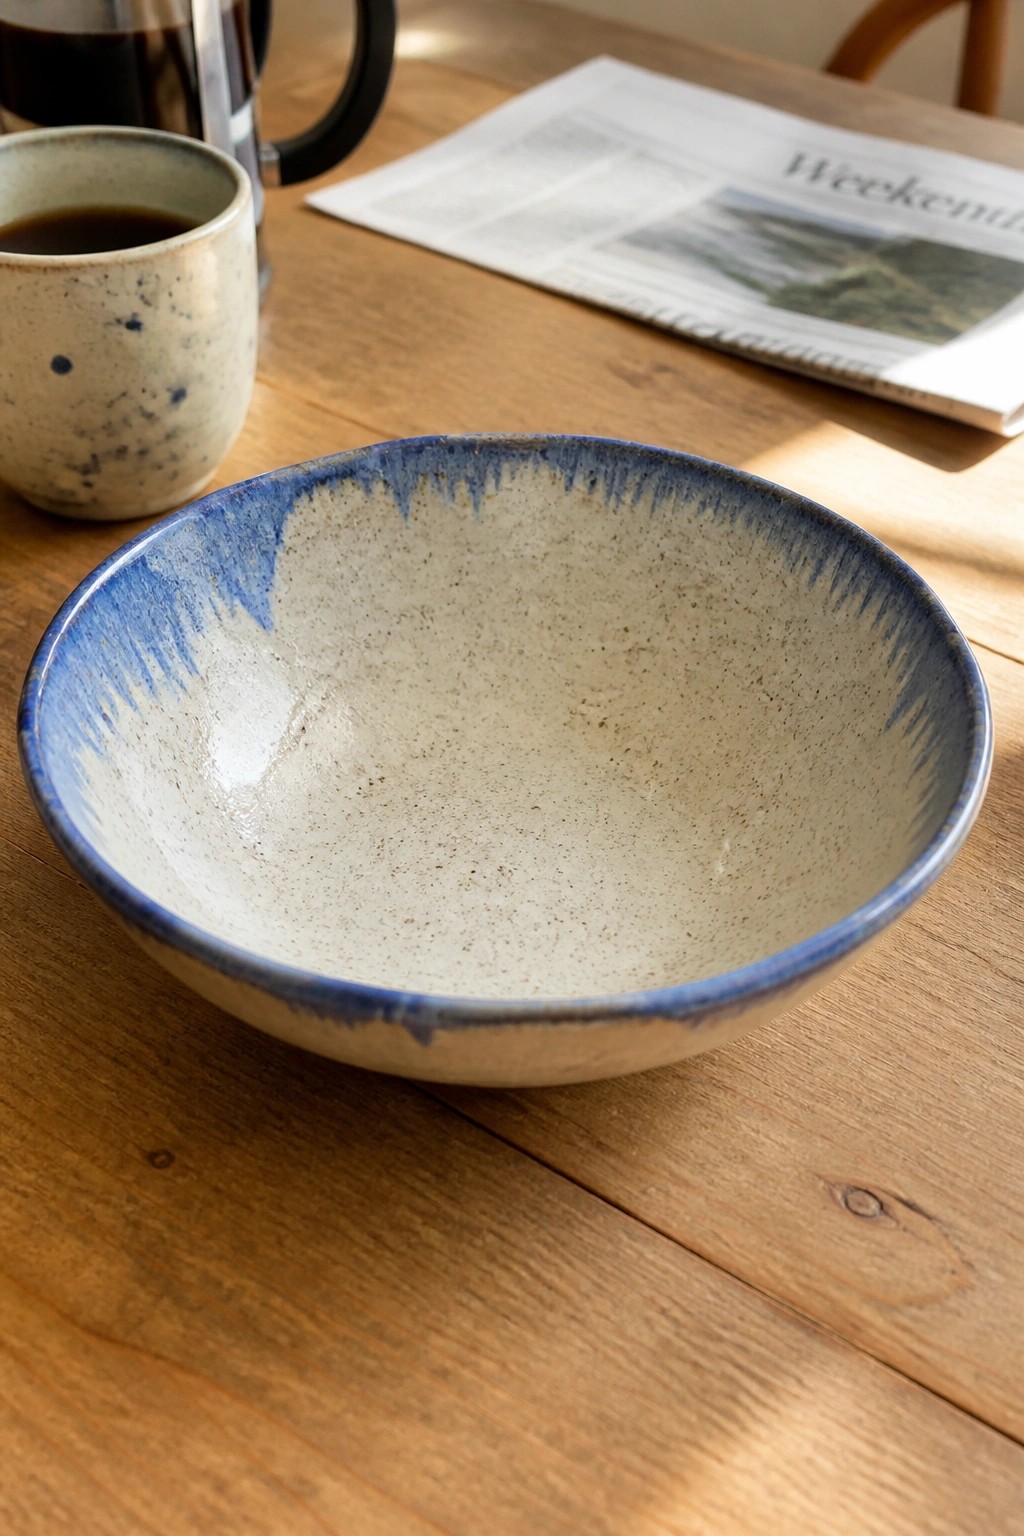
A slab-built bowl begins with a flat sheet of clay cut into a circle and shaped over a form to create a wide, shallow profile with low sides. The speckled clay surface stays visible under a light matte finish while the rim receives a band of blue glaze that runs downward in short, uneven drips. This approach produces a functional serving or snack bowl that relies on simple slab construction and basic glazing rather than added handles or complex trimming.
The shape does a lot of the work here because a flat slab base stays stable and can be sized up or down for different uses like cereal, side dishes, or small salads. You can adapt the rim treatment by changing the glaze color or limiting the drip effect to just the outer edge for a cleaner look. In a kitchen this kind of piece works well for everyday meals since the contrast between the speckled body and colored rim makes it easy to spot on open shelving. For a first slab project the same method can be reworked into a slightly deeper version or a set of matching smaller bowls without needing extra tools.
Scalloped Heart Slab Tray

A slab-rolled rectangular tray gives beginners a straightforward way to make a flat dish with raised edges. Cut the base with a wavy or scalloped template, press small heart shapes into the surface while the clay is leather hard, then add a thin coil or slab rim. A single soft glaze color keeps the focus on the simple pressed details and clean shape.
The small scale works well for holding rings or keys on a dresser or desk. You can swap the hearts for other small stamps or skip them entirely and just keep the scalloped edge. This shape adapts easily into a soap dish or plant saucer by changing the size or glaze. The flat surface and minimal construction make it a quick project that still looks finished.
Rectangular Slab Planter with Drainage Hole
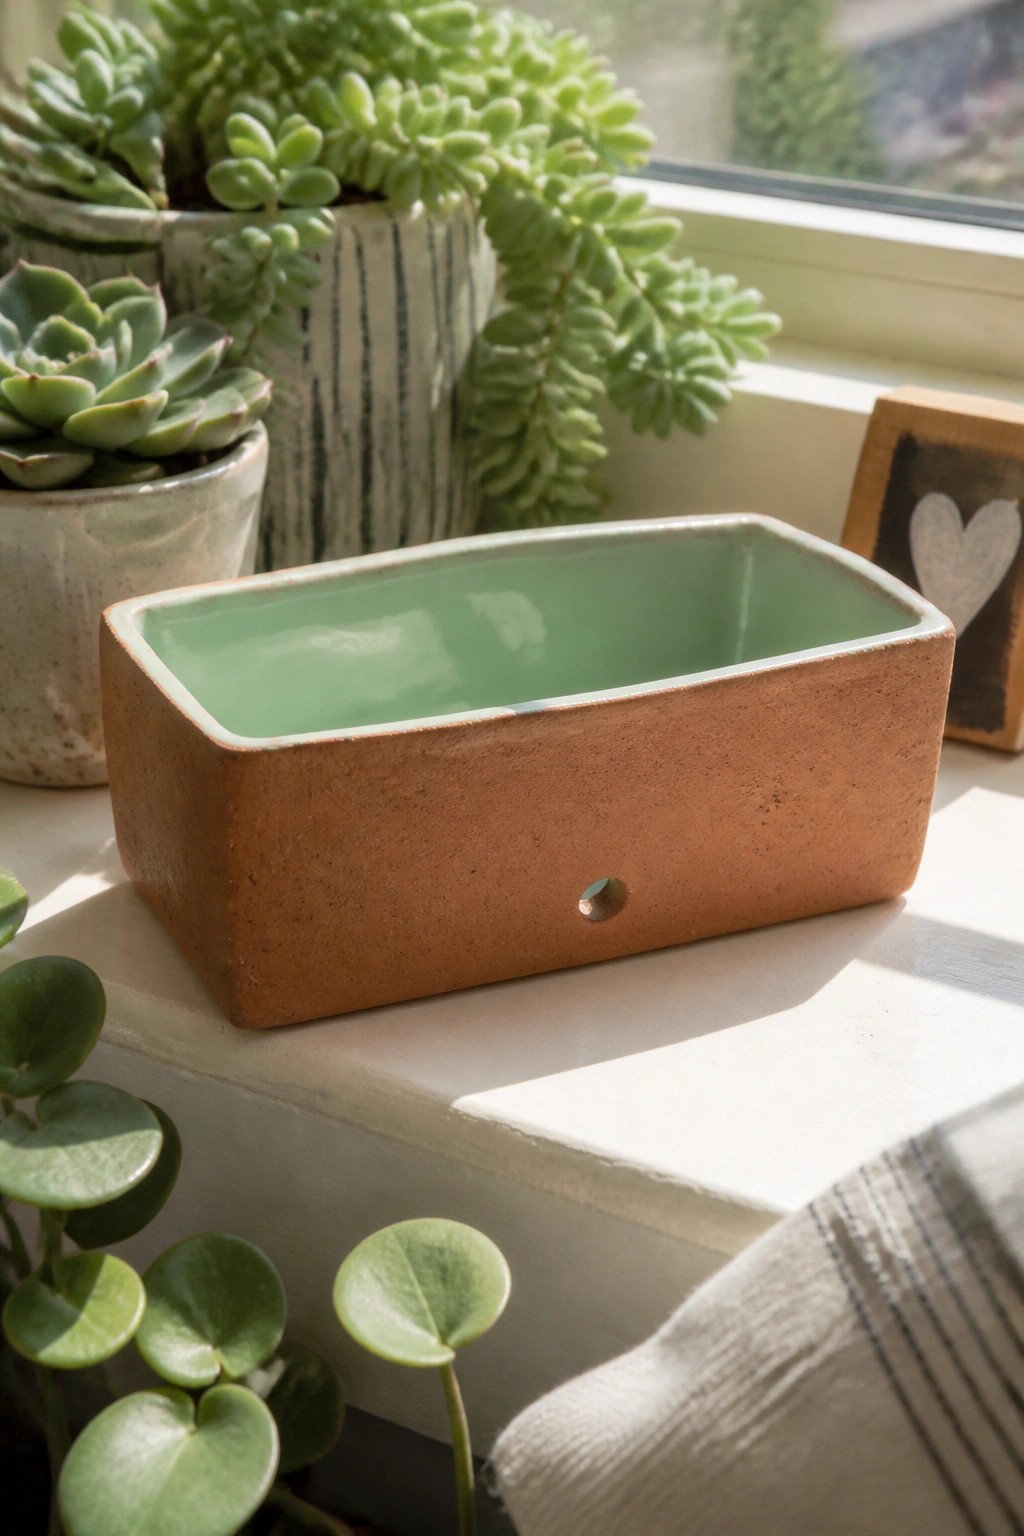
A simple rectangular planter built from clay slabs creates a shallow container that works well for succulents or small herbs. The form stays open and low with straight sides and a flat base, while a small hole punched through one side allows excess water to drain. Leaving the outside unglazed keeps the surface matte and textured, and applying a light glaze only on the inside gives contrast without extra decoration. This approach fits the slab category because it requires only basic cutting, scoring, and joining steps.
The shape does a lot of the work here because the straight walls and flat base are easy to measure and assemble from a few templates. You can scale the same rectangle down for a desk tray or lengthen it for a windowsill herb holder. Adding the drainage hole takes almost no extra time but makes the piece more practical for live plants than a solid tray would be. If you want a version without the hole, the same slab method works for a catch-all dish in a bathroom or entryway.
Floral Embossed Slab Wall Plaque
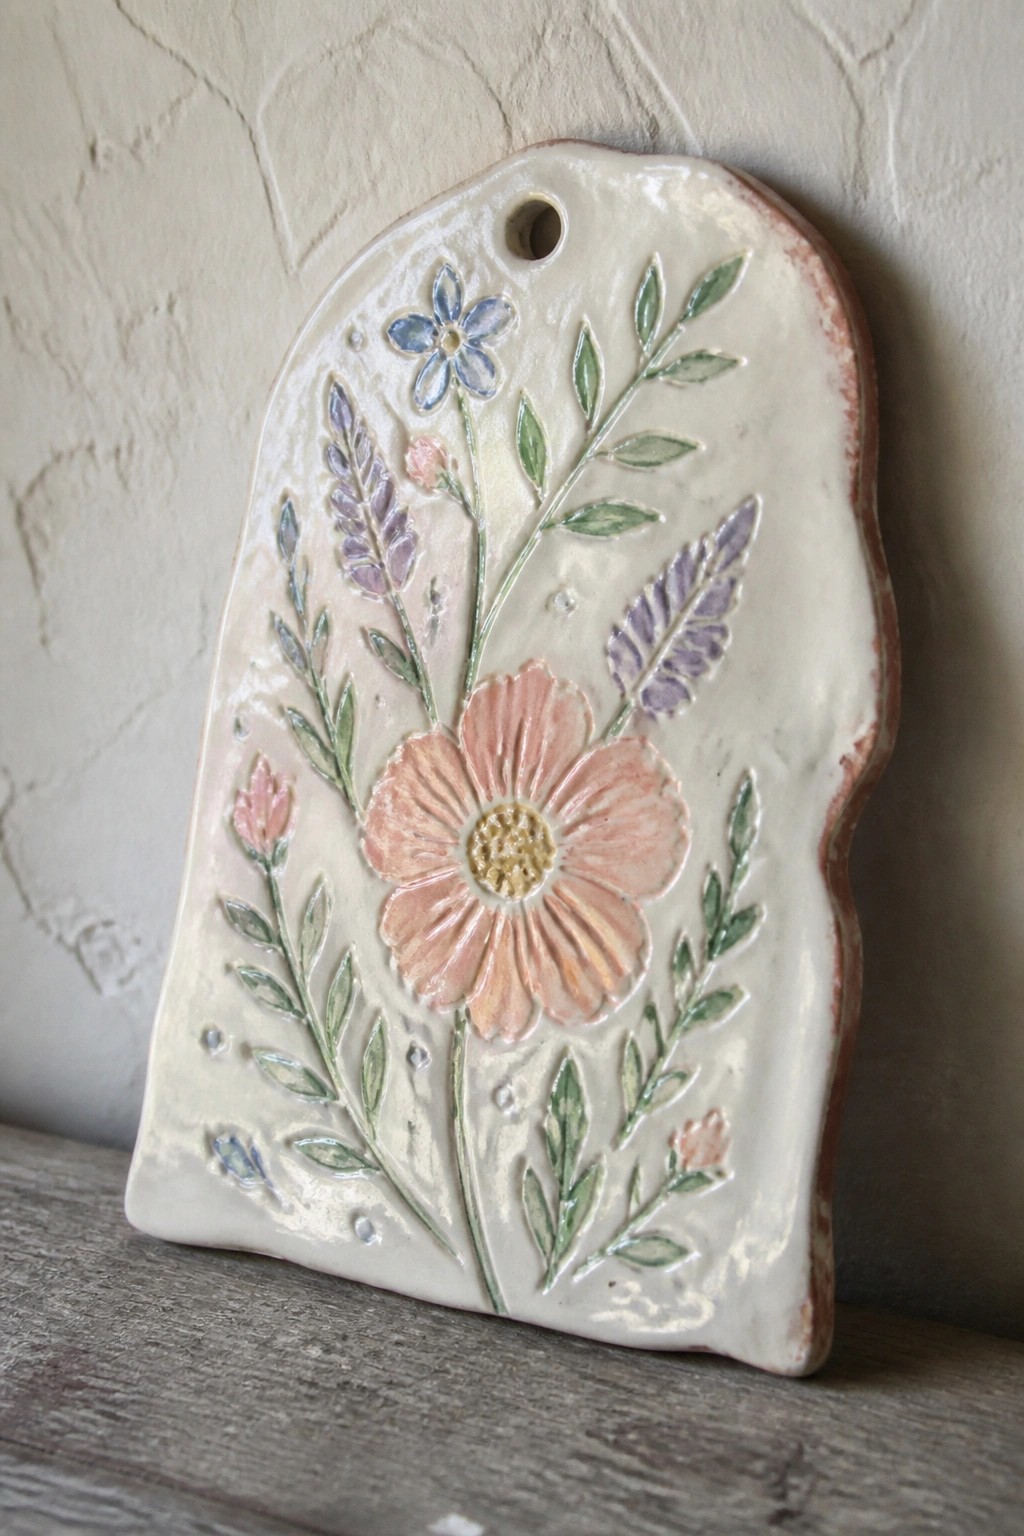
A flat slab of clay cut into an arched rectangle makes a straightforward wall plaque that can be decorated with pressed or carved flowers and leaves. The design uses a large central bloom in pink with smaller buds and stems in blue and green, all raised slightly from the surface so the colors stay contained within the shapes. A hole at the top allows the finished piece to hang without extra hardware. This kind of project keeps the work simple because the slab stays flat and the details come from texture tools or stamps rather than building up forms.
What makes this idea useful is how the same layout can be adjusted for different rooms by changing the overall size or spacing of the flowers. The relief technique works on smaller versions for bathroom tiles or a set of three plaques grouped together on a larger wall. You could also flatten the back and add feet to turn the same slab into a shallow tray. The pressed details stay visible even with basic glazing, so the project does not require advanced color work to look finished.
Slab-Built Spoon Rest with Wavy Texture
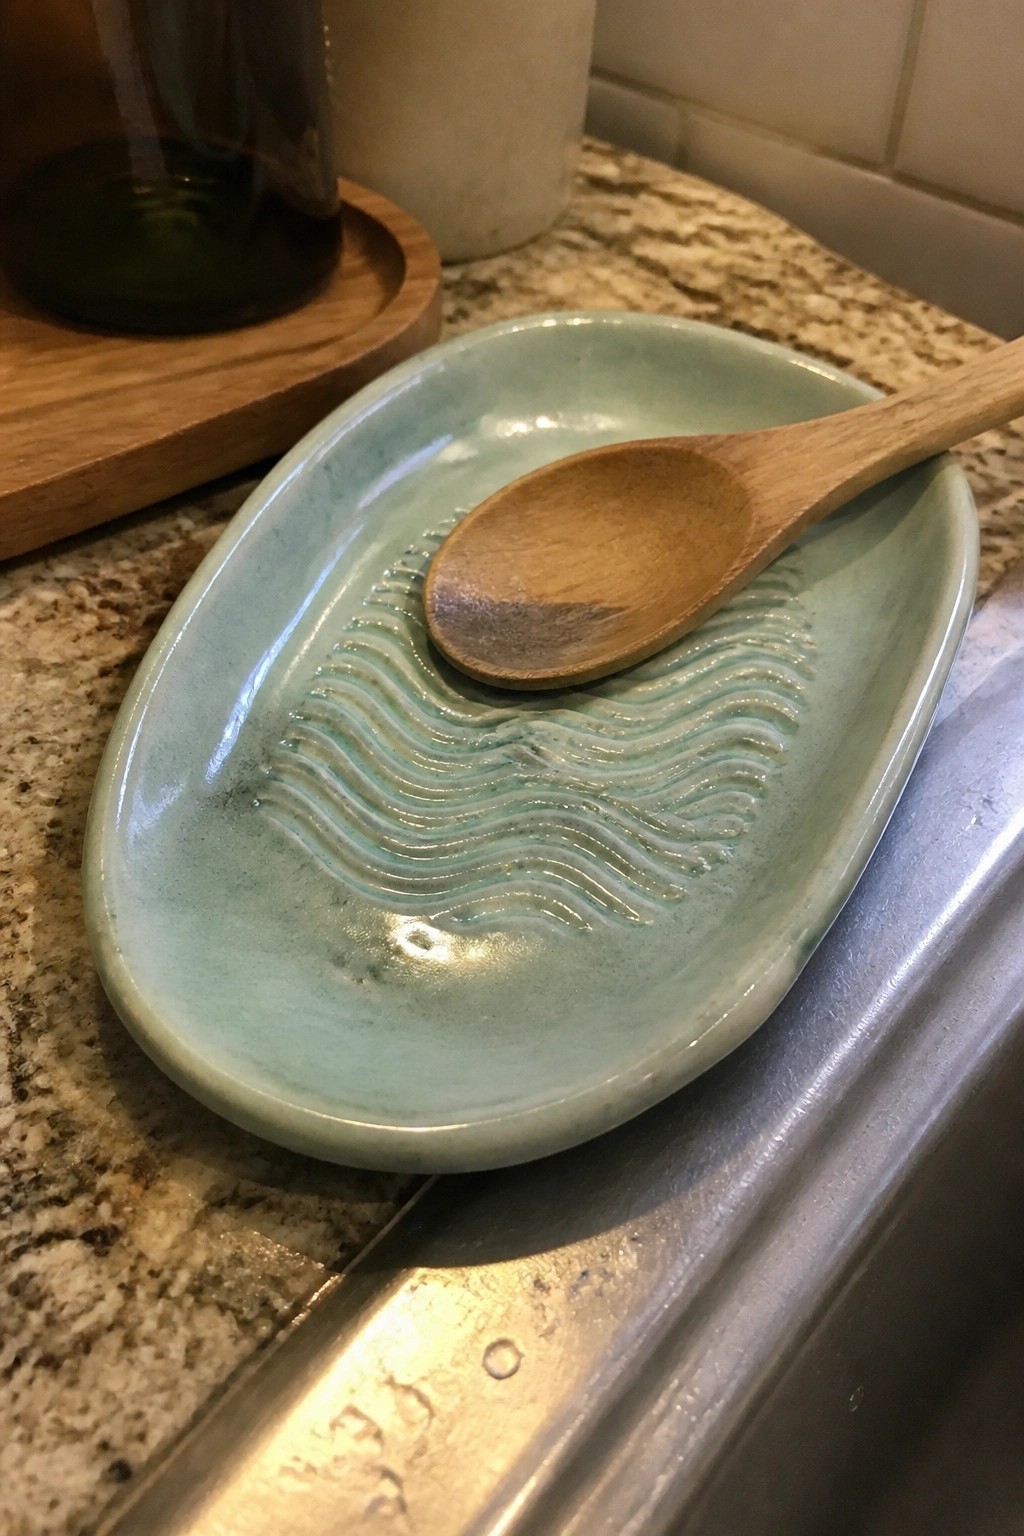
This project uses a simple rolled slab of clay cut into an oval to form a shallow dish. The maker pressed or carved repeating wavy lines across the center before applying a soft green glaze that pools in the grooves. The result is a compact kitchen item meant to hold a spoon or utensil while catching drips. The oval shape and textured center keep the piece practical without adding extra steps.
The small size means you can cut and shape it quickly from one slab with minimal trimming. You could swap the wave pattern for straight lines or dots made with basic tools, or use a different glaze color to match your dishes. In a kitchen it sits neatly beside the stove or sink and takes up little counter space. The same oval slab can be reworked into a small soap dish or butter tray by adjusting the depth and texture.
Leaf Slab Ring Dish
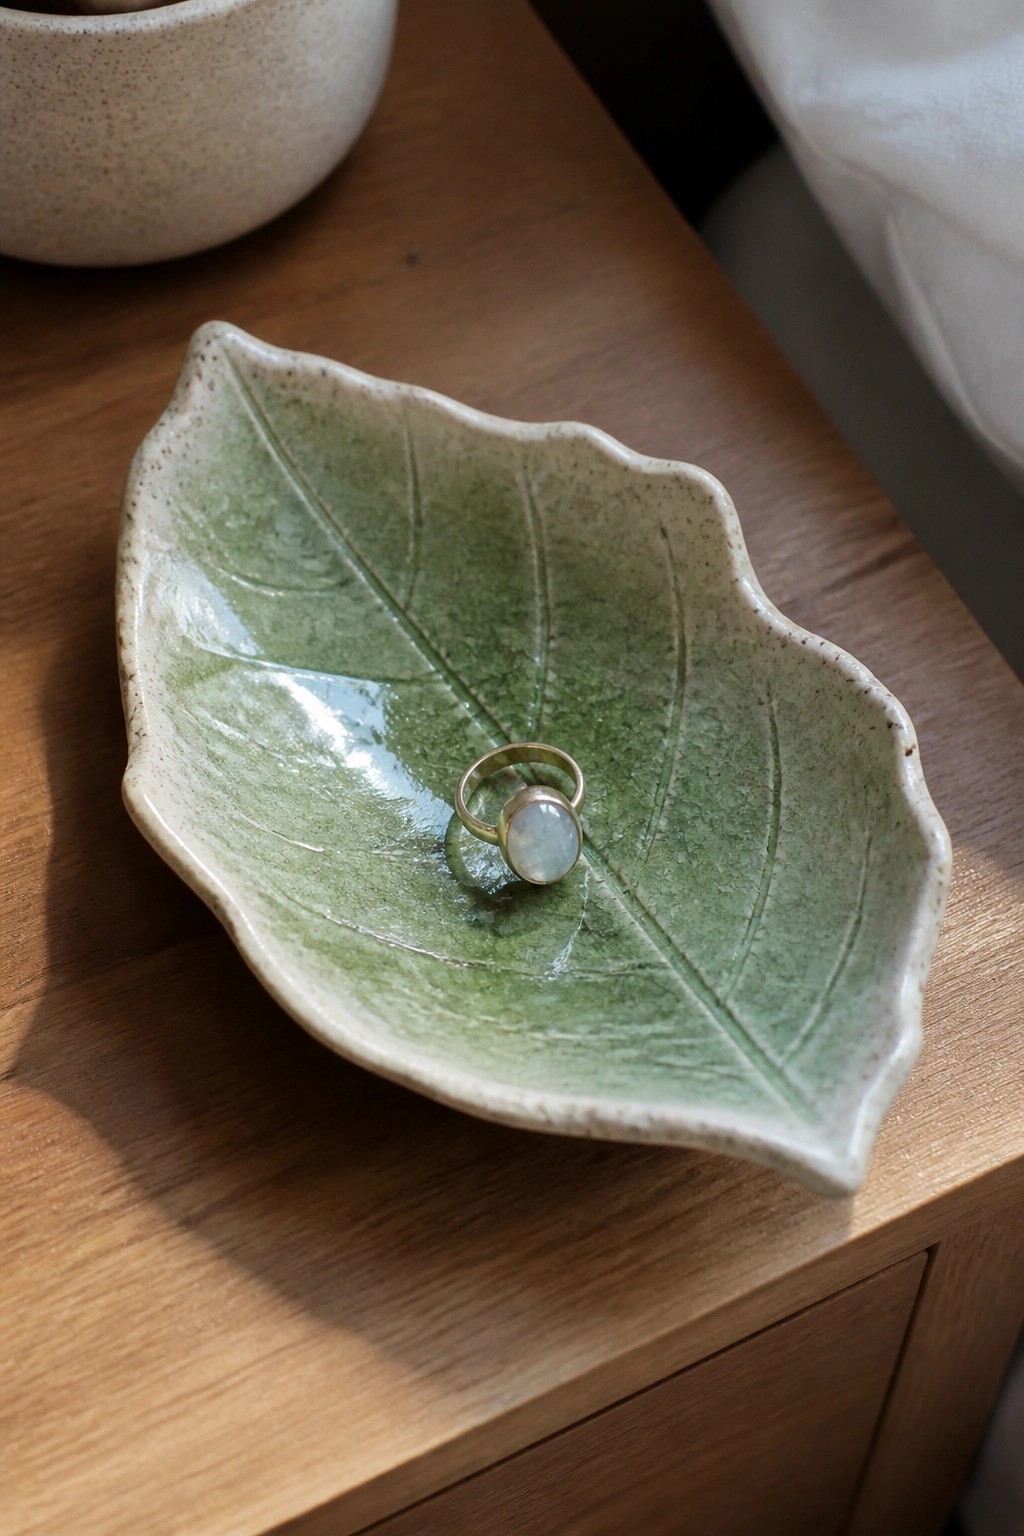
A simple slab-rolled leaf dish makes a practical ring holder or small catch-all. Cut a leaf outline from a flat piece of clay, press in vein lines, and shape the edges slightly upward to keep items in place. The green glaze with speckled texture emphasizes the natural leaf look without needing extra decoration. This approach stays within basic handbuilding and works as a compact desk or nightstand piece.
The small scale keeps the project quick to finish from one slab of clay. You can swap the leaf type or adjust the glaze color to match different rooms or gift themes. The same cut-and-score method adapts easily to a longer tray shape or a set of matching dishes. A piece like this stands out in photos because the form is clear and recognizable even in simple glazes.
Three-Well Tealight Tray
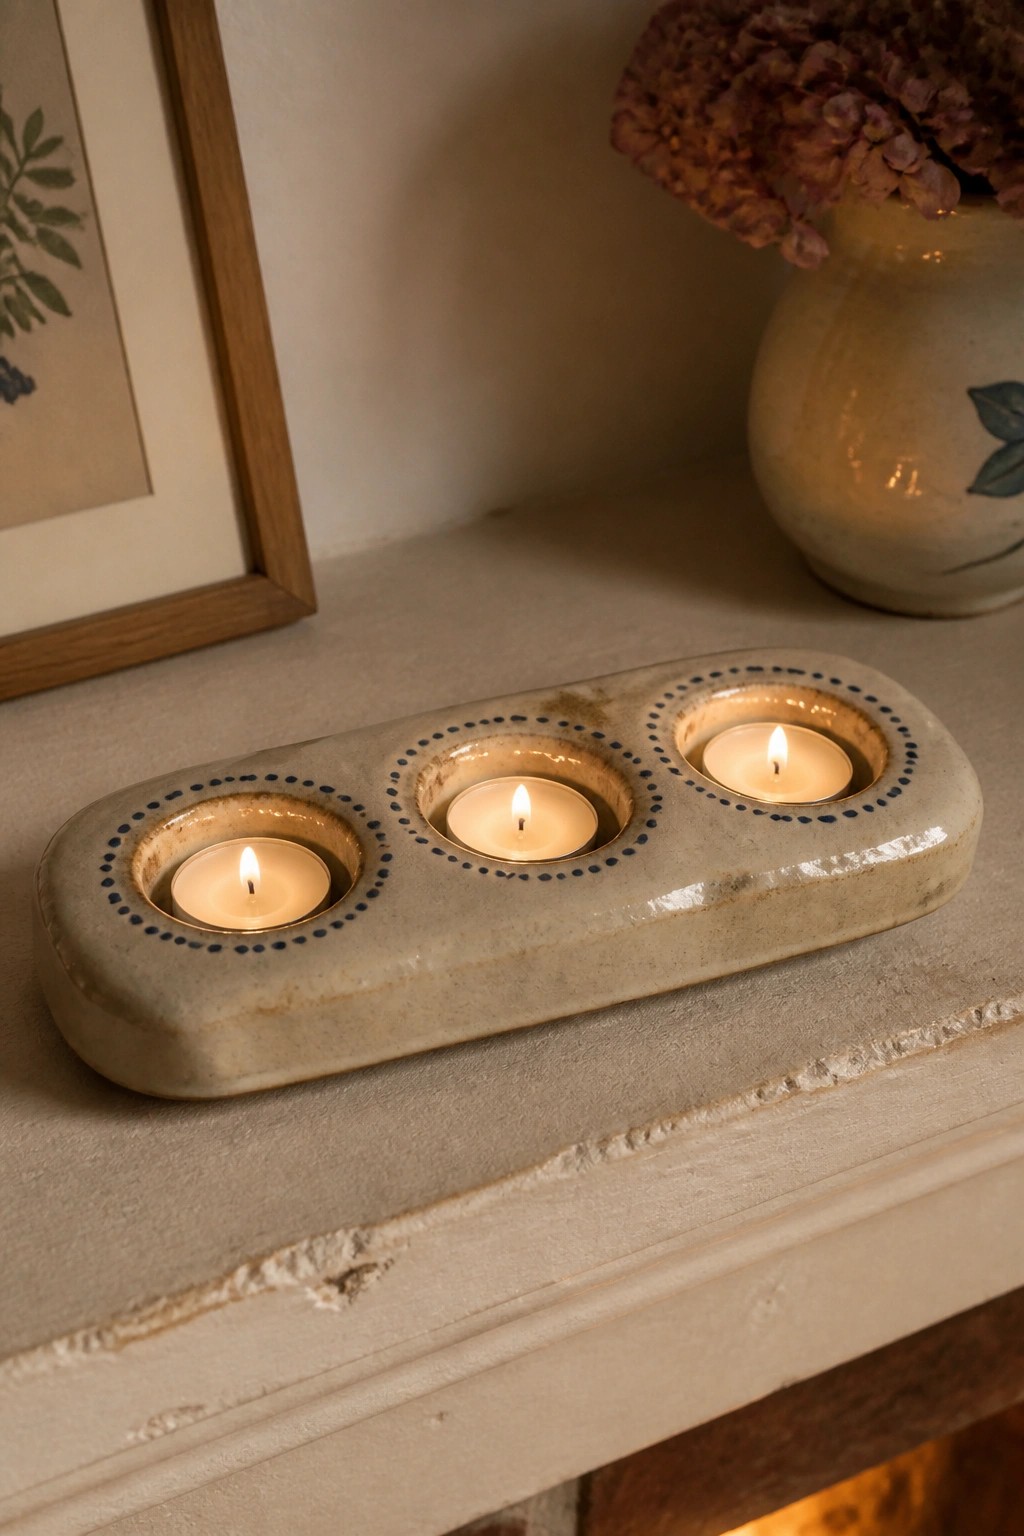
A slab-rolled clay tray with three shallow wells makes a straightforward candle holder that keeps tealights contained and stable. The oval form keeps the piece compact while spacing the candles evenly, and the blue dotted rings around each well create clear visual separation without adding extra height. A light earthy glaze covers the surface and lets the handmade texture show through. This fits the candle piece category and stays simple because it uses basic slab construction and trimming.
What makes this idea useful is how the same layout can shift to two wells for a narrower shelf or four wells for a longer table. The tray shape works on a mantel, side table, or bathroom counter where you need soft light without much bulk. You could replace the dots with scored lines, stamps, or a single color band to change the look while keeping the same base form. For gifts, a version in a single glaze color keeps the project quick but still gives a finished result that stands out in photos.
Ridged Slab Soap Dish

A slab built soap dish uses a flat rectangular base with parallel grooves cut into the surface so water drains away from the bar instead of sitting underneath. Small feet raise the whole piece off the counter while low sides keep everything contained. The simple shape and matte glaze give it a clean look that works as a bathroom item without needing extra decoration.
What makes this idea useful is how quickly the grooves can be changed or removed if you want a flatter tray instead. The same slab layout can be shortened into a ring dish or lengthened for a toothbrush rest. In a bathroom the drainage keeps soap from getting soggy so it lasts longer. You could also make a second one in a different size for kitchen sponges.
Divided Ceramic Salt Dish
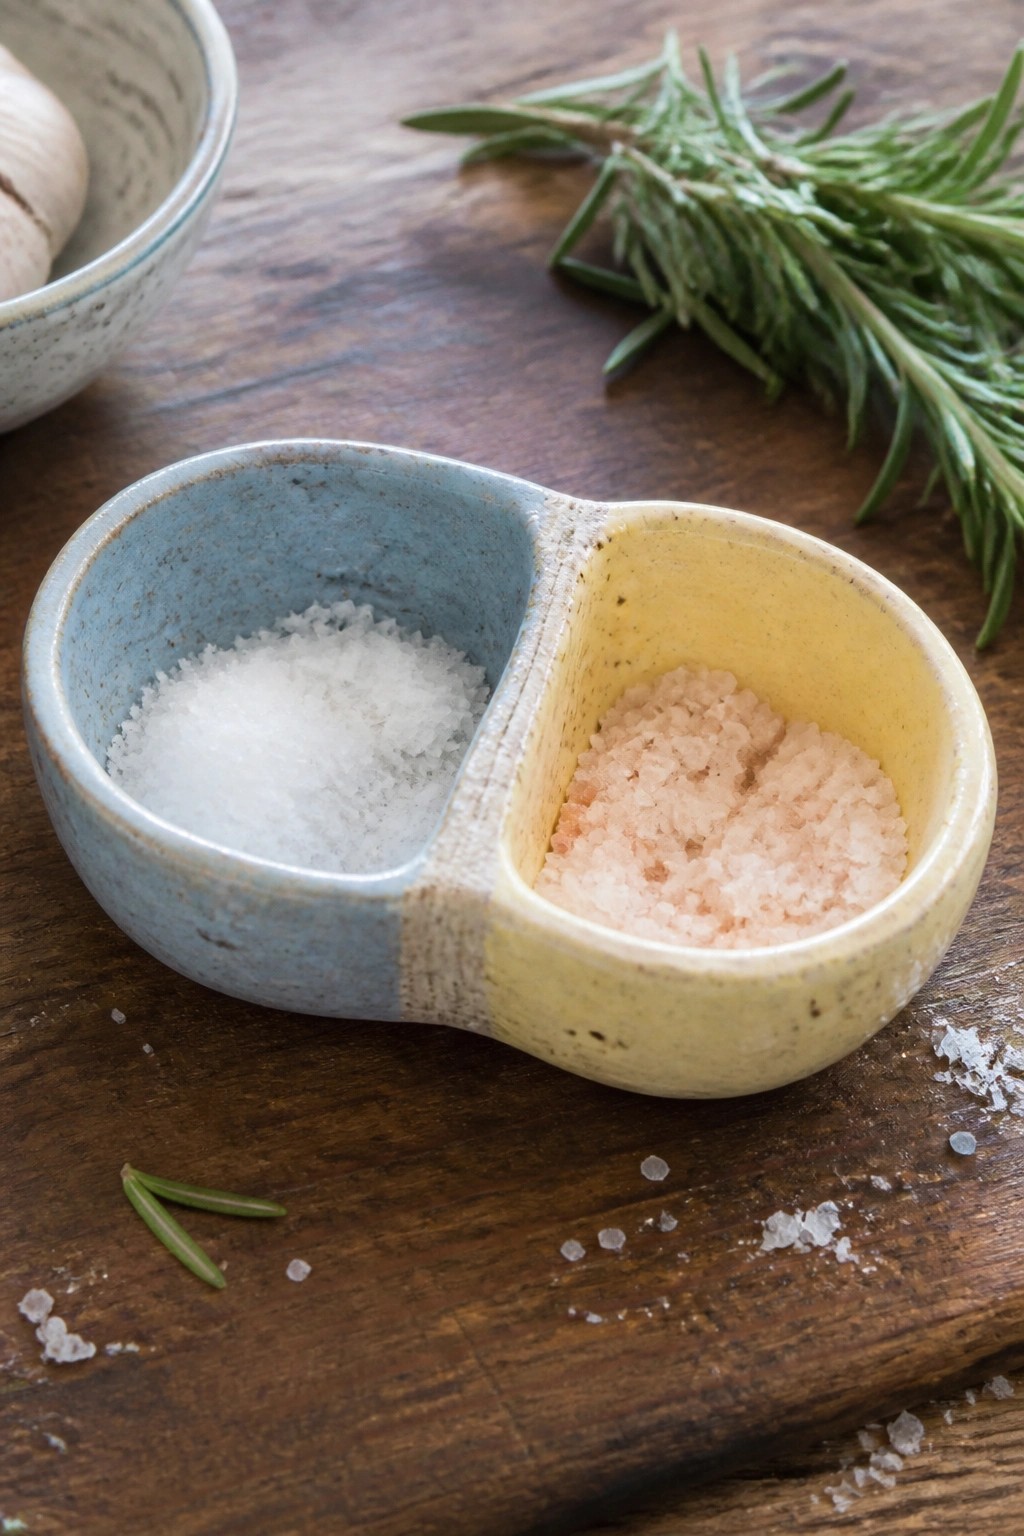
A divided ceramic dish with two connected compartments makes a practical kitchen item for holding different salts or seasonings side by side. The simple oval form pinches in the middle to create clear separation while keeping the whole piece compact. Different colored glazes on each section help users tell the contents apart at a glance without needing labels. This shape works especially well for coarse salts that need easy scooping during cooking.
What makes this idea useful is how the divided layout keeps two ingredients organized in one small object. You can adapt the size slightly to hold spices or finishing salts and change the glaze colors to fit your kitchen palette. In a kitchen this kind of piece sits neatly on the counter and reduces the need for multiple jars. For a gift the same form could be made a bit wider to serve as a two-part dip tray.
Lemon Slice Ring Dish
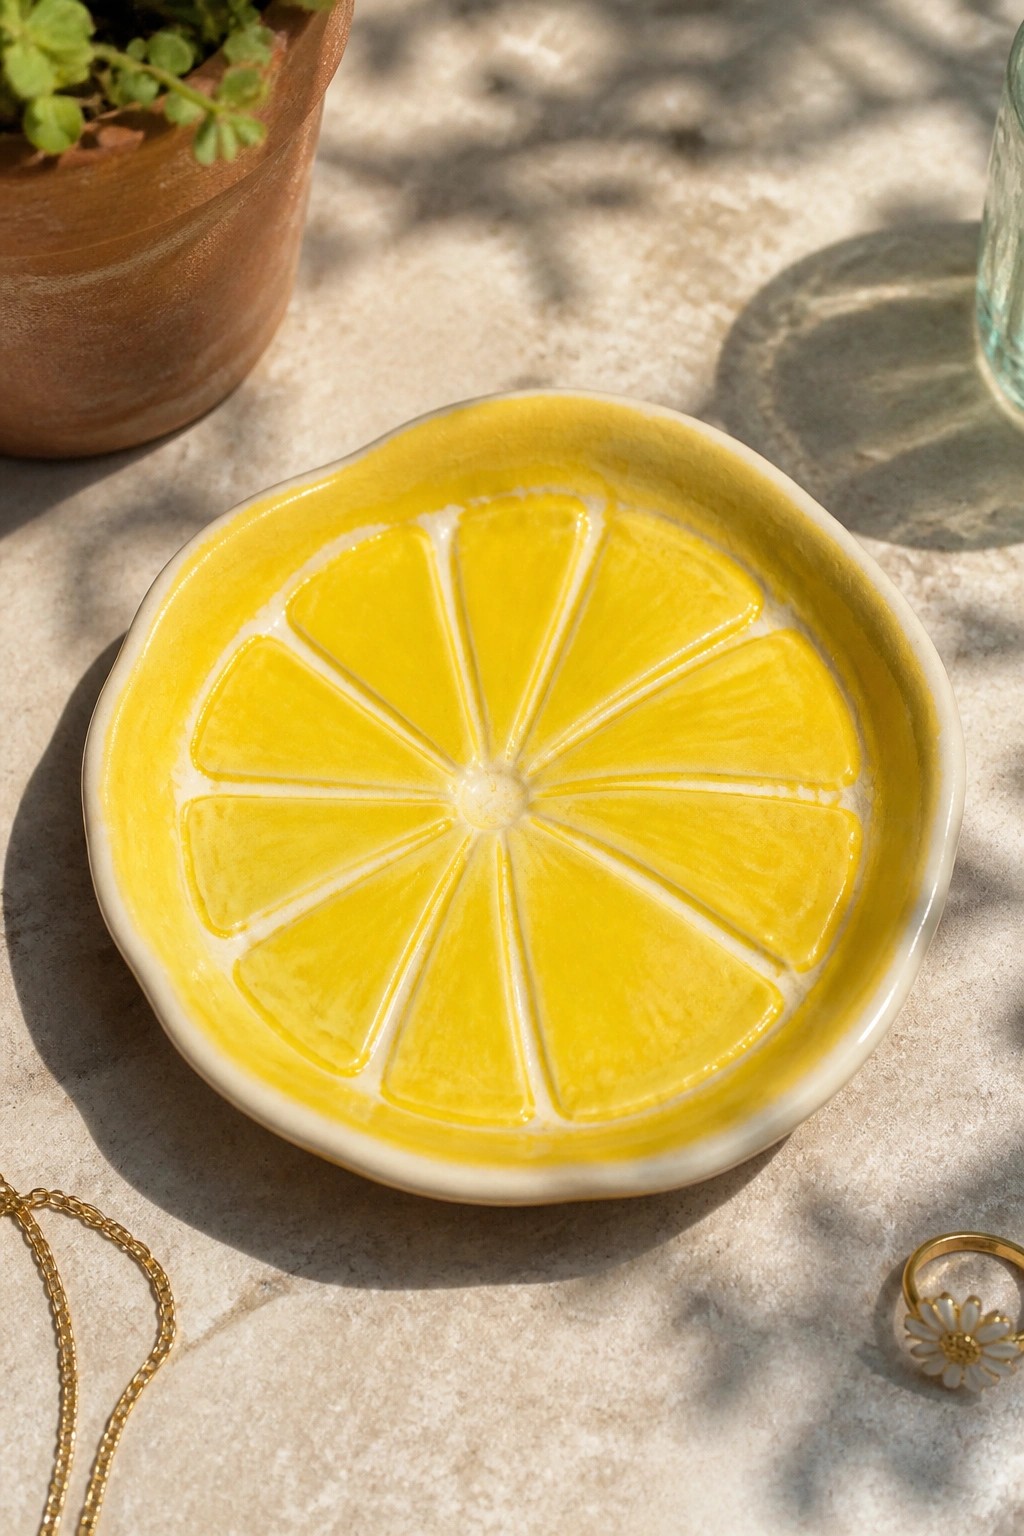
A small slab-built dish formed in a citrus slice shape makes a simple ring dish or catch-all tray. The design relies on a flat round base with impressed lines radiating from the center to suggest segments, finished in a solid yellow glaze that highlights the pattern. This keeps the project to basic handbuilding steps while giving the finished piece a clear fruit motif that reads well from a distance.
What makes this idea useful is how the shallow sides and compact size let it hold rings or small jewelry without taking up much space on a dresser or sink edge. You can rework the same slab shape into an orange or lime version by adjusting the glaze color and the number of segments you press in. For a beginner project the impressed lines add detail without needing extra tools, and the round form is easy to cut from a template so it translates quickly to other small trays or coasters.
Divided Slab Holder for Toothbrushes

A rectangular ceramic caddy built from slabs creates three separate compartments that keep toothbrushes upright and organized on a bathroom counter. The simple box shape with two internal dividers uses basic handbuilding to form clean lines and stable walls. A light speckled surface paired with a thin blue rim gives the piece enough contrast to stand out without extra decoration. This project fits the bathroom item category and stays compact enough for daily use.
What makes this idea useful is how the same rectangular form can be resized or divided differently to hold other small items. You could shorten the length for a two-section version that fits a narrow ledge or add height for taller tools. The flat sides make it simple to stamp initials or try a different rim color on the next try. In a bathroom, this shape gives you practical storage that also works as a small desk tray or makeup brush holder.
Slab-Built Cat Planter
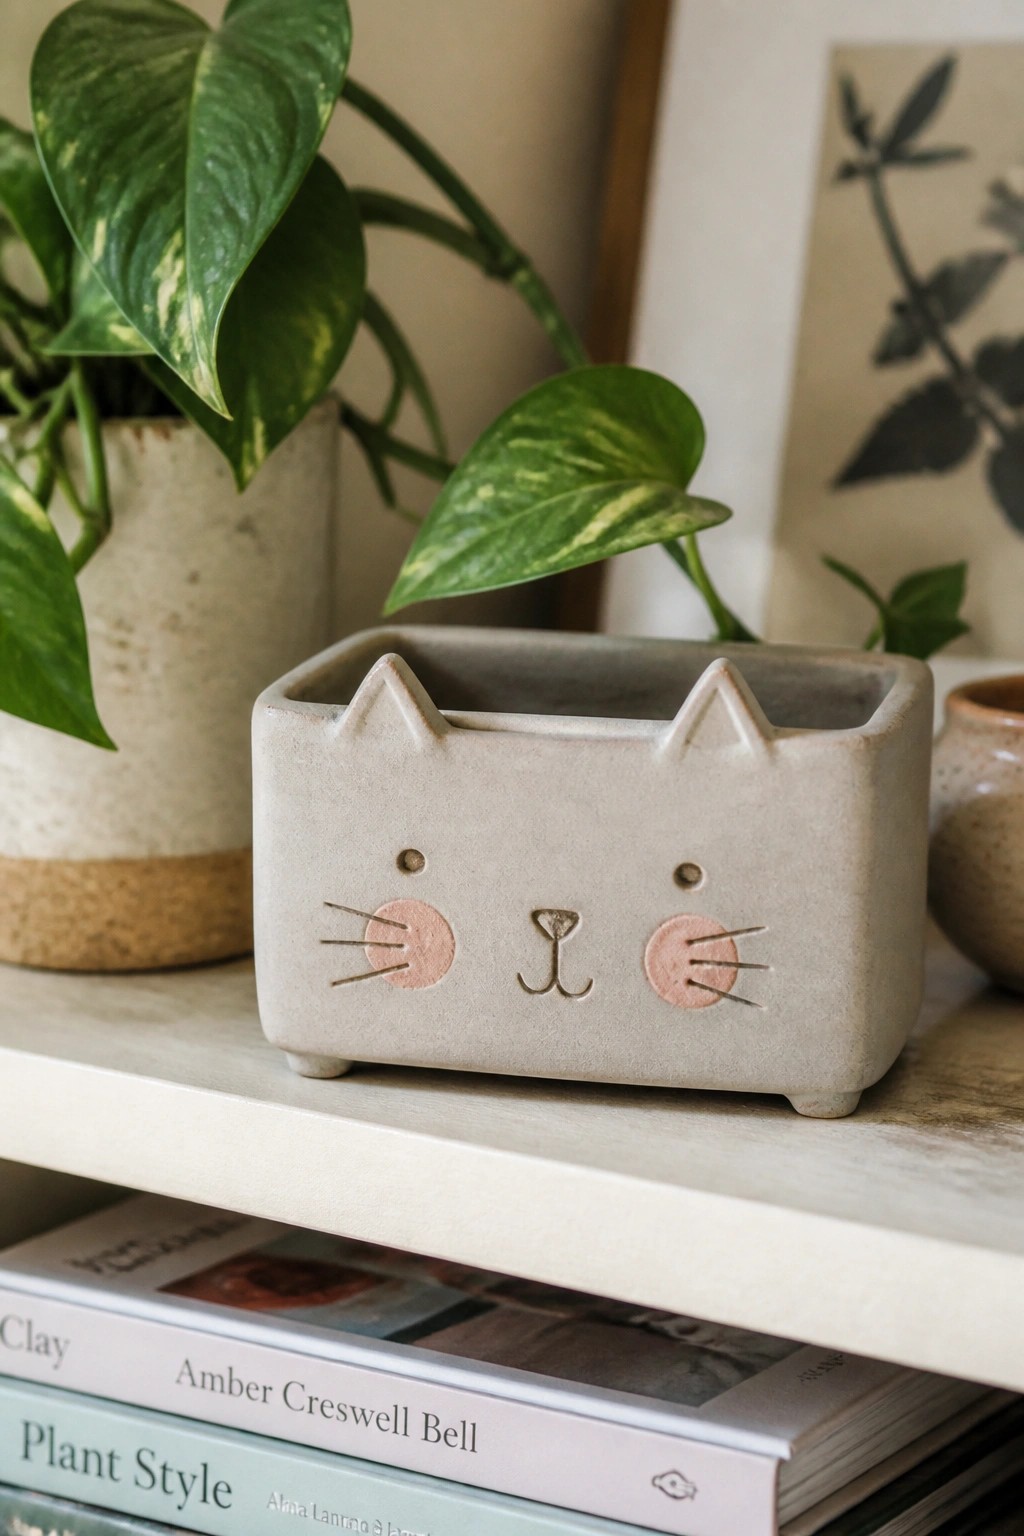
A basic rectangular planter formed from slabs gains its cat look from two small triangles pinched on as ears and a face built with simple stamped or carved marks. The eyes, nose, and whiskers are added with underglaze or colored slip after the slab work is complete, keeping the build straightforward. This produces a compact plant holder sized for a single small houseplant or succulent.
The shape does a lot of the work here because the straight walls come directly from the slab template and need little trimming. You can swap the cat face for another animal or drop the details entirely to make a plain tray or desk holder instead. The small scale also means the piece fits easily on a shelf or bookcase without taking much clay or kiln space.
Slab Napkin Rings with Textured Patterns
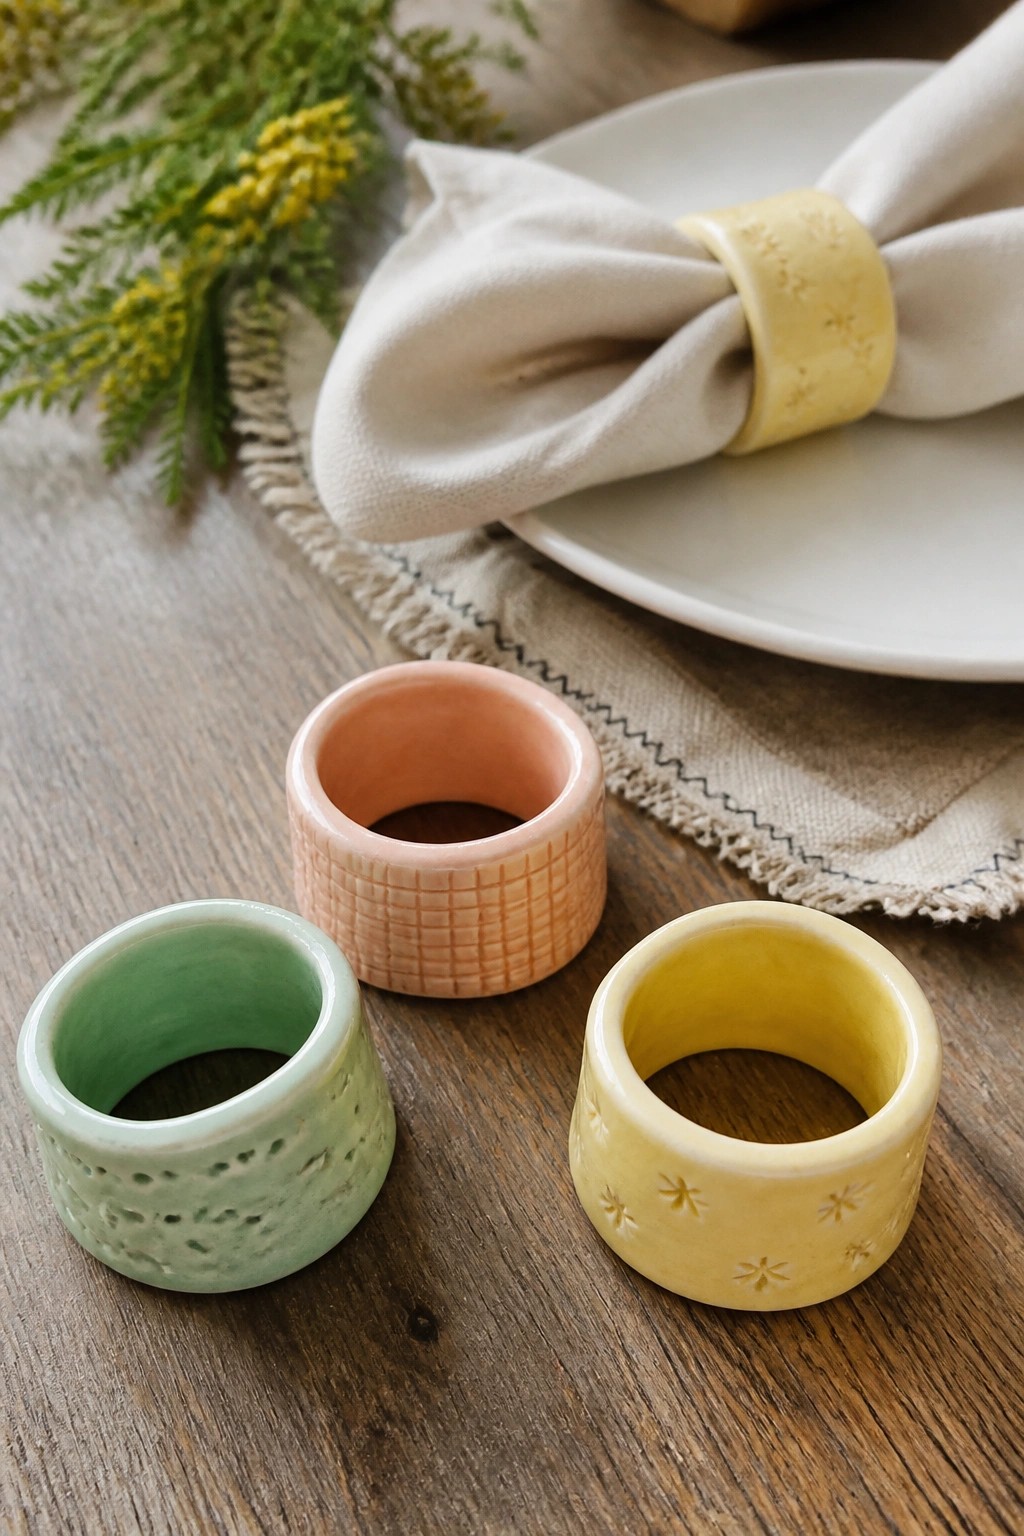
Napkin rings made from clay slabs are formed by rolling out a flat piece of clay, cutting it to size, and joining the short ends into a cylinder. The rings shown here use simple surface decoration like stamping or carving before firing and glazing in soft colors. This approach keeps the project quick while letting the texture and glaze color create visual interest on the finished piece.
The small cylinder shape makes these rings easy to produce in batches and store when not in use. You can change the diameter to fit cloth or paper napkins or swap the impressed patterns for basic lines if you want a faster version. They fit well on a dining table or as part of a place setting and can be made in sets that match existing dinnerware.
Incense Holder from a Rolled Slab Tray

A long rectangular tray made from a single slab of clay works well as an incense holder. One end is pinched or pressed into a small depression to catch ash while the stick rests along the surface. The striped glaze pattern runs across the length and helps the form read as a finished piece rather than a plain slab. This project sits in the holder category and stays simple enough for early handbuilding practice.
What makes this idea useful is how the length and width can be changed without altering the basic construction. The same slab shape could be made shorter for a desk version or widened slightly to hold two sticks side by side. In a bathroom or small shelf space the narrow profile keeps ash contained while taking up little room. The flat surface also gives beginners room to test glaze application before trying more complex joins.
Small Handbuilt Dip Bowls
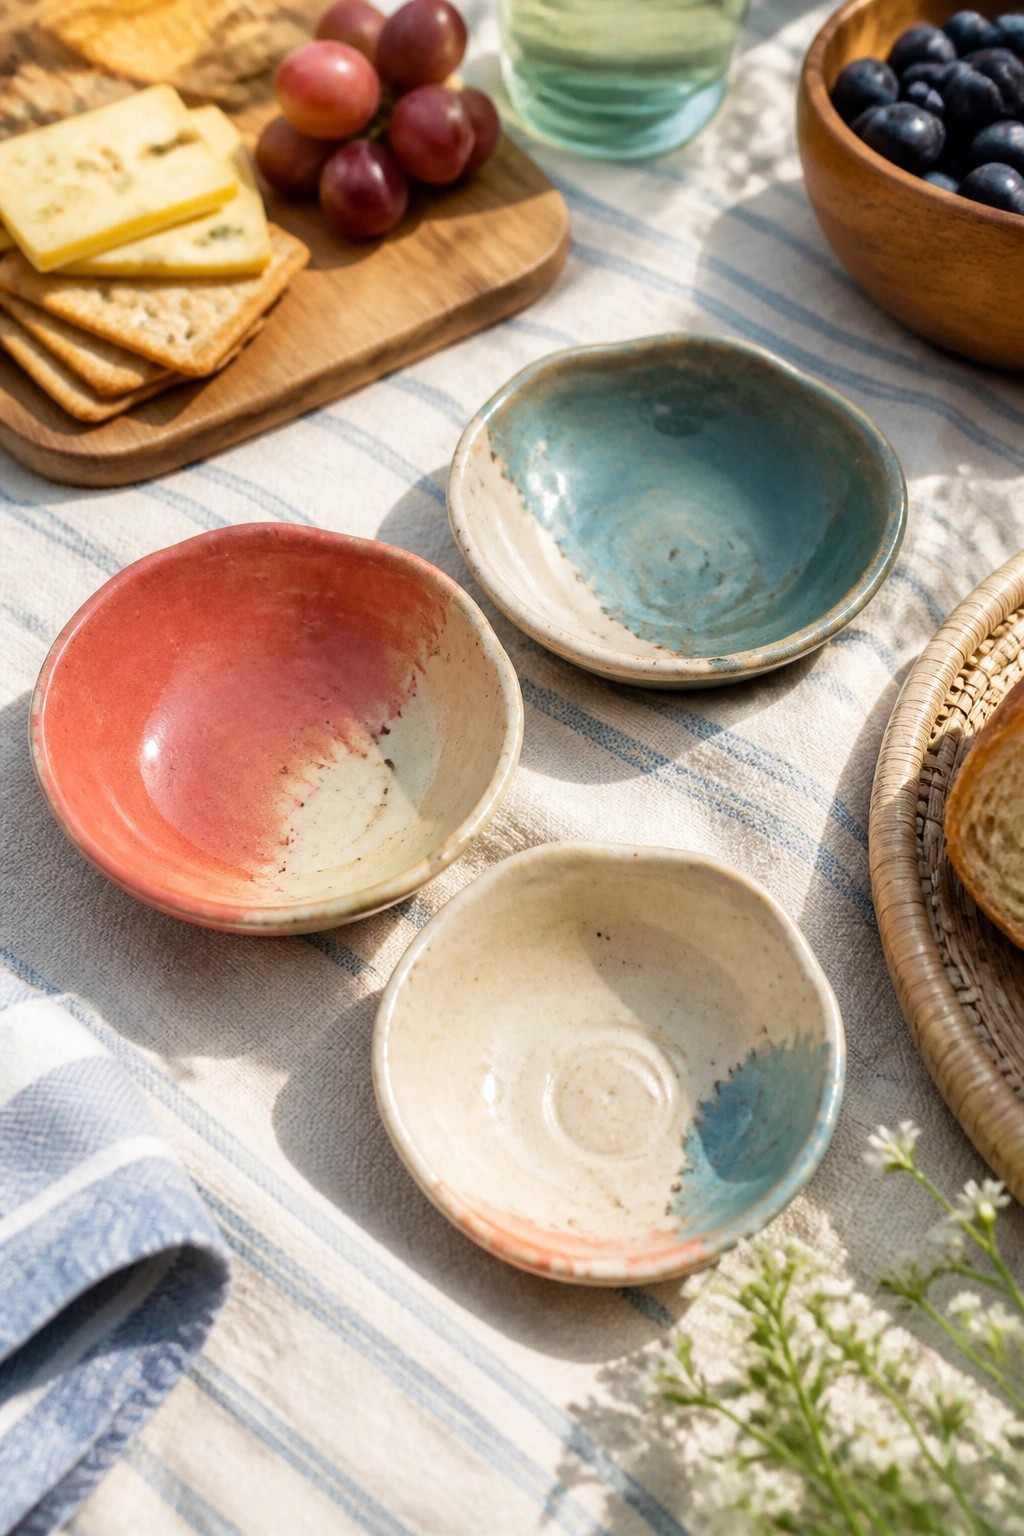
These small ceramic bowls are formed using basic handbuilding methods to create shallow, slightly irregular shapes that sit flat on a table. The design relies on simple forms paired with flowing glaze applications in red-orange, turquoise, and off-white tones that blend at the edges. They work as kitchen serving pieces for dips, spreads, nuts, or small snacks where the casual rim and color variation add interest without extra carving or handles.
What makes this idea useful is the compact size that fits easily into a picnic spread or appetizer tray without taking much space. You can adapt the same shape into a slightly wider version for butter dishes or stack two together for a small double bowl set. Try varying the glaze placement on each piece so a set of four still matches loosely while looking intentionally different. In a kitchen drawer, these store neatly and pull out quickly for everyday use or last-minute hosting.
Three-Section Slab Utensil Holder
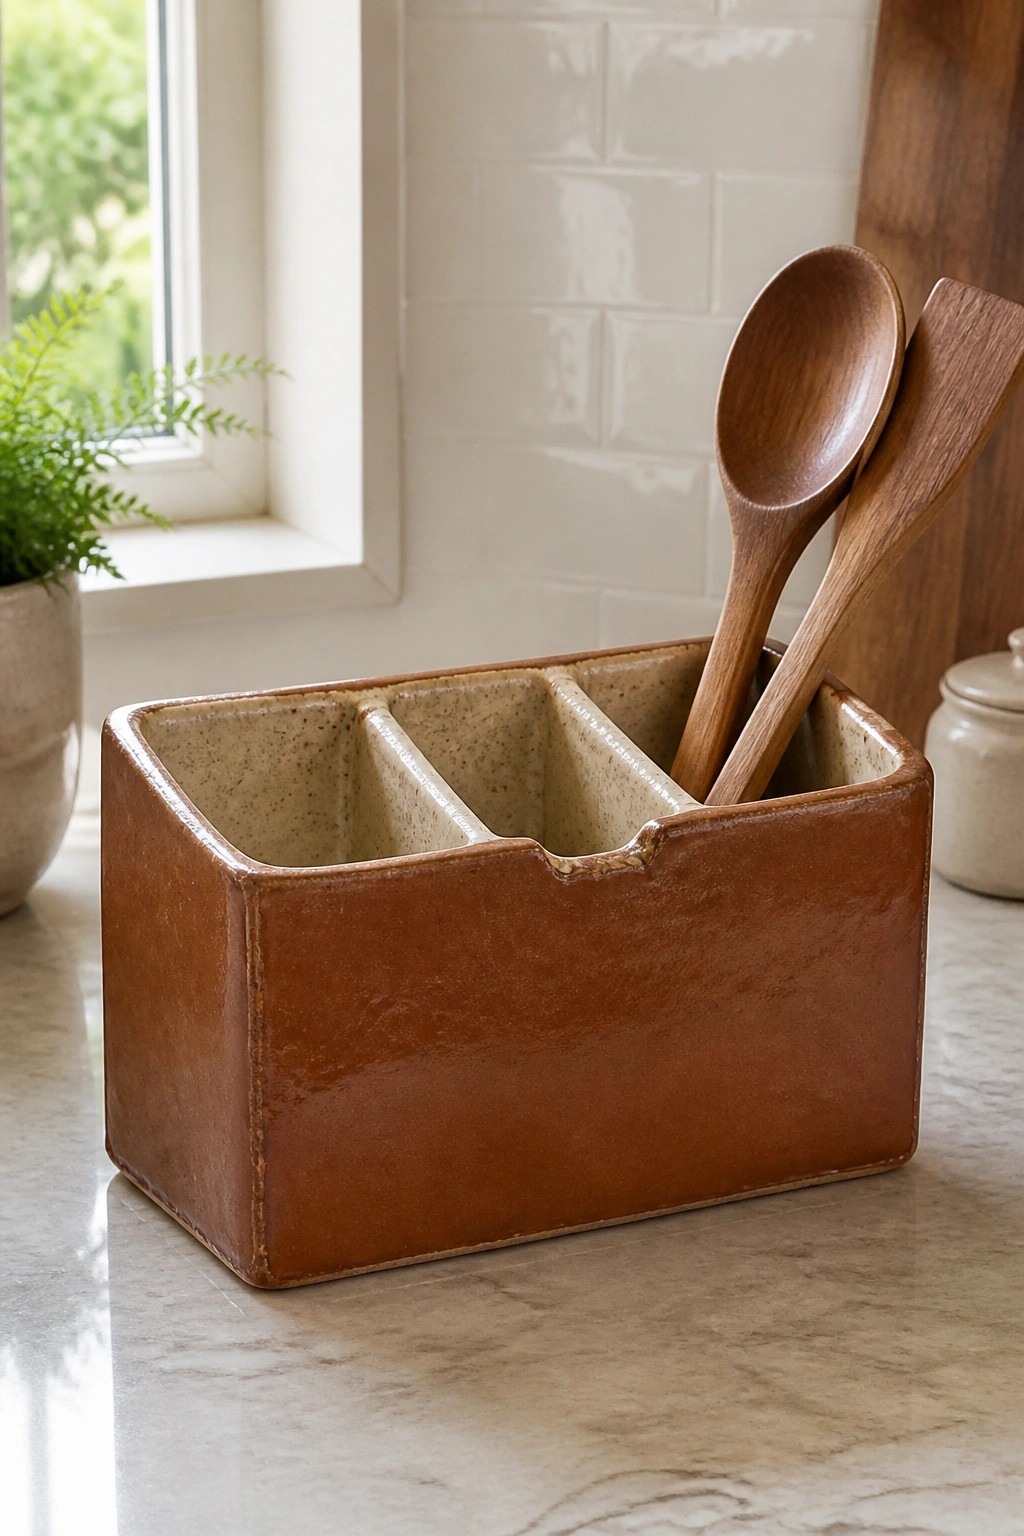
A rectangular slab-built holder with three internal dividers makes a practical kitchen caddy for spoons, spatulas, and other tools. The form uses straight walls and a flat base to keep utensils upright and separated. A glossy brown glaze covers the exterior while the interior shows a lighter speckled surface that contrasts with the outer color.
What makes this idea useful is the way the divided sections turn a basic box into organized storage that fits on a counter. You could scale the same layout down for desk supplies or up for larger tools by adjusting the slab sizes. In a kitchen this kind of piece keeps everyday items within reach without taking much space. The straightforward shape also works if you want to try different glaze colors on the inside and outside.
Tapered Slab Bud Vase
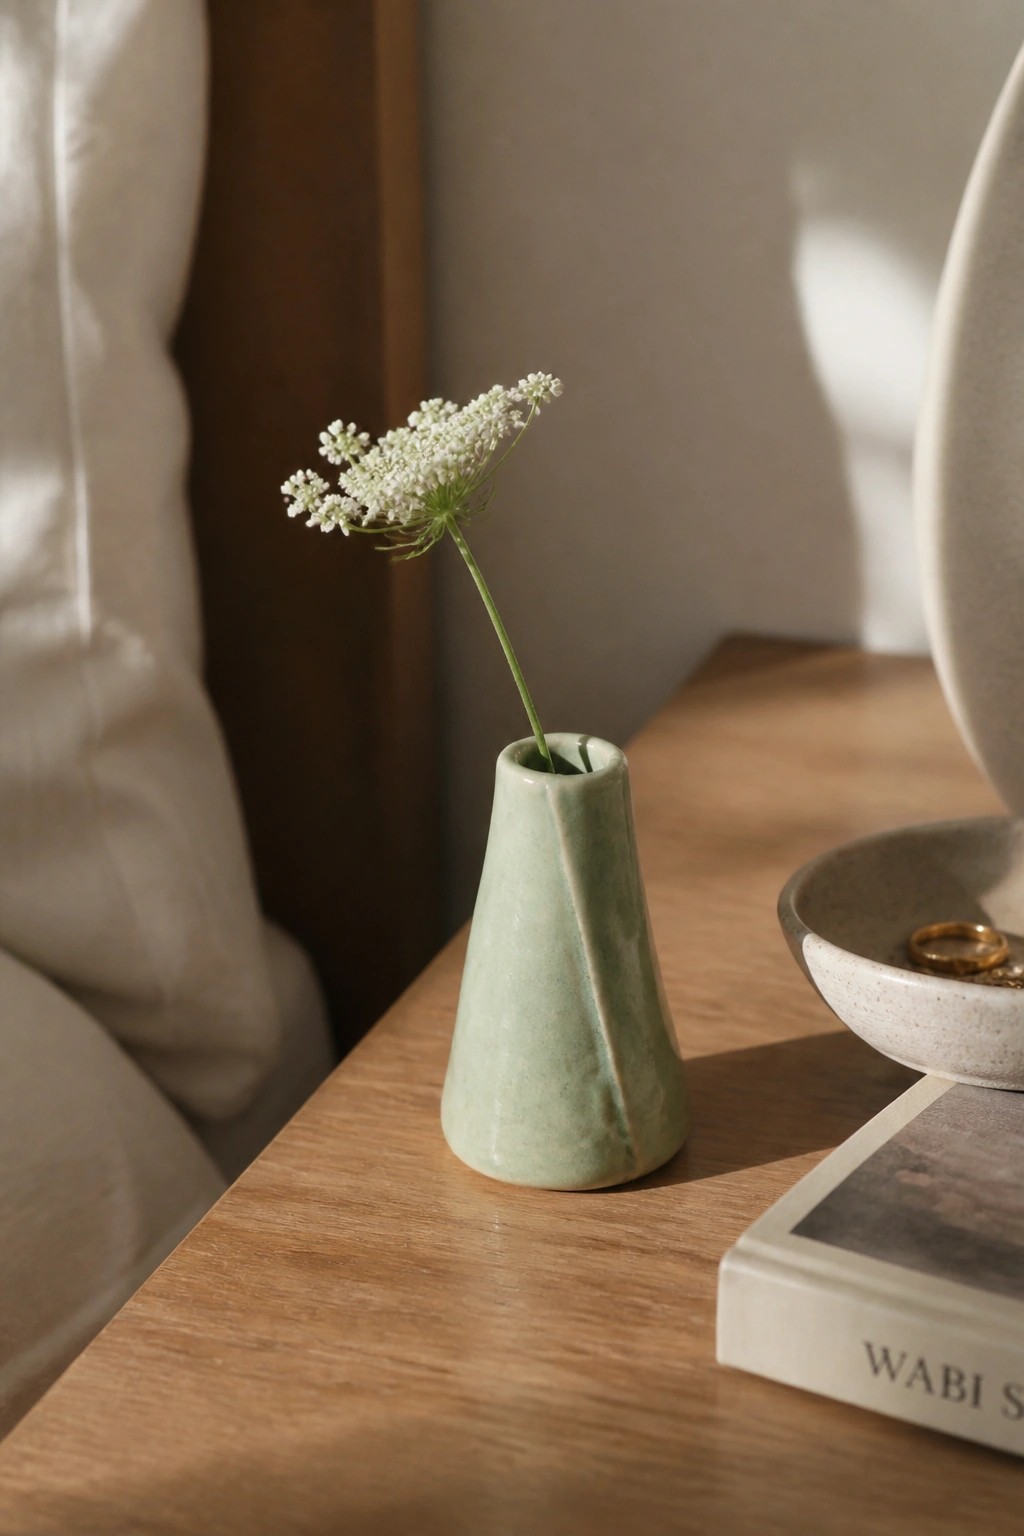
A small tapered vase formed from clay slabs gives you a simple way to display one or two flower stems. The shape starts wider at the base and narrows upward, with a visible seam that shows the handbuilt construction. A matte green glaze covers the surface evenly and keeps the focus on the clean lines rather than added decoration. This kind of piece works as a basic decor object that fits slab techniques without needing extra tools.
What makes this idea useful is how quickly it comes together from a few flat pieces of clay. The small size means it takes up little room on a desk or shelf and uses only a modest amount of material. You can change the taper angle or switch the glaze color to match different rooms, or widen the opening slightly to turn it into a pencil holder. The same slab layout also adapts easily into a ring dish by flattening the top instead of pinching it closed.
Textured Slab Earring Display
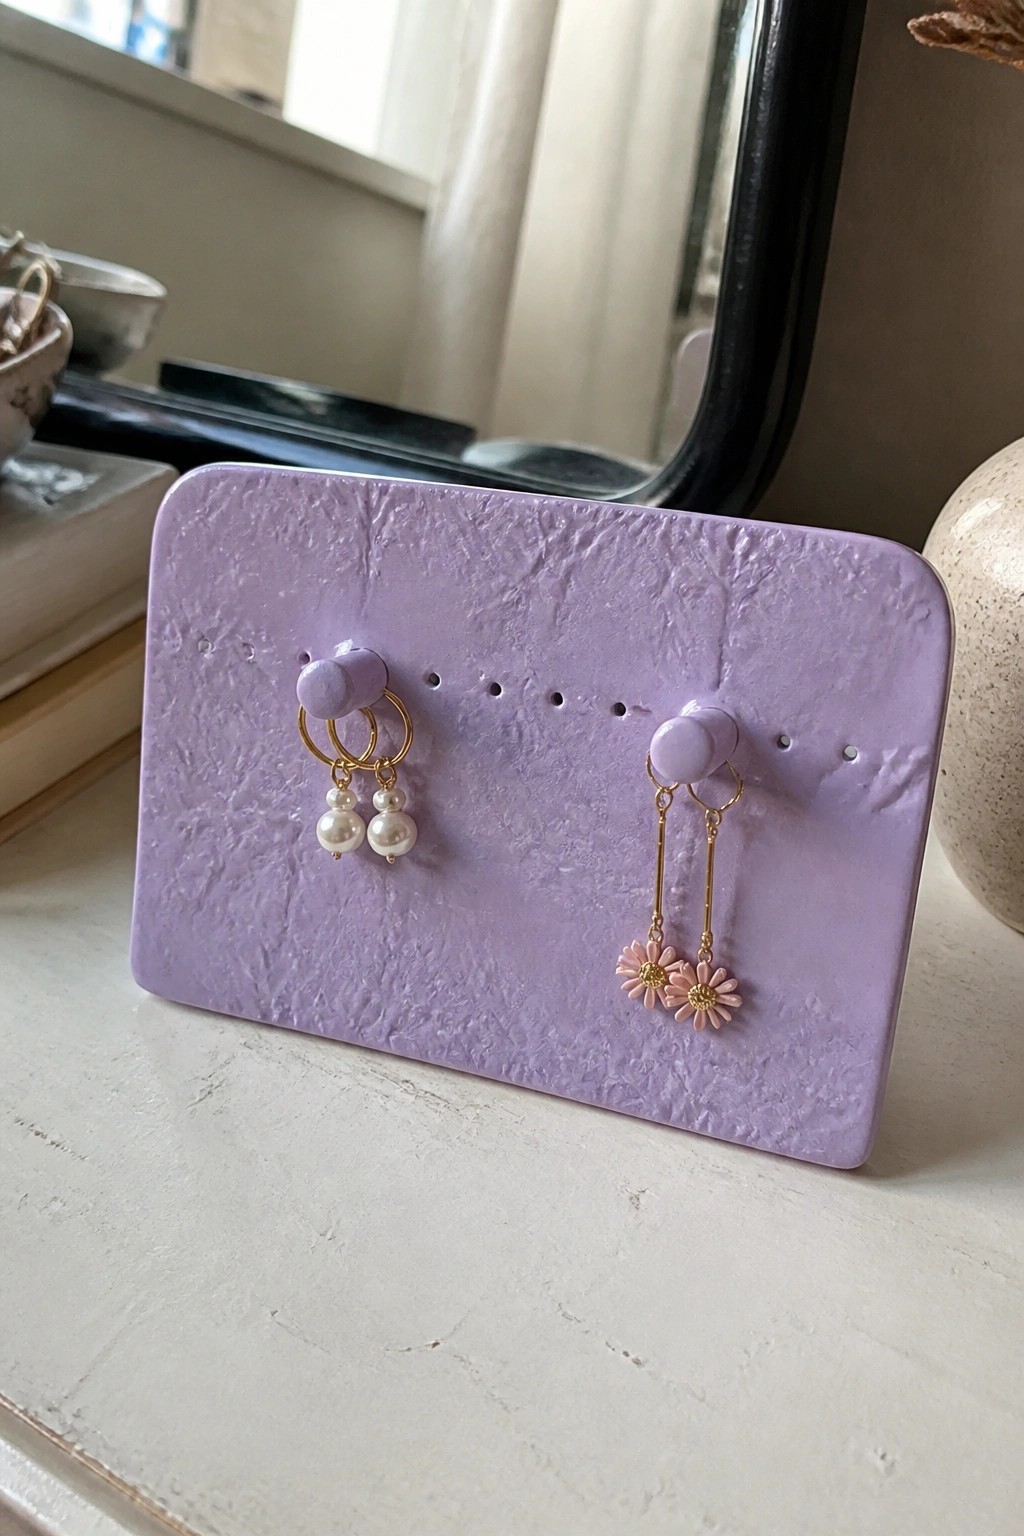
A flat slab of clay rolled to an even thickness works well for an earring holder. After texturing the surface, holes are added across the upper area and small posts are attached to support different earring styles. The finished piece is left unglazed or given a simple matte surface so the focus stays on the jewelry rather than the holder itself.
This shape keeps everything visible and organized on a tabletop or shelf. You can adjust the size or add extra rows if you want more capacity, and the same slab base can be turned into a ring tray by pinching up low sides. The straightforward construction makes it a quick project that still looks intentional next to other handmade items.
Wall Pocket Planter
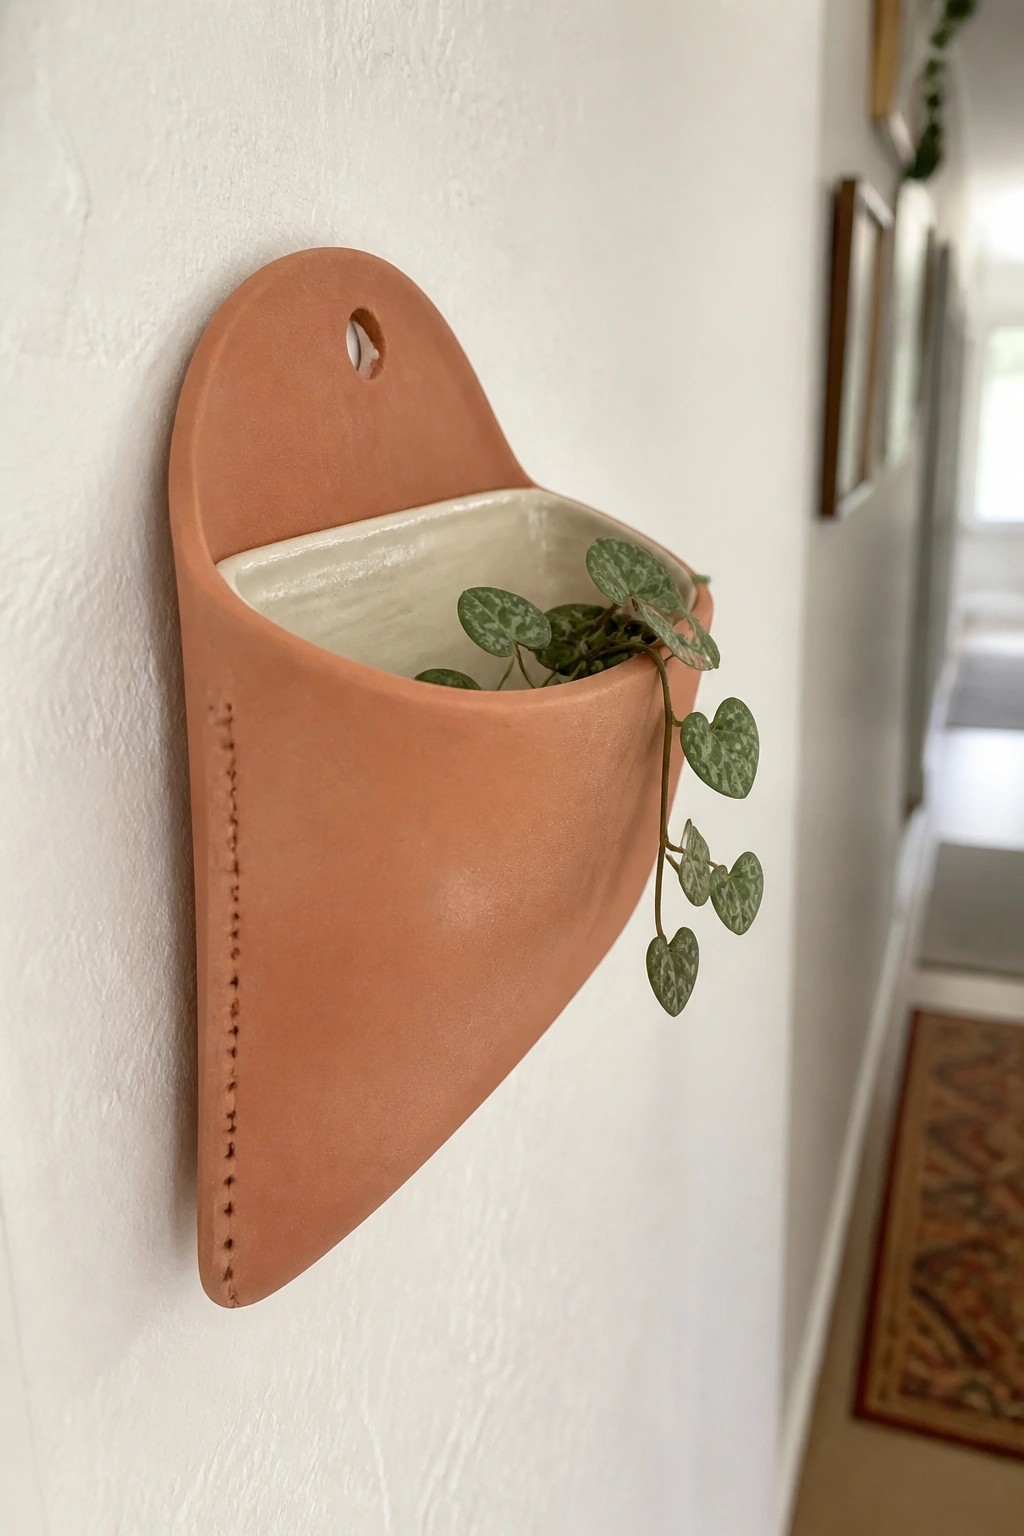
A wall pocket planter built from one slab of clay creates a simple hanging vessel for trailing plants. The shape starts flat, then gets folded and seamed along the edges to form a tapered pouch with a rounded top and a single hole for hanging. The outside keeps the raw clay color while the inside receives a basic white glaze to hold soil and water. This approach works because the open front and narrow profile let vines spill downward without needing shelf space.
What makes this idea useful is how well it fits tight wall areas like hallways or above counters where a standard pot would not. You can adjust the slab width or seam placement to fit larger or smaller plants, or flatten the bottom slightly to make a version that sits on a table instead. The hanging hole and tapered form keep the piece secure and easy to water. For a gift, the same slab method scales down quickly into a smaller pocket for a single vine.
Frequently Asked Questions
What thickness should my clay slabs be for these beginner projects? For most slab projects, roll your clay to about one quarter inch thick. This gives enough strength to hold shape while staying easy to handle and less likely to crack. Use guides like wooden slats on either side of the clay or a simple rolling pin setup to keep the thickness even across the entire slab.
How do I keep my finished pieces from cracking while they dry? Dry pieces slowly by covering them loosely with plastic sheeting for the first day or two, then gradually open the plastic over several more days. Keep the work area at room temperature and away from direct heat or drafts. Scoring and slipping all seams well during assembly also helps prevent weak spots that lead to cracks later.
What basic tools do I need beyond clay to complete these handbuilding projects? Start with a rolling pin or slab roller, a ruler or straight edge for cutting, a scoring tool like a fork or serrated rib, slip made from clay and water, and a sponge for smoothing. Many projects also use simple household items such as cookie cutters, texture mats, or cardboard templates to cut shapes without needing special equipment.
Can these slab projects be made with air dry clay if I do not have access to a kiln? Yes, air dry clay works well for many of the decorative or non functional items in the list. Follow the same slab rolling and joining steps, but allow extra drying time and avoid thin or large flat areas that may warp. Seal the finished piece with a craft varnish for added durability.
How can I add texture or decoration to my slab pottery without advanced skills? Press everyday objects like leaves, lace, or rubber stamps into the clay while it is still soft. You can also carve simple lines with a toothpick or add colored slip with a brush before the piece dries. These methods keep projects beginner friendly and let you personalize each item easily.

Pottery Path is my cozy corner of the internet where I share clay ideas, pottery inspiration, and simple projects you can recreate at home. I love exploring everything from air dry clay to handbuilt pottery to cute minis that brighten your day. My goal is to make clay crafting feel easy, fun, and welcoming for anyone who wants to try it.
You will find beginner friendly tutorials, creative pottery painting ideas, and lots of warm inspiration for slow and happy crafting. If you enjoy hands on creativity, this space will feel like home.