I got into pinch pottery because it seemed like a straightforward way to try making things with clay at home.
You really only need some clay and your hands to begin with.
I’ve put together a list of simple projects that worked for me when I was starting out.
They are all beginner friendly and don’t require any special tools.
Maybe one or two will catch your interest if you’re new to this.
Banded Pinch Mug

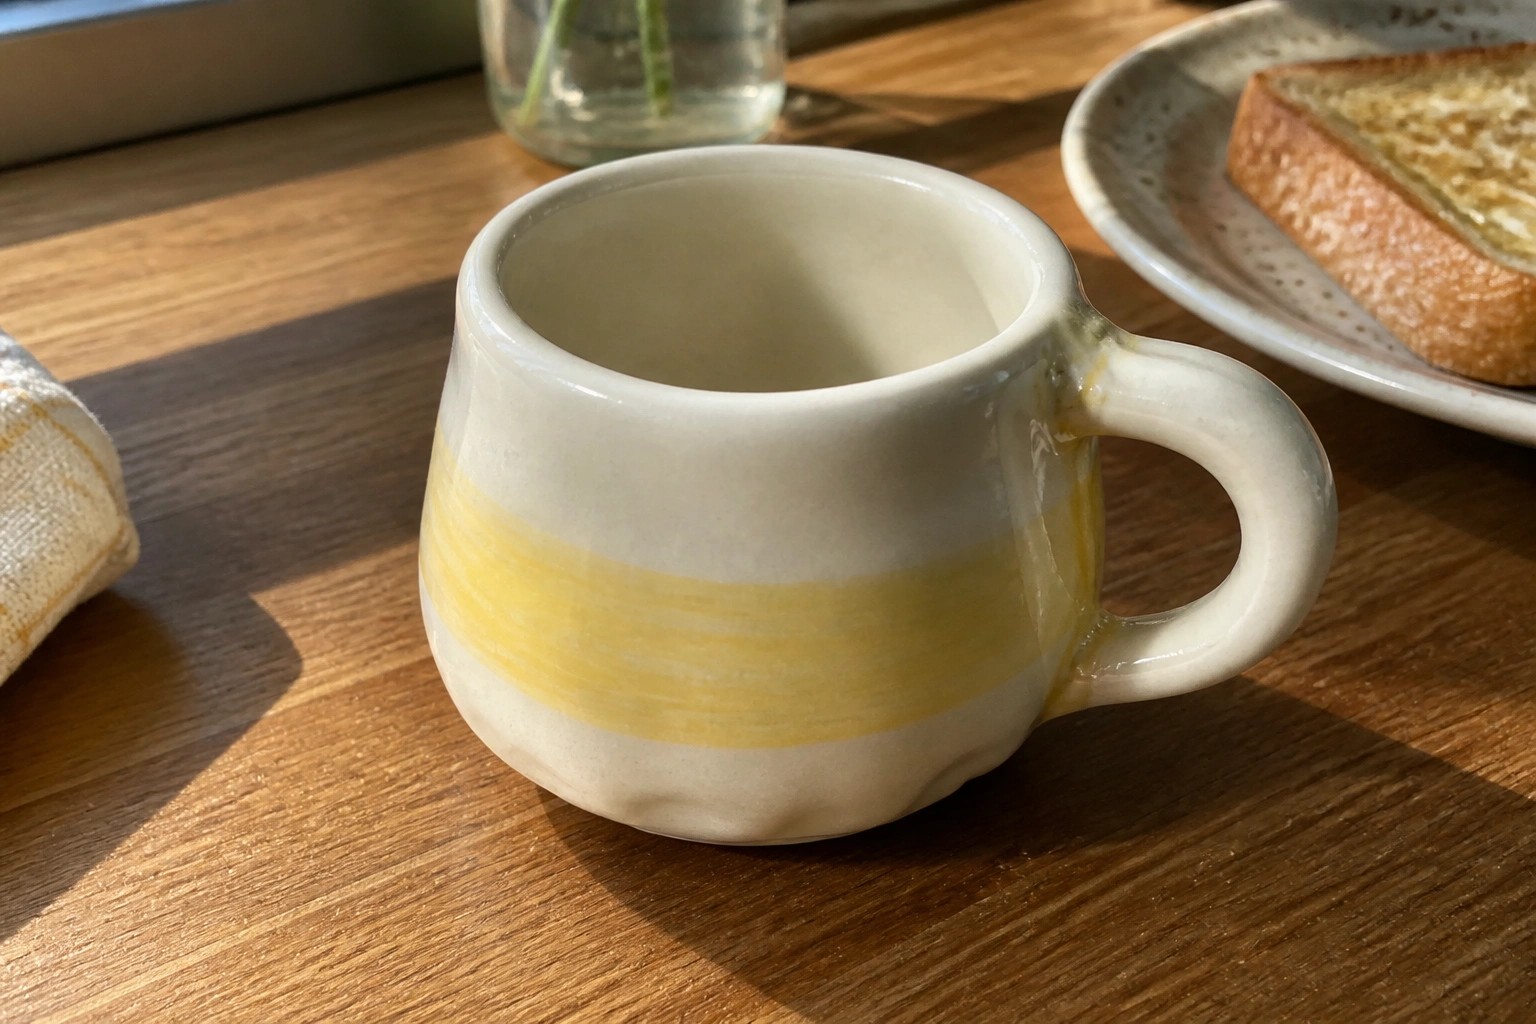
A small pinched cup with an added handle gives beginners a straightforward way to practice forming a functional drinking vessel. Horizontal bands of white and yellow glaze create a simple striped effect that emphasizes the irregular handmade shape. This approach keeps the surface treatment minimal while turning a basic pinch pot into something usable for daily drinks.
The shape does a lot of the work here because the compact size and handle make it easy to hold without extra refinement. You could switch the glaze bands to other colors or skip the handle entirely to make a small bowl instead. In a kitchen this kind of piece works well for espresso or as a creamer, and the same striped idea translates directly to a matching set of two or three cups.
Pinch Bowl with Radiating Glaze Pattern
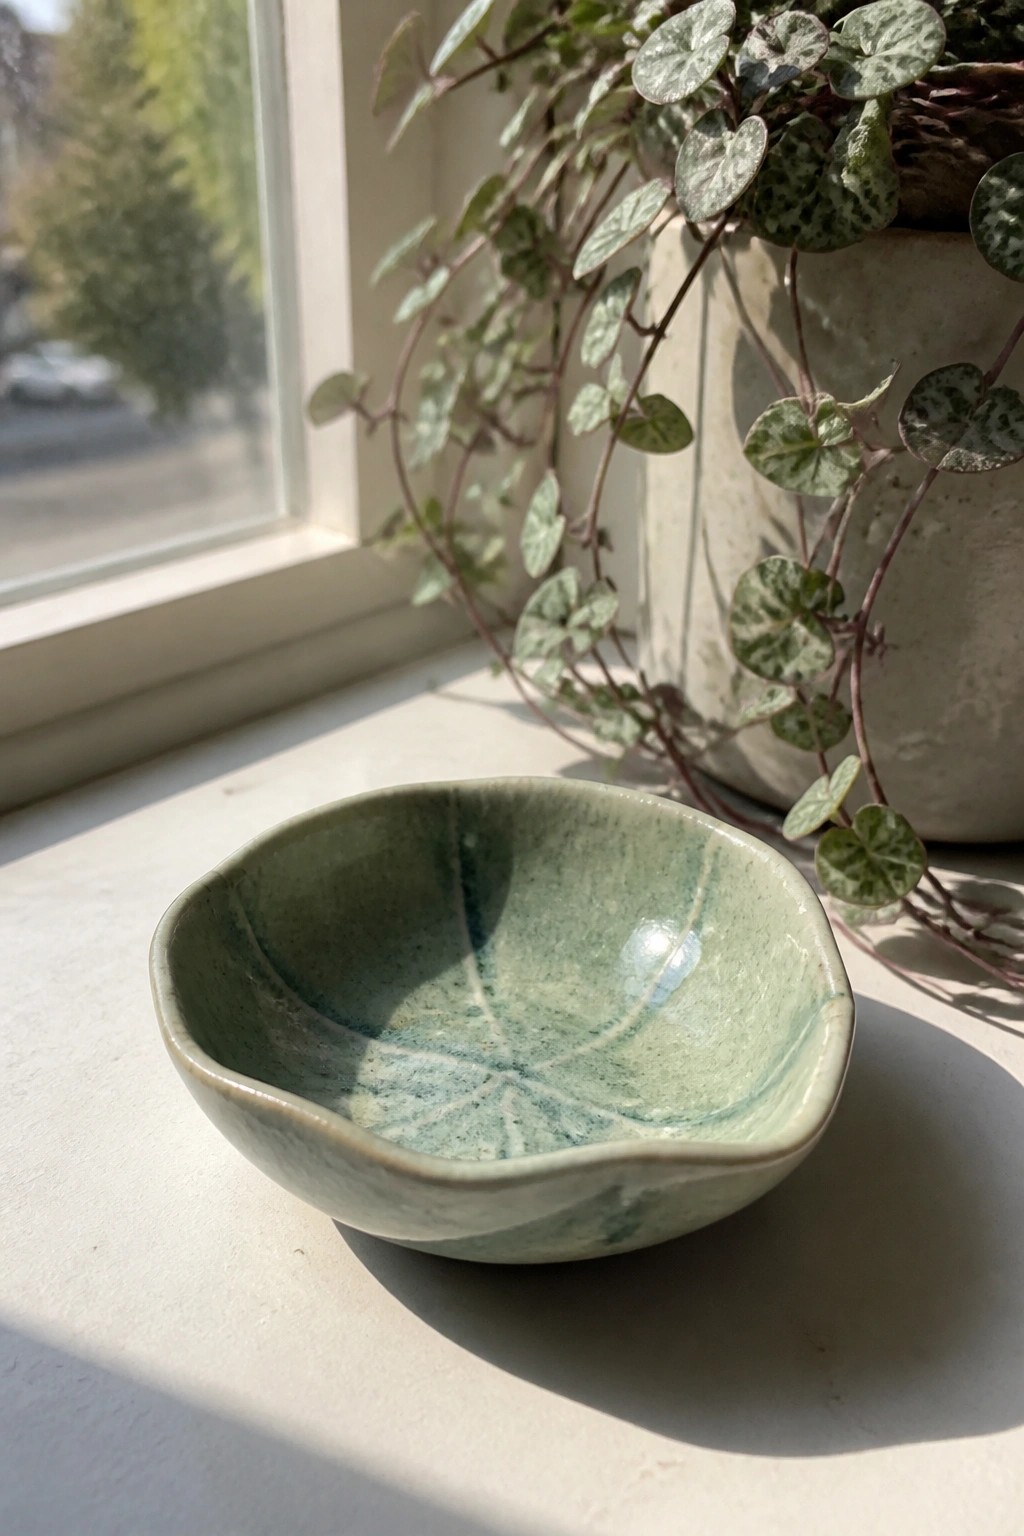
A small pinch bowl starts as a ball of clay opened and shaped by hand into a shallow dish with an uneven rim. The interior carries a simple radiating design created by layering glazes in soft greens and blues that spread during firing. This approach keeps the project to basic forming and glazing steps while producing a finished piece that reads as a small catch-all bowl or ring dish.
The shape does a lot of the work here because the low profile and soft edge make the bowl easy to form consistently even on the first try. You can adapt the same idea by swapping the glaze pattern for stripes or dots or by making a few bowls in different diameters to stack on a shelf. A piece like this works especially well as a desk or entryway tray for small items where its compact size keeps it from taking over the surface.
Speckled Pinch Pot Ring Dish

A small pinch pot formed into a shallow bowl makes an effective ring dish. The compact oval shape keeps rings contained while the white glazed interior contrasts with the unglazed terracotta base. Scattered gold dots add a simple pattern that draws the eye without covering the whole surface. This approach fits the ring dish category and stays beginner-friendly because it relies on basic pinching and minimal surface decoration.
What makes this idea useful is how the small scale lets it sit on a nightstand or bathroom counter without taking up space. You could swap the gold dots for any color or leave the interior plain if you want a faster version. The same pinched form works for holding earrings, loose change, or even small desk items like push pins. In a beginner project list, this stands out on Pinterest because the dotted detail looks intentional while still requiring only basic tools and one glazing step.
Pinch Pot Planter with Painted Face

A basic pinch pot forms the body of this small succulent planter. Short feet are pinched from the base to lift it slightly, and a simple face is added with painted eyes, cheeks, and a mouth. The speckled clay surface stays mostly unglazed so the plant and painted details stand out clearly.
The small scale makes this easy to shape in one session and fit on a narrow shelf or desk. You can change the face to different expressions or skip the feet and use the same form for a ring dish or small catch-all. For plant styling, add a drainage hole before firing so it works for live succulents instead of just display. This version stands out on Pinterest because the face turns an ordinary pot into something recognizable without extra tools or complicated carving.
Oval Spoon Rest

A small oval dish like this makes a practical spoon rest for stovetop cooking. Form the clay into a shallow, elongated shape with slightly raised edges so utensils stay in place without rolling off. The simple blue glaze with its subtle speckling keeps the surface easy to wipe clean while adding a bit of color that blends with most kitchen setups.
What makes this idea useful is how quickly the oval can be pinched out and how well it fits beside burners. Scale the same shape down for a smaller version that holds just one spoon or stretch it longer to catch drips from multiple tools. The flat interior also works for resting a small whisk or tasting spoon during meal prep, and the design adapts easily if you want to try a matte finish or a different glaze color instead.
Pinch Pot Tea Light Holder
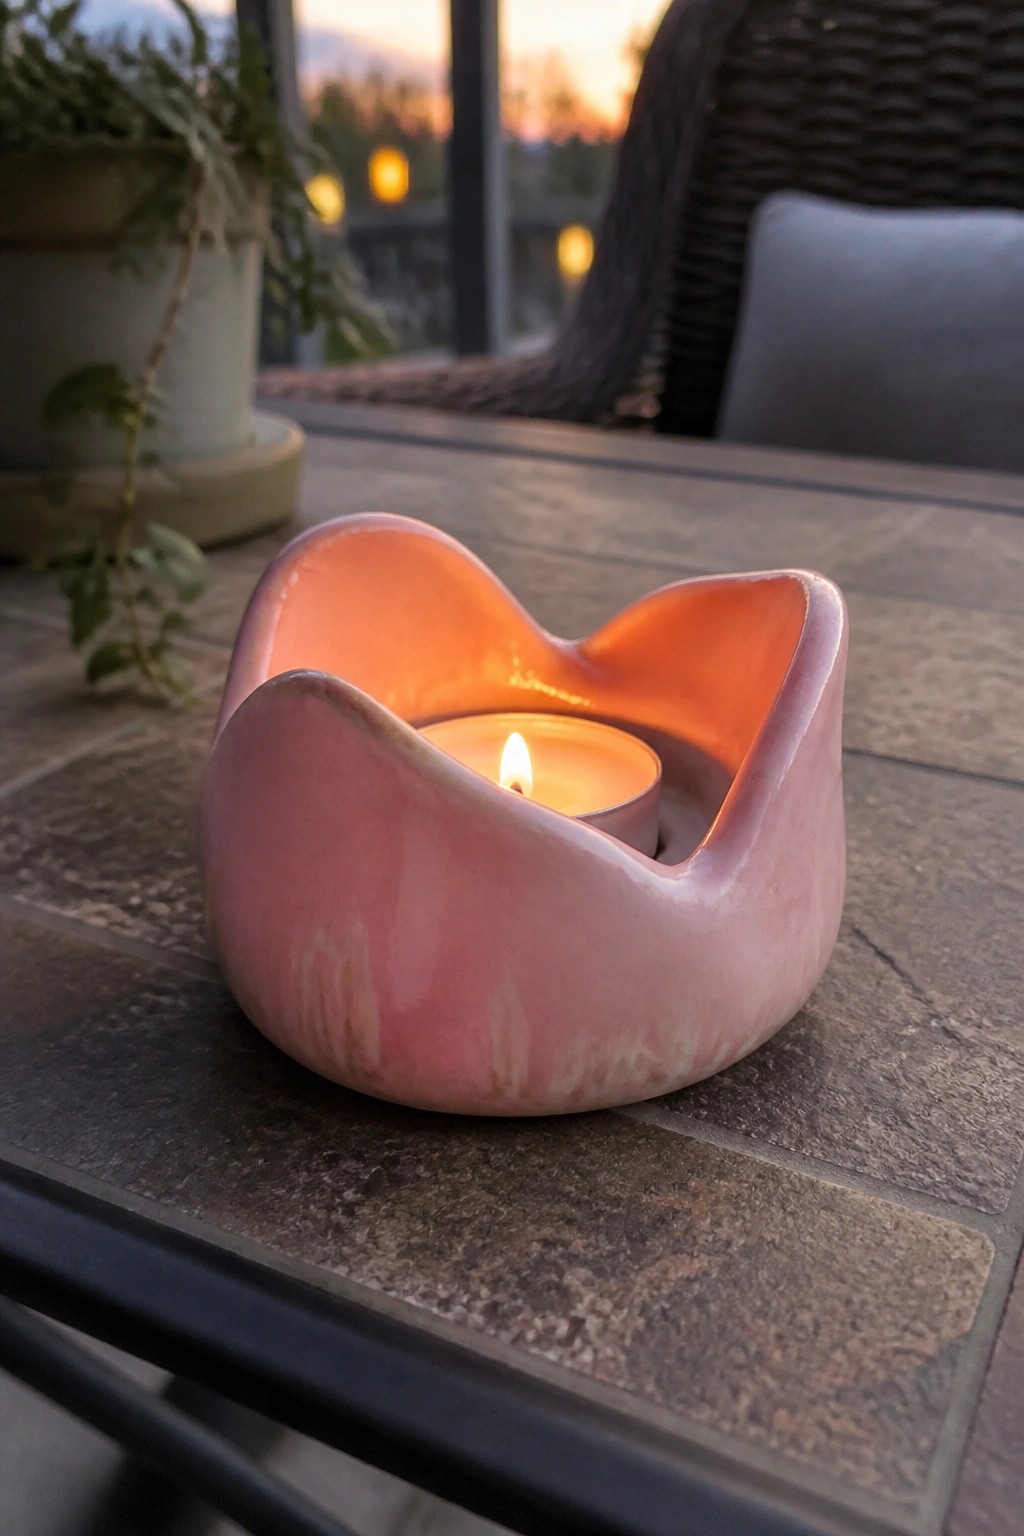
A small pinch pot formed into a low, open candle holder works well for a single tea light. The rim is pinched and shaped into soft waves that create an organic edge without extra tools. A glossy pink glaze covers the surface and lets the candlelight glow from within the curves. This stays in the candle piece category because the shape is sized exactly for a standard tea light and needs no additional parts.
What makes this idea useful is how the wavy rim can be made deeper for a votive or flattened into a shallow ring dish with the same pinching method. The compact size fits on a desk, bathroom shelf, or windowsill where larger pieces would crowd the space. You could change the glaze to a solid matte color or add a second tone along the rim for contrast. The same base shape also adapts quickly into a tiny trinket dish by leaving the center open instead of fitting a candle.
Double Pinch Pot Salt and Pepper Dish

A divided dish formed from two connected pinch pots gives you separate sections for salt and pepper in one small piece. The joined shape keeps the compartments stable while the overall size stays compact enough for daily table use. A simple speckled glaze over the clay surface adds subtle texture without overpowering the handmade form.
What makes this idea useful is how the same double-bowl shape can be scaled up for other kitchen staples like spices or chopped herbs. You could swap the light glaze for a matte finish or add a small foot to change the look with minimal extra work. In a kitchen this kind of piece keeps condiments handy without taking much space, and the basic construction makes it simple to repeat in different sizes.
Pinch Pot Cat Figurine

A small clay cat starts with a basic pinched oval body that you can shape into a seated form. Separate coils or pinched pieces attach easily for the ears and tail, while the face stays simple with two poked holes for eyes and a few lines cut in for the nose and whiskers. The rounded, compact shape holds together well during drying and firing, and the minimal details keep the focus on the overall cat silhouette.
What makes this idea useful is that the same body shape works as a paperweight, desk companion, or small shelf piece without needing extra parts. You can shorten the tail or flatten the ears to make different animal versions or swap the face lines for a different expression. The small scale also means it uses very little clay and fits easily on a windowsill or in a gift box.
Peach Shaped Divided Ring Dish
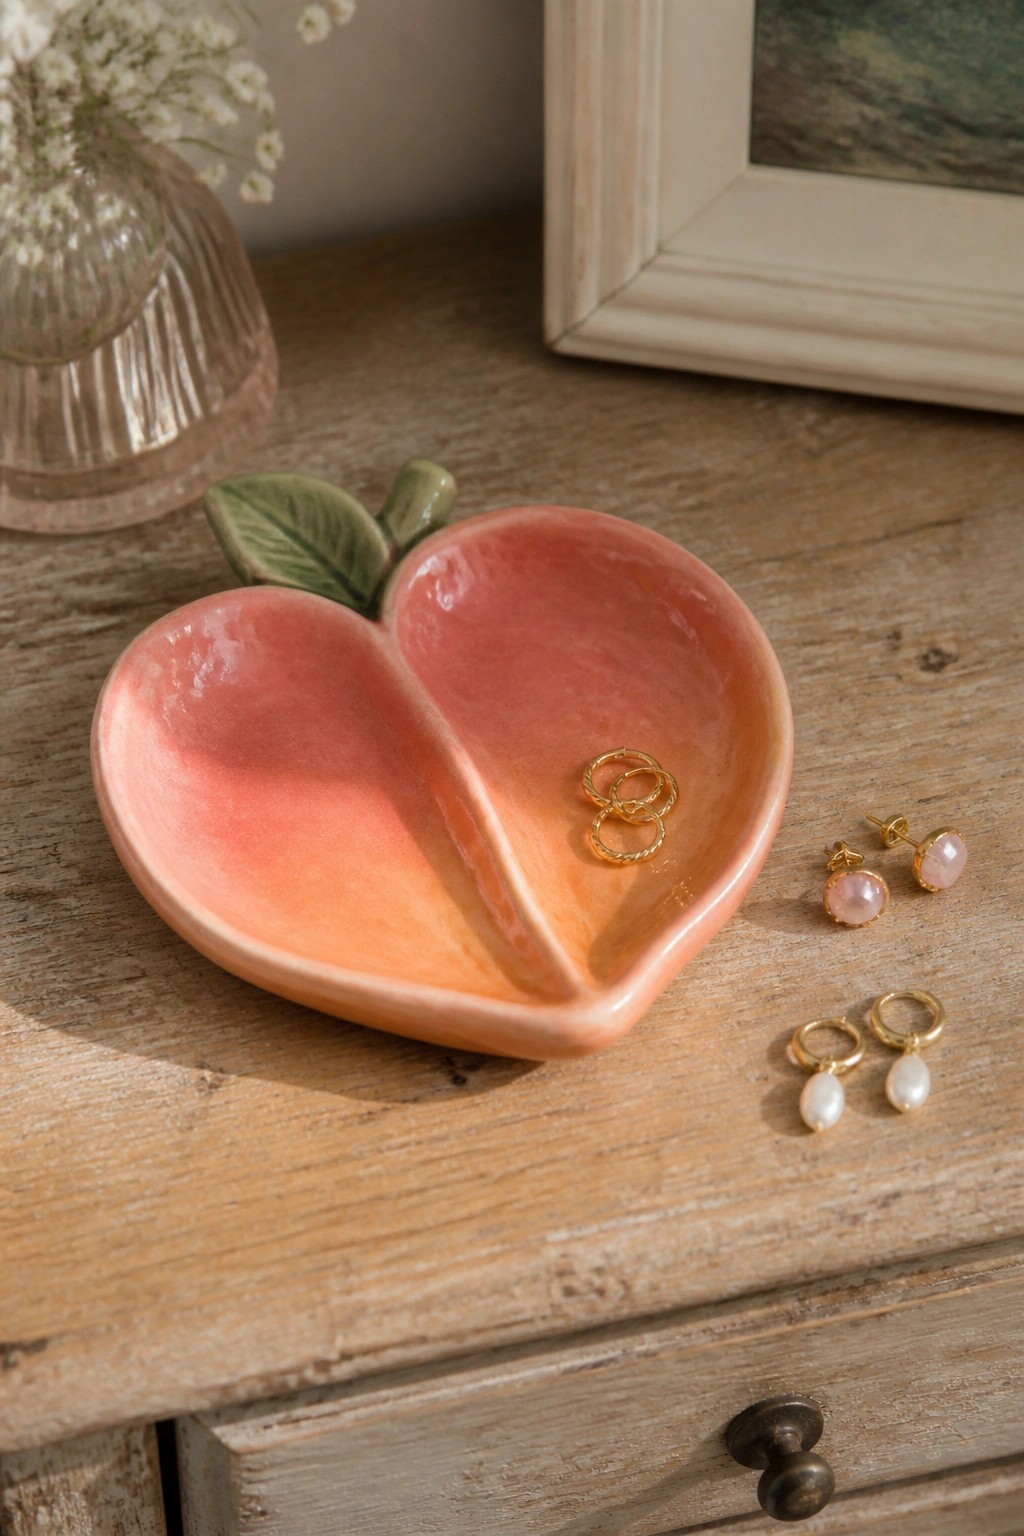
A divided dish formed in the shape of a peach makes a compact ring holder or small jewelry tray. The clay is pinched and joined to create two separate compartments divided by a low center wall. A stem and leaf detail at one end define the fruit shape while a smooth pink-orange glaze covers the surface. This stays simple to build as a small decorative holder that fits on a tabletop.
The small scale makes this easy to adapt into other fruit forms such as an apple or pear using the same two-part layout. It works well on a dresser or bathroom counter for keeping rings in one spot. You could remove the divider to make a single shallow bowl or change the glaze colors to match different kitchen or desk setups. For a gift this shape stands out because it combines storage with a clear fruit motif that photographs cleanly.
Cone Ring Holder on a Dish Base
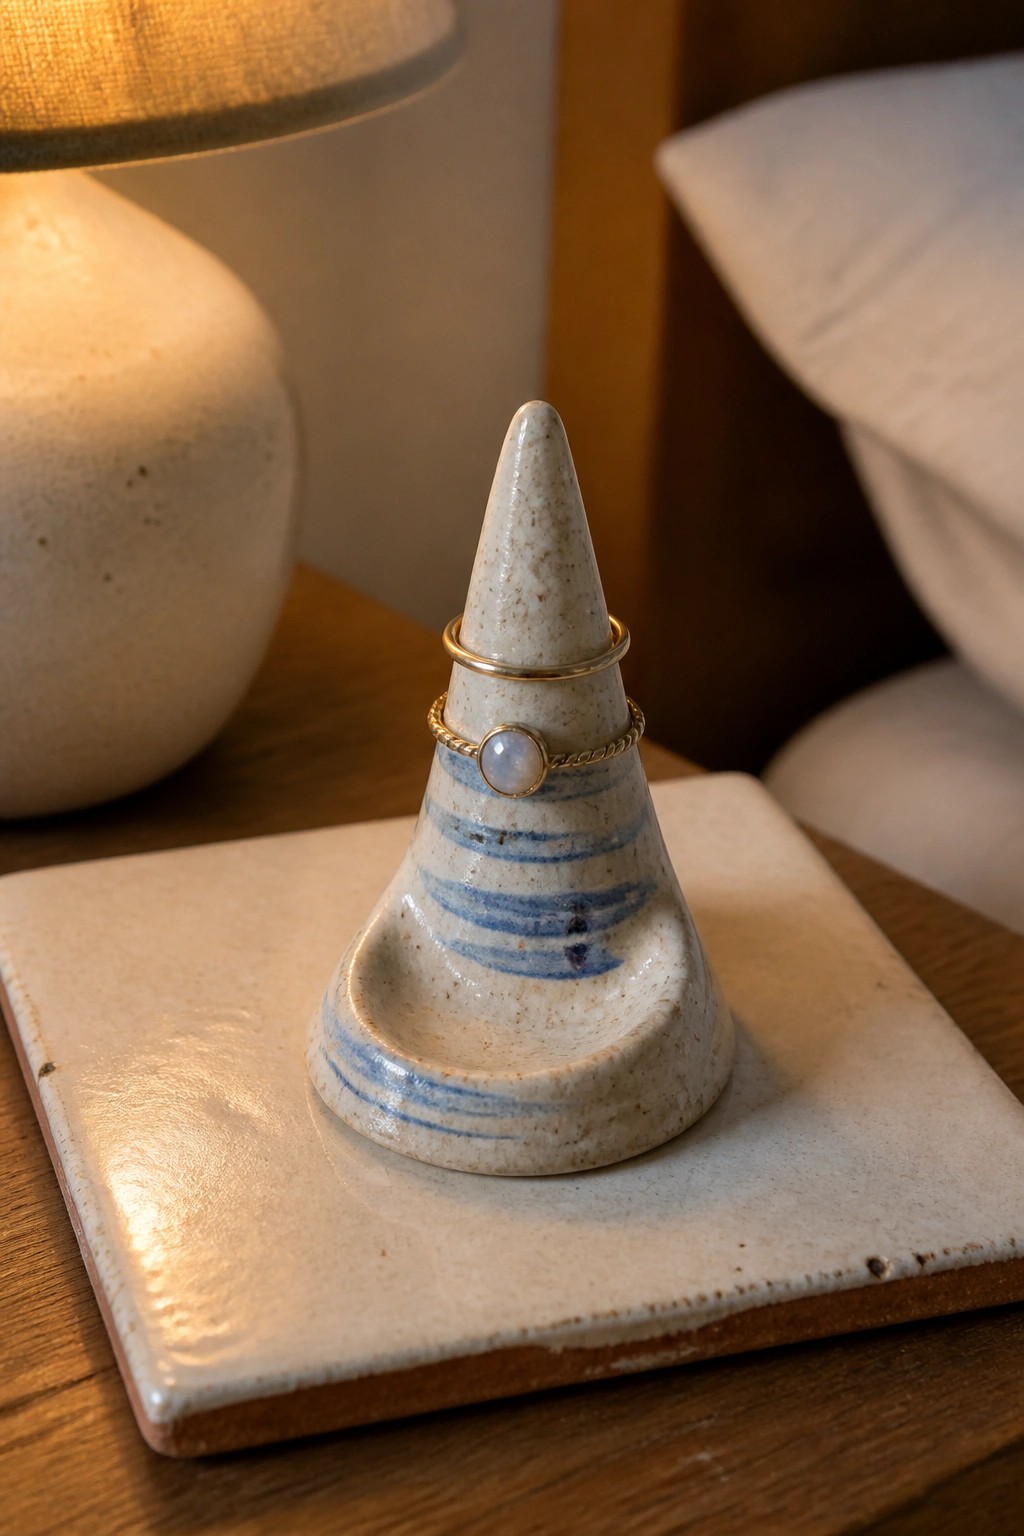
A cone built onto a square base creates a simple ring holder that props jewelry upright while the flat tray underneath catches anything that slides off. The speckled clay with horizontal blue stripes gives the piece enough decoration without needing extra tools or techniques. This project combines a basic pinch form for the cone with a rolled slab for the base, making it a straightforward way to make a functional jewelry stand.
What makes this idea useful is how the small size fits on a nightstand or dresser without crowding other items. You can change the stripe pattern to match different rooms or skip the color entirely for a plain look. The cone height can be adjusted during building to hold more rings or even small bracelets. This shape also works as a starting point for similar holders in other colors or with added texture on the base.
Ridged Soap Dish

A small oval soap dish pinched from clay stays shallow enough to hold a bar of soap without taking up much counter space. Several raised ridges run across the bottom to let water drain away and keep the soap from sitting in a puddle. The green speckled glaze covers the piece evenly and gives it a simple finish that works with most bathroom colors.
What makes this idea useful is how the ridges turn a basic pinch form into something actually functional. You could swap the glaze for a matte white or soft blue to match different tiles, or widen the dish slightly to hold two bars. The same shape works as a small ring tray or sponge holder if you leave the ridges off.
Polka Dot Pinch Pot Holder

A basic pinch pot shaped into a short cylinder becomes a practical toothpick holder when glazed in solid light blue and finished with white dots. The even spacing of the dots keeps the surface simple while the small rimmed opening prevents spills during use. This turns an everyday kitchen item into something that can sit out on a table without looking like standard plastic.
The small scale makes this easy to adapt into a match holder or salt spoon rest by adjusting the height or dot size. It works especially well for outdoor meals since the glazed surface wipes clean quickly after use. You could swap the blue for a neutral tone or reduce the dots to a few accents if you want a faster version that still holds its own on a countertop.
Pinch Pot Bud Vase

A small pinch pot can be shaped into a narrow-neck vase that holds a single stem or small bouquet. The clay is pinched upward from a ball, then gently squeezed and smoothed to create soft curves and a stable base. A solid teal glaze covers the surface and adds a glossy finish that highlights the handmade form without extra carving or texture. This approach keeps the project focused on basic pinching while producing a finished piece ready for display.
What makes this idea useful is how the narrow opening controls the flower arrangement and keeps the focus on one or two blooms. The same shape works as a desk pencil cup or small makeup brush holder if you widen the neck slightly during forming. You can repeat the pinch process with different glaze colors to create a matching set for a kitchen counter or bathroom shelf. Scaling the base wider turns the idea into a simple succulent planter without changing the core technique.
Star Pattern Hanging Disc
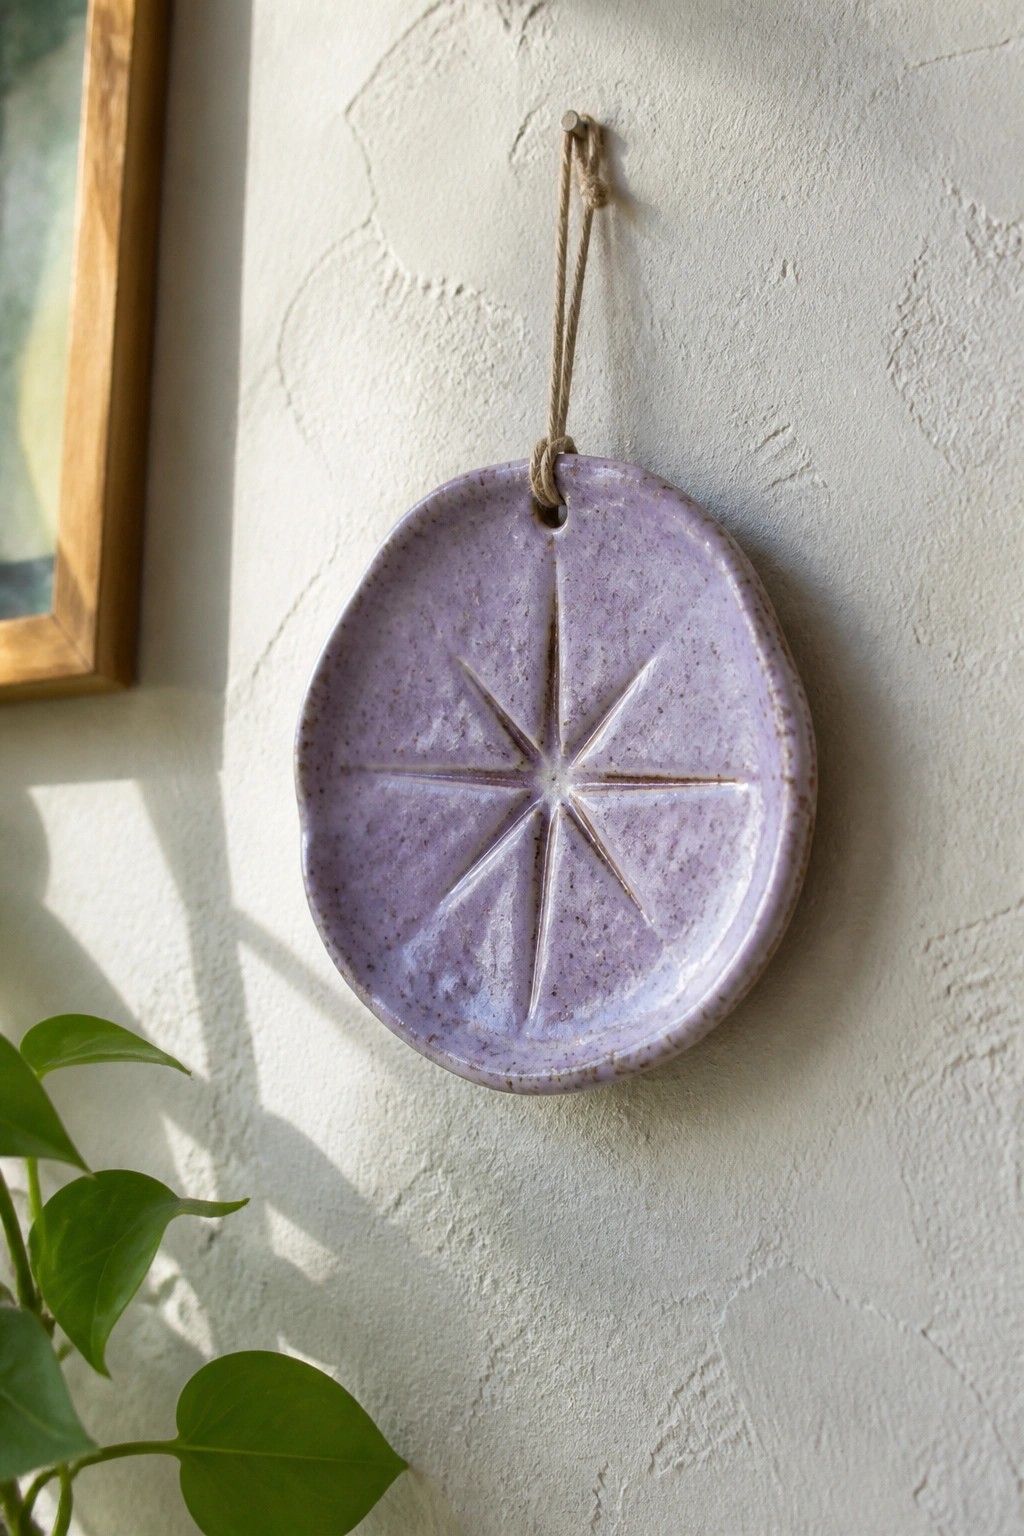
A small round clay disc with a hole near the edge forms a basic hanging ornament. Lines pressed into the surface create a simple star pattern that radiates from the center. The piece is finished with a light purple speckled glaze that settles into the grooves and gives the surface some texture. This fits the category of a quick decor object that requires only pinching and basic surface marking.
What makes this idea useful is how little clay and space it needs while still giving a finished result. The same disc shape can be adapted into a key holder, a small tray, or a set of matching ornaments by changing the size or the pattern pressed into the clay. A single color glaze keeps the focus on the impressed lines, so beginners can practice scoring without worrying about complicated decoration. For a gift, the hanging string makes it ready to use right away on a hook or nail.
Striped Egg Cup
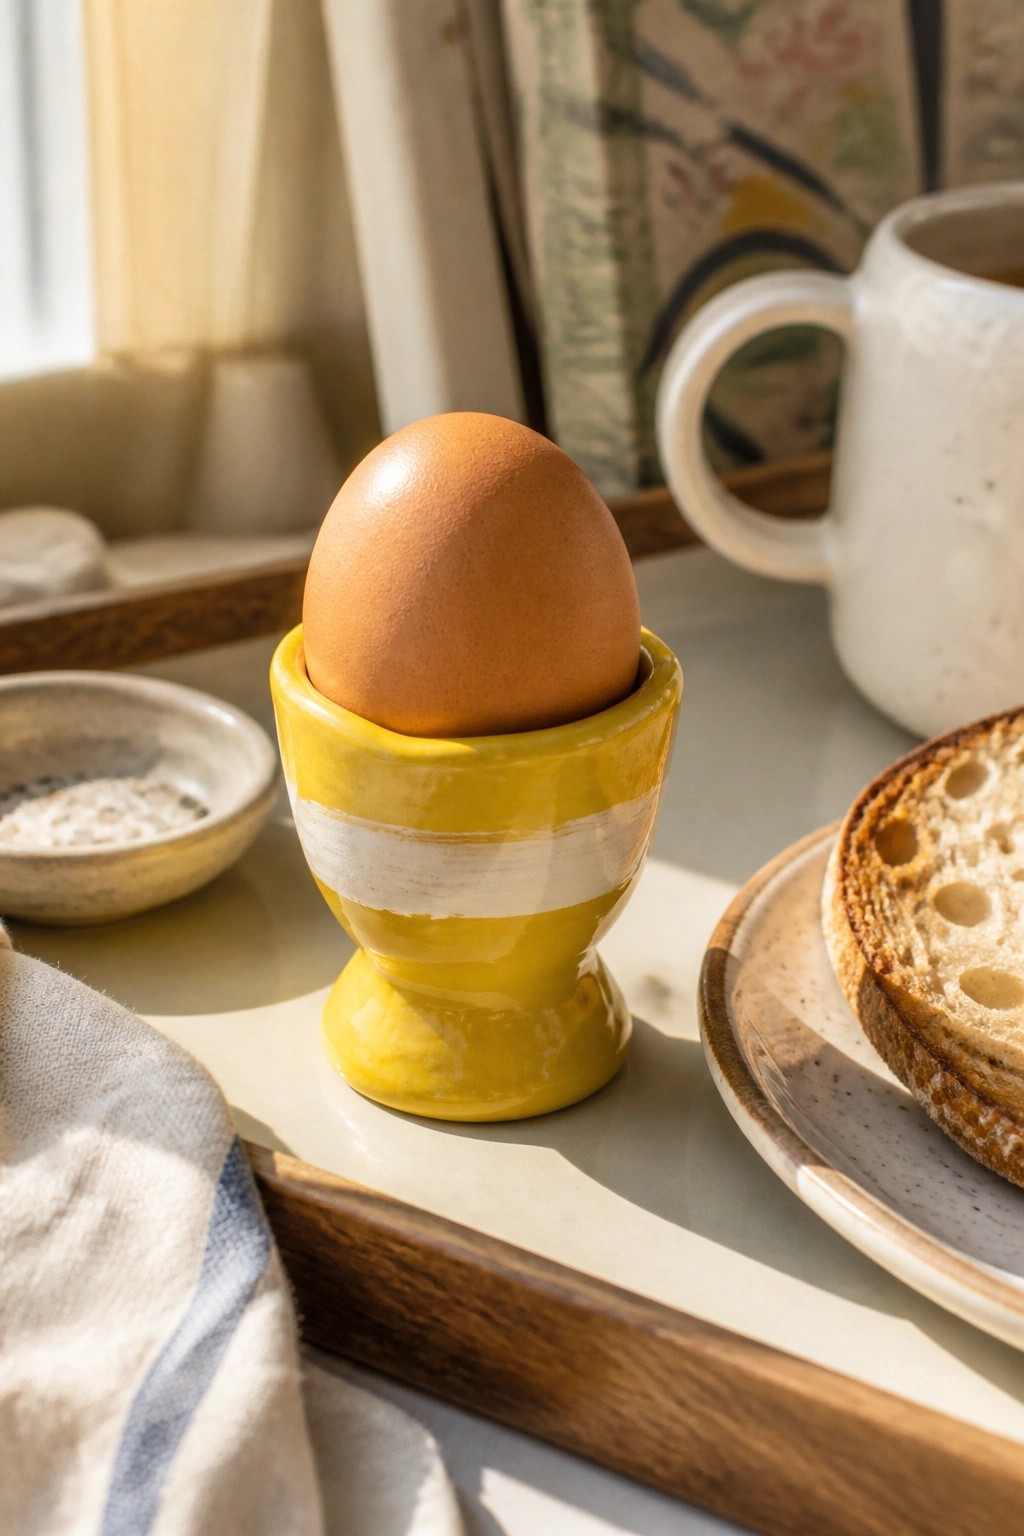
An egg cup formed from clay creates a stable base and rounded cradle that holds one boiled egg upright. The pinched shape tapers toward the foot for balance and flares gently at the rim to keep the egg secure. Horizontal bands of yellow and white glaze give the piece clear visual contrast without adding extra detail. This approach works as a compact kitchen item that needs only basic pinching and simple glazing.
What makes this idea useful is its small size, which means it uses little material and fires quickly. The striped pattern can be swapped for solid color, dots, or left unglazed for a different look. In a kitchen, this kind of piece fits breakfast trays or can be made in multiples for everyday use. The same pinched form can be adapted into a small candle holder or salt cellar by widening or narrowing the opening.
Frequently Asked Questions
What supplies do I need to get started with these pinch pottery ideas?
Beginners can use air dry clay or oven bake clay to avoid needing a kiln right away. Gather a small amount of clay for each project, a bowl of water for smoothing, and simple household items like a toothpick or plastic knife for adding details. Work on a protected surface like a plastic mat to keep things clean.
How can I ensure my pinch pots have even walls and avoid common beginner mistakes?
Start with a smooth ball of clay and use your thumb to create the center while slowly rotating the piece with your other hand. Pinch gently and check thickness frequently by holding it up to light. Add water sparingly to smooth surfaces and practice basic shapes before moving to the more detailed ideas in the list.
Are these pinch pottery projects suitable for children or group activities?
Many of the simple ideas work well for kids aged eight and up with adult help. Choose non toxic clays and focus on fun forms like small bowls or animal shapes. Set up a shared workspace with easy cleanup supplies and encourage creativity over perfection to make it enjoyable for everyone.
How should I dry and seal my finished pinch pottery pieces?
Place completed items on a wire rack and allow them to air dry slowly over several days while turning them occasionally to prevent warping. Once fully dry, apply acrylic paints for color and finish with a clear sealant spray for added strength and water resistance, especially on items meant for display.
What can I do if my clay piece cracks while working on one of these ideas?
Mix a little clay with water to create slip and gently fill small cracks before smoothing the area with your finger. To prevent cracks altogether, cover projects loosely with plastic wrap during breaks to control drying speed and keep clay consistently moist until you are ready to finish.

Pottery Path is my cozy corner of the internet where I share clay ideas, pottery inspiration, and simple projects you can recreate at home. I love exploring everything from air dry clay to handbuilt pottery to cute minis that brighten your day. My goal is to make clay crafting feel easy, fun, and welcoming for anyone who wants to try it.
You will find beginner friendly tutorials, creative pottery painting ideas, and lots of warm inspiration for slow and happy crafting. If you enjoy hands on creativity, this space will feel like home.