Ever found yourself staring up at those pesky tree branches, wishing you could just trim them down to size? But then, you realize your trusty tree pruner’s rope has seen better days – talk about a buzzkill! Don’t worry, we’ve all been there.
Imagine effortlessly gliding through those unruly branches with a perfectly re-tied rope, making your pruning tasks a breeze. No more struggling or frustration, just smooth and efficient trimming. In this article, you’ll learn the simple steps to retie the rope on your tree pruner like a pro.
Assess the Condition of the Current Rope
When assessing the condition of the current rope on your tree pruner, you want to ensure it’s strong and intact to handle the pruning tasks effectively.
Here are a few key points to consider:
- Look for any fraying or significant wear along the length of the rope.
- Check for any knots that may hinder smooth operation.
- Ensure that the rope is securely attached to the pruner mechanism.
- Test the strength and flexibility of the rope by giving it a gentle tug.
By evaluating the state of the current rope, you can determine if it needs to be retied or replaced for optimal performance.
Gather Necessary Tools and Materials
When it comes to retieing the rope on a tree pruner, having the right tools and materials at hand is essential. Here’s what you’ll need:
- New Rope: Ensure you have enough rope to replace the existing one. It’s best to use high-quality, durable rope to withstand outdoor conditions.
- Scissors or Knife: You’ll need these to cut the old rope and trim the new one.
- Tape: Use tape to wrap the ends of the new rope to prevent fraying.
- Lighter or Heat Source: This is useful for sealing the ends of the new rope after cutting.
- Ladder or Step Stool: Depending on the height of the tree pruner, you may need a stable platform to reach it comfortably.
Now that you have gathered all the necessary tools and materials, you’re ready to proceed with retying the rope on your tree pruner.
Remove the Old Rope
To start retying the rope on your tree pruner, you’ll first need to remove the old one. Here’s how:
- Locate the End: Find where the old rope is attached to the pruner mechanism.
- Untie the Knots: If there are any knots securing the rope, untie them carefully.
- Inspect for Wear: Check the entire length of the rope for any signs of wear, fraying, or damage.
- Pull the Rope Through: Slowly pull the old rope out of the pruner, ensuring it doesn’t get caught on any parts.
Remember, safety first! Be mindful of any sharp edges or moving parts as you remove the old rope.
Measure and Cut the New Rope
When replacing the rope on your tree pruner, you’ll need to measure and cut the new rope to fit your specific tool. Here’s how:
- Measure the Rope: Start by uncoiling the new rope and stretching it out along the length of the old rope you removed. Ensure you add a little extra length for trimming later.
- Cut the Rope: Using sharp scissors or a utility knife, trim the new rope to match the length of the old rope, including the additional length you added for adjustments.
- Tips:
- Measure twice, cut once to avoid cutting the rope too short.
- Use a ruler or measuring tape for accuracy when cutting.
Completing this step accurately will set you up for success as you move forward with reattaching the rope onto your tree pruner.
Securely Tie the New Rope onto the Tree Pruner
When securing the new rope onto your tree pruner, tying a secure knot is crucial to ensure it stays in place during use. Here are some key steps to follow:
- Choose a strong knot: Opt for a knot like the figure-eight knot or double fisherman’s knot for maximum durability.
- Wrap the rope securely: Make sure the rope is tightly wound around the pruner’s pulley to prevent slipping.
- Check for twists or tangles: Before finalizing the knot, ensure the rope is straight and free from any twists that could affect its functionality.
- Test the knot: Give the rope a gentle tug to confirm the knot’s stability before putting it to use.
By following these steps, you can securely tie the new rope onto your tree pruner, allowing for smooth and efficient operation.
Recommended Products
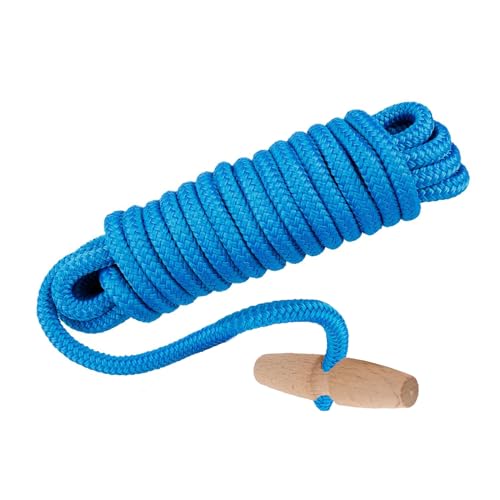
PR-20 Tree Pruner Rope Replacement, for Jameson Fiscar Big Mouth Manual Pole Saw & Tree Pruner,20 feet long with a 5/16 inch diameter(with Wooden Handle)

High-quality PR-20 Tree Pruner rope: Measuring 20 feet long, this product is a sturdy tree pruner rope that is compatible with Jameson Fiskars pruners.

VALUE 3-PACK SET: Includes (3) 1/4" x 25 ft diamond braided polypropylene ropes with a 95 lb working load limit, perfect for home, garage, camping, and outdoor use.
Conclusion
You’ve learned the key steps to securely tie the new rope onto your tree pruner. By choosing a strong knot and wrapping the rope tightly around the pulley, you ensure smooth and efficient operation. Remember to check for twists or tangles and test the knot’s stability before use. Following these guidelines will help you maintain a secure attachment, allowing you to tackle your pruning tasks with ease.
Frequently Asked Questions
How should I securely tie the new rope onto the tree pruner?
To securely tie the new rope onto the tree pruner, choose a strong knot like the figure-eight or double fisherman’s knot. Wrap the rope tightly around the pulley, check for twists or tangles, and test the knot’s stability before use. These steps ensure the new rope is securely attached for efficient operation.
I’ve always been drawn to trees.As a kid, I spent most of my free time outside, climbing, exploring, and trying to figure out the names of the trees around me.That early curiosity eventually led me to study arboriculture and horticulture at Michigan State.Later, I completed a degree in forestry at the University of Michigan.
I’ve been working in tree care and education ever since.These days, I enjoy helping people learn more about the trees in their own backyards.How they grow, how to care for them, and why they matter.You don’t need to be an expert to appreciate trees.A little curiosity goes a long way.