Ever found yourself struggling to use your tree pruner effectively? Wondering how to get it back in top shape without breaking a sweat? Picture this: you’re all set to tackle those unruly branches in your yard, but your tree pruner’s string decides to play hide and seek. Frustrating, right? But fret not, because in this article, you’ll discover the secrets to restringing your tree pruner like a pro.
Have you ever wished for a simpler way to maintain your gardening tools? Imagine effortlessly restringing your tree pruner in just a few easy steps, saving time and hassle. With our expert tips and tricks, you’ll soon be back to pruning with precision and ease. Say goodbye to tangled strings and hello to a smoothly operating tree pruner in no time.
Assessing the Pruner
When assessing your tree pruner, check for these key points:
- Inspect the pruner for any damaged or worn parts.
- Ensure the blade is sharp for effective cutting.
- Check the condition of the string and pulley system.
To restring your tree pruner effectively, it’s crucial to start with a thorough assessment.
Gathering the Necessary Tools
When restringing a tree pruner, gathering the right tools is essential. Here’s what you’ll need:
- New rope: Ensure it is the correct diameter for your tree pruner model.
- Scissors or a knife: For cutting the rope to the required length.
- Screwdriver: To open any covers or access points for the restringing process.
- Pliers: Helpful for removing any remaining old rope or securing knots.
- Measuring tape: To measure the length of the rope needed accurately.
Remember, having the appropriate tools at hand will make the restringing process much smoother.
Recommended Products

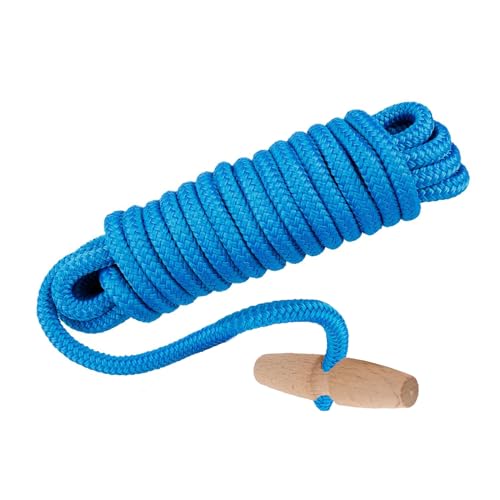
High-quality PR-20 Tree Pruner rope: Measuring 20 feet long, this product is a sturdy tree pruner rope that is compatible with Jameson Fiskars pruners.

Pole saw rope: PR-20 This poly pruning rope measures 20 feet long with a 5/16-inch diameter, tree pruner replacement rope, Compatible with Jameson Fiskars pruner

[Tree Pruner Rope Replacement] Replacement part Number: PR-20. Pole saw rope measures 20 feet long with a 7.5mm diameter and has a wooden handle for ease of use. If your pole pruner rope is broken or damaged, replace a new tree pruner rope is the best choice for you.
Removing the Old String
When it comes to restringing a tree pruner, the first step is to remove the old string. Here’s how you can do it effectively:
- Locate the Pulley System: Find the pulley system on the tree pruner. This is where the string wraps around to extend and retract the cutting blade.
- Cut the Old String: Use scissors or a knife to carefully cut the old string. Make sure to remove any knots and untangle the string from the pulley system.
- Detach the Old String from the Blade: Unhook the old string from the blade, ensuring it’s completely free from any attachments.
- Inspect for Any Remaining String: Double-check the entire pruner to ensure no remnants of the old string are left behind. Clean out any debris that may have accumulated.
- Dispose of the Old String: Properly dispose of the old string to keep your working area tidy and organized.
By following these steps, you’ll successfully complete the crucial task of removing the old string from your tree pruner, setting the stage for a smooth restringing process.
Stringing the Tree Pruner
To start stringing your tree pruner, you’ll first need to cut a new piece of rope that is slightly longer than the original one you removed. Keep in mind that having extra length will give you room for adjustments later on.
Here’s a simple guide to help you string your tree pruner effectively:
- Feed one end of the new rope through the hole in the blade where the old string was attached. Ensure it is securely knotted to prevent it from slipping out.
- Guide the rope up towards the pulley system, making sure it follows the correct path as shown by the previous string’s markings.
- Loop the rope over the pulley wheel and then bring it back down towards the blade. This step ensures that proper tension is maintained when cutting branches.
- Attach the other end of the rope to the locking mechanism, making sure it is securely fastened.
- Test the functionality of your newly strung tree pruner by engaging the rope and observing how it operates. Make any necessary adjustments to the tension for optimal performance.
| Important Tips |
|---|
| Cut new rope slightly longer than the original. |
| Make secure knots to prevent slippage. |
| Follow the correct path for the rope. |
| Ensure proper tension for cutting branches. |
| Test functionality and make adjustments as needed. |
Recommended Products

ArrogantF PR-20 tree pruner rope replacement part number: PR-20,Compatible with Jameson Fiskars manual tree pruners. Pole saw rope measures 20 feet long with a 7.5mm diameter and has a wooden handle for ease of use.

【High Strength Nylon Industrial Silk】Tree trimming rope for jameson uses high-strength nylon industrial silk as the raw material, the molecular structure is tight, resistant to repeated friction, and the strength is 30% to 50% higher than ordinary nylon silk
PR-20 Tree Pruner Rope Replacement, for Jameson Fiscar Big Mouth Manual Pole Saw & Tree Pruner,20 feet long with a 5/16 inch diameter(with Wooden Handle)
Testing and Adjusting
When testing your restringing work on the tree pruner, ensure that the rope moves smoothly through the pulley system without any obstructions. Confirm that the locking mechanism securely holds the tension in place for safe operation.
Here are some key steps for testing and adjusting your newly restrung tree pruner:
- Test the functionality: Pull the rope gently to verify smooth movement and proper tension.
- Check for any knots or snags: Ensure there are no entanglements that could affect the cutting process.
- Adjust the tension if needed: If the rope feels too loose or tight, make necessary adjustments by repositioning it on the pulley system.
- Repeat the testing process: After adjustments, test the pruner again to ensure it operates smoothly and efficiently.
Remember, maintaining the correct tension in the rope is crucial for the optimal performance of your tree pruner. Regularly check the tension and make adjustments as needed to ensure clean and precise cuts while trimming branches.
Conclusion
Ensuring the smooth movement of the rope and proper tension in your tree pruner is essential for safe and efficient operation. By following the key steps outlined in this article – testing for smooth movement, checking for knots, adjusting tension as needed, and repeating the testing process – you can maintain optimal performance. Remember, keeping the correct tension in the rope will result in clean and precise cuts while trimming branches. Regularly checking and adjusting the tension will not only improve the efficiency of your tree pruner but also extend its lifespan. By taking the time to test and adjust your tree pruner correctly, you’ll be able to enjoy hassle-free tree trimming for years to come.
Frequently Asked Questions
How important is it to test and adjust the restringing work on a tree pruner?
Testing and adjusting the restringing work on a tree pruner is crucial for ensuring safe and efficient operation. It helps in verifying smooth movement of the rope through the pulley system, proper tension holding by the locking mechanism, and overall functionality of the pruner for clean and precise cuts.
What are the key steps for testing and adjusting a tree pruner?
The key steps include verifying smooth movement and proper tension of the rope, checking for knots or snags that may hinder operation, adjusting tension if needed for optimal performance, and repeating the testing process after adjustments to ensure everything is in working order.
Why is maintaining the correct tension in the rope important?
Maintaining the correct tension in the rope is essential for optimal performance of the tree pruner. It ensures that the pruner operates smoothly, allowing for clean and precise cuts while trimming branches. Regularly checking and adjusting the tension is recommended to guarantee efficient operation and prolong the pruner’s lifespan.
I’ve always been drawn to trees.As a kid, I spent most of my free time outside, climbing, exploring, and trying to figure out the names of the trees around me.That early curiosity eventually led me to study arboriculture and horticulture at Michigan State.Later, I completed a degree in forestry at the University of Michigan.
I’ve been working in tree care and education ever since.These days, I enjoy helping people learn more about the trees in their own backyards.How they grow, how to care for them, and why they matter.You don’t need to be an expert to appreciate trees.A little curiosity goes a long way.