Ever found yourself struggling to use your pole saw because the pruner’s spring decided to take a vacation? Frustrating, right? But fret not, because in this article, you’ll discover the simple steps to replace that elusive spring and get back to taming your unruly garden with ease.
Overview of Pruner on Pole Saw
When handling a pole saw pruner, understanding its components is key. The pruner consists of a blade at its end, connected to a pole for extended reach. The spring, though small, plays a vital role in its functionality. It keeps the pruner blades open and ready for action.
Proper maintenance of your pole saw pruner ensures smooth operation. If you encounter issues with the spring, you may need to replace it. Fortunately, replacing the spring is a manageable task that you can tackle yourself. Understanding the pruner’s design will help you navigate this process with ease.
To replace the spring on your pruner, you’ll need a few simple tools and a replacement spring that matches the original. By following the right steps and taking care during the process, you can have your pruner up and running smoothly again in no time.
Identifying the Issue with the Spring
When encountering problems with your pruner on a pole saw, the spring could be a likely culprit. Here’s how to identify issues with the spring:
- Observe the pruner carefully to see if the blades aren’t opening or closing properly.
- Listen for any unusual sounds when operating the pruner, as this could indicate a spring issue.
- Inspect the spring for any signs of damage, such as bends or breaks.
- Check if the spring is properly seated in its designated place within the pruner mechanism.
Understanding the signs of a faulty spring is crucial in determining whether it needs replacement.
Recommended Products
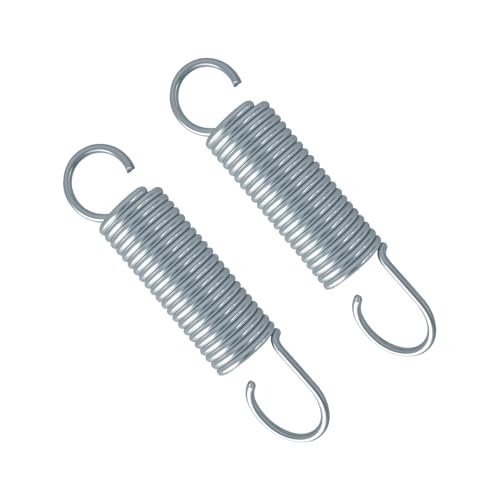
This pruner replacement spring is designed to restore proper tension for compound pruning tools, offering smooth cutting movement for pole saw mechanisms.

Designed for Z104 pole pruner spring replacement, compatible with Marvin PH4 pruner head and other common pole pruner models, offering a reliable spring replacement
Product Information: 6801-5 spring, designed fits for Corona tree pruners 2-piece set—consistent performance as the original component
Tools Needed for Replacement
When replacing the spring on your pruner on a pole saw, having the right tools at hand can make the process smoother and more efficient. Here are the essential tools you’ll need:
- Replacement Spring: Ensure you have the correct replacement spring that is compatible with your pruner model.
- Screwdriver: A screwdriver, ideally with multiple tips, will help you remove any screws holding the pruner components together.
- Needle-Nose Pliers: These will be handy for gripping and manipulating small parts during the replacement.
- Safety Gloves: To protect your hands from any sharp edges or potential injuries.
- Safety Glasses: Always wear safety glasses to shield your eyes from debris or small components that may come loose.
Remember, having the right tools not only eases the replacement process but also helps maintain safety throughout the task.
Step-by-Step Guide to Replacing the Spring
To successfully replace the spring on your pruner on a pole saw, follow these clear steps:
-
Step 1: Preparation
- Gather your tools: replacement spring, screwdriver with multiple tips, needle-nose pliers, safety gloves, and safety glasses. Ensure you have the correct replacement spring compatible with your pruner model.
-
Step 2: Ensuring Safety
- Put on your safety gloves and glasses to protect your hands and eyes during the process.
-
Step 3: Disassembling the Pruner
- Use the screwdriver to carefully remove the screws holding the pruner together. Keep track of the parts and screws as you disassemble.
-
Step 4: Removing the Old Spring
- Locate the old spring within the pruner assembly. Use the needle-nose pliers to remove the old spring from its position.
-
Step 5: Installing the New Spring
- Carefully insert the new spring into the correct position within the pruner assembly, ensuring it is securely in place.
-
Step 6: Reassembling the Pruner
- Reassemble the pruner by putting back the removed parts in the reverse order of disassembly. Tighten the screws to secure the pruner.
-
Step 7: Testing
- Before using the pruner on the pole saw, test the functionality of the new spring by compressing and releasing it a few times.
- Ensure all parts are securely in place, and there are no loose screws before using the pruner on the pole saw.
Recommended Products

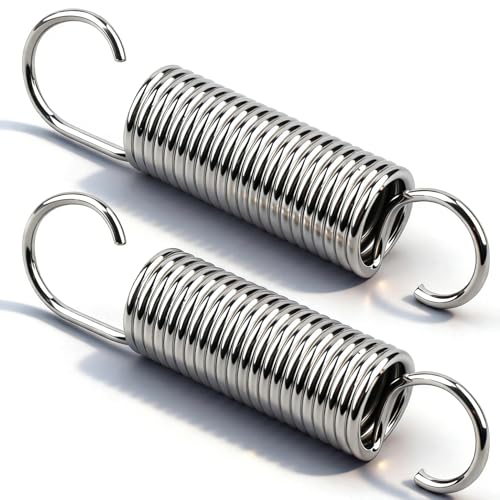
Compatible with Corona 3800-5 compound action tree pruner—this 3800-5 pruner spring is suitable for models TP 3811, TP 3841, and TP 3714, serving as a direct replacement spring for compound action pruners with rope drive.

Fits Marvin PH4 Pruner Head

Compatibility:Z104 pruning shears spring replacement Compatible with Marvin PH4. And garden shears spring replacement compatible with many other Models.
Testing the pruner
Now that you’ve installed the new spring in your pruner on the pole saw, it’s time to ensure everything is in working order. Testing the pruner is a crucial step to guarantee its functionality and your safety while using it. Here’s how you can effectively test your pruner:
- Check the Spring Tension: Press the pruner blades together and release them. The blades should move smoothly and show appropriate resistance due to the spring tension.
- Inspect Blade Alignment: Ensure the blades align correctly when closing and opening. Misaligned blades can affect the cutting precision and may indicate an issue with the spring installation.
- Test Cutting Performance: Find a small branch or twig to cut with your pruner. It should cut effortlessly and cleanly through the branch without much force from your end.
- Verify Safety Mechanisms: Check that any safety locks or features engage and disengage correctly during operation. Safety mechanisms are essential in preventing accidental cuts or injuries.
- Evaluate Overall Comfort: Pay attention to how comfortable the pruner feels in your hand while using it. Ergonomics play a significant role in long-term usability and ease of operation.
- Perform Final Checks: Ensure all screws are tightened, and no parts are loose after testing. Any loose components can affect the pruner’s performance and compromise your safety.
Testing your pruner after replacing the spring is a vital precaution to take before resuming your pruning tasks. A well-functioning pruner not only makes your gardening tasks smoother but also ensures a safe and efficient experience each time you use it.
Conclusion
You’ve now mastered the art of replacing the spring in your pruner on a pole saw. Remember, testing is key to ensuring your pruner is in top shape post-spring replacement. Check the tension, blade alignment, cutting performance, safety features, comfort, and give it a final once-over. A well-functioning pruner is essential for a smooth and safe gardening experience. Happy pruning!
Frequently Asked Questions
1. Why is it important to test the pruner after replacing the spring?
It’s crucial to test the pruner post-spring replacement to ensure proper spring tension, blade alignment, cutting performance, safety mechanisms, comfort, and final checks for a safe and efficient gardening experience.
2. What should I prioritize during the testing phase after replacing the spring in a pruner?
Focus on checking spring tension, blade alignment, cutting performance, safety mechanisms, and comfort to ensure the pruner functions correctly for safe and efficient gardening.
3. How can I verify the success of the spring replacement in my pruner on a pole saw?
By conducting a series of tests including checking spring tension, blade alignment, cutting performance, safety mechanisms, and comfort, you can verify the success of the spring replacement in your pruner on a pole saw.
I’ve always been drawn to trees.As a kid, I spent most of my free time outside, climbing, exploring, and trying to figure out the names of the trees around me.That early curiosity eventually led me to study arboriculture and horticulture at Michigan State.Later, I completed a degree in forestry at the University of Michigan.
I’ve been working in tree care and education ever since.These days, I enjoy helping people learn more about the trees in their own backyards.How they grow, how to care for them, and why they matter.You don’t need to be an expert to appreciate trees.A little curiosity goes a long way.