Ever found yourself struggling with a dull chainsaw blade when you’re in the middle of a project? It can be frustrating and time-consuming. But what if you could easily replace the blade yourself in no time? Imagine the convenience and savings it could bring you. In this article, you’ll discover the simple steps to swap out your chainsaw blade like a pro.
Picture this: You’re in your backyard, ready to tackle that overgrown tree, but your chainsaw blade just isn’t cutting it – literally. Instead of rushing to a professional, wouldn’t it be great to have the confidence to handle it on your own? That’s where knowing how to replace a chainsaw blade comes in handy. With the right guidance, you’ll be back to smoothly slicing through wood in no time.
By learning this essential skill, you’ll not only save money on professional repairs but also gain the independence to maintain your tools effortlessly. Say goodbye to downtime and hello to a well-functioning chainsaw whenever you need it. Stick around to uncover the secrets to mastering this simple yet valuable technique.
Understand the Parts of a Chainsaw Blade
When replacing a chainsaw blade, familiarizing yourself with its parts is crucial. Here’s a breakdown of the key components:
- Guide bar: The long, flat piece that the chain wraps around.
- Drive sprocket: The notched wheel that guides the chain along the guide bar.
- Chain tensioner: Allows you to adjust the chain’s tension for optimal performance.
- Chain catcher: Safety feature that reduces the risk of injury if the chain breaks.
- Cutting chain: Consists of connected cutting links that do the actual cutting.
Understanding these parts will make the replacement process smoother and help you maintain your chainsaw effectively.
Gather the Necessary Tools and Supplies
When it comes to replacing a chainsaw blade, having the right tools and supplies at hand can make the process smoother. Here’s what you’ll need to gather:
- Replacement Chainsaw Blade: Ensure you have the correct size and type for your chainsaw model.
- Screwdriver/Wrench: To loosen the bolts holding the old blade in place.
- Gloves and Eye Protection: Safety first! Protect your hands and eyes during the blade replacement.
- Bar and Chain Oil: To lubricate the new blade for smooth operation.
- Workbench or Stable Surface: A sturdy workspace to safely work on your chainsaw.
- Rags or Paper Towels: Handy for cleaning any debris or oil.
Remember, having these tools and supplies ready before you start can save you time and hassle during the replacement process.
Recommended Products

All-Season Non-Toxic & Eco-Friendly Performance: This biodegradable, non-toxic chainsaw oil provides reliable protection from -15°F to 500°F, perfect for both electric and gas saws. Its ultraclean formula minimizes environmental impact in 100% loss applications.
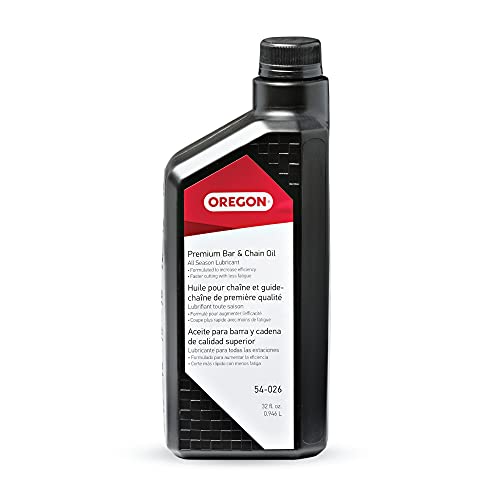
All-season lubricant perfect for gas and electric chainsaws, pole saws, hedge trimmers, and any other equipment that uses slide bars or chain gears – works for all brands

Engineered with anti-wear agent Zinc Dialkyl Dithiophosphate (ZDDP) to help provide a layer of protection for the bar and chain
Safely Remove the Old Blade
When removing the old blade, it’s crucial to prioritize your safety and follow these steps carefully:
- Disconnect the chainsaw from any power source if it’s corded.
- Wear gloves and eye protection to shield yourself from debris.
- Locate the blade-covering nuts at the side of the chainsaw.
- Use a screwdriver or wrench to loosen the nuts and remove the cover.
- Check the chain tension and adjust it if necessary for easier removal.
- Carefully pull the blade out from the guide bar, ensuring you have a firm grip.
- Inspect the old blade for any visible damages or wear and tear.
Properly removing the old blade sets the foundation for a smooth replacement process. Stay cautious while handling the sharp components and keep the work area well-lit for better visibility.
Recommended Products

Package Includes: you will get 3 pieces of thickened 13 by 19 mm chainsaw screnches. Size: 13 x 19mm, thickness: 2mm, Package:3 Pieces. Works with most major brands of chainsaw: Compatible with sae sizes of ½ inch and ¾ inch, and metric sizes of 13mm and 19mm.

Universal Blade Removal Tool, Holds Blade In Place For Faster, Safer Removal, Fits All Walk Behind and Riding Mower Decks To 42"

Includes one Husqvarna Chainsaw Scrench compatible with all Husqvarna chainsaw models and other select chainsaw brands
Install the New Blade Correctly
After safely removing the old chainsaw blade, it’s time to install the new one correctly.
Here are the steps to ensure a smooth replacement process:
- Mount the New Blade: Carefully position the replacement blade on the drive sprocket and guide bar.
- Adjust Chain Tension: Properly adjust the chain tension to ensure optimal performance and safety.
- Secure the Nuts: Tighten the nuts on the guide bar to secure the new blade in place.
- Test the Chain: Before using the chainsaw, ensure that the chain moves smoothly along the guide bar without sagging.
By following these steps, you’ll successfully install the new blade and be ready to resume your chainsaw tasks seamlessly.
Recommended Products

3-BLADE KIT: Includes a 9" 20-tooth chainsaw-style blade, a 10" 80-tooth carbide-tipped blade, and a 9" 36-tooth carbon steel blade for versatile cutting

3-PIECE BLADE KIT: Includes a 9in 36-tooth carbon steel disc blade, a 9in 20-tooth chainsaw tooth blade, and a 6-blade razor head for versatile cutting

Chain fits these chainsaw models with a 10" bar: Craftsman 315.341300, 79240 and 79245 Pole Saw, 358.34550, CR2500A, CMCCS610, Husqvarna 436 LI, T536 and 536 LiXP, Echo CS-271, PPT-2620, PPF-2620
Test the Chainsaw and Make Adjustments if Needed
So, you’ve successfully installed the new blade on your chainsaw. What comes next? Testing it out to ensure everything runs smoothly. Here’s how you can do that:
- Start the Chainsaw: Now that the new blade is in place, it’s time to test it. Give the chainsaw a gentle start-up, making sure everything sounds as it should.
- Check Chain Movement: Watch how the chain moves along the guide bar as you rev the chainsaw. It should glide smoothly without any jerking or irregular movements.
- Listen for Unusual Noises: Pay attention to any strange sounds while the chainsaw is running. Any unusual noises could indicate an issue that needs addressing.
- Inspect Chain Tension: Make sure the chain tension is just right. If it’s too loose or too tight, you’ll need to make adjustments to ensure optimal performance.
- Adjust as Needed: If you notice any issues during the testing phase, don’t worry. It’s common to need slight adjustments after installing a new blade. Refer back to the chain tensioning and adjustment steps to make any necessary changes.
- Test Again: After making adjustments, give the chainsaw another test run. Repeat the steps until everything is running smoothly and efficiently.
By thoroughly testing your chainsaw and making adjustments as needed, you ensure that it’s ready for action when you need it. Remember, a well-maintained chainsaw is a safe and effective tool for all your cutting needs.
Conclusion
You’ve learned the key components of a chainsaw blade and why it’s crucial for a smooth replacement process. By understanding the guide bar, drive sprocket, chain tensioner, chain catcher, and cutting chain, you’re equipped for effective maintenance. Remember to gather the necessary tools beforehand to ensure a safe and efficient blade replacement. After installing the new blade, test your chainsaw by starting it up, checking chain movement, and inspecting chain tension. Make adjustments as needed for optimal performance and safety. A well-maintained chainsaw is essential for successful cutting operations.
Frequently Asked Questions
What are the key components of a chainsaw blade?
The key components of a chainsaw blade include the guide bar, drive sprocket, chain tensioner, chain catcher, and cutting chain.
Why is it important to gather necessary tools before replacing the chainsaw blade?
Gathering necessary tools ensures a safe and efficient process when replacing the chainsaw blade.
How should I test the chainsaw after replacing the blade?
After replacing the blade, start the chainsaw, check chain movement, listen for unusual noises, and inspect chain tension for optimal performance and safety.
Why is maintaining a chainsaw important for cutting operations?
A well-maintained chainsaw ensures effective cutting operations by providing optimal performance and safety.
I’ve always been drawn to trees.As a kid, I spent most of my free time outside, climbing, exploring, and trying to figure out the names of the trees around me.That early curiosity eventually led me to study arboriculture and horticulture at Michigan State.Later, I completed a degree in forestry at the University of Michigan.
I’ve been working in tree care and education ever since.These days, I enjoy helping people learn more about the trees in their own backyards.How they grow, how to care for them, and why they matter.You don’t need to be an expert to appreciate trees.A little curiosity goes a long way.