Ever found yourself staring at a pile of pruner parts, feeling like you’re solving a puzzle without all the pieces? How do you put it all back together without a headache? We’ve all been there.
Imagine effortlessly reassembling your pruner on your pole saw with ease, no more frustration or confusion. Picture saving time and energy by knowing exactly how to tackle this task like a pro.
Cleaning and Organizing Parts
When cleaning your pruner parts, it’s essential to use a mild detergent solution and a soft brush to remove dirt and debris. Remember to dry each piece thoroughly to prevent rusting.
To prevent misplacing parts, create a designated workspace and arrange parts systematically. A helpful tip is to label them or use small containers to keep them organized.
Regular maintenance of your pruner parts not only ensures longevity but also guarantees smooth assembly. Inspect each part for wear and tear, and replace any damaged components promptly.
By adopting good cleaning habits and organization techniques, reassembling your pruner on a pole saw will become a seamless and efficient task.
Identifying Components and Their Functions
When reassembling a pruner on a pole saw, it’s crucial to identify each component and understand its function to ensure a correct and smooth assembly process. Here are some key components you should know:
- Blade: The sharp cutting edge that trims branches.
- Spring: Provides tension for the cutting mechanism.
- Handle: Allows you to grip and maneuver the pruner.
- Locking Mechanism: Keeps the blade securely in place during use.
- Pole Attachment: Connects the pruner to the pole saw for extended reach.
By familiarizing yourself with these components and their roles, you’ll gain clarity and confidence in the reassembly process. Remember to refer to the pruner’s manual for specific details on each part.
Visual aids, such as diagrams or online resources, can also enhance your understanding of the components and how they work together. Don’t hesitate to seek additional guidance if needed to master the component identification process.
Assembly Steps for Reassembling Pruner
When it comes to putting your pruner back together on the pole saw, following a step-by-step approach is key. Here’s a breakdown of the assembly process to help you navigate through it smoothly:
- Gather Your Tools: Before you begin, make sure you have all the necessary tools readily available. This includes items like a screwdriver, lubricant, and any replacement parts you may need.
- Inspect Each Component: Take a close look at each part to ensure there is no damage or wear. If you notice any issues, address them before proceeding with the assembly.
- Attach the Blade: Start by attaching the blade to the pruner head securely. Make sure it is aligned correctly and tightened to avoid any accidents during use.
- Connect the Spring and Handle: Next, connect the spring to the pruner head and handle. This part is crucial for the smooth operation of your pruner, so double-check the connection.
- Engage the Locking Mechanism: Test the locking mechanism to ensure it is functioning correctly. This step is vital for your safety while using the pruner on the pole saw.
- Secure the Pole Attachment: If your pruner has a pole attachment, secure it properly to the pole saw. This step is essential for reaching higher branches with ease.
- Test Your Pruner: Once you’ve reassembled all the parts, give your pruner a test run to make sure everything is working correctly. Address any issues before putting it to use in the garden.
These assembly steps should help you confidently reassemble your pruner on the pole saw for seamless pruning sessions. Remember, following the manufacturer’s guidelines is always a good idea for a safe and effective assembly process.
Reattaching Pruner to Pole Saw
To reattach the pruner to the pole saw, follow these step-by-step instructions:
- Secure the Blade: Ensure the blade is tightly attached to the pruner head.
- Connect the Spring: Attach the spring to the pruner head, ensuring it is properly in place.
- Attach the Handle: Connect the handle securely to the pruner head.
- Test the Locking Mechanism: Make sure the locking mechanism is working correctly before use.
Remember, following these steps diligently is crucial for a safe and effective pruning experience.
Recommended Products
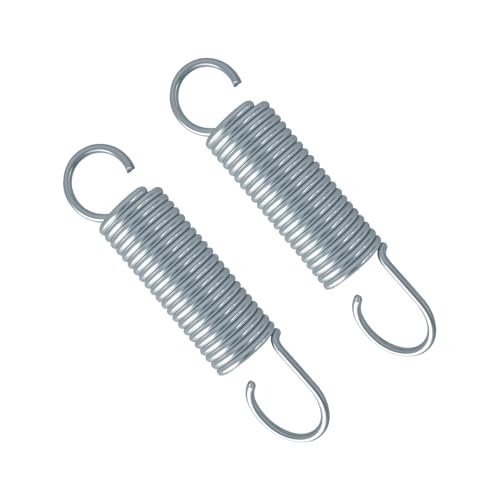
This pruner replacement spring is designed to restore proper tension for compound pruning tools, offering smooth cutting movement for pole saw mechanisms.

Designed for Z104 pole pruner spring replacement, compatible with Marvin PH4 pruner head and other common pole pruner models, offering a reliable spring replacement

Compatibility:Z104 pruning shears spring replacement Compatible with Marvin PH4. And garden shears spring replacement compatible with many other Models.
Testing and Adjustments
When you’ve successfully reattached your pruner to the pole saw, it’s time to ensure everything is working smoothly. Here’s what you need to know:
- Testing the Locking Mechanism: Try locking and unlocking the pruner to guarantee it secures firmly in place.
- Checking Blade Alignment: Confirm the blade is straight and properly aligned with the pole saw for efficient cutting.
- Evaluating Spring Tension: Test the tension of the spring by compressing it gently to check for the right resistance.
- Testing the Trigger Mechanism: Verify that the trigger responds promptly and without any delays.
- Inspecting Overall Functionality: Ensure all components work harmoniously together for a seamless pruning experience.
Remember, thorough testing and adjustments are essential to maximize the performance and safety of your pruner on the pole saw.
Helpful Tip:
Before each use, perform a quick inspection to guarantee your pruner is in optimal working condition.
Conclusion
Now that you’ve reassembled your pruner on the pole saw, remember to test it thoroughly. Make sure the locking mechanism is secure, the blade alignment is correct, and the spring tension is just right. Give the trigger mechanism a try and check the overall functionality for a smooth pruning session. Don’t forget the handy tip of inspecting your pruner before each use to guarantee it’s in top-notch condition. Happy pruning!
Frequently Asked Questions
How important is testing after reattaching the pruner to the pole saw?
It is crucial to test to ensure safety and functionality. Test the locking mechanism, blade alignment, spring tension, trigger mechanism, and overall functionality.
Any tips for maintenance before using the pruner?
Perform a quick inspection before each use to check for optimal working condition.
I’ve always been drawn to trees.As a kid, I spent most of my free time outside, climbing, exploring, and trying to figure out the names of the trees around me.That early curiosity eventually led me to study arboriculture and horticulture at Michigan State.Later, I completed a degree in forestry at the University of Michigan.
I’ve been working in tree care and education ever since.These days, I enjoy helping people learn more about the trees in their own backyards.How they grow, how to care for them, and why they matter.You don’t need to be an expert to appreciate trees.A little curiosity goes a long way.