Ever tried to tackle unruly tree branches with your pruner, only to find the saw blade missing in action? Fret not, as we’ve got your back! Imagine effortlessly attaching the saw blade to your Fiskars tree pruner and swiftly trimming those overgrown branches. In this article, we’ll guide you through the simple steps to ensure you can get back to shaping your garden oasis in no time.
Struggling with the tedious process of fitting the saw blade onto your pruner can be a thing of the past. By following our easy-to-understand instructions, you’ll save time and frustration, allowing you to focus on what truly matters – enjoying a well-maintained garden. Say goodbye to the hassle and hello to a seamless saw blade installation process that will elevate your pruning game.
Check the Contents of Your Fiskars Tree Pruner Kit
When it comes to installing the saw blade on your Fiskars tree pruner, it’s essential to begin by checking the contents of your kit. This ensures that you have all the necessary parts before you start the installation process, preventing any interruptions along the way.
Here’s what you should typically find in your Fiskars tree pruner kit:
- Pruner pole or handle
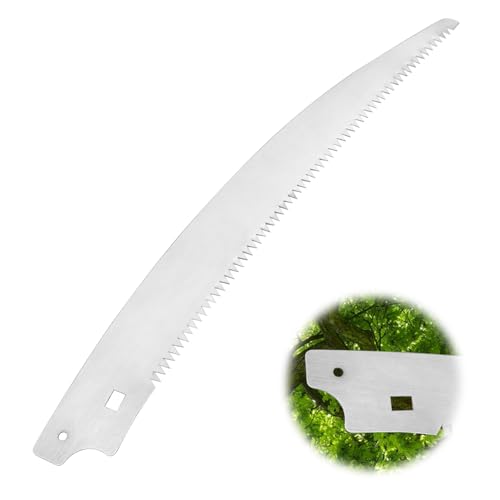
- Saw blade
- Attaching hardware (screws, bolts, nuts)
- Instruction manual
Take a few moments to inspect each item to ensure that nothing is missing or damaged. It’s also helpful to familiarize yourself with the components to streamline the installation process later on. By confirming the contents now, you’ll avoid any frustrations that may arise from missing parts mid-installation.
Identify the Correct Saw Blade for Your Pruner Model
When it comes to installing a saw blade on your Fiskars tree pruner, identifying the correct saw blade for your specific pruner model is crucial. Here are some steps to help you with this process:
- Check the Pruner Model: Look for the model number on your Fiskars tree pruner. It’s usually located on the pole or handle.
- Consult the Instruction Manual: Refer to the instruction manual that came with your pruner. It typically specifies the compatible saw blade models for your pruner.
- Measure the Blade Length: If you are unsure about the compatibility, measure the length of the current saw blade or the slot where the blade fits in your pruner.
Remember, using the correct saw blade for your pruner model ensures optimal performance and safety during operation.
Recommended Products

COMPATIBLE WITH MULTIPLE FISKARS MODELS: Fits Fiskars pruning saw models 9388, 9389, 9390, 9391, 8391, 7889, 7831, 6391 and tree pruner models 9300, 9261, TP45, 9301, 9236

[POLE SAW PRUNER BLADE] Length of the pole saw replacement blade is 15 inches, it is a replacement pruning saw blade designed for fiskars extendable tree pruner parts. The sharp serrated teeth can easily trim branches up to 1.25” or so and help extend the life of pole saw replacement blade.

HIGH-PERFORMANCE REPLACEMENT SAW BLADE: Designed to replace and restore cutting efficiency for Fiskars Lightweight Extendable Tree Pruner and Chain-Drive Extendable Tree Pruner models.
Prepare the Pruner for Saw Blade Installation
When installing a saw blade on your Fiskars tree pruner, it’s essential to prepare the pruner correctly for a smooth and successful installation process.
- First, ensure your pruner is clean and free of any dirt or debris. A clean surface will help you work more efficiently.
- Next, locate the blade release button on your pruner. This button allows you to detach the old blade and prepare for the new one.
- Then, carefully press and hold the blade release button while gently pulling the old blade away from the pruner. Dispose of the old blade safely.
- After removing the old blade, inspect the saw blade mounting area for any damage or debris. Clean the area if necessary to ensure a secure fit for the new blade.
- Finally, before installing the new blade, double-check that it is compatible with your Fiskars tree pruner model. Refer to the instruction manual for a list of compatible saw blade models.
By following these steps, you’ll properly prepare your pruner for the upcoming saw blade installation.
Attach the Saw Blade to Your Fiskars Tree Pruner
Installing a saw blade on your Fiskars tree pruner is a straightforward process. Follow these steps to ensure a successful blade attachment:
- Step 1: Positioning the Blade: Start by aligning the blade with the pruner, ensuring it’s facing the correct direction as per the pruner’s design.
- Step 2: Securing the Blade: Slide the blade into the mounting area, making sure it fits snugly and aligns properly.
- Step 3: Locking Mechanism: Check for any locking mechanism on your pruner that secures the blade in place. Engage the mechanism as per the manufacturer’s instructions.
- Step 4: Testing: Before use, give the saw blade a gentle shake to ensure it’s firmly attached and won’t come loose during operation.
- Step 5: Final Inspection: Double-check the blade installation, ensuring it’s securely fastened and ready for pruning tasks.
- Step 6: Maintenance: Regularly inspect and tighten the blade as needed to maintain optimal performance and safety.
For effective saw blade installation, always refer to the manufacturer’s guidelines for your specific Fiskars tree pruner model.
Test the Saw Blade and Make Adjustments if Needed
When testing the saw blade on your Fiskars tree pruner, ensure that it operates smoothly and without any unusual vibrations or sounds. Here are some key steps to follow in this crucial phase:
- Check the Blade Alignment: Verify that the blade remains straight and aligns properly with the cutting edge.
- Inspect the Cutting Performance: Make several cuts to evaluate the efficiency of the blade in cutting through branches without excessive effort.
- Assess the Cut Quality: Observe the cleanliness of the cuts. A well-installed blade should leave smooth, neat cuts, indicating a sharp and correctly positioned blade.
- Monitor for Safety Concerns: Remain vigilant for any safety hazards such as blade wobbling or unintended movements that could pose risks during operation.
Should you encounter any issues during the testing phase, it’s important to address them promptly. Here are some possible adjustments you may need to make:
- Tightening or Loosening Screws: Adjust the tightness of the screws to stabilize the blade properly.
- Alignment Correction: Realign the blade if you notice any misalignment affecting the cutting performance.
- Blade Sharpening: If the blade dulls quickly or fails to deliver clean cuts, consider sharpening it to maintain optimal performance.
By following these guidelines and conducting thorough testing of the saw blade on your Fiskars tree pruner, you ensure efficiency in your pruning tasks while prioritizing safety throughout the process.
Recommended Products
[POLE SAW PRUNER BLADE] Length of the pole saw replacement blade is 15 inches, it is a replacement pruner saw blade for fiskars. The sharp serrated teeth can easily trim branches up to 1.25” or so and help extend the life of 9390 tree pruner blade.

【COMPATIBLE WITH】Saw blade is designed for compatible with Fiskars Pruning Saw models 9388, 9389, 9390, 9391, 8391, 7889, 7831 and 6391. Also fits pruner models 9300, 9261 and TP45; Fits Fiskars Tree Pruner models #9301, #9300, #9261, and #9236.

LIGHTWEIGHT ALUMINUM CONSTRUCTION: The extension poles are crafted from durable yet lightweight aluminum to minimize arm fatigue and improve maneuverability when working overhead at the full 14 ft reach
Conclusion
Now that you’ve learned the crucial steps for attaching a saw blade to your Fiskars tree pruner, remember that testing is key. Ensure the blade is aligned correctly, assess its cutting performance and quality, and always prioritize safety. Making necessary adjustments like tightening screws or sharpening the blade will enhance your pruning experience. By following these simple guidelines, you’ll not only achieve efficient pruning but also maintain a safe working environment. Happy pruning!
Frequently Asked Questions
How do I attach a saw blade to my Fiskars tree pruner correctly?
To attach a saw blade to your Fiskars tree pruner correctly, follow the manufacturer’s instructions by securing the blade with the provided screws. Ensure the alignment is precise to prevent issues during pruning.
Why is testing the saw blade important after attachment?
Testing the saw blade after attachment is crucial to evaluate cutting performance, cut quality, and safety. It allows you to make adjustments if needed for efficient and safe pruning tasks.
What should I do if the blade alignment is off during testing?
If the blade alignment is off during testing, you may need to tighten the screws, realign the blade, or even sharpen it. Proper alignment is essential for optimal cutting results.
How can I ensure safety while testing the saw blade on the pruner?
To ensure safety while testing the saw blade on the pruner, always wear appropriate safety gear such as gloves and goggles. Watch for any signs of malfunction and stop immediately if safety concerns arise.
I’ve always been drawn to trees.As a kid, I spent most of my free time outside, climbing, exploring, and trying to figure out the names of the trees around me.That early curiosity eventually led me to study arboriculture and horticulture at Michigan State.Later, I completed a degree in forestry at the University of Michigan.
I’ve been working in tree care and education ever since.These days, I enjoy helping people learn more about the trees in their own backyards.How they grow, how to care for them, and why they matter.You don’t need to be an expert to appreciate trees.A little curiosity goes a long way.