Ever struggled with a dull pole pruner that just won’t cut it? Frustrating, right? Picture this: you’re all geared up for some yard work, only to find your tool isn’t up to the task. But fear not, because in this article, you’ll discover the art of hand sharpening your pole pruner with a file.
Imagine effortlessly gliding through branches like a hot knife through butter. By mastering the technique of hand sharpening with a file, you’ll not only save time and money but also ensure your pole pruner is always ready for action. Say goodbye to the hassle of dealing with a blunt tool when you need it the most.
Understanding the Importance of Sharp Pole Pruner
Maintaining a sharp pole pruner is essential for efficient yard work and ensuring safety.
Using a dull blade leads to struggling with cuts, causing frayed branches and uneven cuts.
A sharp blade:
- Cuts cleanly through branches
- Reduces effort needed
- Promotes plant health by preventing tearing
Regularly sharpening your pole pruner with a file keeps it in optimal condition, saving time and money in the long run.
Choosing the Right File for Sharpening
When choosing the right file for sharpening your pole pruner, it’s important to consider a few key factors to ensure the best results:
- File Type: Select a round file specifically designed for sharpening cutting tools like pruners. It should fit comfortably in your hand for ease of use.
- File Size: Opt for a file that matches the blade size of your pole pruner. Using the correct size ensures proper sharpening and a longer blade life.
- Grit Level: Look for a file with a fine grit, around 600-800, for sharpening pruner blades. A finer grit helps achieve a sharp edge without damaging the blade.
- Material: Choose a file made of high-quality steel for durability and precision sharpening. A sturdy file will withstand repeated use.
- Handle: Consider a file with a comfortable grip to reduce hand fatigue during sharpening sessions. A non-slip handle provides better control.
Remember, selecting the right file is crucial for maintaining the sharpness and effectiveness of your pole pruner. A well-chosen file can make the sharpening process easier and more efficient.
Recommended Products

High-Quality Diamond Sands: Industrial diamonds are electroplated onto steel base. It has higher durability and longevity
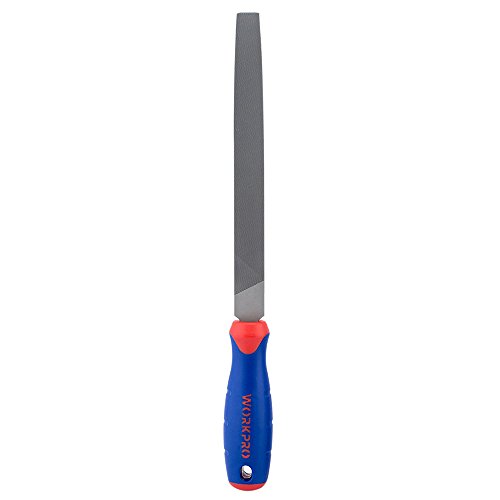
FLAT FILE – The WORKPRO W051002 Flat File has an ergonomic design, anti-slip, and comfortable grip so you can easily sharpen your tools
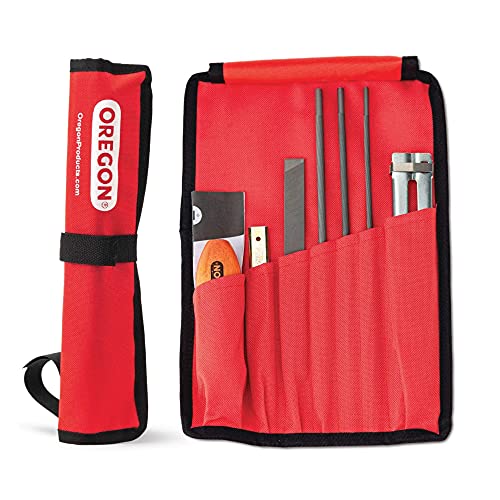
This portable universal chainsaw sharpening kit by Oregon makes it easy to keep your chainsaws, pole saws, and other tools sharp and ready to go
Steps to Prepare the Pole Pruner for Sharpening
Before diving into sharpening your pole pruner, it’s crucial to properly prepare your tools to ensure an effective and efficient sharpening process. Here are the essential steps to get your pole pruner ready:
- Inspect the Blade: Check for any damage, nicks, or dull edges that need to be addressed before sharpening.
- Clean the Blade: Remove any dirt, sap, or debris that may hinder the sharpening process. A clean blade ensures a smoother sharpening experience.
- Secure the Pruner: Properly fasten the pruner to a stable surface to prevent accidents and ensure steady sharpening.
- Protect Yourself: Wear protective gear such as gloves and safety goggles to safeguard against any potential injuries during the sharpening process.
By following these preliminary steps, you set yourself up for a successful sharpening session that will help maintain the sharpness and efficiency of your pole pruner.
Proper Technique for Hand Sharpening with a File
When hand sharpening your pole pruner with a file, it’s crucial to follow the appropriate technique to ensure effective and precise sharpening. Here are some steps to help you sharpen your tool like a pro:
-
Step 1: Positioning
- Secure the pruner on a stable surface to prevent any movements during sharpening.
- Ensure a comfortable posture that allows you to apply consistent pressure while sharpening.
-
Step 2: Angling
- Hold the file at the same angle as the pruner’s bevel, typically around 20-30 degrees.
- Maintain a steady hand and smooth strokes along the cutting edge to remove any dullness.
-
Step 3: Direction
- File from the base towards the tip of the blade in one direction to ensure a uniform sharpening.
- Repeat the process along the entire cutting edge to achieve a sharp and even finish.
-
Step 4: Checking Sharpness
- Test the sharpness of the blade by gently running your finger across the edge.
- A sharp blade will glide smoothly without any jagged edges or snags.
- After sharpening, clean the blade to remove any metal shavings and debris.
- Apply a thin layer of lubricant to protect the blade and maintain its sharpness for longer.
Remember, practicing the proper sharpening technique with a file will not only extend the life of your pole pruner but also ensure efficient cutting every time you use it.
Recommended Products

8" in length. Built in paddle handle.

ALL IN ONE KIT: - The 12-piece complete chainsaw sharpening file kit includes all the field tools you may need to bring your chainsaw back to its optimal condition. Even if you are a beginner, it's easy for you to learn how to sharpen your own saw. The orange pouch has high visibility and portability, you can sharpen anytime and anywhere

Durable monocrystalline diamonds coated full tang stainless steel. The diamond coating of this product has a very high hardness. It can sharpen all your tools like new ones.
Testing the Sharpness of Your Pole Pruner
To ensure optimum cutting performance, it’s crucial to test the sharpness of your pole pruner blade regularly. Here’s how you can do it:
- Visual Inspection: Start by visually examining the blade for any dull or damaged areas. Look for chips, nicks, or irregularities that could affect cutting efficiency.
- Paper Test: A simple and effective way to check sharpness is by slicing through a piece of paper. Smooth, clean cuts indicate a sharp blade, while tearing or jagged edges suggest dullness.
- Thumb Test: With caution, lightly run your thumb along the blade’s edge. A sharp blade should gently catch your skin. Be careful and avoid applying too much pressure to prevent injury.
- Cutting Test: Test the blade on a small branch or twig. A sharp blade will slice effortlessly through the wood with minimal effort on your part.
Regularly testing the sharpness of your pole pruner ensures that it remains in top cutting condition, making your pruning tasks easier and more efficient.
Conclusion
Now that you’ve learned the importance of testing the sharpness of your pole pruner blade, you’re well-equipped to keep it in optimal cutting condition. By regularly checking for sharpness using simple tests like visual inspection, the paper test, the thumb test, and the cutting test, you can ensure that your pruning tasks are efficient and effective. Remember, a sharp blade makes all the difference in achieving clean cuts and maintaining the health of your plants. Keep up with these sharpening techniques, and you’ll be ready to tackle any pruning job with ease. Happy pruning!
Frequently Asked Questions
Why is testing the sharpness of a pole pruner blade important?
Regularly testing the sharpness of a pole pruner blade is crucial to maintain optimal cutting performance.
How can I test the sharpness of my pole pruner blade?
You can test the sharpness of your pole pruner blade through visual inspection, a paper test, thumb test, and cutting test on a small branch.
What are the benefits of keeping my pole pruner blade sharp?
Keeping your pole pruner blade sharp ensures easier and more efficient pruning tasks.
How often should I test the sharpness of my pole pruner blade?
It is recommended to test the sharpness of your pole pruner blade regularly to maintain its cutting condition.
I’ve always been drawn to trees.As a kid, I spent most of my free time outside, climbing, exploring, and trying to figure out the names of the trees around me.That early curiosity eventually led me to study arboriculture and horticulture at Michigan State.Later, I completed a degree in forestry at the University of Michigan.
I’ve been working in tree care and education ever since.These days, I enjoy helping people learn more about the trees in their own backyards.How they grow, how to care for them, and why they matter.You don’t need to be an expert to appreciate trees.A little curiosity goes a long way.