Ever found yourself staring at your overgrown trees, wishing you could trim them without a hassle? What if we told you there’s a simple solution to get your Fiskars pole pruner back in action, ready to tackle those unruly branches in no time? Picture this: a sunny day, birds chirping, and you effortlessly pruning away. Sounds like a dream, right? Well, it’s about to become your reality with our step-by-step guide on fixing your Fiskars pole pruner. Get ready to say goodbye to those pesky branches and hello to a beautifully manicured garden with just a little TLC for your trusty tool.
Assess the Problem
When fixing a Fiskars pole pruner, the first step is to assess the issue at hand. Here are some tips to help you pinpoint the problem:
- Inspect the pruner for visible damage such as bent or broken parts.
- Test the cutting mechanism to see if it’s functioning properly.
- Check the blade sharpness by running your finger lightly along it — be careful!
- Examine the pole segments for any cracks or deformities.
Remember, a thorough assessment will guide you in successfully fixing your Fiskars pole pruner.
Gather Necessary Tools
When fixing your Fiskars pole pruner, it’s essential to have the right tools at hand. Here’s what you’ll need:
- Screwdriver: For loosening screws and securing parts.
- Sharpening Tool: To maintain the blade’s sharpness.
- Safety Gloves: Protect your hands while working.
- Cleaning Cloth: Wipe down the pruner for maintenance.
- Replacement Parts: Have spare parts in case of damage.
- Lubricating Oil: Keep the moving parts well-oiled for smooth operation.
Prepare these tools before starting the repair process to ensure a hassle-free experience.
Recommended Products

Designed for Z104 pole pruner spring replacement, compatible with Marvin PH4 pruner head and other common pole pruner models, offering a reliable spring replacement

Falco Pruner Replacement Springs 2-91 2 Pack Is your Falco listless and unresponsive? Bring it back to life with genuine Falco replacement springs

Compatibility:Z104 pruning shears spring replacement Compatible with Marvin PH4. And garden shears spring replacement compatible with many other Models.
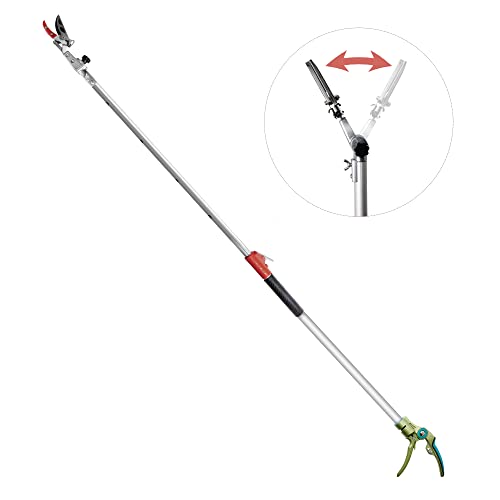
Disassemble the Pole Pruner
When disassembling your Fiskars pole pruner, start by extending the pole to its full length. Check for any locking mechanisms that keep the pole extended. Locate the fasteners that hold the pruner head and blade assembly to the pole.
Use the appropriate tool to remove these fasteners. Carefully detach the pruner head from the pole. Inspect the blade and pruner head for any damage or wear that may be affecting the pruner’s performance.
Remember to note how the components are assembled so you can reassemble the pole pruner correctly.
Inspect for Damages
When inspecting your Fiskars pole pruner for damages, look closely for the following:
- Check the pruner head and blade assembly for any cracks, chips, or excessive wear.
- Inspect the pole for any bends, dents, or signs of weakness.
- Ensure all fasteners are tight and in place to prevent accidents during use.
- Look for any rust or corrosion that may affect the functionality of the pruner.
Regular inspection is key to identifying potential issues early and ensuring your pole pruner remains safe and effective.
Recommended Products

Smooth Cutting: The pruning head can snip branches up to 3cm/1.2 inches thick. The 34cm/13.5 inches long saw blade is made from 1.2mm thick high-carbon SK5 steel and sharpened on 3 sides for smooth cuts. With a sharp saw blade and hedge clipper, easy to cut shrubs, bushes, grass, and branches, Save time and energy.

IDEAL BRANCH TRIMMER: Tree pruner that extends from 7.9 to 12 feet; Lightweight aluminum pole weighing less than five pounds to help minimize fatigue; Ideal for cutting high branches, or making low cuts without bending or kneeling
[Helpful Garden Tool] GARTOL brings to you a lightweight and extendable pruning tool to reach out to the least approachable arenas of your garden. You can conveniently get across other plants to remove the fastgrowing brambles and sting nettles without getting scratched or hurt. For gardening lovers, the telescopic pruner cutter head can can be rotated which resolves mobility issues and gives you the pleasure of trimming your garden without bending down or using a ladder to climb and cut them.
Reassemble and Test
As you reassemble your Fiskars pole pruner, make sure all parts are fitting snugly and securely.
To test, extend the pole pruner fully and lock it in place. Give it a gentle shake to check for any loose parts.
Try cutting a few small branches to make sure the pruner is working smoothly.
It’s essential to test the pruner after reassembly to ensure it’s safe and ready for use.
Remember, your safety comes first.
Recommended Products

Safely Test Smoke & Fire Alarms Without a Ladder Reach most ceiling smoke detectors and fire alarms from the floor using this no‑ladder smoke alarm tester pole, reducing fall risk and preventing overreach during routine safety checks

Safely Test Smoke & Fire Alarms Without a Ladder Reach most ceiling smoke detectors and fire alarms from the floor using this no‑ladder smoke alarm tester pole, reducing fall risk and preventing overreach during routine safety checks

Tess screw in replacement Tips. Does not include pole
Conclusion
Make sure to follow these steps when fixing your Fiskars pole pruner. Reassemble it carefully, ensuring all parts are secure. Test the pruner by extending and shaking it to check for loose components. Confirm its smooth operation by cutting small branches. Remember, safety first – always test the pruner after reassembly before using it. Happy pruning!
Frequently Asked Questions
Why is reassembling and testing my Fiskars pole pruner important?
Reassembling and testing your Fiskars pole pruner is crucial to ensure that all parts fit securely after inspection for damages. Testing post-reassembly helps confirm smooth operation and prevent accidents during use.
How do I test my Fiskars pole pruner post-reassembly?
After reassembly, extend and shake the pruner to check for loose parts. Cut small branches to verify smooth operation. Testing ensures that the pruner is safe to use and performs effectively.
I’ve always been drawn to trees.As a kid, I spent most of my free time outside, climbing, exploring, and trying to figure out the names of the trees around me.That early curiosity eventually led me to study arboriculture and horticulture at Michigan State.Later, I completed a degree in forestry at the University of Michigan.
I’ve been working in tree care and education ever since.These days, I enjoy helping people learn more about the trees in their own backyards.How they grow, how to care for them, and why they matter.You don’t need to be an expert to appreciate trees.A little curiosity goes a long way.