Ever found yourself in a pickle when your Stihl pole saw’s chain needed replacing? How many times have you wished for a quick and easy solution to this common dilemma? Well, fret not, as we’ve got you covered!
Imagine effortlessly swapping out the old chain on your Stihl pole saw with a few simple steps, saving you time and frustration. With our guide, you’ll soon be back to smoothly cutting through branches and tackling your yard work like a pro.
Step 1: Gather the necessary tools
To start changing the chain on your Stihl pole saw, you’ll need to gather a few essential tools. Having everything ready will make the process smoother and quicker. Here’s what you’ll need:
- Flat-head screwdriver
- Socket wrench
- Replacement chain
- Bar and chain oil
- Work gloves
- Safety goggles
- Work surface
- Cleaning cloth
Make sure you have these tools on hand before you begin. Gather them all in one place to avoid interruptions during the chain replacement process.
Recommended Products

All-Season Non-Toxic & Eco-Friendly Performance: This biodegradable, non-toxic chainsaw oil provides reliable protection from -15°F to 500°F, perfect for both electric and gas saws. Its ultraclean formula minimizes environmental impact in 100% loss applications.

Step 2: Determine the correct chain size and type
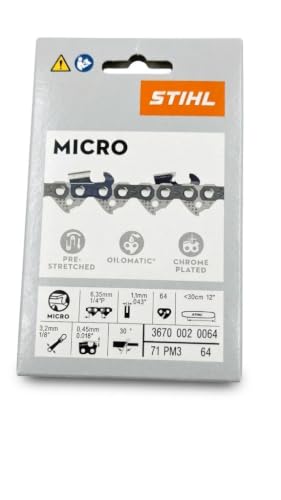
When replacing the chain on your Stihl pole saw, it’s crucial to determine the correct size and type for a seamless process. Here’s how you can do it:
- Check the Stihl manual or manufacturer’s website for specific chain size and type information.
- Look at the old chain to find engraved numbers and codes that indicate the size you need.
- Measure the chain’s length by counting the drive links or by measuring the guide bar to ensure accuracy.
- Consider the chain’s pitch, gauge, and number of drive links to match the replacement chain precisely.
Understanding the specific chain size and type required for your Stihl pole saw ensures a successful chain replacement process.
Recommended Products

SPECIFICATION: 4 packs 12 inch chainsaw chain replacement 1/4"LP Pitch .043" (1.1 mm)Gauge, 64 Drive Links, Please check the Size, chain gauge/the thickness of each drive link, Pitch and Drive Links of the chains before order.

CHAIN PARAMETERS: 5 Pack 10 Inch Pole Saw Chain, 1/4"LP Pitch, .043" (1.1 mm) Gauge, 56 Drive Links. Please check the bar length, Pitch, Gauge and Drive Links of the chain, or you can also send us your chainsaw/bar specifications.(Tips: Visit the FIFCHALL amazon store for more sizes Chainsaw Chains)

Specifications: 3 Pack 12 Inch, 1/4" Pitch, .043" Gauge, 64 Drive Links, Semi Chisel. This chainsaw chain met the kickback performance requirements of ANSl B175.1-2012 when tested according to the provisions of ANSl B175.1-2012. Low kickback chain meets the kickback performance requirements of CSA Standard Z62.3.
Step 3: Loosen the chain tension
When it comes to loosening the chain tension on your Stihl pole saw, it’s essential to follow the correct steps to ensure a smooth process. Here’s how you can do it effectively:
- Locate the tensioning screw: Before loosening the chain, you need to find the tensioning screw on your saw. It’s usually located near the guide bar, and you can use a screwdriver or the tool provided by Stihl to adjust it.
- Turn the screw counterclockwise: To loosen the chain tension, turn the tensioning screw counterclockwise. This will reduce the tension on the chain, making it easier to remove or adjust.
- Check the chain tension: After loosening the chain, it’s essential to check the tension to ensure it’s not too tight or too loose. A properly tensioned chain should move easily around the guide bar but should not sag or droop.
- Test the chain movement: Once you’ve adjusted the tension, give the chain a gentle tug to see how it moves. It should rotate smoothly without binding or coming off the guide bar.
- Secure the tensioning screw: Finally, once you’re satisfied with the chain tension, securely tighten the tensioning screw back in place to keep the chain properly tensioned during operation.
Loosening the chain tension correctly is crucial for the performance and safety of your Stihl pole saw, so make sure to follow these steps diligently.
Step 4: Remove the old chain
Now that you’ve adjusted the tension, it’s time to remove the old chain. Follow these steps:
- Disconnect the spark plug to ensure safety.
- Loosen the nuts on the sprocket cover using a wrench.
- Remove the sprocket cover carefully.
- Slide the bar to its furthest position.
- Take out the old chain by lifting it off the bar and sprocket.
Step 5: Install the new chain
When installing the new chain on your Stihl pole saw, follow these steps to ensure a smooth and hassle-free process:
- Positioning the Chain: Start by placing the new chain over the sprocket at the nose of the bar, ensuring the cutting edges face forward.
- Attaching the Bar: Fit the bar onto the mounting studs, making sure the chain fits into the groove around the bar.
- Securing the Nuts: Loosely secure the nuts on the sprocket cover to hold the bar in place.
- Adjusting Chain Tension: Use the tensioning screw to adjust the chain tension, ensuring it is snug against the bar but can still be pulled easily by hand.
- Testing the Chain: Carefully hand-rotate the chain to confirm it moves freely along the bar without binding.
- Securing the Cover: Once you are satisfied with the chain tension and movement, tighten the nuts on the sprocket cover securely.
- Reconnecting the Spark Plug: Reconnect the spark plug to restore power to your Stihl pole saw.
- Checking Operation: Before use, test the saw’s operation without cutting anything to ensure the chain runs smoothly.
| Chainsaw Maintenance Tips |
|---|
| Regularly inspect the chain for wear and tension. |
| Keep the chain properly lubricated for smooth operation. |
| Replace the chain if you notice excessive wear or damage. |
| Always wear appropriate safety gear when working with your pole saw. |
Step 6: Adjust the chain tension
Adjusting the chain tension is crucial for optimal performance of your Stihl pole saw. To do this, you’ll need to:
- Loosen the two bar nuts.
- Use a screwdriver to adjust the tension screw.
- Check the tension by pulling the chain at the bottom of the guide bar.
- Ensure the chain fits snugly but can still be pulled easily by hand.
Achieving the correct chain tension will prevent issues like kickback and premature wear, keeping you safe and your saw in top condition.
Step 7: Test the saw
Once you’ve adjusted the chain tension, it’s time to test your Stihl pole saw before getting back to work. This step ensures that everything is properly aligned and functioning as it should.
Here’s what you need to do to test your saw:
- Start your pole saw.
- Carefully observe the chain as it rotates.
- Ensure that the chain is running smoothly around the bar.
- Listen for any unusual noises that could indicate a problem.
- Check the chain tension once more to confirm it remains snug.
Congratulations! By testing your saw at this stage, you’re taking a crucial step in ensuring its optimal performance and your safety.
Conclusion
You’ve now mastered the art of changing the chain on your Stihl pole saw. By following the detailed steps provided, you can ensure your saw operates smoothly and efficiently. Remember to prioritize safety by wearing appropriate gear and performing regular maintenance checks. Proper chain tension is key to optimal performance, so be sure to adjust it accurately. After completing the process, test your saw to confirm everything is in working order. With these steps, you’ll be able to enjoy using your Stihl pole saw for various projects with confidence. Happy sawing!
Frequently Asked Questions
How do I properly install a new chain on my Stihl pole saw?
To install a new chain on your Stihl pole saw, follow these steps: position the chain correctly on the bar, secure the bar in place, adjust the chain tension as needed, and reconnect the spark plug.
What maintenance tips should I follow for my pole saw chain?
For your pole saw chain, ensure regular inspection for wear or damage, lubricate the chain to reduce friction, and replace it in a timely manner to avoid accidents and maintain performance.
Why is adjusting chain tension important for pole saws?
Adjusting chain tension is crucial for optimal performance as it ensures smooth chain rotation, prevents excessive wear, and reduces the risk of kickback during operation.
I’ve always been drawn to trees.As a kid, I spent most of my free time outside, climbing, exploring, and trying to figure out the names of the trees around me.That early curiosity eventually led me to study arboriculture and horticulture at Michigan State.Later, I completed a degree in forestry at the University of Michigan.
I’ve been working in tree care and education ever since.These days, I enjoy helping people learn more about the trees in their own backyards.How they grow, how to care for them, and why they matter.You don’t need to be an expert to appreciate trees.A little curiosity goes a long way.