Ever found yourself struggling with a dull chainsaw chain right in the middle of a project? It’s frustrating, isn’t it? But worry not, as we’ve got your back! In this article, we’ll walk you through the simple yet crucial process of changing the chain on your Husqvarna chainsaw.
Imagine effortlessly gliding through wood, the chainsaw cutting like a hot knife through butter. With a sharp chain, that’s the reality you can achieve. By mastering the art of chain replacement, you’ll not only save time and effort but also ensure a smoother, safer cutting experience every time.
Why Regular Chain Maintenance is Important
Regular maintenance of your Husqvarna chainsaw chain is crucial for optimal performance and longevity.
- Safety: A sharp chain reduces the risk of kickback and ensures precise cutting.
- Efficiency: A well-maintained chain allows for faster cutting and smooth operation.
- Cost-Effective: Regular maintenance extends the lifespan of your chain, saving you money in the long run.
Keep your chainsaw chain in top condition by cleaning, tensioning, and sharpening it regularly.
Tools Required for Changing the Chain
When changing the chain on your Husqvarna chainsaw, having the right tools at hand can make the process smoother and more efficient. Here are the essential tools you’ll need:
- Screwdriver: Used to remove the nuts that secure the cover over the chain and bar.
- Bar Tool: Helpful for adjusting the tension of the chain and removing the guide bar.
- Gloves: Protect your hands from sharp edges and debris while working on the chain.
- Safety Glasses: Shield your eyes from potential flying debris during the chain replacement.
- New Chain: Ensure you have the correct replacement chain that fits your Husqvarna chainsaw model.
Remember, having these tools ready before starting the chain replacement can save you time and prevent any interruptions during the process.
Recommended Products

Genuine Husqvarna replacement part.
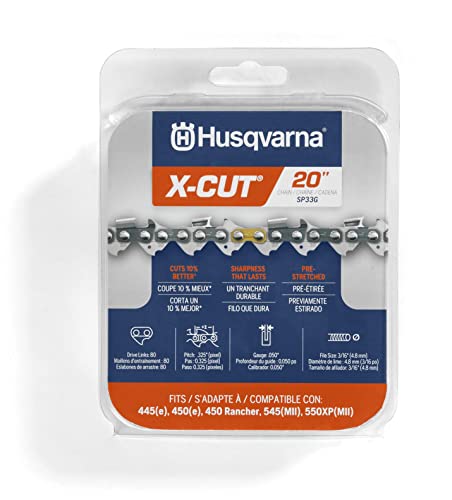
ONLY FITS: Husqvarna 450 Rancher, 445(E), 450(E), 545(MII) and 550XP(MII)

Includes one Chainsaw Sharpening Kit for filing chainsaw chains with a .325" Pixel Pitch, including the Husqvarna SP33G X-Cut chain
Steps to Remove the Old Chain
- Step 1: Ensure the chainsaw is turned off and cool before you start.
- Step 2: Locate the chain brake positioned to the right of the bar.
- Step 3: Disengage the chain brake by pulling it towards the front handle.
- Step 4: Using a screwdriver, loosen the nuts on the side cover.
- Step 5: Once the nuts are loose, remove the side cover and bar nuts.
- Step 6: Slide the guide bar out from the saw body.
- Step 7: Carefully loop the chain off the guide bar and around the clutch drum.
- Step 8: Your old chain is now successfully removed!
Recommended Products

Fit models: 044 044 W 044 R 044 C 046 046 W 046 C 046 Magnum 046 Magnum R 046 WVH 046 Magnum BR, 066 066 W 066 M 066 MR 066 Arctic 066 BR MS 440 MS 440-D MS 440-N MS 440-W MS 440-Z and etc.

Size: handle length: 6.3 inches /16 cm, socket wrench: 19mm/13mm, 4.3oz.

Durable: Made of high quality carbon steel, comes with carbon steel chain breaker punch bars for maximum durability and strength.
Installing the New Chain Correctly
When installing the new chain on your Husqvarna chainsaw, attention to detail is key to ensure it functions properly and safely. Here’s how you can do it correctly:
- Step 1: Thread the Chain: Begin by threading the chain onto the clutch drum, making sure the cutting edges of the chain face towards the front of the saw.
- Step 2: Position the Guide Bar: Slide the guide bar back into place, ensuring the adjustment pin aligns with the hole in the bar. Once in position, attach the bar nuts but keep them loose for now.
- Step 3: Tension the Chain: Use the tensioning screw to tighten the chain until it fits snugly around the guide bar. Ensure there’s a slight tension when pulling the chain from the bottom side of the guide bar.
- Step 4: Secure the Nuts: Once the chain is tensioned correctly, tighten the bar nuts using a wrench. Make sure they are securely fastened, but avoid over-tightening, as it may affect the chain’s movement.
- Step 5: Test the Chain: Before using the chainsaw, manually rotate the chain around the guide bar to ensure it moves freely without binding. Additionally, check the tension again to guarantee it’s within the manufacturer’s recommendations.
By following these steps accurately, you can effectively install the new chain on your Husqvarna chainsaw, enabling you to get back to tackling your yard work with confidence.
Recommended Products

Chain Specifications: 4 Pack 18 Inch Chainsaw Chain, .325" Pitch, .050'' Gauge, 72 Drive Links.

CHAIN PARAMETERS: 4 Pack 20 Inch Chainsaw Chains, .325" Pitch .050" Gauge 80 Drive Links. Please check the bar length, Pitch, Gauge and Drive Links of the chain, or you can also send us your chainsaw/bar specifications.(Tips: Visit the FIFCHALL amazon store for more sizes Chainsaw Chains)

Includes one Husqvarna S83G 20 Inch Chainsaw Chain replacement compatible with Husqvarna 460 Rancher and Husqvarna 455 Rancher models
Testing the New Chain
Now that you’ve installed the new chain on your Husqvarna chainsaw, it’s essential to test it thoroughly before putting it to work. Here’s how to ensure everything is in proper working order:
- Safety First: Put on your safety gear, including gloves and goggles.
- Check the Tension: Ensure the chain tension is correct by gently pulling on the chain at the bottom of the guide bar. It should move freely and make a clicking sound.
- Rotate the Chain: Carefully rotate the chain around the guide bar to check for any snags or misalignments.
- Inspect the Bar: Look for any signs of wear or damage on the guide bar that could affect the chain’s performance.
- Test Run: Start your chainsaw and run it at a low speed to see how smoothly the chain moves around the bar.
- Cutting Test: Make a few test cuts on a scrap piece of wood to see how the new chain performs under load.
- Monitor Oil Flow: Ensure the chain oiler is properly lubricating the chain during operation.
By following these steps, you can ensure that your new chain is installed correctly and ready for use without any hiccups.
Conclusion
You now have all the necessary steps to successfully change the chain on your Husqvarna chainsaw. Remember to pay close attention to details for a safe and effective installation. By following the guide provided, testing the new chain thoroughly, and ensuring proper functioning, you can confidently use your chainsaw without any concerns. Happy sawing!
Frequently Asked Questions
How do I properly install a new chain on a Husqvarna chainsaw?
To install a new chain on a Husqvarna chainsaw, first, loosen the chain tension, remove the guide bar, replace the chain, ensure proper tension, and reassemble the guide bar. Test by rotating the chain and checking for proper tension before conducting a test run.
Why is it important to test a new chain thoroughly after installation?
Testing the new chain thoroughly after installation is important to ensure it is correctly installed and safe to use. By checking tension, rotating the chain, inspecting the guide bar, conducting a test run, making test cuts on wood, and monitoring oil flow, you can avoid potential issues and ensure the chain functions properly.
I’ve always been drawn to trees.As a kid, I spent most of my free time outside, climbing, exploring, and trying to figure out the names of the trees around me.That early curiosity eventually led me to study arboriculture and horticulture at Michigan State.Later, I completed a degree in forestry at the University of Michigan.
I’ve been working in tree care and education ever since.These days, I enjoy helping people learn more about the trees in their own backyards.How they grow, how to care for them, and why they matter.You don’t need to be an expert to appreciate trees.A little curiosity goes a long way.