Ever found yourself staring at a box of parts, wondering how it’ll magically transform into a fully functioning tree pruner? You’re not alone. Assembling a timerline tree pruner can feel like decoding a complex puzzle. But fear not, because in this article, we’ve got your back! By the end of it, you’ll be a pro at putting together your tree pruner, thanks to the power of YouTube tutorials.
Understanding the Parts of a Timerline Tree Pruner
When assembling your tree pruner, it’s crucial to understand the different parts involved. Here’s a breakdown for you:
- Pole: The long, extendable pole that allows you to reach higher branches without the need for a ladder.
- Pruning Head: This section holds the cutting blade and is attached to the end of the pole.
- Cutting Blade: The sharp blade responsible for trimming branches effectively.
- Pole Locks: Mechanisms that secure the pole at your desired length, providing stability while pruning.
- Rope and Pulley System: Enables you to control the cutting blade by pulling and releasing the rope.
Getting to know each part of your tree pruner ensures a smooth assembly process and successful pruning session.
Gathering the Necessary Tools for Assembly
To start assembling your timeline tree pruner, you’ll need to gather a few essential tools. Make sure you have the following items on hand:
- Pole Sections: These are the long parts that will be connected to reach high branches.
- Pruning Head: The part where the cutting blade is attached for trimming branches.
- Cutting Blade: This blade is crucial for pruning branches effectively.
- Pole Locks: These locks secure the pole sections together for stability.
- Rope and Pulley System: Helps control the cutting mechanism at the end of the pole.
For a smooth assembly process, ensure you have all these tools ready. Let’s move on to the next step in putting together your timeline tree pruner.
Following Step-by-Step YouTube Tutorial
If you’re feeling unsure about assembling your timeline tree pruner properly, fear not – the wonders of the internet, especially platforms like YouTube, are here to guide you through the process step by step.
Once you’ve gathered all your tools, head over to YouTube and search for “Timeline Tree Pruner Assembly Tutorial”. It’s like having a personal instructor right in your living room!
Watching a tutorial can make a world of difference. Instead of deciphering confusing manuals, you can visually see each step in action. Plus, you can pause, rewind, and watch as many times as you need to ensure you nail the assembly process.
Troubleshooting Common Assembly Issues
Facing challenges while assembling your timeline tree pruner is completely normal. Here are some common issues and ways to address them:
- Misaligned Parts:
If you find that parts don’t fit together as they should, double-check the instructions and ensure that you’re aligning them correctly. - Stuck Mechanism:
If a mechanism seems stuck or isn’t operating smoothly, try applying some lubricant according to the manufacturer’s recommendations. - Missing Parts:
In case you’re missing a crucial component, reach out to the manufacturer for replacement parts. Avoid using improvised items as substitutes. - Uneven Cuts:
If you’re noticing uneven cuts after assembling the pruner, make sure the blades are sharp and properly aligned. - Difficulty Extending the Tool:
If you’re having trouble extending the pruner to its full length, check for any obstructions in the extension mechanism.
Remember, taking your time and following the instructions carefully can help you avoid many common assembly issues.
Keep these tips in mind as you tackle the assembly process with your timeline tree pruner.
Recommended Products

IDEAL BRANCH TRIMMER: Linear double-pulley system for easy action that easily cut branches up to 1.25 inches.

Sharp Mn Steel Blade for Fast & Clean Cuts: This pole saw uses a sharp three-sided edge with a double-sided barb design to grip branches securely and cut smoothly from multiple angles. The Mn steel blade is durable, rust-resistant, and lightweight, delivering fast, clean cuts. Precision-ground teeth discharge sawdust to avoid clogging, while the soft-wrapped handle ensures comfort during long use and can be replaced easily when needed.

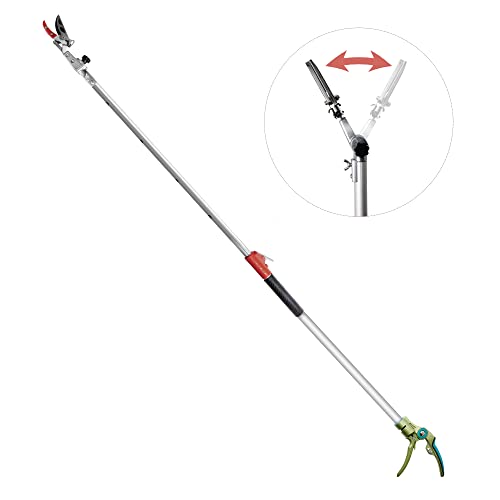
Extra-Long Adjustable Reach: Our tree trimmers is engineered with a telescoping design, offering an extensive adjustable range that extends from 5 to 20 feet. This length allows you to effortlessly access and trim high branches in trees with our pole saws for tree trimming, eliminating the need for a ladder and ensuring your safety while working at elevated heights. Whether it's a towering oak or a tall palm, our tree pruner gives you the flexibility to reach every branch with ease
Testing the Assembled Timerline Tree Pruner
To ensure your Timerline tree pruner is ready for action, thorough testing is crucial. Here are some steps to follow:
- Blade Check: Start by inspecting the blade alignment and sharpness to guarantee clean and precise cuts.
- Cutting Trial: Test the pruner on a few branches of varying thickness to assess its cutting efficiency.
- Extension Verification: Extend the pruner fully to verify smooth and uninterrupted functionality.
- Hinged Mechanism Test: Open and close the pruner multiple times to check for any hitches or resistance.
- Safety Assessment: Ensure all safety features, such as the lock mechanism, are in place and functional.
Remember, a well-assembled and properly tested Timerline tree pruner will make your gardening tasks smoother and more efficient.
| Facts | Data |
|---|---|
| Blade Alignment | Double check |
| Cutting Efficiency | Varying thickness |
| Extension Functionality | Fully extend |
| Hinged Mechanism | Smooth operation |
| Safety Features | Lock mechanism |
Recommended Products
[Helpful Garden Tool] GARTOL brings to you a lightweight and extendable pruning tool to reach out to the least approachable arenas of your garden. You can conveniently get across other plants to remove the fastgrowing brambles and sting nettles without getting scratched or hurt. For gardening lovers, the telescopic pruner cutter head can can be rotated which resolves mobility issues and gives you the pleasure of trimming your garden without bending down or using a ladder to climb and cut them.

HIGH-PERFORMANCE REPLACEMENT SAW BLADE: Designed to replace and restore cutting efficiency for Fiskars Lightweight Extendable Tree Pruner and Chain-Drive Extendable Tree Pruner models.

Maximum cutting thickness: 2-1/2 in.
Conclusion
You’ve now learned the importance of testing your Timerline tree pruner before using it. By following the suggested steps to check alignment, sharpness, cutting efficiency, extension functionality, hinged mechanism, and safety features, you ensure a smooth gardening experience. Remember, a well-assembled and tested pruner is key to maximizing your gardening efficiency. Happy pruning!
Frequently Asked Questions
What are the key steps to test the assembled Timerline tree pruner?
The key steps include checking blade alignment and sharpness, testing cutting efficiency on different branches, verifying smooth extension functionality, assessing hinged mechanism operation, and ensuring the lock mechanism’s safety features.
Why is it important to test an assembled pruner?
Testing ensures the pruner is ready for use, enhances gardening efficiency, and helps identify any issues or defects that need to be addressed before operation.
What specific details should be verified during the testing process?
Details such as blade alignment, sharpness, cutting efficiency, extension functionality, hinged mechanism operation, and safety features like the lock should be thoroughly examined.
I’ve always been drawn to trees.As a kid, I spent most of my free time outside, climbing, exploring, and trying to figure out the names of the trees around me.That early curiosity eventually led me to study arboriculture and horticulture at Michigan State.Later, I completed a degree in forestry at the University of Michigan.
I’ve been working in tree care and education ever since.These days, I enjoy helping people learn more about the trees in their own backyards.How they grow, how to care for them, and why they matter.You don’t need to be an expert to appreciate trees.A little curiosity goes a long way.