
I’ve spent a lot of time at my pottery wheel trying to get more consistent with my throwing.
Some of the best practice has come from simple setups that target specific skills like centering and pulling.
I gathered these ideas because they helped me when I felt like my progress had stalled.
They are straightforward but they keep me improving without overcomplicating things.
Practice Pulling Even Walls on a Compact Cylinder
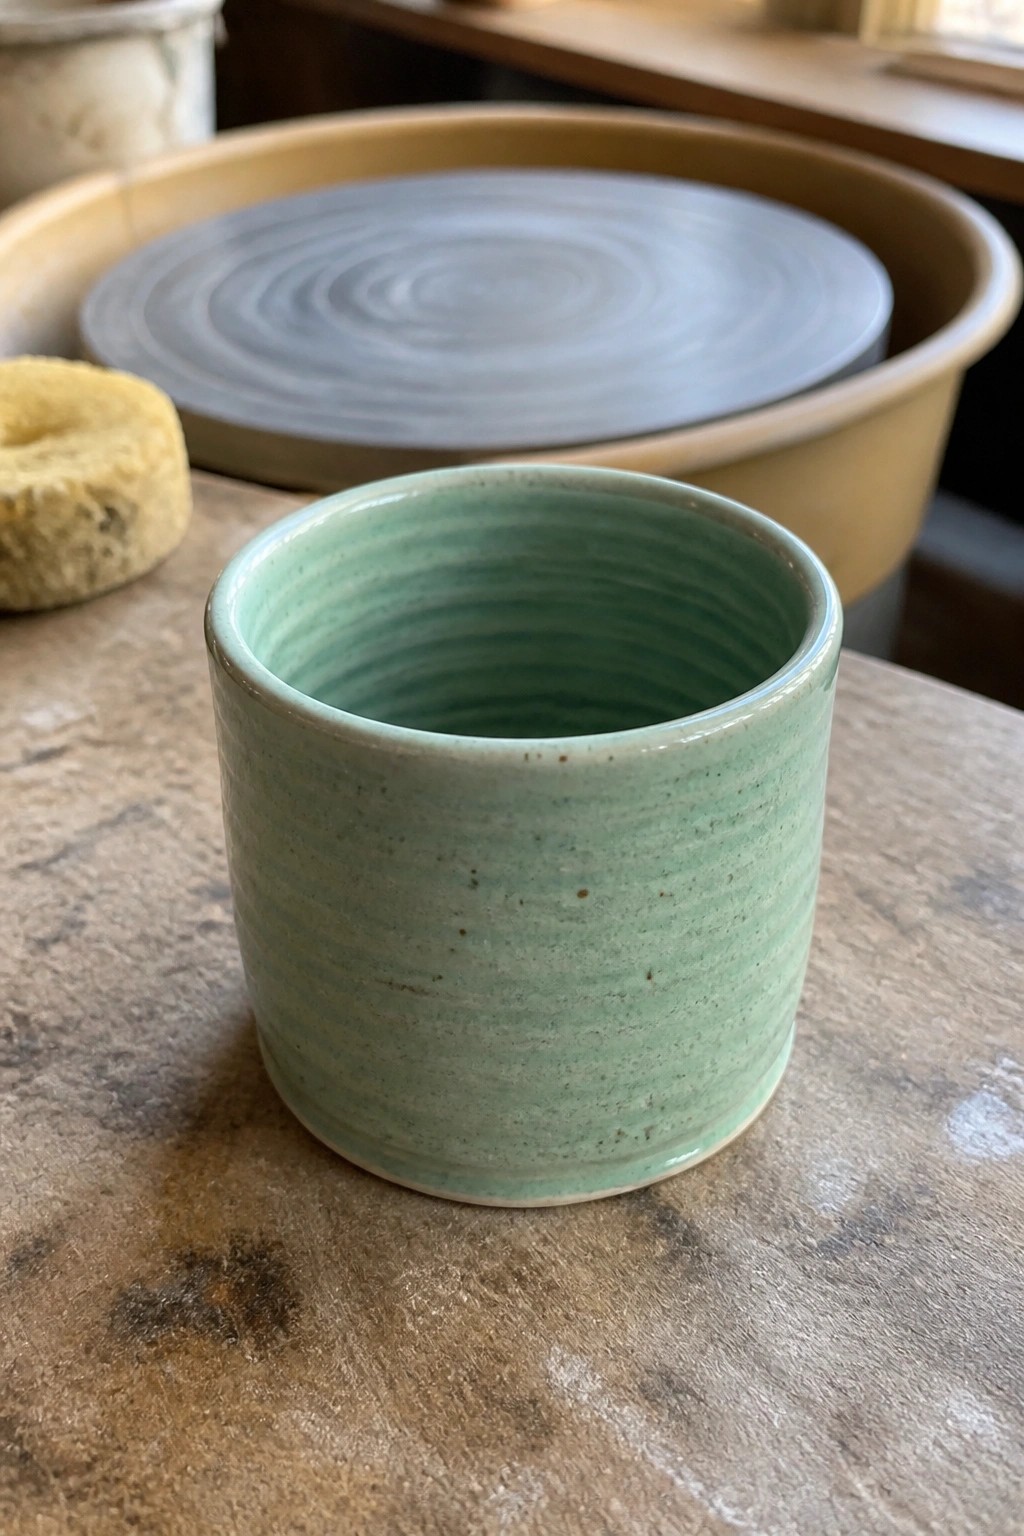
A small thrown cylinder gives you a direct way to work on centering and consistent wall thickness. The straight sides and visible ridges make it easy to see where the clay thinned or thickened during each pull. This shape keeps the project focused on core throwing skills rather than added details like handles or trimming.
What makes this idea useful is how quickly you can repeat it in one session to compare results. The compact size works well as a desk cup, small planter, or bathroom holder, and you can change the rim or foot on the next one without starting over. The same cylinder form also translates easily into a taller tumbler once your walls feel steady.
Wide Serving Bowl with Contrasting Rim Glaze

A wide, shallow bowl thrown on the wheel works well as a serving piece for salads, sides, or snacks. The design pairs a warm terracotta rim with a creamy white interior where the throwing rings remain visible, creating a simple contrast that emphasizes the form. This keeps the focus on the wheel marks and the clean transition between the two glazes without added decoration.
What makes this idea useful is how the open shape fits easily on a table without crowding other dishes. You could adapt the rim color to coordinate with existing kitchenware or switch the interior to a matte glaze for a softer look. In a kitchen, this kind of bowl stores well on open shelves where the color split shows clearly. For a gift, the same proportions work at a smaller scale for individual bowls.
Smiling Tomato Mug
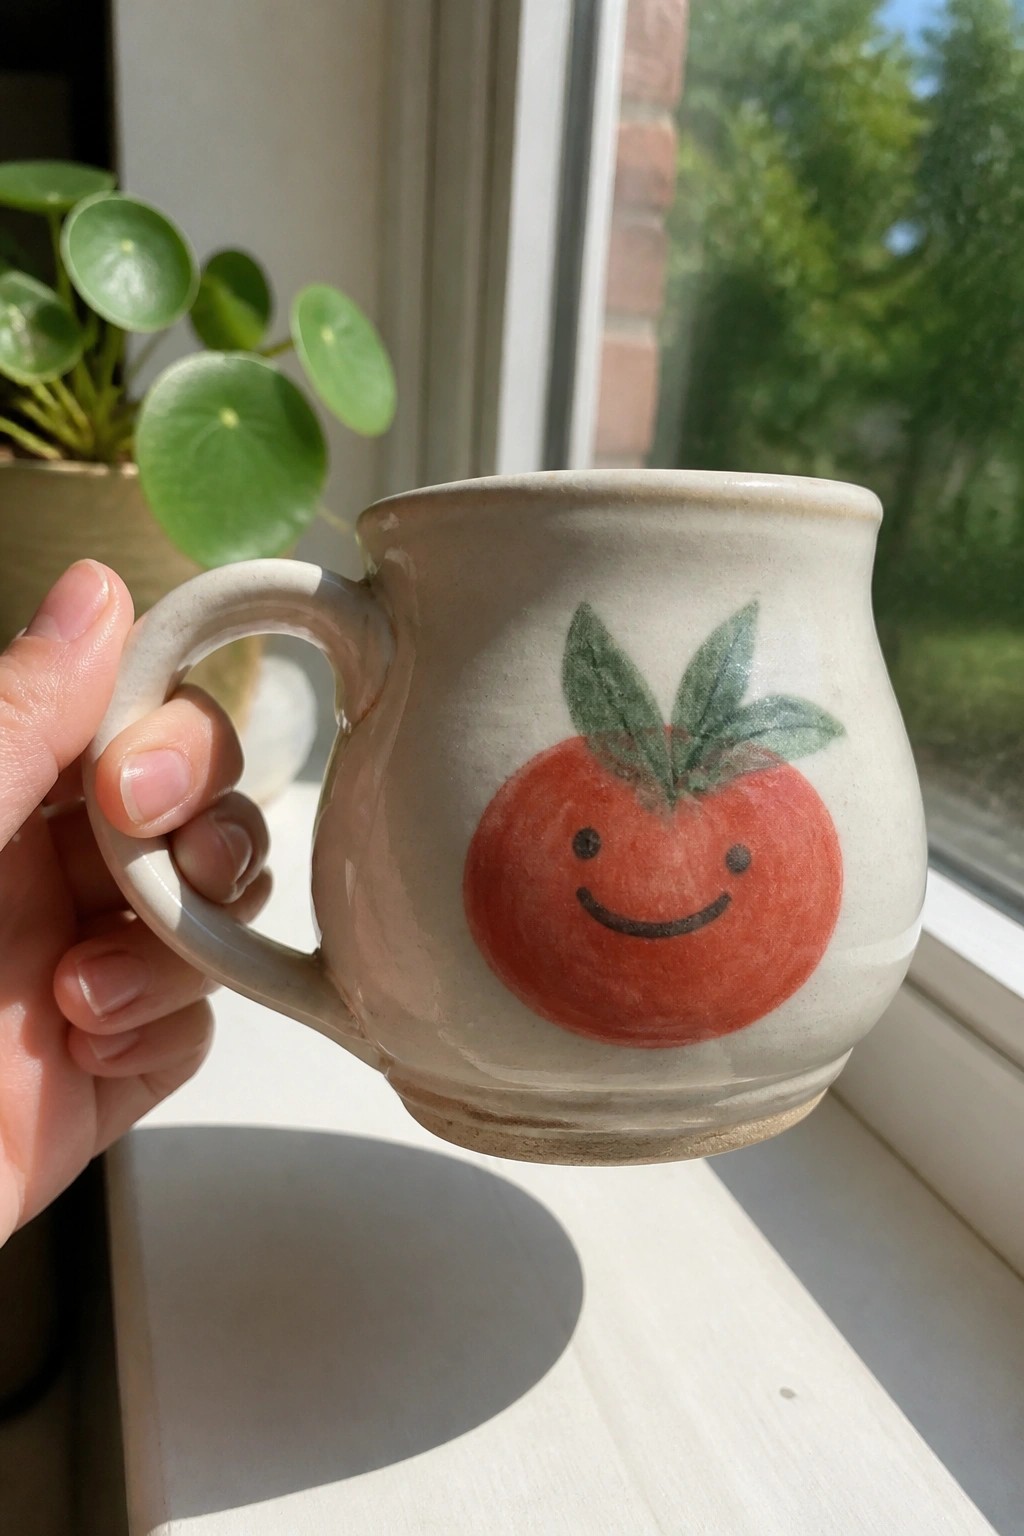
A small thrown mug uses a light matte glaze as the base for a centered tomato motif painted in red and green. Two simple leaves sit at the top of the tomato while black dots and a curved line create the face. The round body of the mug gives the painted element a natural place to sit without extra carving or sculpting.
What makes this idea useful is how the basic cylinder shape already supports a circular motif like the tomato. You could swap the tomato for an apple or lemon and keep the same painting steps on any small mug or cup you throw. For everyday use the size fits well in a kitchen cabinet or on a breakfast tray. The painted detail also transfers easily to a matching set of two or three mugs if you want to repeat the design.
Thrown Bottle Vase with Drip Glaze

A bottle vase thrown on the wheel starts as a tall cylinder that gets narrowed at the neck and gently shaped into a rounded shoulder. The form here uses a warm tan glaze over the body with a darker brown layer applied near the rim so it runs down naturally during firing. This keeps the focus on clean wheel work and simple glaze movement rather than added texture or carving.
What makes this idea useful is how the narrow neck and tall proportions help practice collaring and even wall thickness. The shape works well as a single-stem vase on a shelf or windowsill where the glaze runs become the main detail. You could shorten the body for a small bud vase or swap the glaze colors to test different drip patterns on the same form.
Lidded Storage Jar
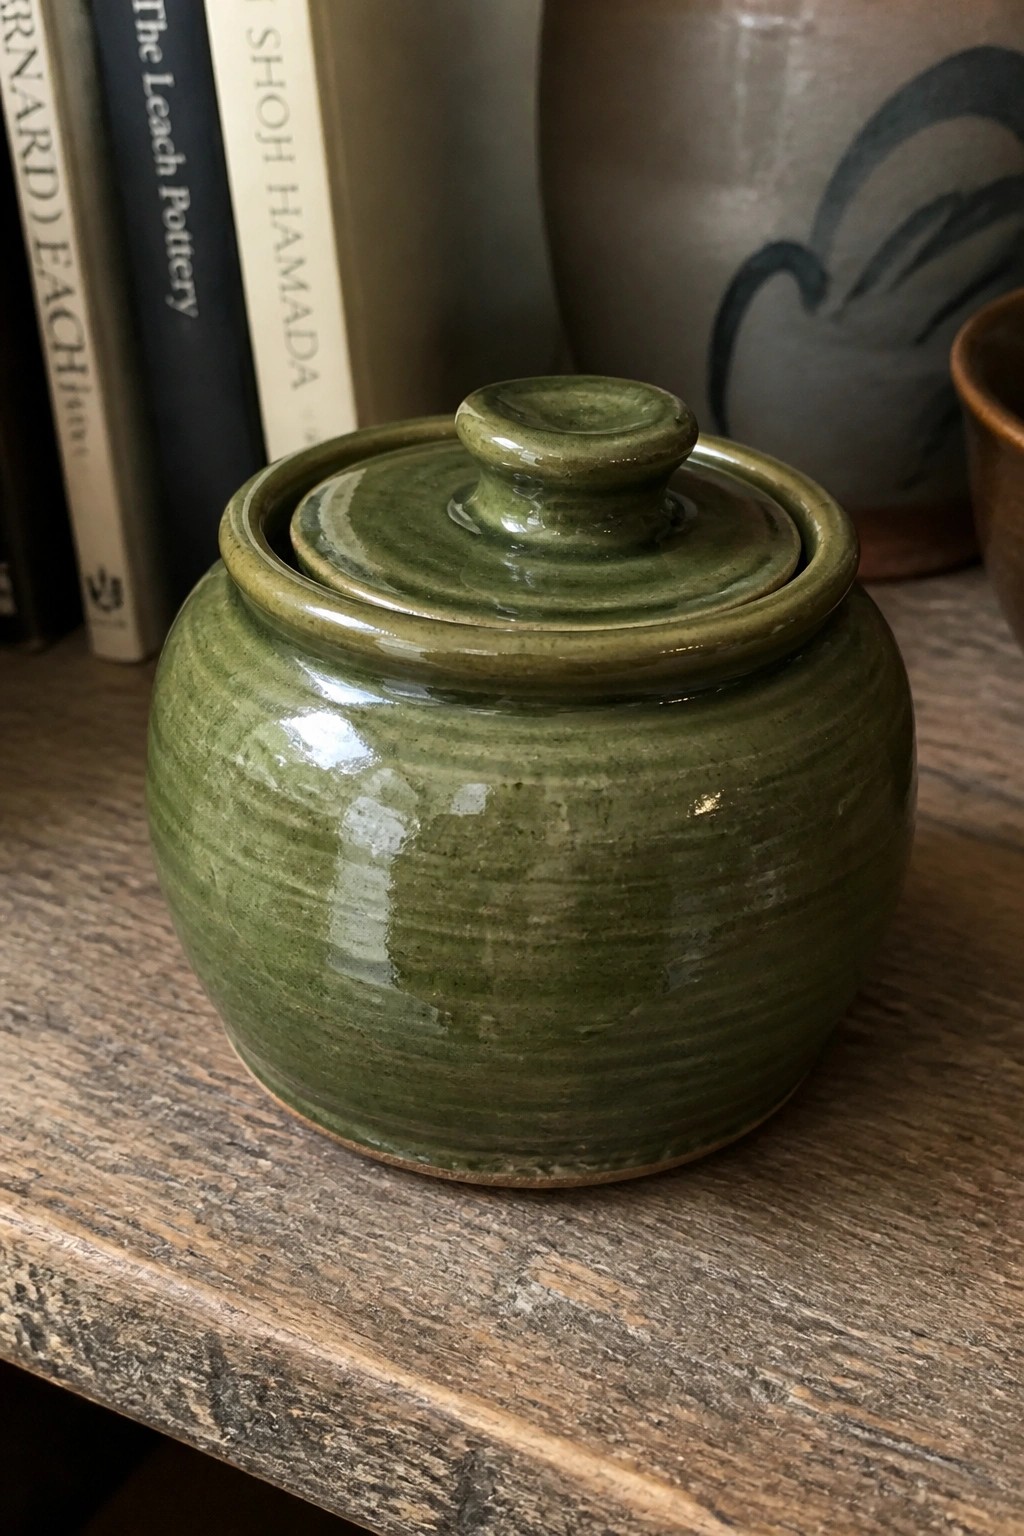
A small lidded jar works well as a basic throwing exercise because it requires centering, pulling even walls, and throwing a lid that sits flush. The rounded body shows clear throwing lines that add subtle texture, while the simple knob on the lid keeps the form functional and easy to lift. A single-color glaze like this green one lets the shape stand out without extra decoration. This type of project falls into the kitchen storage or small container category.
The shape does a lot of the work here because the round profile throws quickly once you have the basic cylinder down. Try scaling it up or down depending on whether you want a spice jar, tea caddy, or cotton ball holder. A piece like this adapts easily to different glazes or a matte finish if you want less shine. For a gift, something like this stores well on a shelf and does not take much clay or kiln space.
Bowl with Running Blue Glaze

A wheel-thrown bowl finished with a white glaze and blue that runs down the exterior creates a simple but bold pattern. The blue starts near the rim and streaks downward, bleeding into the white for an organic effect. The foot ring is cleanly trimmed with visible throwing lines on the base, showing the form was centered and pulled evenly on the wheel. This approach fits the category of functional bowls meant for everyday use or display.
What makes this idea useful is how the glaze application builds directly on basic throwing skills without needing extra tools. The shape works well as a mixing bowl or serving piece in a kitchen, and the running blue can be adapted by testing different thicknesses or adding a second color at the rim. For a gift, the same form could be scaled down into smaller dessert bowls while keeping the white and blue combination. The result stands out on Pinterest because the contrast between the clean foot and the fluid glaze lines gives it a clear handmade look.
Thrown Creamer Pitcher with Spout
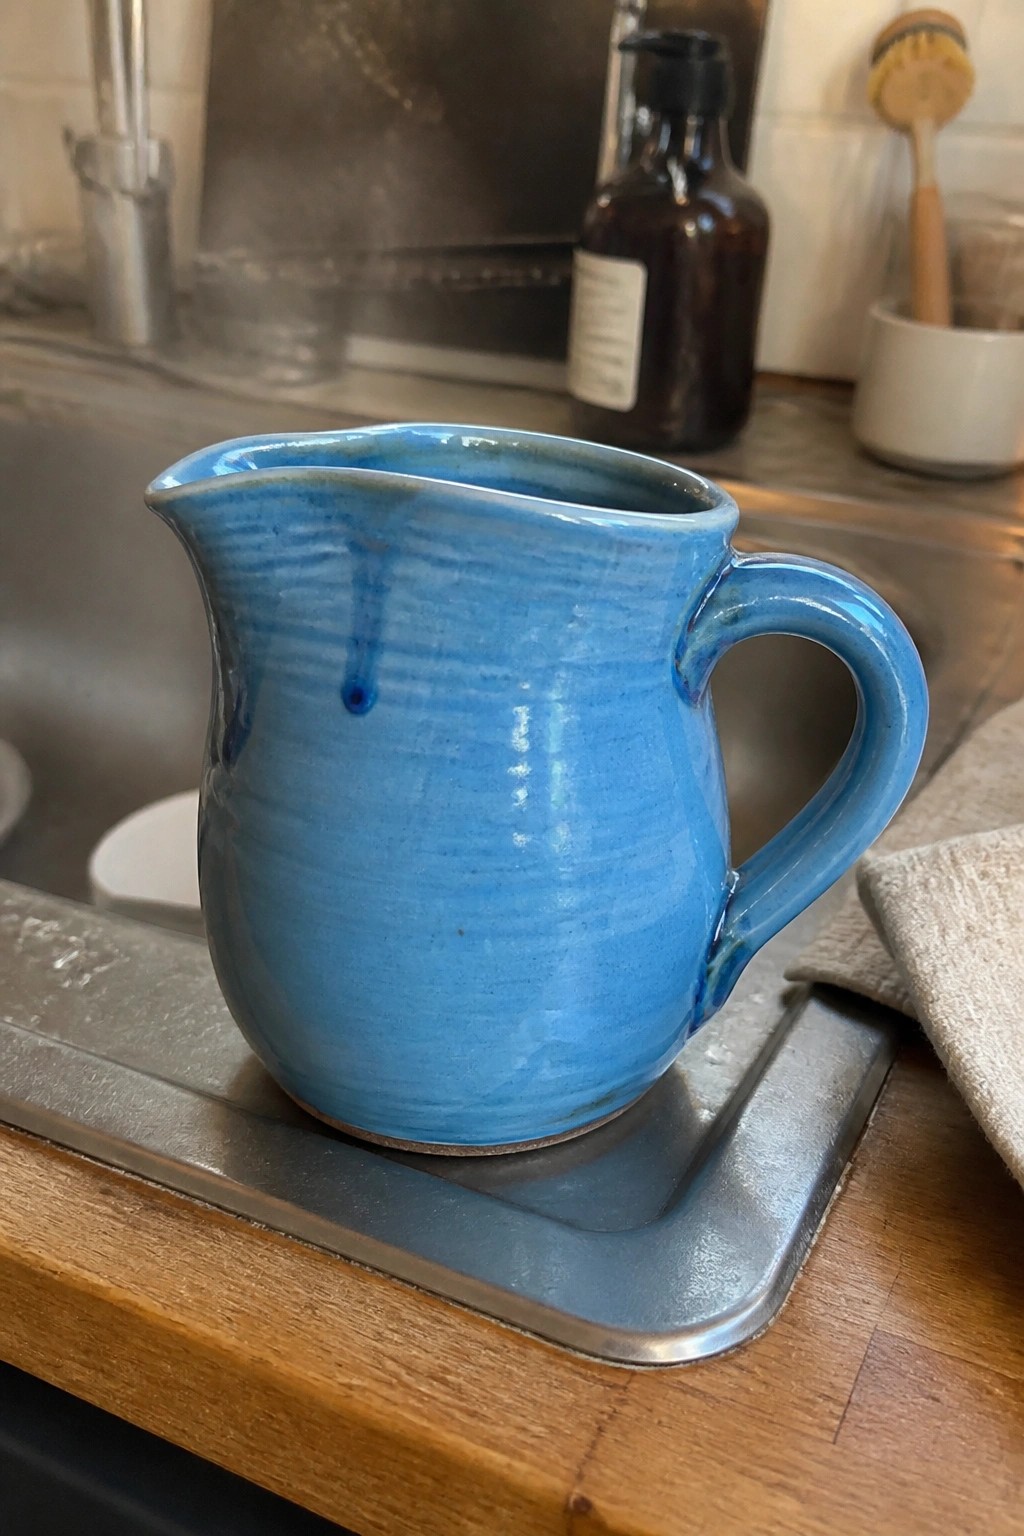
A wheel-thrown creamer pitcher gives solid practice in centering, wall pulling, and shaping a functional pour spout. The form stays compact with a rounded body, narrow base, and a simple pulled handle attached after trimming. The blue glaze highlights the throwing lines while the darker drip accents add contrast without extra decoration. This type of kitchen piece builds core skills in symmetry and handle placement that transfer directly to larger pitchers or vases.
What makes this idea useful is the small size, which lets you repeat the shape quickly to refine your spout pinching and handle joining. The same proportions work well scaled up for a milk jug or reworked into a narrow-necked vase. You can swap the solid blue for any food-safe glaze and still keep the clean lines that photograph clearly for sharing. In a kitchen setting it handles daily use without needing extra surface details.
Two-Tone Speckled Mugs

These mugs feature a simple two-tone glaze treatment where the lower half keeps a speckled cream surface and the upper half takes a solid color. The looped handles match the upper glaze for a clean connection between parts. The shape stays compact with straight walls and a slight foot, which helps the color split read clearly without extra decoration.
What makes this idea useful is how the split glaze can be repeated across a set while varying only the top color for quick variety. The form works well for everyday drinking since the proportions stay balanced and the handle sits comfortably in the hand. You could adapt the same color break to taller tumblers or shorter bowls by adjusting the wheel-thrown height and keeping the lower band unglazed or lightly speckled.
Cat Face Planter

A small ceramic planter formed as a cat face gives you a compact way to hold one succulent or small plant. The rounded body acts as the pot while two ears attach at the top and a simple face gets added with pinched or carved details for eyes, nose, and whiskers. A single light green glaze covers the surface and keeps the focus on the sculpted features rather than added color. This approach fits the planter category and works best at a scale that sits easily on a shelf or windowsill.
The shape does a lot of the work here because the ears and face turn an ordinary pot into something that reads clearly as a cat without needing extra pieces. You can adapt the same base form for other animals by swapping the ear style or face lines, or drop the face entirely and keep just the ear shape for a quicker version. In a kitchen or plant corner this size leaves room for other pots nearby while still holding enough soil for a small plant. For a gift the idea scales easily to different glaze colors or a slightly larger body if you want to fit a bigger plant.
Wheel-Thrown Tea Light Holder with Rim Accents

A wheel-thrown tea light holder starts with a small, centered disk that is opened just enough to create a shallow well for a standard tea light. The wide rim stays thick enough to support added hand-built details such as pinched lobes or leaf shapes around the edge. A single flowing glaze in a blue-green tone settles into the throwing ridges and gives the surface a streaked, textured look that highlights the wheel work.
What makes this idea useful is that the same basic form can be thrown in batches and then varied with different rim treatments or glaze colors. It fits on a side table, mantel, or desk without taking up much space and works as a quick gift once the candle is added. You could simplify the rim to a plain edge or scale the whole piece up slightly to hold a larger votive. The compact size also makes it a good project for practicing even walls and controlled glazing on a small form.
Curved Spoon Rest for Kitchen Use

A spoon rest built as a long curved form gives you a dedicated spot to set down cooking utensils during a meal. The shape narrows at one end and opens into a shallow well at the other so a spoon handle stays in place without sliding. A deep blue glaze that pools slightly in the center creates contrast against the lighter clay rim while the notched edge adds a simple finishing detail.
What makes this idea useful is how little counter space it takes while still catching drips near the stove. The same curved profile could be shortened into a single-spoon version or lengthened for larger utensils. In a kitchen, this kind of piece keeps wooden spoons and ladles off the surface without needing extra storage. You could also try the shape in a matte glaze if you want less shine on a busy countertop.
Scalloped Ring Dish with Center Post
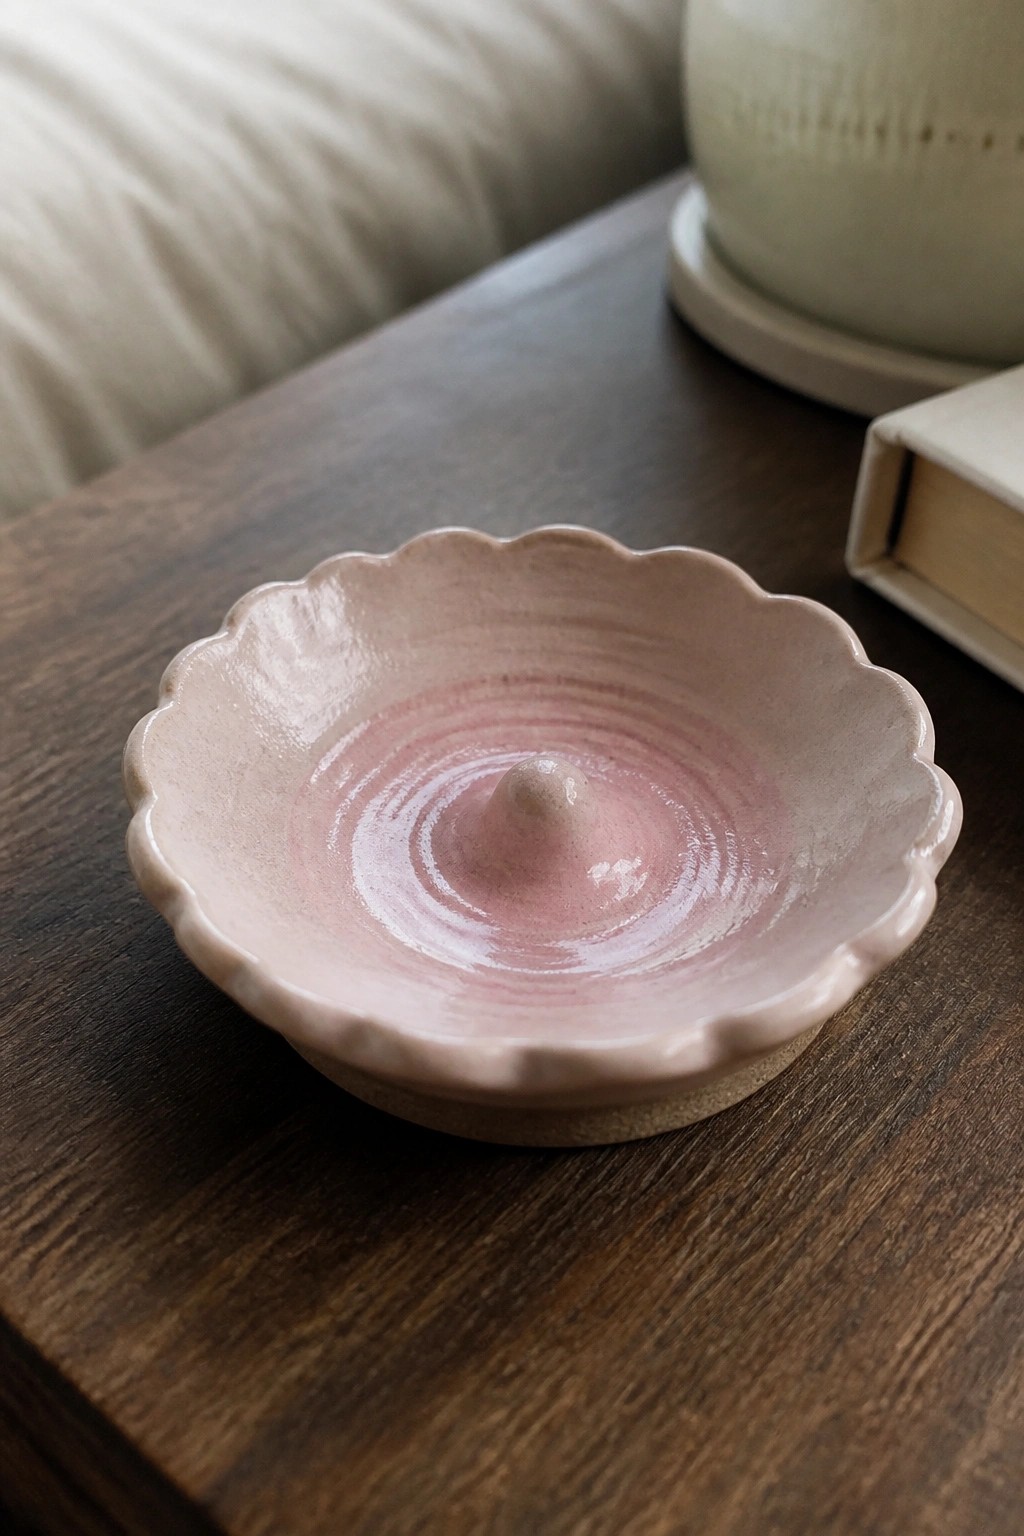
A wheel-thrown ring dish gives you a compact form that holds jewelry upright when you add a small centered post after the initial shaping. The shallow bowl with a scalloped rim keeps the piece simple while the raised knob in the middle prevents rings from sliding around. Using one glaze color lets the throwing lines remain visible and shows the texture of the clay without extra surface work.
What makes this idea useful is how the small scale turns a basic plate shape into a desk or dresser piece that takes up little space. You can adapt the scalloped edge with a template during trimming or leave the rim plain for faster production. The same post and shallow bowl can be reworked into a soap dish or small candle holder by adjusting the diameter slightly.
Joined Double Bowls for Spices or Dips
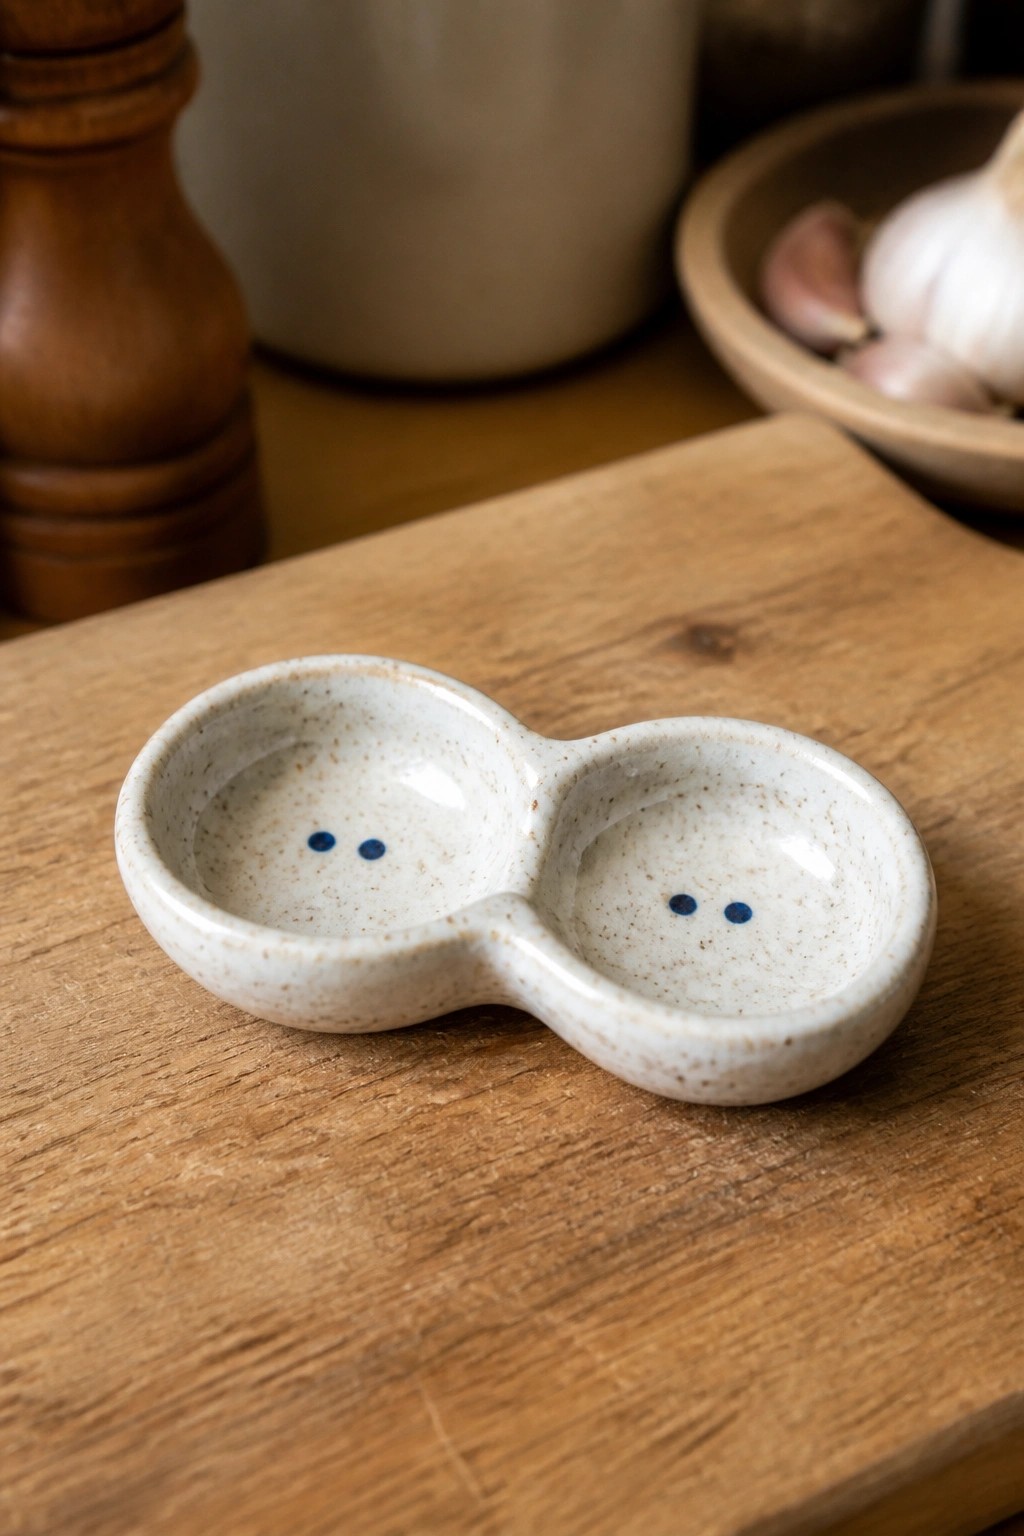
A double bowl formed by joining two small thrown rounds creates a compact kitchen piece that keeps two separate portions side by side. The speckled off-white glaze covers the entire form while small blue dots are painted inside each compartment for a simple accent. This shape works well for salt and pepper, spice blends, or small amounts of sauce without taking up much counter space.
What makes this idea useful is how the connected form lets you serve two items from one object instead of reaching for multiple dishes. You could scale the same joined shape larger for olive oil and vinegar or make a shallower version for ring storage. The painted dots take little time with underglaze and give the piece a clear focal point when shared online.
Yarn Bowl with Rim Notch for Guided Yarn
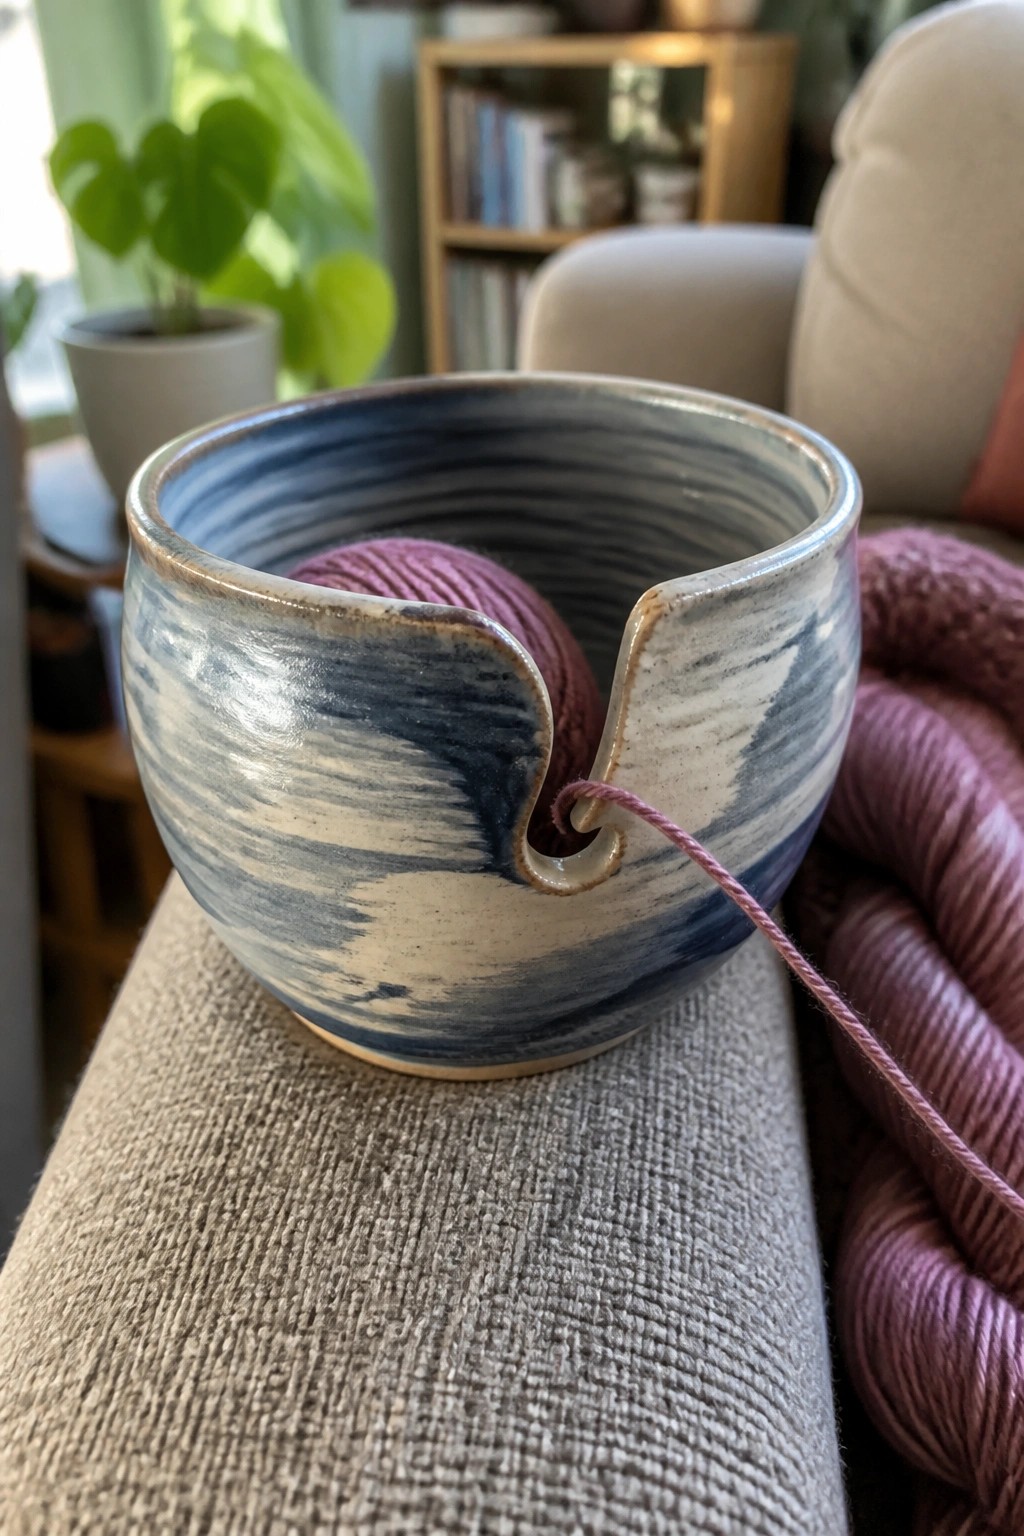
A yarn bowl thrown on the wheel and finished with a cut notch in the rim keeps a ball of yarn contained while feeding the strand out steadily. The rounded form prevents the yarn from rolling away, and the notch acts as a simple guide that reduces tangling during knitting or crocheting. The blue and white streaked glaze highlights the throwing lines without competing with the functional cutout.
What makes this idea useful is that it adds one practical feature to a standard bowl shape that knitters actually reach for. You can vary the notch width or placement on future versions to suit thicker yarns or multiple strands. This kind of piece works especially well as a quick market item or a gift that fits on a side table next to a project bag. The small scale also lets you test different rim cuts without committing to a large form.
Oval Tray with Integrated Dip Well
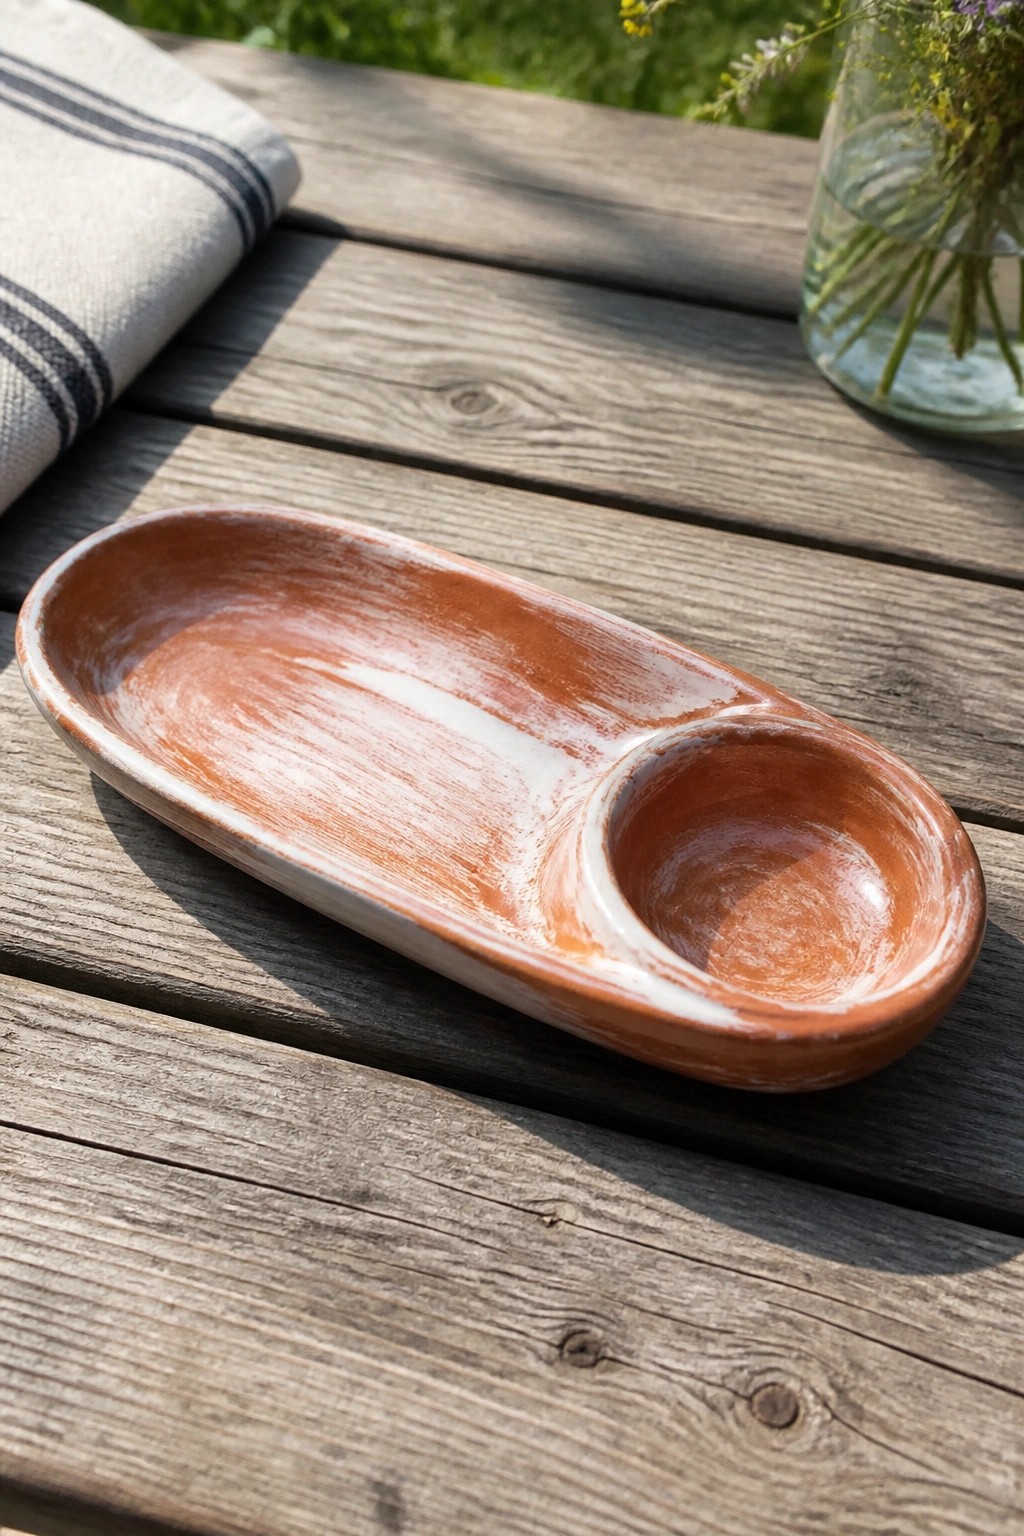
A thrown oval tray with a small round well formed at one end creates a simple divided serving piece. The main flat area holds crackers, bread, or sliced vegetables while the well keeps a dip or sauce contained. The surface shows a terracotta body with white slip brushed on unevenly before firing, which leaves the clay color visible in places and gives the piece a casual kitchen look.
What makes this idea useful is how the long oval shape takes up little table space yet still offers two functions in one object. You could rework the same form into a sushi board by making the well narrower or turn it into a cheese server by widening the flat section. In a kitchen this kind of piece works well for everyday snacks or small gatherings because it needs no extra bowls. The slip-brushed finish also photographs cleanly for Pinterest without requiring complex glazing.
Throwing a Set of Small Vases With Different Profiles
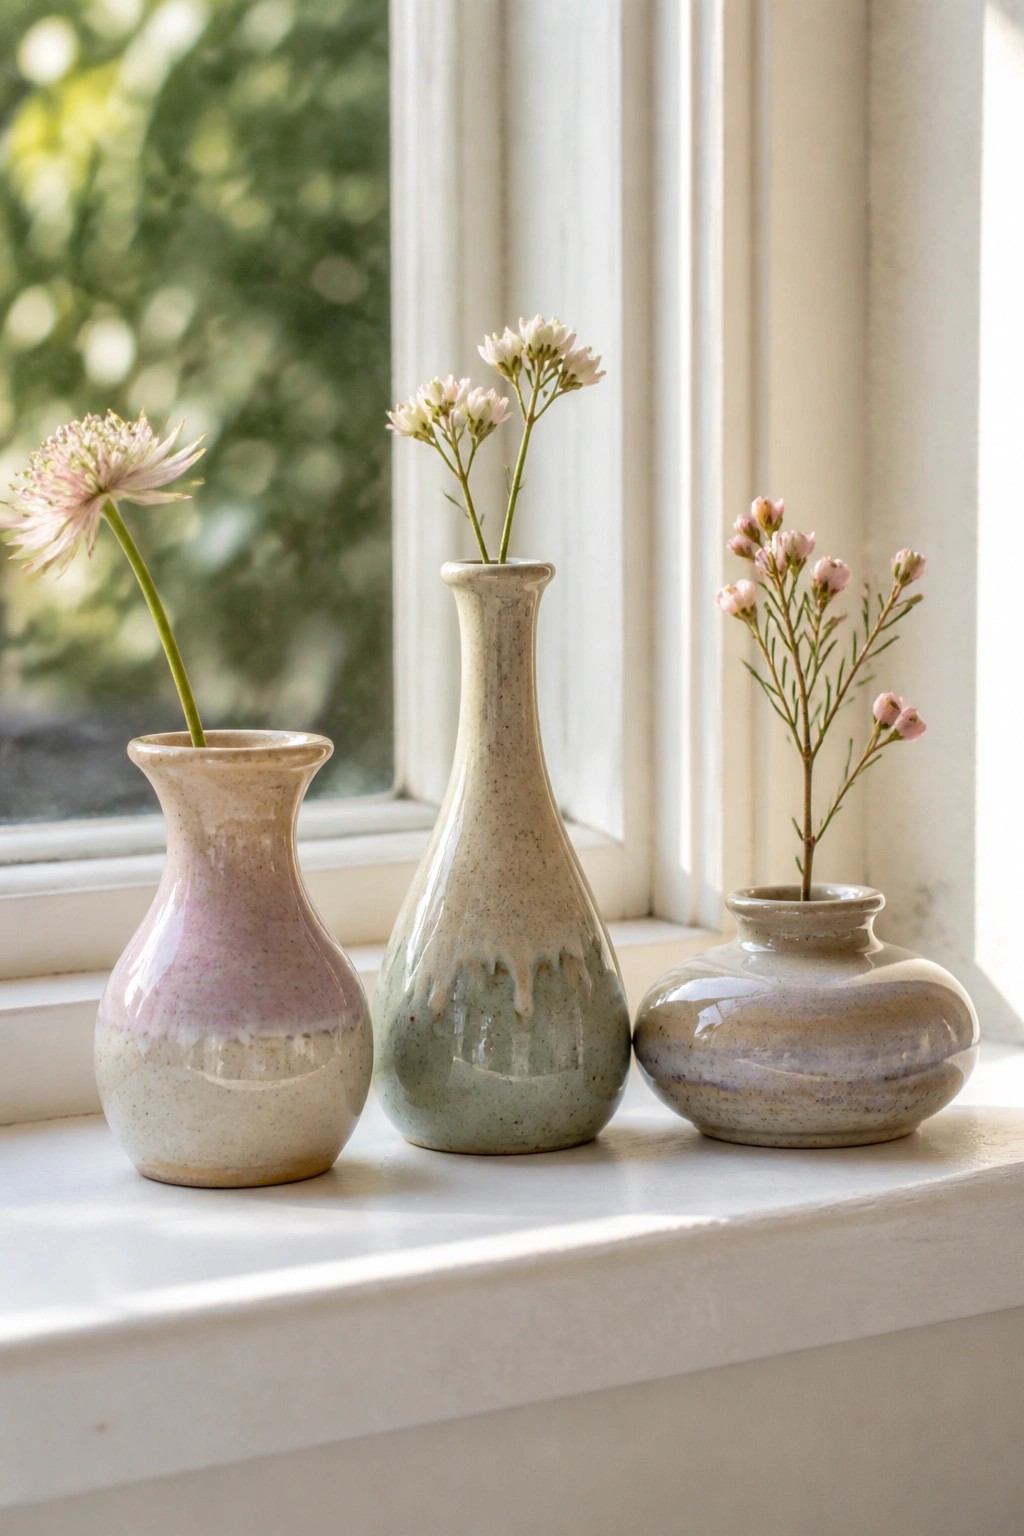
Throwing several vases in one session builds control over basic forms by varying the proportions each time. The left vase uses a rounded belly and short neck, the middle one stretches into a taller silhouette with a gentle shoulder, and the right one stays low and wide. Simple dipped or brushed glazes highlight the clay without adding extra decoration, letting the thrown shapes stand out.
What makes this idea useful is that each vase requires different hand positions and pressure points on the wheel. You can adapt the same session by making one version taller or wider next time, or by switching to a slightly different rim treatment. These pieces fit well as bud vases for a table or windowsill and take up little shelf space while drying. Scaling the whole set down keeps the practice focused on form rather than size.
Pedestal Bowl with Scalloped Rim
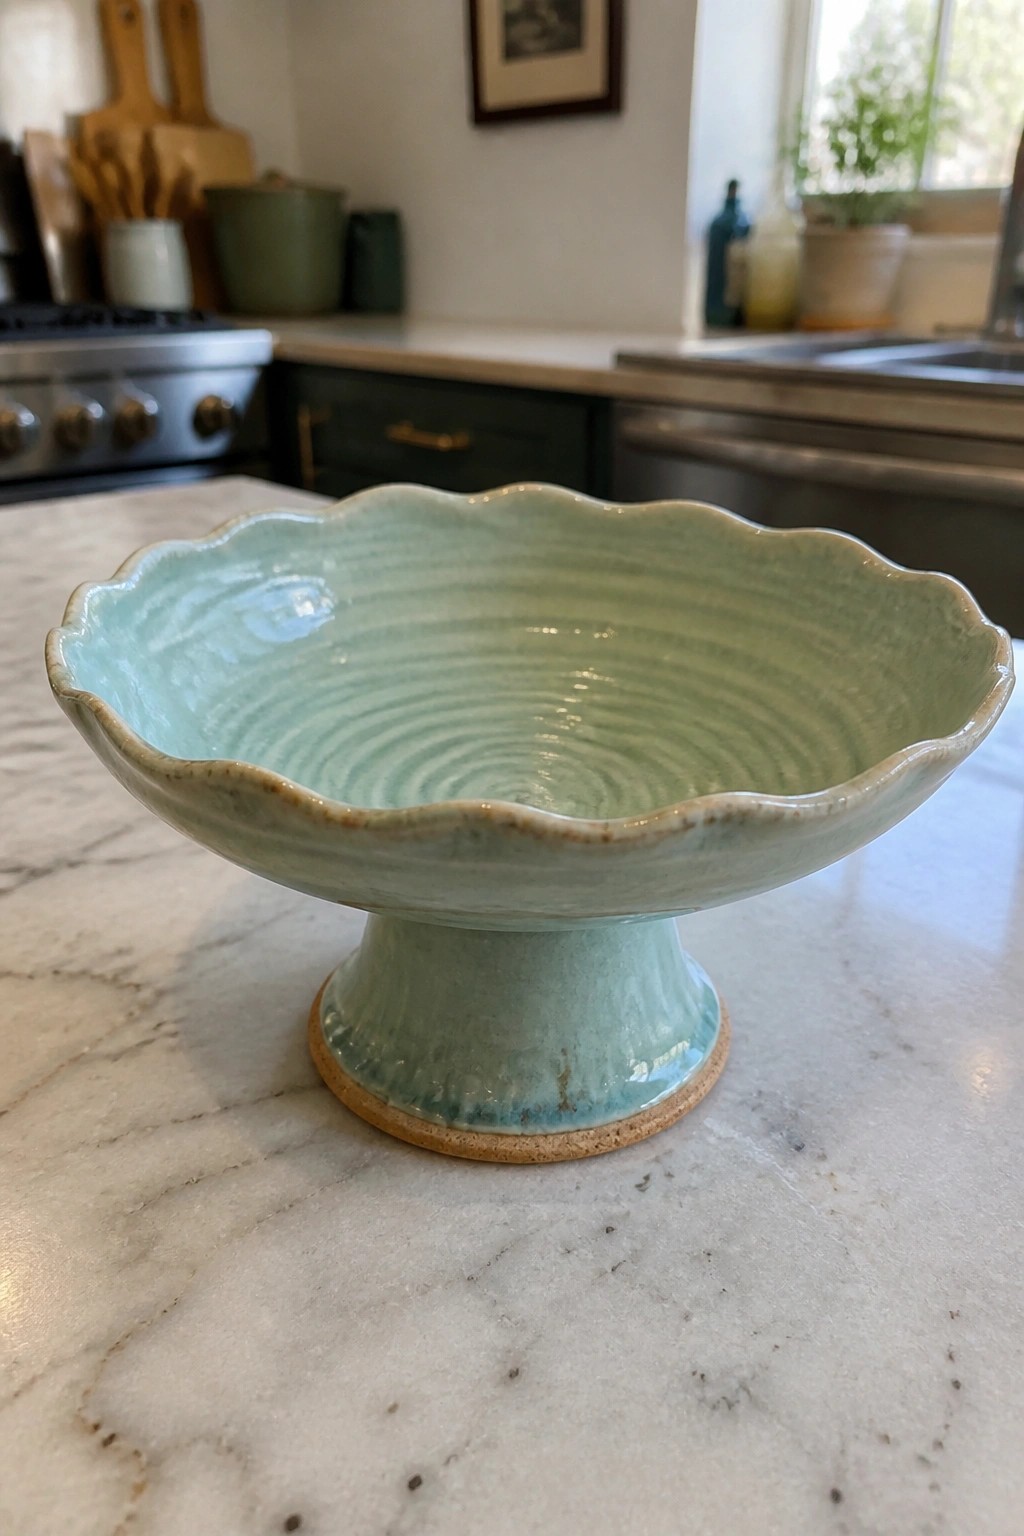
A small footed bowl gives you a compact form that still feels finished because of the added base. The wavy rim comes from simple shaping while the clay is soft, and the horizontal ridges inside show the throwing lines left visible under a light green glaze. This turns a standard bowl into a raised dish that works for snacks, fruit, or small kitchen items.
What makes this idea useful is how the pedestal keeps the piece from looking flat on a counter or table. You could repeat the scalloped edge on a regular bowl or swap the glaze for a matte finish to change the look without changing the shape. In a kitchen this size works for holding nuts or small produce, and the same base idea could be added to a tray or shallow plate for variety.
Incised Floral Bowl
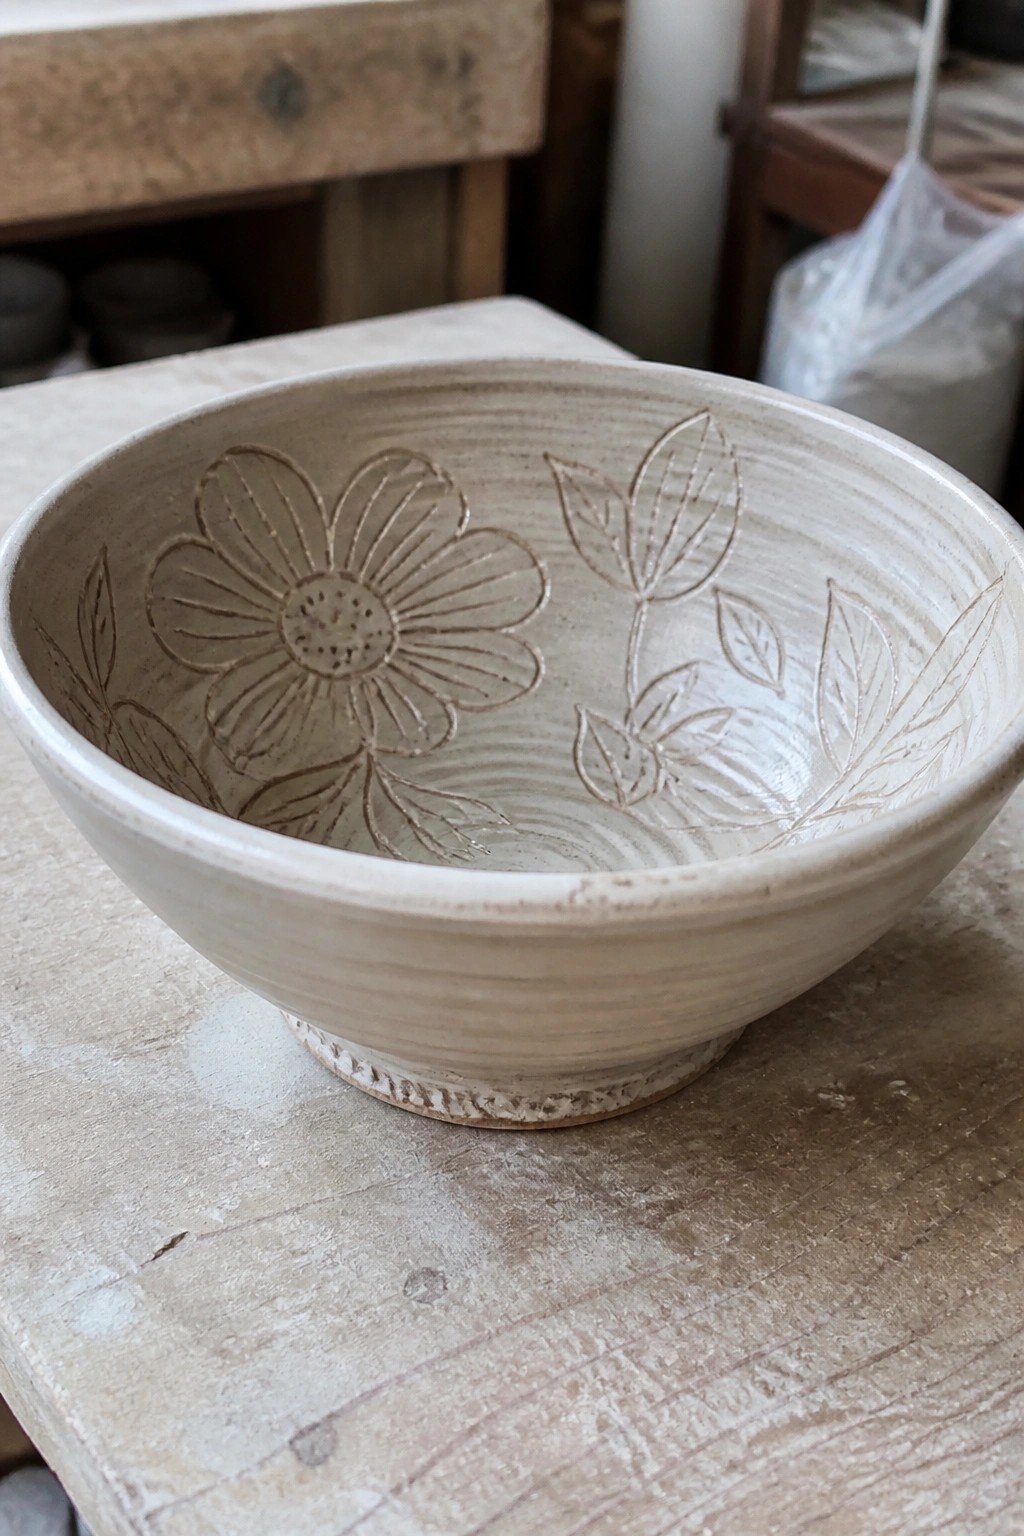
A wheel-thrown bowl develops more character when you carve simple floral and leaf motifs into the interior after centering and pulling the walls. The large daisy on one side and the paired leafy stems on the other create balanced visual weight while the throwing rings remain visible near the rim. A light glaze keeps the carved lines crisp and lets the natural clay tone show through the incisions.
What makes this idea useful is how the carved details add interest without requiring multiple glazes or complex forms. The shape works well as a small fruit bowl or desk catch-all, and the same carving approach can be repeated on plates or low trays by adjusting motif size. You can simplify the design to just one flower if you want quicker practice sessions on the wheel. The interior placement keeps the outside clean for easy trimming and stacking.
Frequently Asked Questions
1. How can beginners start with these pottery wheel ideas without feeling overwhelmed? Start with the simplest exercises focused on centering and basic opening. Spend short sessions of 10 to 15 minutes repeating one idea at a time until the motion feels natural. Gradually add the next skill once you can center a small ball of clay consistently. This step by step approach builds confidence and prevents frustration while strengthening core throwing fundamentals.
2. What tools or materials work best alongside these wheel exercises? Use a basic pottery wheel, a bucket of water, a sponge, and a few wooden or metal ribs for shaping. Keep a wire cutter and needle tool nearby for trimming excess clay. Soft clay with good plasticity is ideal. Avoid adding too many gadgets at first so you can focus on hand and wheel coordination during each practice idea.
3. How often should someone practice these ideas to see real improvement in throwing skills? Aim for three to four short sessions per week rather than long infrequent ones. Consistent repetition helps muscle memory develop faster. Track your progress by noting how long you can keep a centered mound spinning smoothly or how tall you can pull a simple cylinder. Over several weeks the core skills will feel more automatic.
4. Can these clever ideas help when trying to throw larger or more complex forms later on? Yes. The exercises strengthen centering, wall evenness, and height control, which directly transfer to bigger pieces. Once basic cylinders and bowls feel stable, apply the same movements to wider bases or taller walls. Many of the ideas include variations that scale up naturally as your strength and control improve.
5. What should I do if clay keeps flying off the wheel during these practice sessions? Slow the wheel speed and make sure the clay is firmly attached to the bat or wheel head before starting. Keep your hands wet and apply even pressure from both sides when centering. If the clay still wobbles, stop and recenter it rather than fighting an off balance lump. This habit prevents wasted time and protects your wheel from unnecessary strain.

Pottery Path is my cozy corner of the internet where I share clay ideas, pottery inspiration, and simple projects you can recreate at home. I love exploring everything from air dry clay to handbuilt pottery to cute minis that brighten your day. My goal is to make clay crafting feel easy, fun, and welcoming for anyone who wants to try it.
You will find beginner friendly tutorials, creative pottery painting ideas, and lots of warm inspiration for slow and happy crafting. If you enjoy hands on creativity, this space will feel like home.