I often find myself reaching for my carving tools when I want to add something extra to a plain bowl.
Trying out different patterns has become a regular part of my pottery routine.
Some of these ideas come from things I have seen in workshops or online.
Others are variations I worked out on my own pieces.
It is nice to have a collection of them to refer back to when starting a new project.
Fern Impressed Trinket Bowl
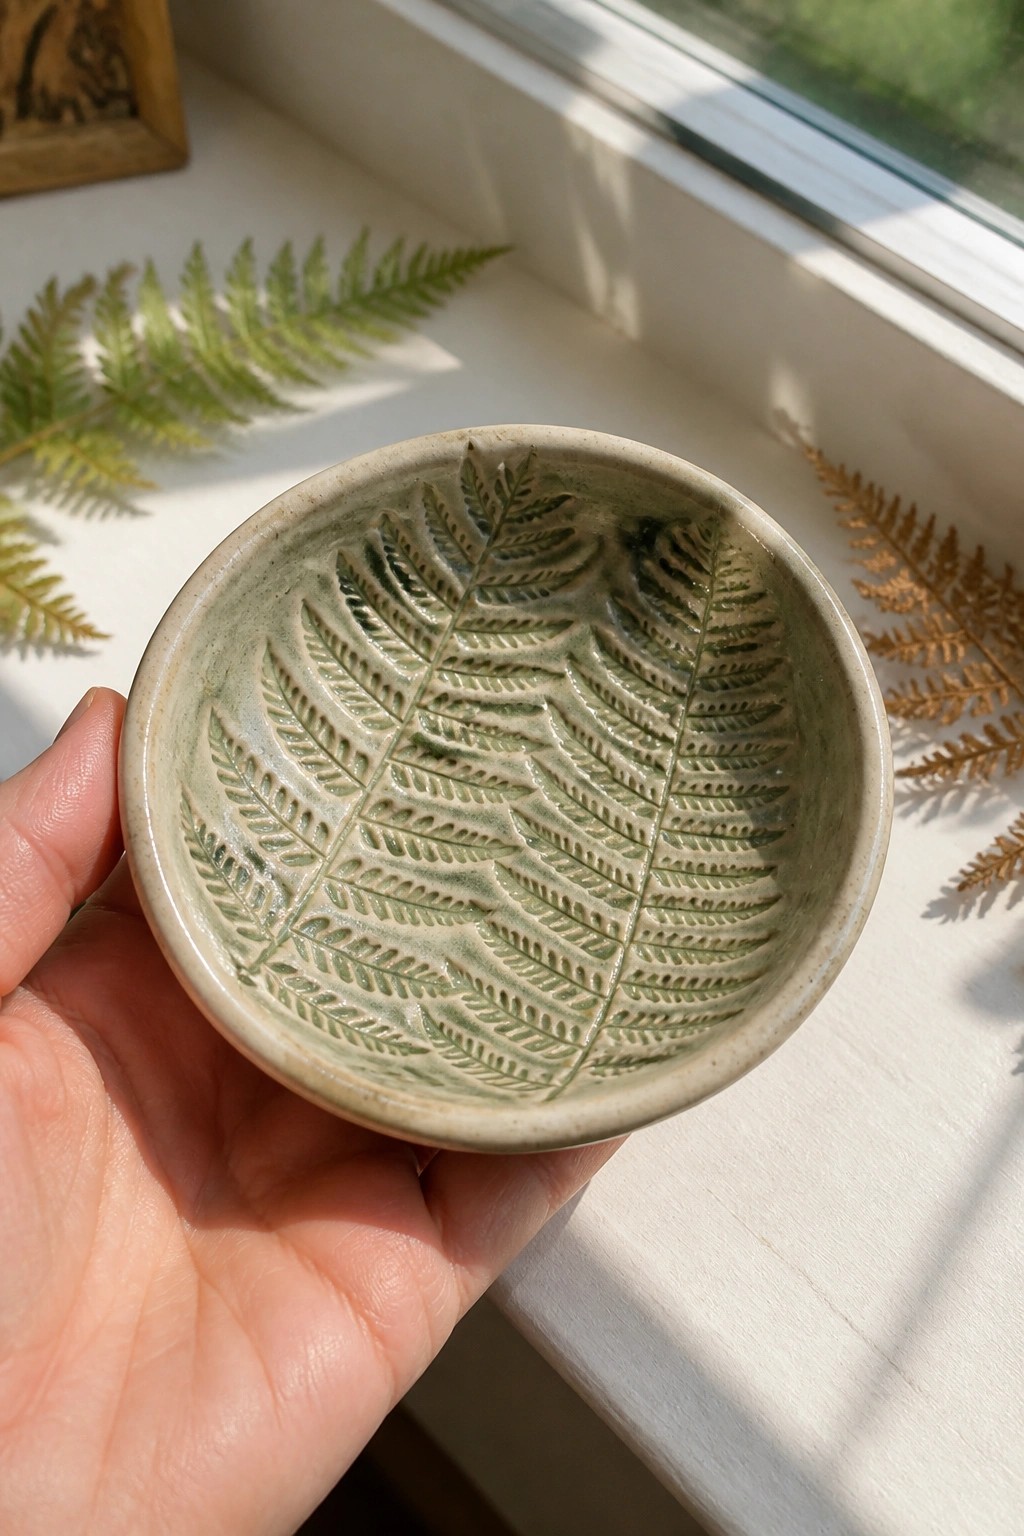
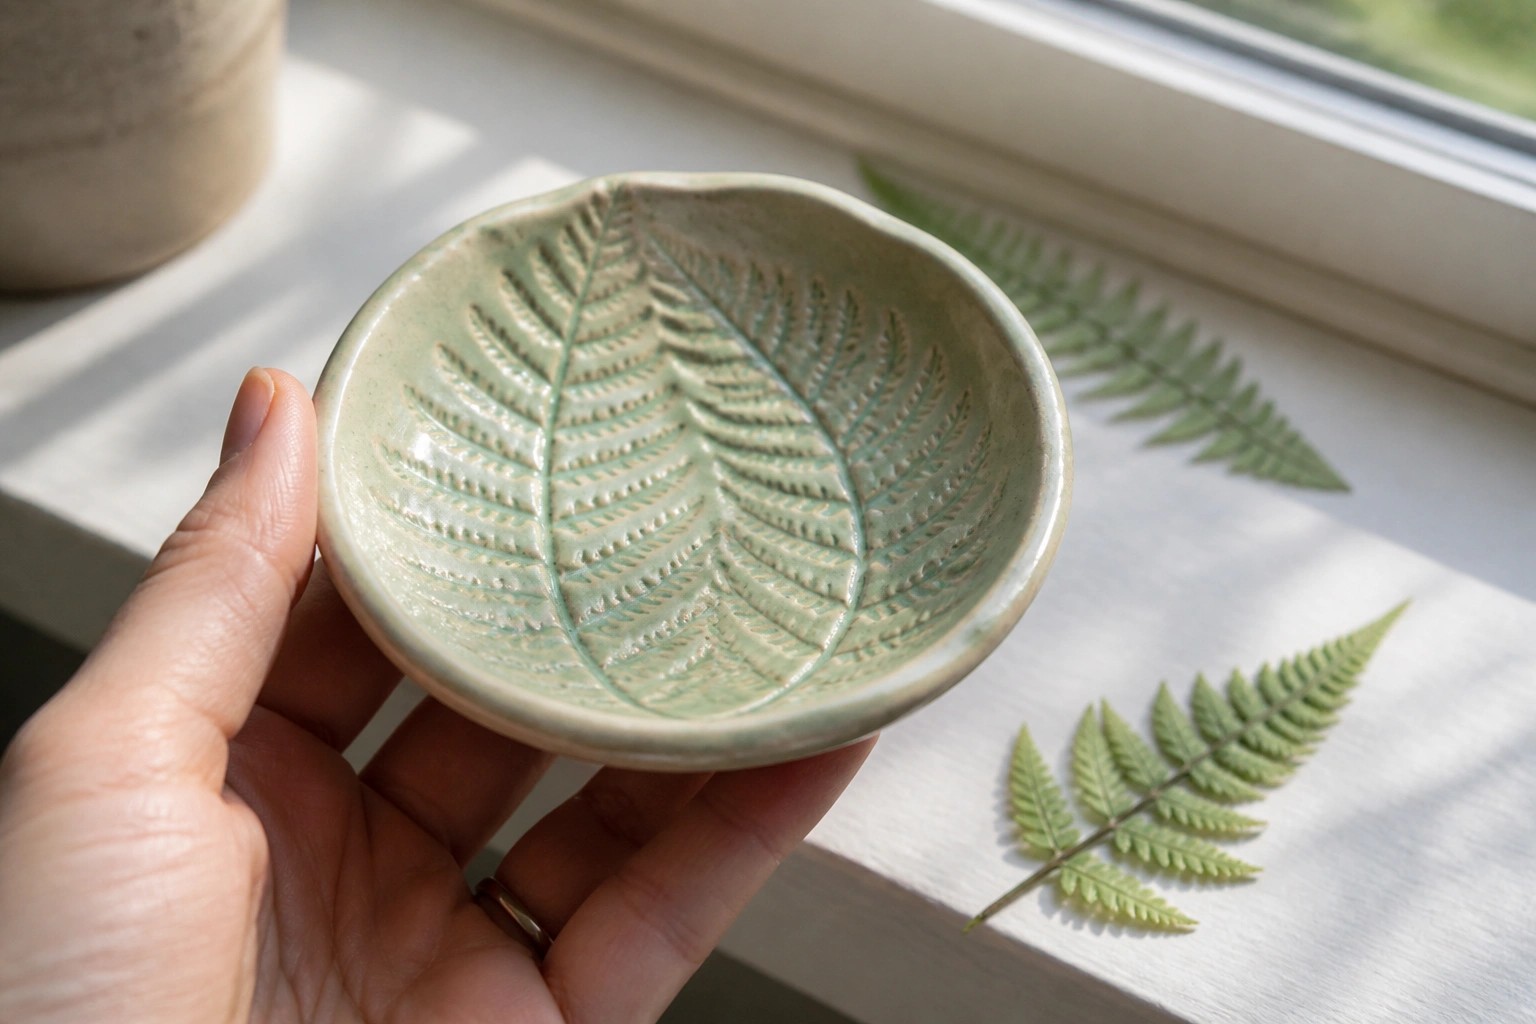
A small round ceramic bowl gains its main interest from multiple fern fronds pressed directly into the clay before glazing. The light green glaze settles into the recessed leaf veins, making the pattern stand out without extra painting or carving after the form is made. This method keeps the outside plain so the interior pattern becomes the focal point on a simple dish shape.
The small scale lets the bowl function as a ring dish or catch-all on a dresser or desk without taking much space. You can repeat the same pressing technique on plates or taller cups by using fresh or dried ferns from the same plant. Changing the glaze color to a deeper green or brown shifts the look while keeping the leaf detail intact.
Carved Wave Pattern on a Blue Ceramic Bowl
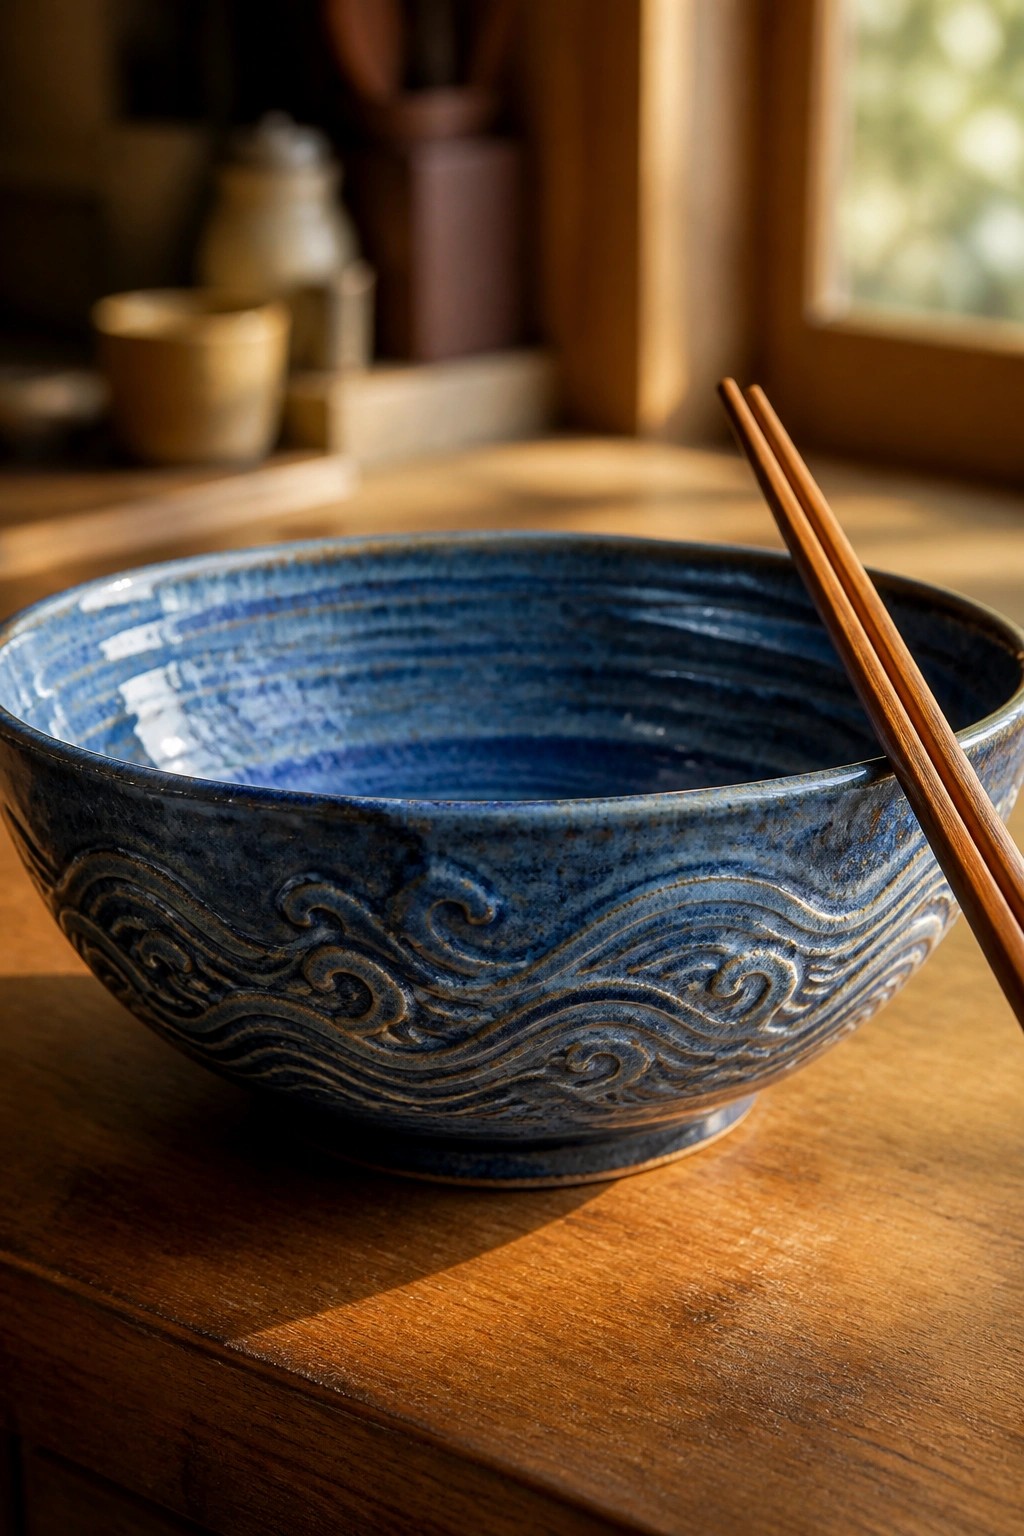
Carve a repeating wave motif into the exterior of a ceramic bowl to create a textured band around the form. The waves add raised and recessed surfaces that interact with the glaze, letting it pool in the lines for stronger contrast. A deep blue glaze covers both the inside and outside, keeping the interior smooth for practical use while the exterior carries the detail. This approach belongs to the category of patterned bowls that combine everyday function with surface carving.
The shape does a lot of the work here since the wide bowl gives enough surface area for the pattern to read clearly without feeling crowded. A piece like this works especially well as a serving bowl for salads or sides on a dining table. You could adapt the same wave carving to a smaller dip bowl set or stretch it vertically on a vase. For a gift, something like this pairs easily with chopsticks or wooden servers to make the present more complete.
Carved Geometric Patterns on a Footed Bowl
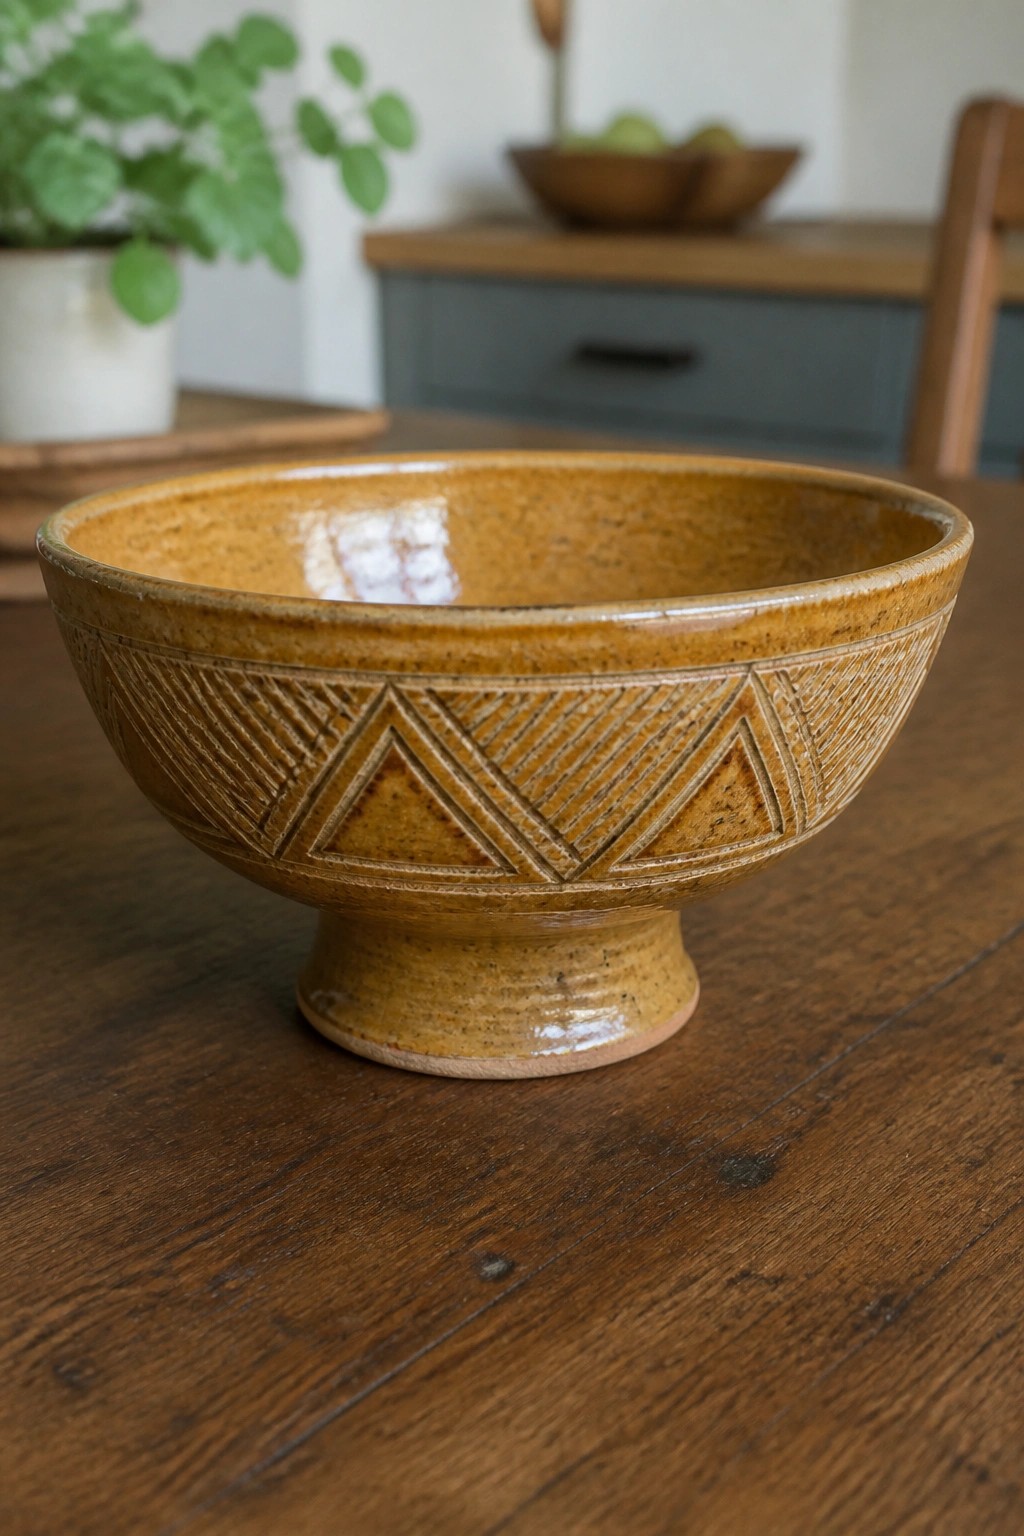
A footed bowl works well for this style of surface carving because the raised base gives the form a clear upper band where the pattern can sit without interfering with the rim or foot. The design uses repeating triangles and diagonal lines cut into the clay, which catch the glaze in the grooves and create contrast against the speckled surface. This keeps the bowl simple in shape while making the exterior the main focus. The idea fits into the patterned bowl category for table use or display.
What makes this idea useful is how the carved band can be adjusted in width or spacing to fit bowls of different sizes. The footed shape helps the piece sit steady on a table and works for serving or holding fruit without looking too formal. You could scale the same triangle and line pattern down for a smaller bowl or stretch the lines vertically on a taller form like a vase. In a kitchen this kind of bowl stands out on a shelf because the texture shows up even from a distance.
Nesting Bowls with Carved Rim Bands
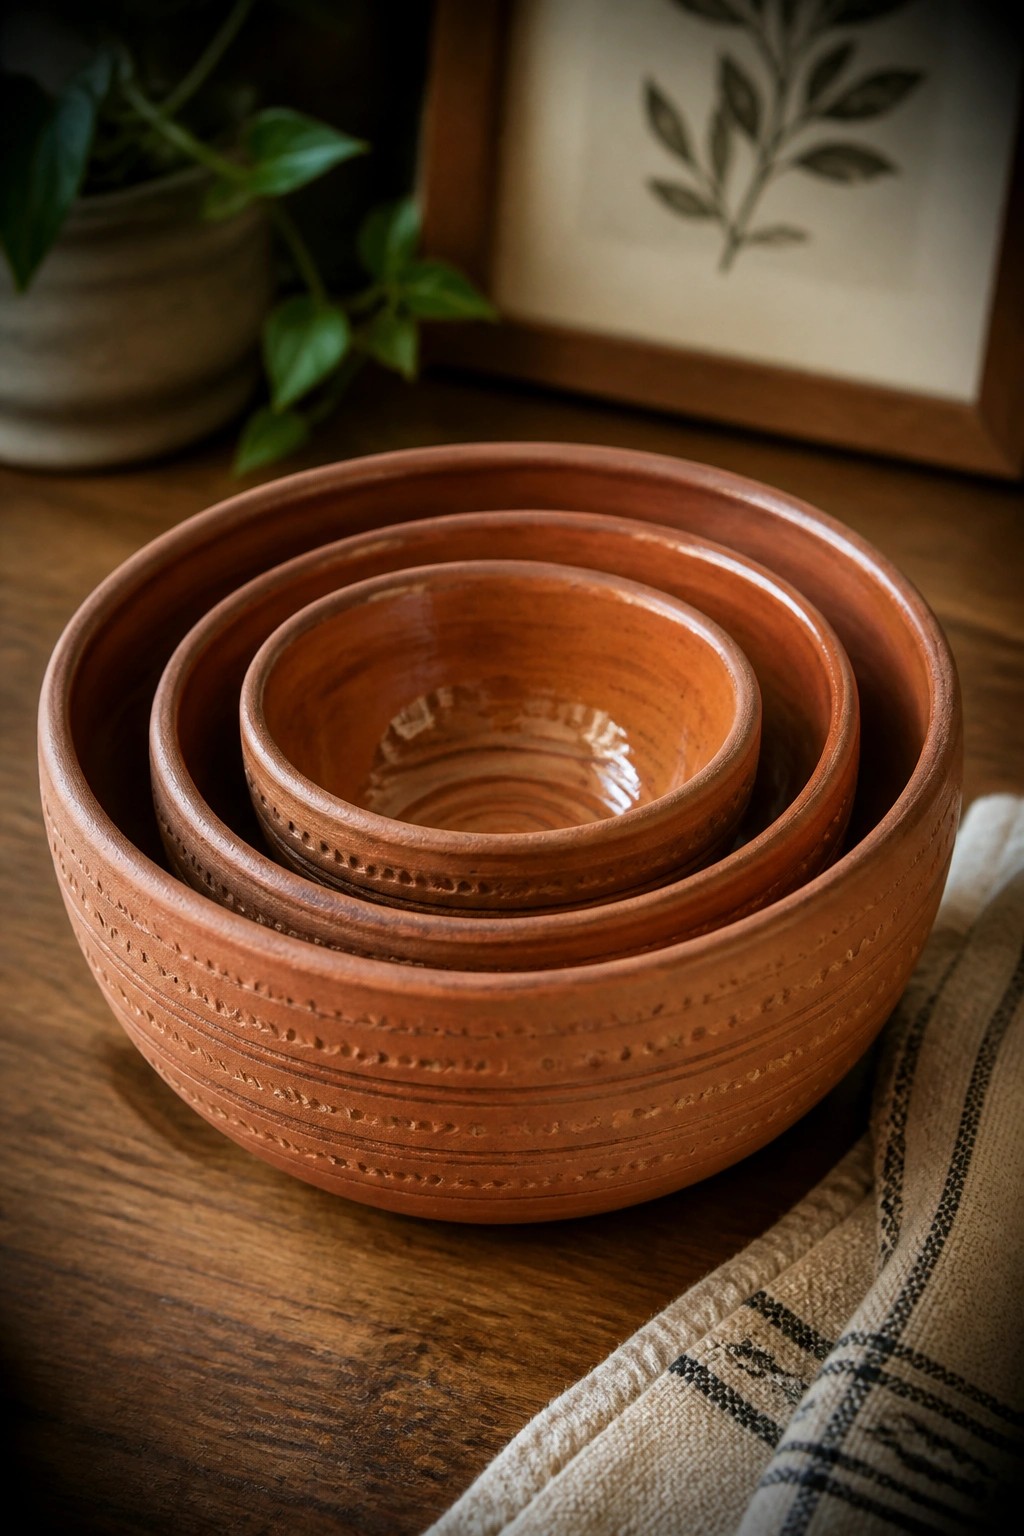
A set of three graduated ceramic bowls forms a nesting collection where each piece carries simple carved lines and dotted rows along the exterior rim. The unglazed terracotta shows the clay body clearly, letting the incised textures stand out through shadow and depth instead of color. This idea fits the category of functional kitchen bowls that gain visual interest from surface carving rather than glaze or added decoration.
The nesting shape makes the set practical for everyday storage while the carved bands remain visible on the outside. You can apply the same horizontal line and dot pattern to a single large mixing bowl or scale it down for individual serving dishes by changing the spacing between rows. The technique requires only basic carving tools and works on any wheel-thrown or hand-built form, so it adapts easily to whatever bowls you already make.
Spiral Cutout Yarn Bowl for Knitting Projects
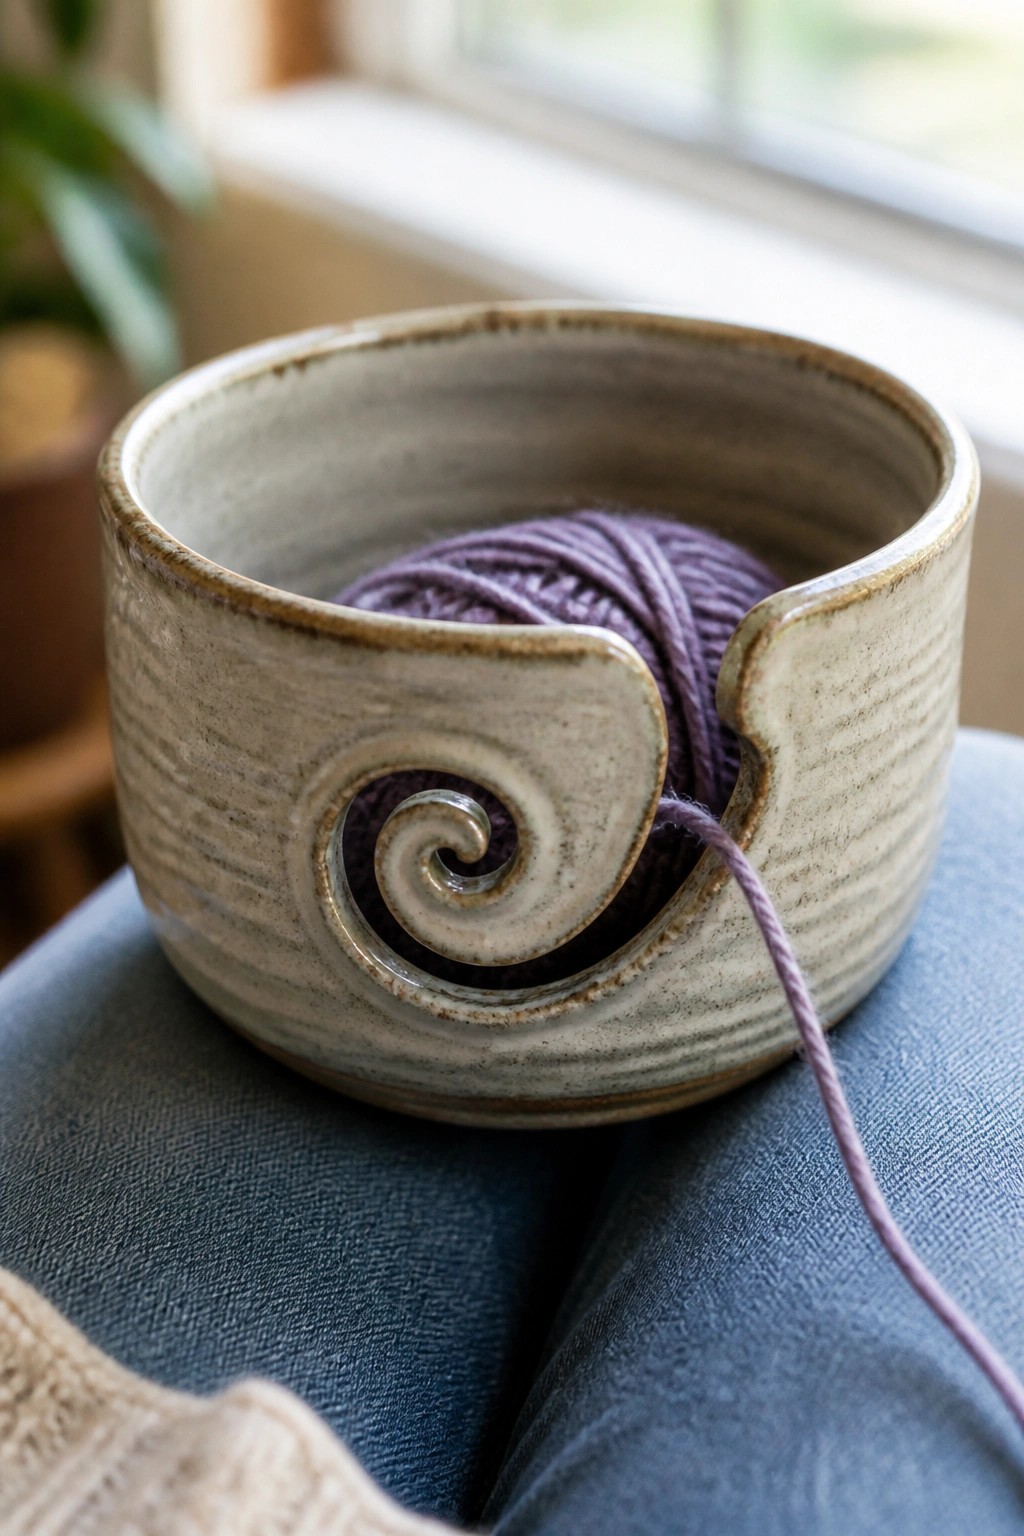
A ceramic bowl with a large spiral opening carved into one side holds a ball of yarn while allowing the strand to feed out smoothly through the cutout. The swirl shape serves as both a functional guide and a decorative element that keeps the yarn from tangling or rolling away. This project fits the category of a specialized craft holder rather than a plain decorative bowl.
What makes this idea useful is how the carved opening turns an ordinary bowl into a practical tool that stays put on a lap or table during long projects. You could scale the same spiral down for smaller bowls meant for embroidery thread or widen the cutout for bulkier yarns. In a craft space the shape keeps supplies contained without needing extra gadgets, and the carving style could be simplified to a straight slot or repeated in a series around the rim for a different look.
Carved Floral Band on a Green Serving Bowl
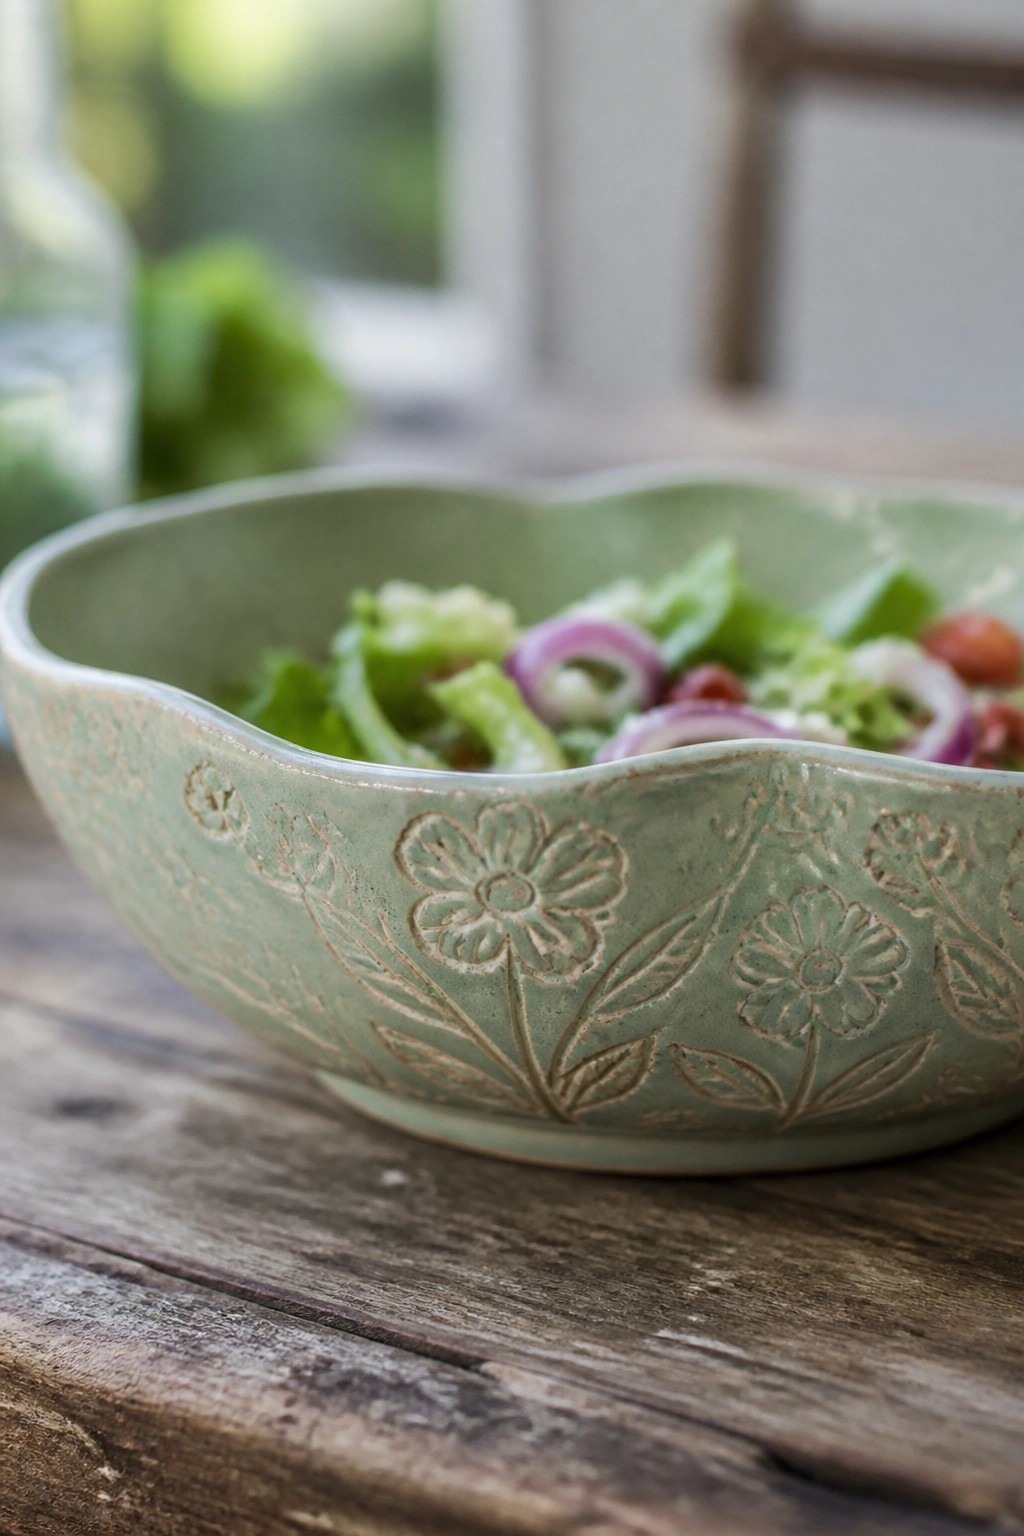
A round ceramic bowl gains interest when you press or carve a repeating row of flowers and leaves into the clay just below the rim. The light green glaze highlights the raised patterns while keeping the surface smooth enough for food use. This style works as a salad or serving bowl because the decoration sits on the exterior and stays visible during meals.
What makes this idea useful is how the carved band gives the bowl a finished look without covering the entire surface. You could repeat the same stamp layout on a set of smaller bowls or switch to a single larger flower motif for a deeper serving dish. The shape and color also translate easily to a fruit bowl or a decorative catch-all on a kitchen counter.
Incised Radial Lines on a Small Dipping Bowl
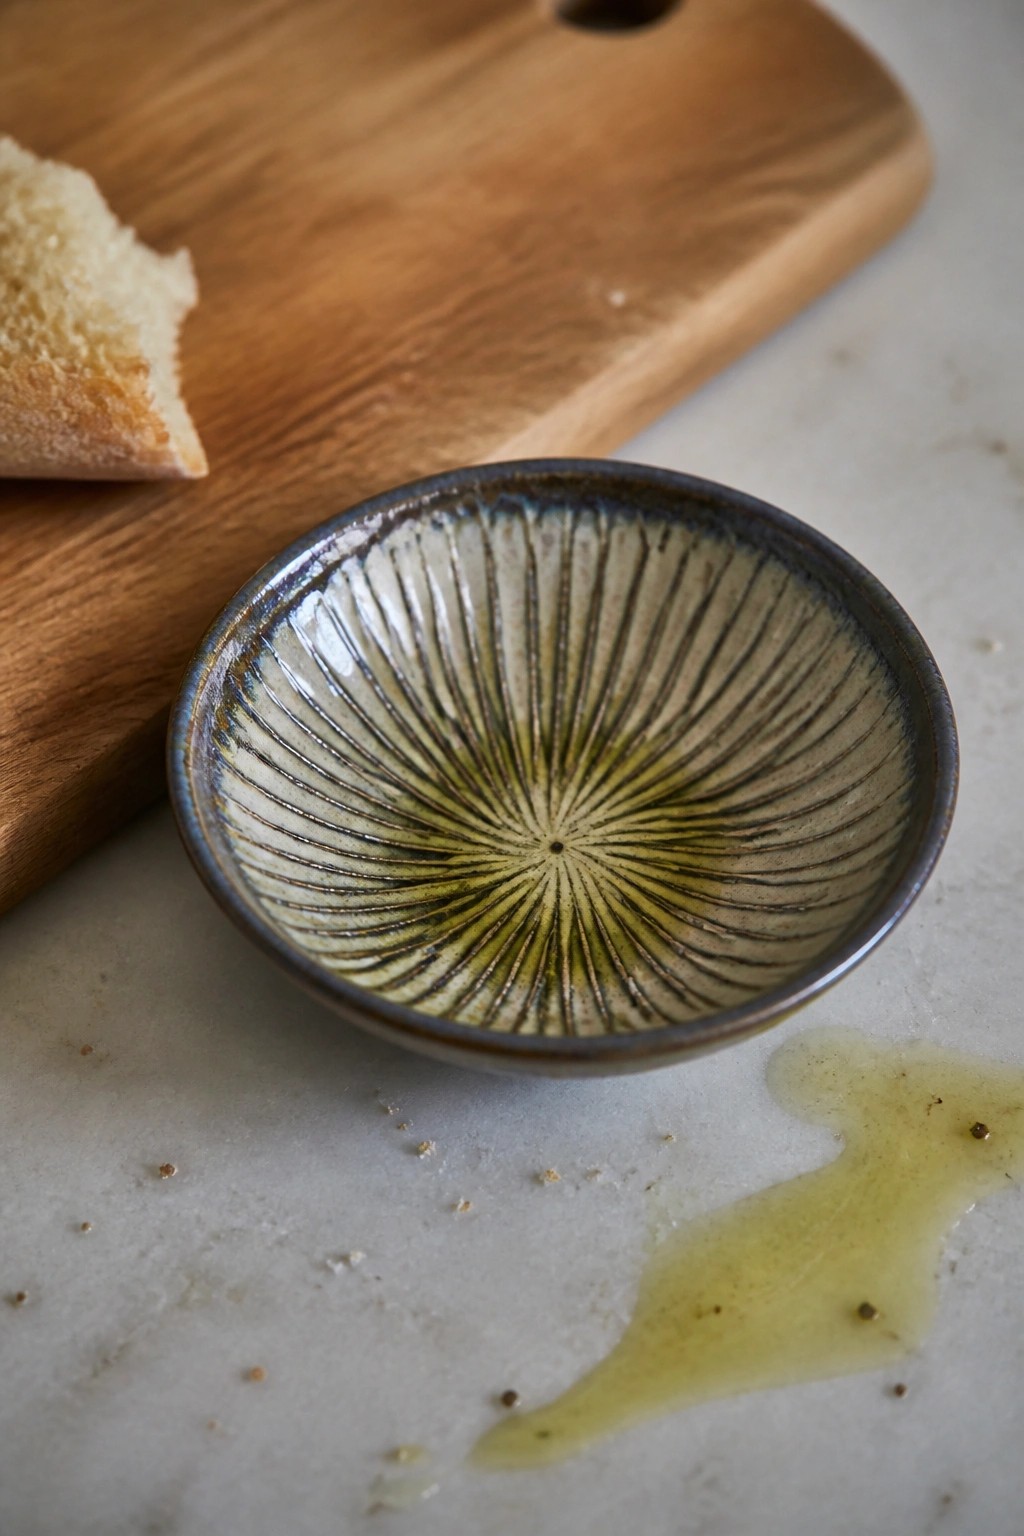
A compact ceramic bowl with incised lines radiating from the center forms a clear sunburst pattern across the interior. The lines are carved into the clay before glazing so the darker color settles into the grooves and creates strong contrast against the lighter surface. This approach suits a small kitchen bowl meant for oil, dips, or condiments where the pattern stays visible even when the bowl is in use.
What makes this idea useful is that the radiating lines are simple to mark with basic tools and still look deliberate on a small form. The same pattern could be adapted to ramekins or a slightly larger serving bowl by spacing the lines farther apart. In a kitchen setting the compact size keeps it practical for everyday table use while the graphic interior gives it enough detail to photograph well for recipe posts.
Carved Circular Texture on a Speckled Breakfast Bowl
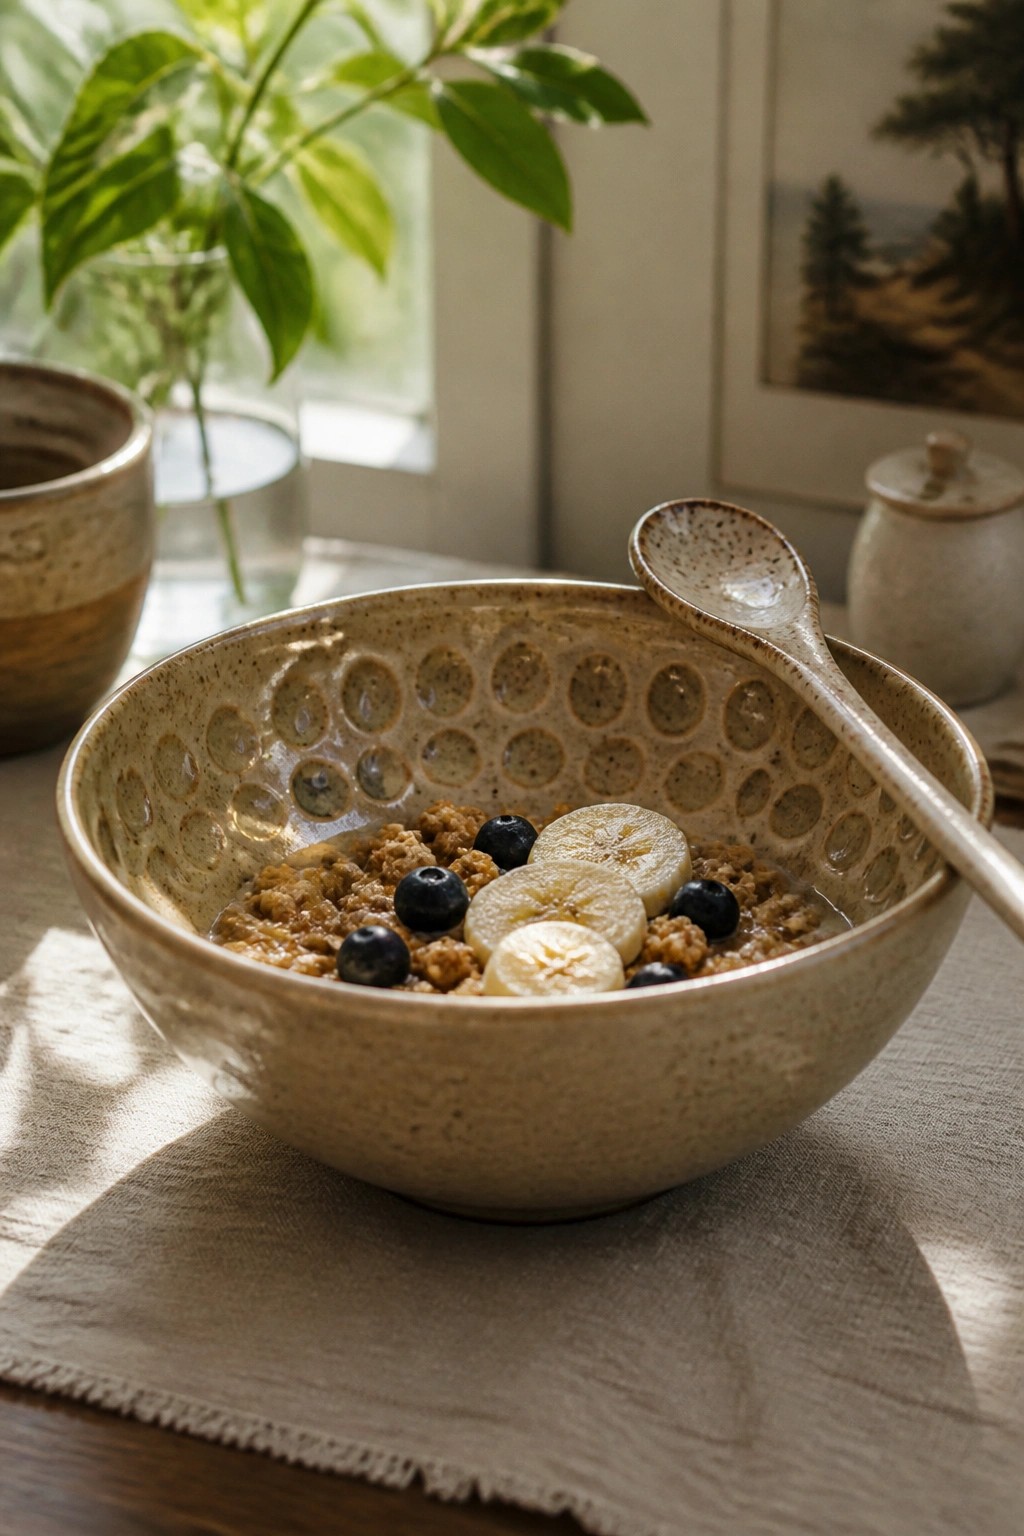
A wide ceramic bowl with a repeating pattern of carved circular indentations covering the exterior surface. The speckled glaze settles into the carved spots to create contrast and depth while keeping the overall finish light and neutral. This approach works well for a functional serving bowl that can handle cereal, salads, or snacks without extra decoration.
What makes this idea useful is the straightforward carving method that adds visual interest with basic tools. You could scale the same circle pattern down for smaller prep bowls or repeat it across a set of dishes for a matching look. The light glaze color makes it easy to pair with everyday kitchen items or adapt into a simple gift project.
Carved Spirals on a Fluted Rim Bowl
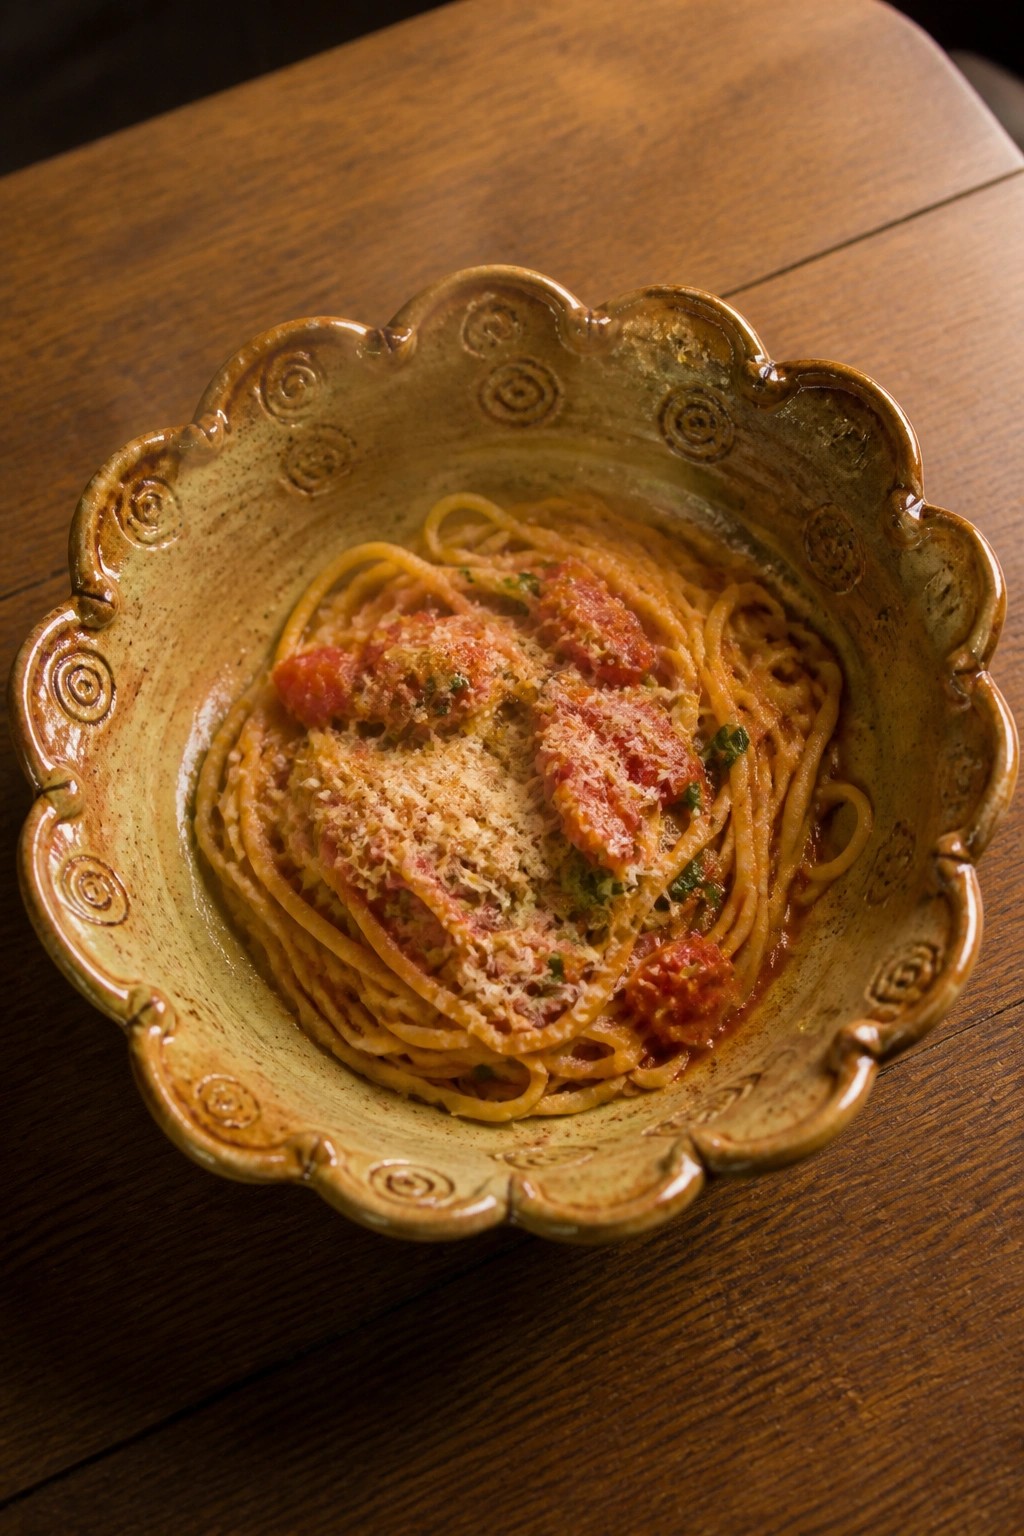
A ceramic bowl with a scalloped rim gives you a natural edge for adding repeated carved or impressed patterns. Small spirals pressed or cut into the clay around the rim create a simple repeating texture that contrasts with the smoother bowl body. The design keeps the interior plain so the bowl stays functional for food while the rim carries the pattern.
What makes this idea useful is how the rim pattern can be scaled up or down depending on the bowl size you throw. You could use the same spiral stamp on a set of smaller dishes or try a single row of circles on a larger serving piece. In the kitchen this shape works well for pasta or salad because the decorative edge stays visible even when the bowl is filled. The same rim treatment adapts easily to a tray or low planter if you want to move the idea outside of tableware.
Leaf and Circle Carvings on a Small Rounded Bowl
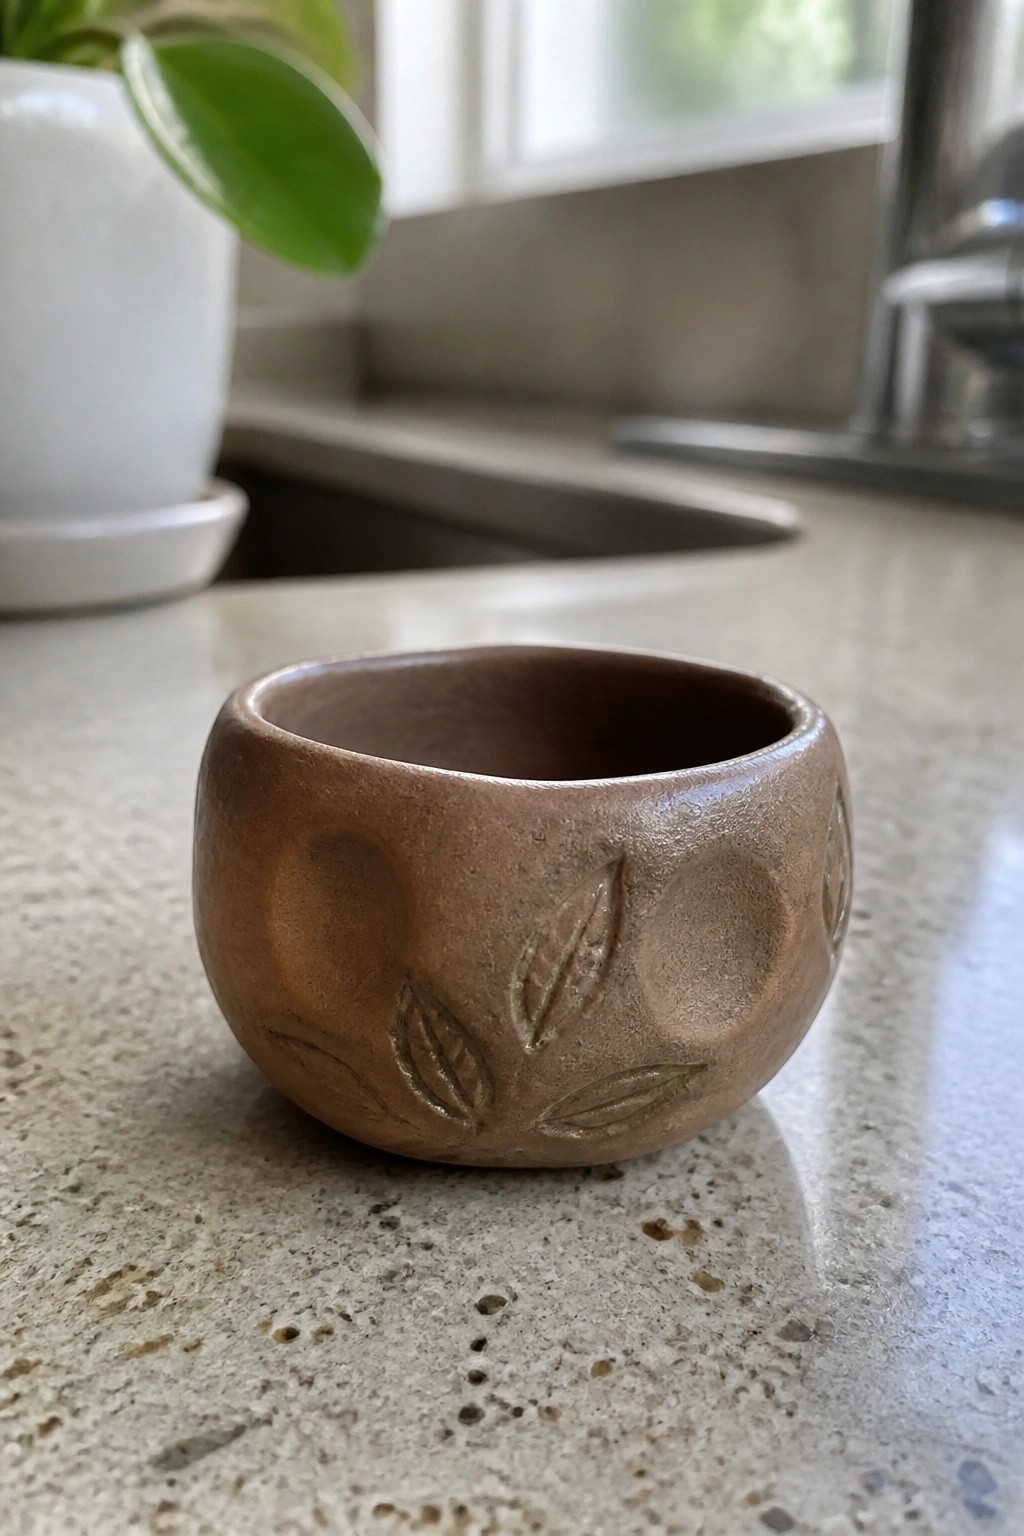
A compact bowl like this one uses exterior carving to add pattern without changing the simple rounded shape. The design clusters incised leaves in one section while spacing out circular depressions around the rest of the form. The earthy brown surface lets the carved lines read clearly and gives the piece a finished look once fired. This fits the category of a small decorative or utility bowl that can hold rings, spices, or small snacks.
What makes this idea useful is the way the small scale keeps the carving manageable for practice or quick projects. You could repeat the same leaf motif on a taller cup or stretch the circular impressions across a wider serving dish. The mix of organic leaves and simple circles creates contrast that stands out in photos without requiring advanced skills. For a variation, carve the leaves first then add the circles afterward to change how the textures catch light.
Carved Openwork Floral Border on a Wide Bowl
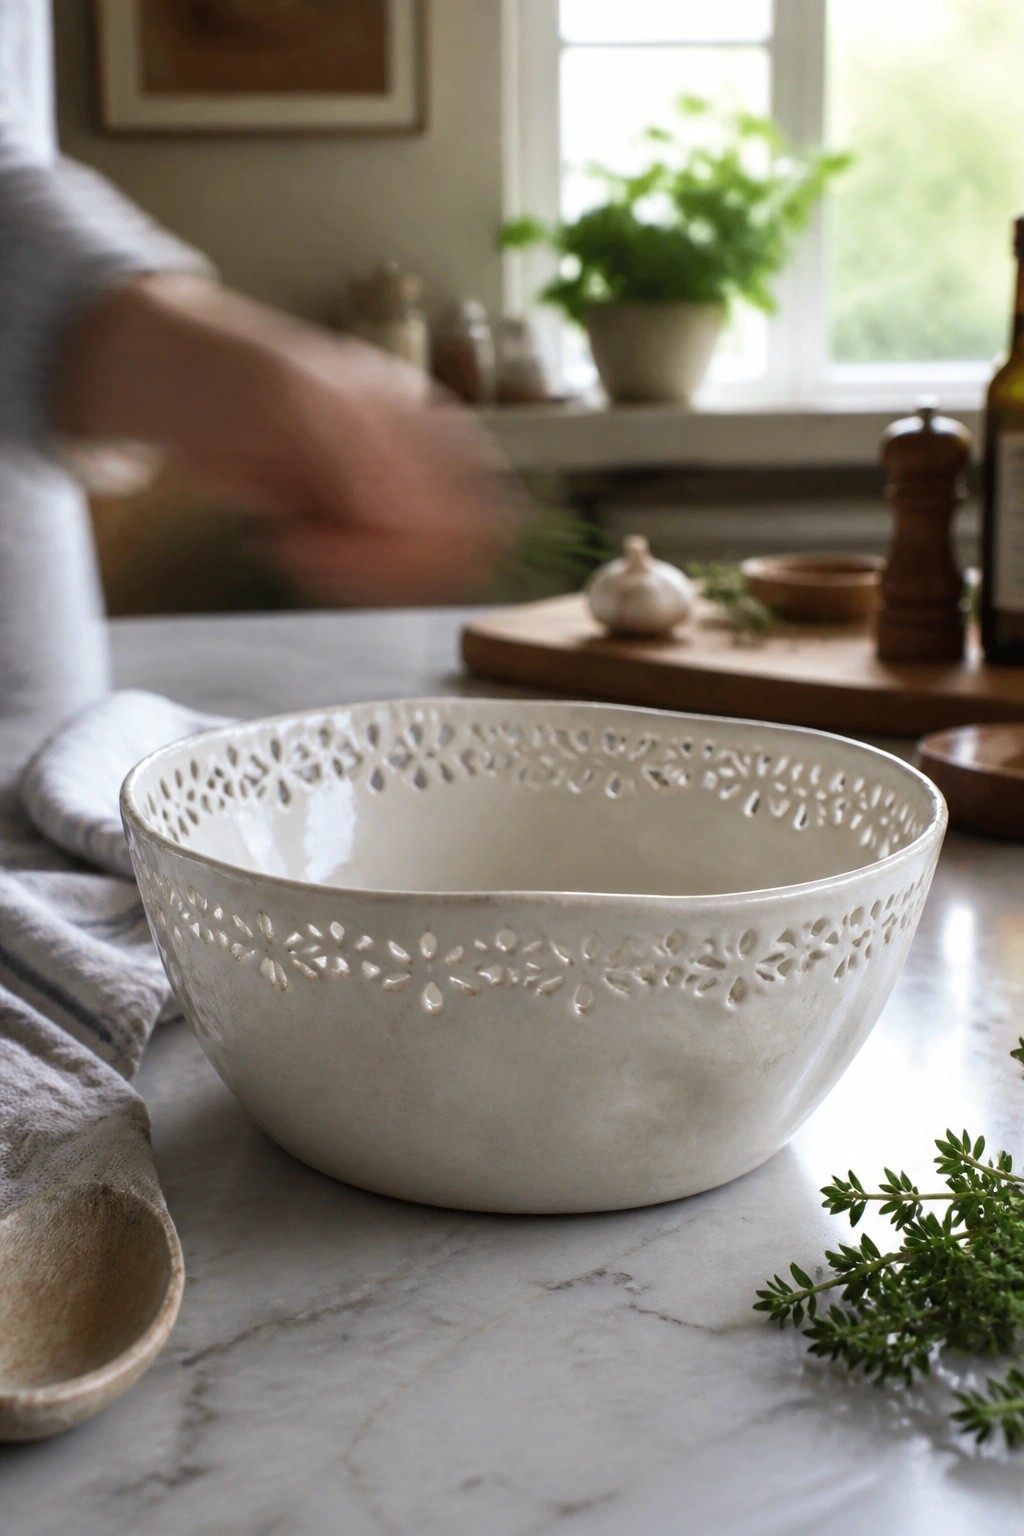
A wide ceramic bowl with a smooth white glaze uses a repeating row of carved daisy shapes along the rim. The cutouts create negative space that forms a light, lace-like band while keeping the rest of the bowl solid and functional. This approach relies on simple repetition and careful removal of clay to add pattern without extra color or texture.
The shape works especially well for kitchen use like holding produce or serving sides. You could scale the same carving down for a smaller prep bowl or try a tighter repeat on a shallow dish. For a gift this style stands out because the openwork adds detail that photographs cleanly. The pattern also adapts to other motifs like leaves or stars if you want to change the look while keeping the rim focus.
Incised Spiral Pattern in a Ceramic Bowl
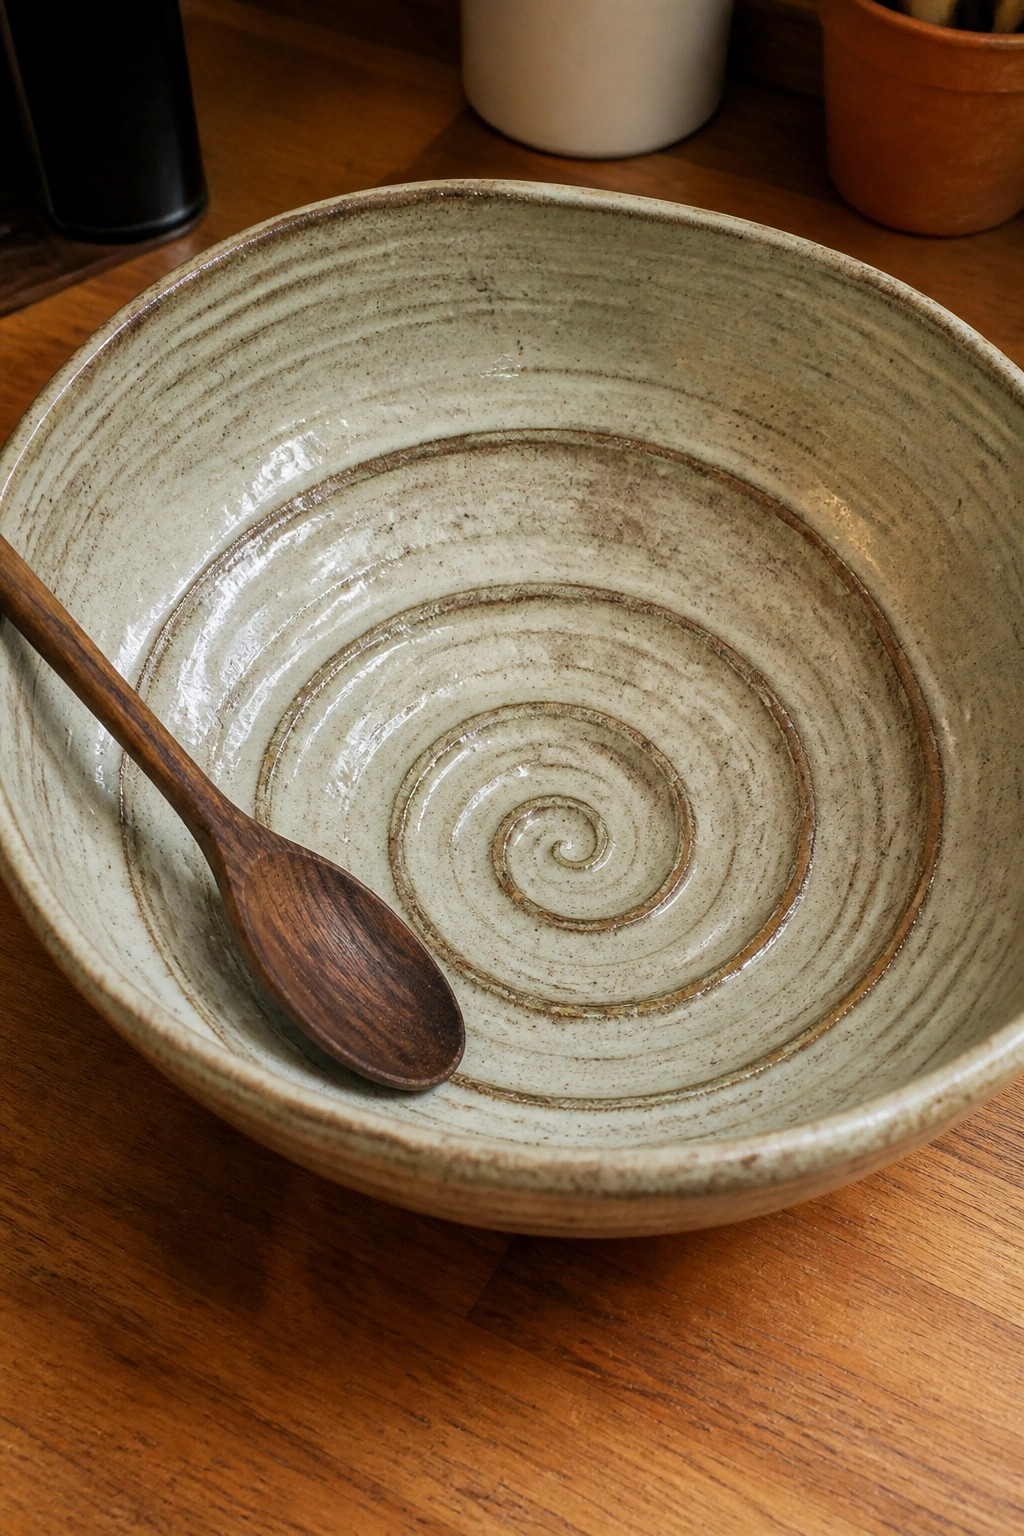
A ceramic bowl with a carved spiral design incised into the interior base turns the center into the main visual feature. The grooves create a series of concentric rings that catch glaze and add depth without any added color or slip. This keeps the project focused on carving as the primary decorative technique and works especially well on a wide, shallow bowl form.
What makes this idea useful is how the spiral can be adjusted in spacing or depth to suit bowls of many sizes. The same pattern adapts easily to a mixing bowl, a serving dish, or even a smaller prep bowl for kitchen use. You could simplify the carving to fewer rings or extend it closer to the rim depending on the piece. In a kitchen setting the textured interior also helps with visual interest when the bowl sits empty on a counter or shelf.
Carved Paw Prints on a Ceramic Pet Bowl
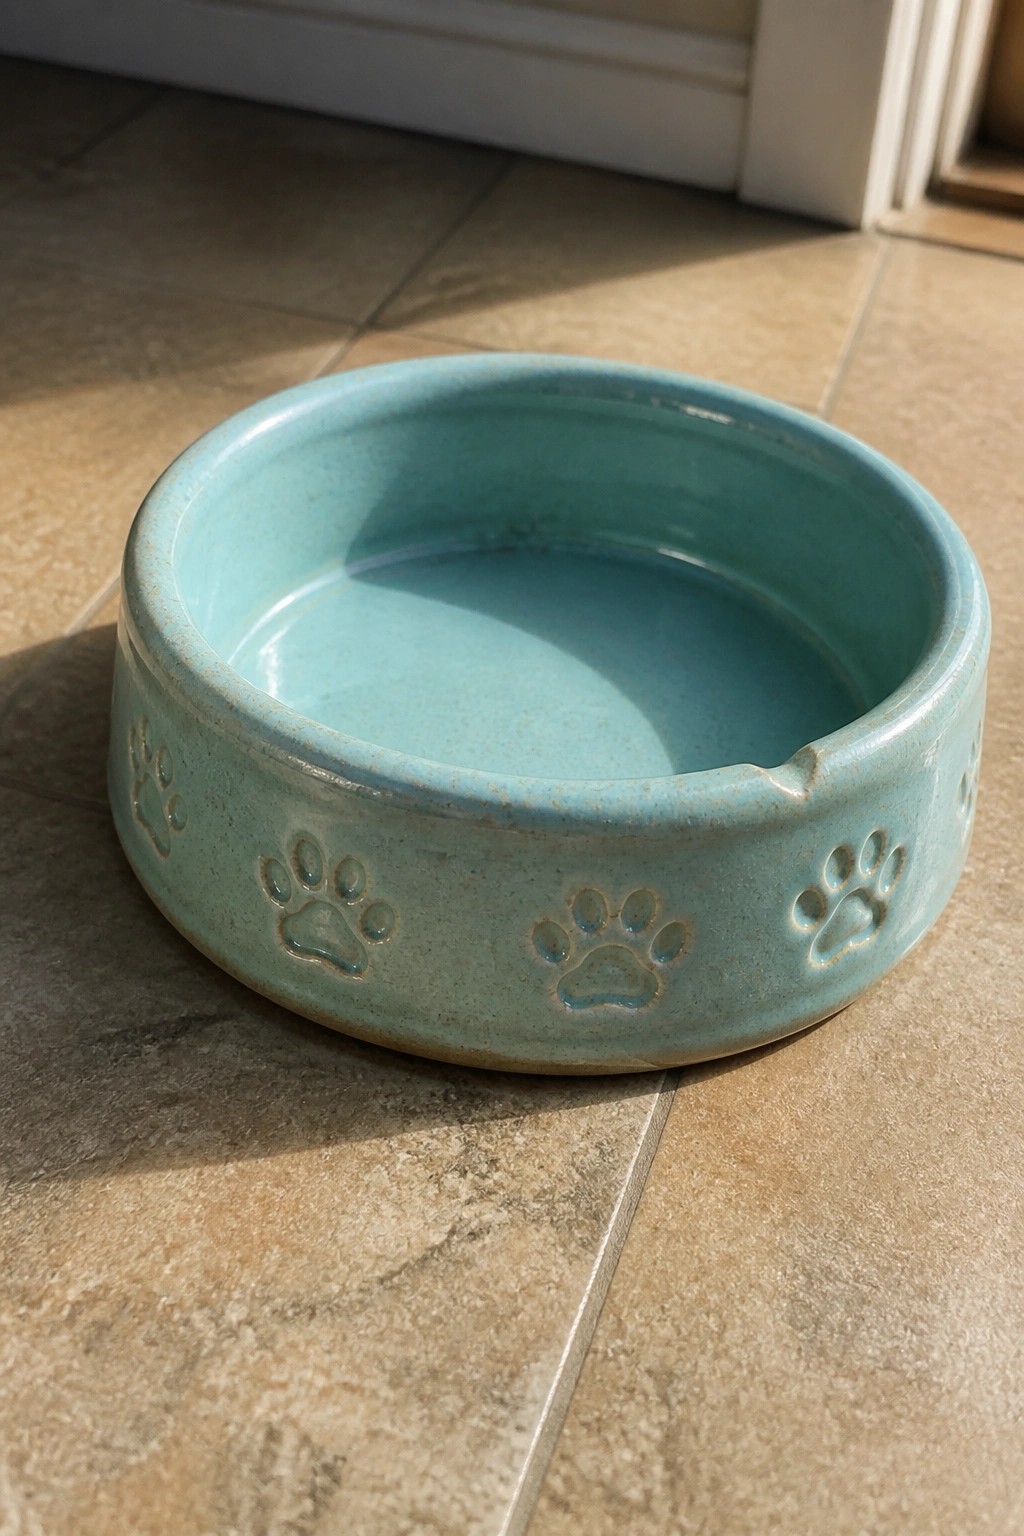
A low, wide ceramic bowl becomes a pet feeding dish when paw prints are stamped or carved in a repeating band around the outside wall. The turquoise glaze covers both the smooth interior and the textured exterior, letting the prints show as slight depressions without affecting the usable surface. This keeps the design functional for daily use while turning a plain bowl into a patterned piece.
What makes this idea useful is how the stamp method lets you change the motif quickly if you want a different animal or simpler geometric repeat. The wide shape sits stable on the floor for food or water and works in any kitchen or entry area without taking much space. You could apply the same carving band to a taller planter or shrink it for a small ring dish by adjusting only the stamp size and glaze color.
Carved Divided Bowl for Sauces and Condiments
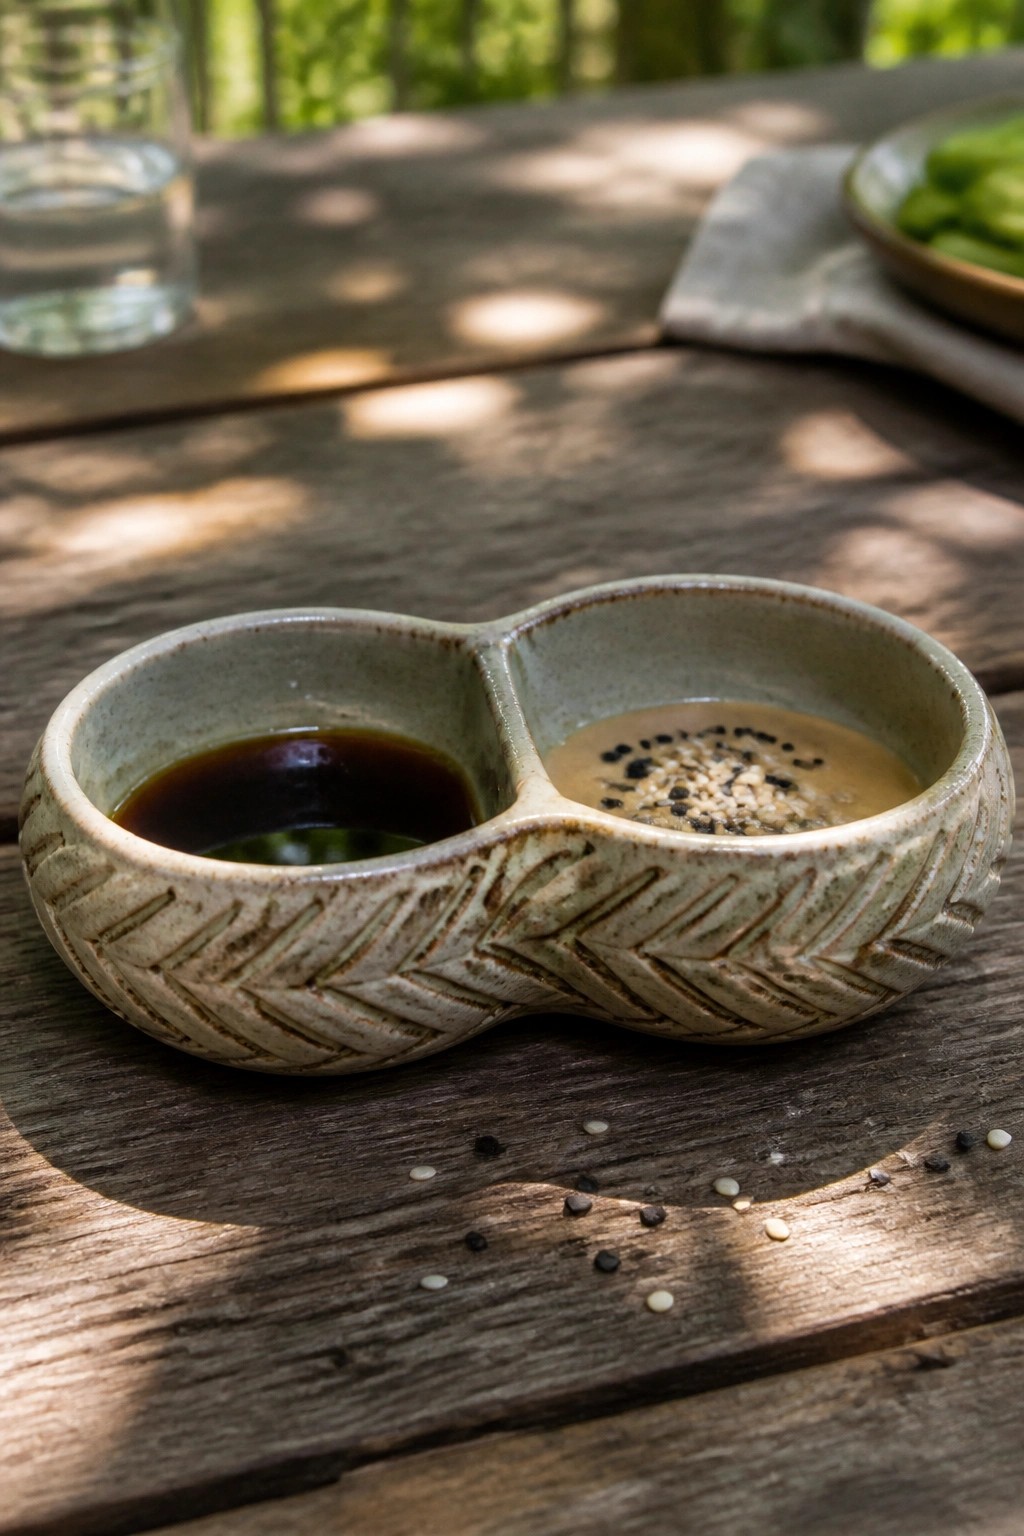
A two-compartment ceramic bowl lets you serve two sauces or dips without mixing them. The exterior carries a repeating carved herringbone pattern that runs around both sections and gives the piece a consistent texture. Smooth glaze covers the inside wells while the carved areas stay matte, creating a clear contrast between the patterned outside and the food areas. This approach works as a kitchen serving piece that stays compact and functional.
What makes this idea useful is how the connected shape keeps everything in one object while the carving adds detail that stands out on a table. You could repeat the same herringbone cut on a longer tray or on small individual ramekins for snacks. In a kitchen, this kind of piece keeps soy sauce, dressings, or dips organized during meals and photographs well for recipe posts. The pattern is simple enough to test on other forms like a single large bowl or a set of pinch pots.
Lace-Textured Pedestal Bowl
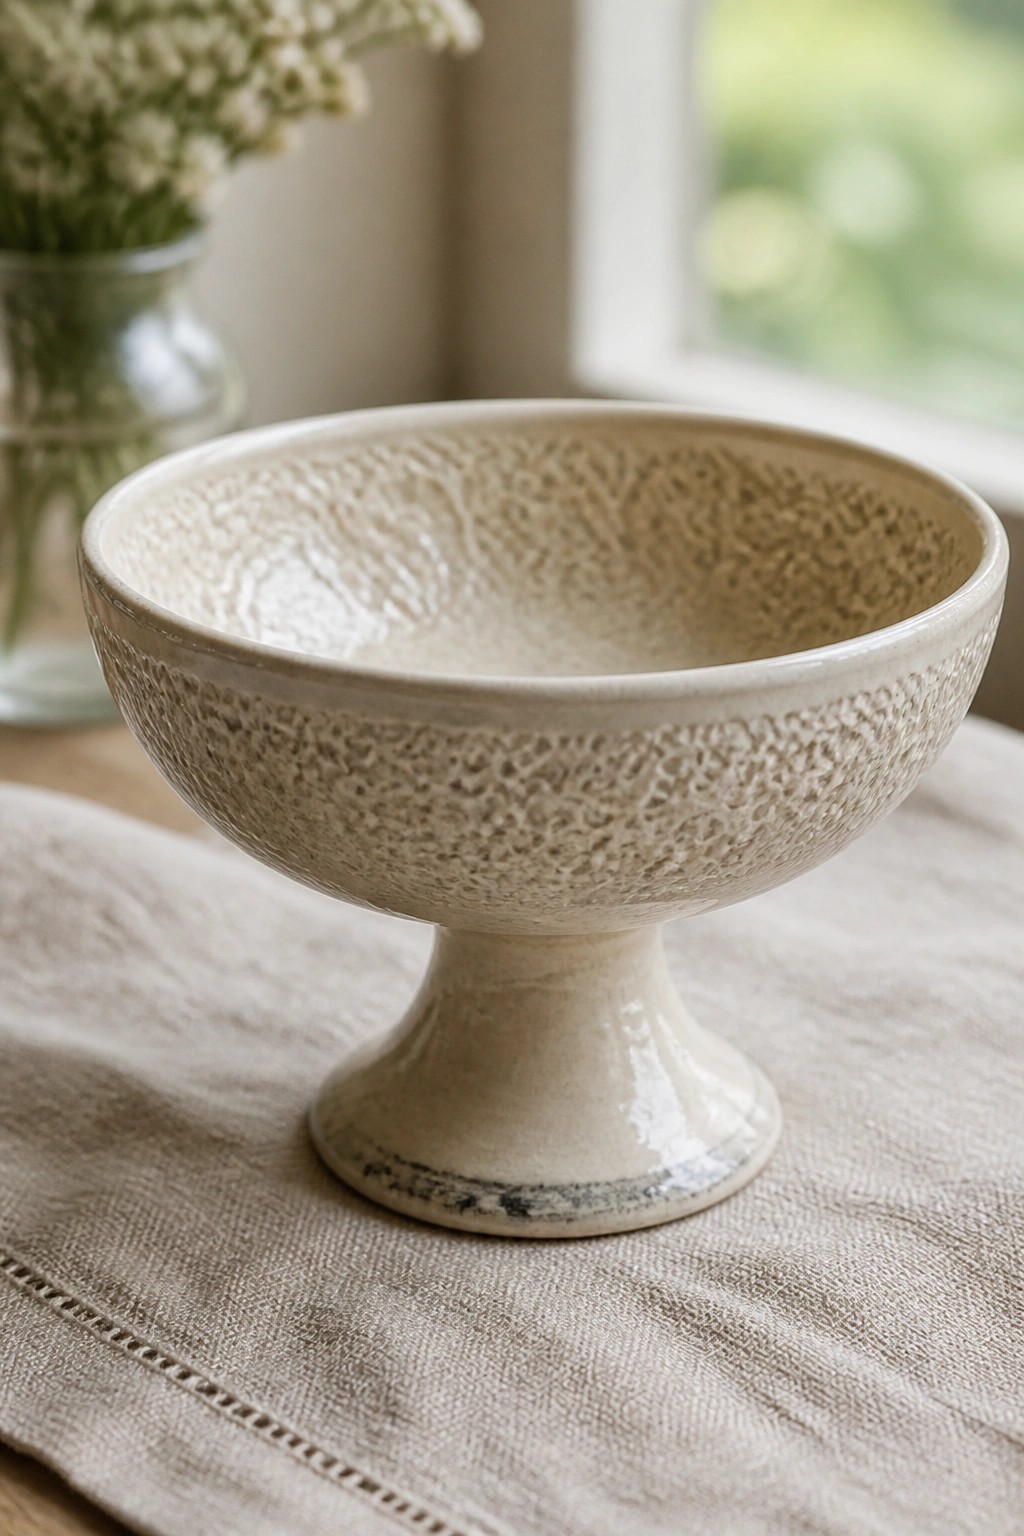
A footed ceramic bowl with an all-over impressed pattern gives a simple way to create surface interest on a classic shape. The repeated motif covers the interior and exterior, producing a consistent texture that catches light without needing extra color or glaze layers. This approach works well for decorative bowls meant for display or holding fruit, keys, or small items on a table.
What makes this idea useful is the way the footed base lifts the form and makes the texture more visible from different angles. You could apply the same stamping method to a wider salad bowl or scale it down for a small trinket dish. The neutral glaze keeps the focus on the pattern, so it fits easily into most kitchen or dining setups without clashing with other dishes. For a variation, try pressing the texture only around the rim and leaving the lower half plain.
Herringbone Carved Exterior on a Deep Serving Bowl
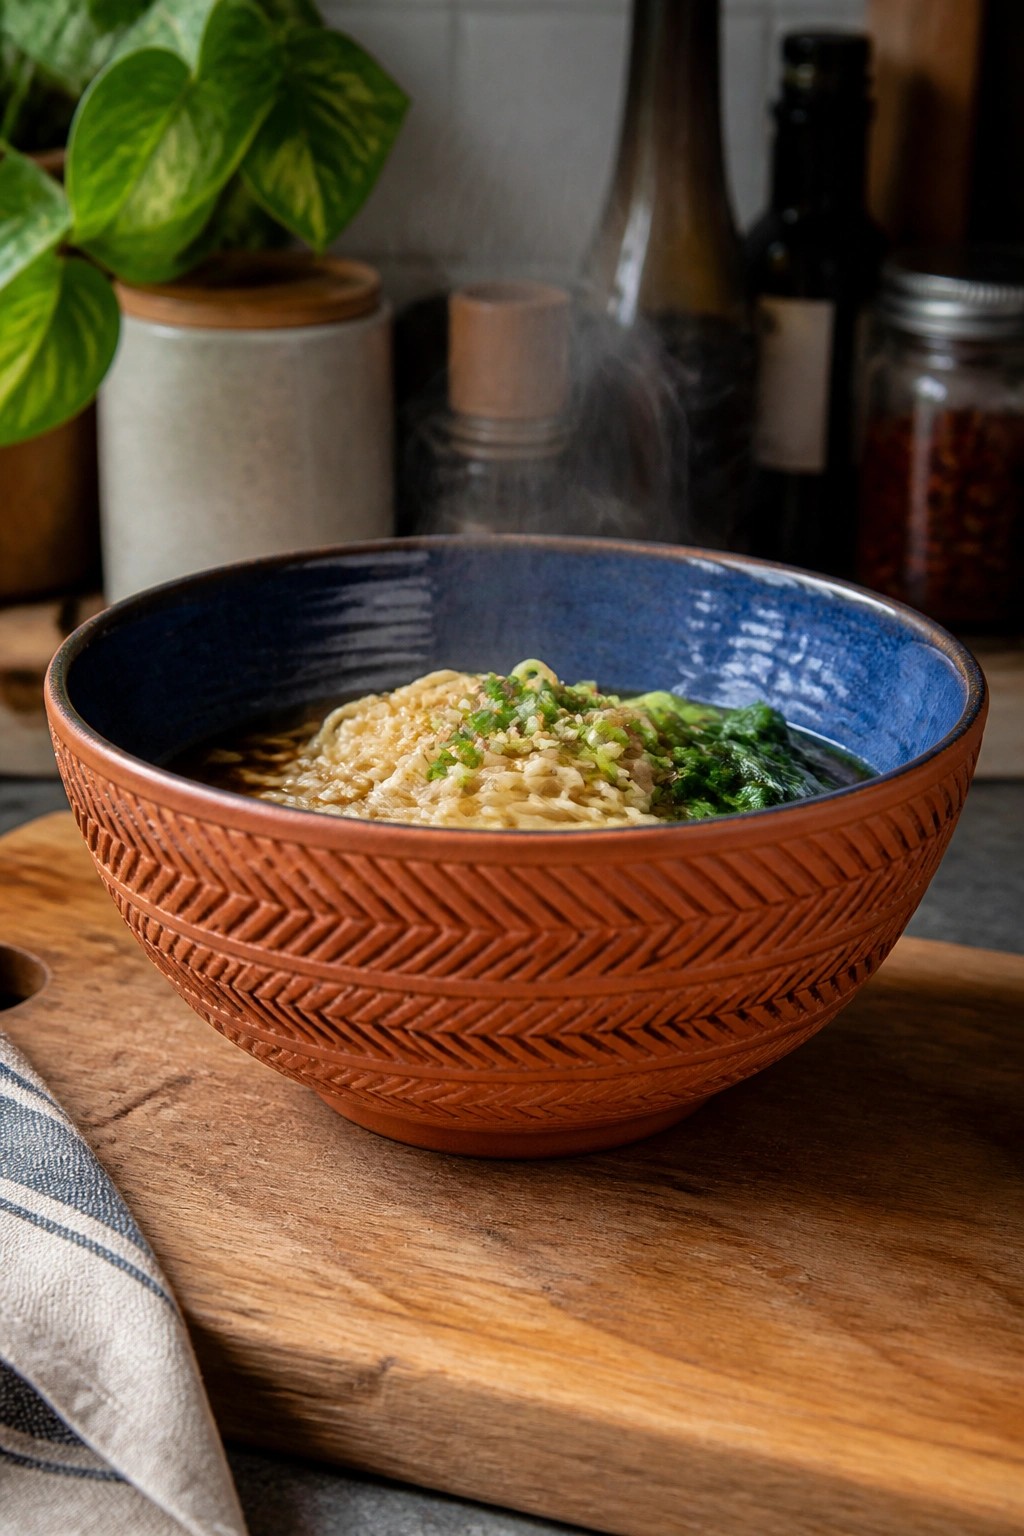
A deep bowl with a repeating herringbone pattern pressed into the exterior gives a simple way to add surface texture to a functional piece. The design uses angled lines that create a woven look across the clay while the inside receives a solid blue glaze for contrast. This approach works especially well on larger bowls meant for soup or noodles because the pattern stays visible even when the bowl is in use. It belongs to the category of kitchen bowls that rely on carved or stamped details rather than added color.
What makes this idea useful is how the exterior texture turns an ordinary bowl into something that stands out on a table without extra decoration. You could adapt the same stamping method to smaller bowls or plates by tightening the pattern scale. In a kitchen this kind of piece holds up well for daily serving because the rough surface provides grip and hides minor wear. The carving could be simplified with wider lines for faster results or extended onto a matching lidded jar for a small set.
Radiating Fluted Carving on a Small Ceramic Dish
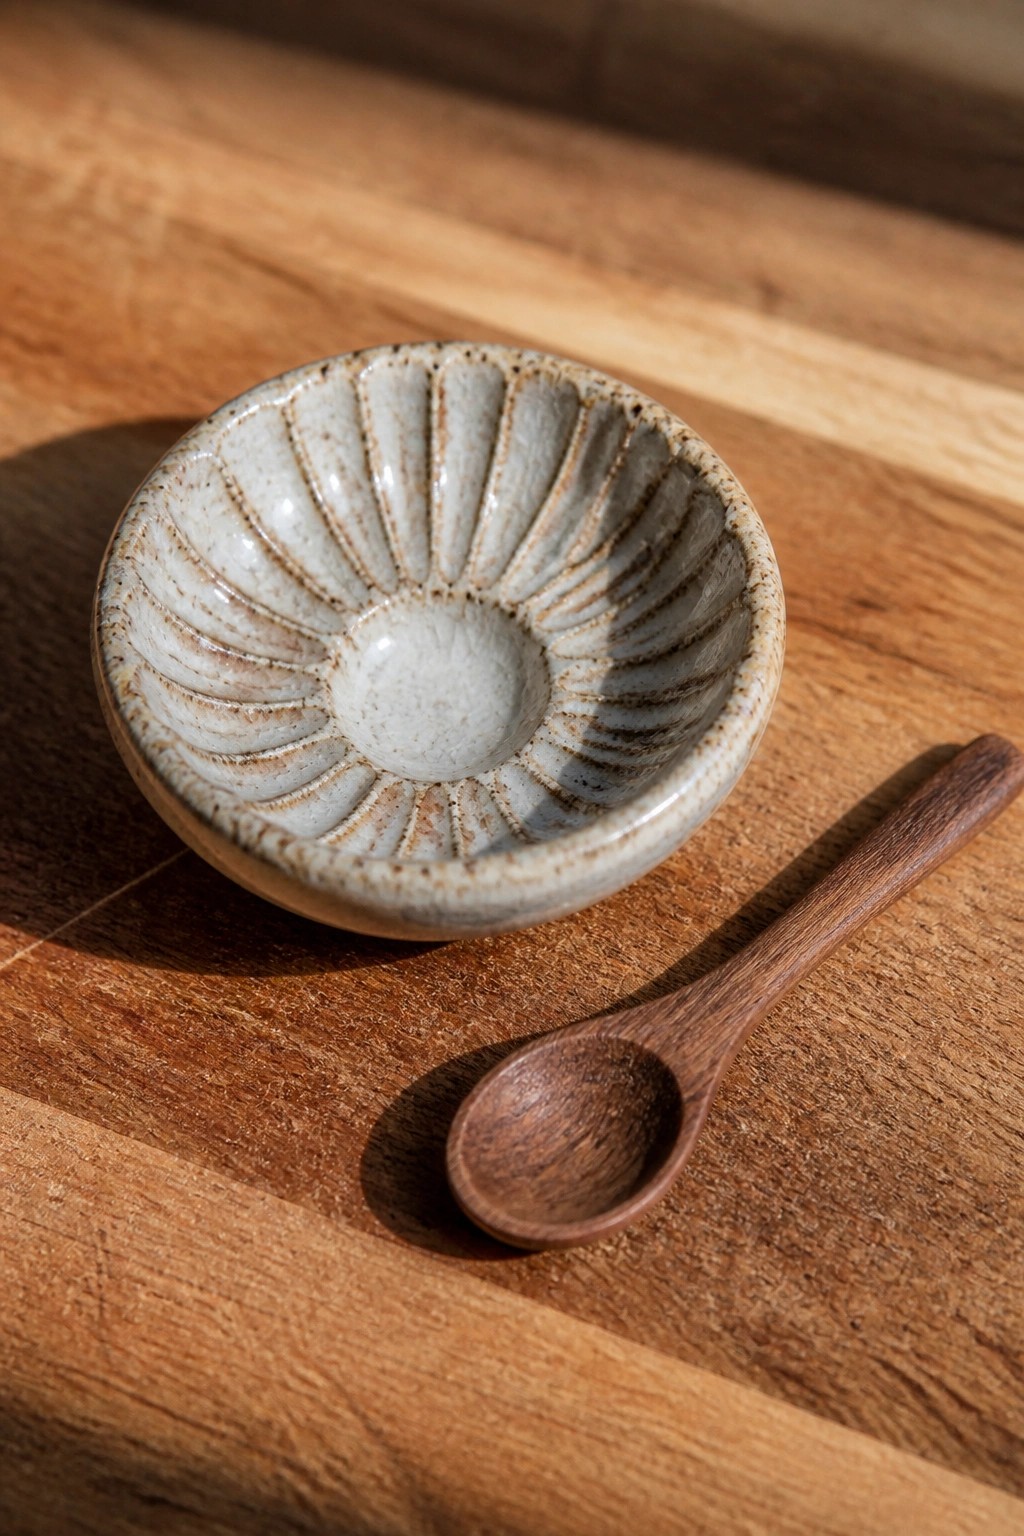
A small ceramic bowl with carved radiating flutes inside makes a practical choice for a condiment or spice dish. The grooves run from the center outward in even segments, catching glaze in the recessed areas to create contrast without extra color work. This approach keeps the design simple while adding texture that suits a compact kitchen item.
What makes this idea useful is the way the small scale limits how much carving is needed, so the pattern stays manageable on a basic wheel-thrown or slab-built form. You could repeat the same cuts around the exterior of a taller bowl or scale the idea down further for individual salt cellars in a set. In a kitchen this kind of piece works well for holding small amounts of ingredients because the flutes help keep contents from sliding around. For a gift, pairing the dish with a short wooden spoon turns it into a ready-to-use item that stands out in a collection of plain ceramics.
Leaf Vein Carved Bowl
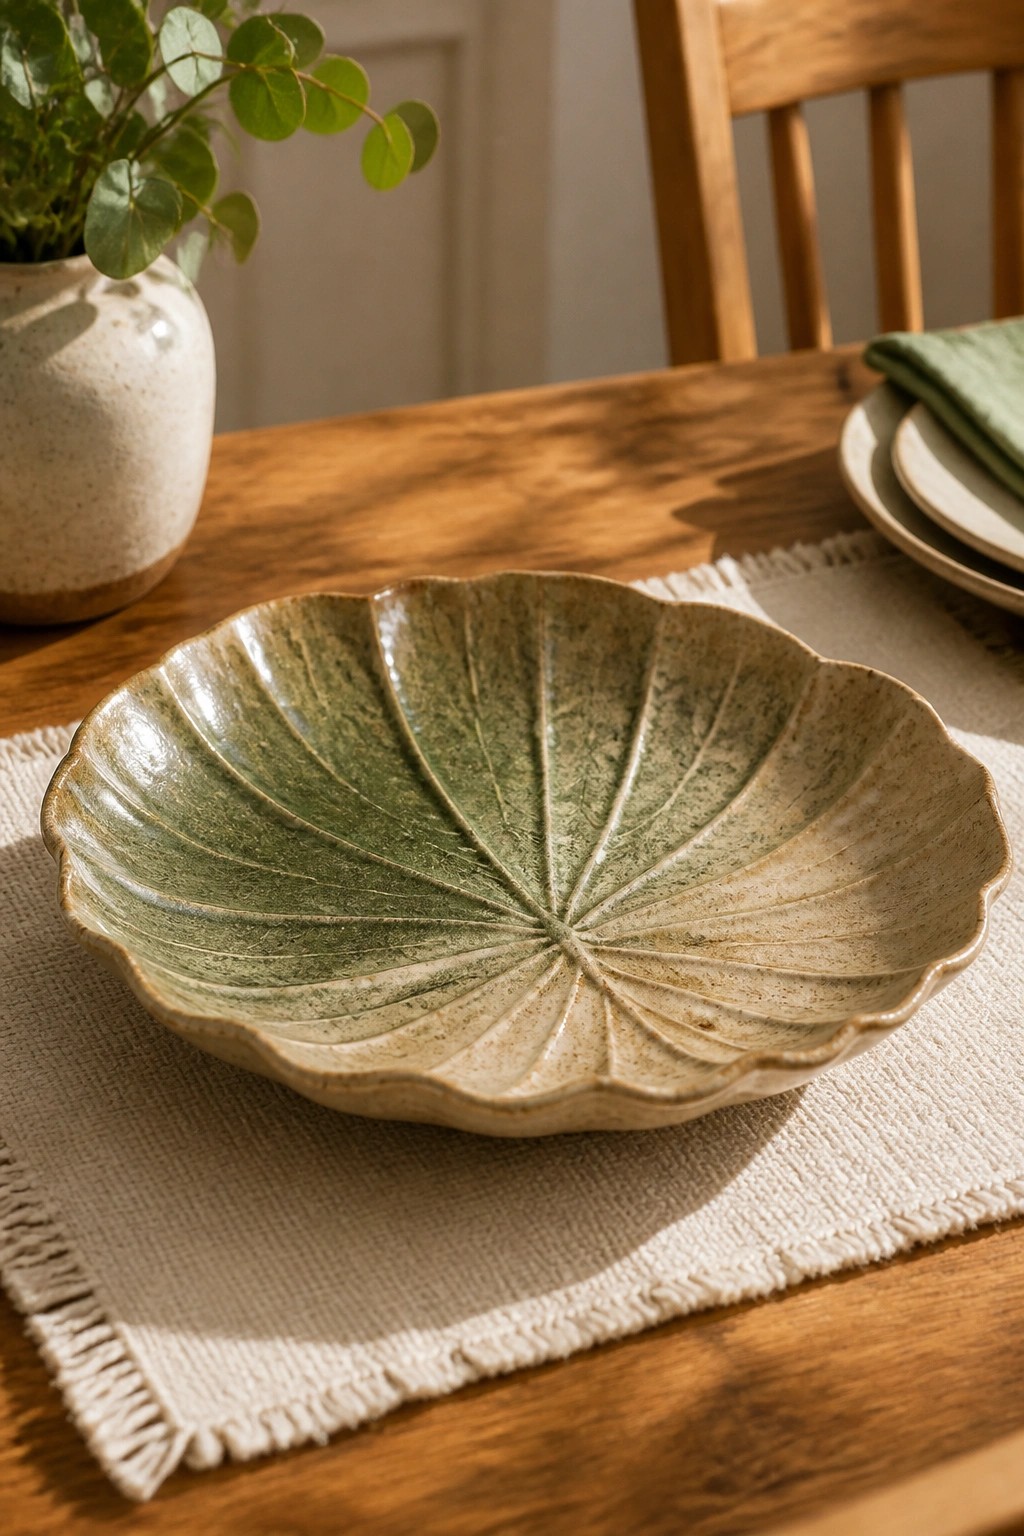
A shallow ceramic bowl with a scalloped rim and lines carved to radiate from the center creates a clear leaf or flower effect. The green glaze pools in the carved areas while lighter tones sit on the raised surfaces, which helps the pattern stand out without extra color. This approach turns a basic bowl into a textured piece that still functions for serving or display. The form fits the category of a decorative or low serving bowl.
What makes this idea useful is how the carved lines give the surface interest while the wide, low shape keeps it practical for fruit or snacks. The same radiating pattern could be scaled down for small plates or repeated on a taller vase. In a kitchen or dining area the green tones pair easily with neutral dishes and wood. The carving itself can be simplified with fewer lines if you want a quicker version or made deeper for stronger texture.
Relief Carved Owl Bowl with Layered Feather Texture
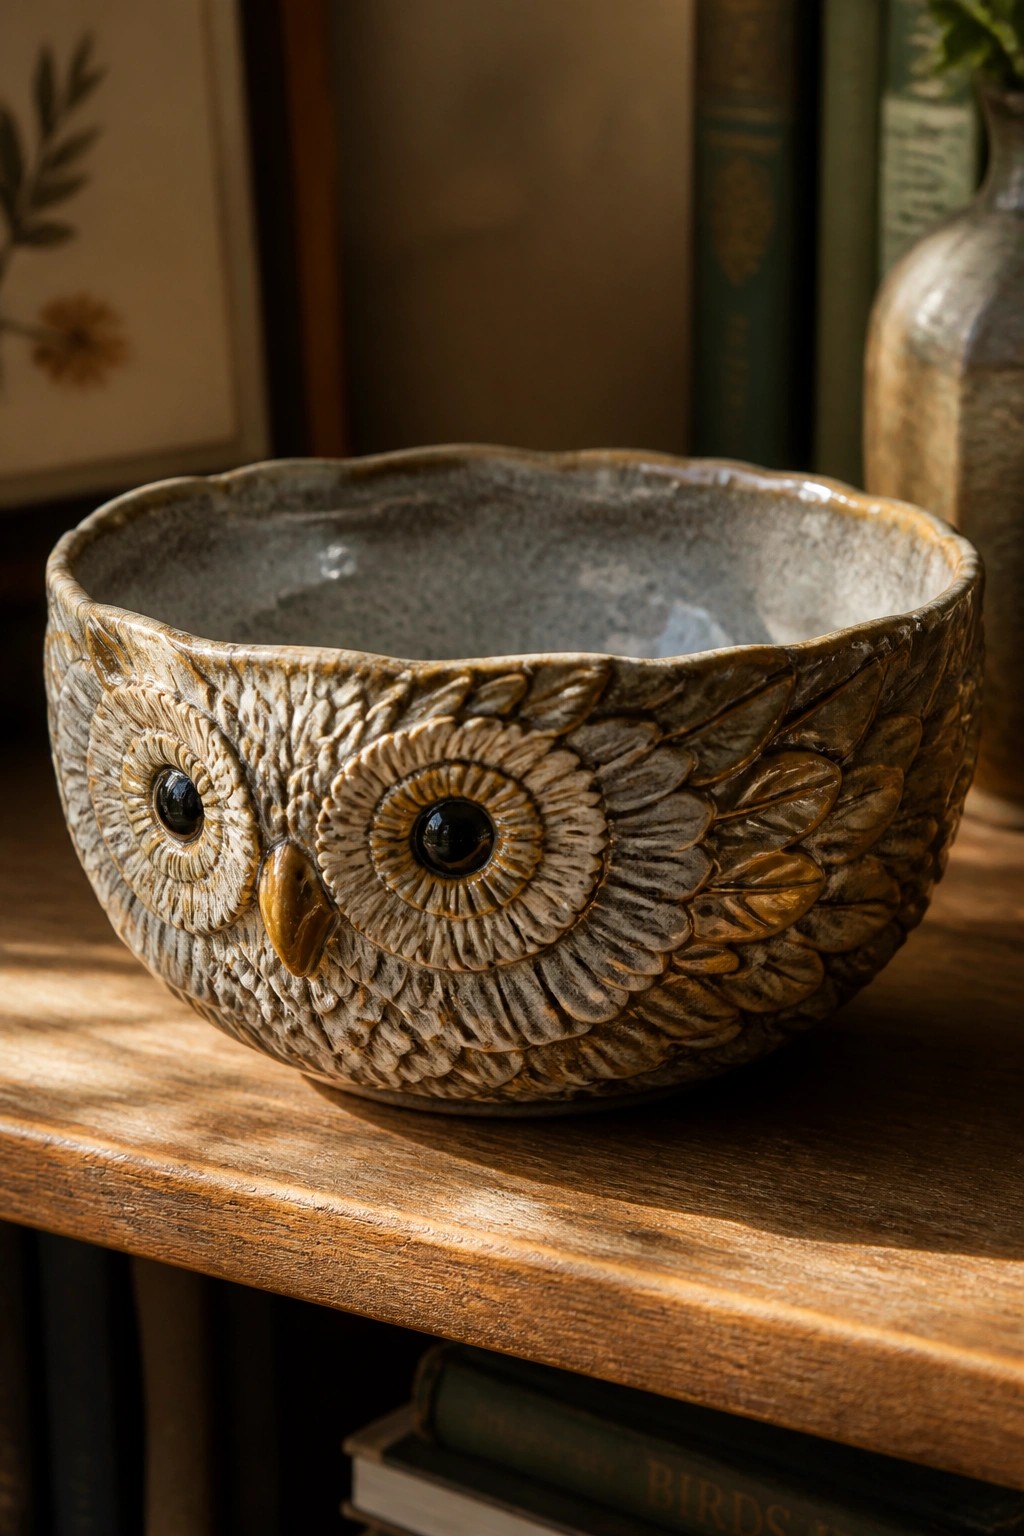
A round ceramic bowl gains strong visual interest when an owl face is built through relief carving on the exterior. Overlapping feather shapes radiate around two raised circular eyes and a short beak, creating a patterned surface that plays with light and shadow. The design keeps the interior smooth for practical use while turning the outside into the main decorative element. This fits the category of a textured bowl that works as both a container and a display piece.
What makes this idea useful is how the carved details let the bowl stand out on a shelf or mantel without needing extra paint or glaze layers. You can adapt the feather pattern to a shallower dish or a taller vase by changing how far the eyes and beak extend from the surface. For a quicker version, repeat just the feather bands around the rim instead of building a full face. In a kitchen or living space, the earthy tones and raised texture help the piece blend with natural decor styles while still reading as handmade pottery.
Slanted Linear Carvings on a Speckled Bowl
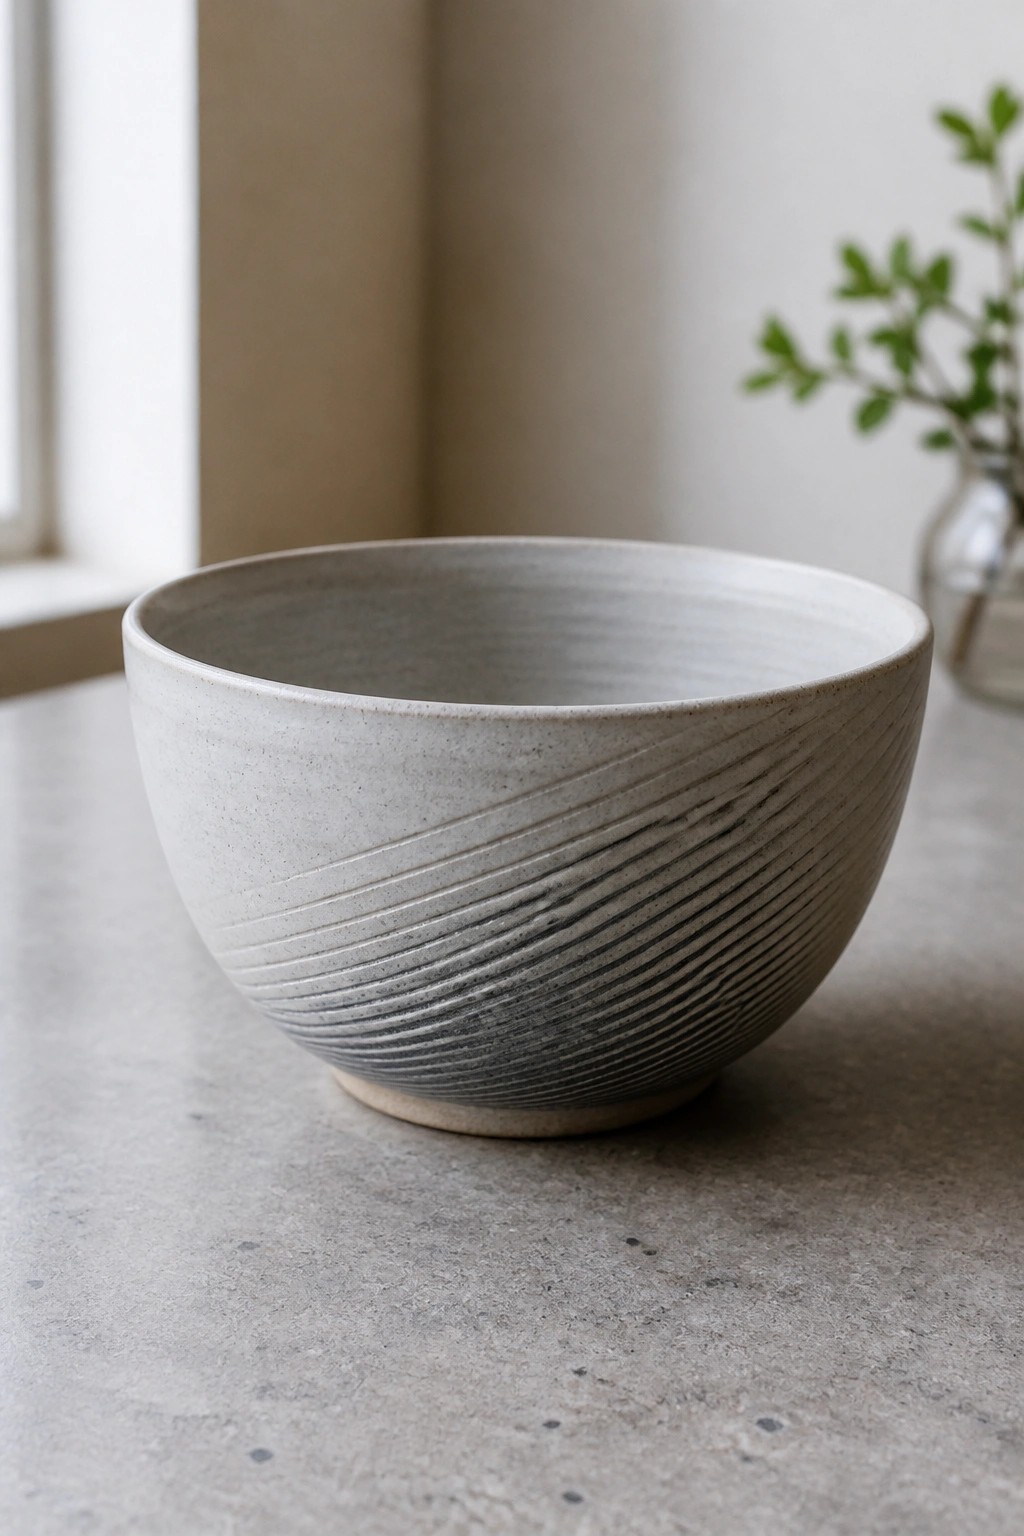
A wheel-thrown bowl can be finished with a band of carved lines that run diagonally around the lower half. The lines are spaced evenly and cut deeper toward the base, which creates a gradual shift in tone on the speckled clay surface. The upper portion stays smooth, so the carved area reads as a deliberate design choice rather than surface decoration. This style fits the textured bowl category in the series because the pattern comes from removal of clay rather than added slip or glaze.
What makes this idea useful is how the carving stays contained to one section, which keeps the bowl simple to throw and finish. The same line pattern can be adapted to a smaller serving bowl or a lidded jar by shortening the band and tightening the spacing. In a kitchen it works as a mixing or salad bowl without the texture interfering with the rim. You could also try the approach on a taller cylinder form by rotating the lines vertically for a different object.
Stamped Stars on a Swirling Glaze Bowl
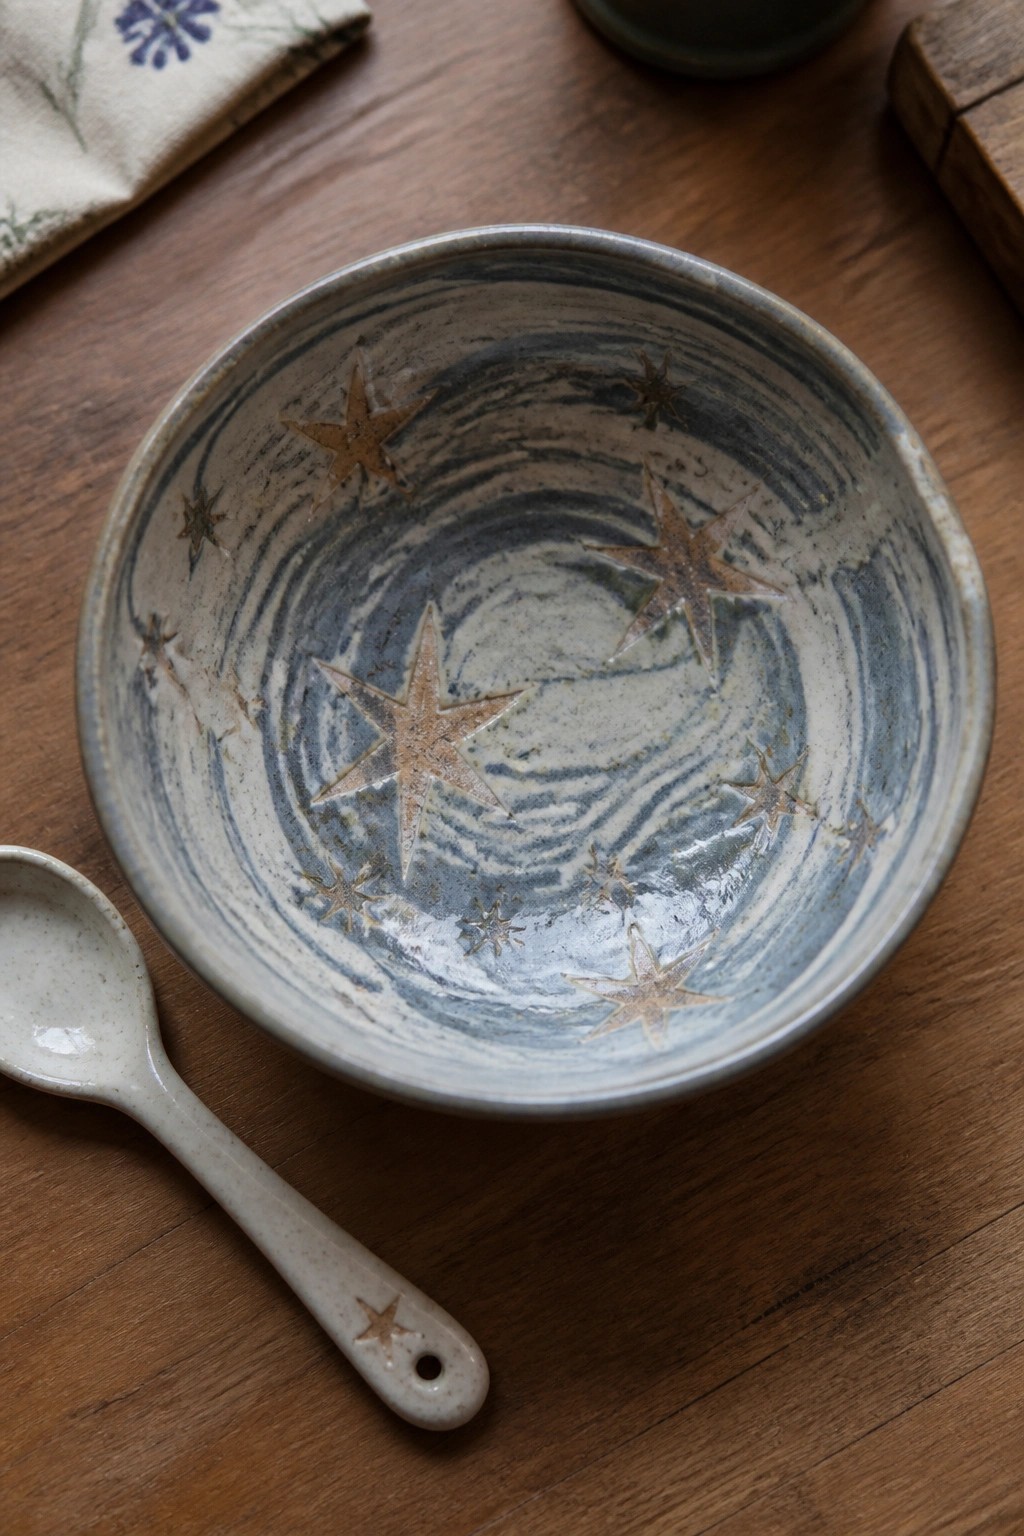
A simple ceramic bowl gets its pattern from repeated star stamps pressed into the clay before glazing. The blue and white swirling lines come from the glaze itself, while the stars stay raised or recessed enough to catch a contrasting tone. Pairing the bowl with a matching spoon that carries the same star on the handle turns the set into a complete kitchen piece. This approach works for any round bowl form where you want a repeating motif without covering the whole surface.
The shape does a lot of the work here because the open bowl interior shows off the full pattern while the spoon adds a small matching detail. You could stamp the same stars onto plates or a mug set using the same stamp tool. For a gift, something like this pairs well with everyday use since the stars stay visible even after food is added. The small scale of the motif also makes it easy to try on a test tile first before committing to a full bowl.
Overlapping Scale Texture on a Ceramic Bowl
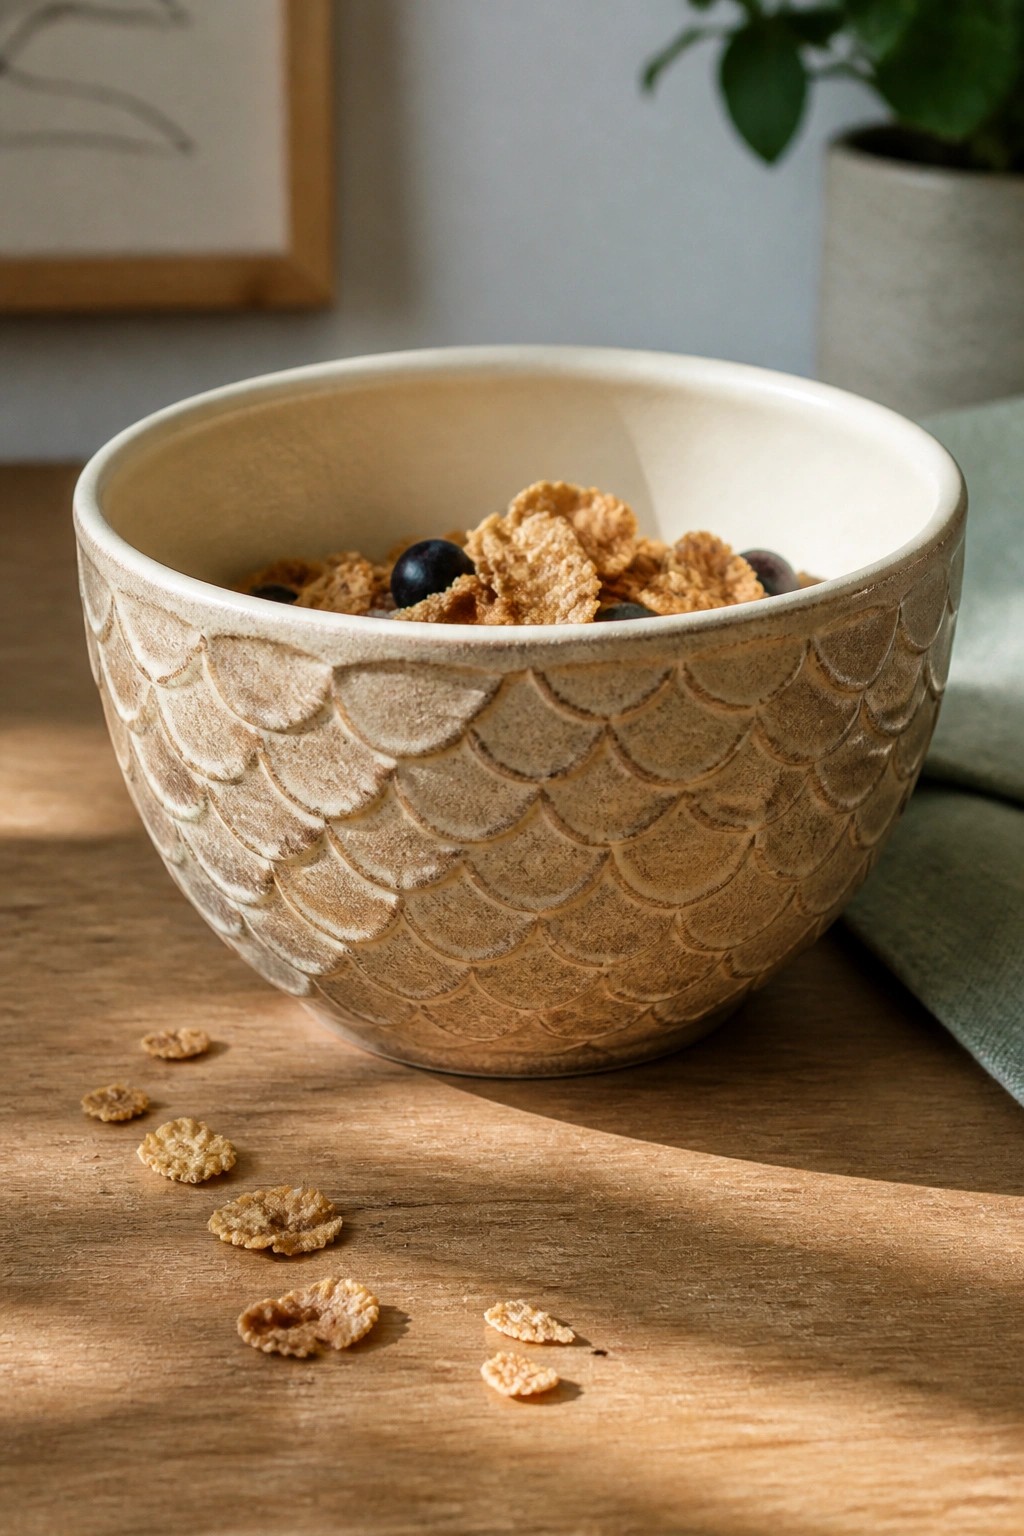
A ceramic bowl with a repeating scale pattern carved into the exterior gives the surface a layered, ridged texture that stands out against the smooth interior. The arcs are arranged in offset rows that wrap around the form, creating consistent visual rhythm without covering the entire piece. This works as a straightforward kitchen bowl since the inside stays plain for food contact while the outside pattern adds interest to the overall shape.
The shape does a lot of the work here because the wide opening and sturdy walls suit both breakfast portions and side dishes. You could adapt the same carving to a smaller dessert bowl or a taller soup bowl by changing the scale of the arcs to match the new size. For a gift, something like this pairs easily with simple wooden utensils or a linen napkin. The pattern also photographs clearly for recipe posts or product listings since the texture shows up well in natural light.
Dimple Carving with Glaze Pooling in a Bowl
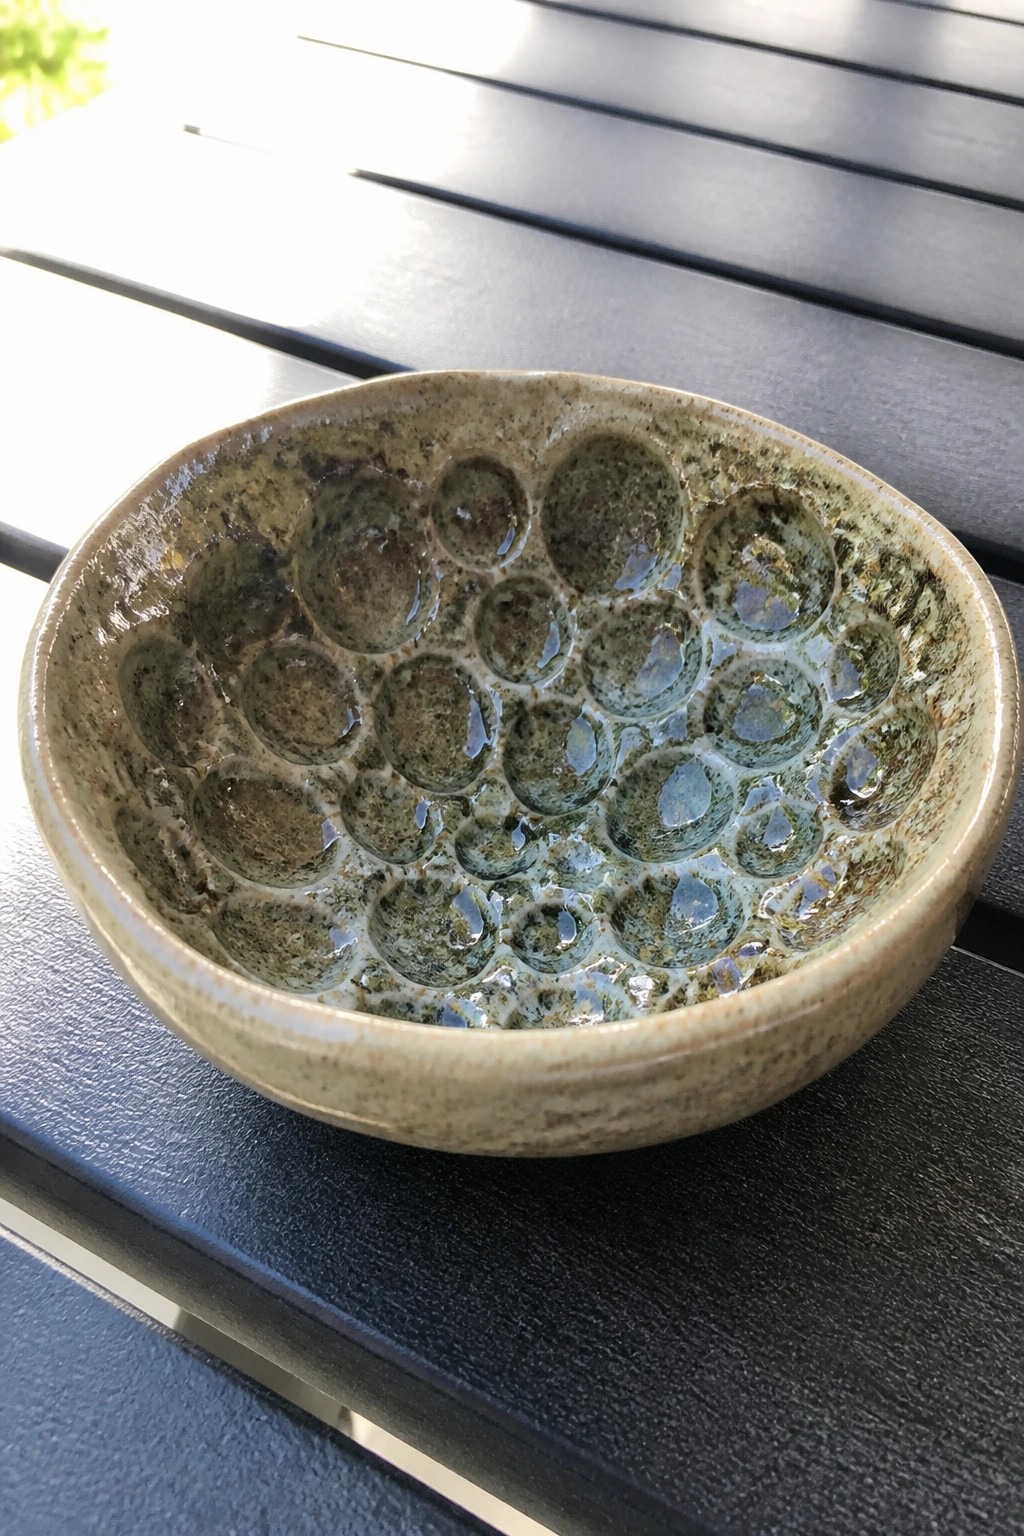
A small ceramic bowl with its interior carved into a pattern of rounded indentations creates pockets that hold extra glaze during firing. The repetitive carving produces a textured surface where the glaze pools thicker in the depressions, shifting the color and adding shine in those spots. This turns an otherwise plain bowl into one defined by its carved texture rather than added decoration.
The shape works well as a small dish for salt, spices, or jewelry on a countertop. The same dimple pattern can be scaled up on a larger serving bowl by spacing the circles wider or made smaller for a ring dish or spoon rest. Using a single glaze over the carved areas keeps the focus on the texture without needing multiple colors or complex painting.
Carved Wave and Spiral Planter Bowl
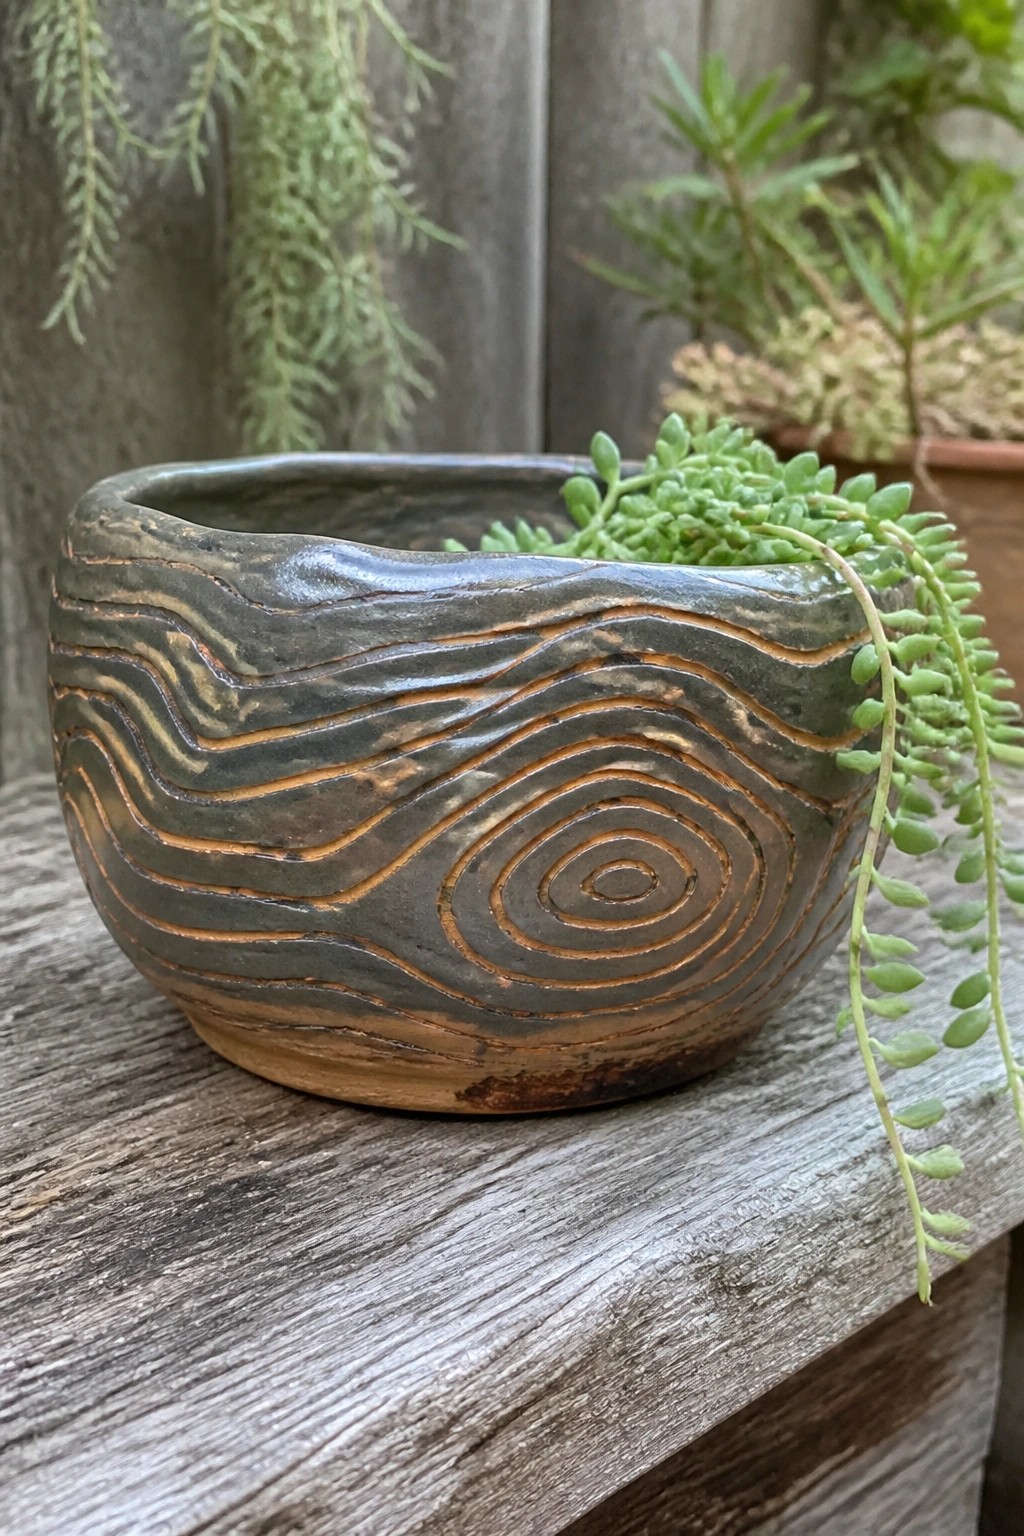
A wide, low ceramic bowl makes an effective succulent planter when the exterior carries hand-carved horizontal waves on one side and a centered spiral on the other. The grooves are emphasized by a dark glaze that settles into the lines and exposes warmer brown tones along the raised edges. This approach keeps the decoration simple yet bold, relying on the carved texture rather than added color or multiple glazes. The rounded shape gives enough room for soil while letting the surface pattern remain the main feature.
What makes this idea useful is how the same carving layout scales to smaller or taller forms without losing impact. You can drop the spiral and use only the wave lines for a faster version, or extend the spiral around the whole bowl for a more uniform look. The low profile works well on a shelf or table where a trailing plant can hang over the rim. The textured surface also photographs clearly for reference or sharing, and the idea transfers easily to matte or glossy glazes.
Frequently Asked Questions
What tools are best for creating textured and patterned designs on pottery bowls?
A basic set of carving tools includes wire loop tools for removing clay in controlled areas, sgraffito needles for fine lines, and texture stamps or ribs for adding raised patterns. Start with a few versatile sizes and keep them sharp by regular honing. For deeper textures try flexible rubber or wooden ribs to press in repeating motifs without tearing the surface. Always test tools on a small slab of the same clay first to see how they interact with moisture levels.
How can I avoid cracking when carving intricate patterns into a bowl?
Work on clay that is firm but still slightly damp, often called leather hard, because this stage holds detail without being brittle. Carve in stages rather than all at once and mist the surface lightly if it begins to dry out. Support the bowl on a foam cushion or banding wheel to reduce stress on the walls while you turn it. After carving, cover the piece loosely with plastic for 24 hours so moisture evens out before slow drying.
Which clay bodies hold carved textures and patterns most clearly?
Stoneware clays with fine grog or porcelain bodies usually capture sharp edges and subtle textures without slumping. Avoid very coarse earthenware if you want crisp lines, though it can work for bolder, rustic patterns. Test a small bowl in your chosen clay and fire it to the temperature you plan to use, noting how the patterns look after shrinkage. Many artists mix a bit of grog into smoother clay to add tooth for better tool grip.
How do I highlight carved designs when glazing my finished bowls?
Apply a base glaze that contrasts with the clay color, then wipe excess from raised areas so color pools in the recessed textures. Matte or satin glazes often emphasize depth better than shiny ones. For added interest layer a thin wash of iron or cobalt oxide into the patterns before the main glaze. Always run a test tile with the same carving and firing schedule to check how the glaze moves and settles.
What safety steps should I follow when carving multiple bowls in one session?
Wear a dust mask when sanding or trimming dry clay and work in a well ventilated space. Keep a damp sponge nearby to wipe up shavings immediately so they do not become airborne. Take regular breaks to stretch your hands and wrists, especially when doing repetitive carving motions. Store sharp tools in a dedicated holder with blades covered between uses.

Pottery Path is my cozy corner of the internet where I share clay ideas, pottery inspiration, and simple projects you can recreate at home. I love exploring everything from air dry clay to handbuilt pottery to cute minis that brighten your day. My goal is to make clay crafting feel easy, fun, and welcoming for anyone who wants to try it.
You will find beginner friendly tutorials, creative pottery painting ideas, and lots of warm inspiration for slow and happy crafting. If you enjoy hands on creativity, this space will feel like home.