I have been experimenting with hand built mugs in my studio for the past few months. It can be tricky to get them to hold their shape without extra support especially when you are new to pottery. I collected some simple designs that have been reliable for me and other beginners I know. They do not require advanced techniques or tools. These nineteen ideas are ones I would recommend trying first.
Organic Mug with Loop Handle
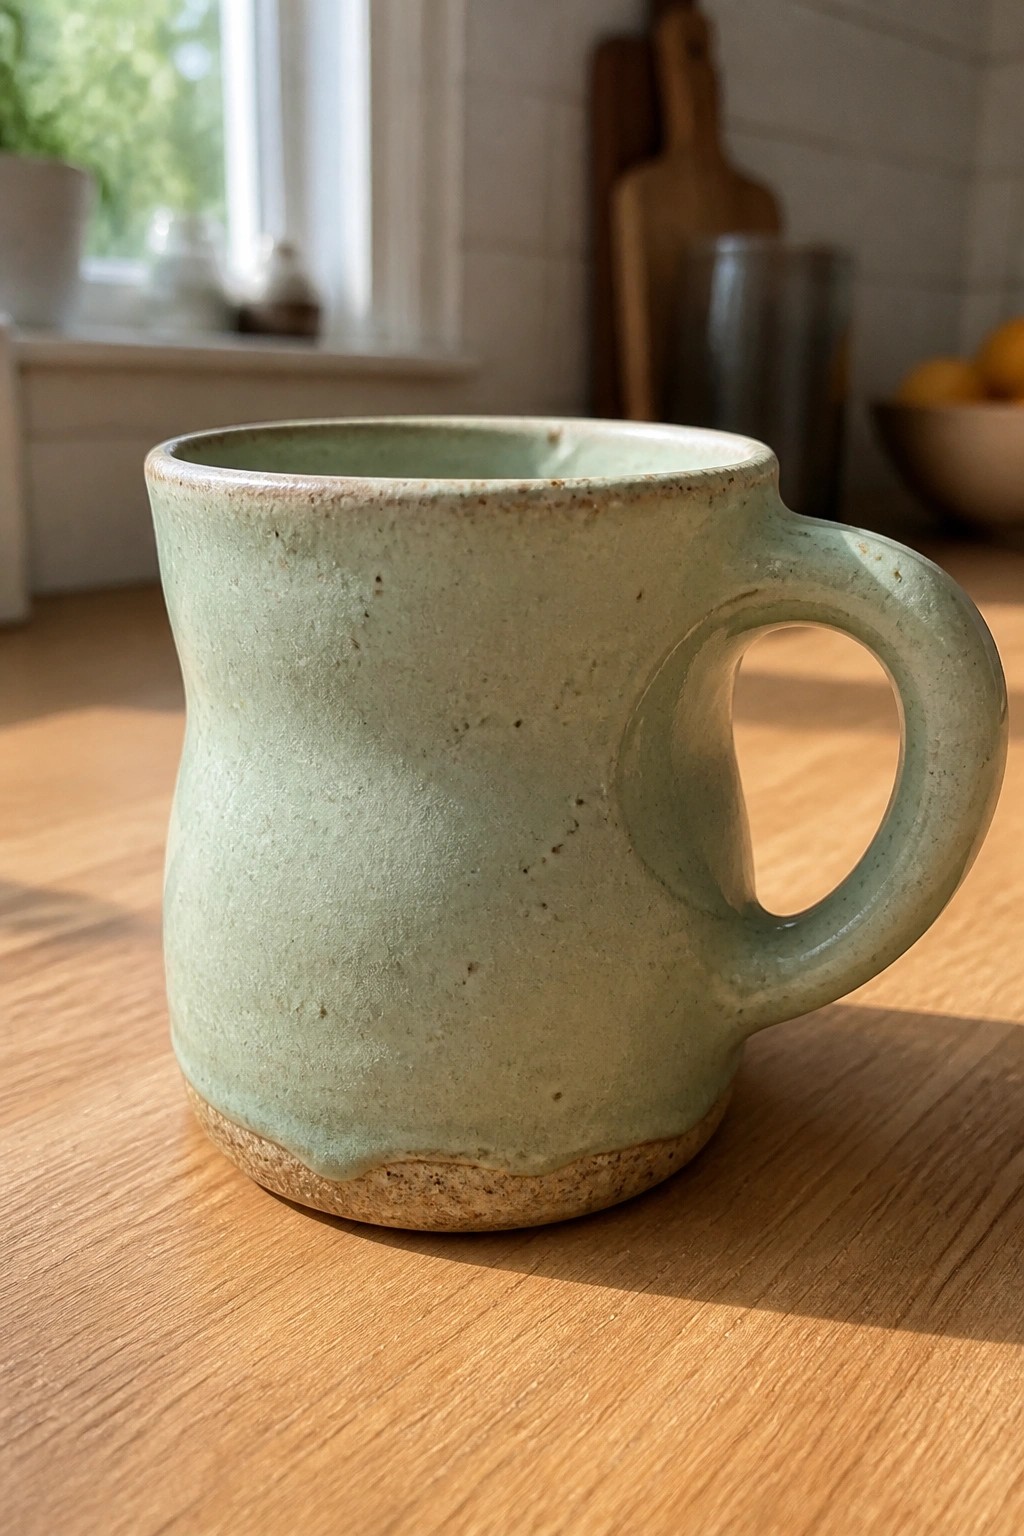
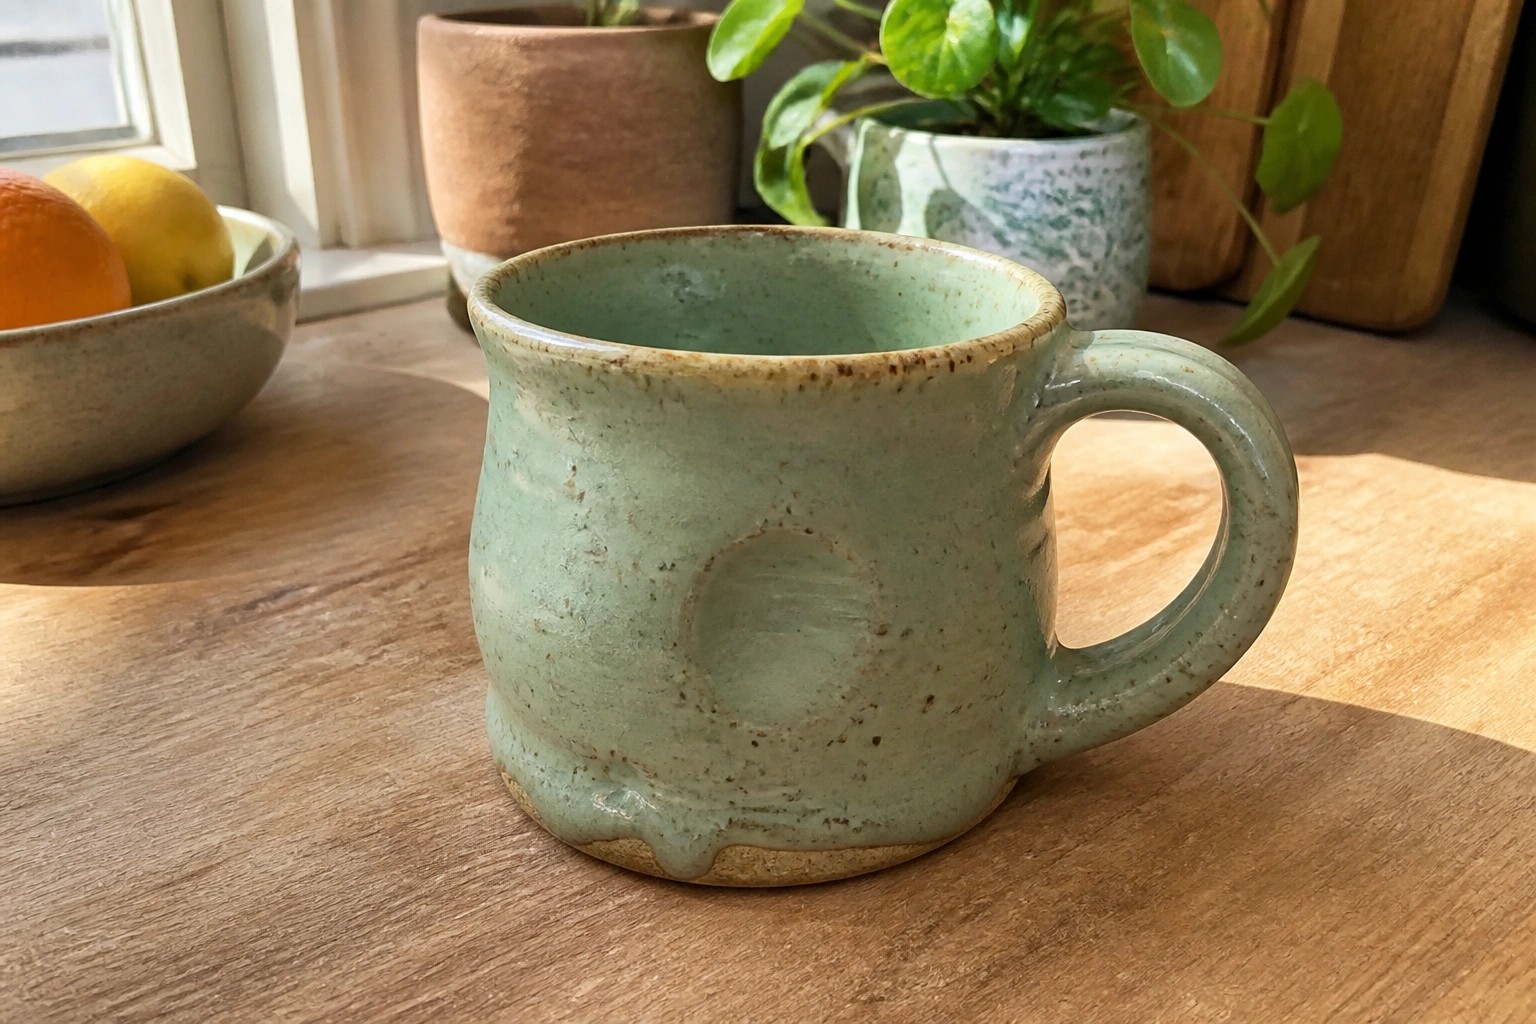
A hand-built mug shaped by pinching and smoothing gives the form an uneven, rounded profile that feels natural rather than uniform. The soft mint glaze covers the upper body while the speckled clay base stays exposed, creating a simple color break without extra decoration. The handle features a large circular opening that adds visual interest through negative space and keeps the overall piece lightweight.
The compact size works well for daily drinks and stores easily in a cabinet. You can adjust the handle by making the opening smaller or adding light finger ridges for grip. This shape translates easily to a smaller version for espresso or a taller one for soup. The exposed base also gives you a quick way to test different clay bodies without changing the whole glaze plan.
Color Blocked Square Mugs
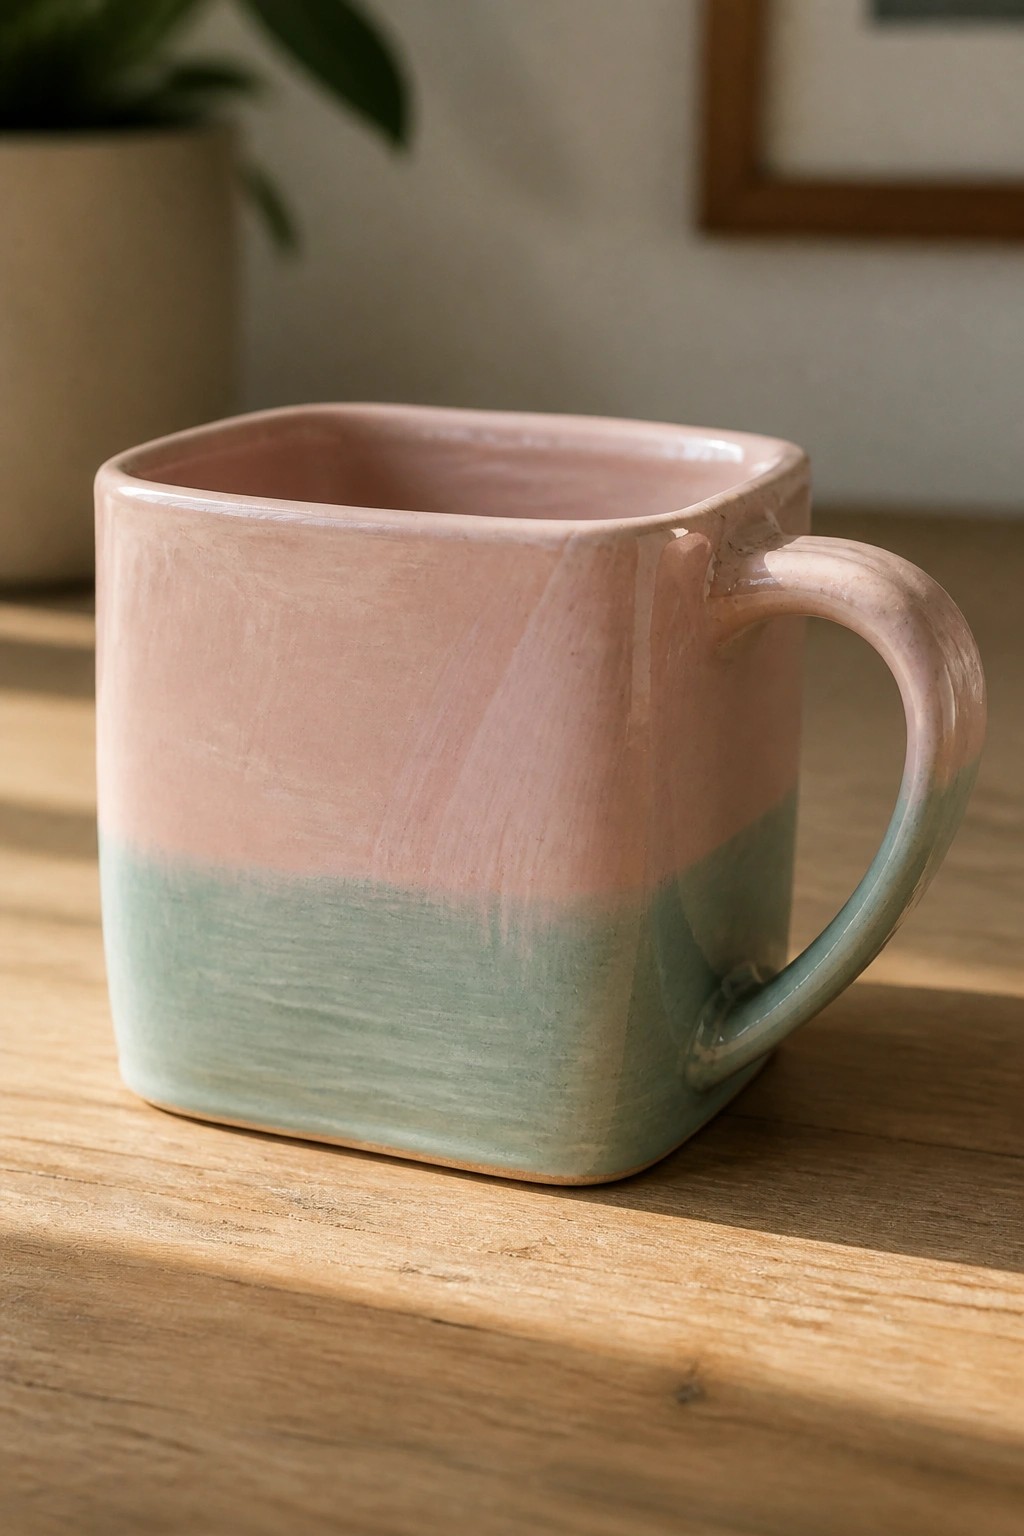
A square mug formed from soft slabs creates flat sides that are simple to join and keep straight during drying. The two-tone glaze splits the body into a pink upper section and a green lower section, letting the color change do the visual work instead of added texture or carving. This keeps the project quick while still producing a finished piece that reads as intentional rather than plain.
The shape does a lot of the work here because the flat walls stack cleanly in a cupboard and the wide base gives stability without extra trimming. You can change the height of the color bands or swap the glaze colors to match different kitchen palettes or gift themes. The same slab method also scales down for small espresso cups or up for larger soup bowls if you want to repeat the idea in other sizes.
Mug with Horizontal Texture Ridges and Speckled Glaze
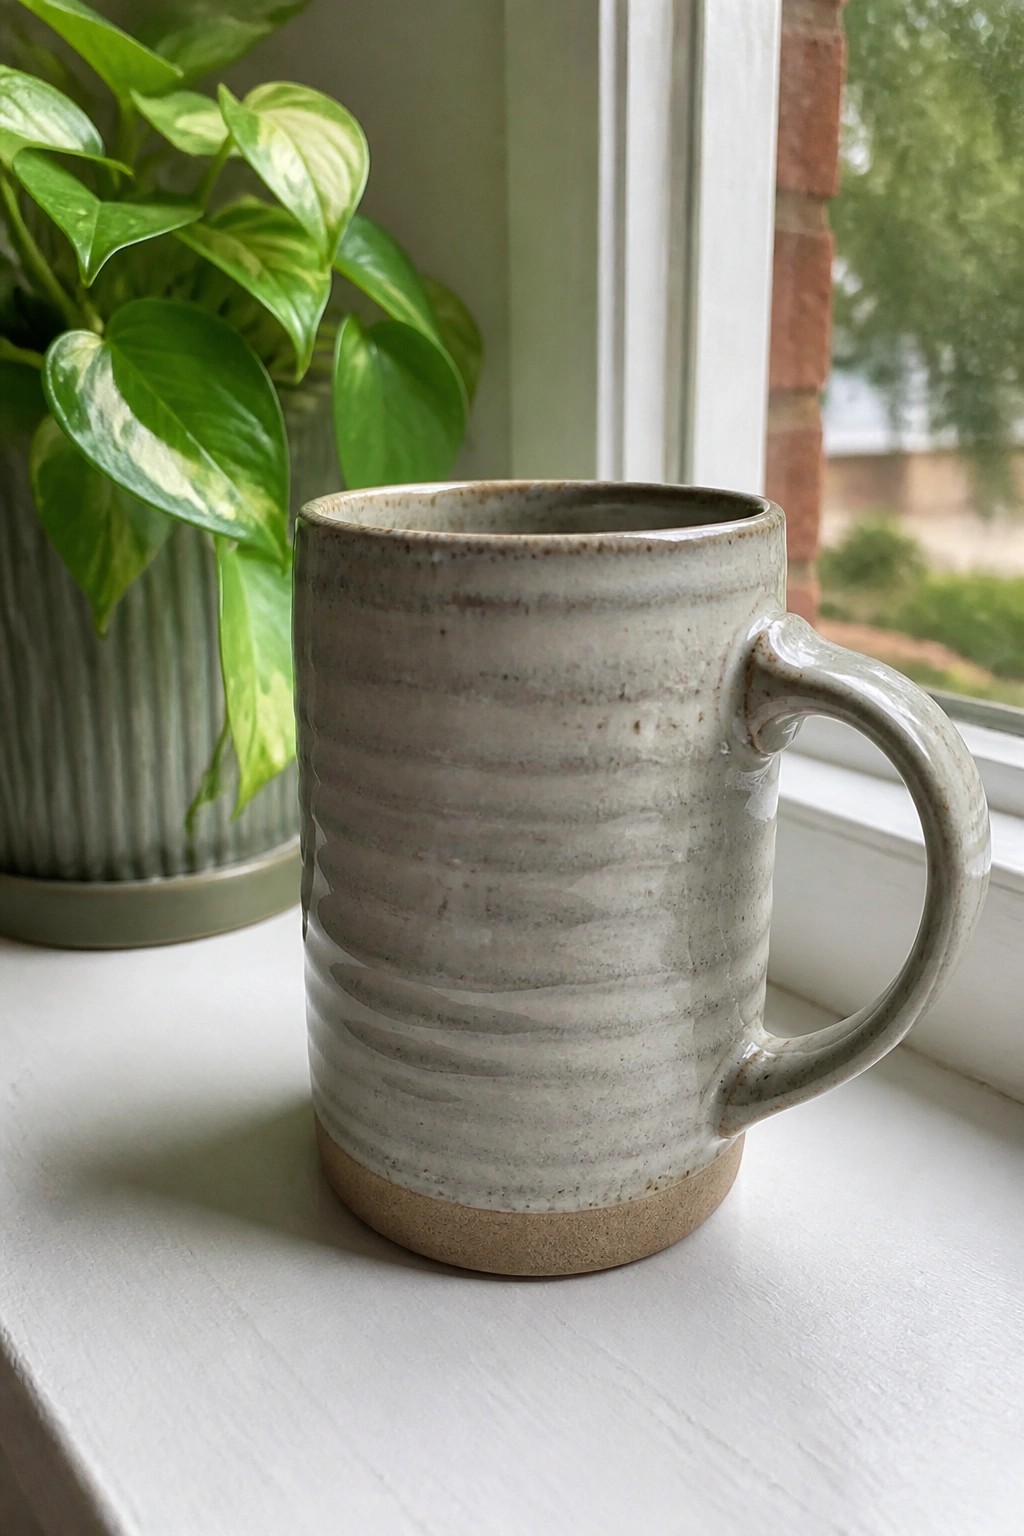
A basic cylinder mug gains visual structure when you add even horizontal ridges around the body before the clay firms up. The light speckled glaze settles into those grooves to create soft contrast while leaving the handle smooth for comfort. This keeps the overall form straightforward to build by hand yet gives the finished piece a clear surface pattern that reads well from a distance.
What makes this idea useful is how the ridges can be pressed in with a simple rib tool or the edge of a card during the making stage. The shape works especially well as an everyday drinking mug because the texture adds grip without making the surface rough to the touch. You could repeat the same ridge pattern on a shorter tumbler or stretch it taller for a travel mug. In a kitchen, the neutral glaze lets the mug blend with other dishes while the lines keep it from looking plain.
Embossed Leaf Mug
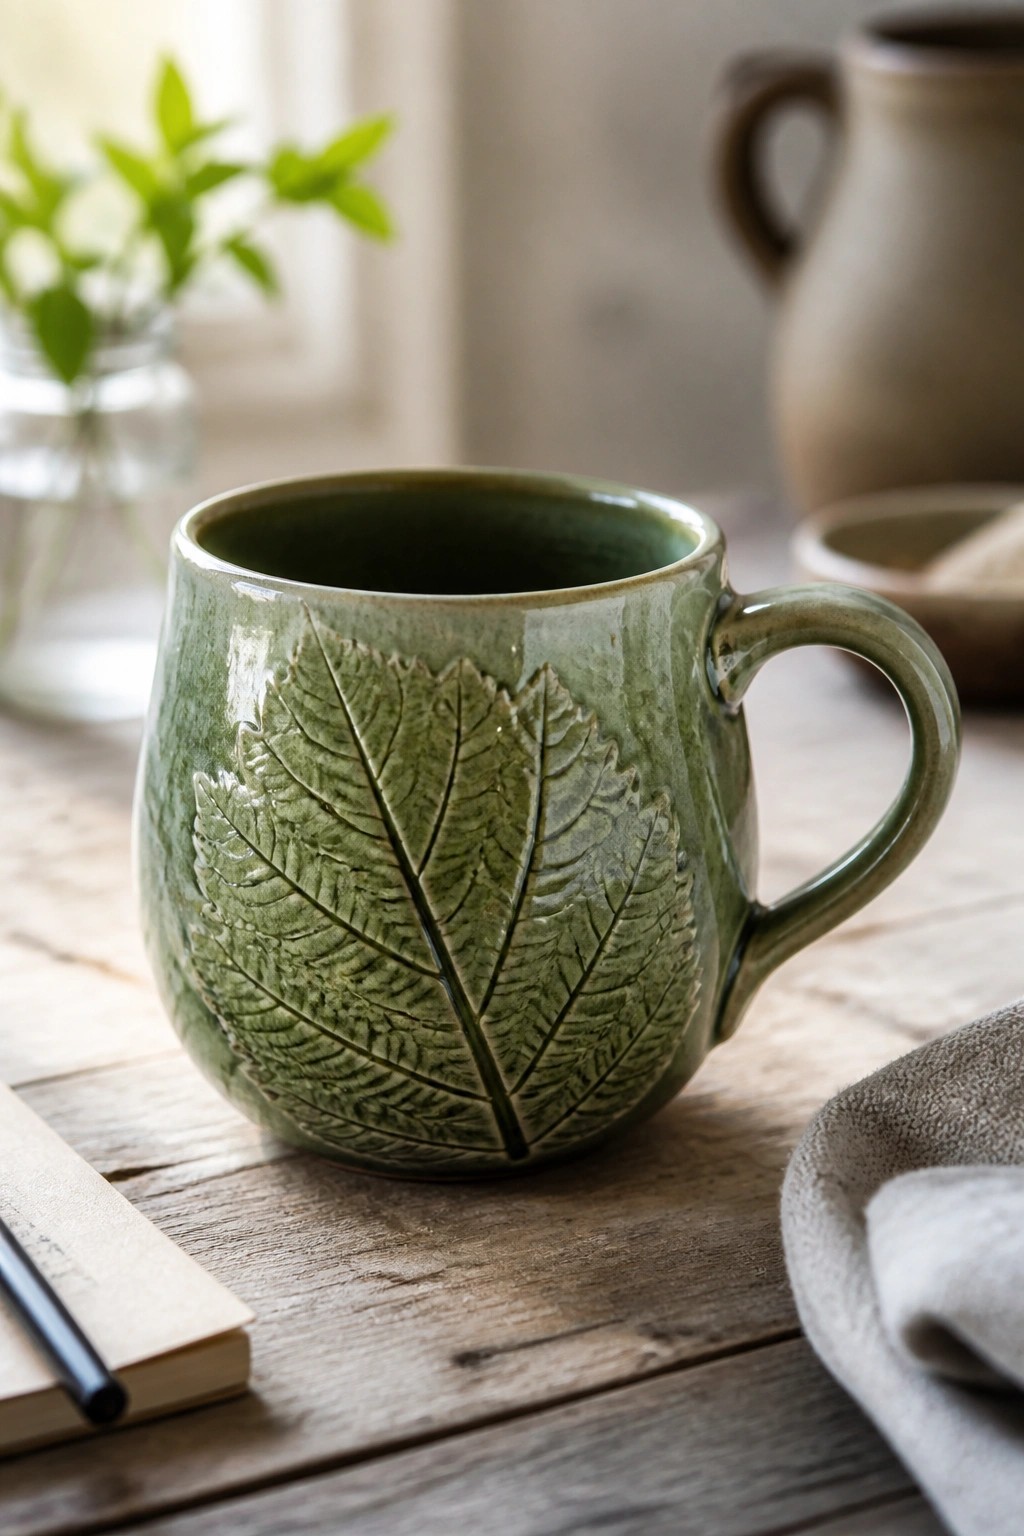
A hand-built ceramic mug works well when a real or molded leaf is pressed firmly into a soft slab of clay before assembly. The resulting raised veins create strong texture that catches light and glaze differently across the surface. A single large leaf centered on the front gives the mug clear visual focus while the rest of the form stays simple and functional.
What makes this idea useful is that the texture does most of the decorative work with almost no extra tools. The same leaf press can be repeated on a set of mugs or swapped for different leaf shapes to change the look quickly. This shape also adapts easily into a small planter or a desk pencil holder if you prefer something other than a drinking vessel. For a beginner project the method stays straightforward yet produces a finished piece that photographs clearly for sharing.
Speckled Mug with Stamped Base Band
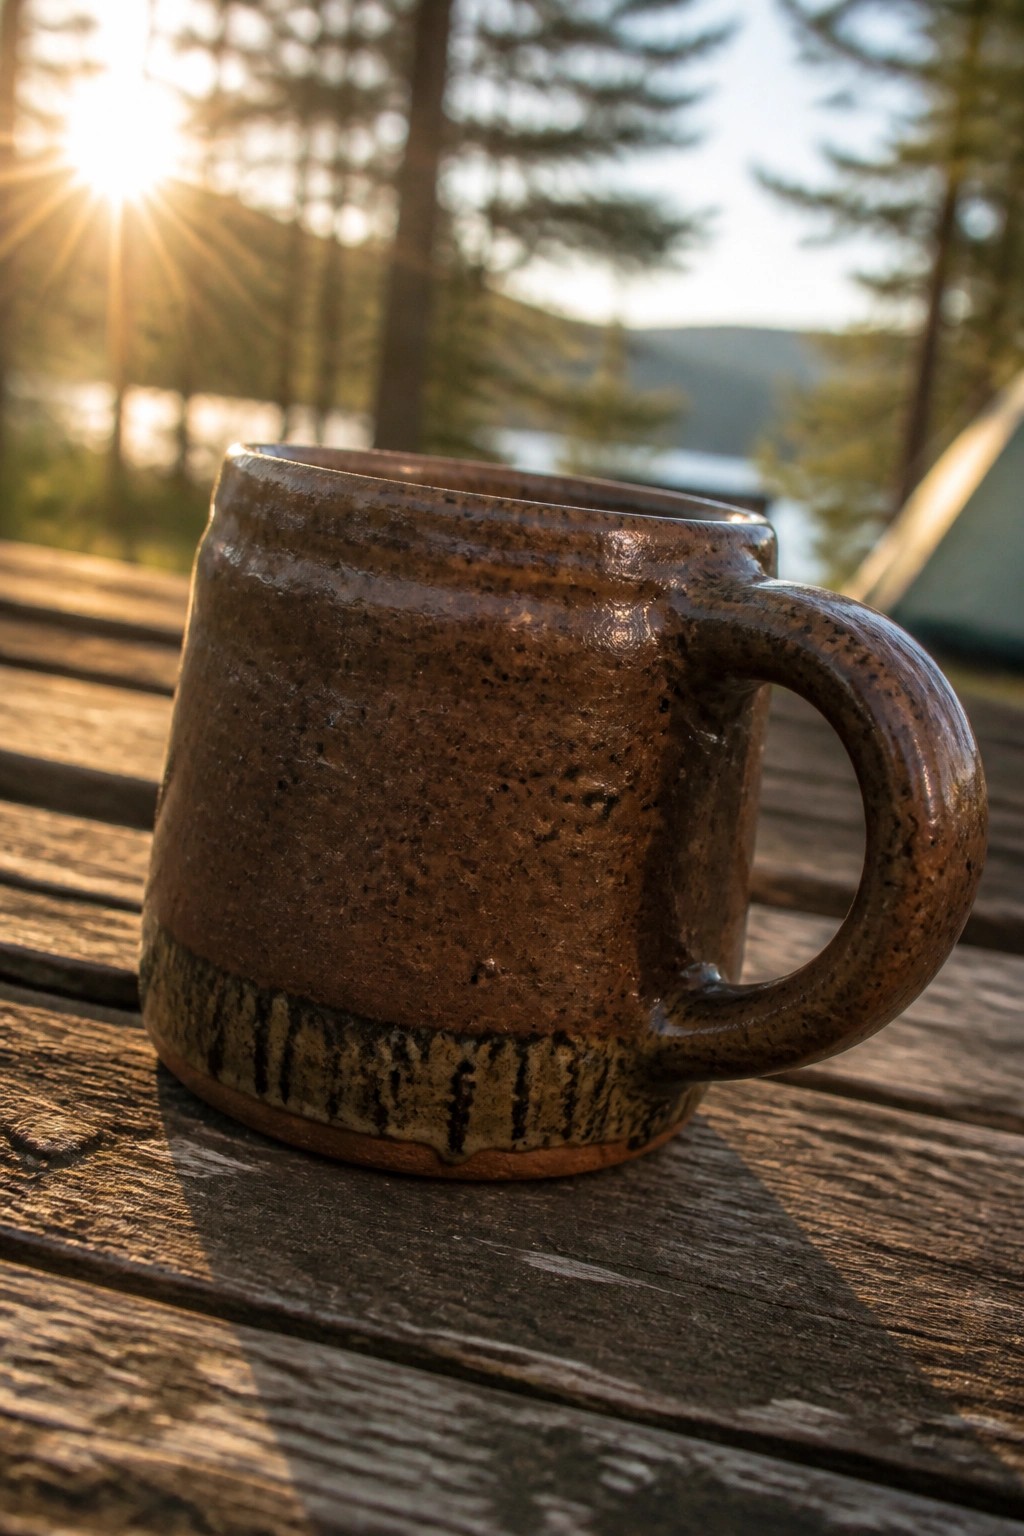
A handbuilt mug works well when the form stays thick and slightly tapered to support its own weight during drying. This version uses a simple cylinder shape with a pulled or attached handle and adds interest through a speckled brown glaze over most of the surface. The lower third switches to a lighter clay tone that has been scored with vertical lines before glazing, creating a clear contrast without extra carving tools. The overall size stays practical for daily drinking while the textured band gives the mug a finished look that still reads as beginner-made.
What makes this idea useful is how the base band can be changed with different stamps or simple tool marks without altering the main form. The sturdy walls and wide foot help the mug keep its shape even if the clay is on the softer side when assembled. In a kitchen this style pairs easily with other earthy dishes, and the same base treatment can be moved to a small bowl or planter by keeping the cylinder height low. The two-tone glaze also photographs clearly on a simple surface, which helps the finished piece stand out in a collection of similar beginner mugs.
Speckled Teal Mini Mug
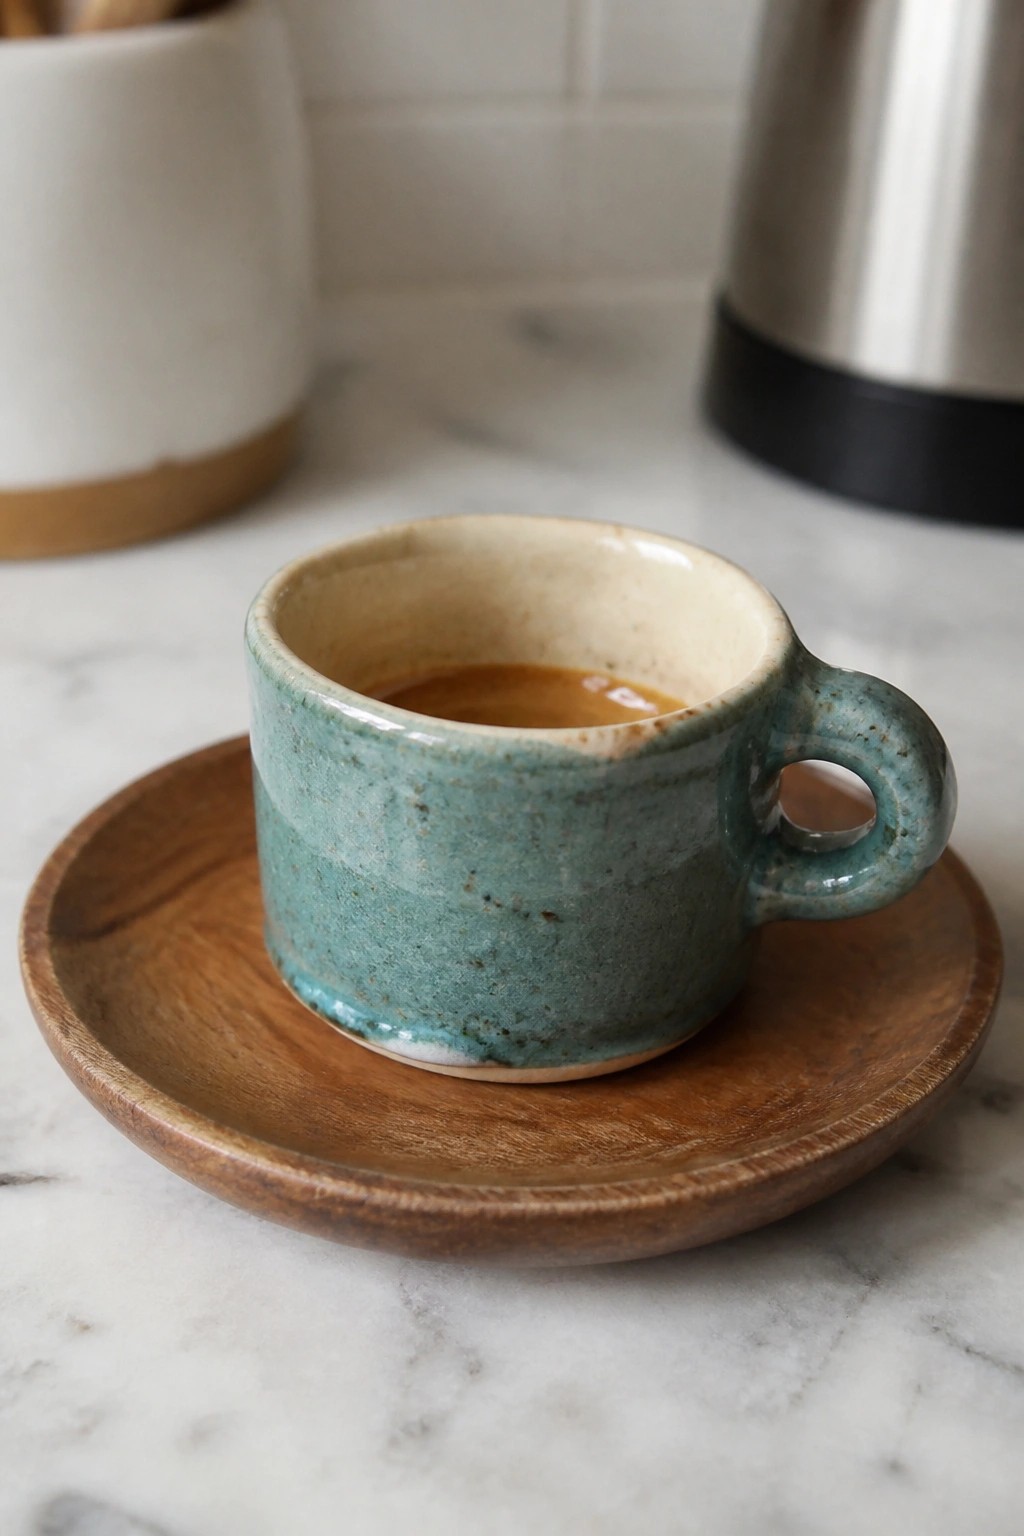
A small handbuilt ceramic mug like this suits espresso or short coffee servings. The straight walls and thick looped handle keep the form stable during building and drying. A mottled teal glaze with visible speckles adds surface interest while the lighter interior clay shows through at the rim. This style falls into the simple drinking mug category that stays functional without extra attachments.
The small scale makes this easy to adapt by changing the glaze color or handle thickness for different hand sizes. You could pair it with a matching clay saucer instead of wood or stretch the same proportions into a slightly taller tea cup. In a kitchen this kind of piece takes up little shelf space yet stands out because of the textured finish. For gifts the compact shape also means less clay and quicker drying time.
Handleless Cylinder Mug
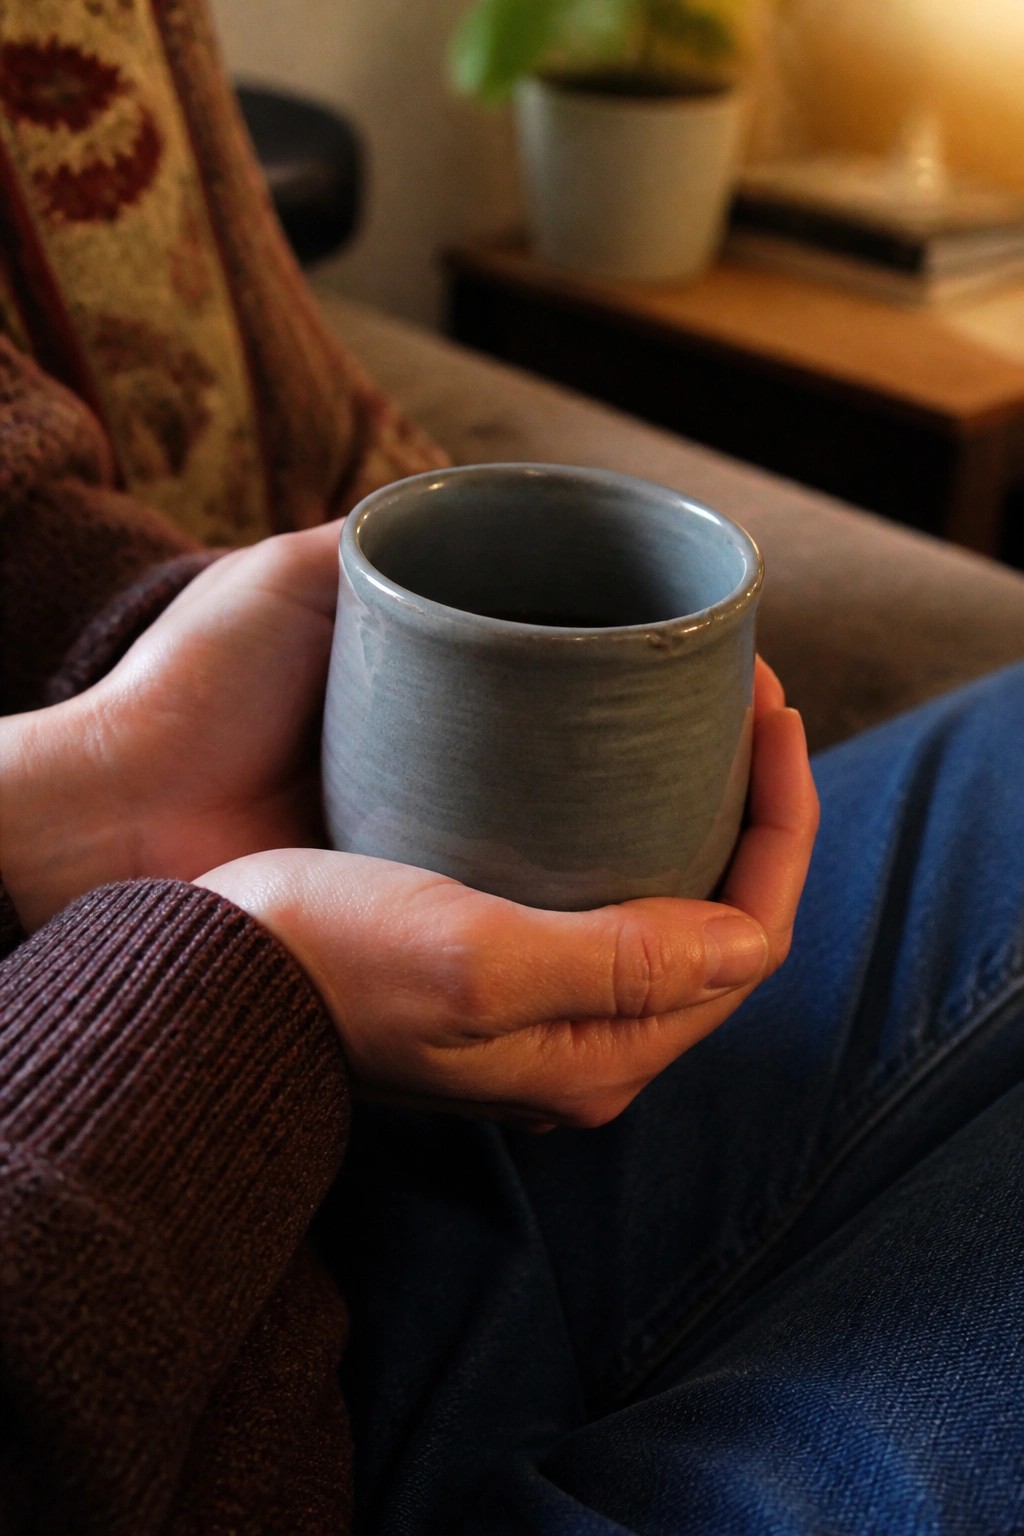
A handleless cylinder mug built from clay gives beginners a stable form that holds its shape during construction and drying. The straight sides with a slight inward taper at the base create a compact drinking vessel that sits comfortably in the hand. A single muted blue-gray glaze keeps the focus on the wheel or hand-built surface while adding a soft, even finish.
What makes this idea useful is how well the simple proportions work for everyday drinks without needing a handle. The same shape scales easily to a taller version for tea or a shorter one for espresso. You could adapt it by switching to an unglazed exterior with a glossy interior or by pinching a small thumb rest into the side for better grip. In a kitchen or on a desk this style stays out of the way yet still feels intentional.
Cat Ear Mug with Painted Face
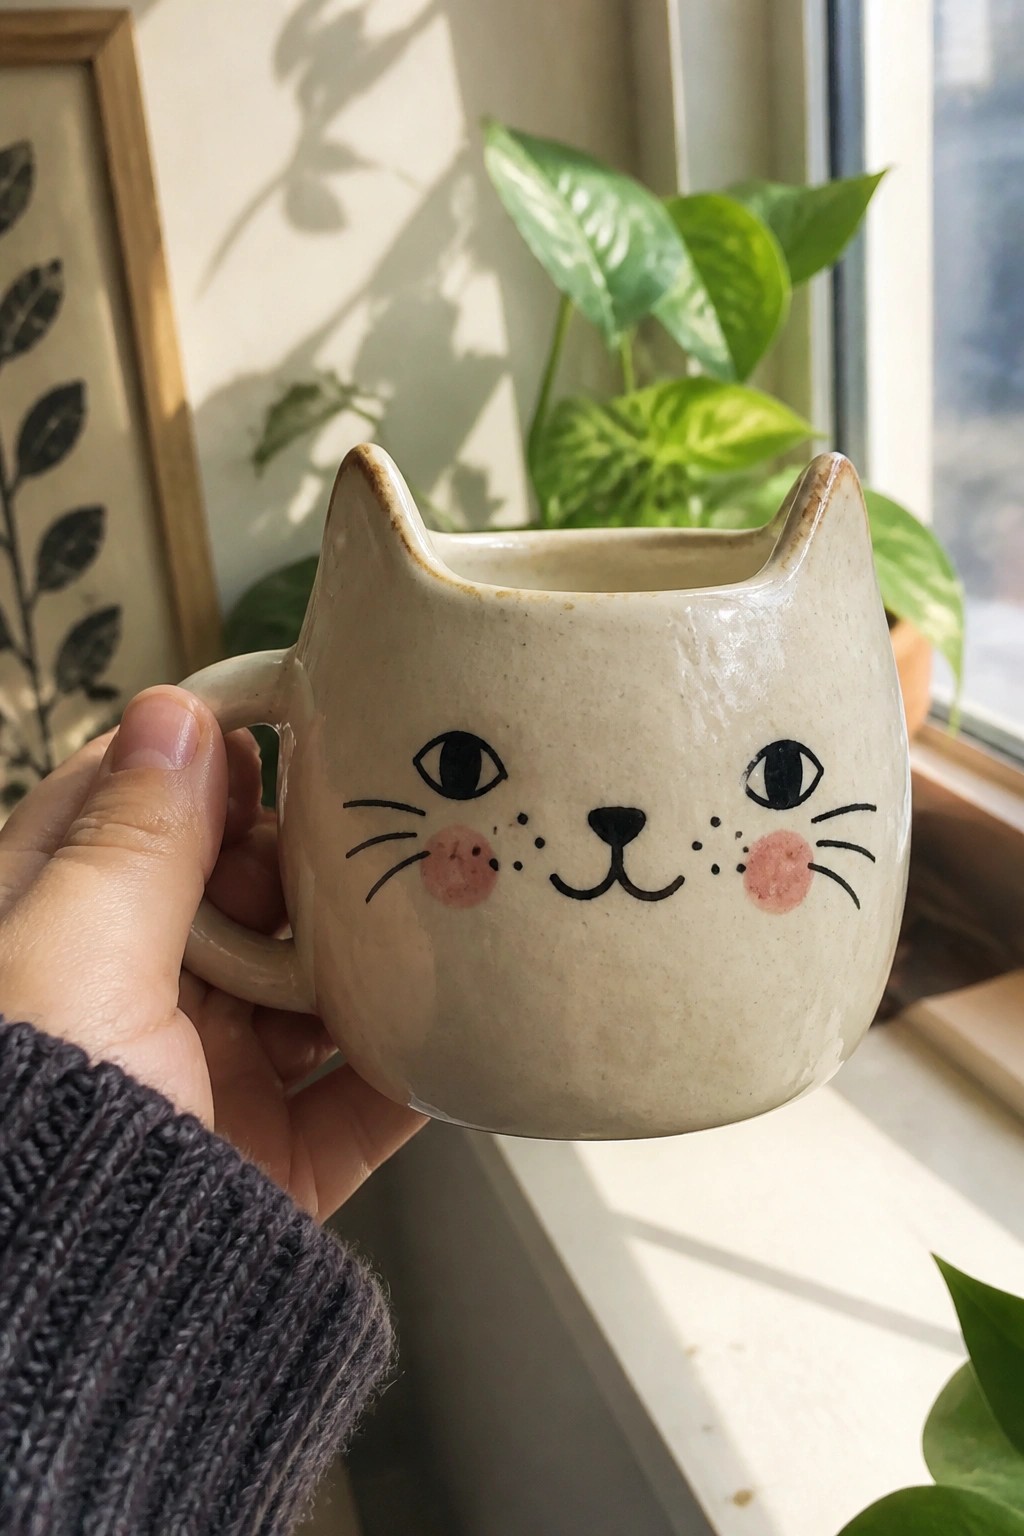
A basic cylinder mug can be pinched and pulled at the rim to form two pointed cat ears that sit upright. The face is built from simple painted elements including oval eyes, a small nose, whiskers, and dotted cheeks that sit evenly on the curved surface. This keeps the overall form balanced and easy to hold while turning the mug into a clear animal shape.
What makes this idea useful is that the ears add visual interest without changing how the mug pours or stacks. The painted details can be swapped for different animals or simplified to fewer lines if you want a faster version. A piece like this works especially well as a gift mug since the shape stays functional and the face gives it instant appeal on a shelf or desk.
Coral Mug with Raised Polka Dots
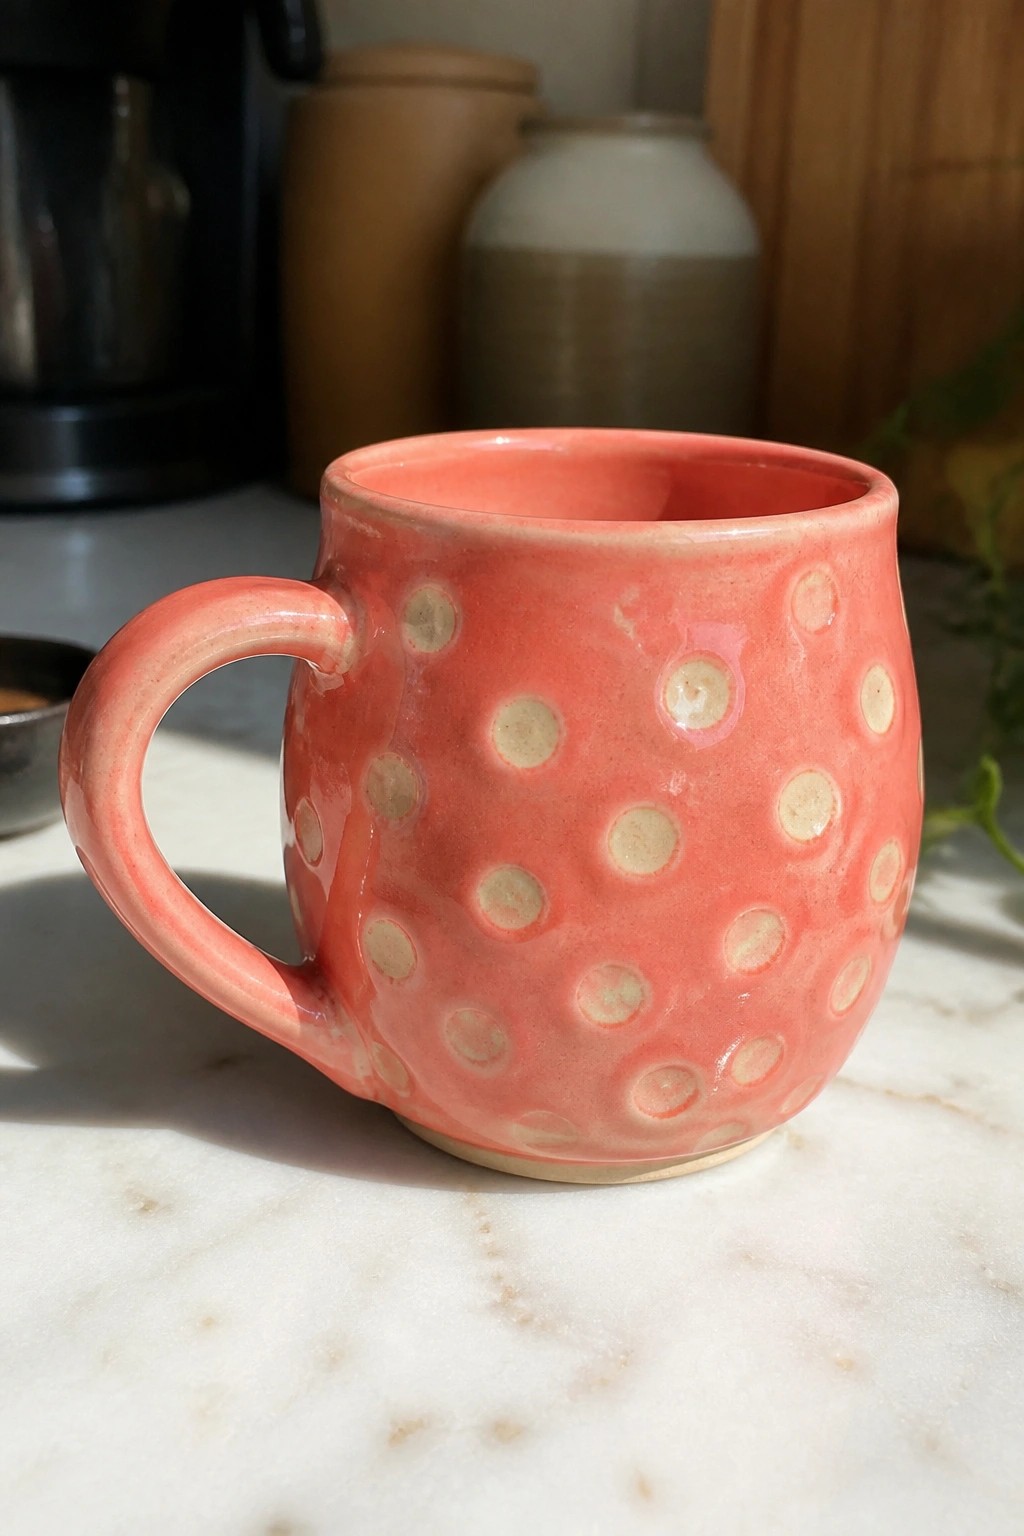
A hand-built mug with a slightly tapered body and attached handle uses rows of small raised dots to create a simple repeating pattern. The main surface is finished in a bright coral glaze while the dots are left in a lighter contrasting tone, making the texture easy to see without extra carving or painting. This style fits the mug category and works because the dots can be added after the basic form is pinched or slabbed, keeping the shape stable during drying.
What makes this idea useful is how the dot pattern can be adjusted in spacing or size to fit different mug proportions without changing the construction method. You could apply the same raised dots to a shorter wide mug or try them on a small pitcher shape instead. In a kitchen setting the color and texture help the piece stand out on a shelf while remaining functional for daily drinks. For a first project the approach keeps the focus on building a solid wall thickness and handle attachment before adding surface details.
Two Tone Banded Mugs
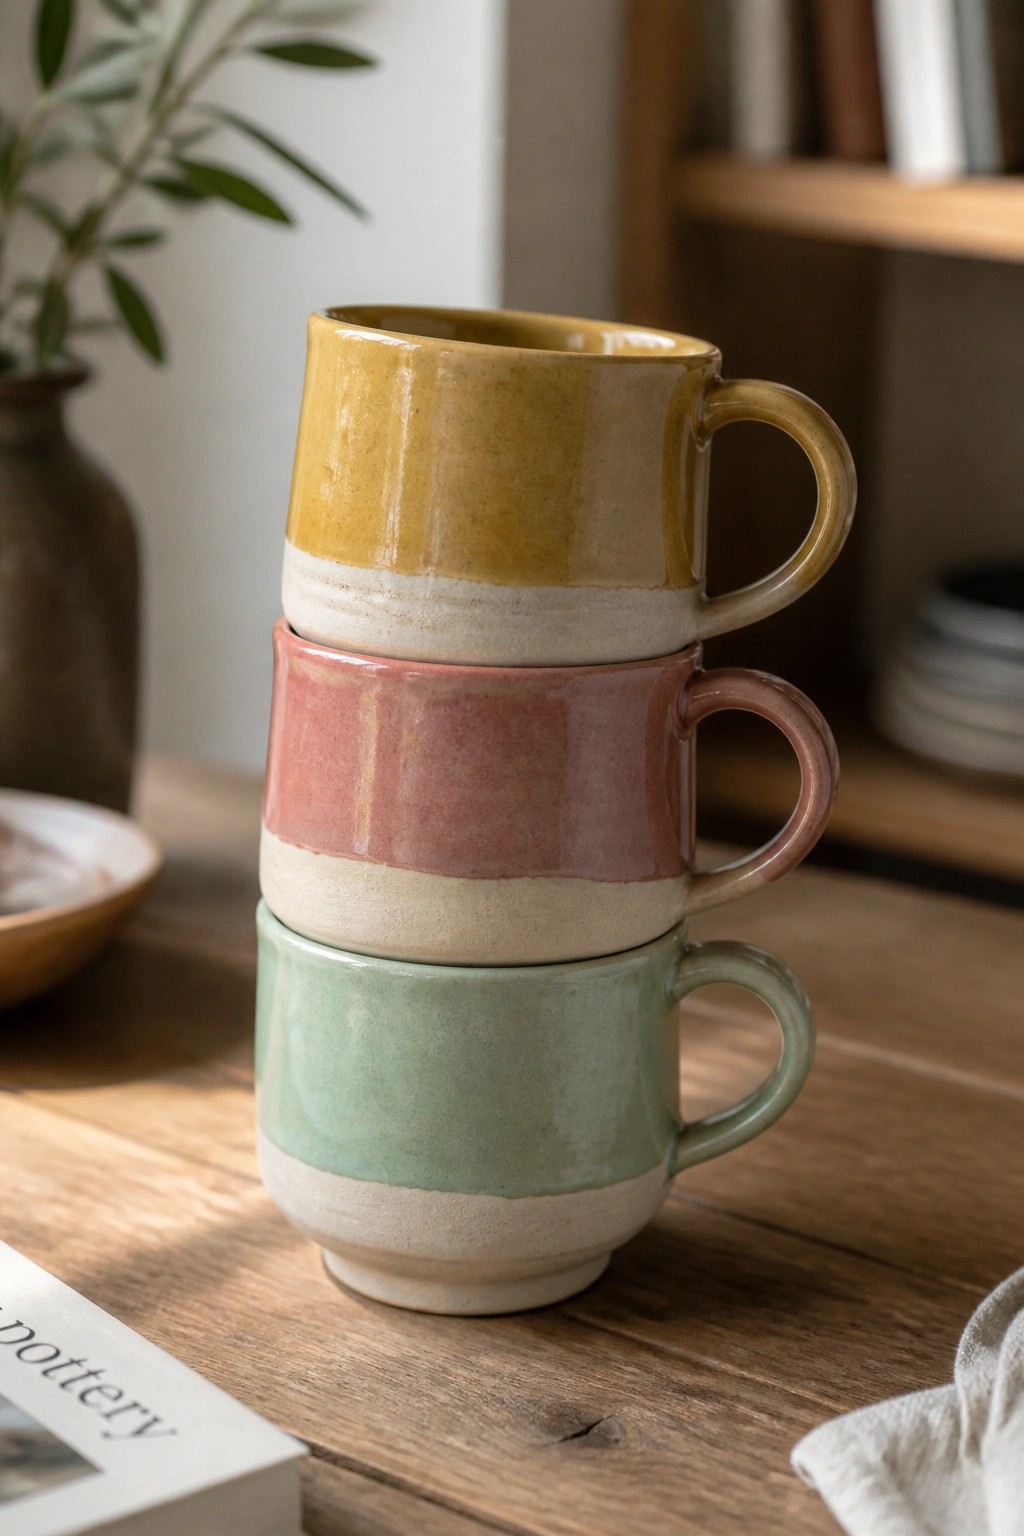
These mugs use a simple two-tone approach with a colored glaze on the upper portion and a lighter band left at the base. The horizontal division gives the form a clean break that keeps the eye moving without added carving or texture. Each piece stays easy to throw or hand-build because the shape stays cylindrical with a basic pulled or attached handle. The idea belongs in the mug category where beginners can focus on even walls and a reliable handle attachment rather than complex details.
What makes this idea useful is how the banded glaze can be done with one quick dip or two separate applications. The mugs stack neatly so they take up little shelf space in a kitchen or on a coffee station. You could change the color pairings to match existing dishes or make a mixed set for gifts. The same proportions work for a slightly larger version if you want to turn the idea into small bowls later.
Incised Leaf Design on a Speckled Green Mug
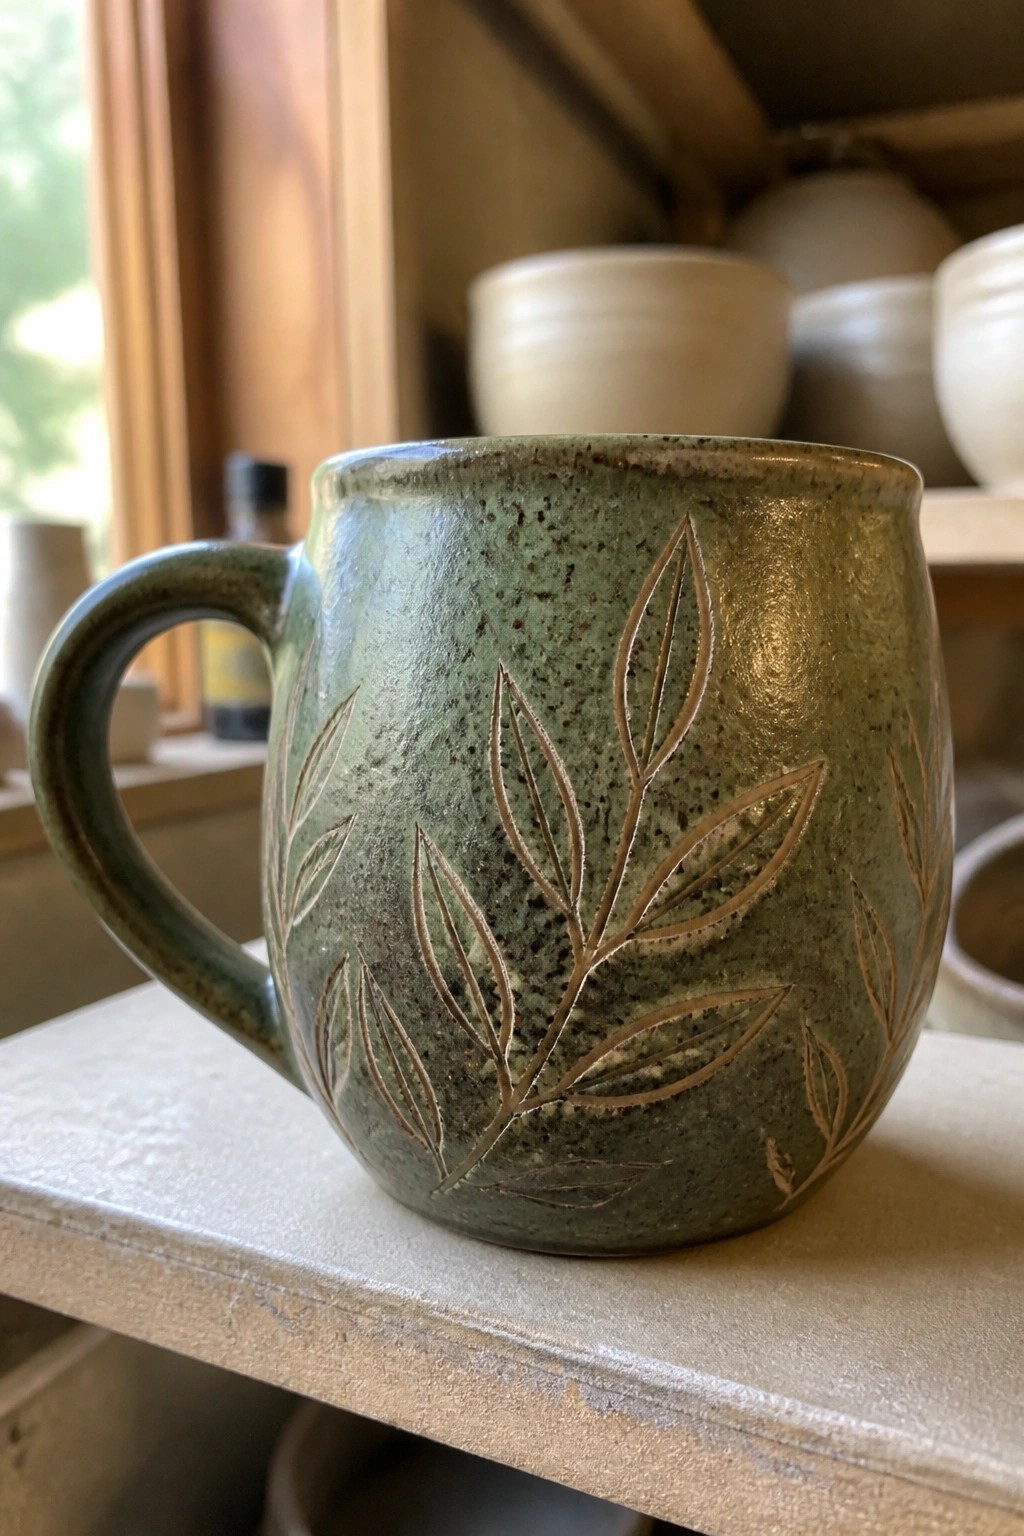
A hand-built mug gains a clear focal point when you carve a simple branch of leaves into the leather-hard clay before glazing. The design uses shallow incised lines that catch light and shadow once the speckled green glaze is applied. This keeps the overall form basic while the pattern adds texture without requiring extra clay attachments or complex shaping.
What makes this idea useful is how the leaf motif can be drawn freehand or traced from a template and adjusted to fit any mug size. You could repeat the same carving on a shorter, wider cup or reduce it to a single stem on a smaller vessel. The green glaze works in most kitchens because it pairs with neutral dishes, and the carving stays visible even after multiple firings. For a first attempt, start with fewer leaves so the lines stay clean and the walls do not thin out.
Rounded Hand Built Mug with Variegated Glaze
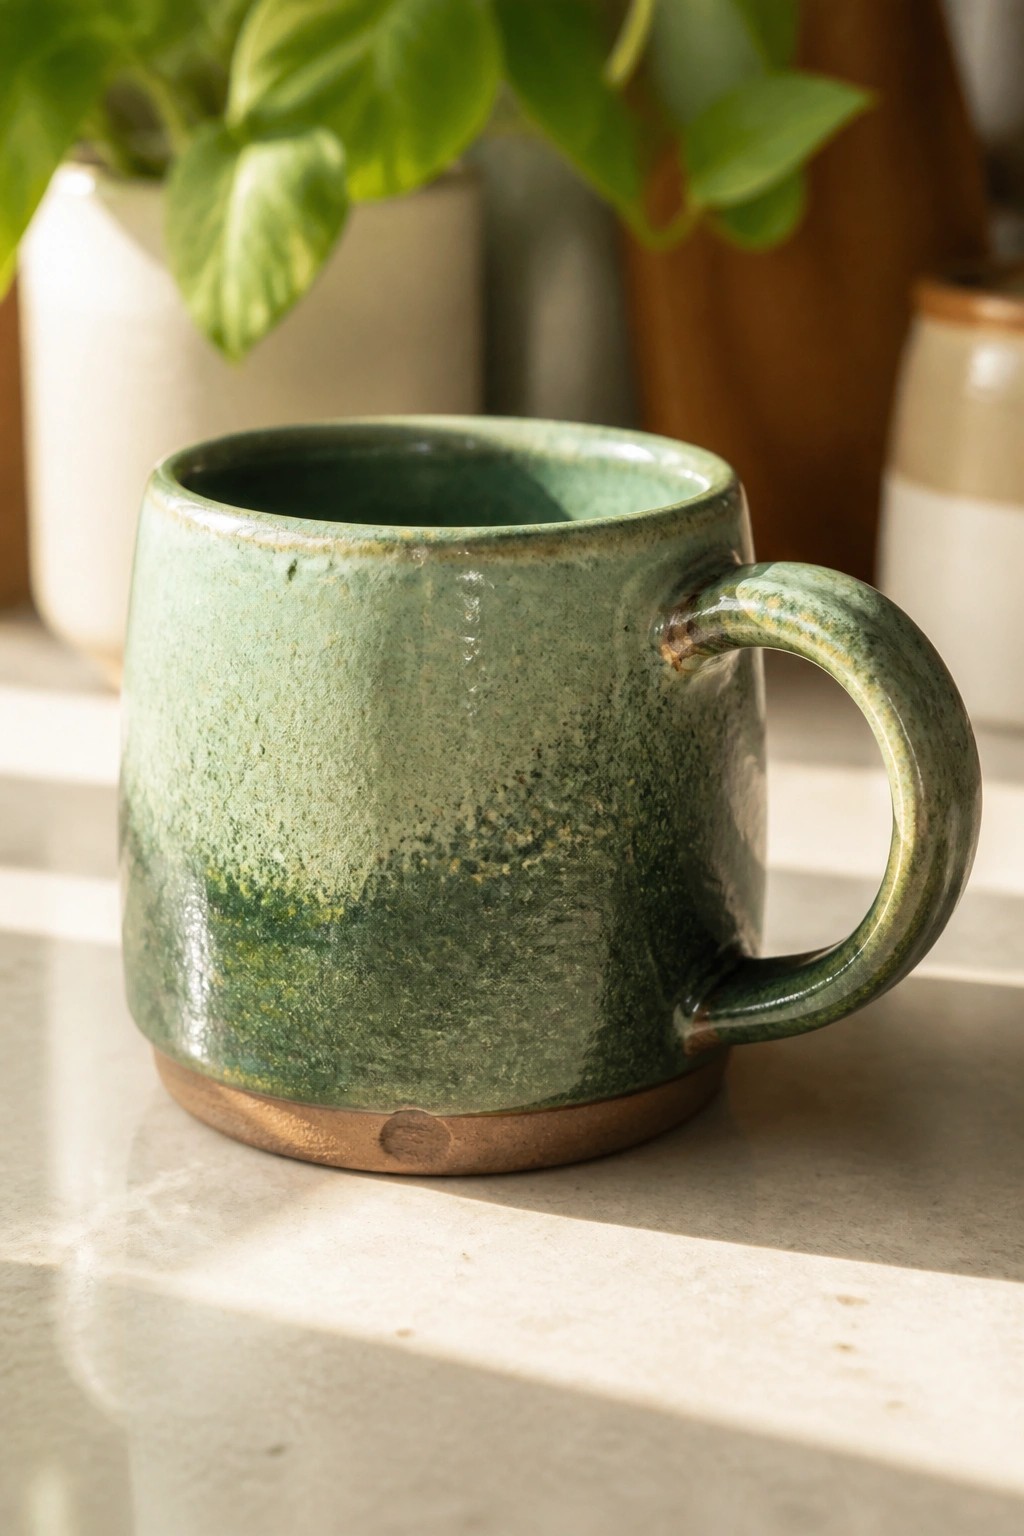
A hand built mug formed from a simple pinched or slabbed clay body gives this project its soft rounded shape and thick walls. The green glaze pools and breaks across the surface, creating a natural shift from light to dark tones with visible speckling that adds interest without extra decoration. The unglazed base and short sturdy handle keep the form balanced and functional for daily use. This fits the beginner mug category because the shape relies on basic hand building rather than wheel throwing or complex sculpting.
The shape does a lot of the work here since the wide belly and low center of gravity make the mug stable and comfortable to grip. You can adapt the same form by swapping the green glaze for any reactive color or by adding a simple thumb rest on the handle. It works especially well as a first project when you want something you can actually drink from instead of just display. For a set, repeat the same size and let slight differences in glaze application give each mug its own variation.
Two Tone Dip Glazed Mug
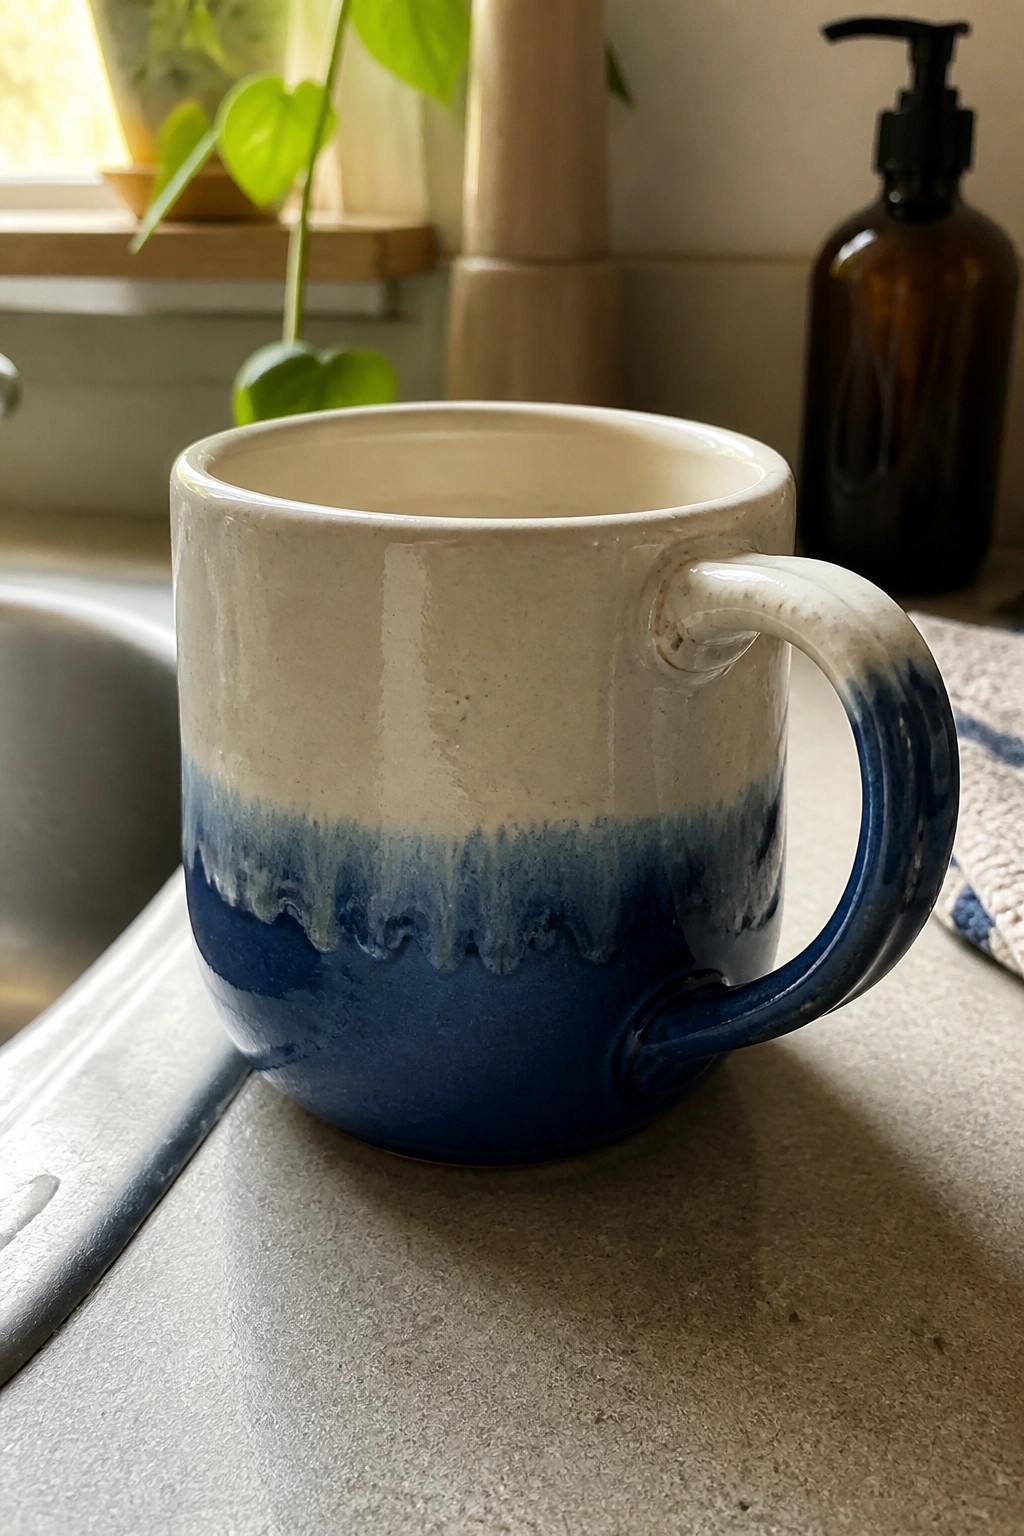
A hand-built mug with a white upper section and deep blue lower half uses a simple dip glaze technique. The glaze meets in an uneven wavy line that adds movement without any added carving or stamping. This style keeps the focus on the form itself while the color split gives it clear definition. The rounded body and attached handle make it a straightforward mug shape that holds its form during building and drying.
What makes this idea useful is how the dip line changes with each piece depending on how deep or angled the mug sits in the glaze. In a kitchen setting the contrast helps the mug stand out against other dishes without needing extra decoration. You could rework the same shape into a shorter soup bowl or try a different color pair such as gray fading into white. The basic form also gives beginners room to practice even wall thickness before adding handles or spouts.
Speckled Mug with a Ridged Handle
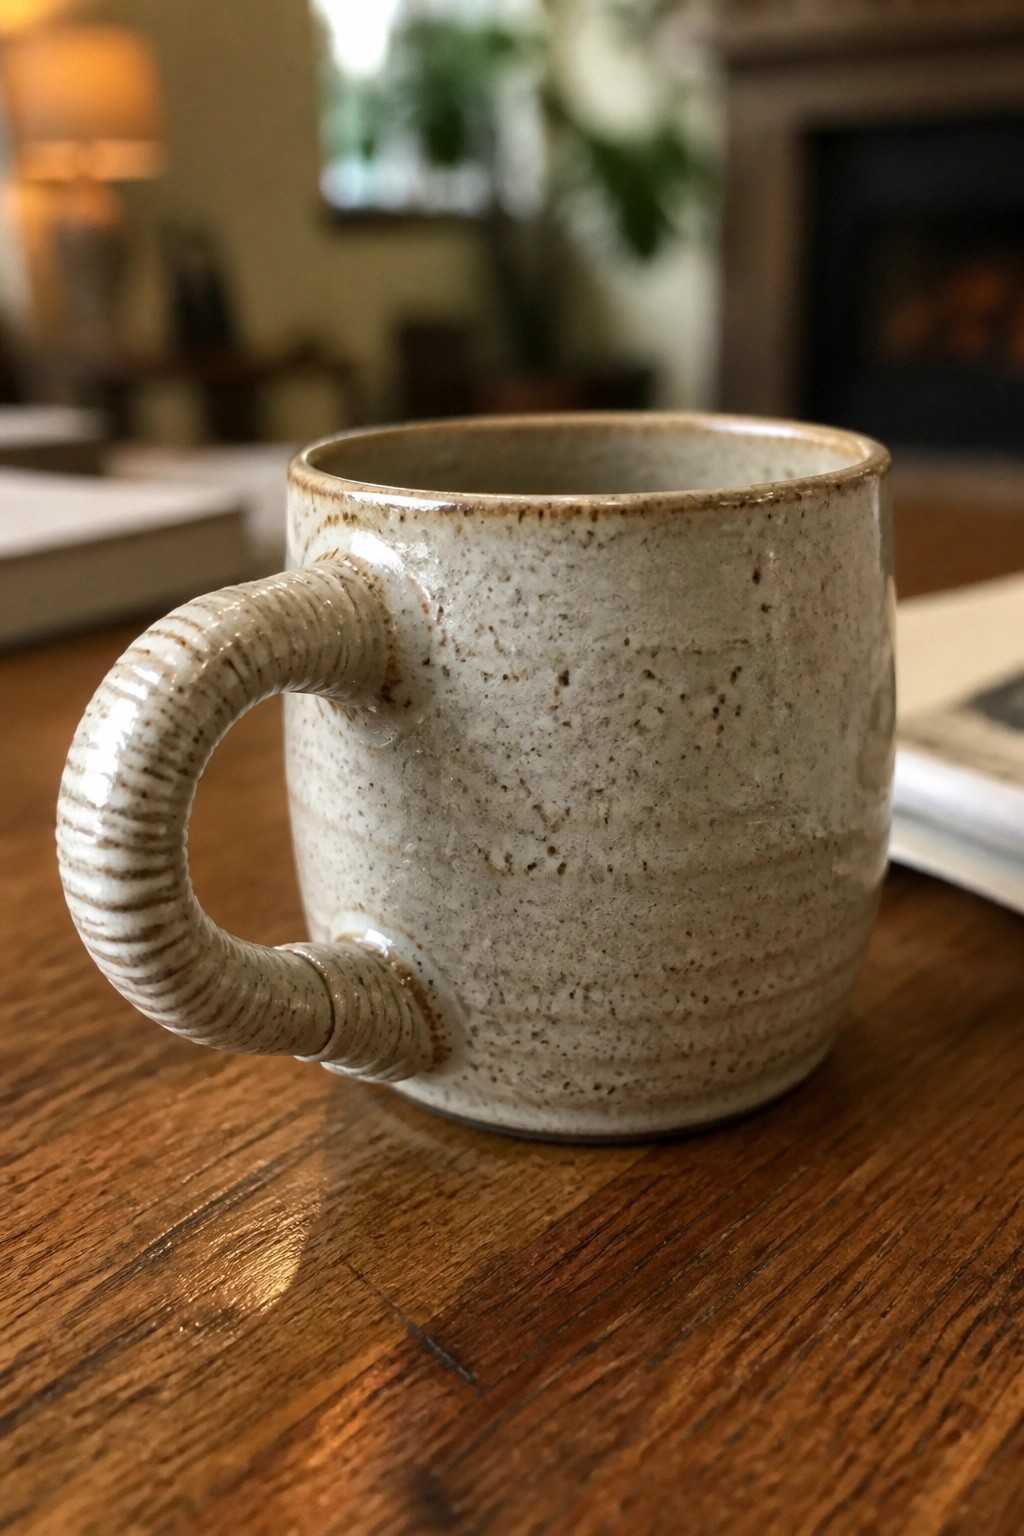
A hand-built mug with a straightforward cylindrical shape works well when the walls stay thick enough to hold form during drying. The speckled glaze adds subtle variation across the surface without requiring extra decoration. The handle is built by wrapping coils that create ridges, giving it a solid grip while keeping the overall form simple.
What makes this idea useful is how the ridged handle adds interest without complicating the build. You can adapt the same shape using different clay colors or switch the glaze to a solid matte finish for a cleaner look. This style works especially well as an everyday drinking mug because the wide base helps it sit steady. For a variation, shorten the walls slightly and turn the same handle technique into a small pitcher.
Organic Mug with Pressed Indent
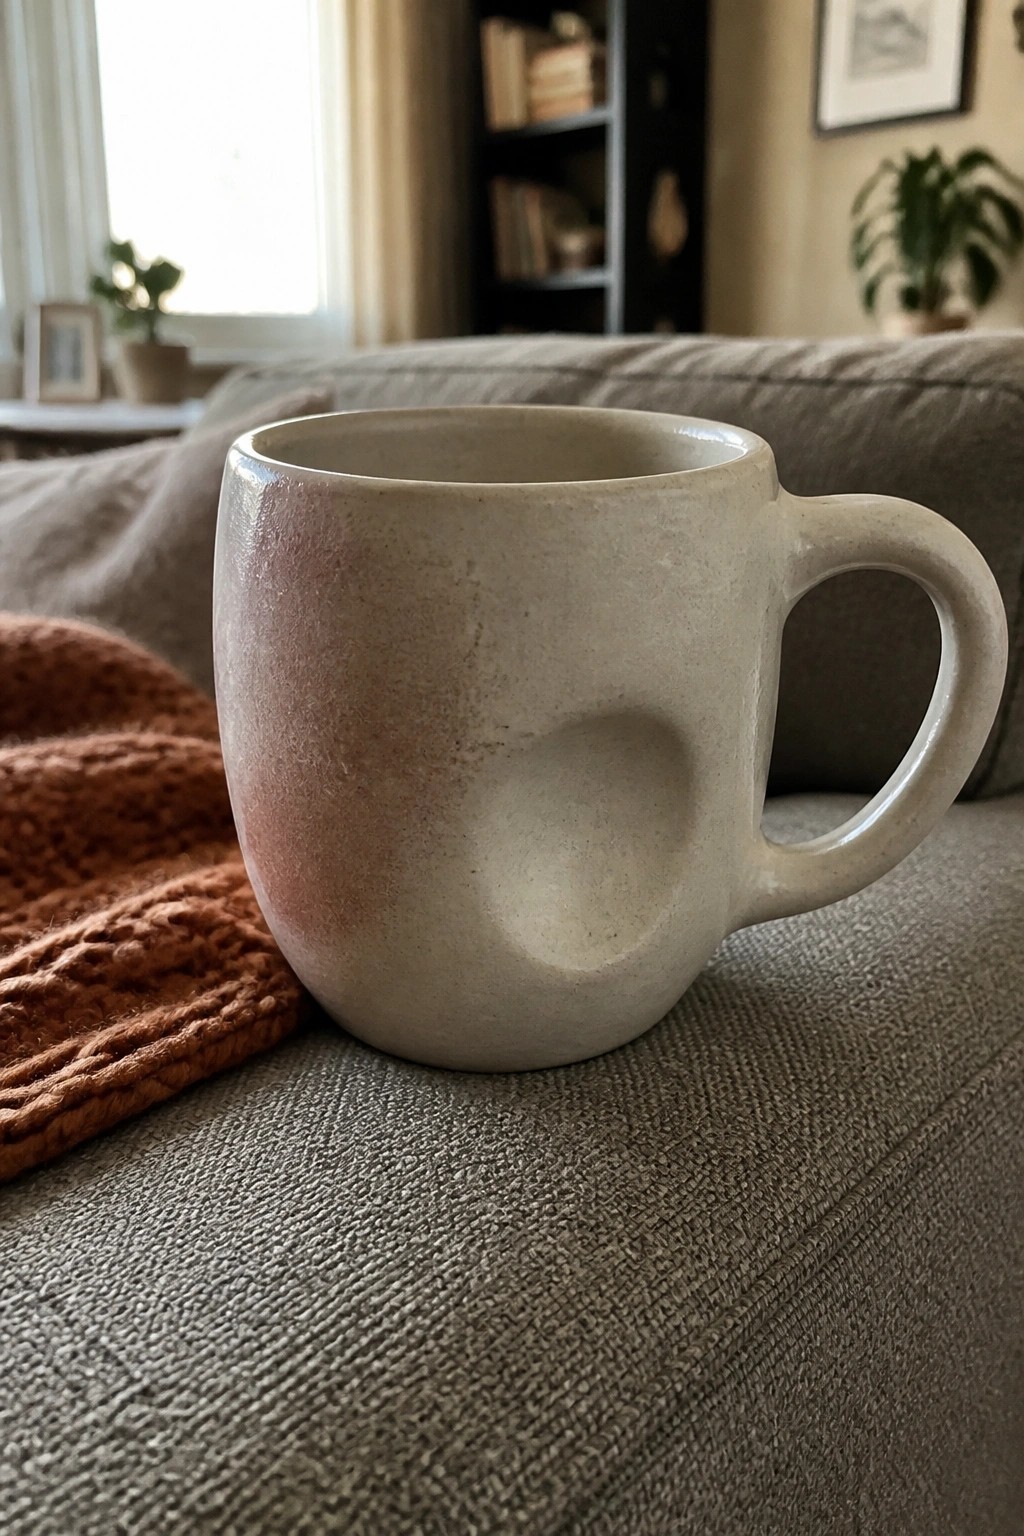
A hand-built ceramic mug with a single rounded indent pressed into the side gives the form an asymmetrical shape that still holds liquid well. The indent is created by pushing into the clay while it is firm but workable, keeping the overall build simple. A matte speckled glaze in a light neutral tone lets the surface texture and the dent show clearly without adding extra decoration.
What makes this idea useful is that the indent requires no extra tools beyond a finger or a basic modeling tool during construction. This mug works especially well as a daily coffee cup or a small holder for pens and brushes. You could adapt the same indent on a shorter tumbler or a set of four mugs by changing the size and depth of the dent on each one. The small detail helps the piece photograph clearly for sharing ideas online.
Three-Footed Mug
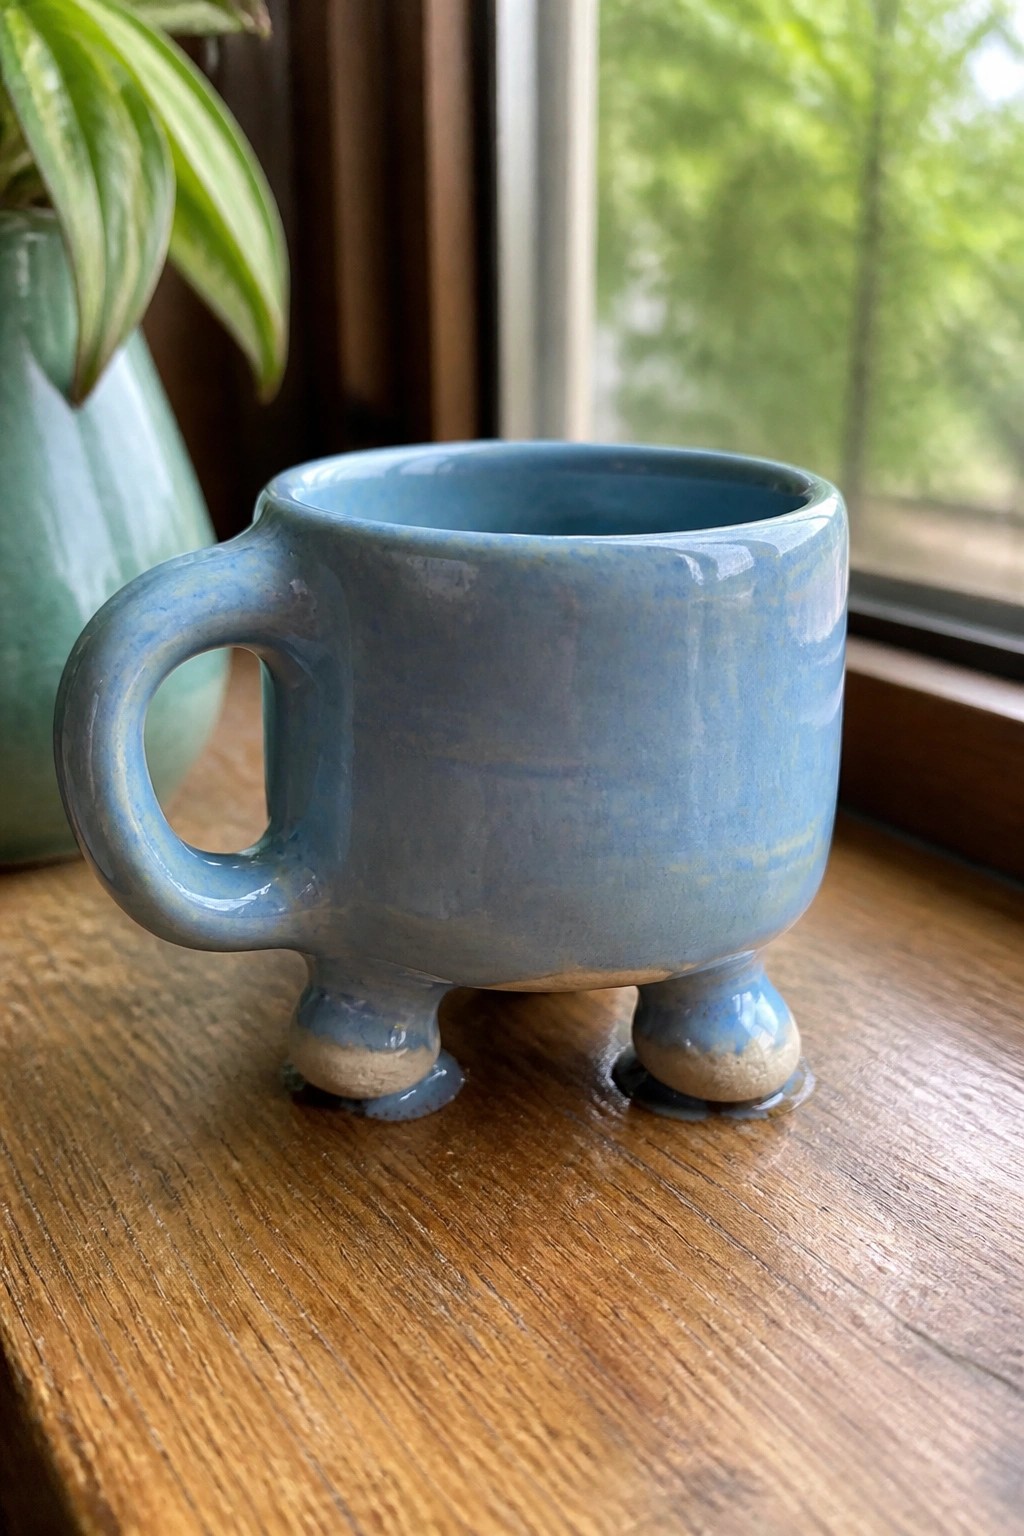
A handbuilt mug raised on three short feet gives the piece a lifted stance while keeping the overall form compact. The rounded body and attached loop handle follow a simple construction that works well with slab or coil methods. A single blue glaze coats the surface and settles into the crevices around the feet. This style fits the mug category but adds a small structural detail that changes how the piece sits and looks.
What makes this idea useful is the feet, which require only a bit of extra clay yet create a clear visual difference from a flat-bottomed mug. You can adapt the same shape by shortening the feet or using a different glaze to change the final look. A piece like this works especially well for small drinks or as a desk holder for pens and brushes. The small scale also makes it simple to try in a single afternoon without needing much clay or space.
Lidded Mug with Spiral Lid Texture
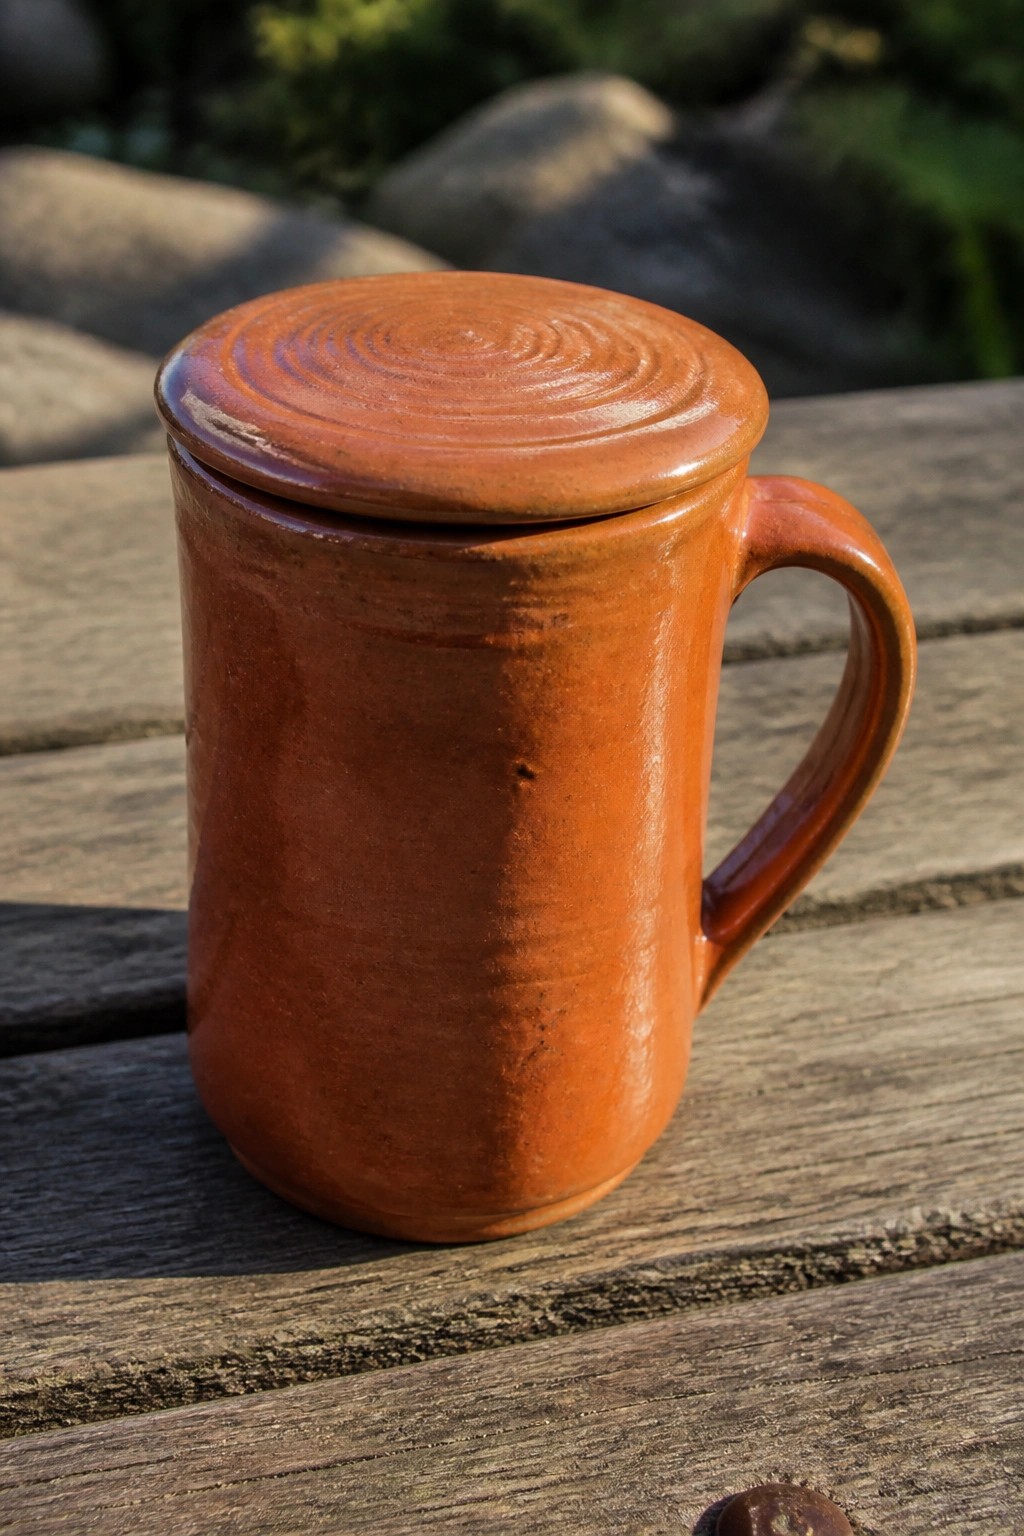
A lidded mug gives you a simple way to keep drinks warmer for longer without extra tools. This version uses a straight cylinder body with a fitted lid that carries a spiral pattern pressed into the surface before firing. The handle is pulled and attached at an angle that stays comfortable to grip. An earthy red glaze covers the whole piece and highlights the handmade texture without hiding it.
What makes this idea useful is how the lid turns a basic mug into something more practical for desk or table use. You can change the spiral to other stamp patterns or skip the texture entirely if you want a quicker build. The same cylinder shape works for small storage jars too if you adjust the lid fit slightly. For gifts this style stands out because it looks finished but stays simple to form by hand.
Speckled Reactive Glaze Mug
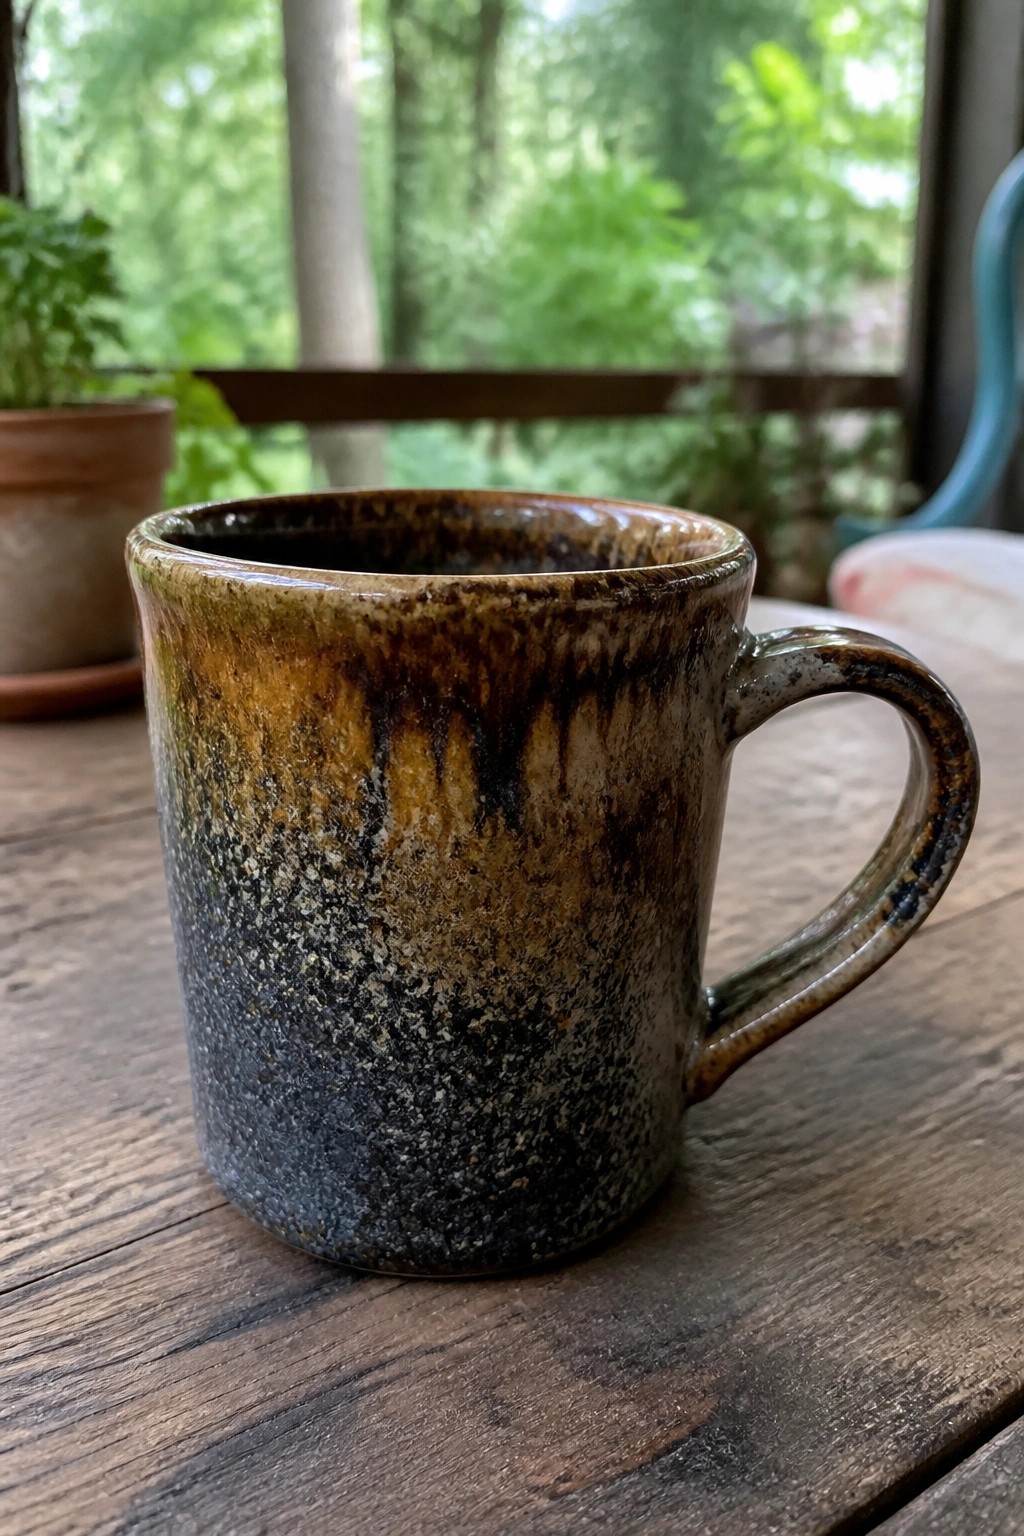
A simple straight-sided mug takes on more depth when covered in a glaze that breaks into dark gray at the base and shifts to brown and gold tones toward the rim. The mottled speckling and slight drips near the top create surface variation without any added carving or painting. This style keeps the focus on the form itself while letting the glaze handle the decoration. It stays firmly in the category of a functional everyday mug.
What makes this idea useful is how the glaze pattern can be recreated with basic layering of two or three commercial glazes instead of custom mixing. The same shape works well for coffee or tea and scales easily to smaller or taller versions. You could swap the color range for cooler tones or add a single band of a contrasting glaze near the rim to change the look without altering the build. In a kitchen this kind of mug blends with other stoneware while still reading as handmade.
Mug with Sculpted Heart Accent
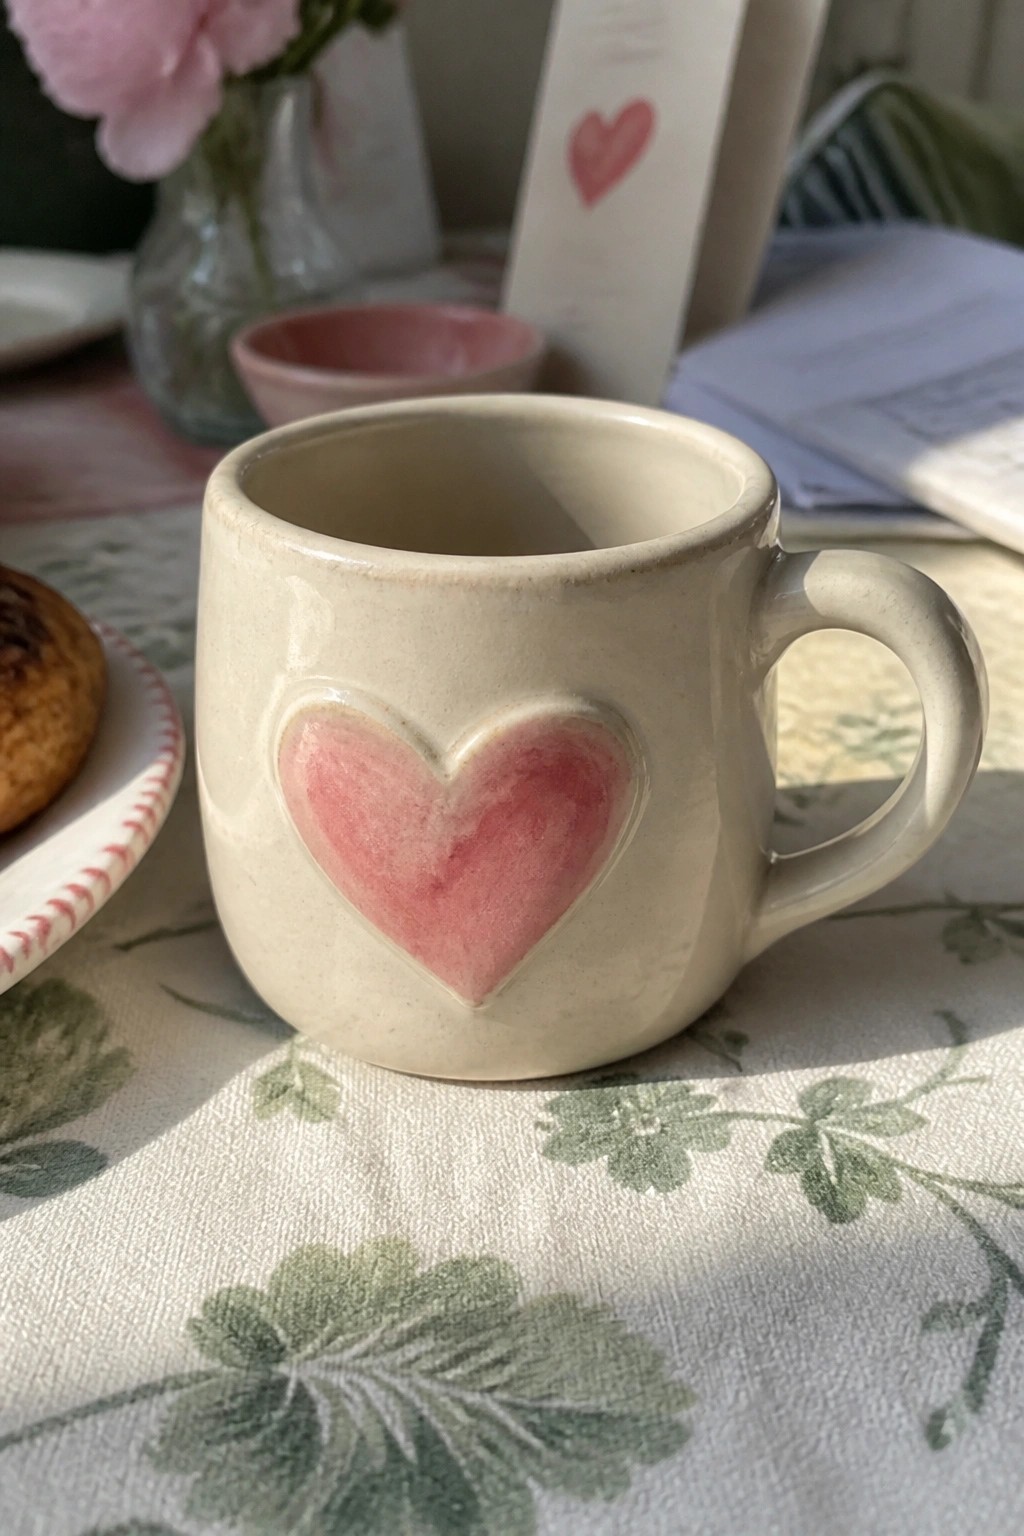
A hand-built ceramic mug works well with a raised heart shape formed directly into the side before the piece dries. The heart receives a separate pink wash while the rest of the mug stays in a light clay body, giving clear contrast without extra layers. This approach keeps the design simple and contained so the mug remains easy to grip and stack. It belongs in the category of straightforward mug projects that add one small sculpted detail.
The shape does a lot of the work here because a basic cylinder form stays stable even after the heart is added. You could change the heart size, switch the accent color, or repeat the same motif on a smaller bowl or spoon rest. In a kitchen or on a breakfast table this mug stays practical for daily drinks while standing out in photos for sharing. The idea adapts easily if you want to try it on a taller travel mug or keep it short for espresso.
Frequently Asked Questions
Question: Which hand building method works best for beginners making mugs that hold their shape? Answer: Slab construction tends to be the most reliable starting point. Cut even slabs with a template, then join them over a simple cylindrical support like a jar or tube. This setup keeps the walls straight and stable as you work.
Question: How thick should the clay walls be to avoid slumping in these projects? Answer: Keep walls around a quarter inch thick throughout. Measure consistently with a ruler or caliper during building. Even thickness helps the mug dry at the same rate and stay upright without extra props.
Question: What is the easiest way to attach a handle so it does not bend or fall off later? Answer: Score and slip both surfaces well when the mug reaches the leather hard stage. Press the handle firmly into place and let it firm up for an hour or two before moving the piece. A small prop underneath can hold it steady during this time.
Question: How long should I let a hand built mug dry before it goes into the kiln? Answer: Plan for one to two weeks of slow drying depending on room conditions. Keep the mug loosely covered with plastic for the first several days, then uncover gradually. Bone dry clay that feels room temperature throughout is ready for bisque firing.
Question: Are there any simple finishing steps that improve both appearance and durability? Answer: Once the mug is leather hard, smooth seams with a rib tool and add light texture if desired. After bisque firing choose a food safe glaze and apply two thin coats. Fire to the clay body temperature listed on the clay package for a strong finished piece.

Pottery Path is my cozy corner of the internet where I share clay ideas, pottery inspiration, and simple projects you can recreate at home. I love exploring everything from air dry clay to handbuilt pottery to cute minis that brighten your day. My goal is to make clay crafting feel easy, fun, and welcoming for anyone who wants to try it.
You will find beginner friendly tutorials, creative pottery painting ideas, and lots of warm inspiration for slow and happy crafting. If you enjoy hands on creativity, this space will feel like home.