I’ve tried stamping patterns into my clay a few times now and it has been a straightforward way to add some texture.
Some attempts worked well while others needed a bit of adjusting but that helped me figure out what feels right.
If you are just getting started with pottery these ideas might give you simple options to try without much extra gear.
I stuck to basic household items and easy to find tools for most of them.
Here are 17 patterns that could work for beginners like me.
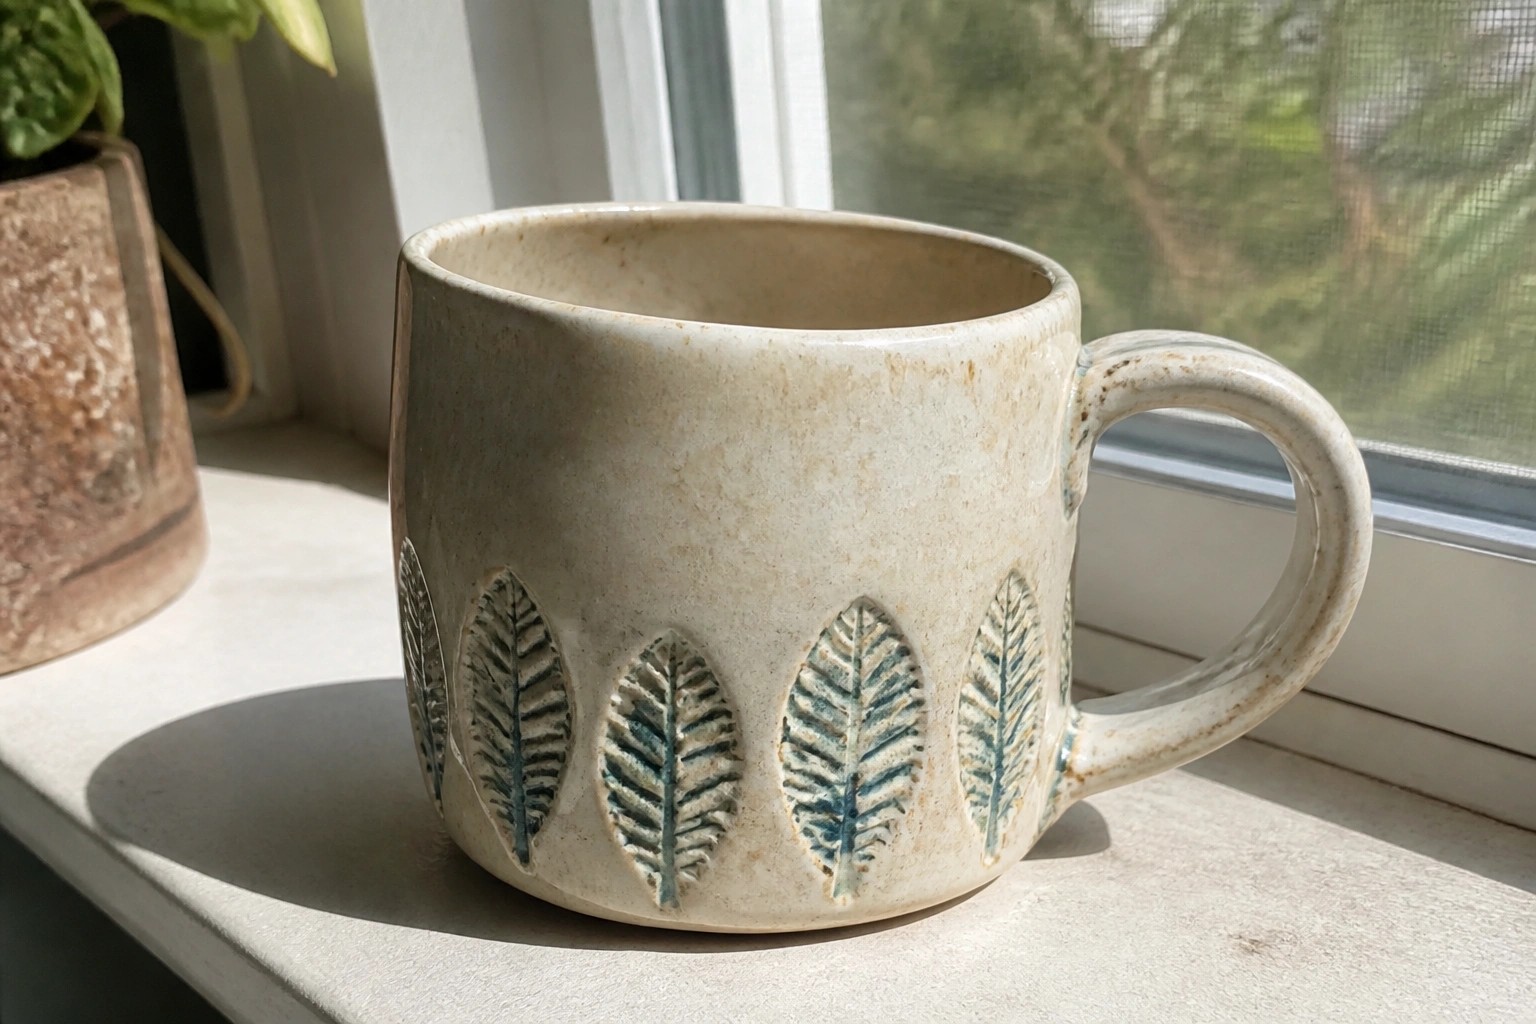
Stamped Leaf Band on a Basic Mug

A standard ceramic mug can feature a repeating row of impressed leaf shapes pressed into the clay around the lower section. The leaves create a clear horizontal band that adds pattern without covering the entire surface. The stamp impressions catch glaze in the recessed areas, giving the leaves a slightly different tone from the rest of the mug body.
What makes this idea useful is how easily the same stamp can be reused on other simple forms like a small bowl or a soap dish. The spacing between leaves can be adjusted to fit different diameters, and the design stays visible even after glazing. For a gift, something like this keeps the focus on the pattern rather than complex shaping. The approach also photographs cleanly for sharing project ideas online.
Impressed Circle Stamps on a Small Bowl
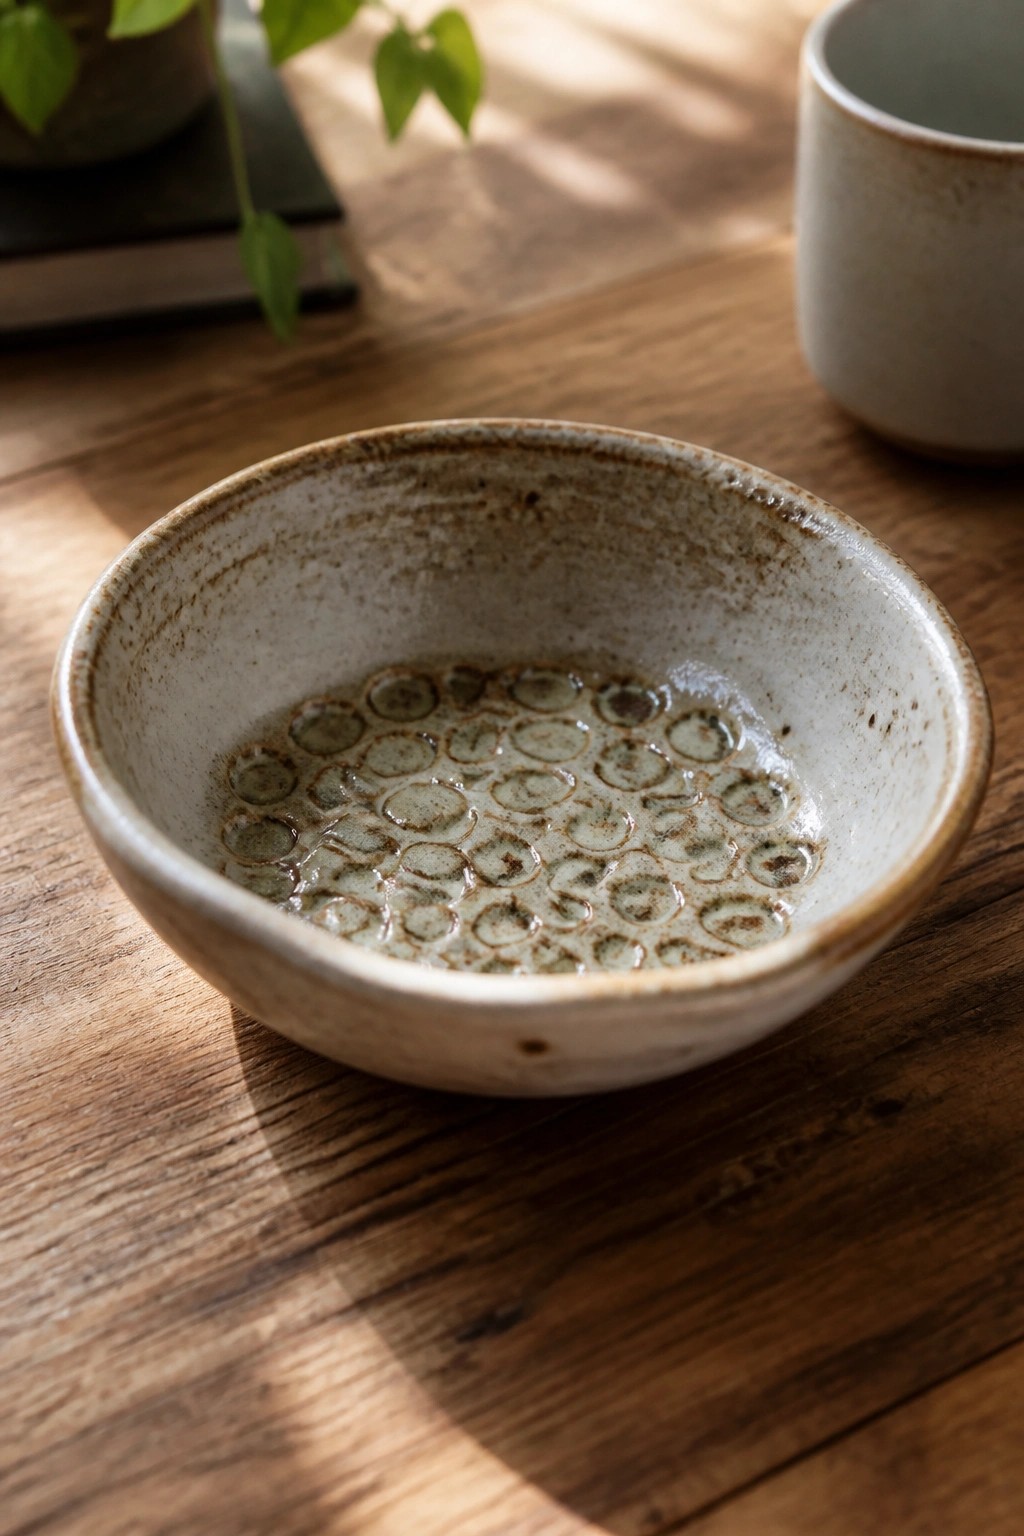
A small ceramic bowl gets its main interest from rows of repeated circle stamps pressed into the clay while it was still soft. The stamps sit close together across the interior base, creating a grid of raised rings that catch the glaze and show up as darker lines once fired. This approach turns a plain bowl shape into a stamped pattern project that stays simple but looks finished. The light speckled glaze helps the impressions stand out without needing extra color or carving.
What makes this idea useful is how easily the same stamping can move to other small forms like a ring dish, spoon rest, or tiny tray. You can change the spacing or size of the circles to make the pattern tighter or more open depending on the piece. For beginners, starting with a round stamp on a shallow bowl keeps the surface flat and easy to press evenly. The finished look photographs well for sharing because the pattern reads clearly even in a quick snapshot.
Impressed Celestial Motifs on a Small Dish
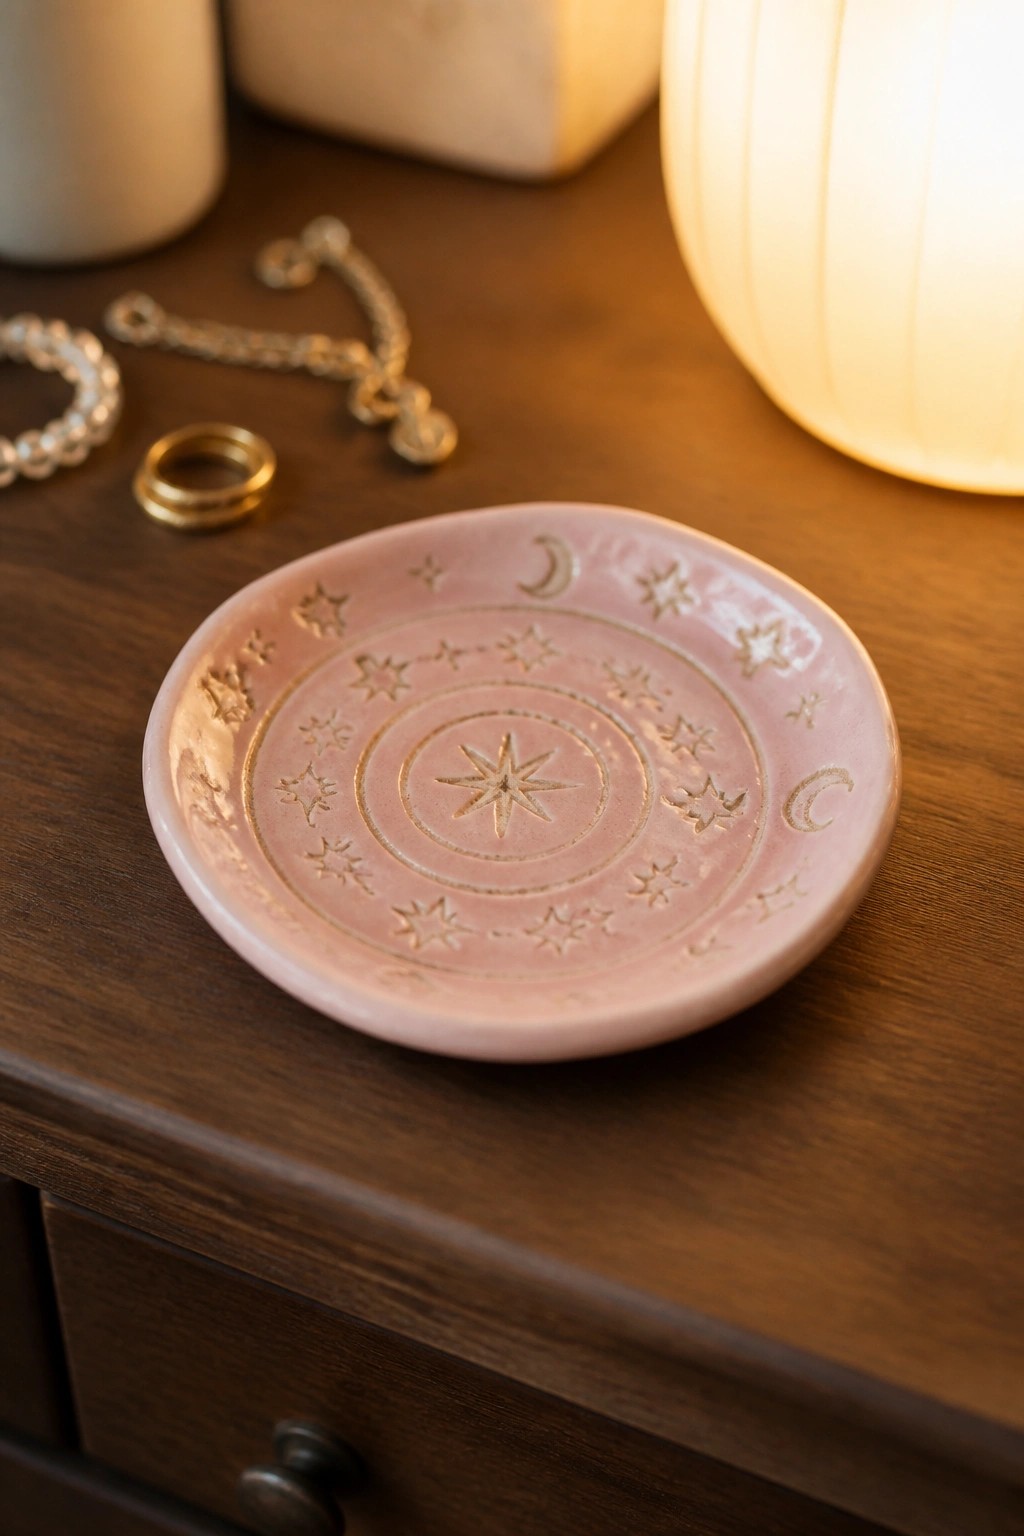
A small round dish becomes a ring holder or trinket tray when you press star and moon stamps into the clay around the rim and add a central starburst. Concentric circles keep the stamps aligned so the pattern stays balanced even on a curved surface. A light pink glaze highlights the recessed lines without covering them, which makes the impressed shapes read clearly after firing. This method fits the impressed pattern category because it relies on simple repeated stamps rather than freehand carving.
What makes this idea useful is how the same stamps transfer directly to other small items like a soap dish or key tray. The compact size limits how many impressions you need, so the project stays quick for beginners. You could change the stamps to leaves or dots and keep the same layout on a different colored clay body. In a bathroom or on a dresser, the dish holds small items while the stamped design adds interest without extra color work.
Heart Stamps on a Hedgehog Planter
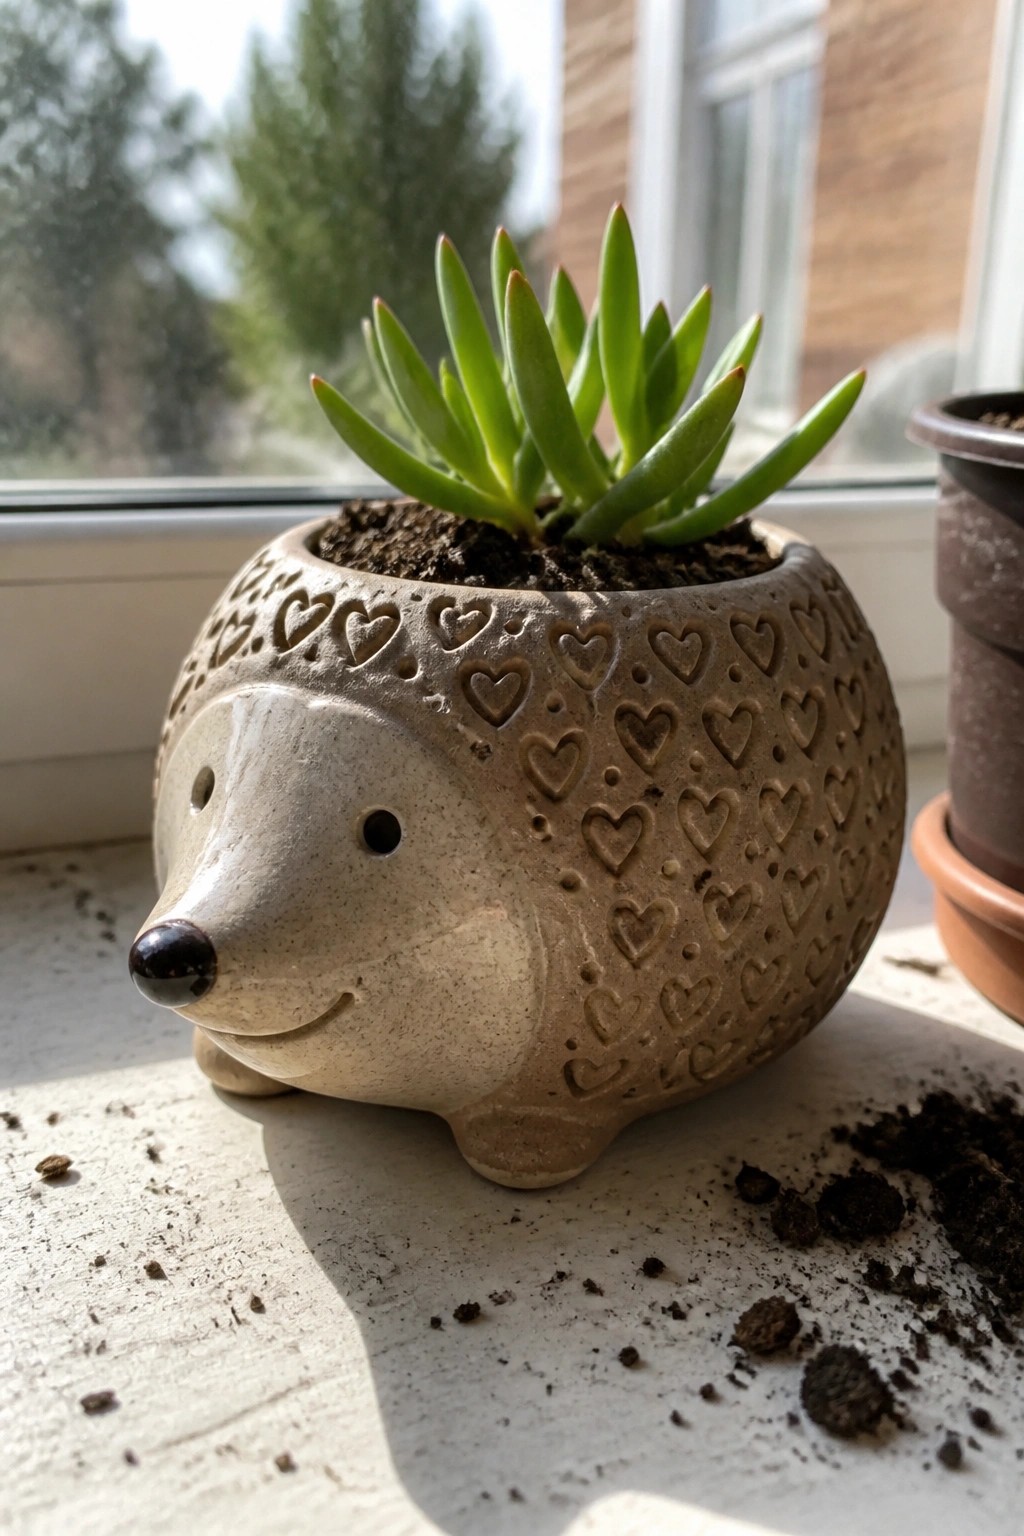
A small ceramic planter formed in the shape of a hedgehog uses rows of impressed heart stamps across its rounded body to create a repeating pattern. The simple sculpted face with basic eyes, nose, and mouth keeps the focus on the stamped texture rather than extra detail. This approach works as a compact planter suited for succulents or small houseplants.
The rounded body gives plenty of surface area for the heart stamps to show up clearly without crowding. You could use the same stamp on a plain round bowl or a low tray by pressing the pattern before the clay firms up. A piece like this fits well on a windowsill or desk where the small scale keeps it practical for plant styling while the stamp pattern photographs cleanly for sharing.
Impressed Fern Wall Hanging

A flat rectangular clay slab becomes a simple wall hanging once you press real fern fronds and delicate stems into the surface to create raised impressions. The light green glaze settles into those recessed areas and leaves the rest of the piece in a soft off-white tone so the plant details stand out clearly. A single hole drilled near the top lets the finished piece hang straight without any extra hardware. This method works especially well for turning collected foliage into a lightweight decor object.
What makes this idea useful is how quickly you can change the pressed plants to match whatever grows near you or fits the season. The long rectangular shape hangs neatly in narrow spots like above a desk or beside a window where a wider piece would crowd the space. You could shrink the same slab down for a set of smaller tiles or press the same botanicals onto a flat tray instead. For a gift, something like this travels easily and needs no special display beyond a small nail.
Scale Texture on a Ceramic Spoon Rest

A small ceramic spoon rest can be made by pressing a repeating scale stamp into the clay surface while it is still soft. The overlapping half-circle pattern creates a textured area that catches light once the piece is glazed. A glossy turquoise finish emphasizes the impressed lines and gives the spoon rest a practical, wipe-clean surface for kitchen use. This fits the impressed pattern category because the design relies on a simple stamp repeated across the form rather than added clay or paint.
What makes this idea useful is that the spoon rest shape requires only a small slab of clay and takes little time to form. The scale stamp can be adjusted in size or depth to suit different tools or even adapted onto the rim of a small bowl. In a kitchen, this piece keeps spoons from marking counters while matching other stamped dishes you make. You could try the same stamp on a larger tray or shorten the pattern to a border if you want to test the technique on a different object first.
Impressed Lace Pattern Candle Holder

A small rounded ceramic candle holder gains its main interest from a repeating scalloped pattern pressed into the clay while still soft. The impressed texture wraps evenly around the exterior and allows light to pass through the thinner raised areas when a candle burns inside. This creates a simple way to add surface detail without adding extra clay or complicated carving. The form stays compact enough to function as a tea light or votive holder on a table or shelf.
The small scale keeps the stamping manageable even when trying the technique for the first time. You can repeat the same lace-style stamp on a slightly taller cylinder to make a taller votive or shorten the walls to create a shallow ring dish instead. The pattern also works on a plain slab built into a square tray if you want to move away from round shapes. A piece this size takes up little kiln space, so it is practical for testing multiple stamp variations in one firing.
Impressed Citrus Slice Plate

A shallow ceramic plate uses a stamped radial pattern to divide the surface into wedge-shaped segments that resemble a sliced citrus fruit. The impressed lines create clean divisions where a pale yellow glaze pools, contrasting against the speckled white clay body. This turns an ordinary plate into a kitchen item that showcases the stamping technique without needing additional carving or painting.
What makes this idea useful is how the radial layout works on any round form you already have. You could adapt the same segment count to smaller coasters or a ring dish by scaling down the stamp size and using fewer divisions. The glaze pooling in the impressed areas gives clear definition without extra steps, which keeps the process simple for beginners. In a kitchen setting this kind of plate stands out on open shelving or as a serving piece for snacks.
Impressed Dimple Pattern on a Small Salt Cellar

A small clay bowl uses rows of impressed circles pressed into the leather-hard surface to create a repeating dimple texture. The shape stays simple and rounded, while the exterior pattern gives the piece visual interest without added color or carving. Once glazed in a soft green, the texture shows up clearly and turns the bowl into a practical kitchen item for holding salt or spices.
What makes this idea useful is how the stamping stays effective on a compact form that requires little clay or drying time. You could apply the same dimple rows to a matching lidded jar or a shallow tray for butter. The small scale makes it easy to fit multiple pieces on a shelf or gift set, and the texture photographs cleanly for recipe posts or kitchen styling.
Impressed Leaf Stamps on a Small Rounded Vase
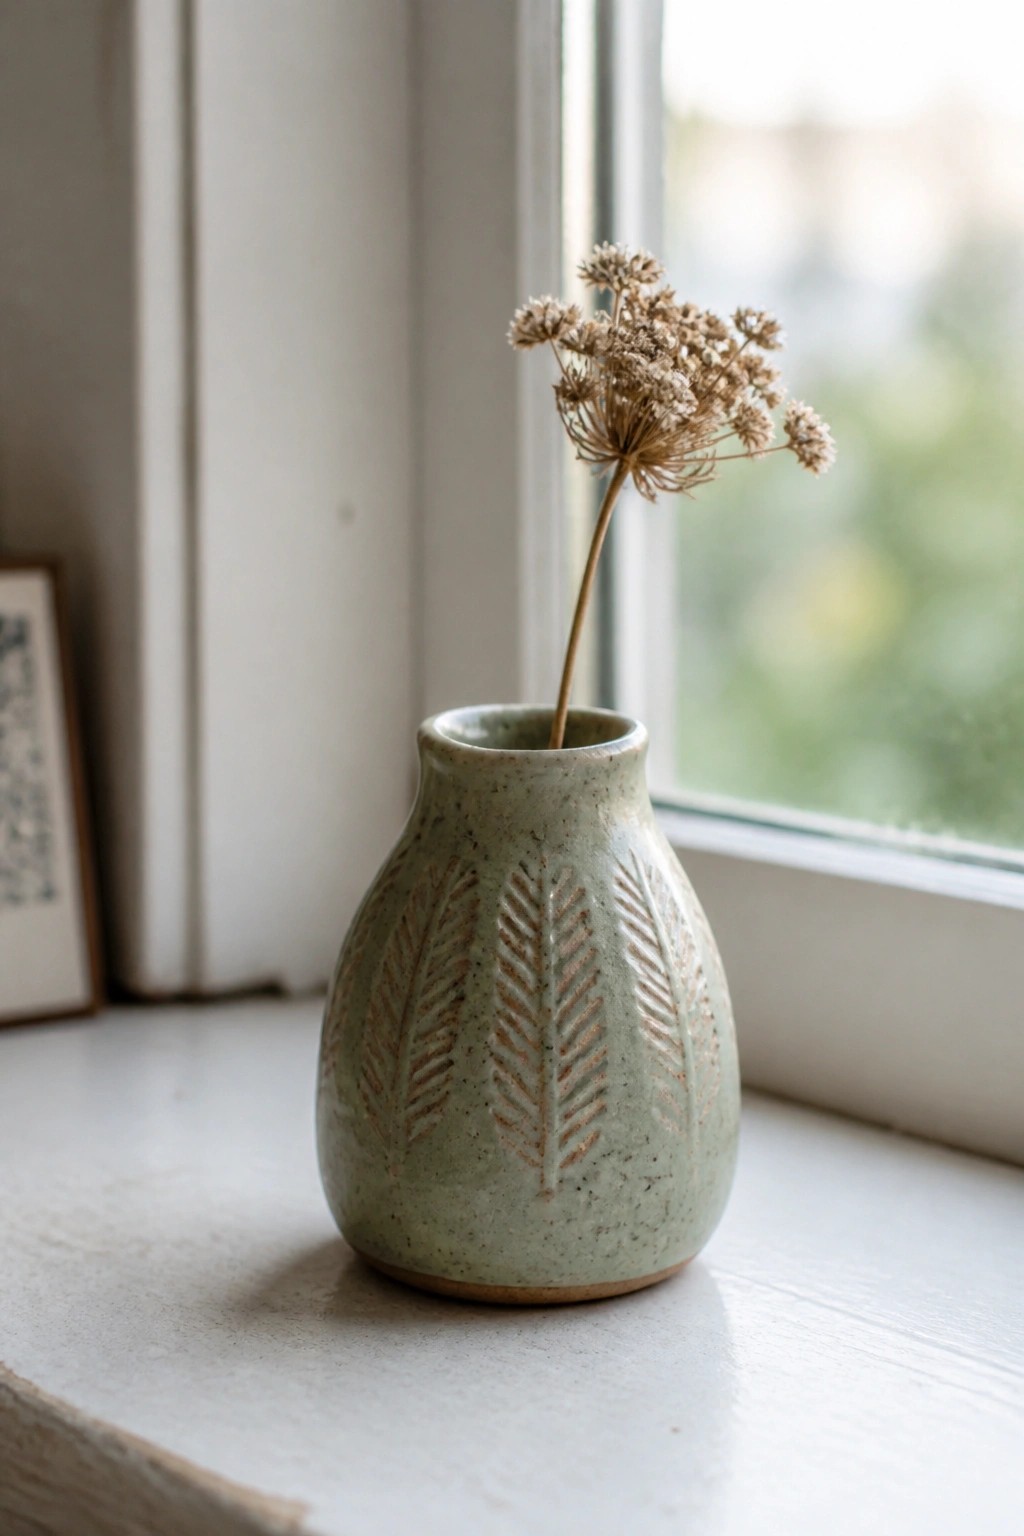
A small bud vase gives you a good surface for impressed patterns when you stamp vertical rows of leaf shapes around the body. The repeating fern-like impressions create texture that shows up clearly once a light speckled glaze is applied. This approach keeps the focus on the stamped lines rather than added color or carving.
What makes this idea useful is how the same leaf stamp works on any curved form without much planning. You could switch to a mug or small pitcher and still use the vertical layout. The compact size also makes it simple to test different stamp depths or spacing before committing to a larger piece.
Impressed Dotted Lines for Figurine Texture

A small ceramic cat figurine uses a repeating impressed pattern of short black dashes to build texture across the body. The marks are applied with a simple stamping tool before glazing, creating a consistent surface that reads as fur from a distance. Painted details on the face and ears keep the focus on the form while the stamped texture adds depth without extra carving.
What makes this idea useful is that the same stamping tool works on any rounded shape, so you can test the pattern on a plain ball or cylinder first. The small scale makes it easy to finish in one session and place on a shelf or desk. You could rework the dotted lines onto a simple bird or rabbit form, or even stamp them around the base of a small planter for a matching set.
Grid Stamped Soap Dish
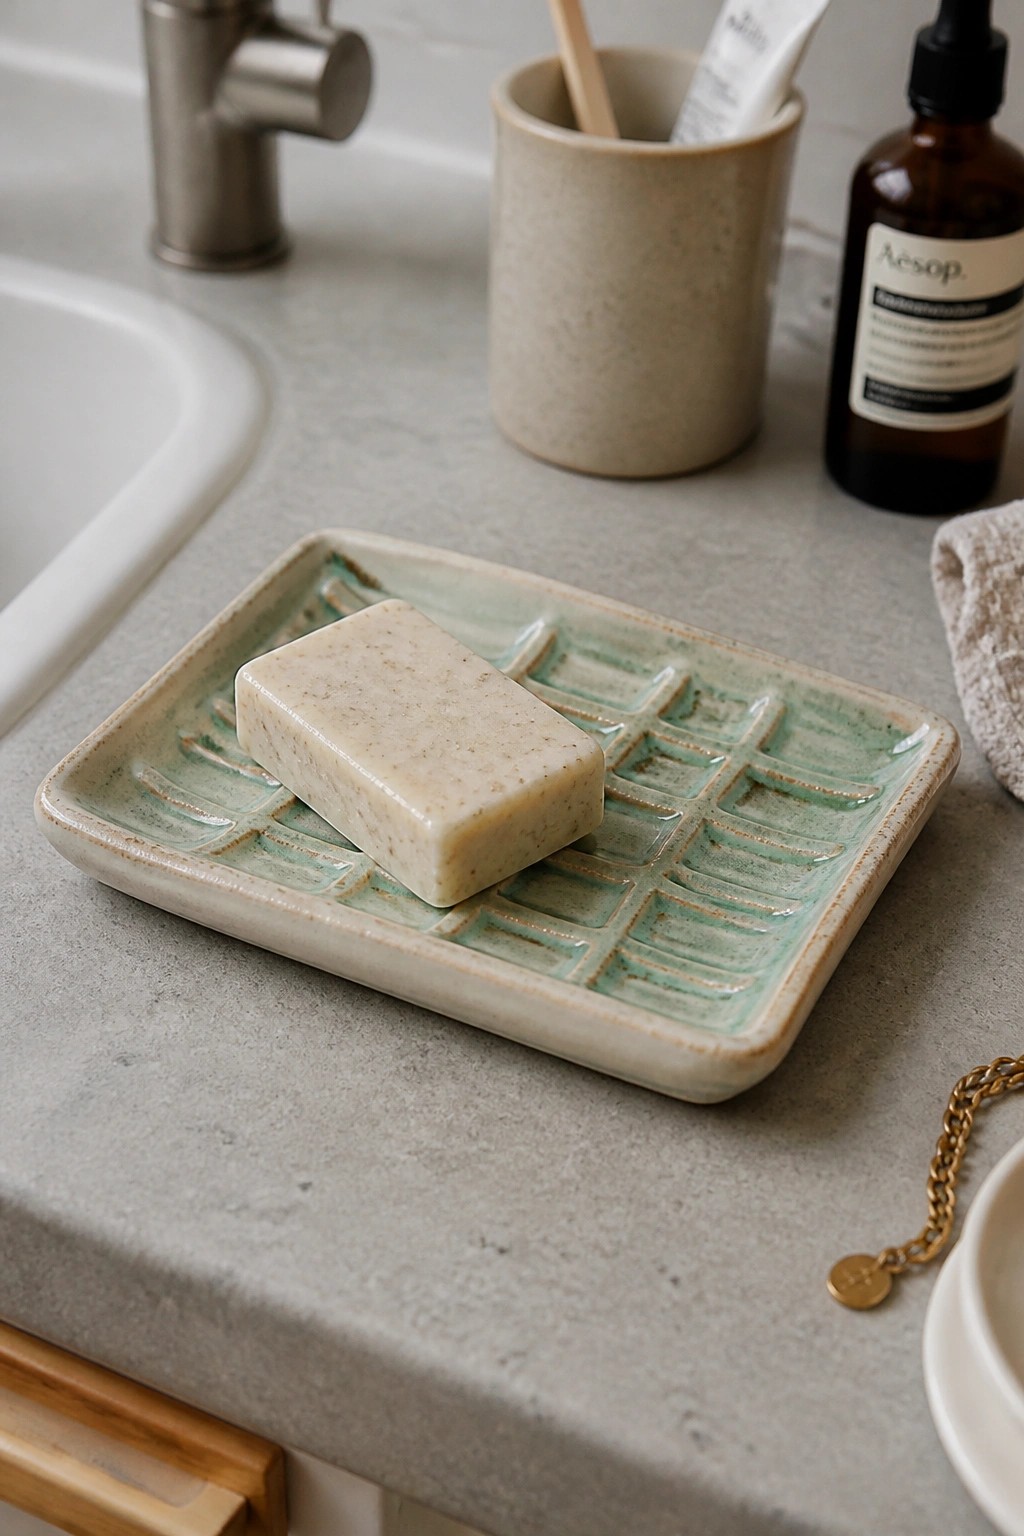
A rectangular soap dish made from a flat slab of clay gets its function from an impressed grid pattern stamped across the surface. The lines create shallow channels that let water drain while the raised sections keep the bar from sliding around. A light glaze over the whole piece with a second color settled into the grooves makes the pattern readable without extra decoration. This idea belongs in the bathroom item category where a simple impressed design improves both use and looks.
The shape does a lot of the work here because the grid keeps soap drier than a flat tray would. You can use the same stamping approach on a larger slab to make a matching toothbrush tray or scale it down for a small ring dish. In a bathroom this piece handles daily use while the pattern gives it enough detail to stand out in photos. The grid stamp itself is easy to repeat with a ruler and a basic tool so the idea transfers quickly to other flat projects.
Circle Stamps on a Mini Mug
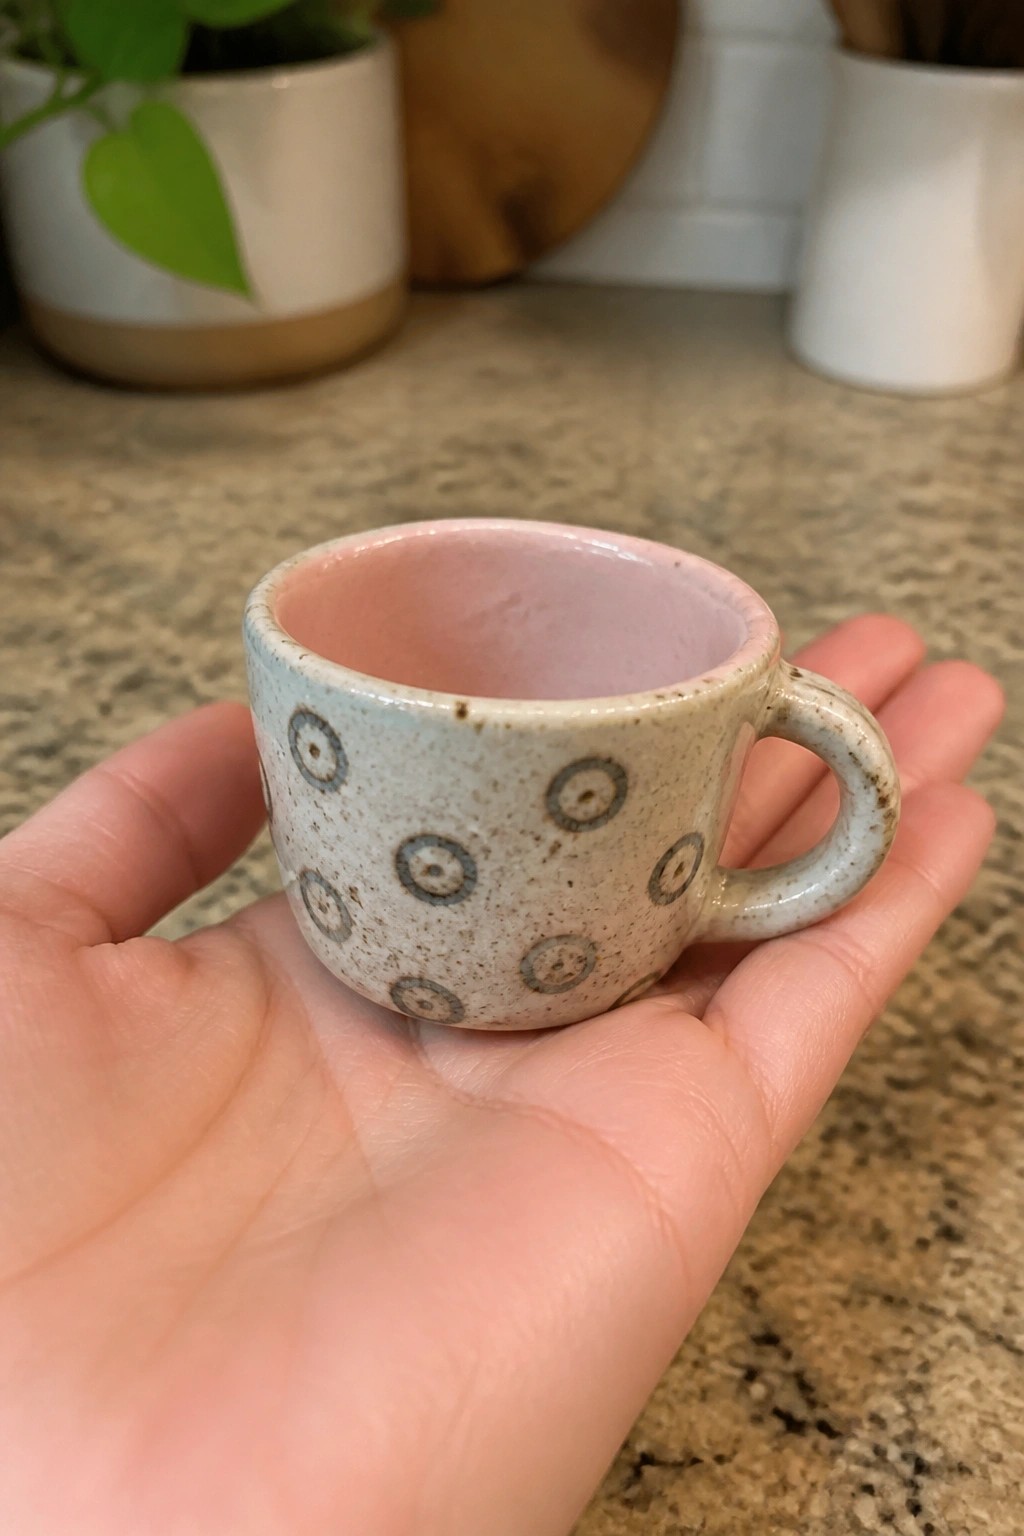
A small handled cup gives the stamped circles room to repeat without needing perfect spacing. The light speckled surface lets the impressed rings read clearly in a contrasting tone, while the curved form keeps the pattern from looking flat. The soft pink interior glaze finishes the inside and creates a simple color break at the rim. This approach fits the mug category and shows how basic circle stamps can cover a compact shape evenly.
The small scale makes the stamping easy to complete in one sitting without running out of room. You could repeat the same circle motif on a slightly larger cup by adding one extra row or switch the stamp size for a different object like a small pitcher. The speckled glaze also softens any uneven pressure from the stamp, so the pattern stays forgiving. In a kitchen setting this size works for espresso shots or as a tiny creamer that still reads as intentional rather than leftover clay.
Spiral Stamps on a Yarn Bowl

A yarn bowl made from clay uses a simple notch in the rim to hold and feed yarn while you knit or crochet. The impressed spiral patterns stamped around the outside give the rounded form repeated texture without needing extra color or glaze. The warm terracotta tone keeps the focus on the stamped marks and the handmade shape. This fits the holder category, where stamping turns a basic bowl into a craft tool.
What makes this idea useful is that the spirals can be stamped with any small round tool or carved stamp while the clay is still soft. The bowl shape sits steady on a table and works for anyone who knits regularly, and the same stamp pattern could move to a mug or a small plant pot. You could scale it down for a desk catch-all or leave the interior unglazed for a matte finish that matches natural yarn. The stamped detail makes the piece easy to spot in project photos online.
Impressed Circles on a Bathroom Holder
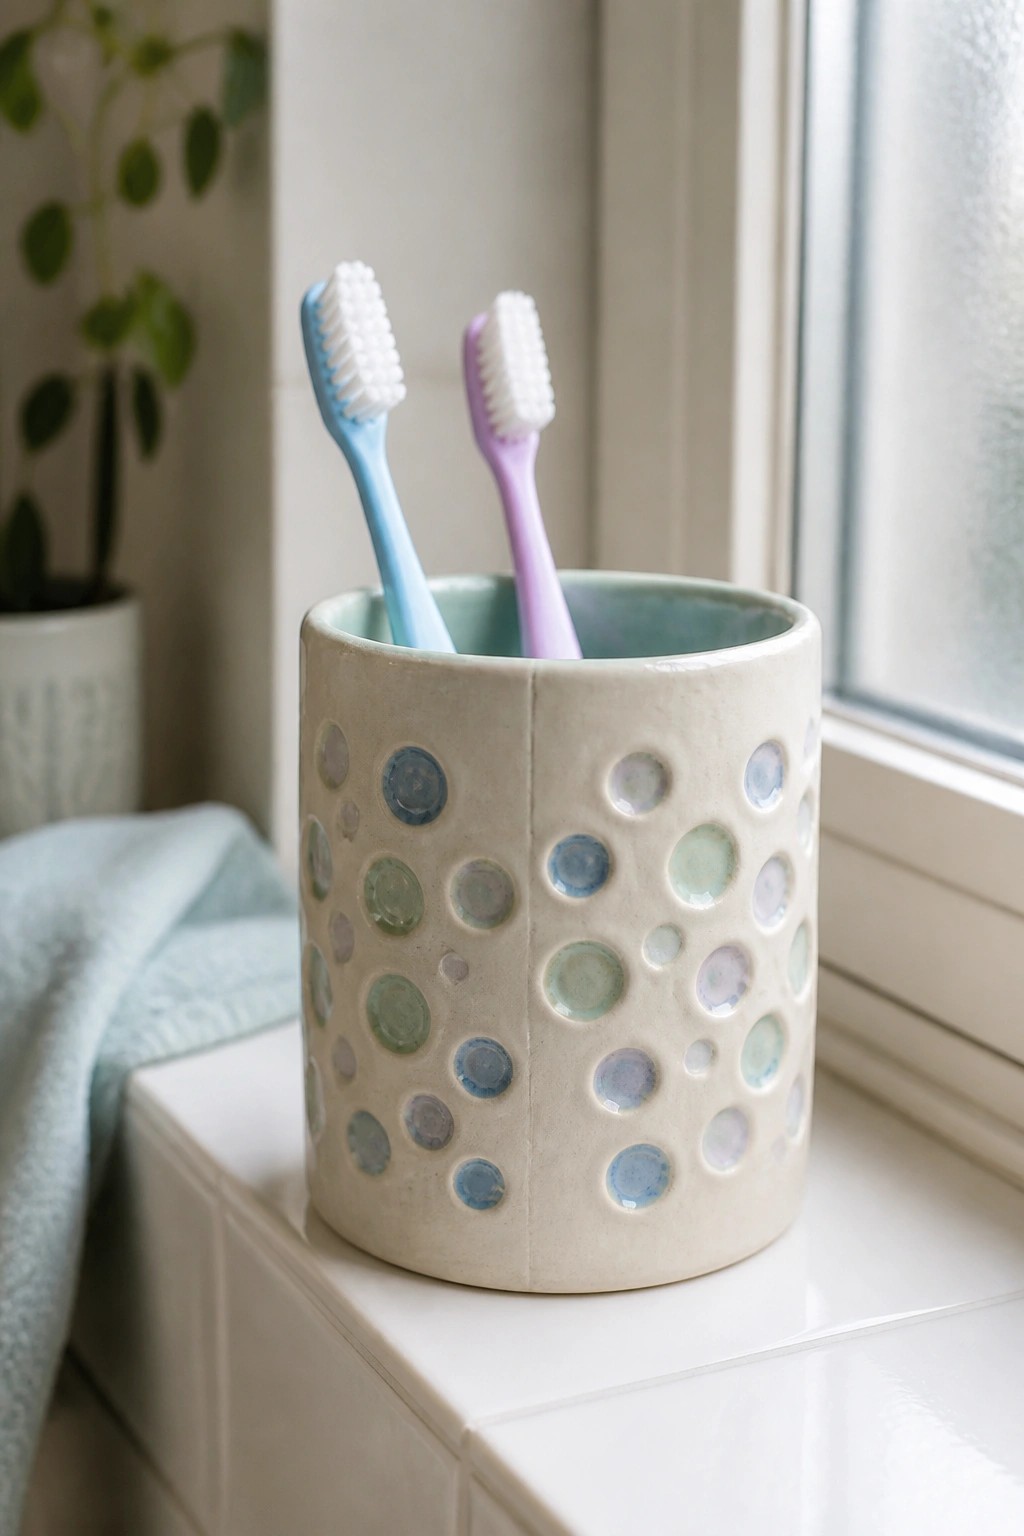
A cylindrical ceramic toothbrush holder uses rows of impressed circles in varying sizes to create a dotted surface pattern. The circles are glazed in soft shades of blue, green, and lavender that sit slightly below the matte off-white clay body. This stamping method gives a simple bathroom item extra visual texture while keeping the overall form clean and functional.
What makes this idea useful is that the same stamping approach works on any small upright shape you already throw or hand-build. You can repeat the circle impressions at different densities to change the look without learning new techniques. The holder shape itself stores toothbrushes neatly on a counter or shelf and could be widened slightly into a small cup for cotton swabs or makeup brushes.
Stamped Pattern Coasters with Mixed Impressions

Square ceramic coasters like these use simple stamps pressed into the clay to create repeating textures such as leaves, honeycomb, scales, and grids. The impressions are left visible under matte glazes in soft colors that sit in the recessed areas and highlight the raised edges. This method keeps the coasters flat and functional while the stamped details add clear visual contrast without extra carving or painting. The approach suits small flat pieces where the pattern can cover most of the surface.
What makes this idea useful is how quickly you can produce a full set by repeating the same stamps across multiple tiles. You can swap out just one or two stamps to create variety within a matching color scheme or change the glaze on identical shapes for an easy update. These coasters work on a desk or side table and stack neatly for storage. The same stamping can be applied to small trays or soap dishes if you want to expand the project later.
Mushroom Stamps on Small Clay Dishes

A shallow, round ceramic dish made from light clay takes repeated mushroom stamps impressed directly into the interior surface. The stamps sit evenly across the base with no added color or glaze to obscure the texture. This keeps the project focused on pattern rather than form and works as a simple ring dish or pinch bowl.
What makes this idea useful is how quickly the same stamp can be used on other flat or shallow shapes like coasters or soap dishes. The small size lets you make several pieces in one sitting for gifts or desk storage. You can change the stamp to leaves or geometric shapes without changing the basic dish form.
Frequently Asked Questions
What household items work best for creating impressed patterns on beginner pottery projects?
Many everyday objects like leaves, shells, lace fabric, buttons, and even textured kitchen tools such as forks or cheese graters can produce beautiful results. Start by rolling out your clay to an even thickness, then press the item firmly but gently into the surface. Test on a small scrap piece first to see the depth of the impression before applying it to your main project.
How do I stop clay from sticking to my stamps during the process?
Lightly dust the stamp with cornstarch or talc powder before pressing it into the clay. This creates a barrier that releases cleanly without distorting the pattern. If you prefer not to use powder, try pressing the stamp into the clay and then lifting it straight up without twisting. Keep a small bowl of water nearby to moisten your fingers if the clay starts to feel too tacky.
What is the best stage of clay dryness for stamping impressed designs?
Work with clay that is soft but not overly wet, often called the soft leather-hard stage. At this point the clay holds its shape yet still accepts clear impressions. If the clay is too wet the pattern may slump or fill in, while bone-dry clay will crack under pressure. Cover your work with plastic when taking breaks to maintain the right moisture level.
How can I make sure my impressed patterns stay sharp after the piece dries and fires?
Apply even pressure during stamping and avoid overworking the clay afterward. Once stamped, let the piece dry slowly under loose plastic to prevent warping that could soften the details. After bisque firing, choose a glaze that is thin enough to highlight the texture rather than fill it in completely. Multiple light coats often work better than one thick layer.
Can I combine multiple stamping ideas from the list on a single piece without it looking cluttered?
Yes, plan your design on paper first by dividing the surface into sections such as borders, centers, and accents. Use simpler patterns like lines or dots in one area and more detailed stamps like flowers in another. Space the impressions at least a quarter inch apart to keep each one distinct, and step back frequently to check the overall balance as you work.

Pottery Path is my cozy corner of the internet where I share clay ideas, pottery inspiration, and simple projects you can recreate at home. I love exploring everything from air dry clay to handbuilt pottery to cute minis that brighten your day. My goal is to make clay crafting feel easy, fun, and welcoming for anyone who wants to try it.
You will find beginner friendly tutorials, creative pottery painting ideas, and lots of warm inspiration for slow and happy crafting. If you enjoy hands on creativity, this space will feel like home.