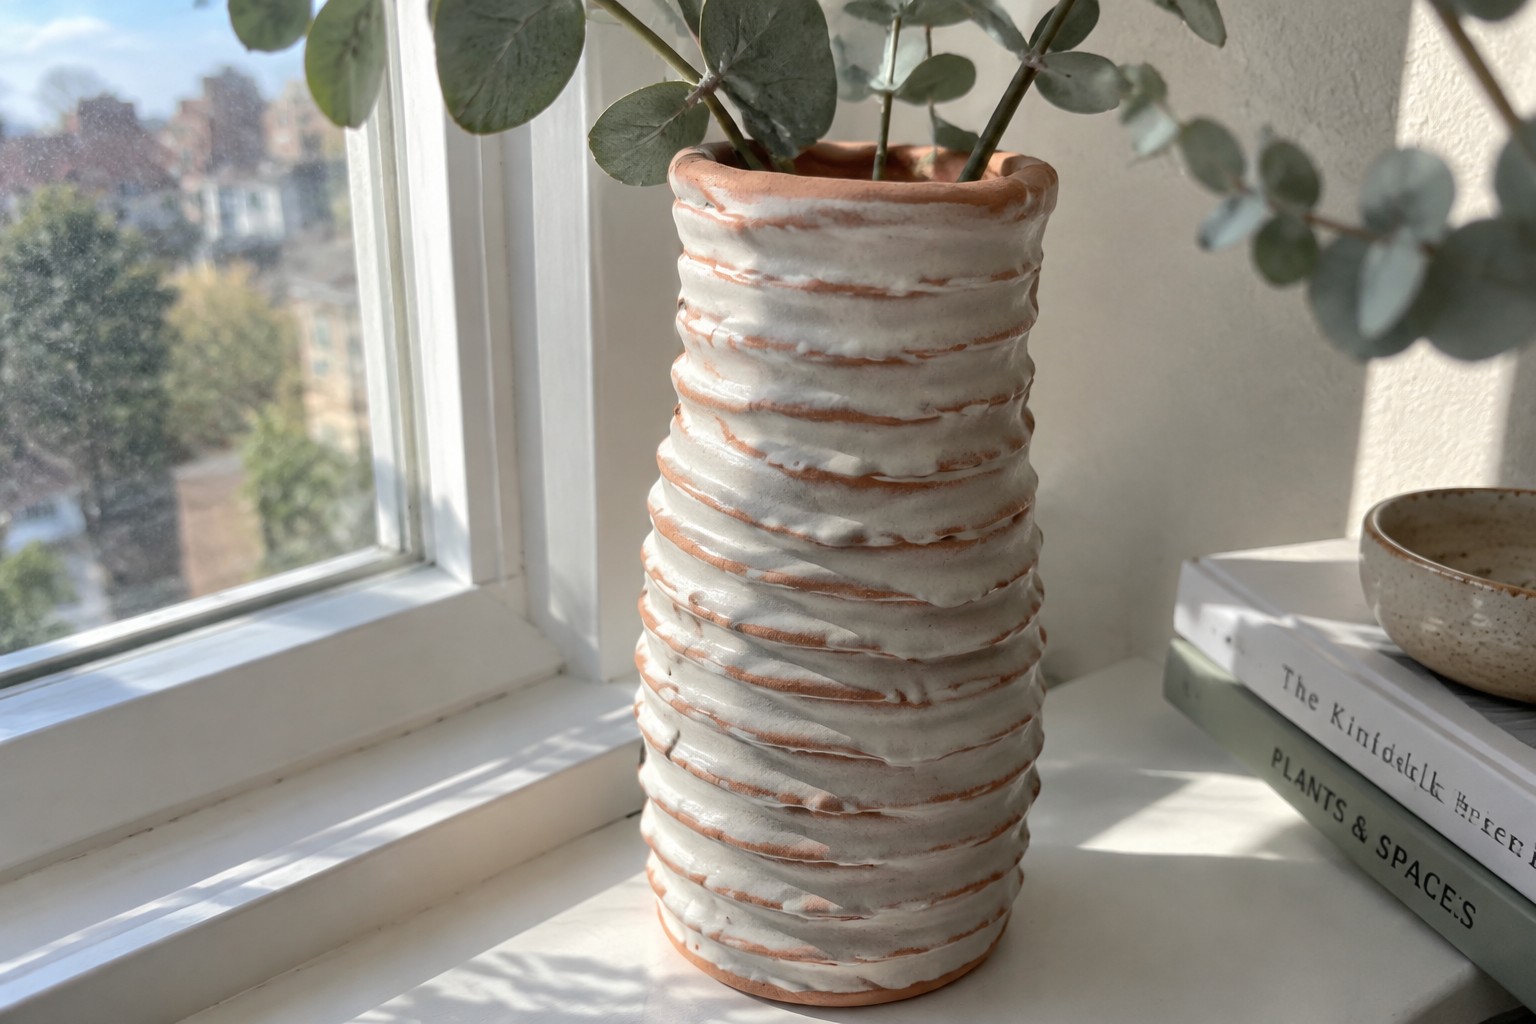
I have been trying out coil building in my pottery lately and it has grown on me.
The texture from leaving the coils exposed adds something simple and handmade to the pots.
I like how it shows the making process without any extra steps.
Over time I have collected photos of pieces that use this approach in different ways.
Here are some that stood out to me.
Tall Coil Vase With Exposed Horizontal Ridges
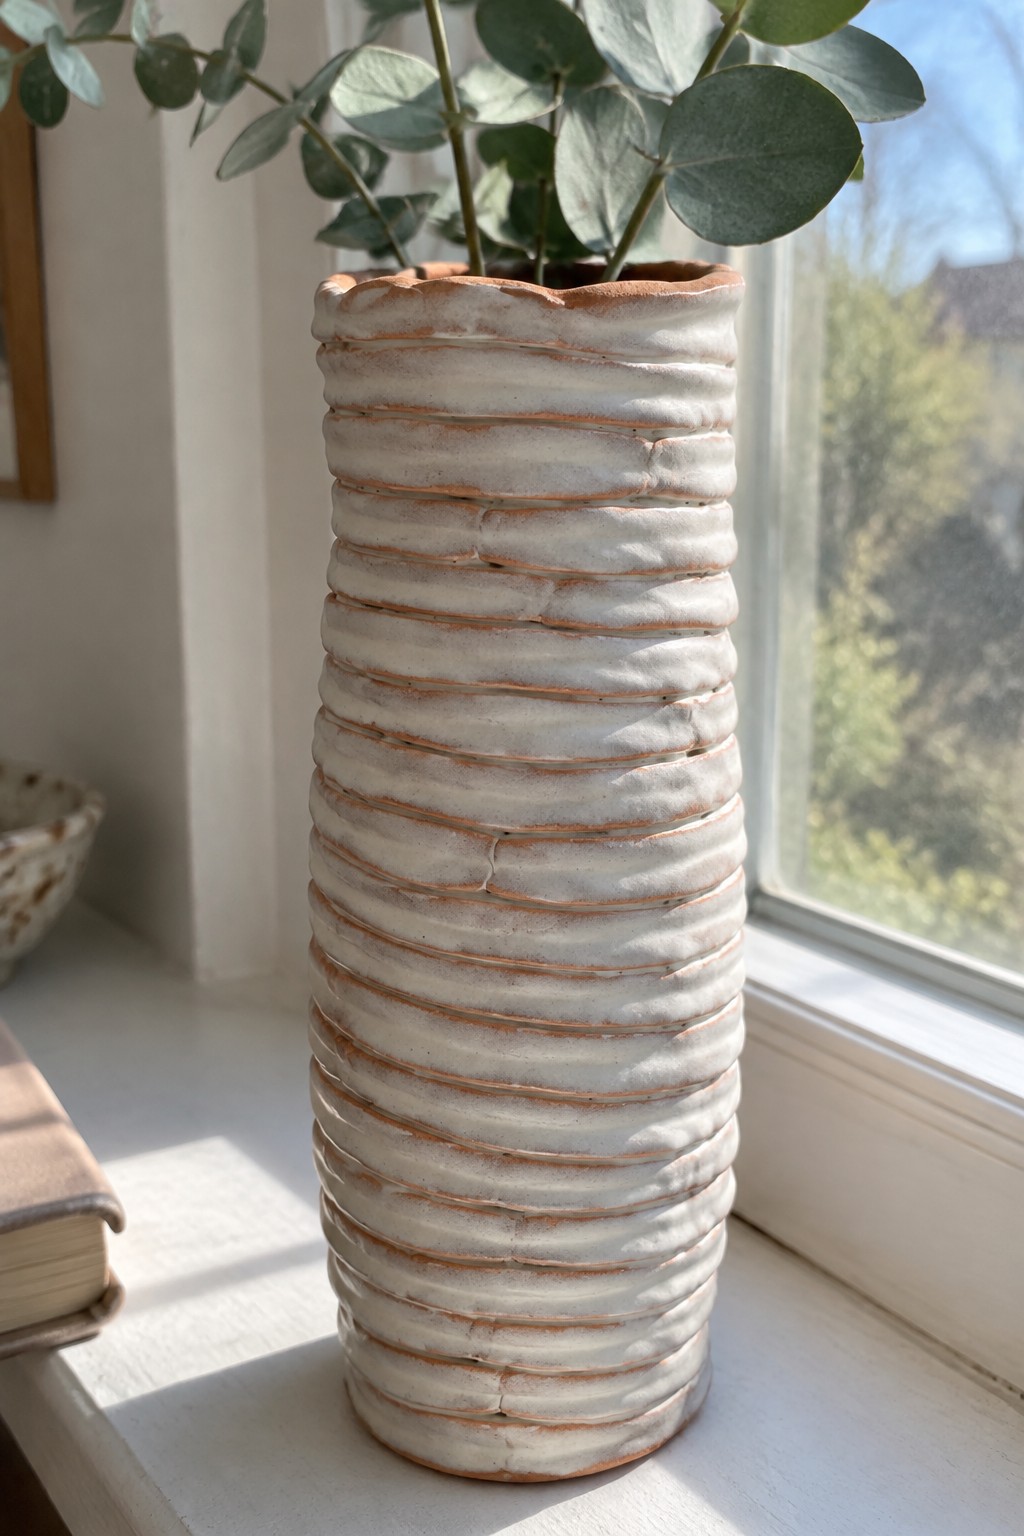
This coil-built vase is formed from stacked horizontal coils that remain visible after a white slip is applied. The terracotta clay shows through along the edges of each coil, creating a clear striped pattern that highlights the construction. The tall, narrow cylinder shape suits it for use as a plant holder or dried stem vase, while the uneven rim adds a simple finishing detail.
What makes this idea useful is the way the exposed coils create texture and color contrast without extra carving or painting. You could scale the same stacking method down for smaller items like pencil cups or match holders. The clean white and clay color pairing photographs clearly, which helps when posting plant display ideas.
Coiled Cat Planter With Marbled Glaze
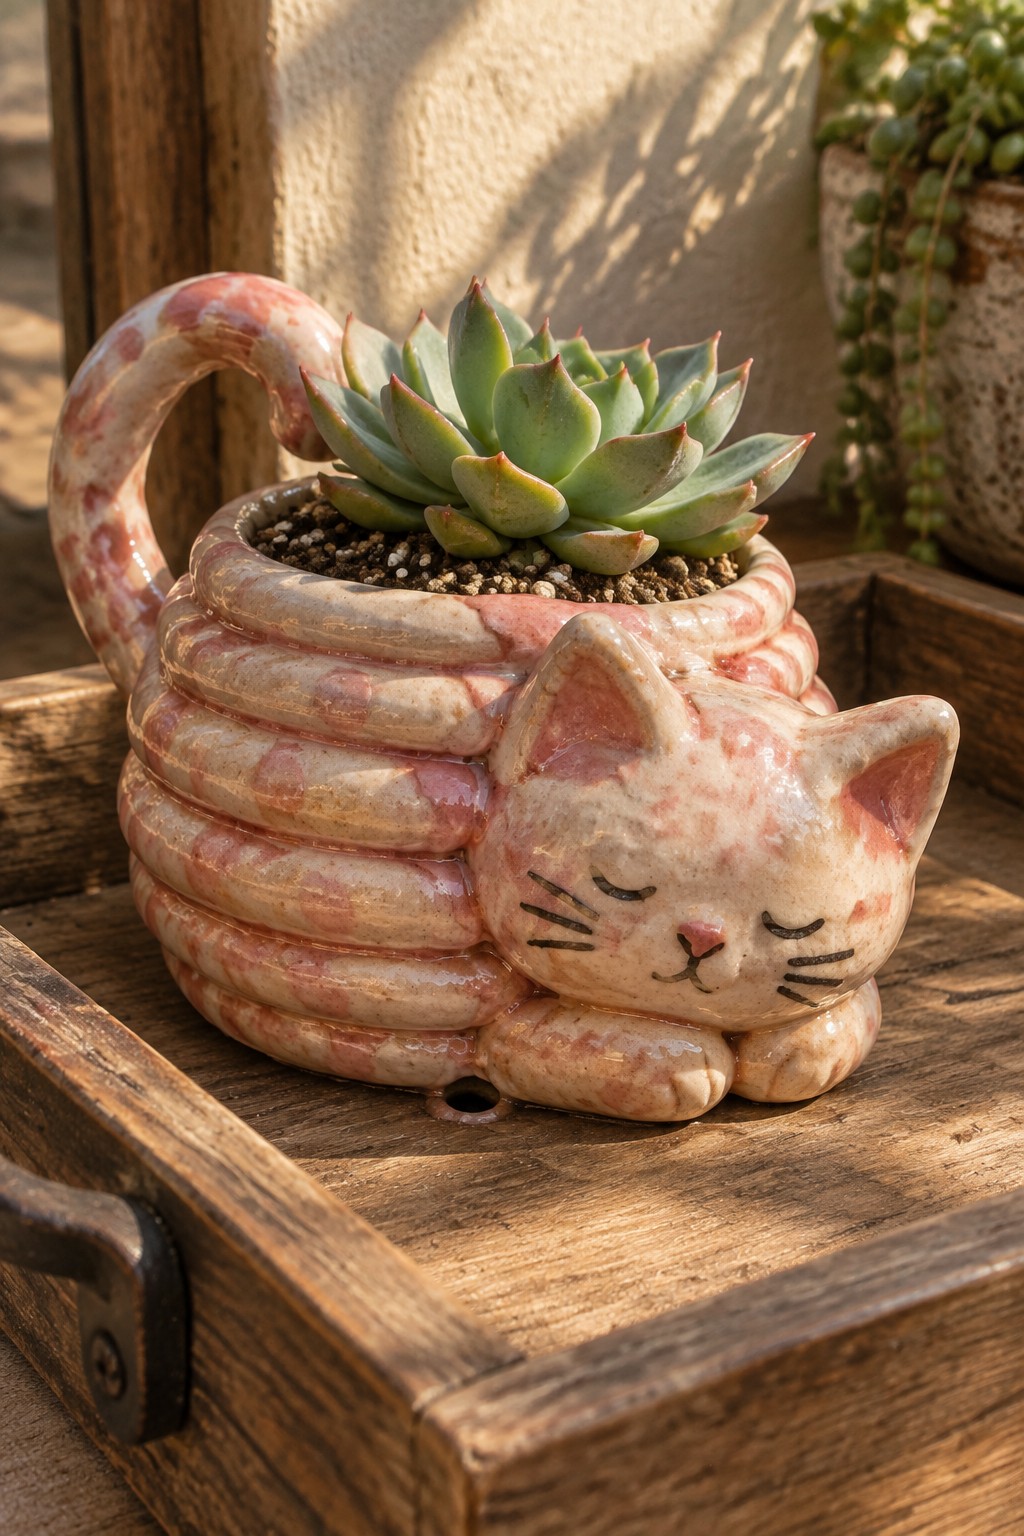
A coil-built planter shaped like a resting cat uses stacked coils to form the body while leaving the ridges visible as texture. The cat head is added at one end with simple sculpted features like closed eyes and whiskers, and a curved coil handle extends from the back. Pink and cream marbled glaze covers the surface but still lets the coil lines show through. This approach turns a basic planter into a small decorative piece that holds succulents or other low-water plants.
The compact size makes it easy to place on a windowsill or shelf without taking up much room. You could keep the same coiled construction and swap the cat face for a different animal or abstract shape to match other decor. The marbled glaze works well because it adds color variation while preserving the texture, so the same idea could be used for small holders or trays. For gifts, this shape stands out on a table because the exposed coils and clear handmade form make it different from plain pots.
Stacked Coil Serving Bowl
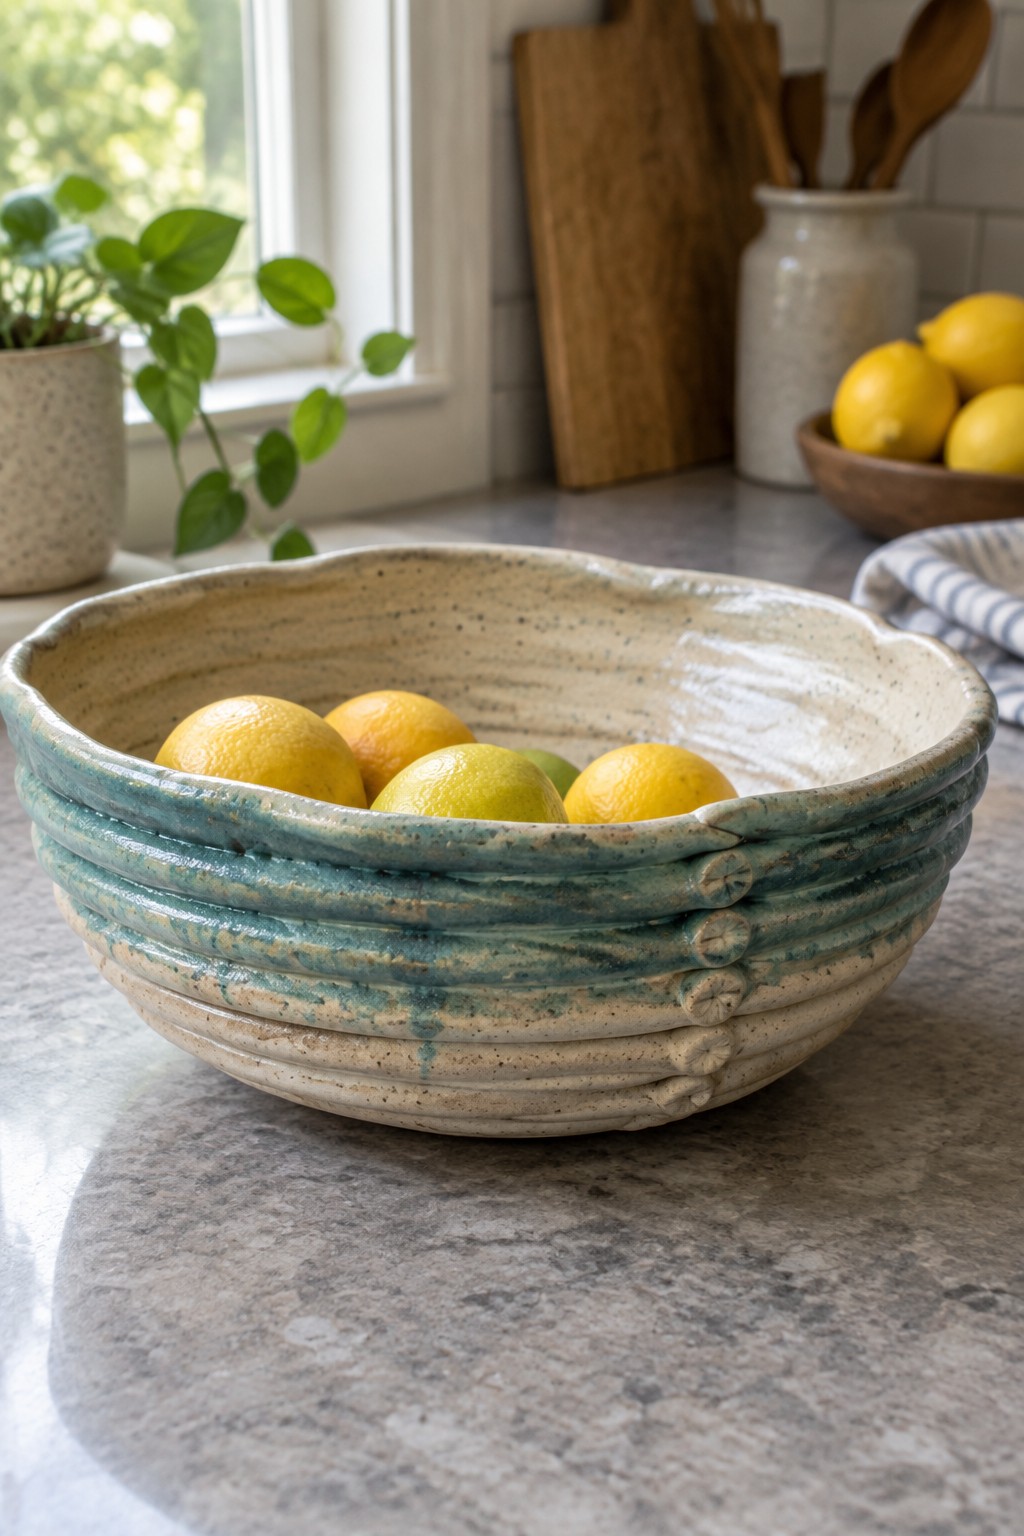
A wide, shallow bowl built entirely from coils leaves the construction lines visible as even horizontal bands around the outside. The coils are emphasized with a blue-green glaze that settles into the grooves while the base clay stays a warm speckled cream. This turns the stacking process into the main surface detail and keeps the interior smooth for practical use as a fruit or salad bowl.
What makes this idea useful is the way the exposed coils add texture without extra carving or attachments. You could repeat the same stacking method on narrower cylinders to make utensil holders or scale it down for individual bowls. The low, open shape fits well on a counter where people reach in often, and swapping the glaze colors would let the same coil pattern work in different kitchen palettes.
Coiled Mug with Horizontal Texture Lines
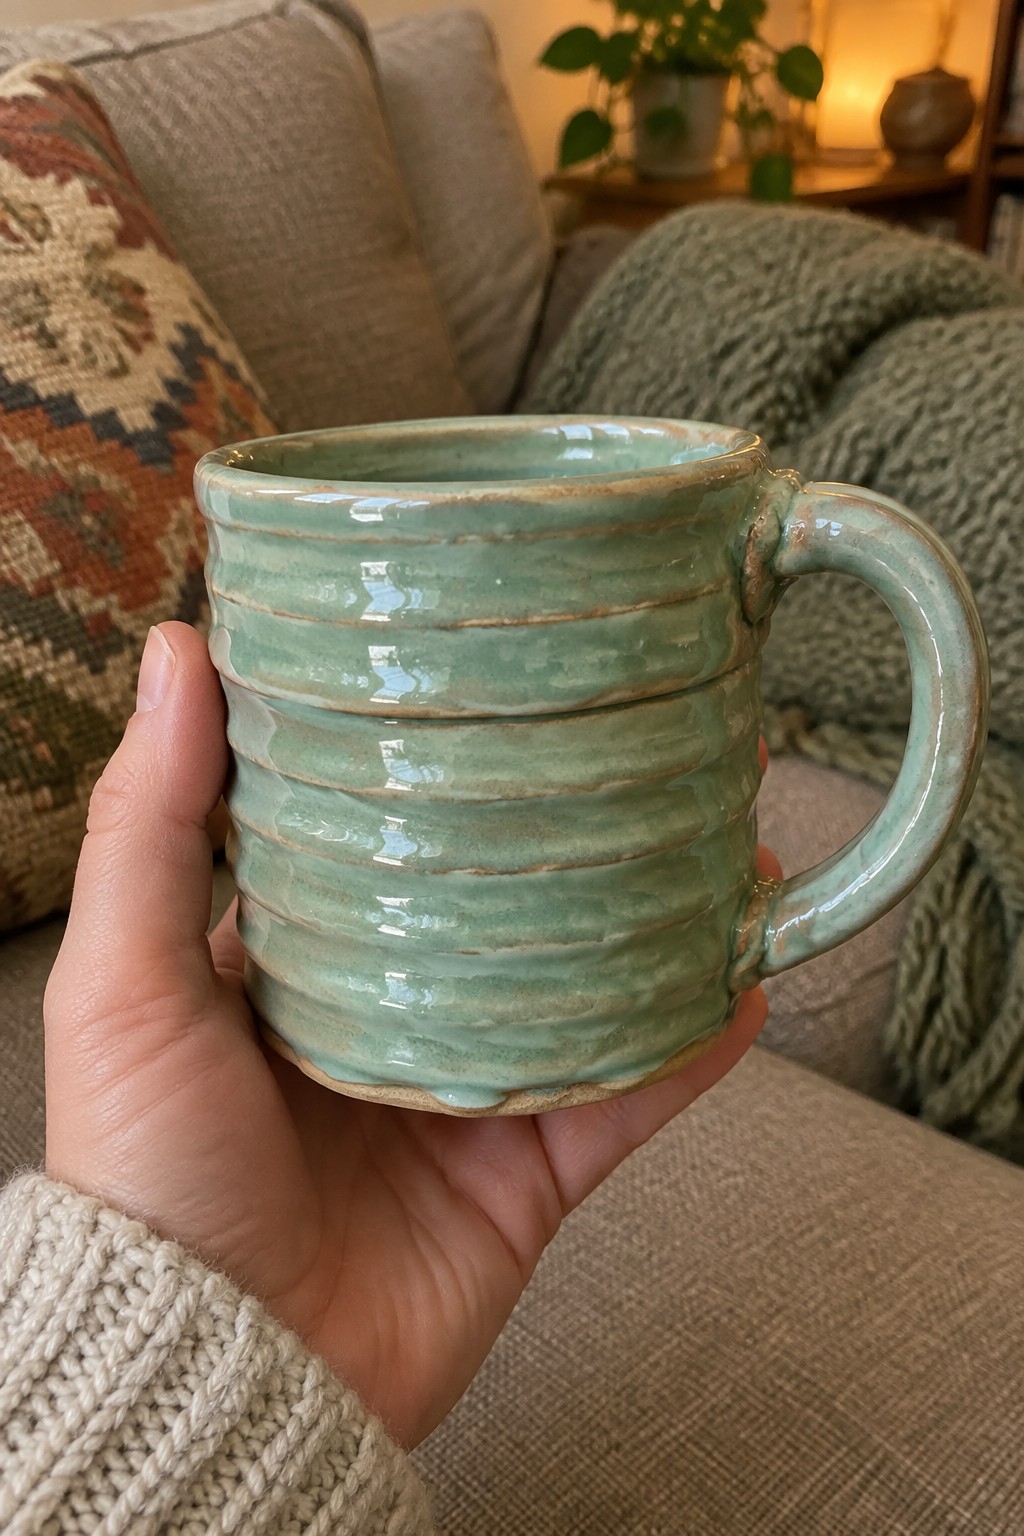
A mug formed by stacking coils keeps each layer visible as crisp horizontal ridges that wrap around the body. The translucent sea green glaze settles into the grooves while catching light on the raised edges, making the construction method part of the finished look. This approach works well for a compact drinking vessel because the coils add strength without needing a smooth surface. The handle attaches at two points and follows the same rounded profile as the body.
What makes this idea useful is how the exposed coils create surface interest with almost no extra steps after building. You could repeat the same stacking method for small tumblers or slightly taller travel mugs by adjusting coil thickness. The soft green tone stays versatile on a shelf or table without clashing with other kitchen items. For a simple change, leave the rim level and smooth while keeping the body textured so the contrast highlights the coil work.
Coiled Candle Holder With Wavy Glazed Rim
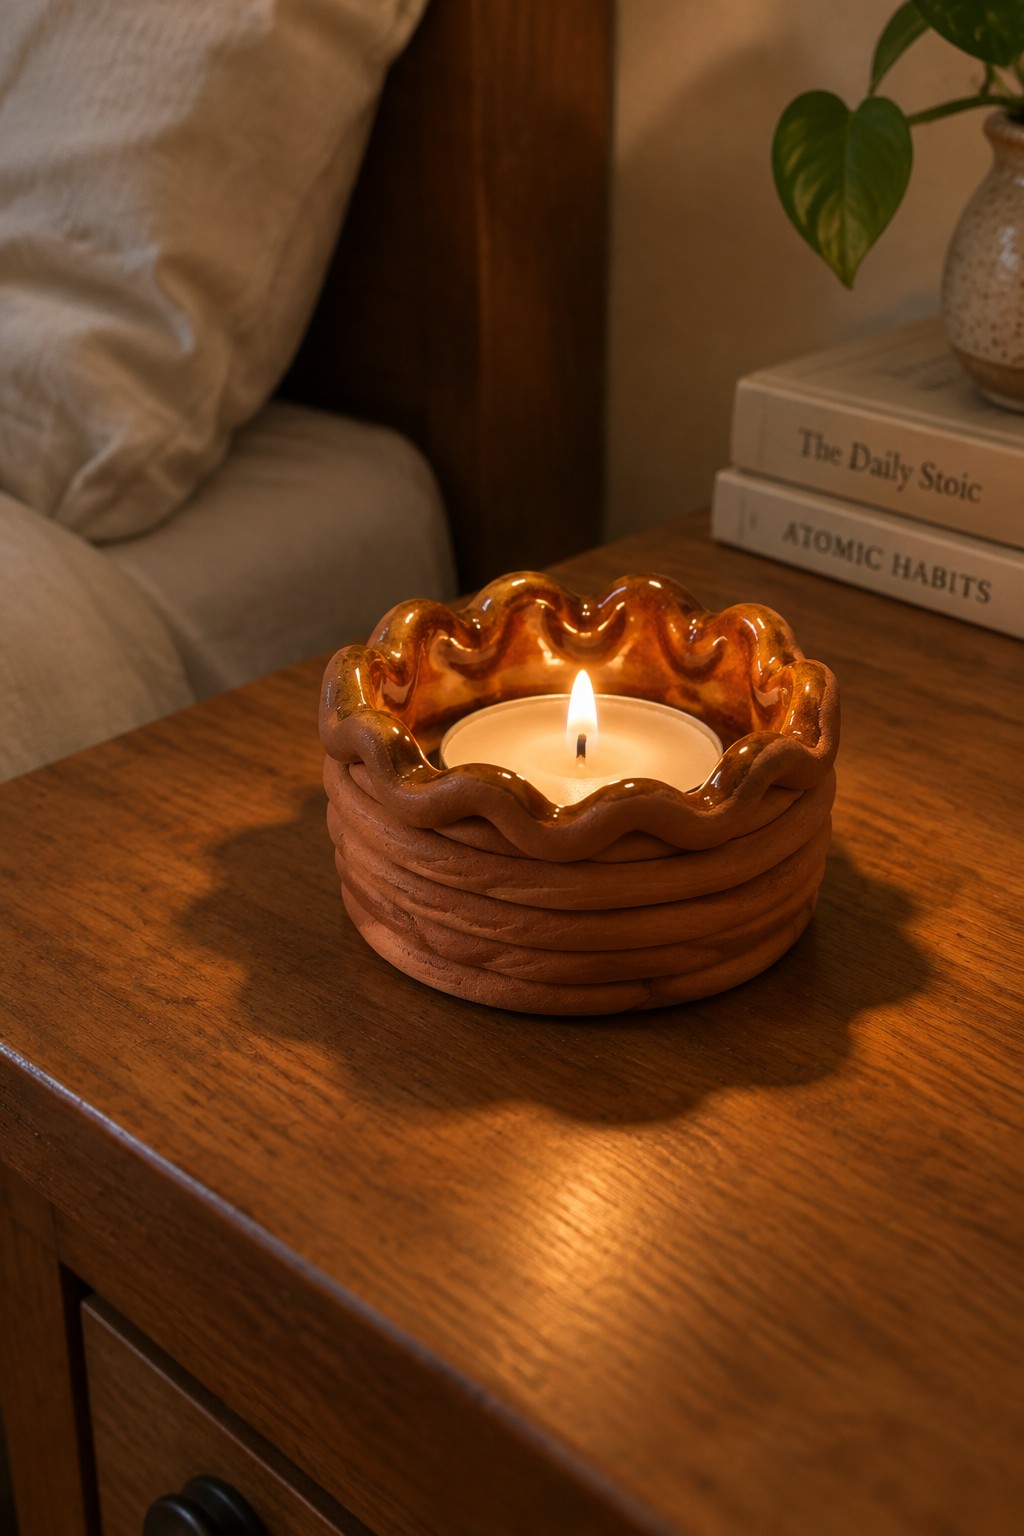
This project uses the coil method to build a small, low bowl that doubles as a tea light holder. The lower section keeps the coils visible and stacked in uneven rows for texture, while the top edge is smoothed, pinched into soft waves, and coated with a glossy brown glaze that pools in the dips. The contrast between the raw terracotta coils and the shiny rim gives the piece its main visual interest without any added decoration. It fits the candle piece category and stays compact enough to sit on a side table or shelf.
The shape does a lot of the work here because the low, wide profile holds a standard tea light securely while the wavy rim catches light and shadow. You could scale the same coil structure taller for a small planter or shorten it into a ring dish by keeping the same rim treatment. Changing the glaze color on the edge or pressing the coils flatter would shift the look without changing the build process. This kind of piece stands out on Pinterest because the exposed coils make the construction method obvious while the finished rim keeps it looking intentional.
Pink Swirl Coil Ring Dish
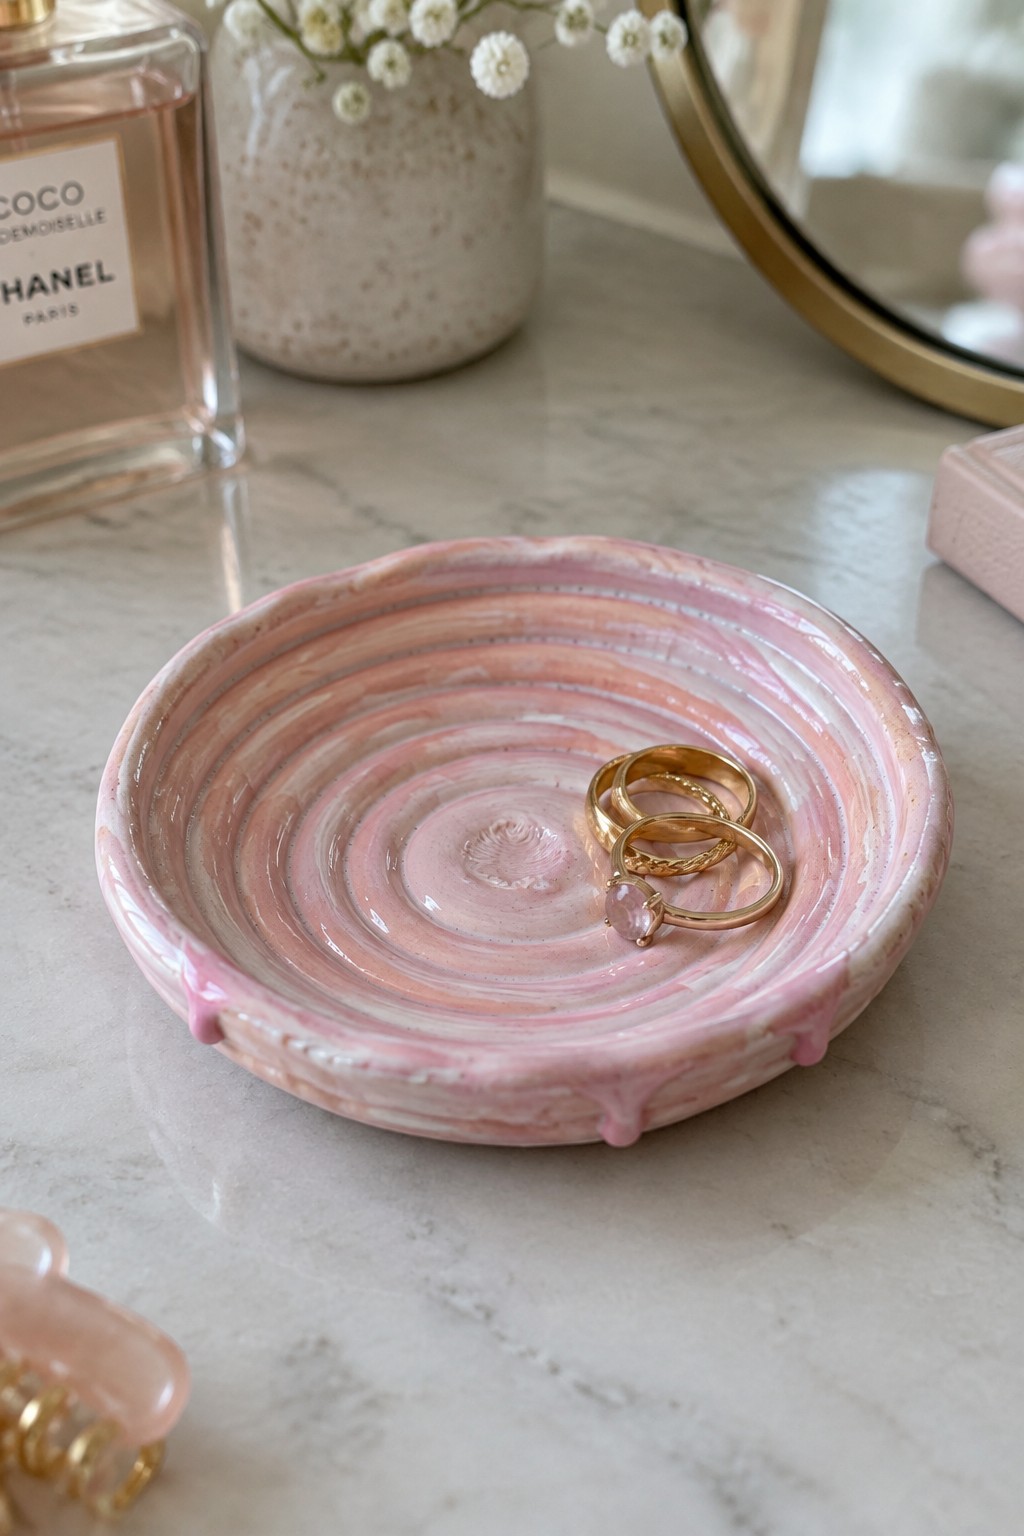
A small coil-built ring dish keeps the spiral construction visible at the base while the outer walls receive a loose pink and white glaze application. The glaze is brushed in broad strokes that blend into soft streaks on the rim and drip slightly over the edge, leaving the center coils exposed as the main texture. This method turns the building process into the surface pattern rather than covering it completely.
The compact size works well on a vanity or nightstand for holding rings and small jewelry. You can swap the pink for other glaze colors to match different rooms or make several in graduated sizes for a matching set. Leaving the center coils bare creates contrast with the glazed rim and makes the piece easy to adapt into a shallow tray or soap rest by widening the base.
Coil Built Utensil Holder With Exposed Ridges
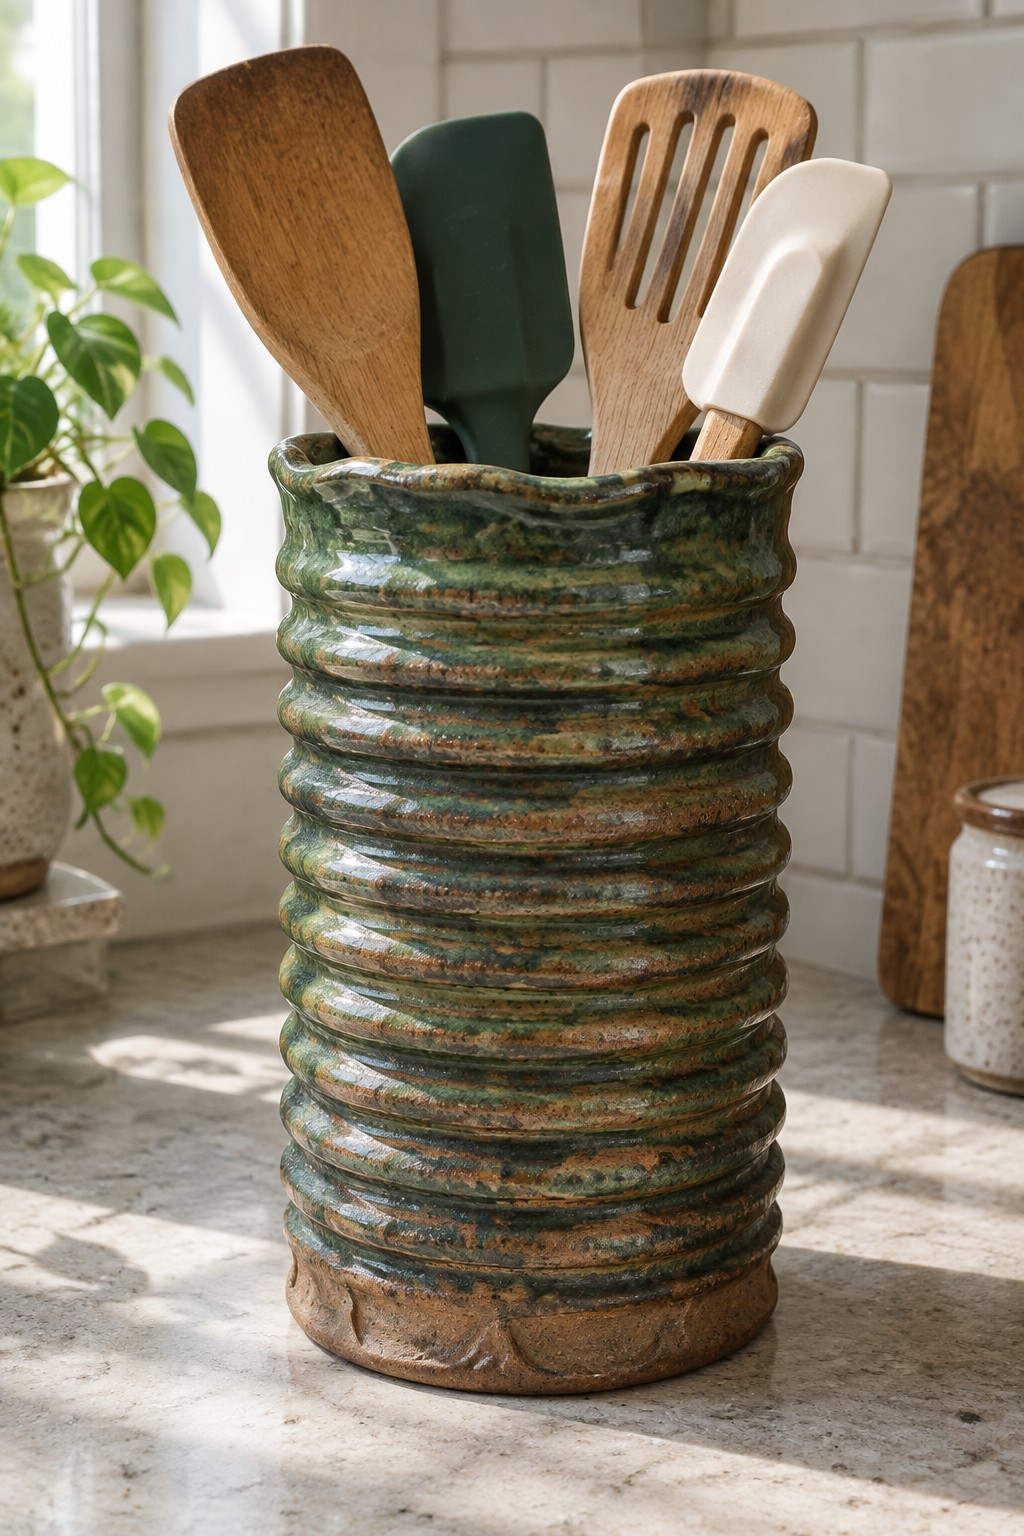
A coil-built utensil holder starts with stacked rings of clay that form a tall, narrow cylinder sized to keep spatulas, spoons, and turners upright on the counter. The exposed coils create horizontal ridges that trap glaze in the grooves, producing the streaked green and brown surface seen here. This shape works as a kitchen storage piece because the open top and stable base let tools stand ready while the textured walls add visual weight without added handles or lids.
What makes this idea useful is how the coil ridges give the finished piece both grip and drainage if water drips down from freshly washed tools. You could scale the same stacking method down for a paintbrush cup or widen it slightly for a wooden spoon crock. In a kitchen the earthy glaze tones sit comfortably next to cutting boards and plants, and the visible coils keep the holder looking like pottery instead of factory ware. This would be easy to turn into a matching small spoon rest using leftover coils from the same build.
Coiled Teapot with Exposed Horizontal Ridges
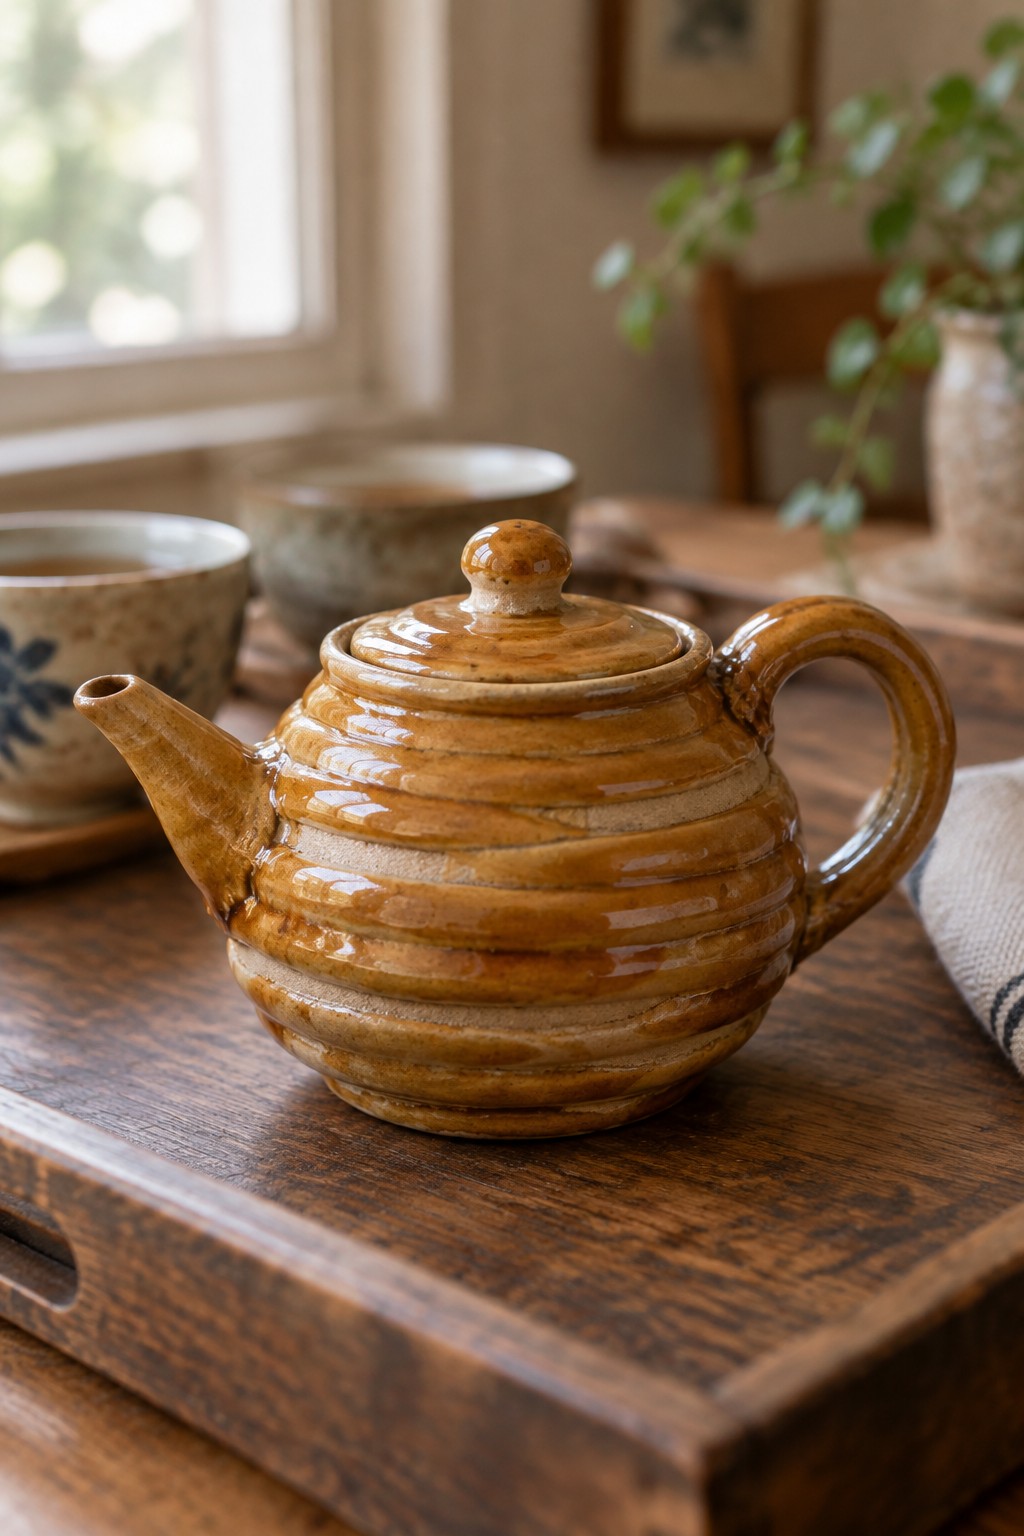
A coil-built teapot forms the body from stacked clay rings that remain visible as horizontal lines beneath a glossy brown glaze. The rounded shape includes a short spout, a sturdy looped handle, and a fitted lid with a simple knob. This keeps the construction method on display instead of hiding the seams under a smooth surface.
What makes this idea useful is that the same stacking technique works for pitchers, vases, or larger serving pots without changing the process. The earthy glaze color pairs with wood trays or other kitchen pieces while the visible coils add surface interest that survives everyday handling. You could shorten the body for a creamer or widen it for a sugar bowl while keeping the ridge pattern intact.
Hanging Planter Built With Exposed Horizontal Coils
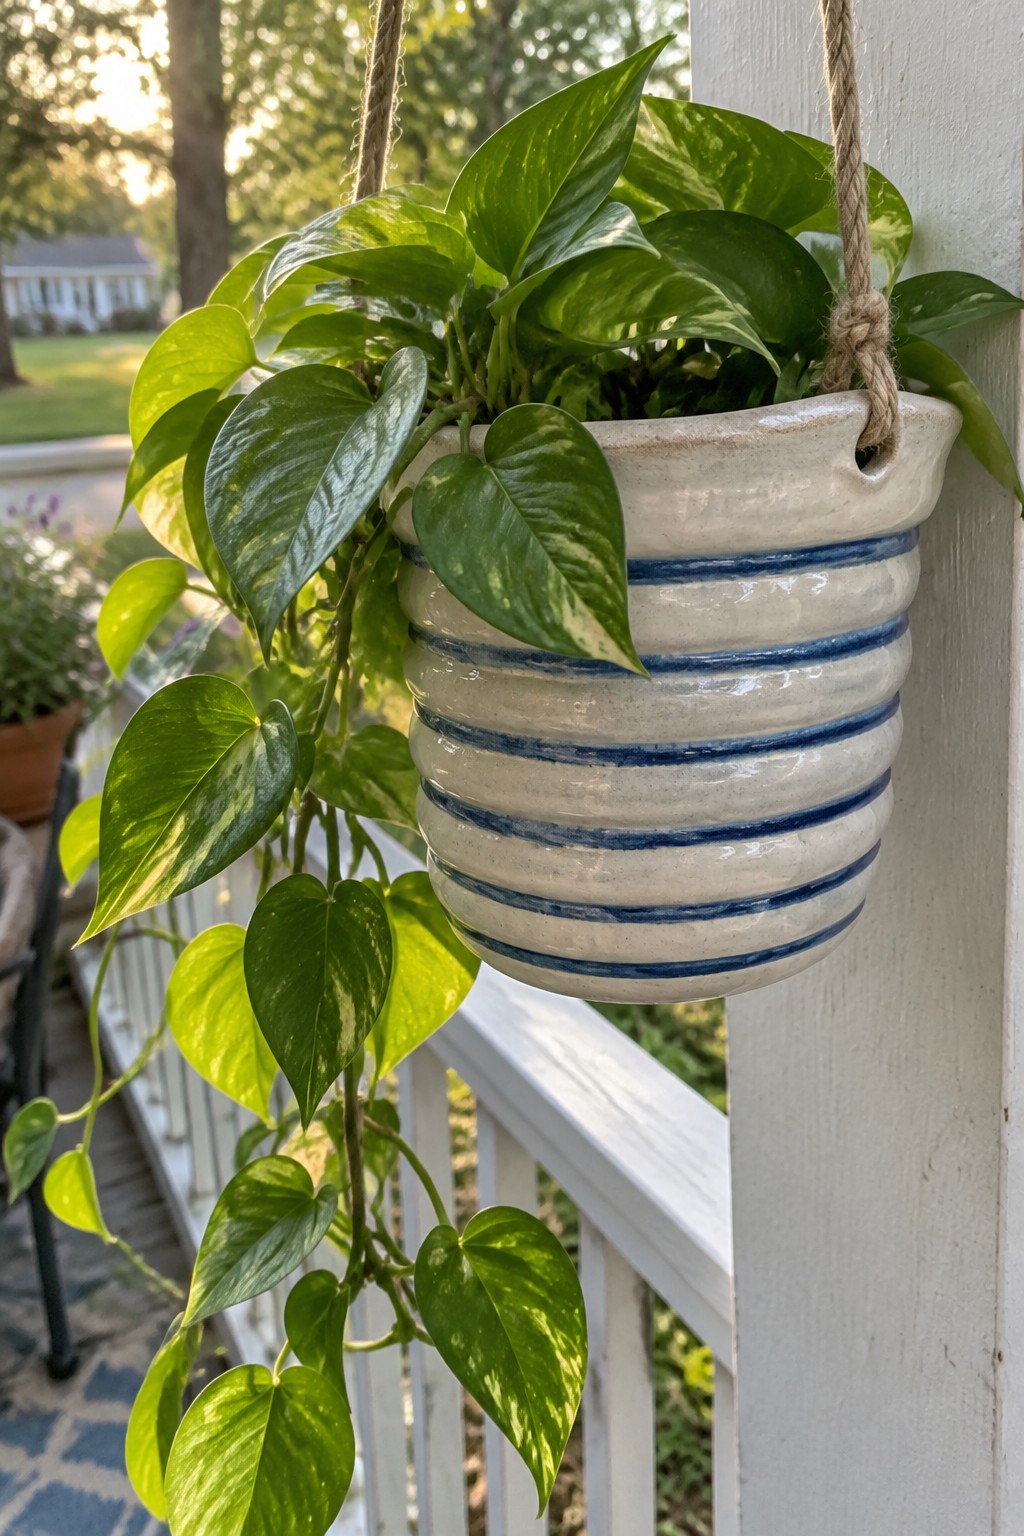
A coil pot planter forms its walls from stacked clay coils that remain visible as even horizontal ridges around the body. White glaze covers most of the surface while blue stripes follow the coil lines to emphasize the construction. The rounded cylinder shape with a slight lip at the top suits trailing houseplants and hangs from rope threaded through two small holes near the rim. This approach keeps the focus on the coil texture rather than added sculpting or carving.
The shape does a lot of the work here because the straight sides and open top give plenty of room for root growth without extra trimming. Blue stripes along the coils make the texture stand out even from a distance, so the same pattern could be repeated on a shorter version for a windowsill or widened for a larger floor plant. For a gift, something like this works well because the hanging cords and simple color scheme fit many porch or balcony setups. You could swap the blue for another color or leave the coils unglazed below the rim to change the look with minimal extra effort.
Spiraling Coil Candle Holder with Window Cutout
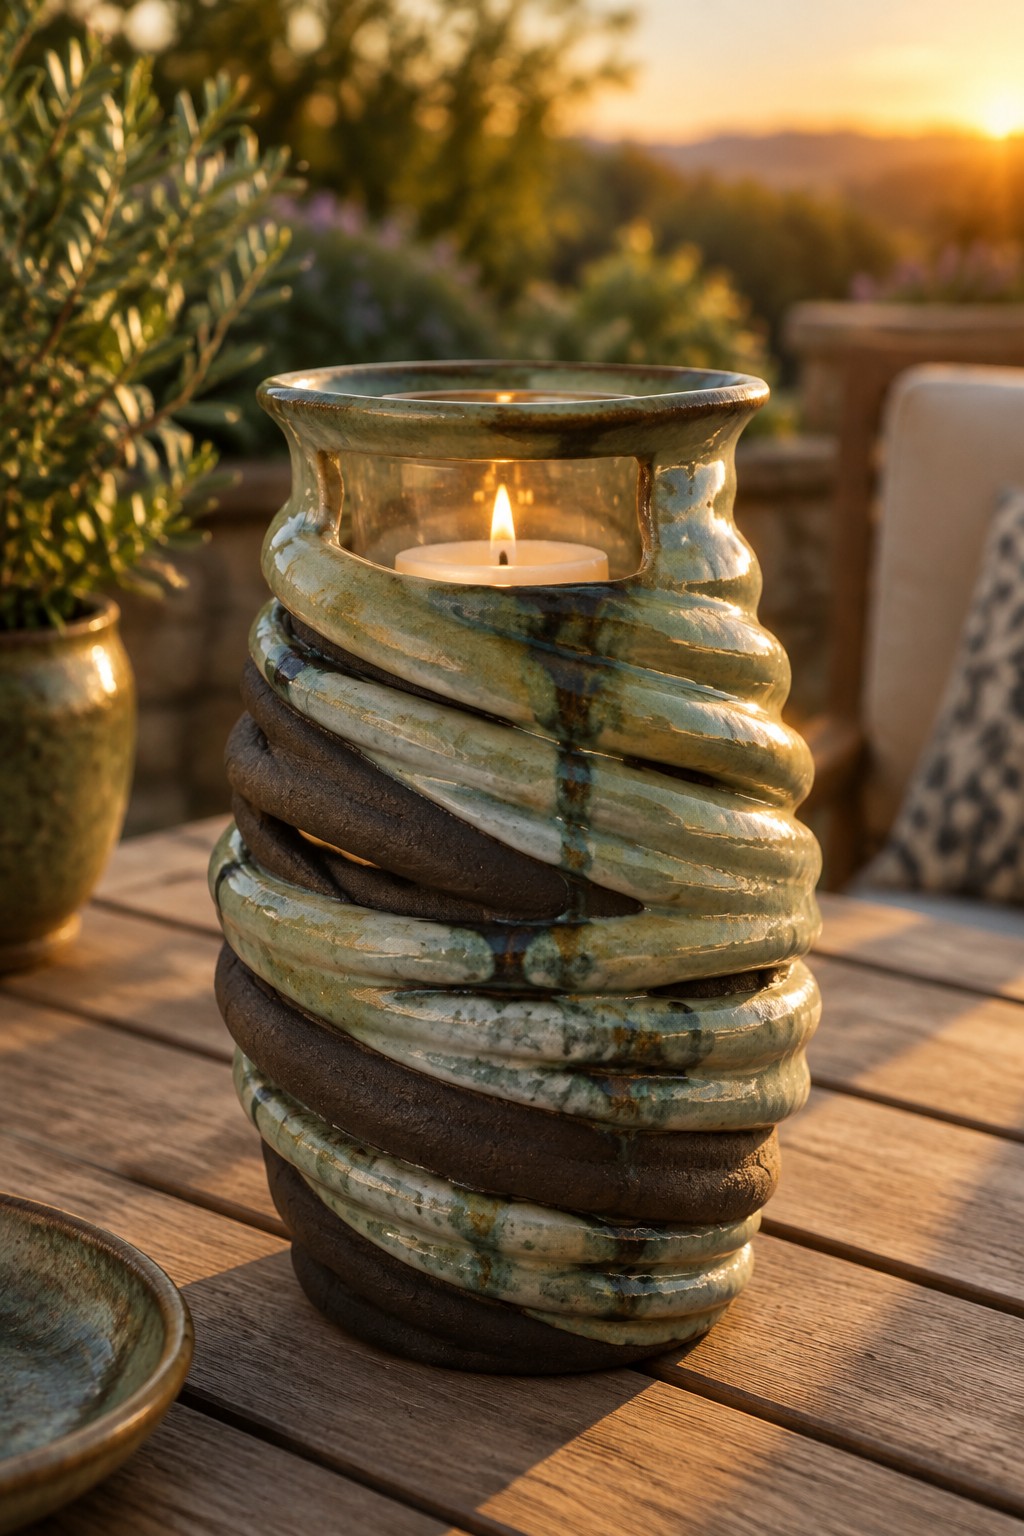
This coil-built candle holder stacks thick ropes of clay into a tall, irregular cylinder that narrows slightly toward the top. The coils stay fully exposed and create deep horizontal ridges that catch glaze in varying thicknesses. A simple rectangular opening cut through the wall lets light from the candle escape sideways while the open top makes lighting easy. The green and brown glaze pools in the grooves between coils, emphasizing the handmade ridges without covering them completely.
What makes this idea useful is the way the exposed coils do most of the visual work once the glaze is applied. The side window turns an ordinary coil form into a working lantern that sits well on an outdoor table or shelf. You could repeat the same stacking and pinching method to make a shorter version for tea lights or widen the coils for a larger pillar candle holder. The cutout also gives you a clear place to stop the glaze if you want contrast between the lit section and the rest of the piece.
Coiled Outer Bowl With Glazed Inner Liner
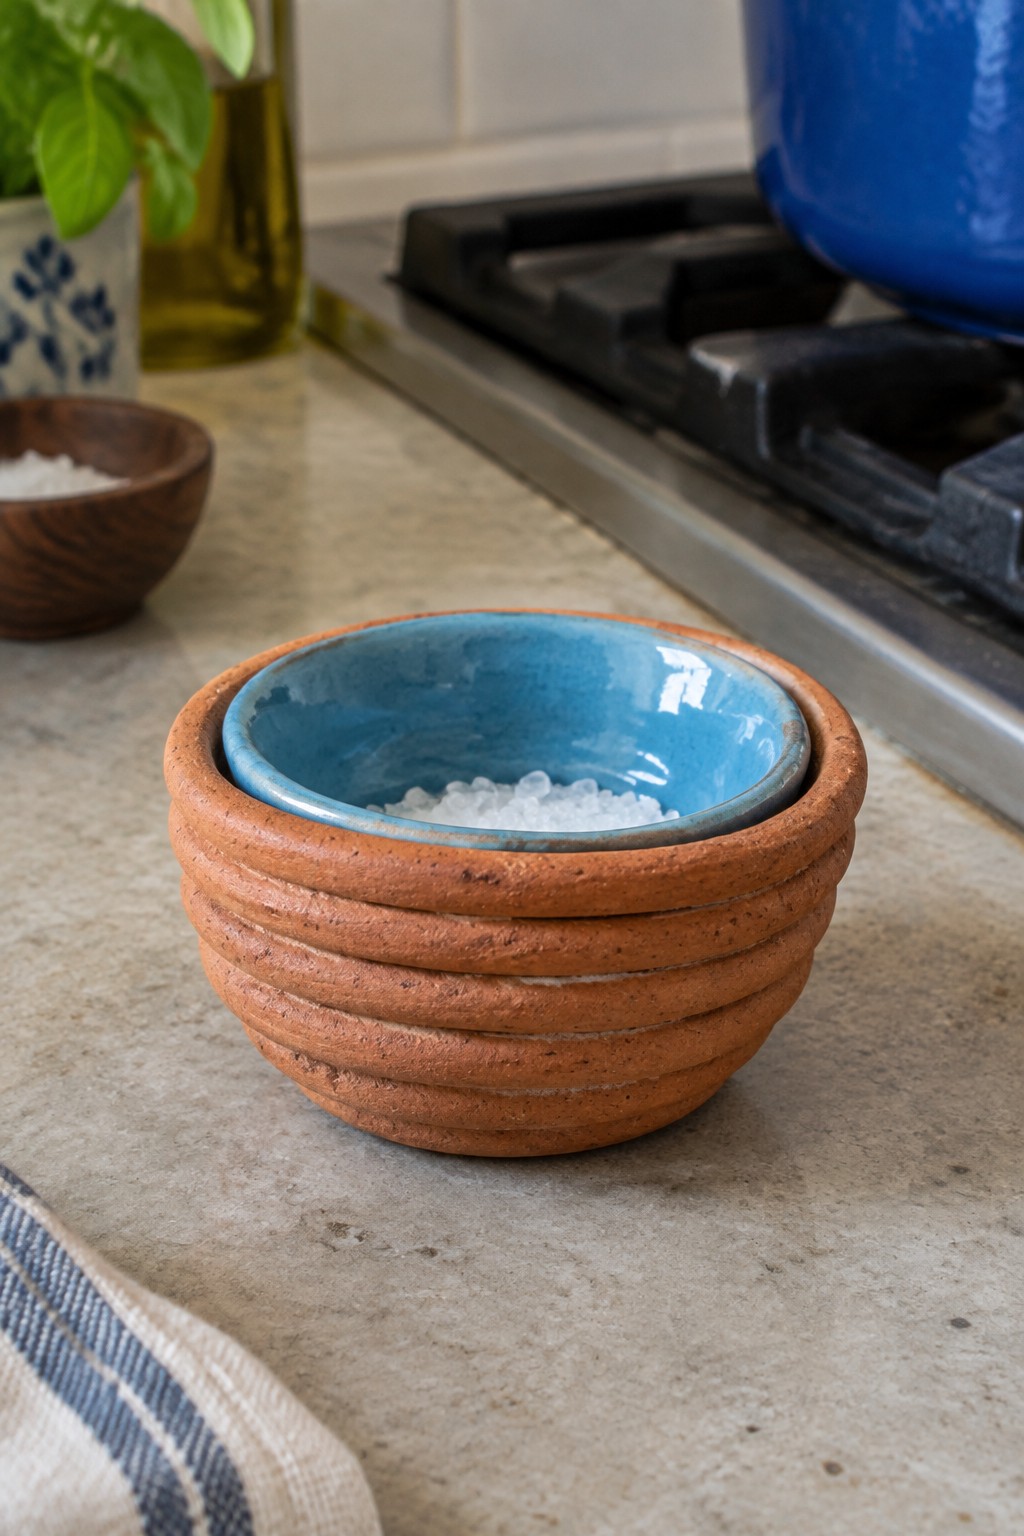
A coil-built bowl with visible horizontal ridges forms a textured outer container in unglazed terracotta. The exposed coils create a sturdy, layered surface that holds a smaller smooth blue bowl inside, turning the piece into a kitchen container for salt or spices. The contrast between the rough coils and the glossy inner bowl keeps the focus on the handmade texture while the inner piece handles the actual use. This setup works as a simple kitchen item that shows off the coil construction without extra decoration.
What makes this idea useful is how the outer coil bowl adds height and presence on a counter without needing much space. You could adapt it by switching the inner bowl color or size to match other dishes, or widen the coils for a bolder look. In a kitchen this shape keeps small staples accessible and pairs with both modern and rustic pieces already in use. The same coil technique could be scaled up into a holder for utensils or a small planter.
Wavy Coil Spoon Rest
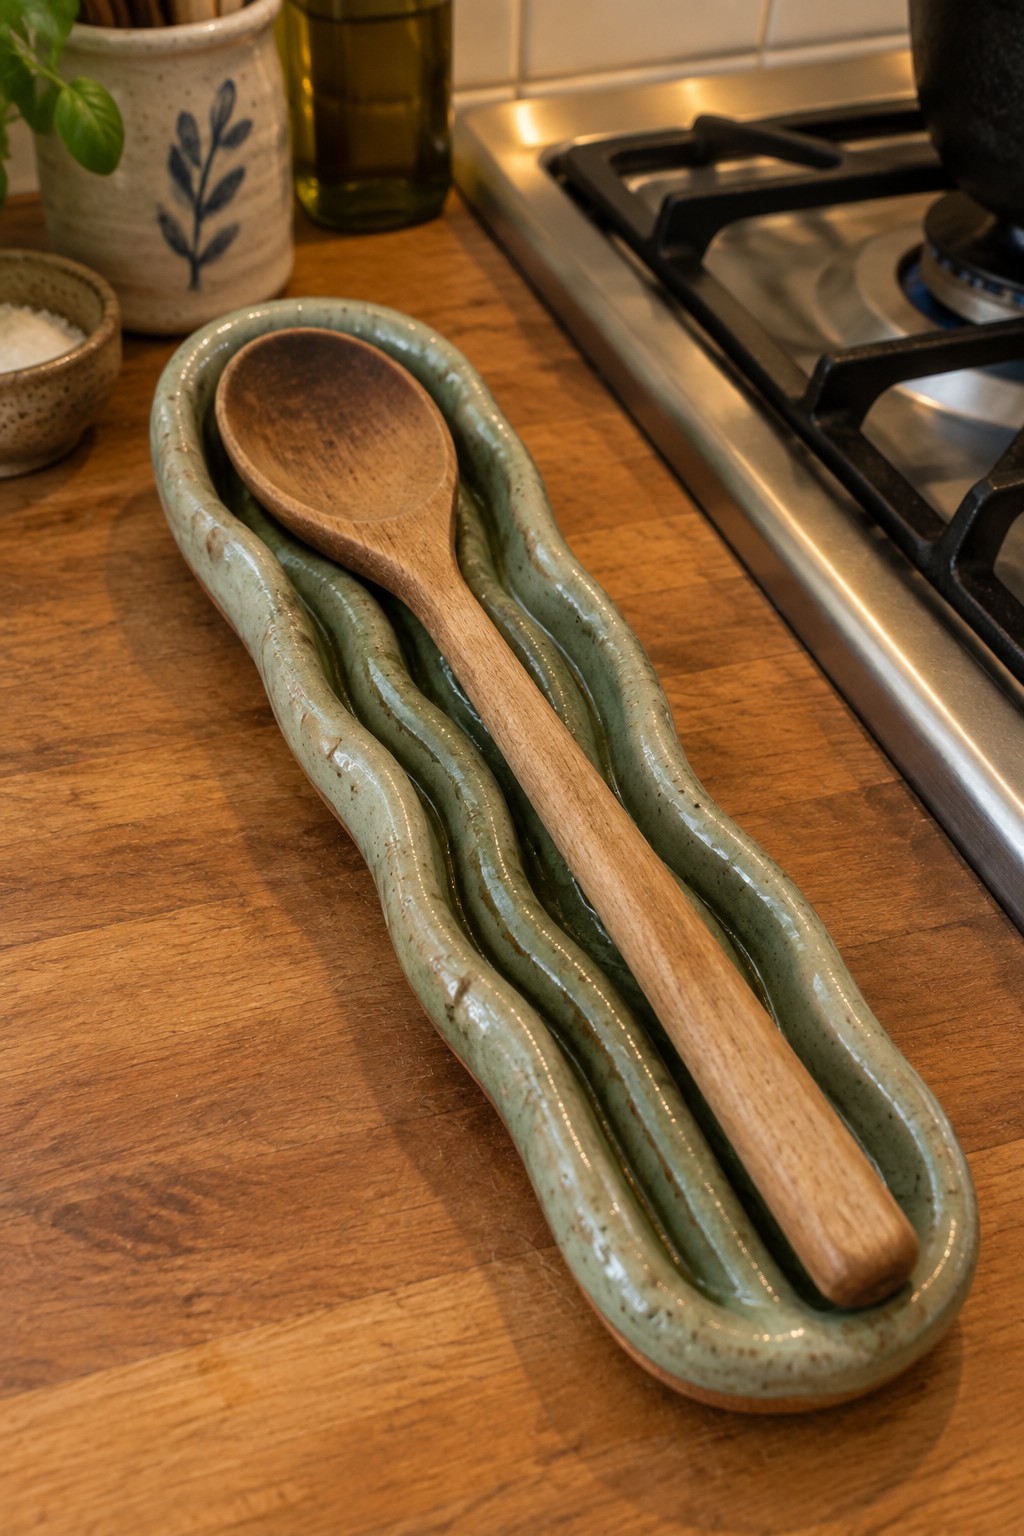
A long spoon rest built from stacked coils creates a wavy, trough-like form that cradles wooden utensils. The coils are left partially exposed along the ridges and glazed in a speckled green that settles into the grooves. This kitchen piece uses the coil structure itself to hold the spoon handle while the undulating shape keeps it from rolling.
What makes this idea useful is how the same coil layout can be stretched longer for multiple tools or shortened into a small rest for one spoon. The wavy profile gives natural stops so the utensil stays in place on a busy counter. You could rework the coils into a wider version that doubles as a mini trivet or adapt the glaze to a matte finish if you want more grip. The exposed coil texture keeps the project simple while still looking intentional on a stovetop.
Exposed Coil Yarn Bowl With Rim Notch
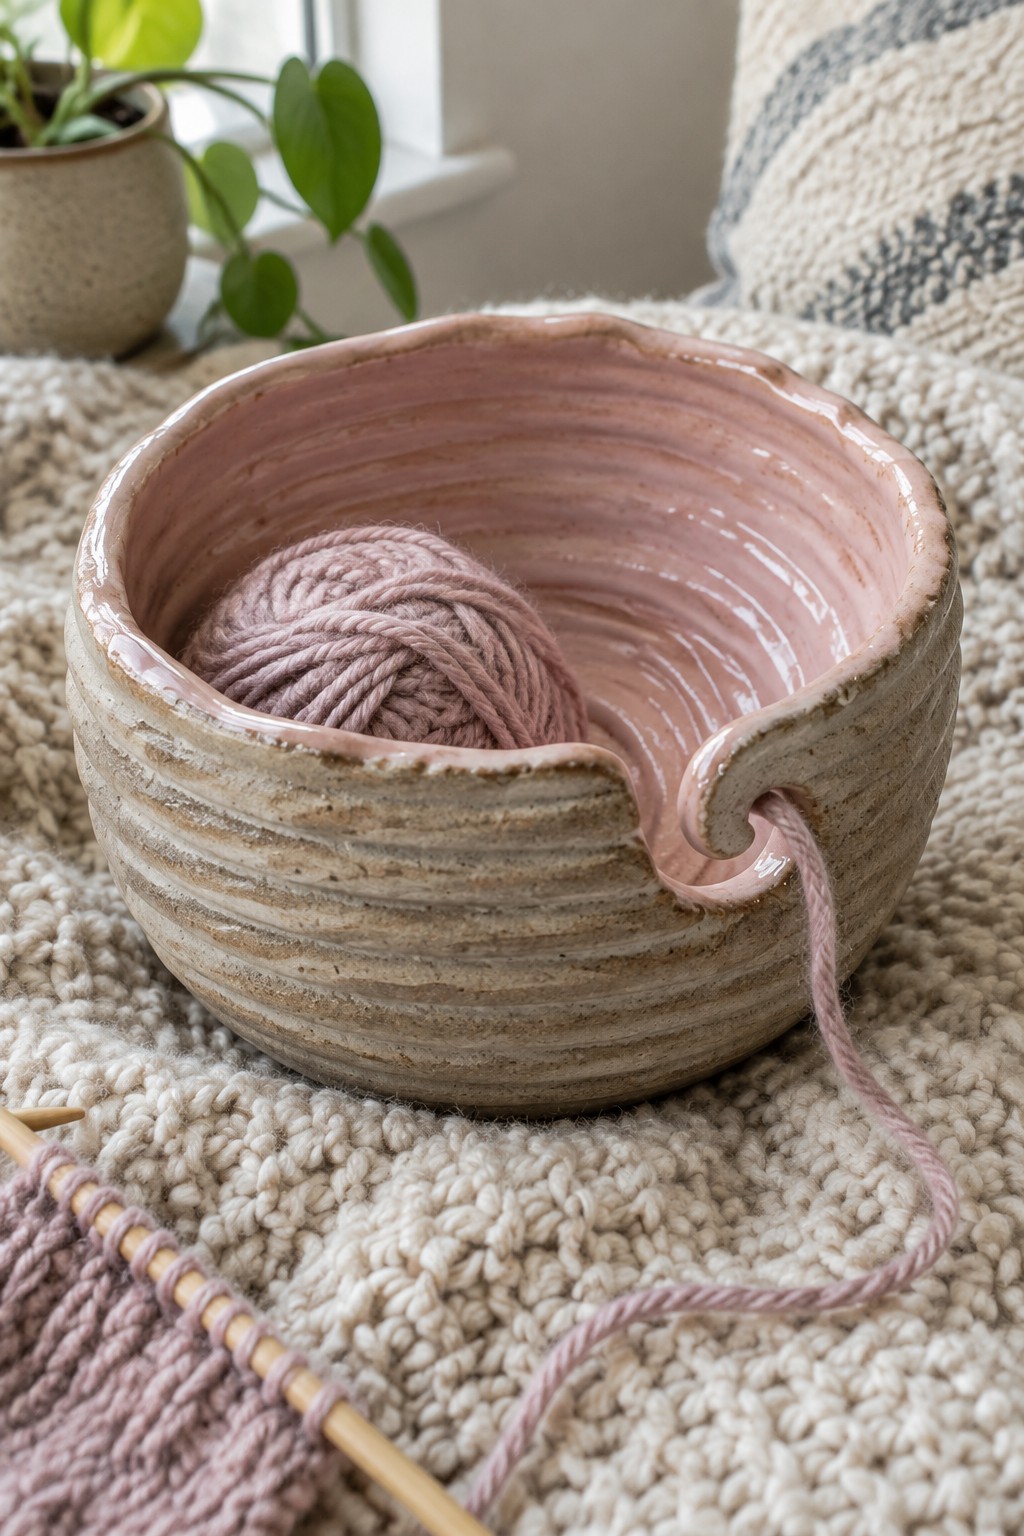
A coil-built yarn bowl uses stacked clay coils left visible on the exterior to create horizontal ridges that emphasize the handmade construction. The interior receives a smooth pink glaze while the outside stays unglazed to highlight the texture. A simple cutout in the rim guides the yarn strand and prevents it from rolling away during use.
What makes this idea useful is how the exposed coils do the visual work without added carving or slip decoration. The same form works well on a coffee table or in a knitting basket where you need the yarn to feed smoothly. You could scale the diameter down for embroidery thread or widen the notch for thicker yarns like roving. The basic coil-and-notch method also translates easily to a small desktop version for washi tape or string.
Stacked Coil Incense Tray
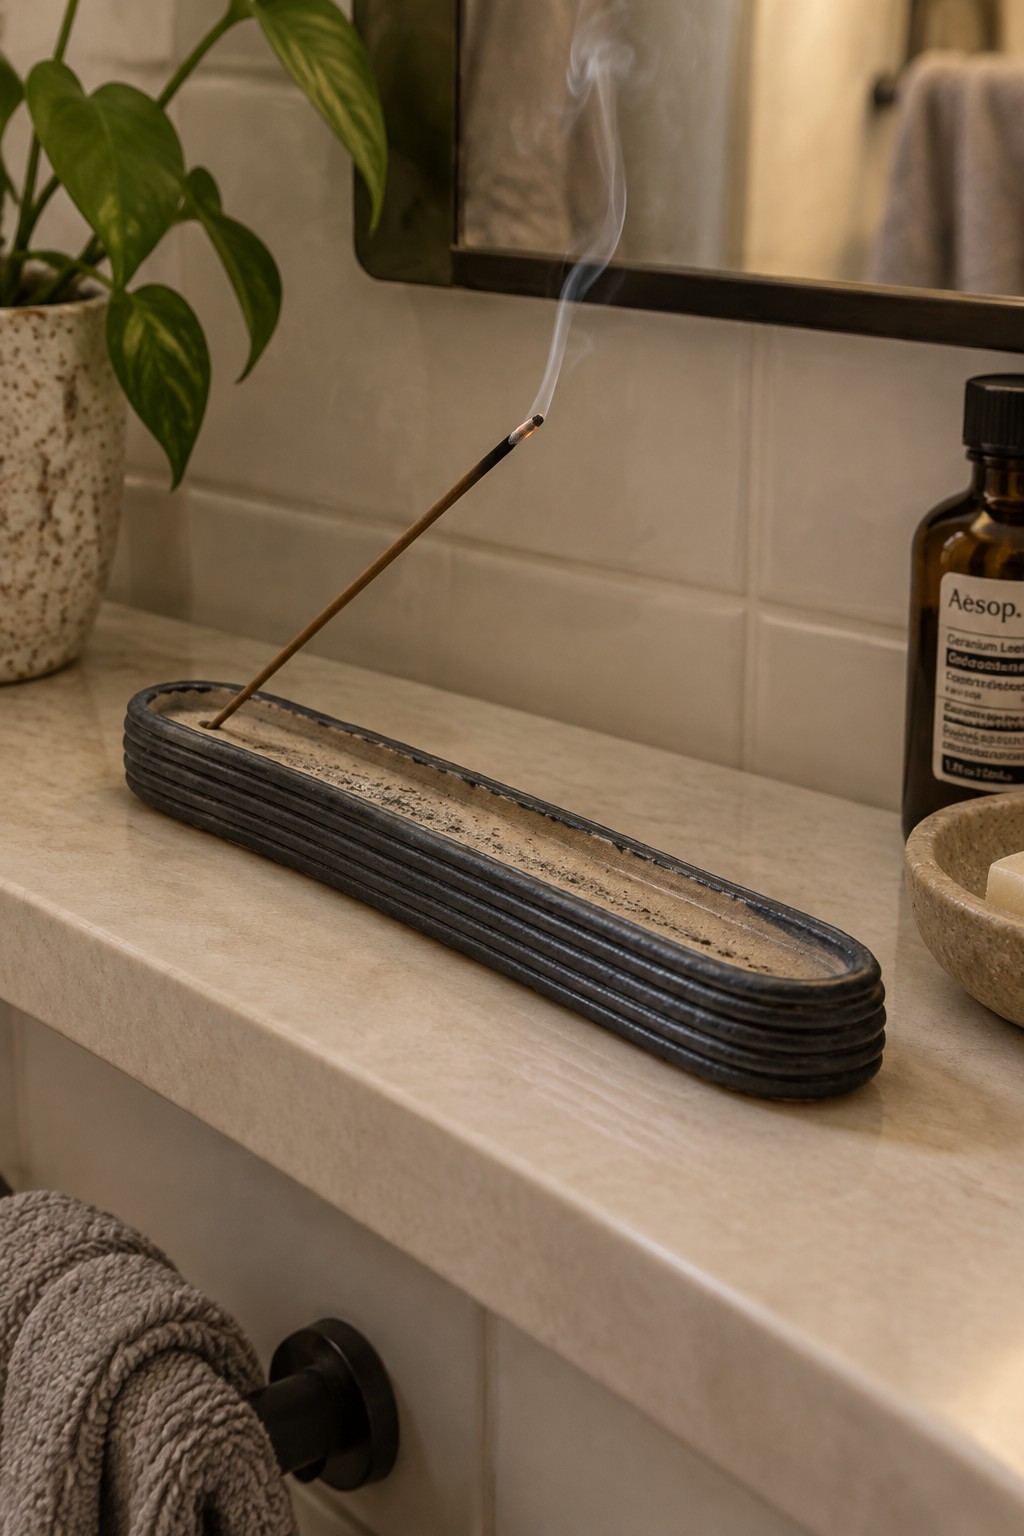
A narrow rectangular tray built from stacked coils creates a functional incense holder that contains ash while the stick burns. The coils are left visible along the sides and rim, giving the piece a clear handmade texture without extra decoration. A dark matte surface finish helps the coil lines stand out and keeps the tray from competing with other items on a counter. This shape works as a bathroom or desk accessory that holds one stick at a time.
What makes this idea useful is how the long, low profile fits into tight spaces like bathroom ledges or nightstands. You could shorten the same stacked coil layout to make a smaller tray for a desk or widen it slightly for a soap rest. The exposed coils already provide enough grip to keep ash in place, so no extra carving is needed. Scaling the length down would also turn the basic construction into a simple ring dish or match holder.
Hanging Coil Planter with Built-In Loop
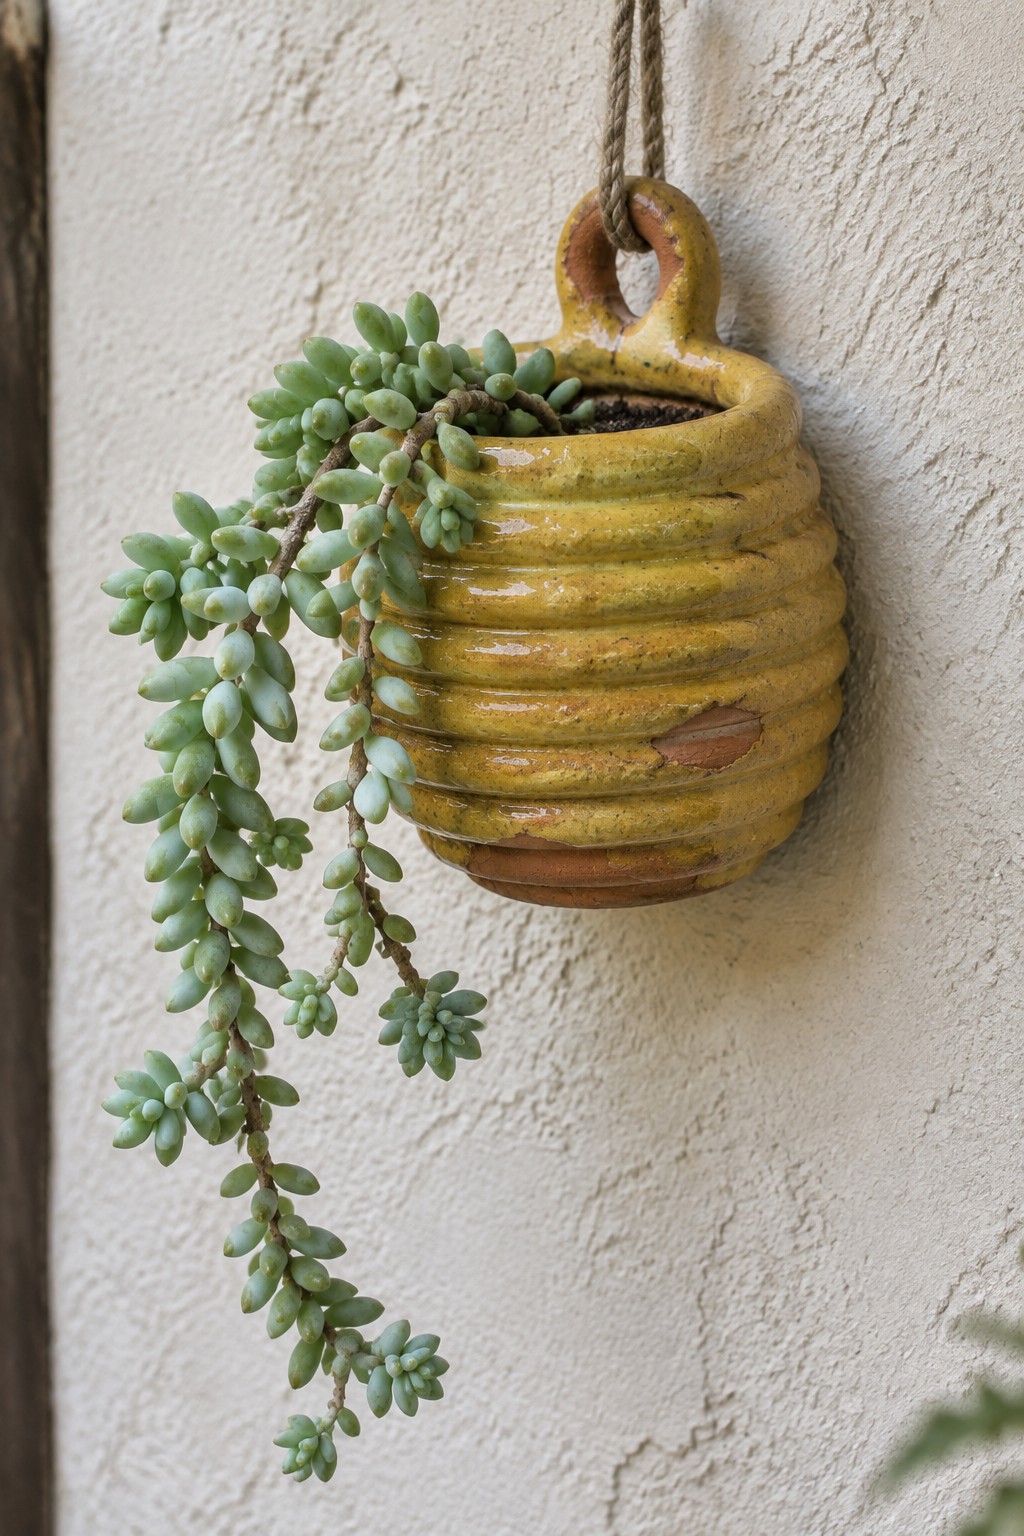
A hanging planter made from stacked coils gives you a simple way to display trailing succulents without needing a separate stand or shelf. The pot is formed by rolling and joining coils into a rounded body, then adding a sturdy loop at the top so it can hang from rope or wire. A yellow glaze covers most of the surface while the coil lines remain visible underneath, creating texture that shows the construction method. This shape works especially well for plants that drape downward because the narrow opening keeps soil in place while the body gives roots room to grow.
What makes this idea useful is that the hanging loop removes the need for extra hardware, so the finished piece can go on a wall hook or beam right away. You could adapt the same coil method to make a shorter, wider version for a tabletop or stretch it taller for larger herbs. The exposed coils also mean you can choose to stop glazing partway down if you want more of the clay color to show through. For a gift, this form is easy to repeat in different glaze colors while keeping the same hanging structure.
Stacked Coil Toothbrush Holder With Painted Dots
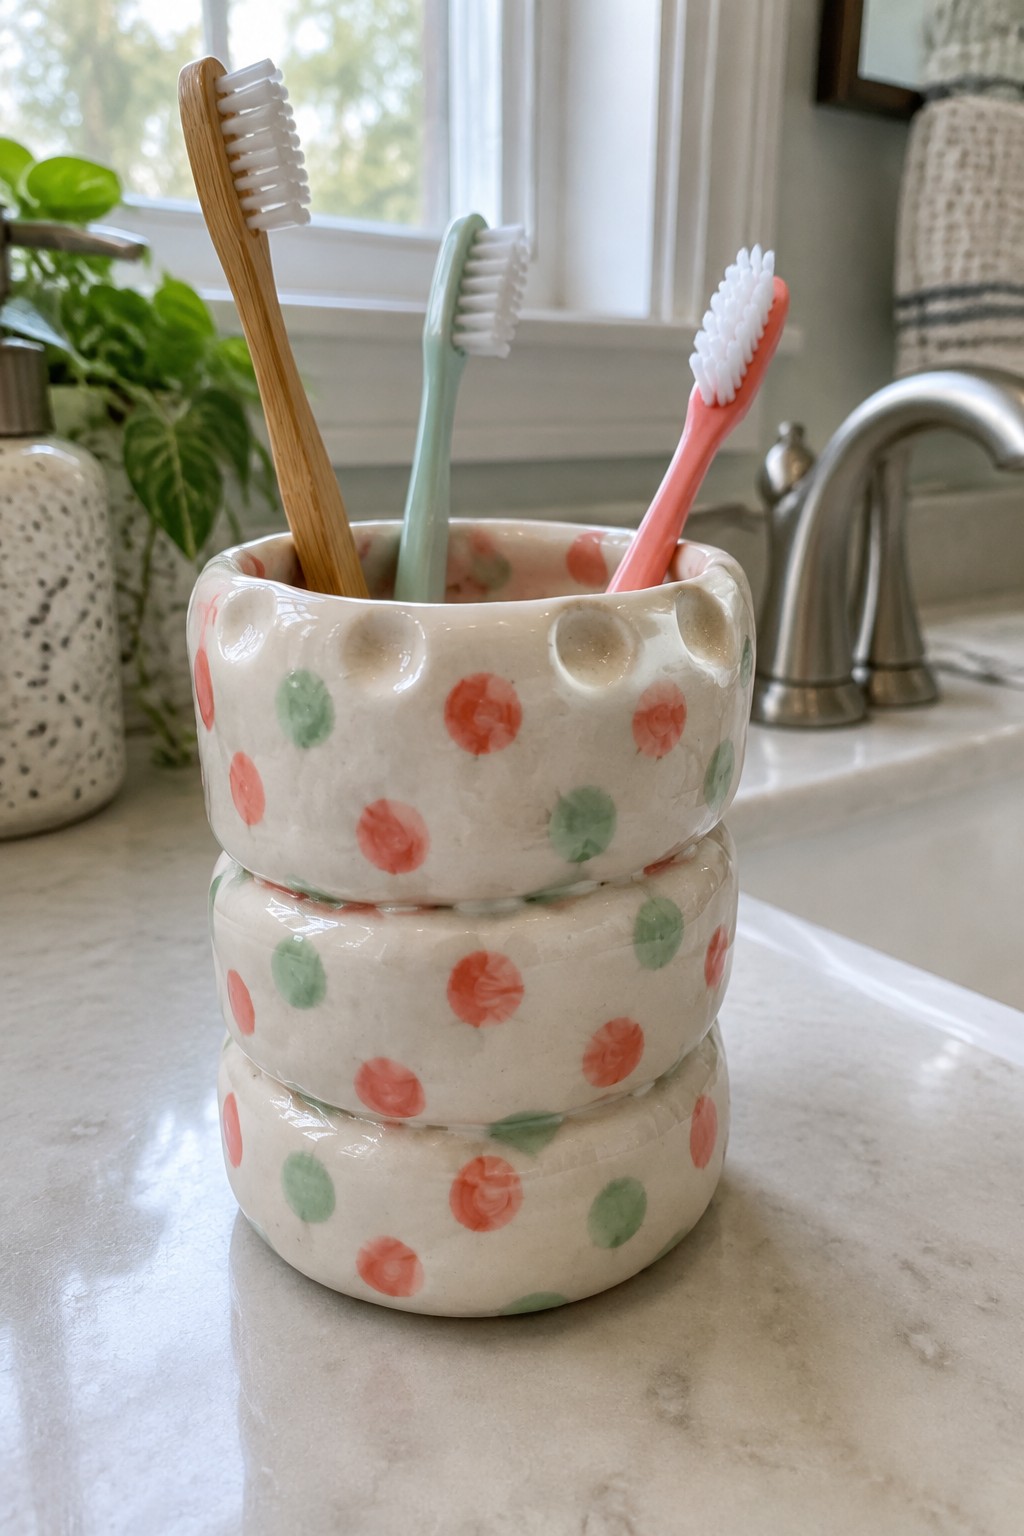
A coil-built ceramic holder formed from three stacked sections creates a compact toothbrush caddy for bathroom use. The irregular rims show the coil construction while the smooth white surface carries simple hand-painted coral and green dots. This shape keeps the piece stable on a counter and gives enough height to hold several brushes upright. The painted pattern adds color without covering the handmade texture at the edges.
What makes this idea useful is how the stacked sections let you vary the overall height or create separate compartments for different items. The dot pattern is straightforward to paint and can be changed to other simple motifs or left plain if you prefer a quieter look. In a bathroom this size works well because it stays out of the way yet keeps brushes organized and visible. The same stacked coil approach could be shortened into a single ring for a soap dish or widened into a small planter.
Stacked Coil Jar With Glazed Lid Accent
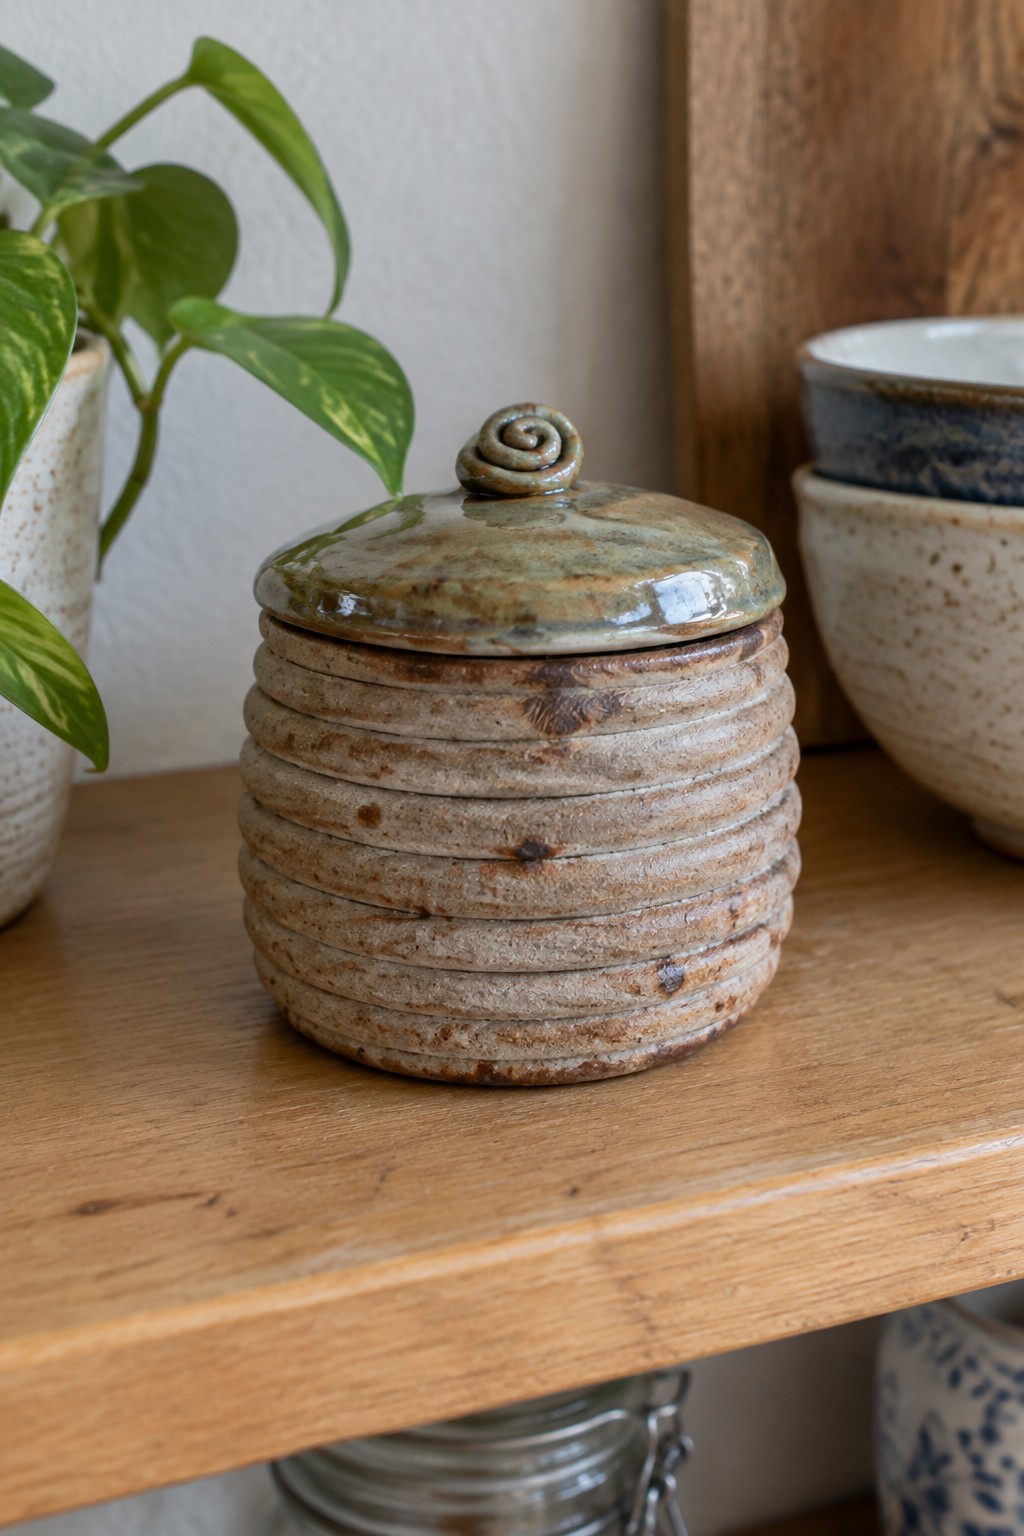
A coil built lidded jar keeps every horizontal ring of clay visible so the construction becomes the surface pattern. The body stays in its natural clay tones while the lid receives a layer of greenish glaze that catches light differently and sets it apart. A small spiral coil forms the knob and echoes the same building method used for the walls. This approach works well for a small kitchen canister or countertop storage piece where the texture does most of the visual work.
What makes this idea useful is how the exposed coils create texture with almost no extra finishing steps. The rounded shape and modest size let it sit on a shelf or counter without taking much space while still holding tea, sugar, or small tools. You could scale the same coil method up for a taller flour jar or down for a cotton ball holder in the bathroom. The simple contrast between the rough body and smoother lid also gives a clear way to vary the look without changing the core technique.
Coil-Built Oval Tray with Exposed Rim Texture
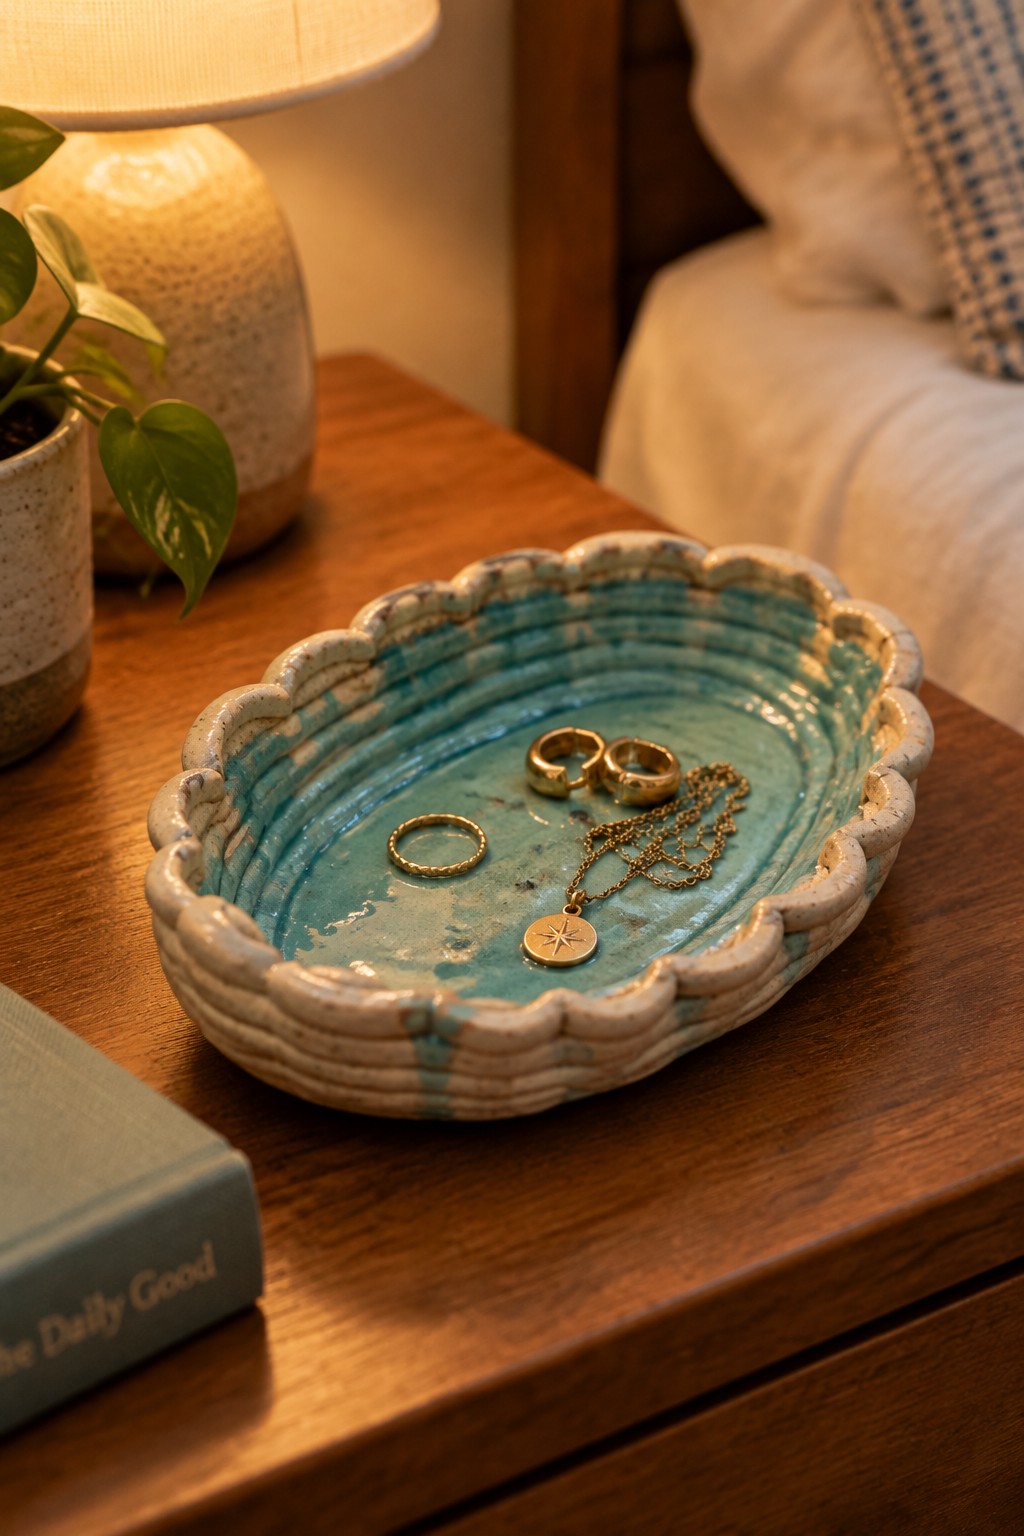
A coil-built oval tray makes a practical jewelry or small-item holder. The coils are left visible along the rim and pinched into a repeating scalloped edge that shows the construction clearly. A turquoise glaze covers the interior and settles into the coil lines, while the rim stays mostly unglazed to keep the clay texture prominent. This keeps the piece simple while making the coil work the main design feature.
The small scale means you can build it quickly on a tabletop without special tools. The same rim treatment works on a round version for a soap dish or a slightly deeper shape for a desk catch-all. Because the texture already provides pattern, you can use a single glaze color and still have the piece read as intentional. It fits easily on a nightstand or dresser without competing with other objects.
Hedgehog Coil Planter With Painted Spines
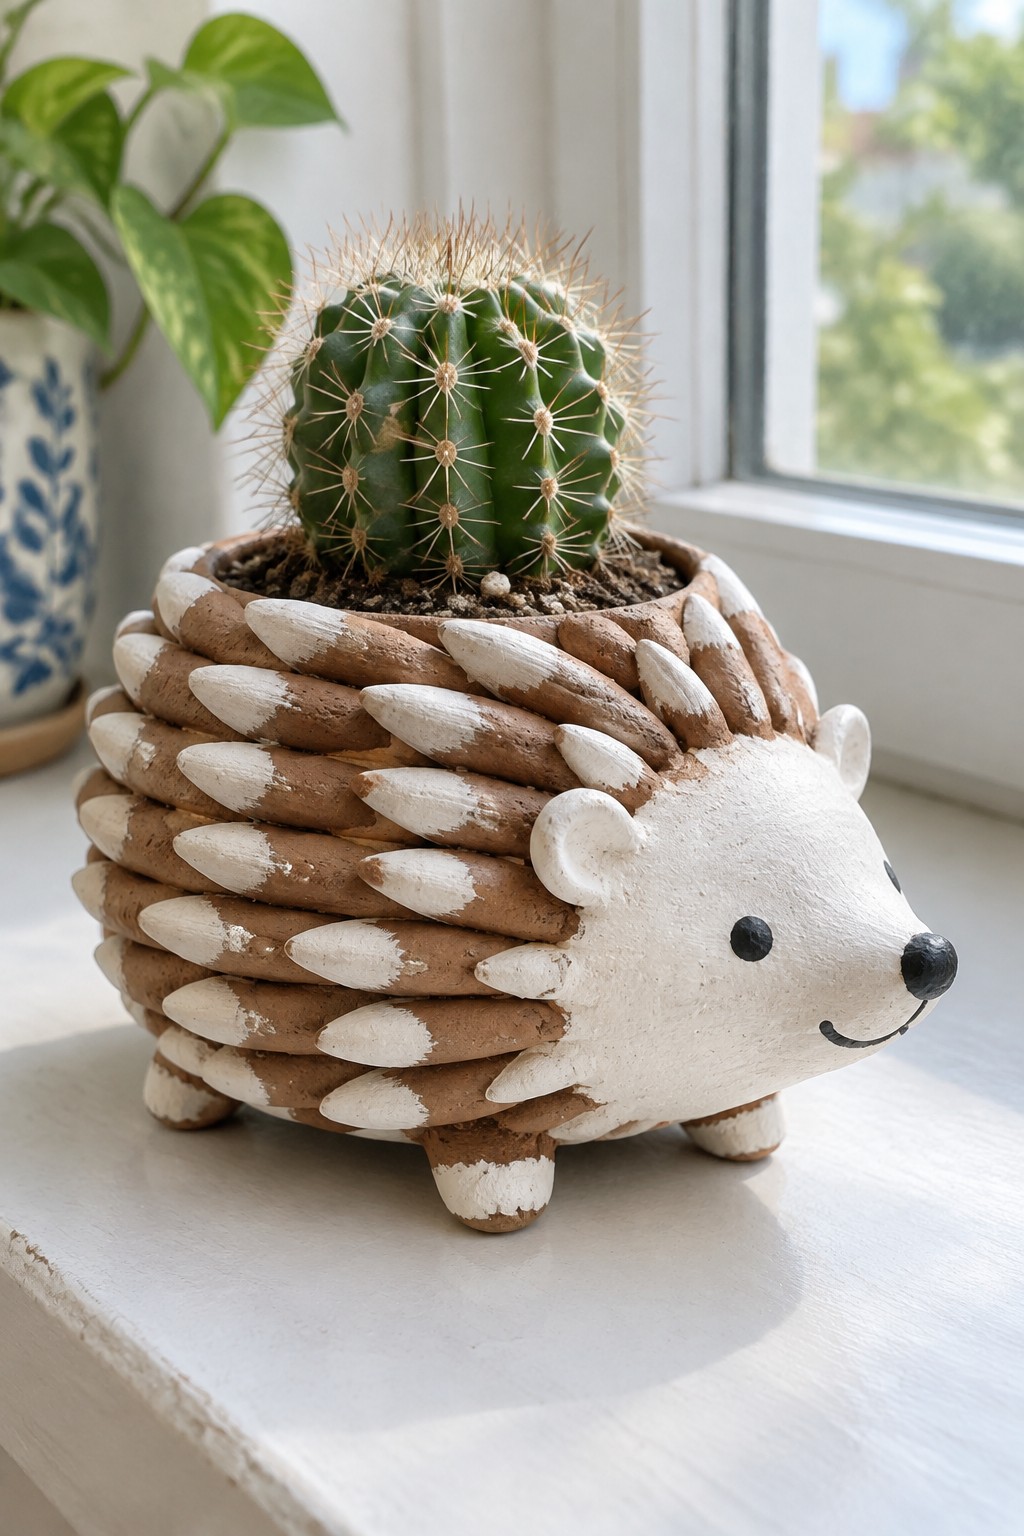
A coil built planter shaped like a hedgehog gives a clear animal form while keeping the stacked coils exposed as the main texture. The coils are rolled, stacked, and smoothed just enough to hold the rounded body shape, then painted in alternating brown and white bands to suggest spines. A simple sculpted head with ears, eyes, and a snout attaches to one end, and the open top holds a small cactus or succulent.
What makes this idea useful is how the coil texture stays visible instead of being hidden under heavy smoothing or glaze. The small scale works well on a shelf or windowsill without needing much space, and the same coil method can be adapted to other animals by changing the head shape and paint pattern. You could simplify the design by using one color on the coils or build a taller version to hold a larger plant. This approach stands out because the coils do most of the visual work once the basic animal outline is in place.
Stacked Coil Creamer With Horizontal Ridges
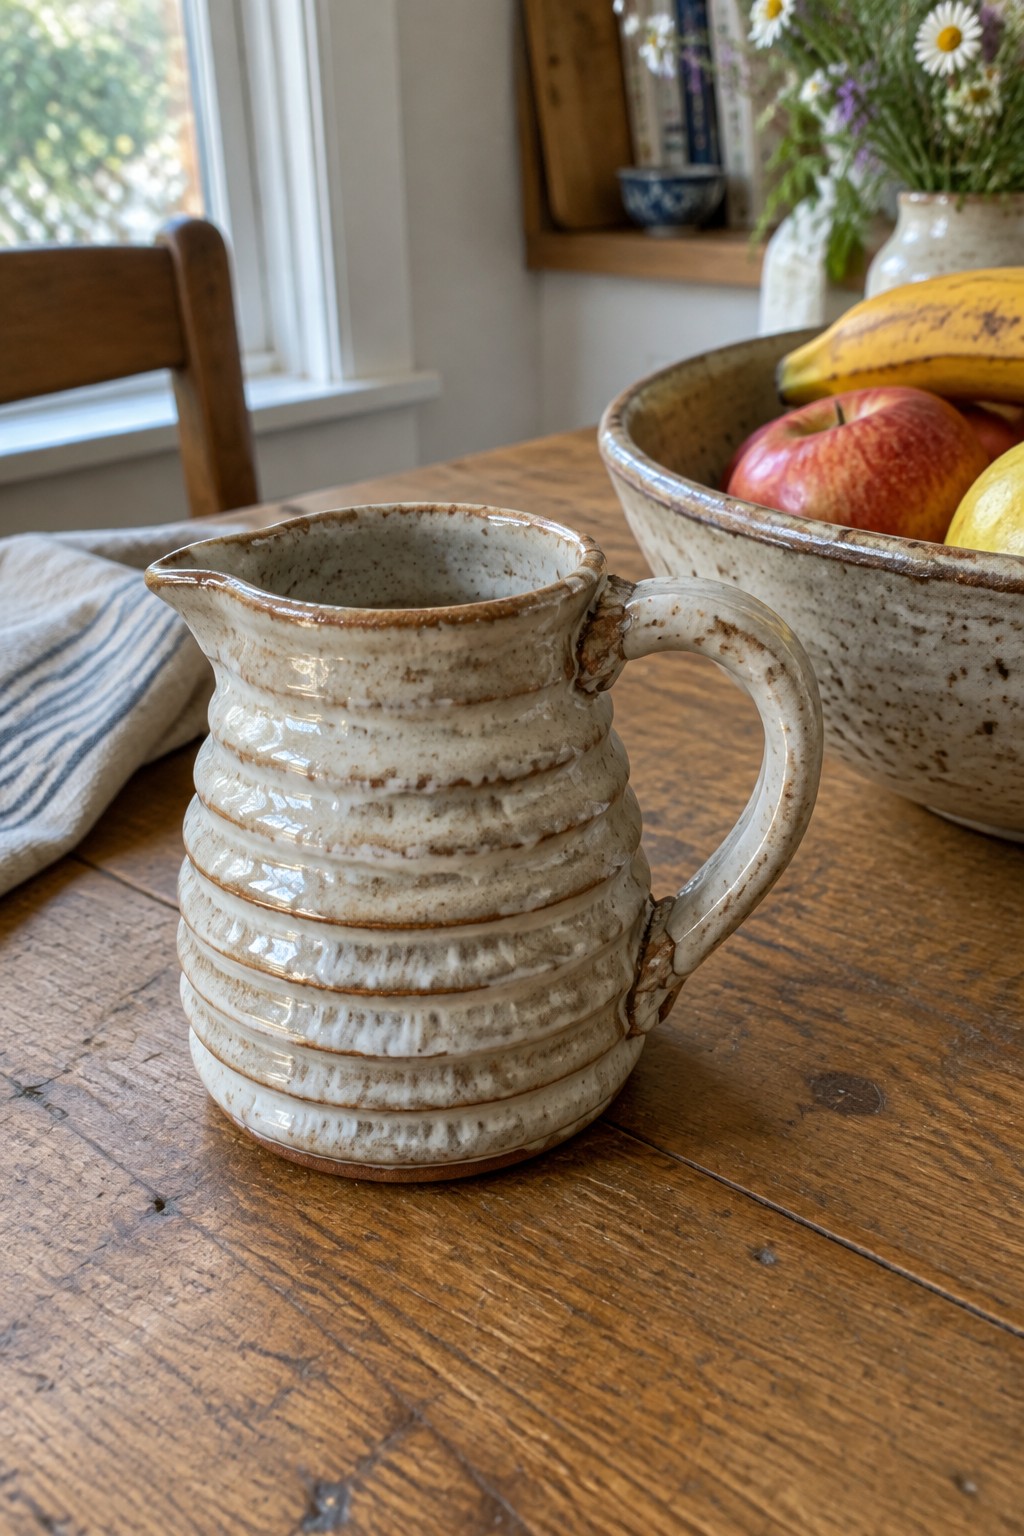
A small pitcher made from coils keeps the construction lines visible as even horizontal ridges that circle the body from base to rim. The compact shape includes a tapered profile and a sturdy pulled handle, finished with a light speckled glaze that settles into the grooves. This creates a functional creamer or small serving piece that highlights the coil texture rather than hiding it. The approach works for any potter who wants the building method to remain part of the final surface.
What makes this idea useful is the way the ridges give the piece enough detail to stand out on a shelf while still staying simple to throw or hand-build. The small scale makes it easy to adapt into a syrup pitcher, small vase, or even a set of matching cups by repeating the same stacking pattern. In a kitchen this shape holds just enough liquid for daily use without taking up much space. You could vary the glaze color or ridge spacing to match different tableware collections.
Frequently Asked Questions
What materials are best for creating coil pots with exposed coil texture?
Start with a groggy stoneware or earthenware clay that has some texture already built in, as it helps the coils grip each other without slipping. You will need a basic rolling pin or slab roller for even coils, a scoring tool, slip for joining, and simple hand tools like a rib or wooden stick to gently press coils together without flattening the surface. Avoid porcelain if you want strong visible coils, since it tends to smooth out easily during handling.
How do I keep the coils visible instead of blending them into a smooth surface?
Score and slip each coil thoroughly before adding the next, then press them together just enough to bond without erasing the ridges. Work in sections and let lower layers firm up slightly before stacking higher ones. Use your fingers or a textured rib to define the edges rather than smoothing tools, and consider leaving the exterior untouched while only refining the interior for strength.
What firing schedule works well for coil pots to avoid cracking along the joins?
Fire slowly through the early stages up to 1000 degrees Fahrenheit to allow moisture to escape from the thick coil areas. Use a kiln with good ventilation and consider a longer hold at bisque temperature if your clay is thick. Once glazed, a standard cone 6 or cone 04 schedule usually works fine, but always test a small piece first since exposed coils can trap air pockets more than pinched forms.
Can coil pots with exposed texture be made functional for plants or kitchen use?
Yes, but choose food-safe glazes if the pot will hold edibles and apply them only on the interior or rim. Seal the exterior lightly with a matte wax resist or leave it unglazed for a natural look. For plant pots, drill drainage holes before the final firing and use a waterproof liner inside to protect the textured surface from constant moisture.
How can I adapt the ideas from these examples to my own workspace or skill level?
Begin with smaller test pieces to practice coil spacing and pressure before scaling up to larger forms. Photograph your own attempts from multiple angles like the examples and compare them to see which coil sizes and stacking patterns you prefer. Join online pottery forums or local classes to share progress and get feedback, then iterate by varying coil thickness or adding subtle color slips between layers.

Pottery Path is my cozy corner of the internet where I share clay ideas, pottery inspiration, and simple projects you can recreate at home. I love exploring everything from air dry clay to handbuilt pottery to cute minis that brighten your day. My goal is to make clay crafting feel easy, fun, and welcoming for anyone who wants to try it.
You will find beginner friendly tutorials, creative pottery painting ideas, and lots of warm inspiration for slow and happy crafting. If you enjoy hands on creativity, this space will feel like home.