Ever found yourself in the middle of a project, only to have your chainsaw’s chain give up on you? Picture this: you’re all geared up, ready to tackle that overgrown tree in your backyard, but your chainsaw just isn’t cutting it – literally. Frustrating, right? Well, fret not, because in this article, you’re about to learn the ropes on how to change the chain on your chainsaw like a pro.
Selecting the Right Replacement Chain
When it comes to Selecting the Right Replacement Chain for your chainsaw, there are a few key factors to consider to ensure compatibility and optimal performance.
- Chain Type: Start by determining the type of chain needed for your specific chainsaw model. There are different types of chains, such as full chisel, semi-chisel, and low profile chains, each designed for different cutting needs.
- Bar Length: Match the replacement chain to the correct bar length of your chainsaw. Using a chain that is too long or too short can lead to safety hazards and inefficient cutting.
- Pitch and Gauge: Pay attention to the pitch (distance between drive links) and gauge (thickness of the drive links) of the chain, as these specifications must match those of your chainsaw’s guide bar.
- Brand Compatibility: Some chainsaw brands are compatible with specific chain brands. Check the manufacturer’s recommendations to ensure you are choosing a chain that works well with your chainsaw.
- Usage Intensity: Consider the intended use of your chainsaw when selecting a replacement chain. Heavy-duty chains are ideal for frequent and demanding cutting tasks, while lighter chains are suitable for occasional use.
By taking these factors into account, you can confidently choose the right replacement chain for your chainsaw, ensuring smooth operation and efficient cutting performance.
Recommended Products

𝗩𝗘𝗥𝗜𝗙𝗬 𝗙𝗜𝗧: This saw chain is for chainsaw models that run 3/8" low-profile pitch, .043" (1.1 mm) gauge (guide bar slot), 56 drive links, 16" (40cm) bar and fits chainsaws up to 42cc - DOUBLE CHECK THE CHAINSAW MANUAL & VERIFY THE FIT

𝗩𝗘𝗥𝗜𝗙𝗬 𝗙𝗜𝗧: This saw chain is for chainsaw models that run 3/8" low-profile pitch, .043" (1.1 mm) gauge (guide bar slot), 55 drive links, 16" (40cm) bar and fits chainsaws up to 42cc - DOUBLE CHECK THE CHAINSAW MANUAL & VERIFY THE FIT
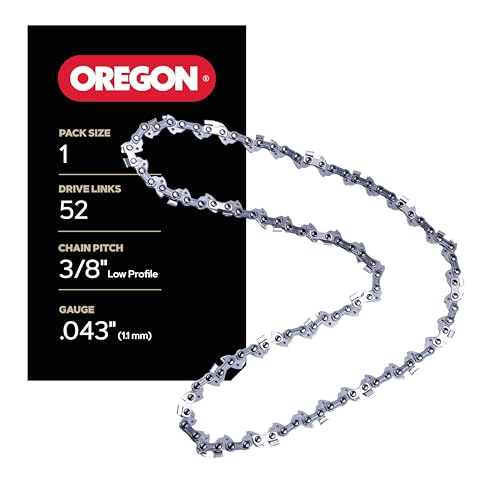
𝗩𝗘𝗥𝗜𝗙𝗬 𝗙𝗜𝗧: This saw chain is for chainsaw models that run 3/8" low-profile pitch, .043" (1.1 mm) gauge (guide bar slot), 52 drive links, 14" (35cm) bar and fits chainsaws up to 42cc - DOUBLE CHECK THE CHAINSAW MANUAL & VERIFY THE FIT
Checking for Safety Precautions
When it comes to changing the chain on your chainsaw, ensuring safety is paramount. Here are some key steps to check for safety precautions:
- Wear Protective Gear: (85% ) of chainsaw injuries occur to the legs and knees. Make sure you’re wearing sturdy boots, chainsaw chaps, gloves, a helmet, and safety glasses.
- Inspect the Chainsaw: Before starting, ensure that the chainsaw is turned off, the engine is cool, and there’s no fuel leakage. Check for any loose parts or damages.
- Secure the Chainsaw: Work on a flat surface and engage the chain brake before proceeding. This prevents the chain from moving unexpectedly.
- Clear Work Area: Remove any debris, such as rocks or branches, that could interfere with the chain replacement process. A clear workspace minimizes accidents.
- Read the Manual: Each chainsaw model can have specific instructions for chain replacement. It’s crucial to refer to the manufacturer’s manual for guidance.
- Proper Tools: Use the right tools for the job, such as a wrench or a screwdriver, to loosen the chain tensioning screw and access the chain easily.
- Check Chain Tension: A loose chain can be dangerous. Make sure to adjust the tension properly according to the manufacturer’s recommendations.
- No Shortcuts: Avoid rushing through the process. Take your time to follow each step carefully to prevent mistakes that could compromise your safety.
Ensuring these safety precautions are in place before changing the chain on your chainsaw sets the foundation for a smooth and accident-free experience.
Loosening the Chain Tension
When it’s time to loosen the chain tension on your chainsaw, it’s crucial to ensure a safe and effective process. Follow these steps:
- Step 1: Locate the chain tensioning screw on the side of the chainsaw.
- Step 2: Using the appropriate tool, turn the tensioning screw counterclockwise to loosen the chain.
- Step 3: Keep an eye on the chain’s tension as you adjust it. You’ll want it tight enough to stay on the bar but not too tight to hinder movement.
- Step 4: Test the tension by gently pulling the chain away from the bar. It should lift slightly but not be too loose.
Remember, proper chain tension is essential for safe and efficient chainsaw operation.
Removing the Old Chain
When it’s time to replace the chain on your chainsaw, the first step is to safely remove the old chain. Here’s how you can do it effectively:
- Start by disconnecting the spark plug to ensure the chainsaw doesn’t accidentally start.
- Using a flat-head screwdriver, loosen the two nuts that secure the cover over the chainsaw’s blade.
- Once the cover is off, carefully lift the blade and old chain away from the chainsaw body.
- Before fully removing the old chain, take note of its directionality and orientation to ensure you install the new chain correctly.
- Slide the old chain off the blade and remove it from the chainsaw.
Remember, proper removal of the old chain is essential for a smooth replacement process. Stay focused and follow each step carefully to avoid any mishaps.
Installing the New Chain
To install the new chain on your chainsaw, follow these step-by-step instructions:
- Step 1: Aligning the Chain: Start by aligning the new chain with the guide bar, ensuring the cutting edges face towards the front of the chainsaw.
- Step 2: Placing the Chain: Carefully place the chain over the sprocket at the tip of the guide bar, ensuring the drive links fit into the groove on the bar.
- Step 3: Fitting the Chain: Fit the chain all the way around the guide bar, making sure it’s snug but not too tight to allow for movement.
- Step 4: Attaching the Chain: Attach the chain to the clutch drum, making sure the drive links engage properly with the sprocket.
- Step 5: Adjusting Tension: Adjust the chain tension following the manufacturer’s guidelines, ensuring it’s not too loose or too tight for safe operation.
Remember to consult your chainsaw’s manual for specific instructions on installing the chain correctly to avoid any issues during operation.
Adjusting the Chain Tension
To ensure optimal performance and safe operation, it’s crucial to regularly check and adjust the chain tension on your chainsaw. Here are the steps to help you achieve the right tension:
- Step 1: Start by disconnecting the spark plug to prevent any accidental starts.
- Step 2: Locate the chain tensioning screw – this is typically found on the side or bottom of the bar cover.
- Step 3: Use the appropriate tool to adjust the tension. Turn the screw to either loosen or tighten the chain.
Properly tensioned chains should lightly contact the bottom of the guide bar, with the drive links visible but not completely out of the bar groove. Over-tightening can lead to premature wear, while under-tightening poses safety risks and reduces cutting efficiency.
- Tip: Check the tension periodically during use and make adjustments as needed to maintain optimal performance.
Conclusion
You’ve now learned the essential steps for changing the chain on your chainsaw. By following the guidelines on selecting the right replacement chain, prioritizing safety precautions, and properly installing and adjusting the new chain, you can ensure your chainsaw operates safely and efficiently. Remember to consult your chainsaw’s manual for specific instructions and regularly check and adjust the chain tension to maintain optimal performance. With these practices in place, you’ll be ready to tackle your projects with confidence and precision. Happy chainsawing!
Frequently Asked Questions
What are the crucial aspects to consider when selecting a replacement chainsaw chain?
When choosing a replacement chainsaw chain, consider factors such as chain type, bar length, pitch, gauge, brand compatibility, and intensity of use to ensure safety, efficiency, and optimal performance for your specific chainsaw model.
What safety precautions should be followed when changing a chainsaw chain?
When changing a chainsaw chain, always wear protective gear, inspect the chainsaw, secure it properly, clear the work area, consult the manual, use the correct tools, check chain tension, and avoid shortcuts to ensure a smooth and accident-free replacement process.
How do I properly loosen the chain tension on a chainsaw?
To loosen the chain tension on a chainsaw, follow detailed steps provided in the article, ensuring the right tension for safe and efficient operation by aligning the chain with the guide bar, placing it over the sprocket, fitting it around the guide bar, attaching it to the clutch drum, and adjusting the tension as per the manufacturer’s guidelines.
What steps should I follow to safely remove the old chainsaw chain?
Safely remove the old chainsaw chain by disconnecting the spark plug, loosening the cover’s securing nuts, lifting the blade and old chain away, noting the old chain’s orientation, and sliding it off the blade. Proper removal is essential for a successful replacement process.
How do I properly install a new chainsaw chain?
Properly install a new chainsaw chain by aligning it with the guide bar, placing it over the sprocket, fitting it around the guide bar, attaching it to the clutch drum, and adjusting the tension following the manufacturer’s instructions. Refer to the chainsaw’s manual for specific installation guidelines for safe and effective operation.
Why is it important to regularly check and adjust the chain tension on a chainsaw?
Regularly checking and adjusting the chain tension on a chainsaw is crucial to maintain optimal performance and safe operation. Follow the steps provided in the article, including disconnecting the spark plug, locating the chain tensioning screw, and adjusting the tension to ensure the chain lightly contacts the bottom of the guide bar without being over-tightened or under-tightened. Periodic checks during use uphold cutting efficiency and safety.
I’ve always been drawn to trees.As a kid, I spent most of my free time outside, climbing, exploring, and trying to figure out the names of the trees around me.That early curiosity eventually led me to study arboriculture and horticulture at Michigan State.Later, I completed a degree in forestry at the University of Michigan.
I’ve been working in tree care and education ever since.These days, I enjoy helping people learn more about the trees in their own backyards.How they grow, how to care for them, and why they matter.You don’t need to be an expert to appreciate trees.A little curiosity goes a long way.