I’ve tried out a lot of glaze mixes on my own pots over the years.
Some of them turned out with nice surface patterns after the kiln cooled down.
I put together these ideas because they worked well for me in building some depth without needing fancy equipment.
They mostly rely on how the glazes flow and overlap when they get hot.
A few simple layers can make a big difference in the final look.
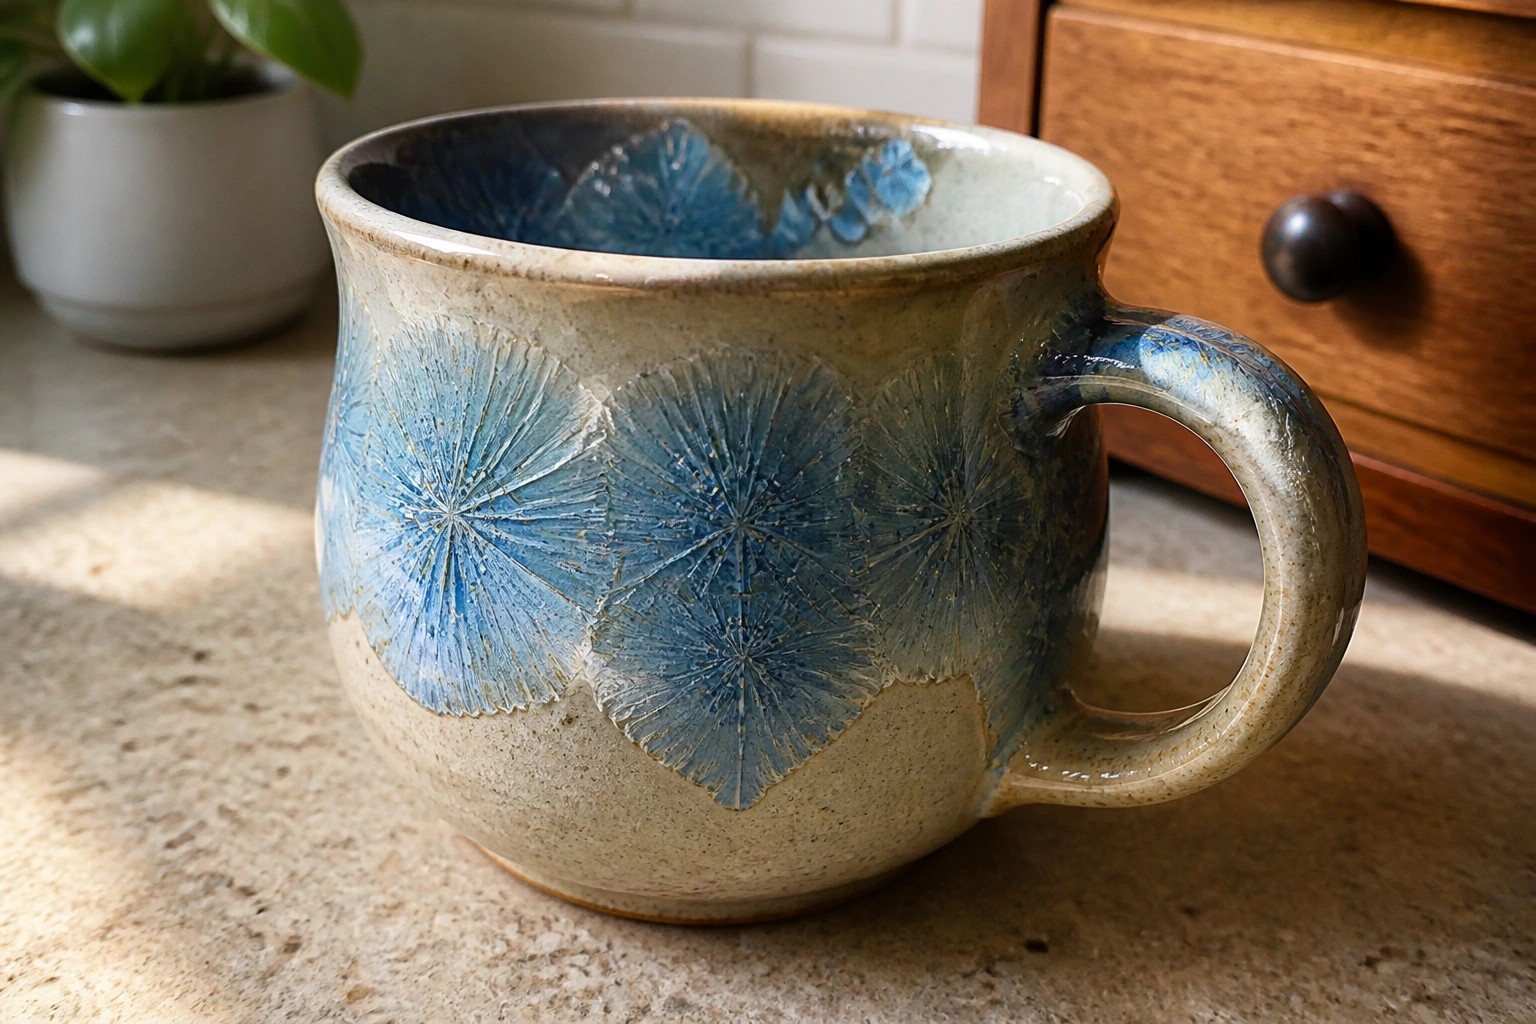
Crystalline Glaze Patterns on Mugs
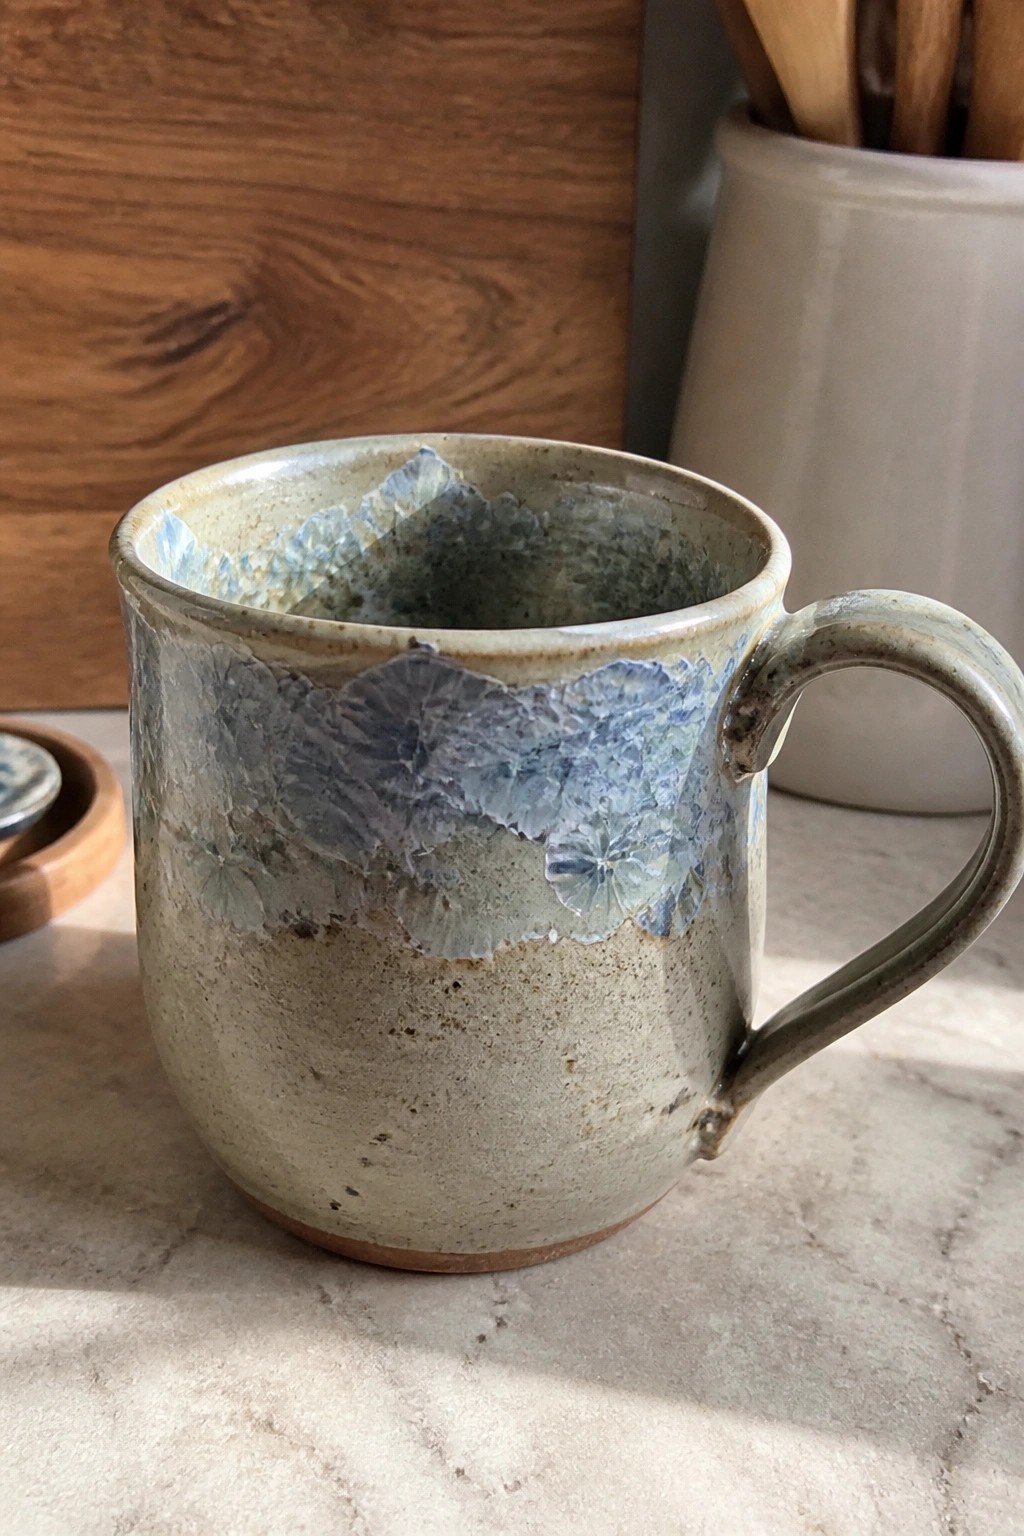
A stoneware mug uses a crystalline glaze on the upper half that develops blue flower-like formations during firing. The lower section stays a matte speckled beige, creating a clear horizontal break between the two surfaces. This setup lets the crystals form freely on the vertical walls while keeping the base simple and functional for daily handling.
What makes this idea useful is the way the crystalline glaze can be limited to one section so the pattern stays bold without covering the whole piece. The same approach works on tumblers or small bowls by shifting where the glaze stops. In a kitchen the contrast between the blue crystals and the neutral base helps the mug read clearly on a shelf or in a cabinet. You could rework the idea on a taller form by letting the crystals run lower for a different proportion.
Reactive Glaze Blends on Wheel-Thrown Bowls
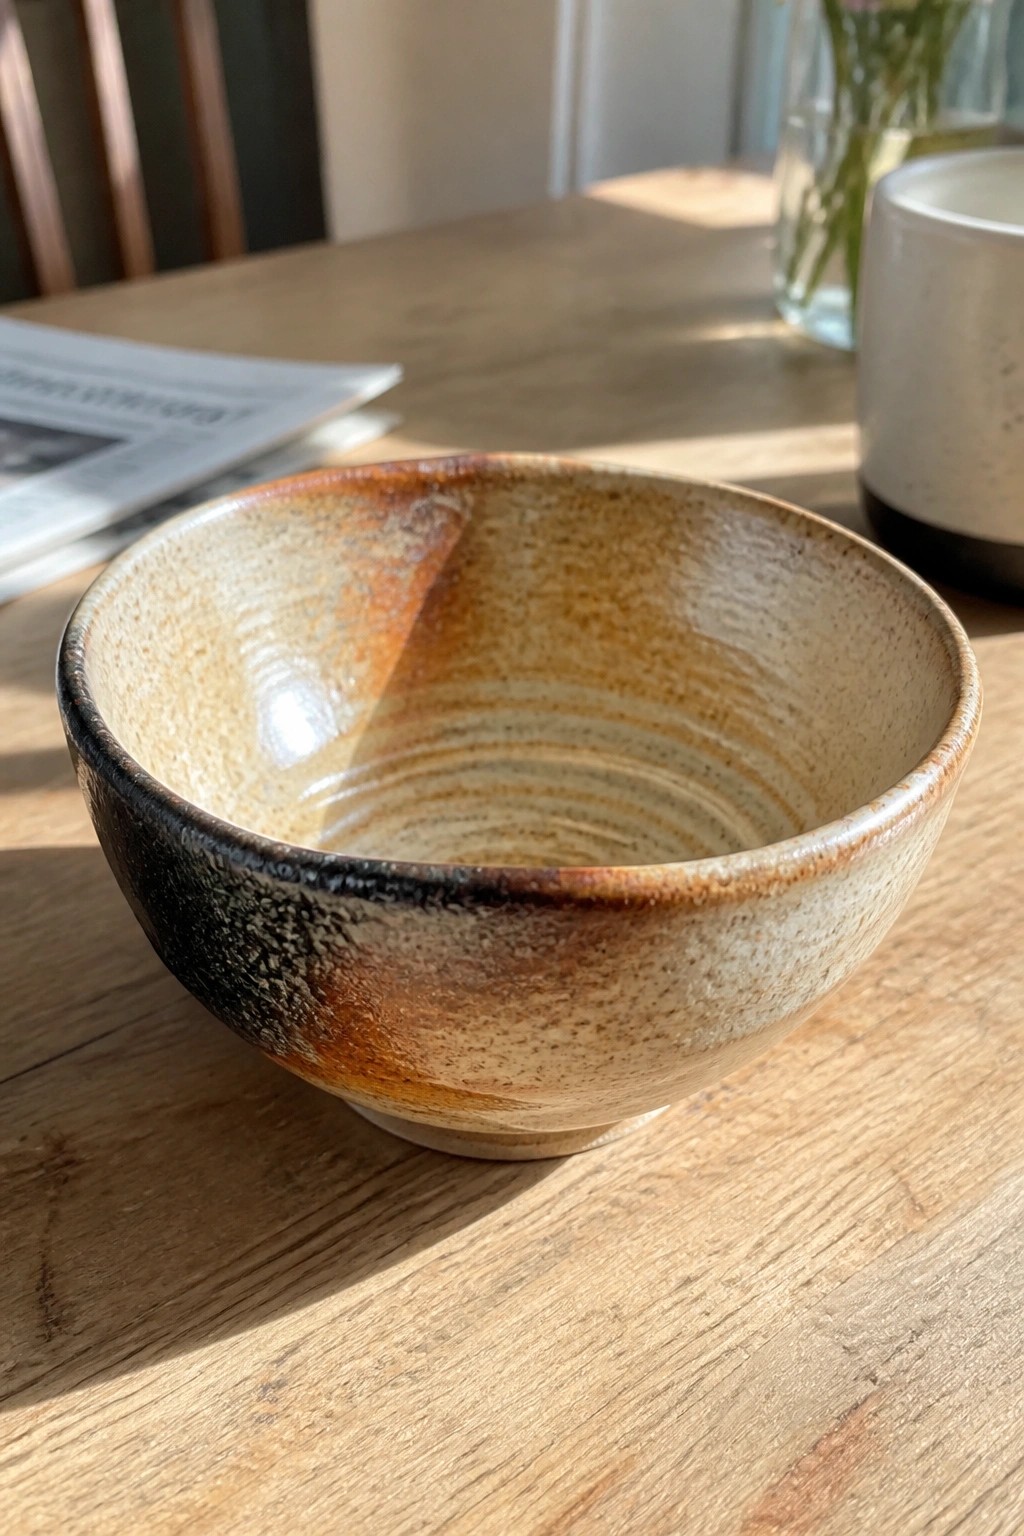
A wheel-thrown bowl finished with overlapping glazes that shift from dark brown at the rim through orange and beige tones toward the base. The surface develops natural speckling and subtle horizontal lines from the throwing process that interact with the glaze flow. This creates a varied color pattern across the form without any added brushwork or carving.
The shape suits a small serving bowl or side dish for the table. You can scale the same glaze layering to mugs or larger bowls to get comparable depth while keeping the process straightforward. A piece like this stands out on Pinterest because the color shifts happen during firing rather than from extra steps.
Running Glaze on a Compact Planter Form
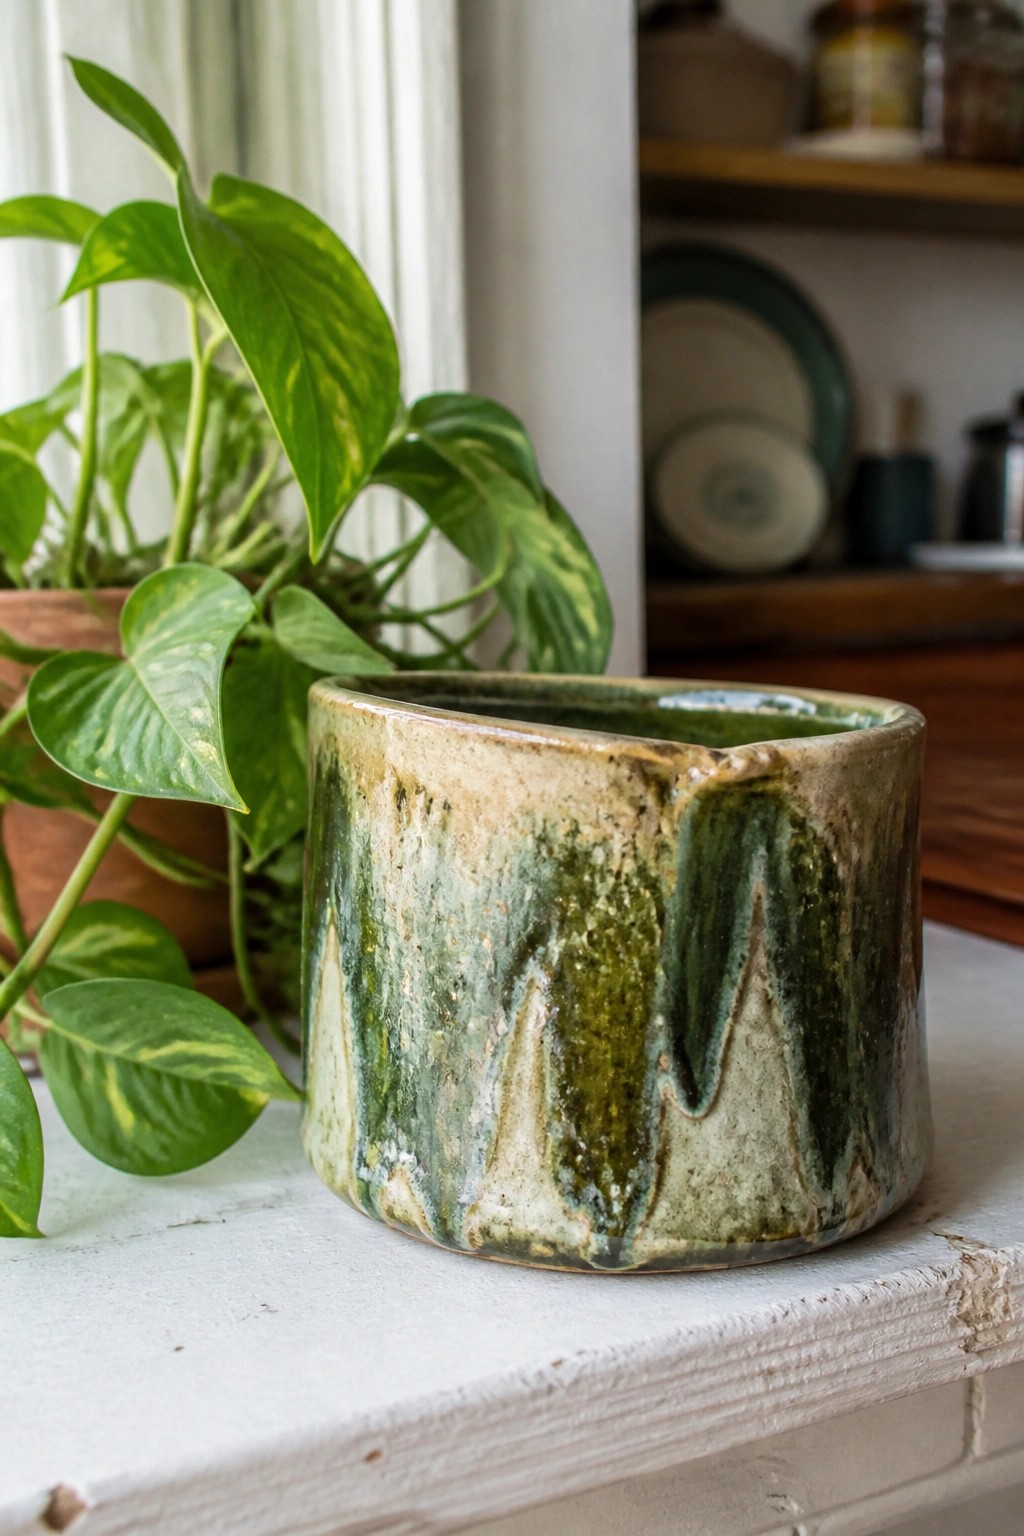
A basic cylindrical planter takes on more surface interest when a fluid glaze is applied thick enough to run and pool during the firing. The green streaks break over a lighter base clay, forming vertical patterns that change with the pot’s slight irregularities. This works well for small planters where the form stays simple and the glaze provides the main detail.
What makes this idea useful is how the glaze movement adds texture without extra carving or painting steps. You can scale the same approach to a larger cachepot or adapt the colors for a set of matching small bowls. The compact size makes it easy to test new glaze combos on a wheel or hand-built shape, and the finished piece fits on a shelf or windowsill without taking much space. For Pinterest, the dripping effect photographs clearly against a plain background.
Crackle Glaze for a Radial Pattern on a Shallow Bowl
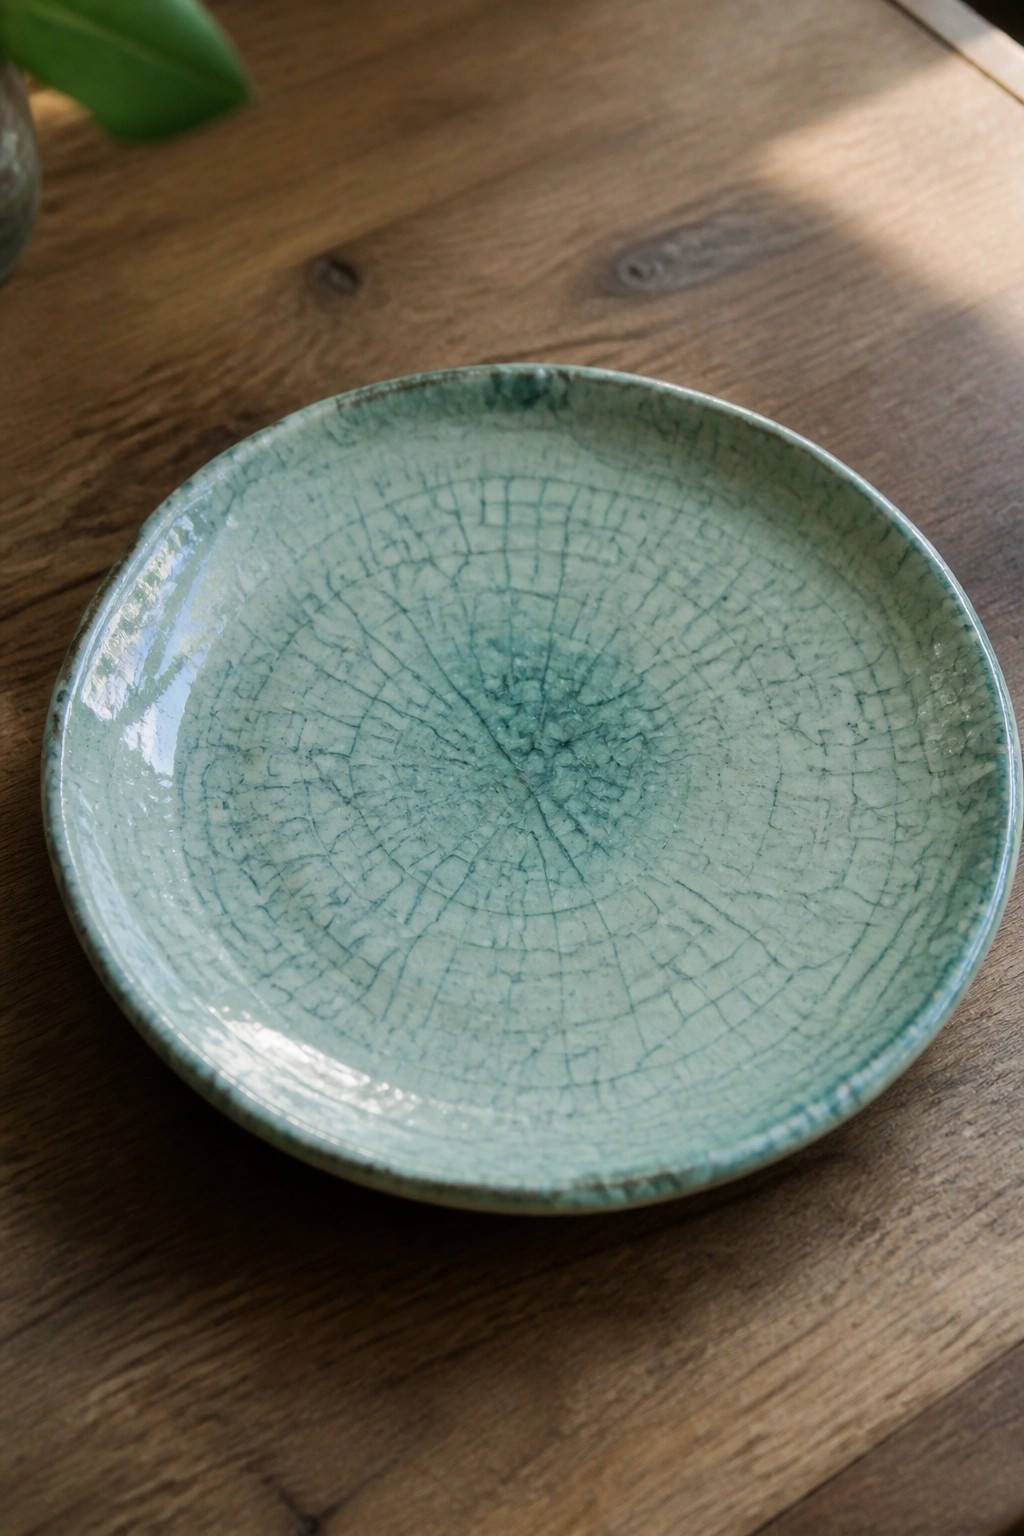
A shallow ceramic bowl finished with a green crackle glaze that breaks into fine lines radiating from the center. The cracks create a dense, circular pattern across the surface, with the color shifting from deeper teal in the middle to lighter tones near the rim. This glaze approach keeps the focus on the surface effect itself rather than added carving or painting. It suits any low, open form where the full pattern can be seen at once.
What makes this idea useful is how the crackle develops during firing without extra steps after glazing. The shape works well as a catch-all dish on a dresser or a small plate for snacks. You can scale the same glaze treatment to slightly larger plates or test it on different clay bodies to control how wide the cracks become. The result stands out in photos because the pattern reads clearly even in simple lighting.
Distressed Two-Tone Glaze on a Flower-Shaped Dish
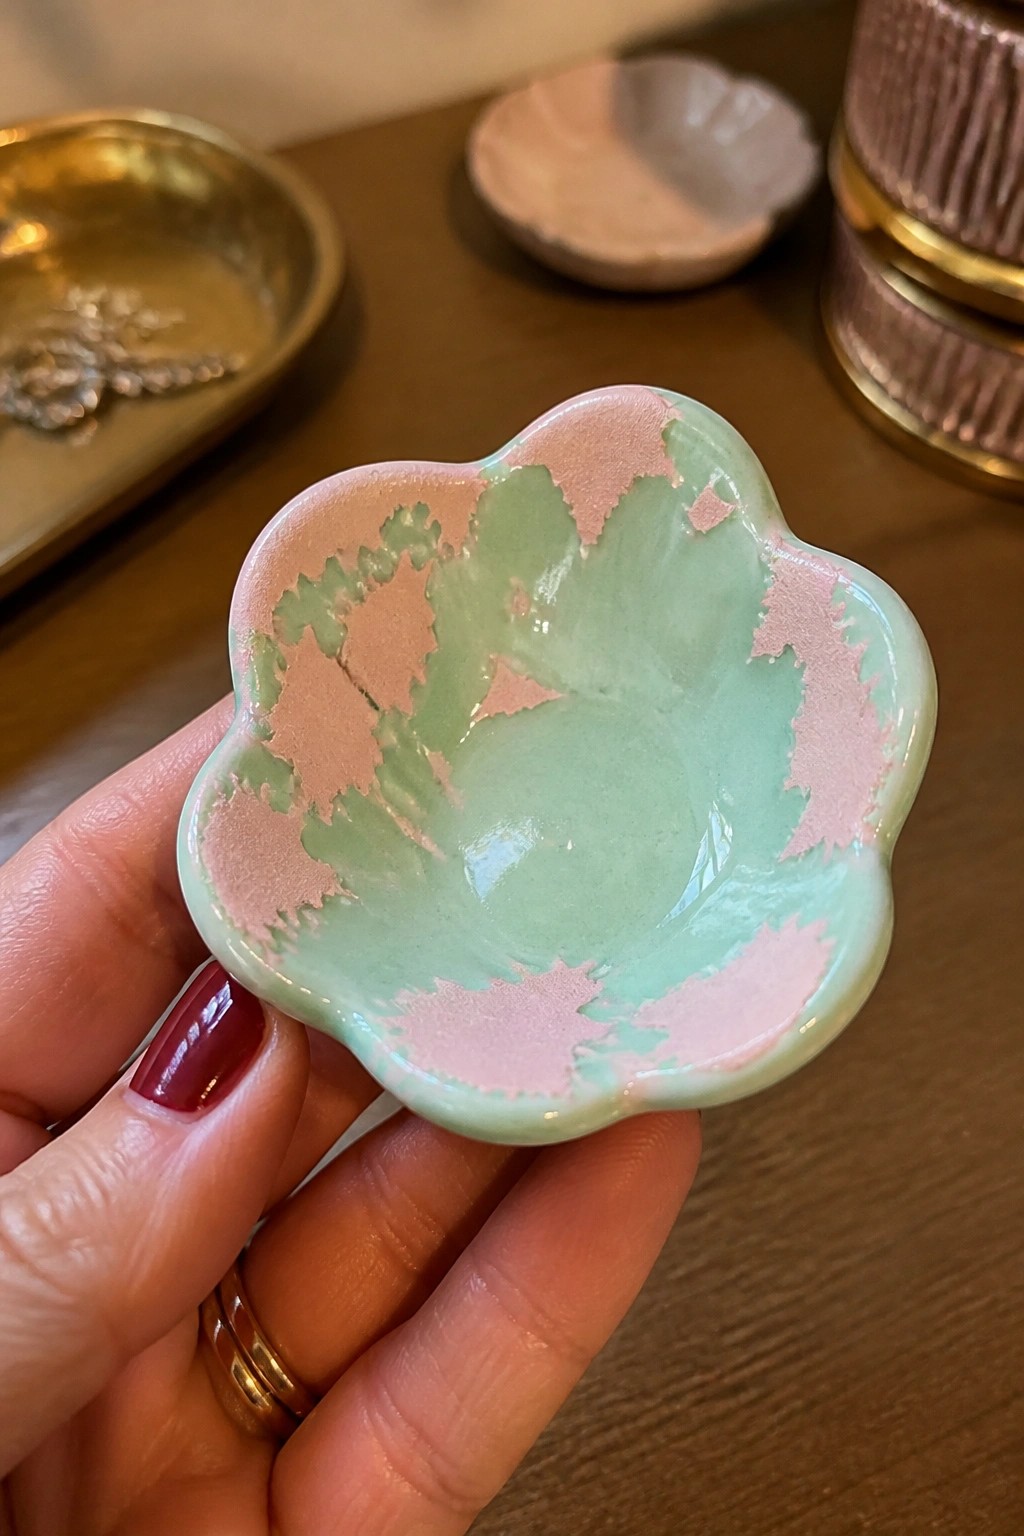
A small scalloped ceramic dish uses a light green glaze base with pink sections that break through in irregular patches. The effect comes from layering or a reactive glaze that separates during firing, leaving the pink visible along the edges and in spots across the surface. The flower-like outline keeps the piece simple while the glaze contrast supplies the main visual interest. This approach fits well for small ring dishes or trinket holders.
The small size lets you test how two glazes interact without using much material. You can repeat the same shape and color split to make a set of matching dishes for earrings or loose change. The irregular pink patches photograph clearly, which helps the finished piece stand out if you post it for inspiration. For a different use, apply the same glaze pairing to a slightly larger tray that still sits on a dresser.
Speckled Reactive Glaze on a Narrow Tray

A long rectangular ceramic tray finished with a mottled reactive glaze works well as a spoon rest or small kitchen holder. The glaze mixes dark browns and blacks with scattered blue speckles and vertical streaks that create movement across the surface without added decoration. This approach suits simple slab-built forms where the glaze firing produces the main visual interest.
What makes this idea useful is how the narrow shape keeps utensils from rolling while the busy glaze pattern hides small surface flaws. You could shorten the same form into a soap dish or widen it slightly for a small plant saucer. The speckled effect photographs clearly for sharing because the contrast between the dark base and lighter streaks stands out even in basic lighting.
Flowing Multi-Glaze Combinations on a Bulbous Vase
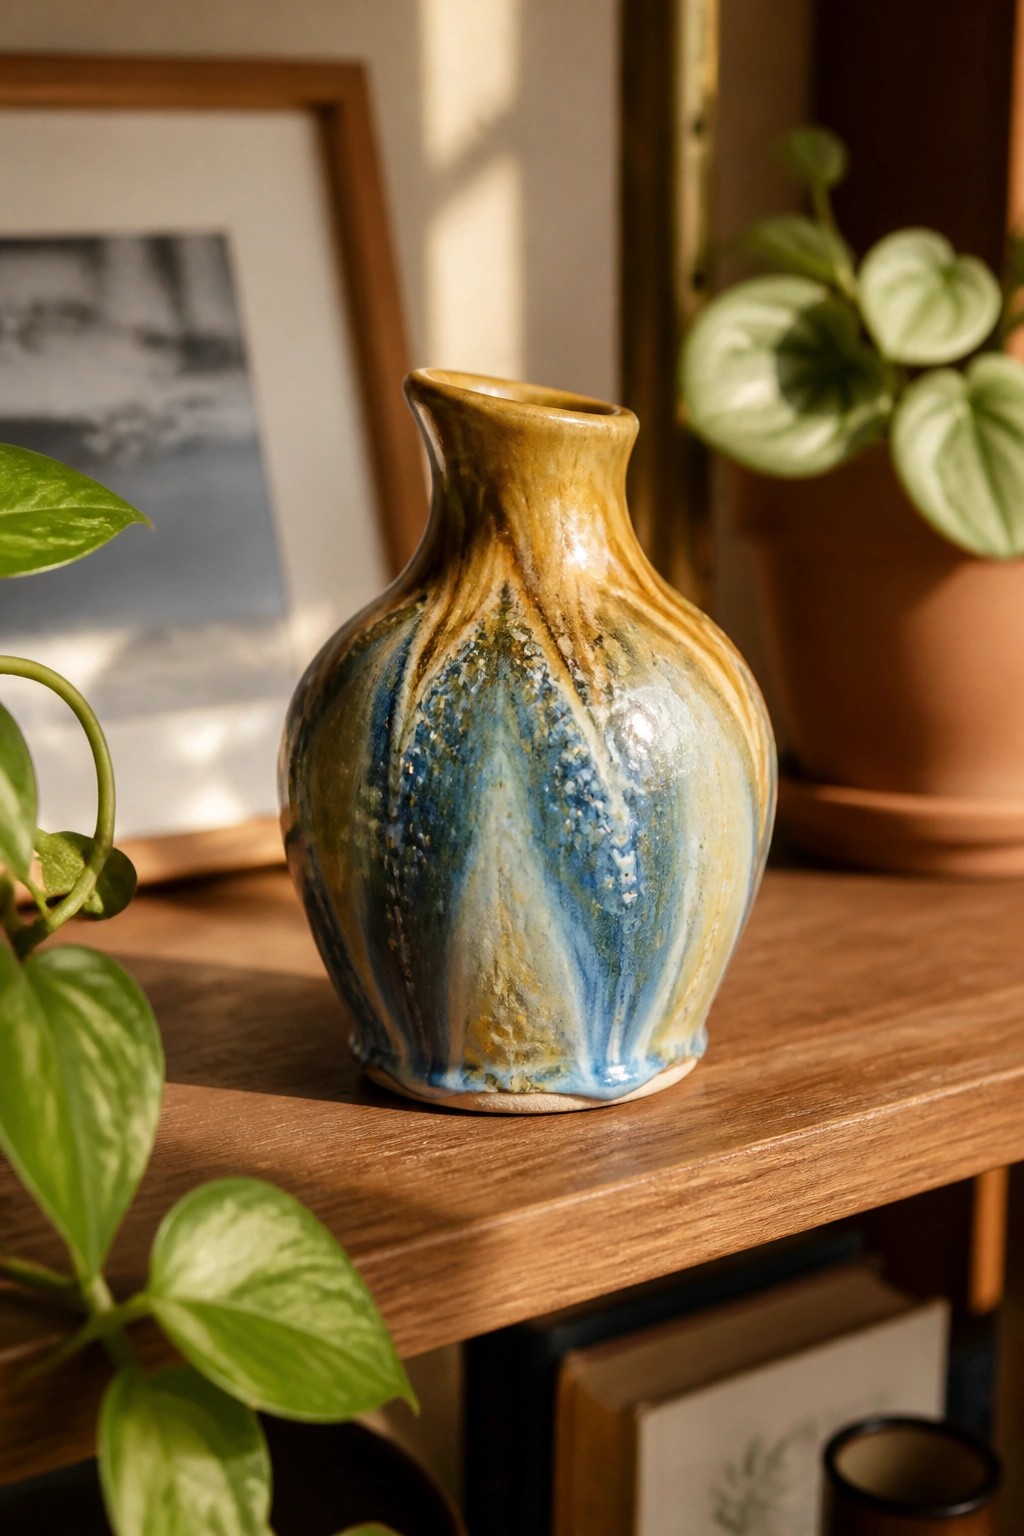
A small rounded ceramic vase gives running glazes plenty of surface area to move and interact during firing. The glaze application layers warmer brown and yellow tones near the neck with cooler blues lower down, so the colors melt, drip, and streak vertically while picking up some speckling where they overlap. This approach relies on choosing glazes that have different melting points so they create natural movement and blending without extra carving or painting.
What makes this idea useful is that the compact shape keeps the drips from running off the piece entirely, which helps control the final look. You can adapt the same layering on a taller cylinder or a set of small bud vases by changing the order of the colors or adjusting the thickness of each coat. The contrast between the blue and brown tones photographs clearly, which helps it perform well as a reference on Pinterest boards about glaze testing. For a simpler version, try the same combo on a basic wheel-thrown form first and note how the clay color underneath shifts the final result.
Crackled Glaze Tea Light Holder
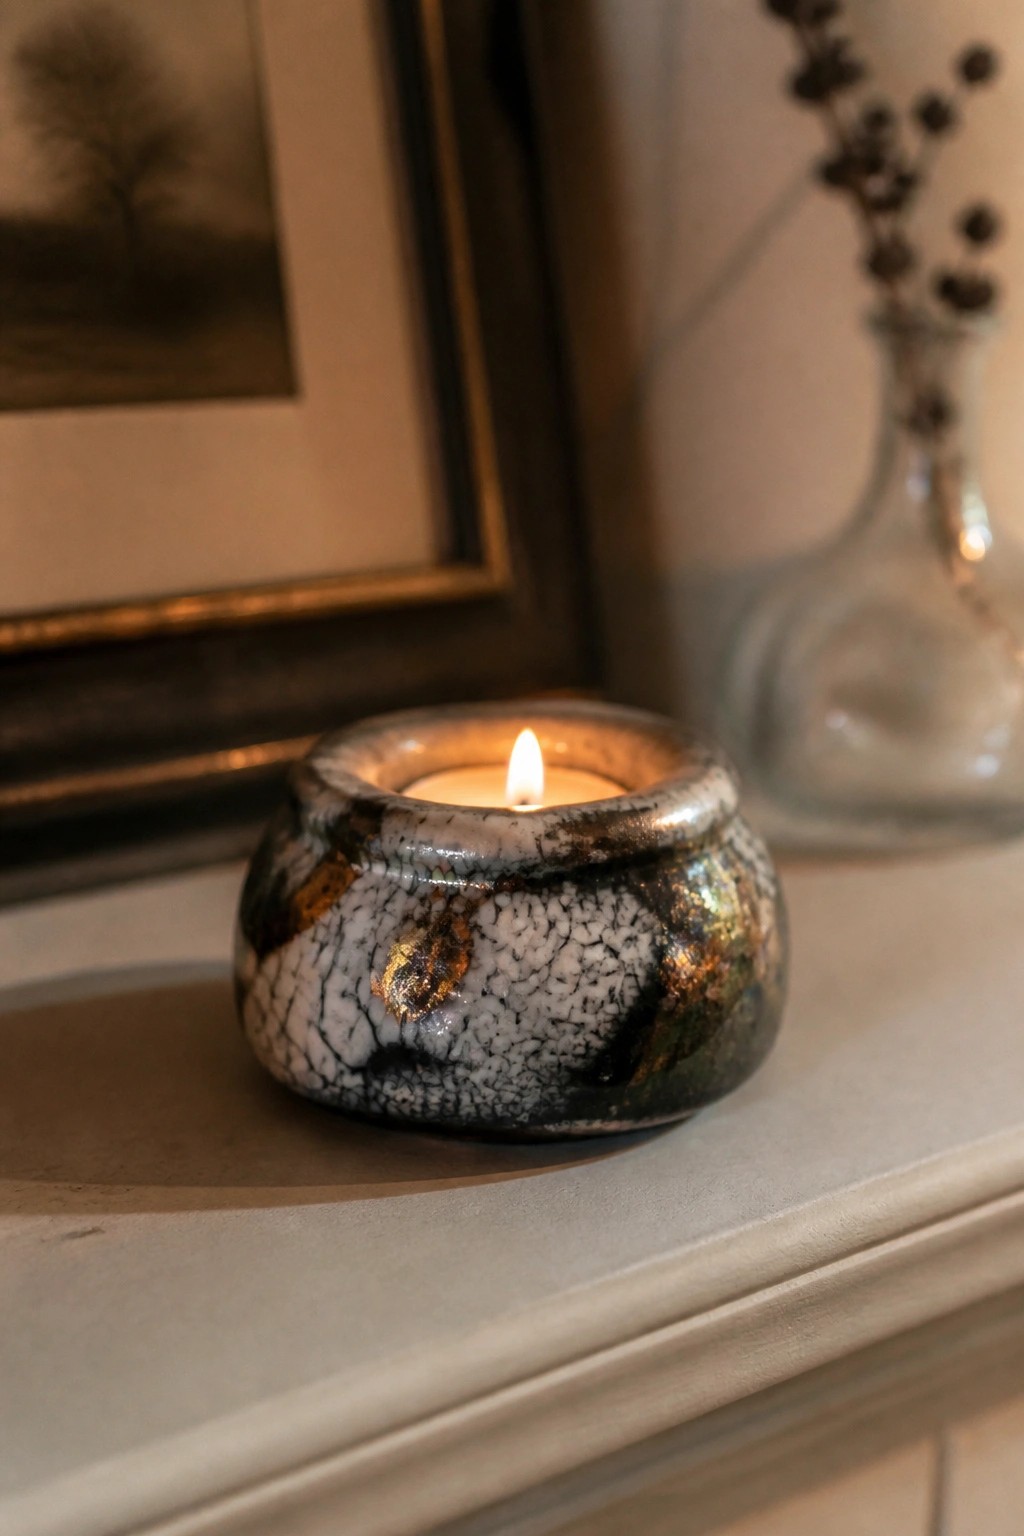
A small, low ceramic tea light holder relies on a heavily crackled glaze that creates a network of white lines across dark and metallic patches. The simple rounded shape keeps the candle centered while letting the irregular surface pattern take over as the main visual feature. This fits the category of small decorative candle pieces where the glaze effect is the entire design.
What makes this idea useful is how the crackle texture shows up clearly on a compact form that does not require much clay or kiln space. The same glaze treatment could be applied to ring dishes or small soap dishes to create a matching set. A piece like this works especially well on a mantel or shelf where the light from the candle highlights the metallic spots. You could simplify the shape further into a flat tile to test the glaze before committing to a full holder.
Speckled Reactive Glaze on a Small Salt Bowl
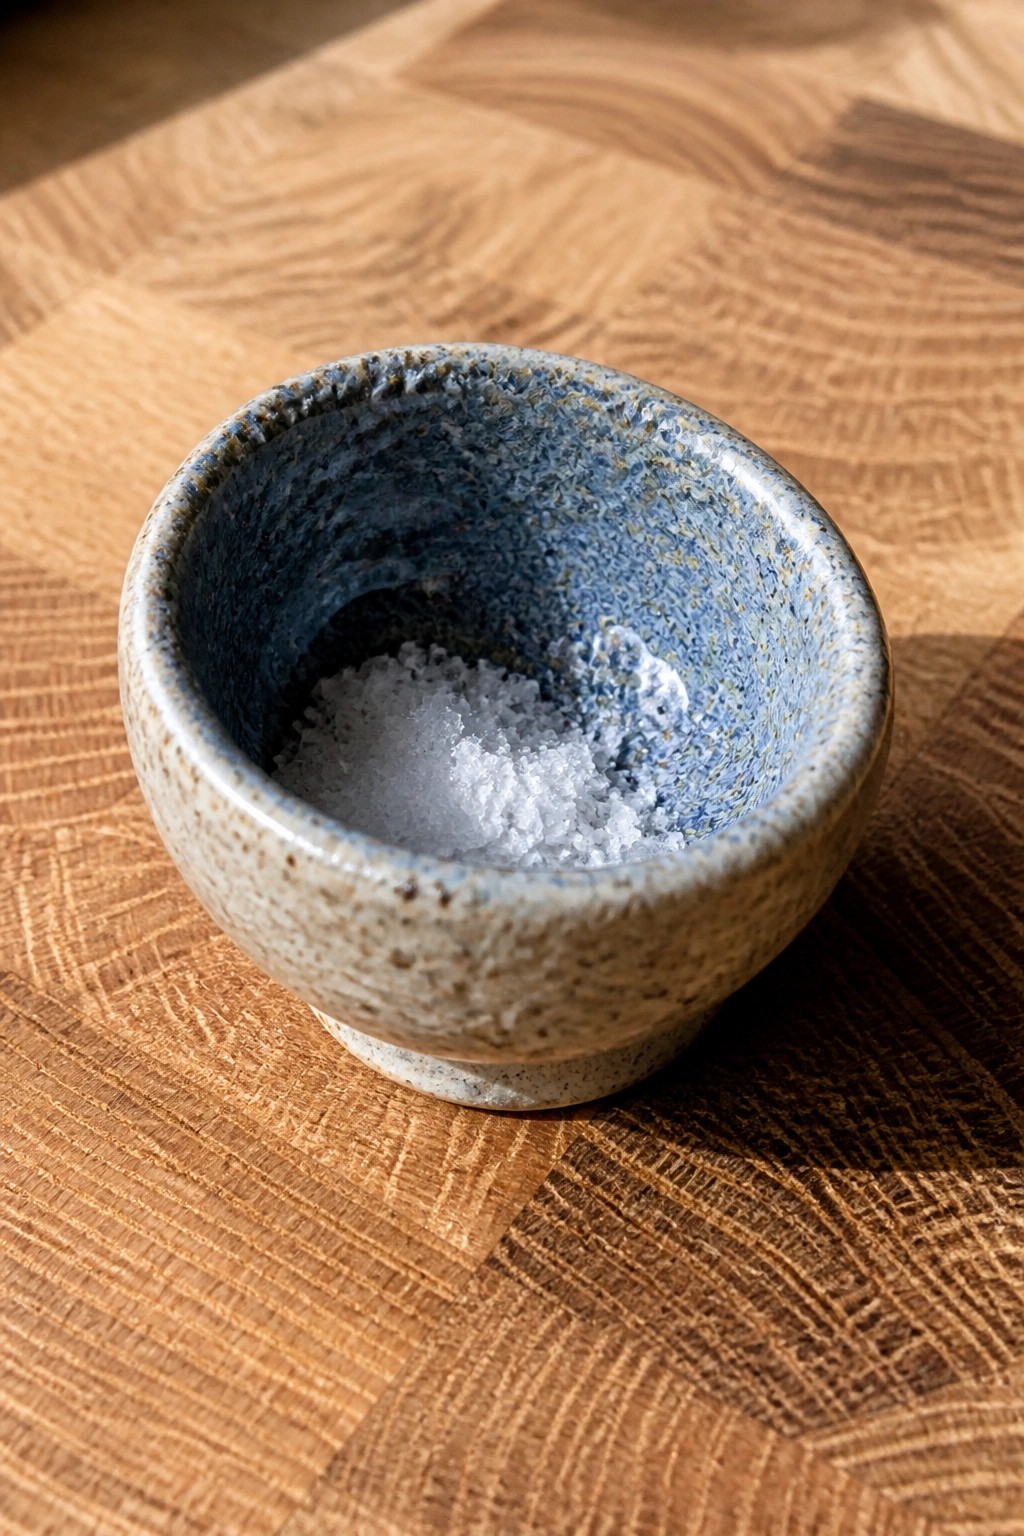
A compact ceramic bowl uses a mottled blue glaze that breaks into lighter patches where it thins over the curved surface. The speckled texture and color shifts create natural variation without added carving or painting. This approach suits simple kitchen pieces like salt cellars or spice bowls where the glaze itself supplies the visual interest.
The small scale keeps the project quick to throw or hand-build and easy to fire in a single load. You can adapt the same glaze to slightly larger condiment dishes or test it on different clay bodies to change how the speckles develop. In a kitchen this shape works well for daily use while still looking distinct from plain white ware.
Reactive Glaze Patterns on a Hanging Plaque
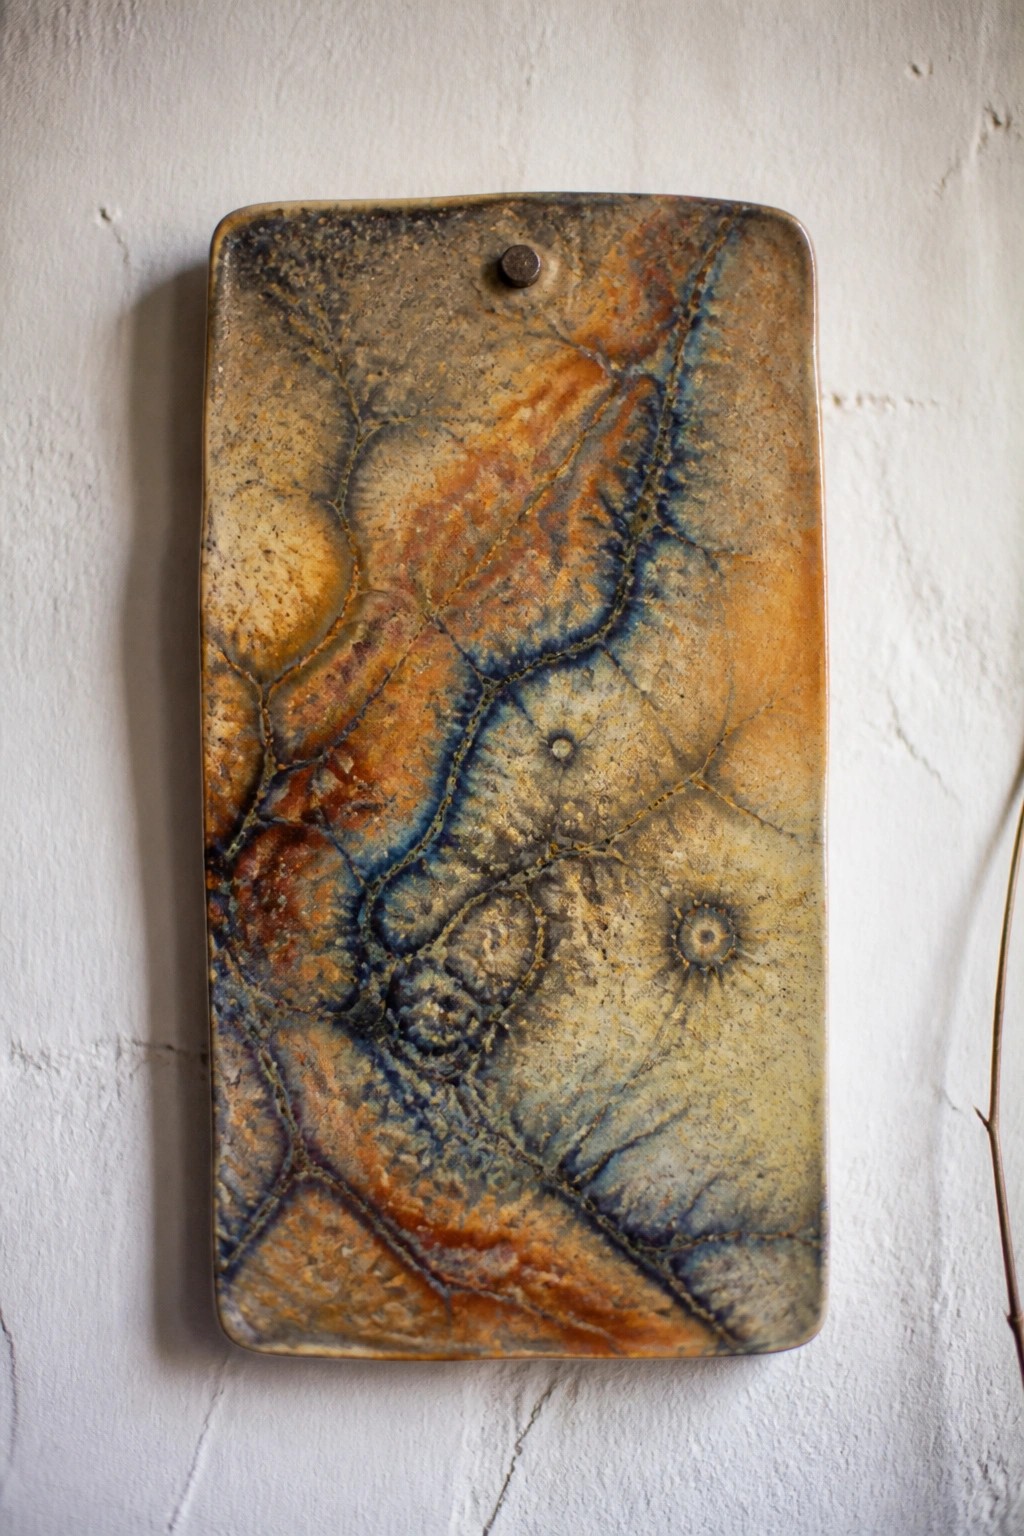
A flat rectangular ceramic plaque uses a reactive glaze combination that blends earthy oranges, browns, and blue accents into organic flowing shapes with visible separation lines. The glaze pools and crawls slightly during firing to form the irregular patches and web-like edges across the surface. This approach works well on a simple slab form because the flat plane lets the glaze move freely without running off edges. The small hole at the top turns the finished piece into ready-to-hang wall decor.
What makes this idea useful is that the same reactive glaze mix can be applied to smaller tiles for a grouped wall display or scaled up to a larger serving tray. The neutral color range fits easily into most rooms without clashing, while the pattern keeps the surface interesting even from a distance. You could simplify the shape to a square or oval if you want faster drying and firing times. The effect stands out on Pinterest because the flowing colors read as abstract art rather than a standard glaze test tile.
Dripping Glaze Layers on Small Animal Sculptures
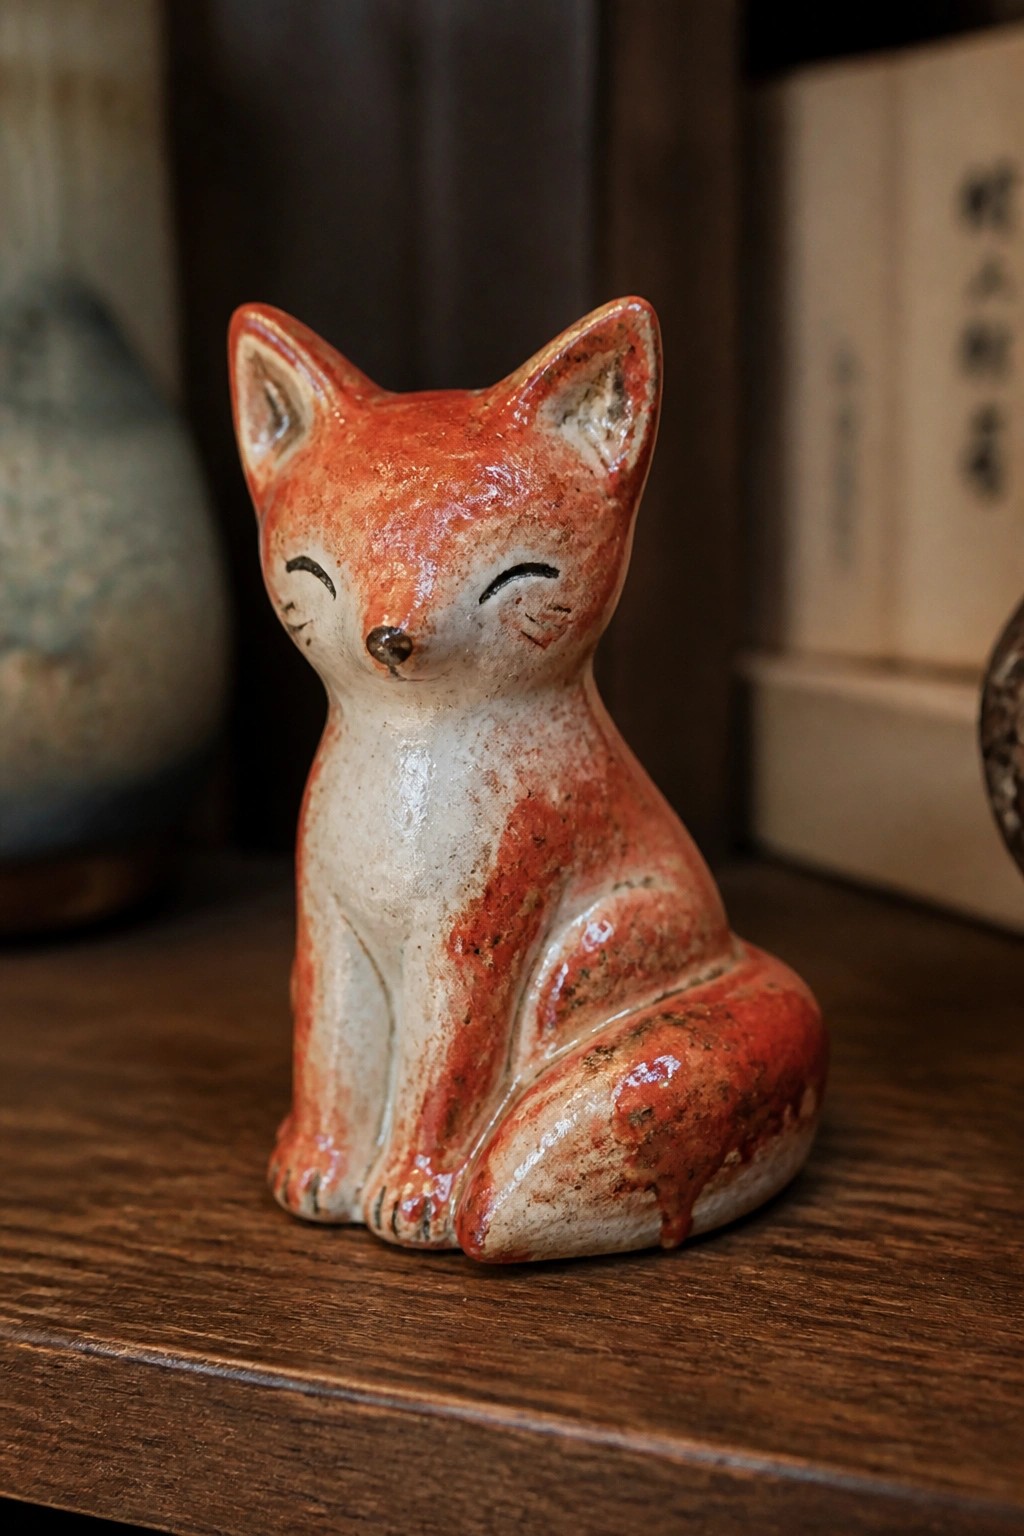
A handbuilt clay fox figurine uses a white base with a red-orange glaze applied heavily on the upper body so it runs and pools during firing. The glaze creates streaked and mottled patches that follow the curves of the head, back, and legs while leaving the lower body lighter. This approach relies on the glaze’s flow to add surface variation to a simple sculpted form without extra carving or underglaze detailing.
What makes this idea useful is how the running glaze turns a basic animal shape into a finished piece with minimal extra work. You could apply the same two-glaze method to other small animals or birds using different color pairs to test flow and coverage. The compact size works well for shelf or desk decor and lets you fit several test pieces in one kiln load. For gifts, the finished look comes mostly from the glaze choice rather than fine sculpting details.
Reactive Glaze Streaks on a Rectangular Tray
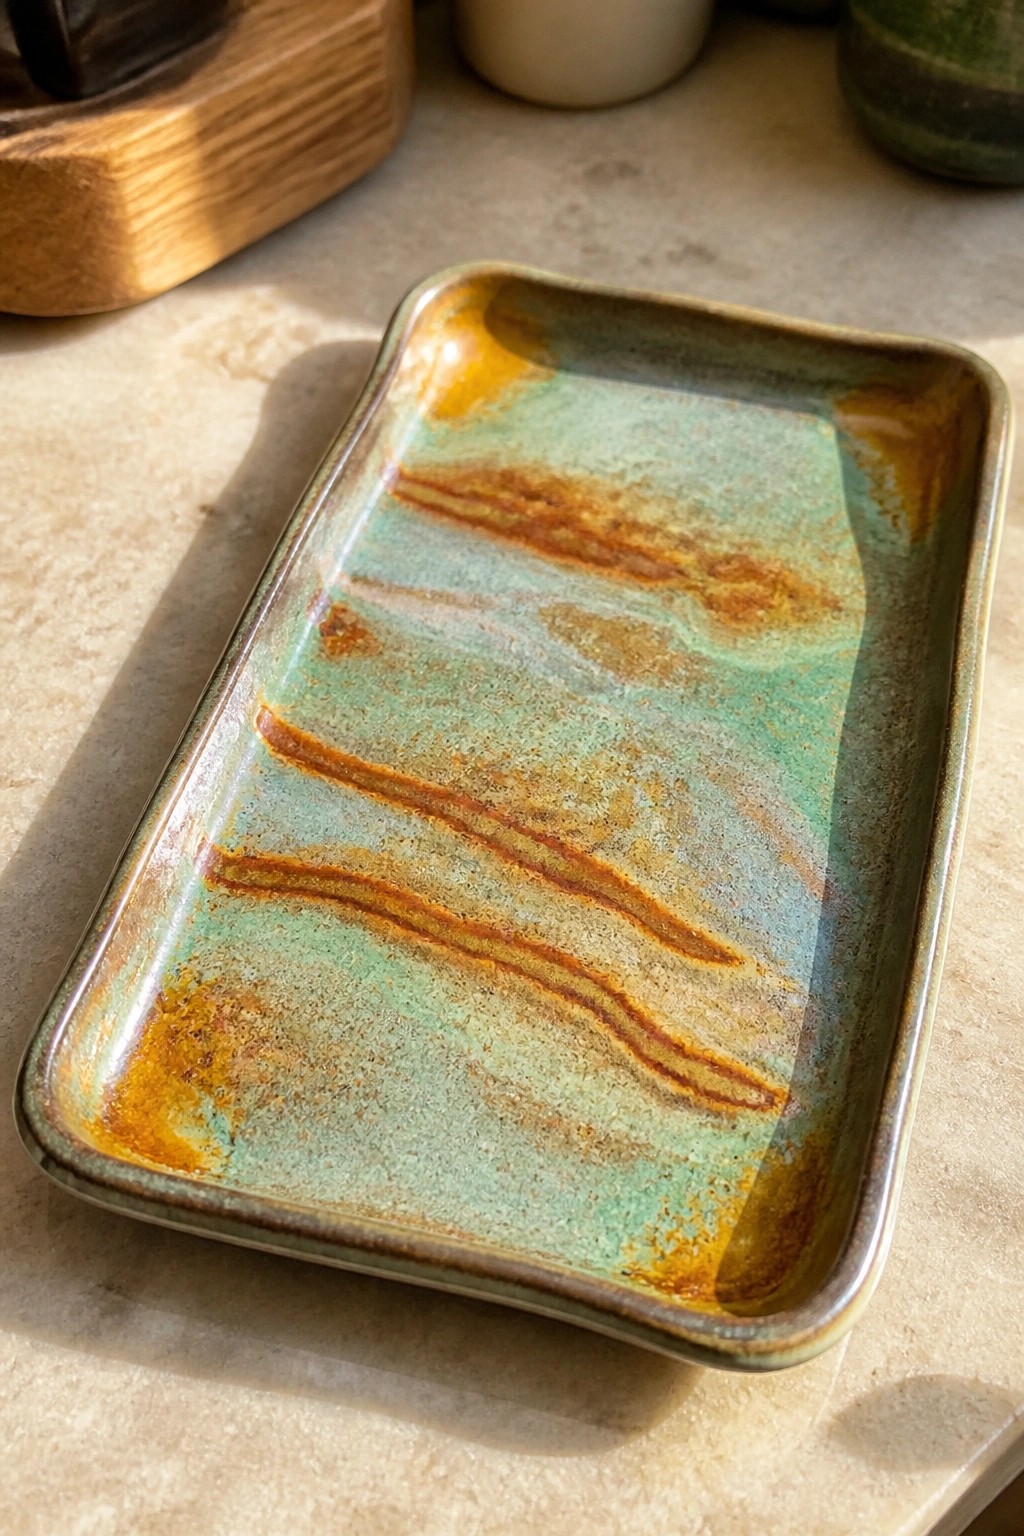
A rectangular clay tray takes on visual interest through layered glazes that move and blend during the firing. The combination produces long streaks of turquoise and green mixed with warmer orange tones that settle into an organic pattern across the flat surface. This method suits open tray shapes because the glaze has room to flow without pooling in tight corners. The finished piece works as a small serving dish, catch-all, or display item.
What makes this idea useful is that the same layering can be repeated on plates, coasters, or shallow bowls to test how different glazes interact. The rectangular shape keeps the pattern easy to read and adapts well to both kitchen use and desk storage. For a gift, the tray offers a simple form that still shows off kiln movement without needing extra carving or handles. You can start with just two glazes on a smaller test piece to control the streaking before trying larger versions.
Matte Speckled Glaze on a Bathroom Holder
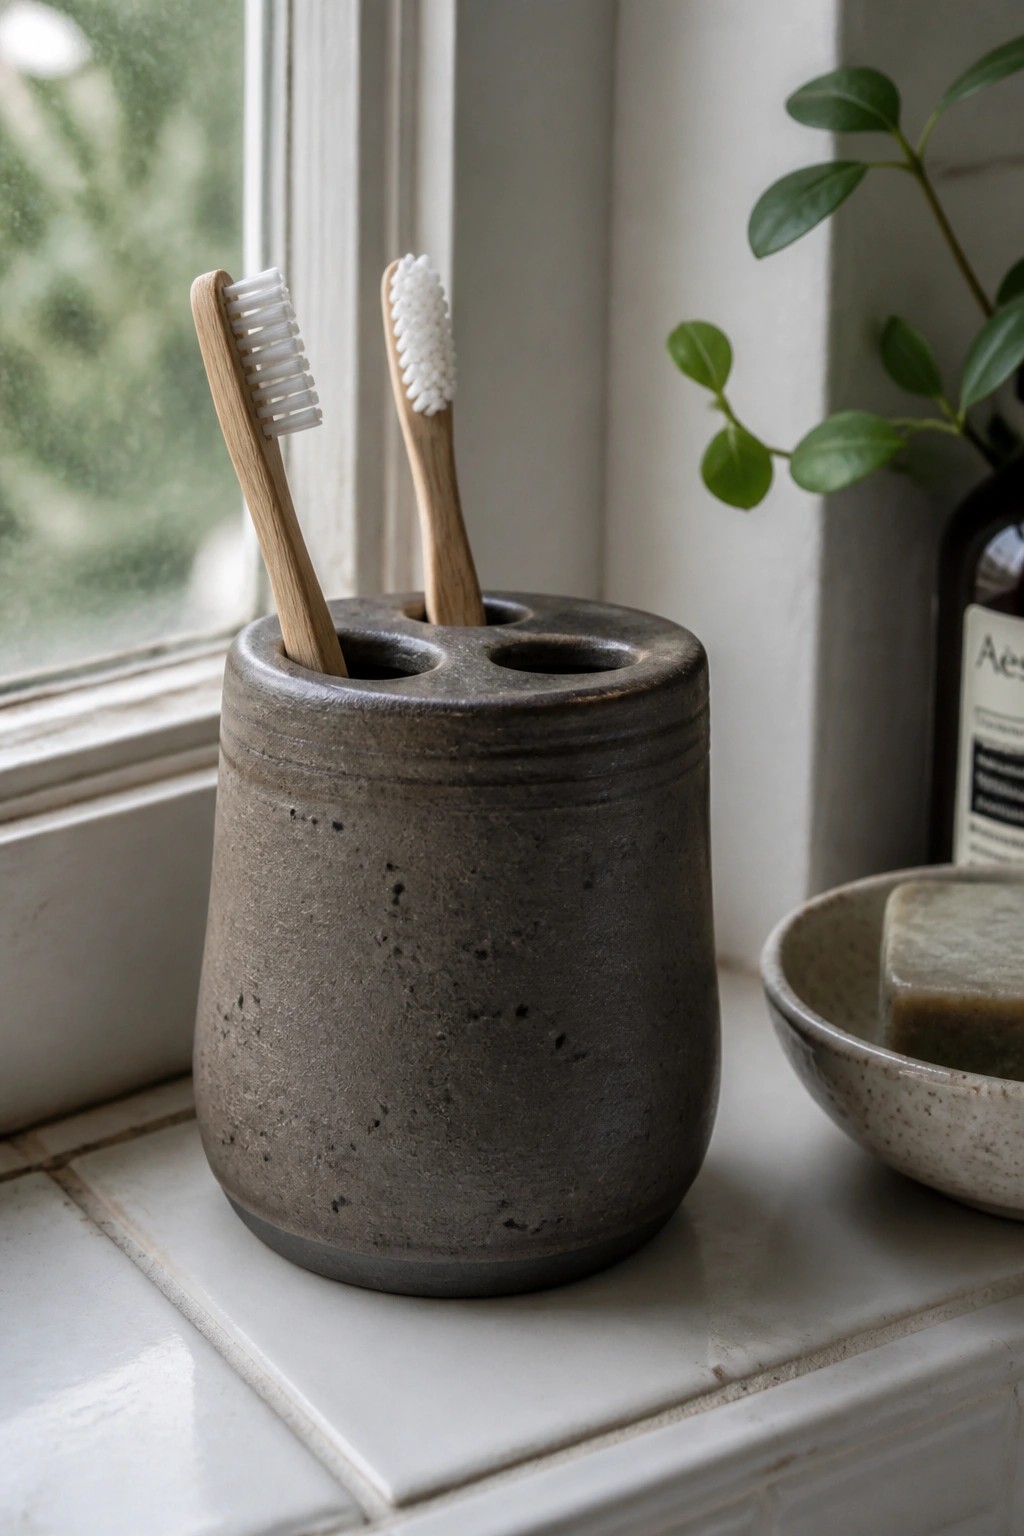
A round clay toothbrush holder with two or three openings at the top uses a dark matte glaze that leaves a rough, stone-like surface marked by small dark flecks. The form stays simple and functional, with the glaze providing the main visual interest through its uneven texture and muted tone. This approach fits bathroom items where the goal is to create a holder that looks natural next to tile and other matte surfaces.
What makes this idea useful is how the speckled glaze effect turns a basic cylinder into something that photographs well without needing extra decoration. The same shape and glaze could be scaled down for a cotton swab cup or widened into a soap dish with a matching finish. In a bathroom, the holder keeps brushes upright while the texture helps it avoid looking too clean or commercial next to other handmade pieces.
Reactive Glaze Tea Light Bowl
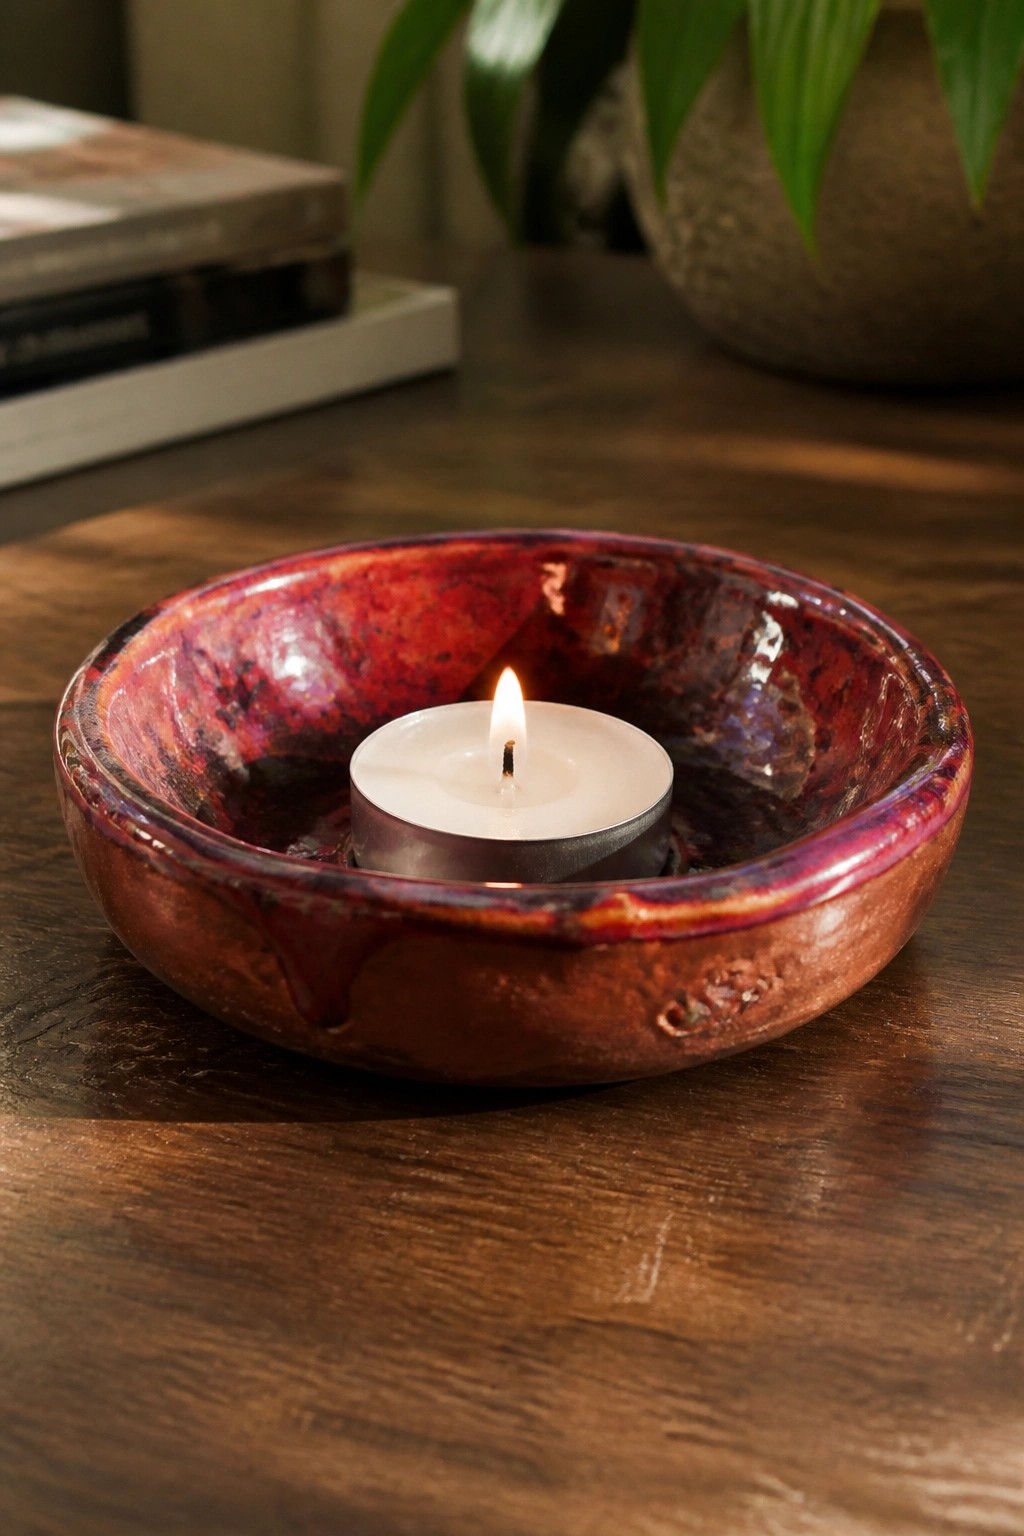
A small, low-profile ceramic bowl glazed in shifting reds, purples, and copper tones makes an effective tea light holder. The rounded form keeps the metal cup stable while the glossy glaze pools and streaks across the surface to create natural color variation. This fits the category of simple decor objects where the glaze itself provides the main interest rather than added carving or painting.
What makes this idea useful is how the same compact bowl shape can sit on a shelf, nightstand, or dining table without taking much space. You can rework the idea by using a matte version of the glaze or scaling the bowl slightly larger to hold a votive instead. For gifts, the approach works well because each piece ends up looking different based on how the glaze moves in the kiln.
Spiral Notch Yarn Bowl
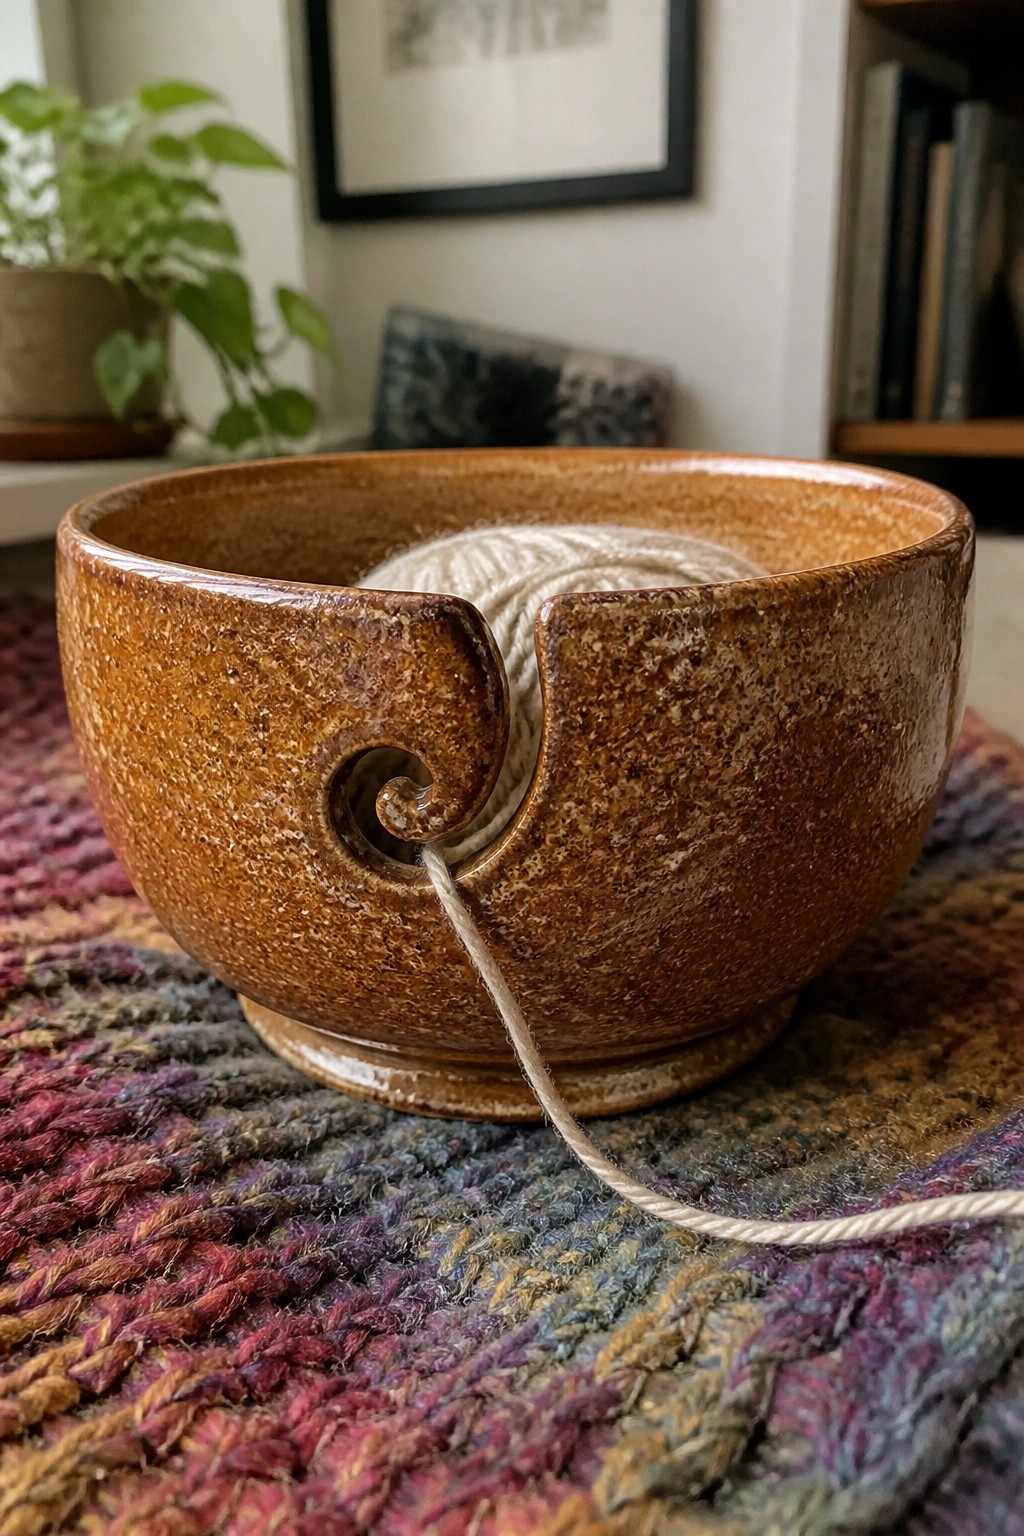
A ceramic yarn bowl uses a wide, low profile with a thick rim and a sculpted spiral opening cut into one side. The notch lets yarn feed out steadily while the curve of the opening stops the ball from jumping out during use. This turns an ordinary bowl shape into a dedicated knitting or crochet tool that keeps supplies contained on a table or lap.
What makes this idea useful is how the spiral notch solves a common tangling problem without any extra hardware. You could adapt the same cutout on a taller cylinder form for embroidery floss or scale the whole bowl down for a smaller thread holder. In a craft space, the compact shape sits flat and stable next to a project bag. Test the notch width on a few scrap pieces first so the yarn glides without catching on the edges.
Crackle Glaze on a Petal-Shaped Dish
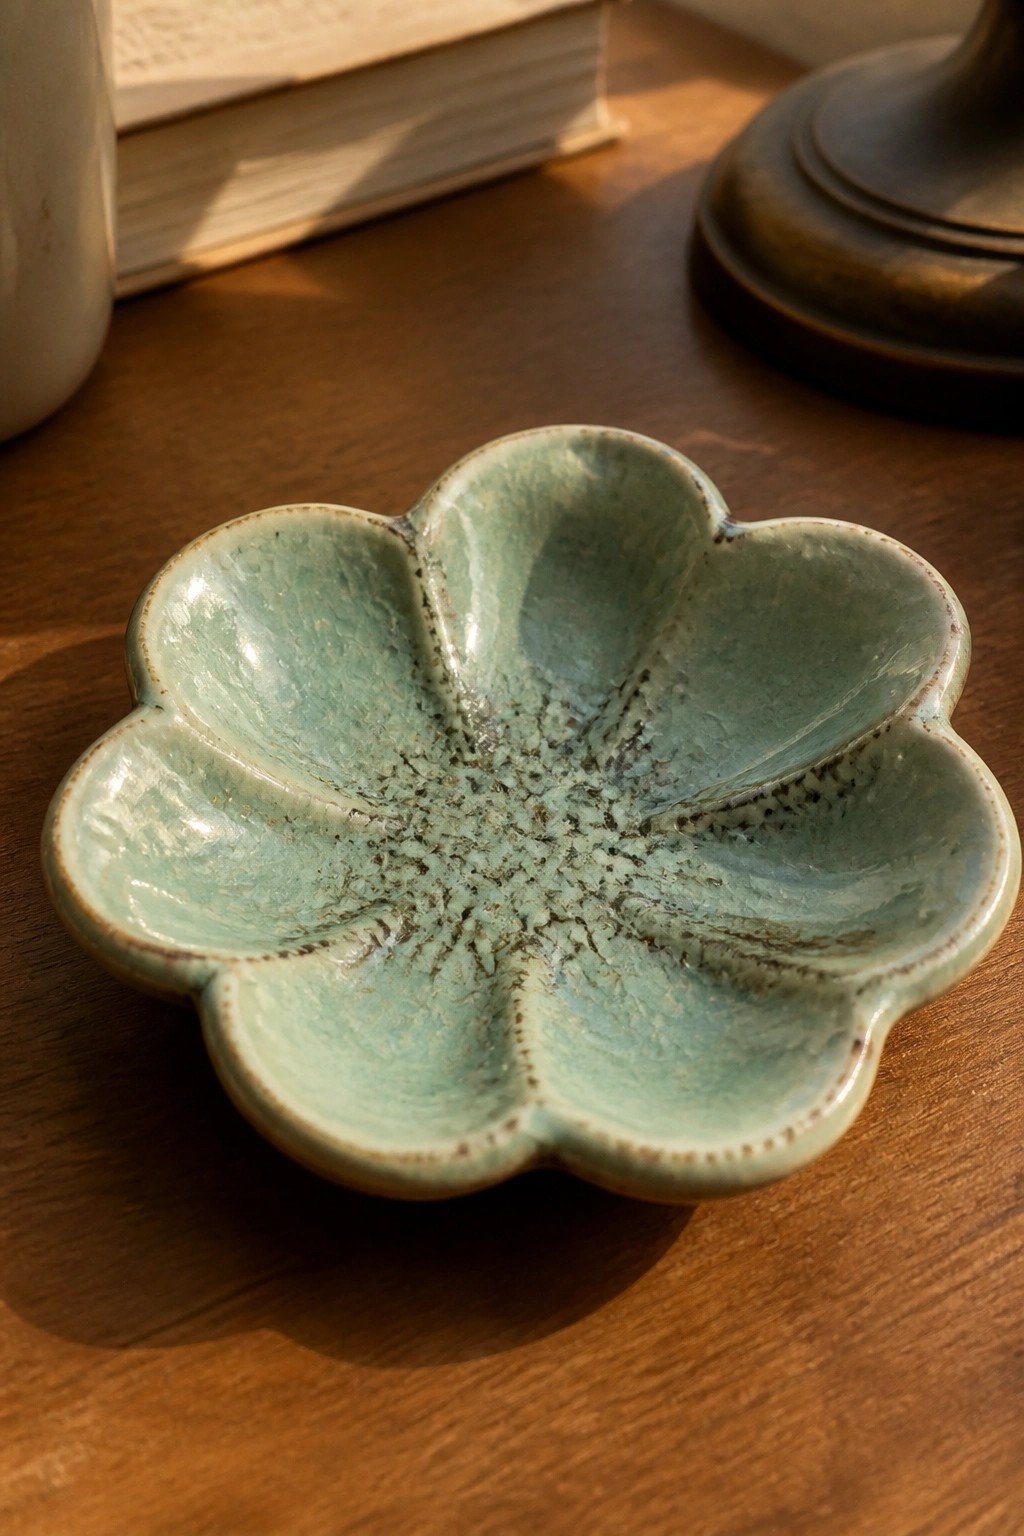
A small flower-shaped dish with six rounded petals makes a simple ring holder or trinket tray. The form is shallow and open, which lets a reactive glaze pool in the center and develop a dense web of fine cracks with dark speckling. The glaze shifts from pale turquoise on the petals to a browner tone along the edges, showing how the same mix can vary across the surface. This setup works because the flat base and gentle curves give the glaze room to settle and highlight its texture after firing.
The small scale makes this easy to adapt into a soap dish for a bathroom or a holder for keys by the door. You can keep the same petal outline and change the glaze color or try a matte version for a different finish. The centered crackle pattern photographs clearly, which helps it perform well on Pinterest when shown against a plain wood surface. For a gift, the same shape can be made slightly deeper to hold small candles or loose tea bags.
Hammered Copper Texture on a Small Lidded Jar
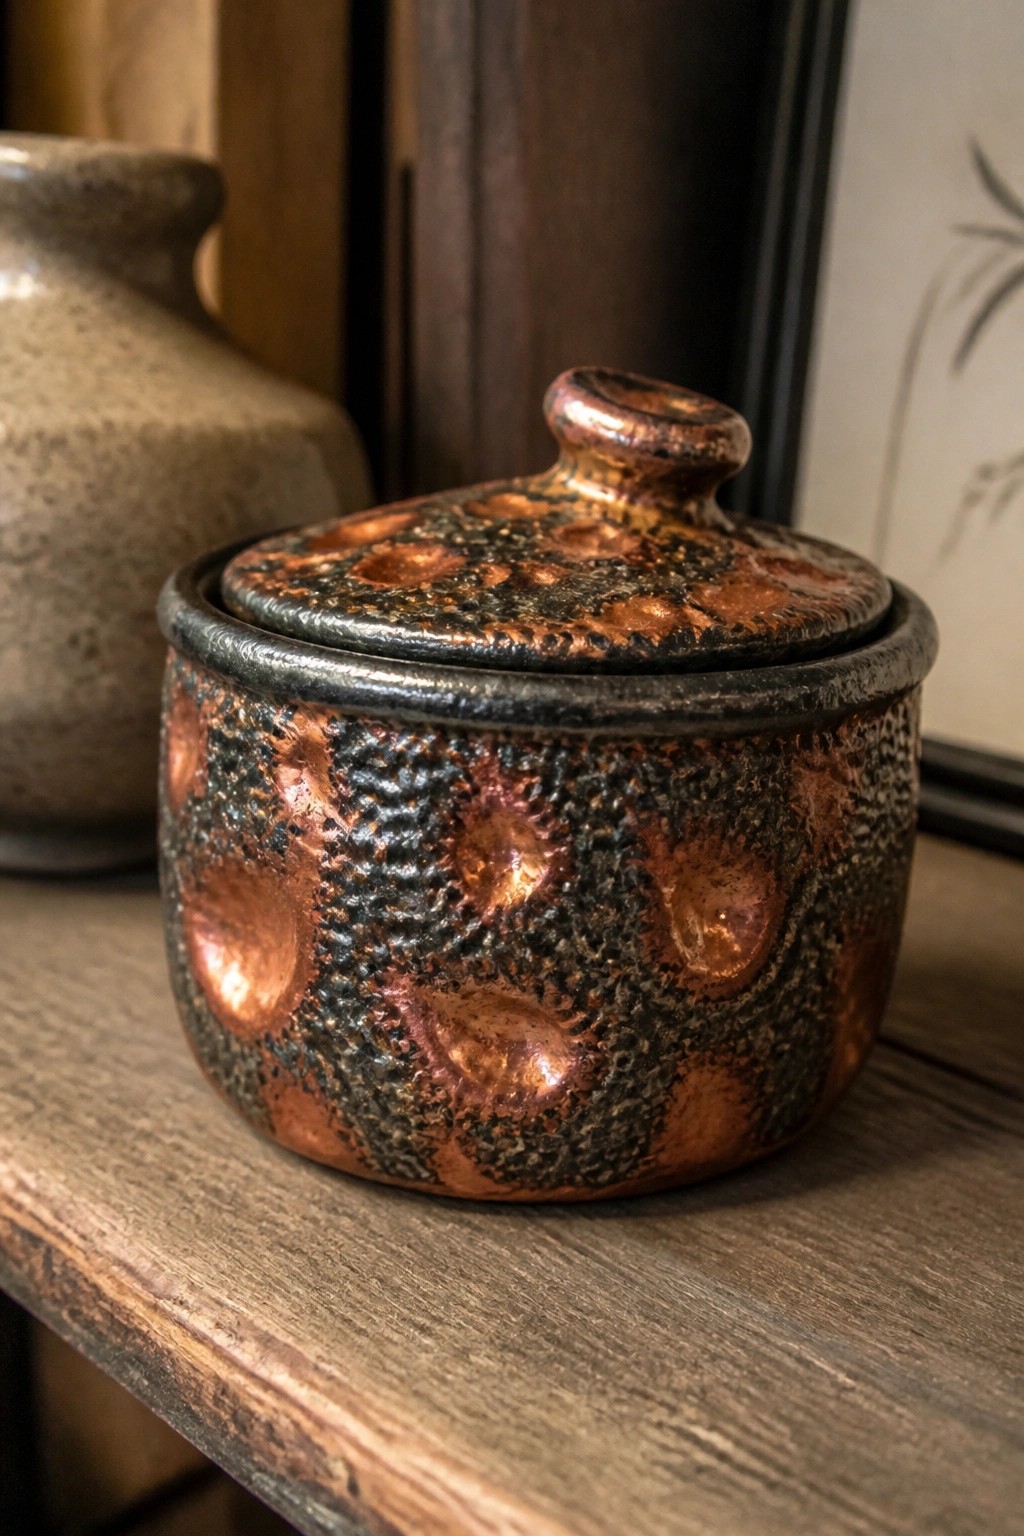
A small lidded jar takes on visual weight through a thick, uneven glaze that mixes dark matte areas with raised copper spots. The surface shows deliberate circular indentations that break up the round form and create shifting reflections. This glaze treatment turns a basic storage shape into a compact piece suited for countertop or shelf use.
What makes this idea useful is how the texture does most of the decorative work on an otherwise simple form. The jar suits small kitchen storage such as salt, sugar, or loose tea, and the same glaze could be applied to a set of matching canisters or a low bowl. Scaling the shape down further would make it practical for holding rings or small desk items while keeping the same surface effect.
Crackle Glaze on a Square Soap Dish
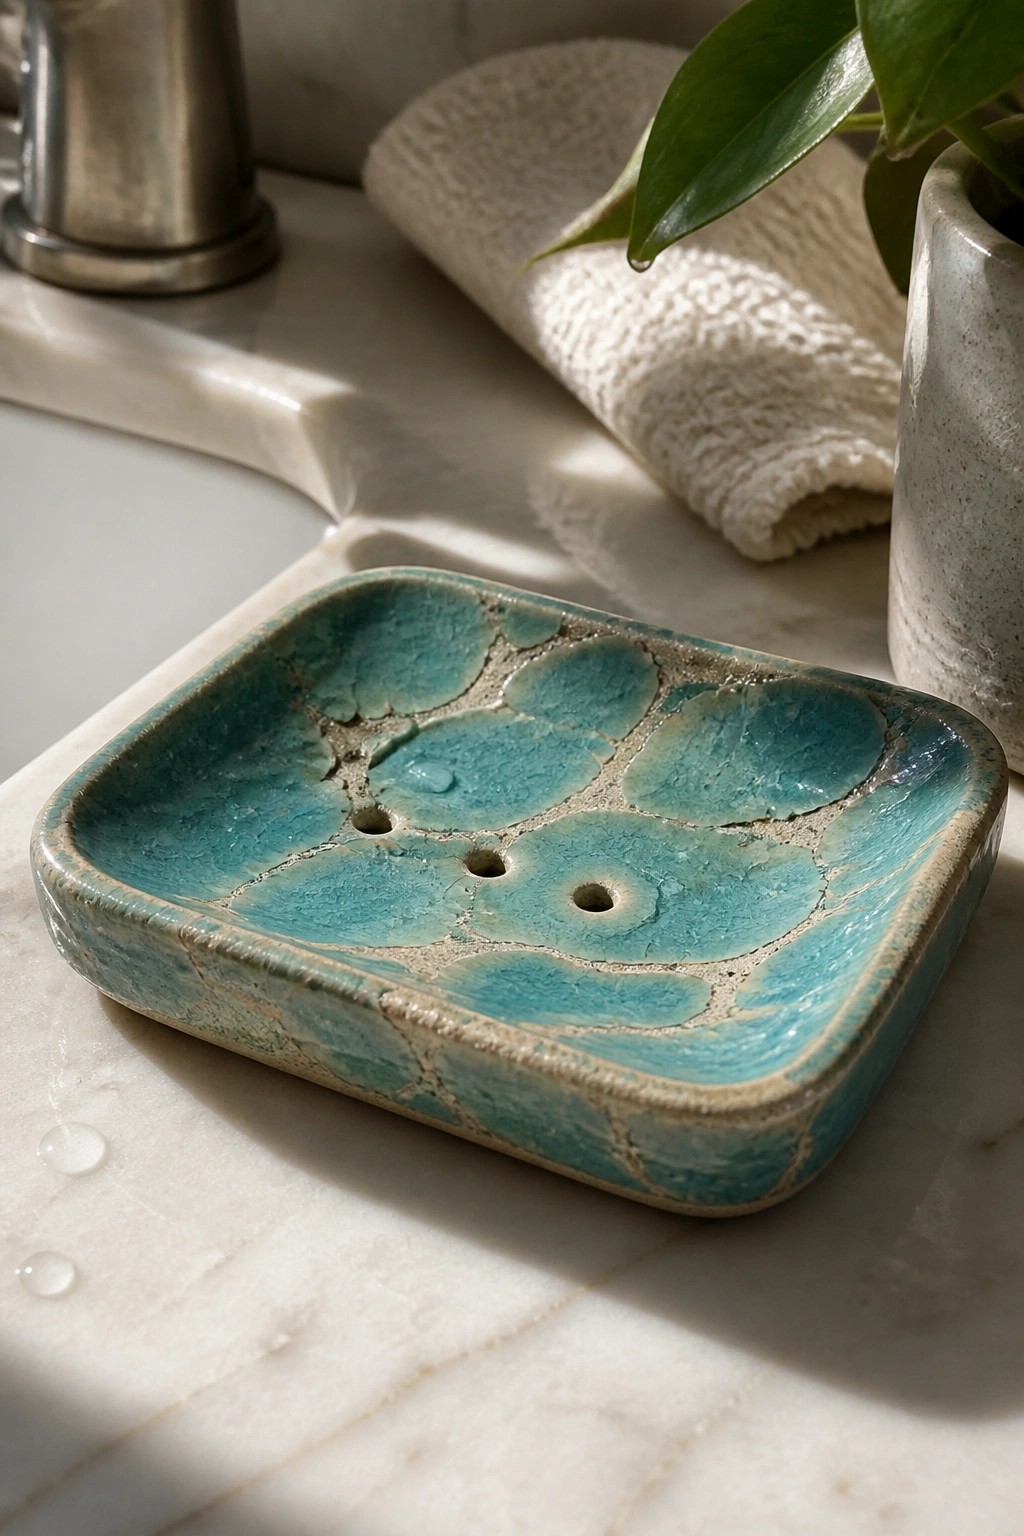
A square ceramic soap dish made with a turquoise crackle glaze creates surface interest through the contrast between the glossy blue areas and the lighter lines that form during firing. The design uses several circular impressions pressed into the clay along with small drainage holes in the base. This combination works well for bathroom items where the glaze itself supplies both the color and the texture.
What makes this idea useful is how the crackle effect draws attention to the simple square form without added carving or painting. The small size fits on a sink ledge or shelf, and the same glaze approach could be repeated on a longer tray or a set of matching containers. For a gift, something like this stands out because the surface develops its own pattern once the piece is fired.
Layered Glaze Coasters with Reactive Kiln Effects
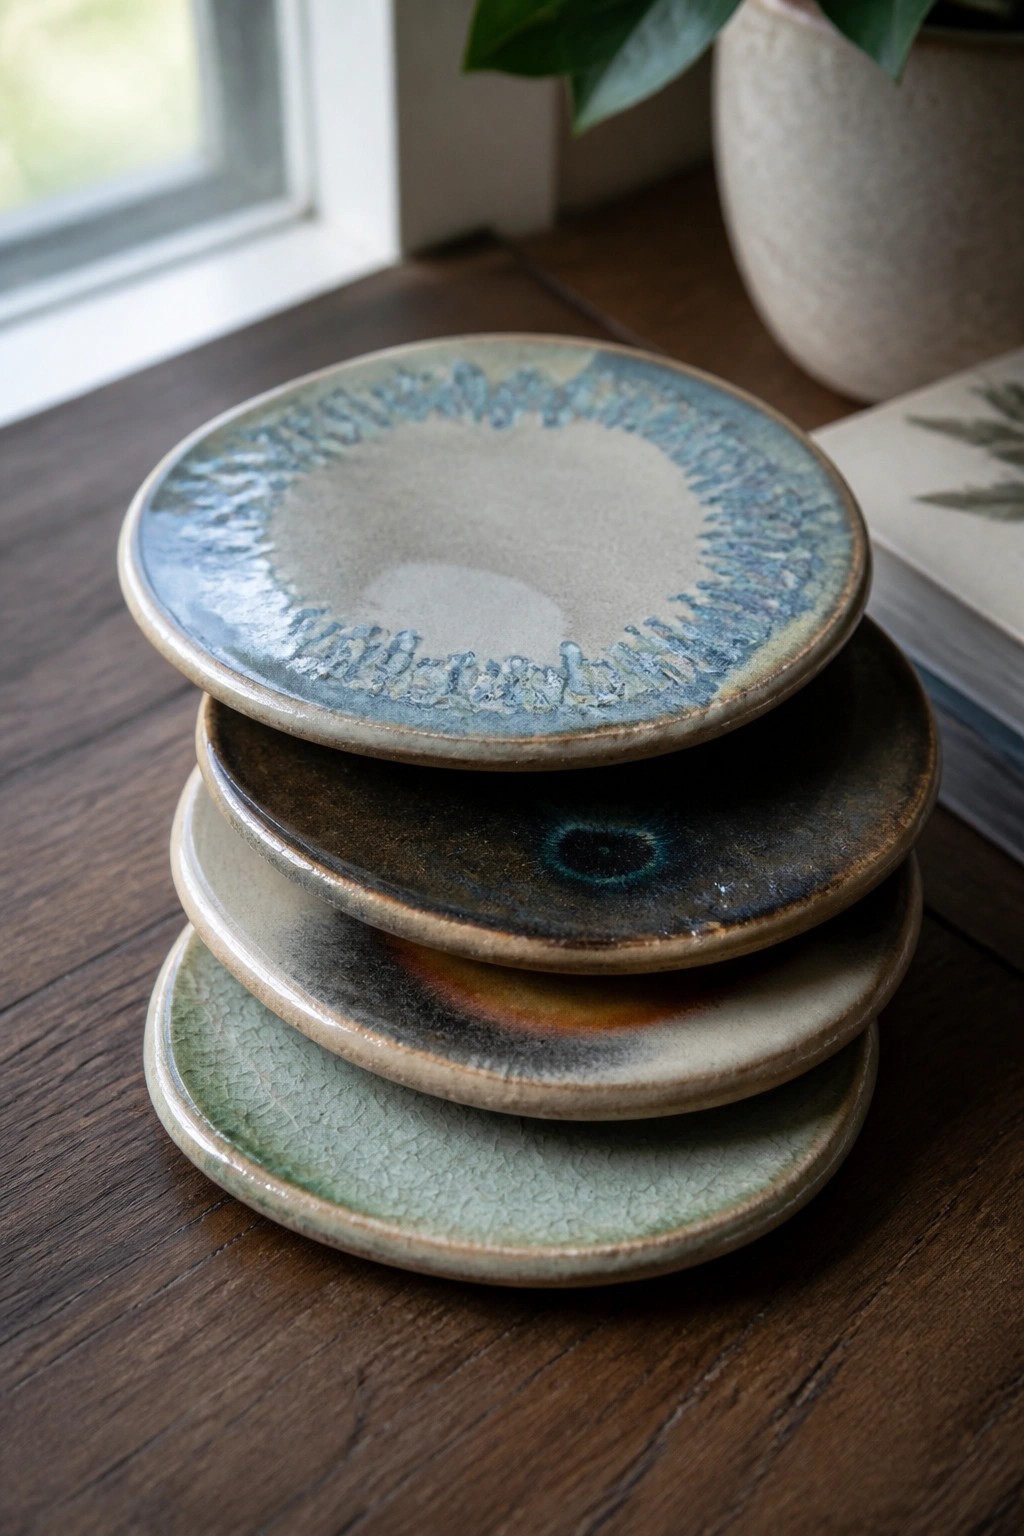
Small flat ceramic coasters are a straightforward way to test multiple glaze combinations on one piece. Each coaster here uses a base glaze covered by a second layer that breaks or runs during firing, creating rings, spots, and color shifts across the surface. The flat shape keeps the focus on how the glazes interact instead of form details. This approach works well for anyone wanting to see clear results from different glaze pairings without committing to larger forms.
What makes this idea useful is that the coasters are quick to throw or hand-build in batches and take up little kiln space. You can swap just one glaze on each piece to compare how it reacts with the same base, which speeds up testing. They also function as drink rests, small plant pads, or desk organizers, so the finished set has everyday use. The same stacking method translates easily to ring dishes or soap dishes if you want a slightly different shape.
Frequently Asked Questions
What safety steps are essential when testing new glaze combinations that might release fumes in the kiln?
Always work in a well-ventilated space and wear a respirator rated for particulates when mixing dry ingredients. Test small batches first on test tiles fired in the same kiln you plan to use for finished pieces. Keep a log of each recipe including exact measurements and firing results so you can repeat successes or adjust failures without guesswork. Avoid adding unknown scraps or untested colorants that could create unexpected toxic byproducts.
How do I adapt these glaze ideas for an electric kiln if the article focuses on reduction effects?
Electric kilns produce oxidation atmospheres by default so focus on layering commercial or homemade glazes that develop crystals or matte textures through slow cooling rather than flame effects. Introduce small amounts of silicon carbide or other additives that create local reduction spots without needing gas. Program your kiln controller for a controlled cool-down cycle of 100 degrees per hour from peak temperature down to 1400 degrees Fahrenheit to encourage crystal growth in glazes designed for that purpose.
Which of these surface effects require multiple kiln firings and how should I schedule them?
Effects like heavy crawling or built-up crystalline surfaces often benefit from a bisque firing followed by a glaze firing and then a third low-temperature luster firing around cone 018. Allow each piece to cool completely between firings to prevent cracking. Keep the second firing slightly lower than the first glaze firing if you are adding overglaze details so the base layer stays stable while the top layer matures.
What common problems occur when trying to achieve bubbling or lava-like textures and how can I fix them?
Bubbles that pop and leave craters usually result from firing too fast or using glazes with excess organic material. Slow the ramp rate to 150 degrees per hour through the 1000 to 1200 degree range and screen your glaze slurry to remove lumps. If the surface stays flat instead of flowing add a small percentage of a flux like spodumene to lower the melting point without changing the overall color.
How can I combine several of the listed techniques on one piece without the glazes running together?
Apply the base glaze thinly and let it dry fully before adding wax resist or paper stencils to separate areas. Fire to a lower cone than the highest-maturing glaze in your combination so only selected sections fully melt. Use a kiln shelf with plenty of space around each piece and prop the work if needed to control flow direction during the hold at peak temperature.

Pottery Path is my cozy corner of the internet where I share clay ideas, pottery inspiration, and simple projects you can recreate at home. I love exploring everything from air dry clay to handbuilt pottery to cute minis that brighten your day. My goal is to make clay crafting feel easy, fun, and welcoming for anyone who wants to try it.
You will find beginner friendly tutorials, creative pottery painting ideas, and lots of warm inspiration for slow and happy crafting. If you enjoy hands on creativity, this space will feel like home.