In the realm of DIY crafts, aspen wood is a hidden gem – a versatile and beautiful material that holds endless possibilities for the creative mind. Whether you're a seasoned woodworker or a beginner, this article will guide you through the best practices for working with aspen wood, ensuring your projects are both visually stunning and durable.
From selecting the right wood to mastering essential techniques, join us as we embark on a journey to craft with finesse and create lasting treasures.
Key Takeaways
- Choose the right grade of aspen wood for your project, considering the desired finish and appearance.
- Pay attention to the moisture content of the wood to prevent warping and cracking.
- Use the appropriate tools and equipment, including protective gear, hand tools, and power tools.
- Follow a step-by-step guide to properly prepare the wood, including inspecting, sanding, conditioning, and sanding again.
Choosing the Right Aspen Wood for Your DIY Project
Selecting the appropriate aspen wood is crucial when embarking on a DIY project. The type of wood you choose can greatly impact the outcome of your craft.
When it comes to aspen wood, there are a few key factors to consider. Firstly, you need to decide on the grade of the wood. Clear-grade aspen wood is ideal for crafts that require a smooth and uniform finish, while rustic-grade aspen wood adds character with its natural knots and imperfections.
Secondly, consider the moisture content of the wood. It is important to choose wood that is properly dried, as excessive moisture can lead to warping and cracking.
Lastly, think about the types of finishes you want to use. Common finishes for aspen wood crafts include stains, paints, and clear sealers.
By choosing the right aspen wood and finishes for your DIY project, you can ensure a successful and visually appealing result. Avoid common mistakes such as neglecting to sand the wood properly, not using a primer before painting, or rushing the drying process.
With careful consideration and attention to detail, your aspen wood craft will be a beautiful and long-lasting addition to your home.
Essential Tools and Equipment for Aspen Wood Crafts
When embarking on your aspen wood craft, it is essential to have the necessary tools and equipment to ensure a successful and efficient DIY project.
Safety precautions for DIY projects are of utmost importance when working with aspen wood. Make sure to wear protective eyewear, gloves, and a dust mask to avoid any potential injuries or health risks.
Additionally, it is crucial to have a well-equipped toolbox that includes basic hand tools such as a hammer, screwdriver set, chisels, and a tape measure. Power tools like a circular saw, jigsaw, and sander can also be beneficial for more complex projects.
Troubleshooting common issues in aspen wood crafts may require additional tools such as a wood filler, sandpaper, and clamps.
Recommended Products

Eye Protection - Eye protection glasses that offers the highest protection for your eyes. The anti-fog coating provide additional protection from debris, while the lens provide 95-100% UV protection

Tough, industrial design; safety eyewear that looks as tough as it protects
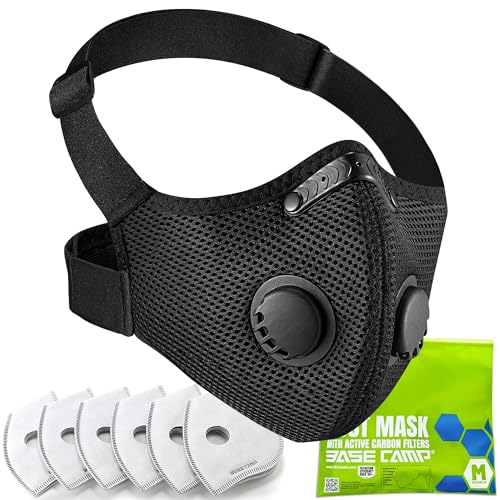
Designed specially for average daily mask-wearing >8hrs per day professional /occupational use
Step-by-Step Guide to Preparing Aspen Wood for DIY Projects
To properly prepare aspen wood for DIY projects, it is essential to follow a step-by-step guide that ensures the wood is ready for crafting. Preparing aspen wood for beginners can be a daunting task, but with the right approach, it can be a rewarding experience. One of the most common mistakes in aspen wood crafts is not properly preparing the wood before beginning a project. This can lead to issues such as warping, splitting, or uneven staining. To avoid these pitfalls, follow these steps:
| Step | Description |
|---|---|
| 1 | Inspect the wood for any defects or damages. |
| 2 | Remove any rough edges or splinters using sandpaper. |
| 3 | Apply a wood conditioner to seal the wood and prevent it from absorbing too much moisture. |
| 4 | Sand the wood again to create a smooth surface for painting or staining. |
Techniques for Cutting and Shaping Aspen Wood in DIY Crafts
Cutting and shaping aspen wood requires precision and careful technique to achieve desired results in DIY crafts. Whether you're creating intricate designs with aspen wood or simply cutting it into specific shapes, here are three essential tips to help you master the art of working with this versatile material:
- Use sharp tools: To achieve clean and precise cuts, it's crucial to use sharp carving tools. Dull blades can cause splintering and uneven edges, ruining the overall look of your project.
- Plan your cuts: Before making any cuts, take the time to plan out your design. Mark the areas where you'll be cutting or shaping the wood, ensuring that you have a clear vision of the final result.
- Take it slow: Aspen wood is relatively soft, so it's important to take your time when cutting or shaping it. Rushing can lead to mistakes or uneven cuts. Remember, patience is key when working with this delicate material.
Finishing and Sealing Aspen Wood Crafts for Longevity and Beauty
Continuing the discussion on techniques for cutting and shaping aspen wood in DIY crafts, attention must now be given to the important process of finishing and sealing these crafts to enhance their longevity and beauty. Proper finishing and sealing techniques not only protect the wood from moisture and wear but also bring out the natural beauty of the aspen grain.
To maintain aspen wood crafts, it is crucial to follow these steps:
| Steps for Finishing and Sealing Aspen Wood Crafts | Benefits |
|---|---|
| Sand the surface of the wood to remove any imperfections and smooth the grain. | Creates a smooth and even surface for the finish to adhere to. |
| Apply a wood stain or paint of your choice to enhance the color and appearance of the wood. | Adds depth and richness to the finished piece. |
| Seal the wood with a clear polyurethane or lacquer to protect it from moisture, scratches, and UV damage. | Extends the lifespan of the craft while preserving its natural beauty. |
Recommended Products

Protects indoor wood surfaces such as furniture, windows, cabinets, trim and more

PROTECT WOOD SURFACES – Minwax Polyurethane Wood Finish protects interior projects like woodwork, furniture, floors and cabinets. The oil-based, clear top coat is one of the most durable coatings for wood protection against scratches, spills and more.

Protects indoor wood surfaces such as furniture, windows, cabinets, trim and more
Frequently Asked Questions
What Are the Different Types of Finishes That Can Be Used on Aspen Wood Crafts?
There are various types of finishes that can be used on aspen wood crafts, each offering different benefits. Choosing the right finish for your aspen wood projects requires considering factors such as durability, appearance, and ease of application.
How Can I Prevent Splitting or Cracking in My Aspen Wood Projects?
To prevent splitting or cracking in aspen wood projects, it is crucial to employ effective strategies in preventing warping and protecting against moisture. By following best practices, such as proper storage and sealing techniques, you can ensure the longevity of your DIY creations.
Are There Any Safety Precautions I Should Take While Working With Aspen Wood?
When working with aspen wood, it is important to prioritize safety. This includes wearing appropriate safety equipment such as goggles, gloves, and a dust mask. Additionally, using tools properly and following safety guidelines will help prevent accidents and ensure a successful DIY project.
Can Aspen Wood Be Stained or Painted to Achieve a Different Color?
Yes, aspen wood can be stained or painted to achieve a different color. Staining can enhance the natural beauty of the wood, while painting allows for endless creative possibilities in home decor. However, it's important to consider the pros and cons of each method for DIY projects.
Are There Any Specific Maintenance Tips for Preserving the Beauty of Aspen Wood Crafts Over Time?
Preserving the beauty of aspen wood crafts over time requires proper maintenance. To maintain the appearance, regular cleaning, dusting, and polishing are recommended. Additionally, protecting the wood from excessive sunlight and moisture is crucial.

My interest in trees started when I first saw the giant sequoias in Yosemite.
I was a teenager then, and I remember thinking, “I need to learn more about this.”
That moment stuck with me.
A few years later, I went on to study forestry at Michigan Tech.
Since graduating, I’ve worked in a mix of hands-on tree care and community education.
I’ve spent over ten years helping people understand how to plant, maintain, and protect the trees in their neighborhoods.
I don’t see trees as just part of the landscape.
They are living things that make a real difference in our daily lives.